- 1Chatgpt与文心一言哪个AI更好?
- 2数学建模算法集合_数学建模中的集合
- 3文件管理--文件状态
- 4大创项目推荐 深度学习实现行人重识别 - python opencv yolo Reid_行人重识别person_reid代码实现
- 5怎样设计一个好用的短链接服务?
- 6【Git】多个托管平台Git账户配置
- 7stable-diffusion-webui(1.2.1版本) win10系统本地电脑部署_networkx-3.1-py3-none-any.whl
- 8大厂字节程序员薪资曝光:排行世界第五厉害了_字节跳动程序员工资一般多少
- 9golang使用energy开发GUI桌面程序,CEF,LCL_golang energy
- 10李宏毅机器学习笔记--Regression_regression -l star_tlist -c
ROS中使用RealSense-D435_realsense d435
赞
踩
D435简介
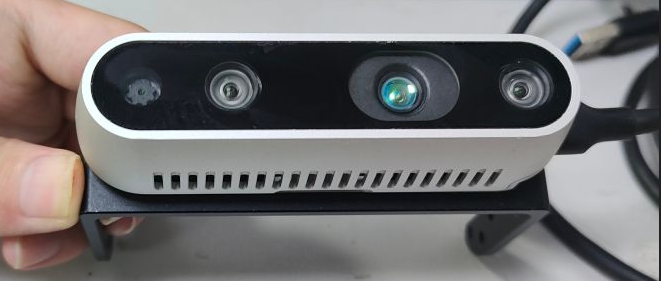
Intel RealSense D435是Intel推出的一款结合RGB和深度摄像的立体视觉摄像头,具有以下主要特点:
-
使用双摄像头和红外投射器实现立体视觉采集。
-
提供频率可达90Hz的VGA分辨率(640x480)深度图像。
-
具有2个720p RGB摄像头,提供1920x1080分辨率彩色视频流。
-
使用全局快门同步RGB图像和深度图像。
-
内置6轴IMU运动跟踪模块。
-
支持近距离检测,最小检测距离约0.25米。
-
提供硬件级图像流同步和时间戳。
-
支持USB 3.0接口传输高速率图像流。
-
提供SDK开发包,兼容ROS、OpenCV等主流框架。
-
小巧轻便的模块化设计。
D435采用了活体立体视觉技术,具有准确、高帧率的深度映射能力,可广泛应用于机器人定位与导航、物体识别、人机交互等计算机视觉任务中。
RealSense的SDK2.0安装
方法1:直接利用安装源安装
注册服务器公匙
sudo apt-key adv --keyserver keyserver.ubuntu.com --recv-key F6E65AC044F831AC80A06380C8B3A55A6F3EFCDE || sudo apt-key adv --keyserver hkp://keyserver.ubuntu.com:80 --recv-key F6E65AC044F831AC80A06380C8B3A55A6F3EFCDE
- 1
将服务器添加到存储库列表
sudo add-apt-repository "deb https://librealsense.intel.com/Debian/apt-repo $(lsb_release -cs) main" -u
- 1
安装库
基础
sudo apt-get install librealsense2-dkms
sudo apt-get install librealsense2-utils
- 1
- 2
可选
sudo apt-get install librealsense2-dev
sudo apt-get install librealsense2-dbg
- 1
- 2
不过这个方法只能下在最新版本,由于ros2的适配,该版本的realsense-ros对ros2匹配,因此在下载时建议使用方法2下载
方法2:利用源码安装
GitHub下载librealsense
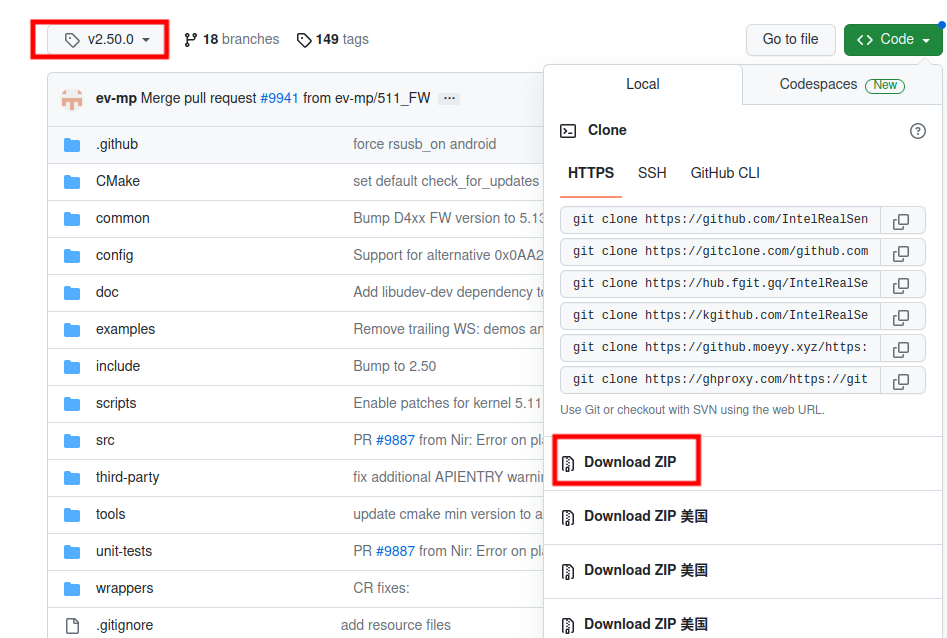
这里以v2.50.0版本为例
安装编译依赖
sudo apt-get install git libssl-dev libusb-1.0-0-dev pkg-config libgtk-3-dev bison flex
sudo apt-get install libglfw3-dev libgl1-mesa-dev libglu1-mesa-dev libelf-dev elfutils
- 1
- 2
运行脚本
cd librealsense-2.50.0/
./scripts/setup_udev_rules.sh
- 1
- 2
cmake编译
mkdir build
cd build
cmake ../ -DBUILD_EXAMPLES=true
make -j8 #j8的意思是根据自己处理器内核数量来加快编译
sudo make install
- 1
- 2
- 3
- 4
- 5
重新连接 Intel Realsense 深度摄像机并运行: realsense-viewer 以验证安装
软件显示
连接d435与电脑
realsense-viewer
- 1
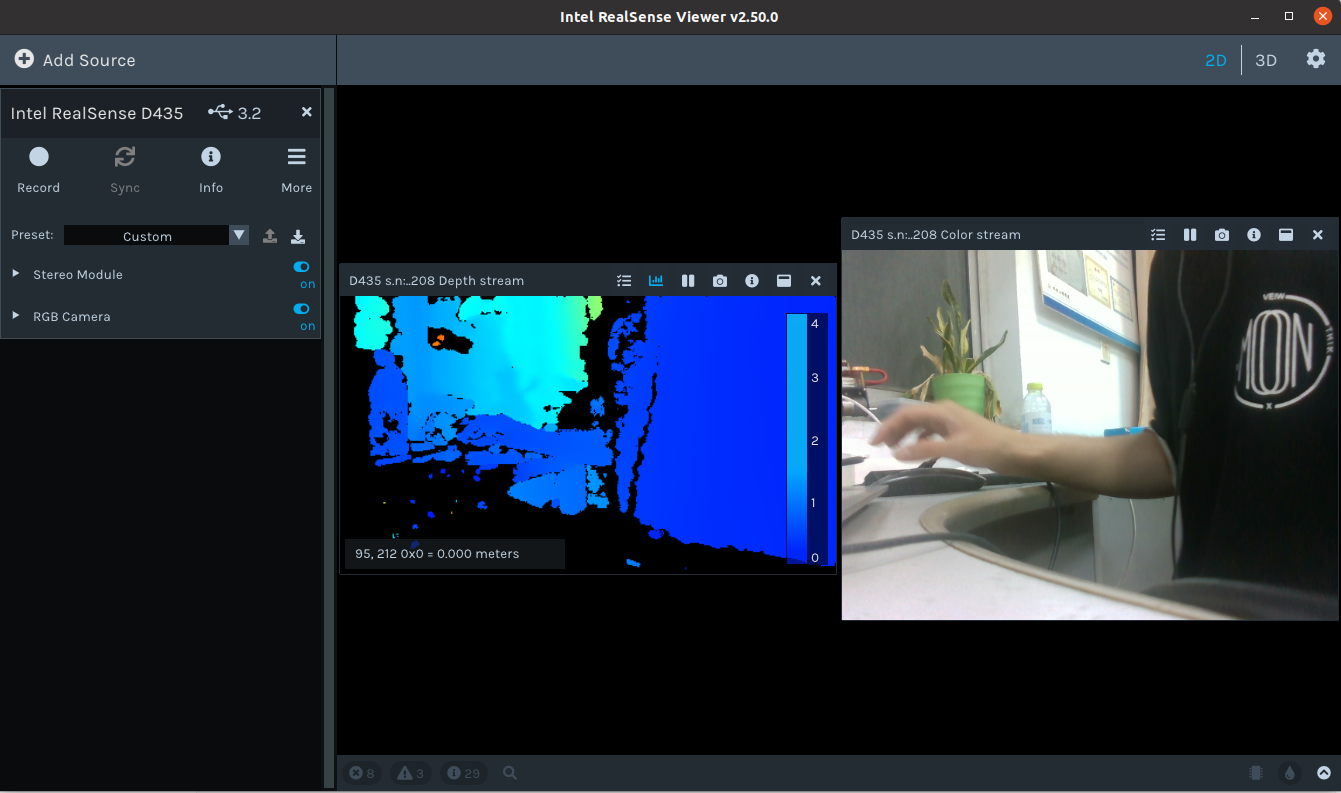
左侧的Stereo Module可以开启深度图显示,RGB Module可以显示RGB影像
ROS接口安装
由于ros1的维护,直接安装会以最新版本下载,其适配ros2,导致编译失败,所以在安装时要选择与之ros相对应的tag
以ros noetic为例
安装realsense-ros: https://gitcode.net/mirrors/intelrealsense/realsense-ros?utm_source=csdn_github_accelerator
安装ddynamic_reconfigure:https://gitcode.net/mirrors/pal-robotics/ddynamic_reconfigure?utm_source=csdn_github_accelerator
下载其压缩包,然后解压缩到~/catkin_ws/src目录下
编译
catkin_make
- 1
启动节点
roslaunch realsense2_camera rs_camera.launch
- 1
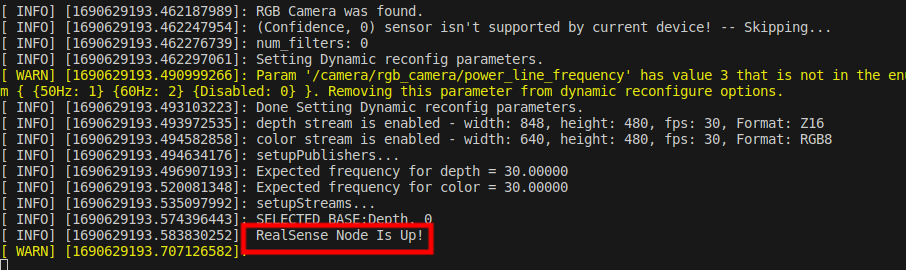
出现RealSense Node Is Up!证明节点启动成功
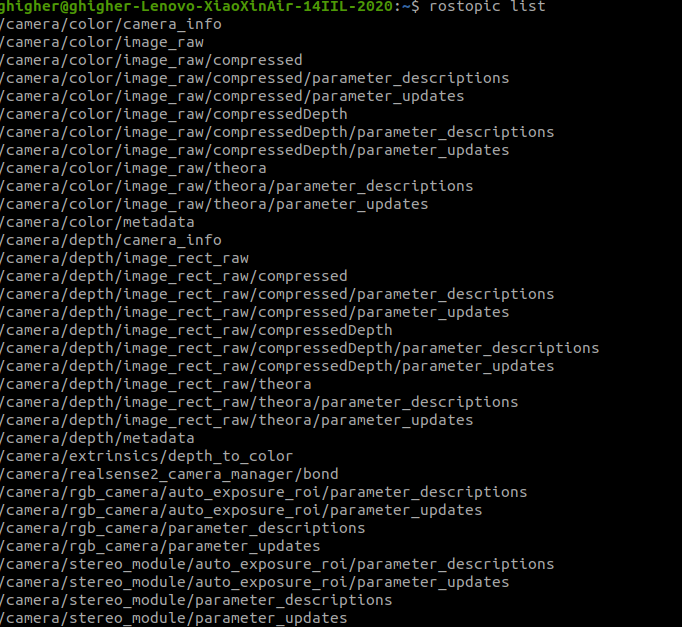
查看话题
rostopic list
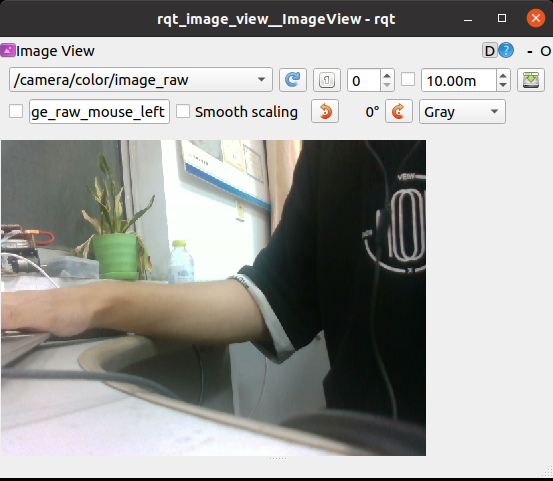
rqt_image_view
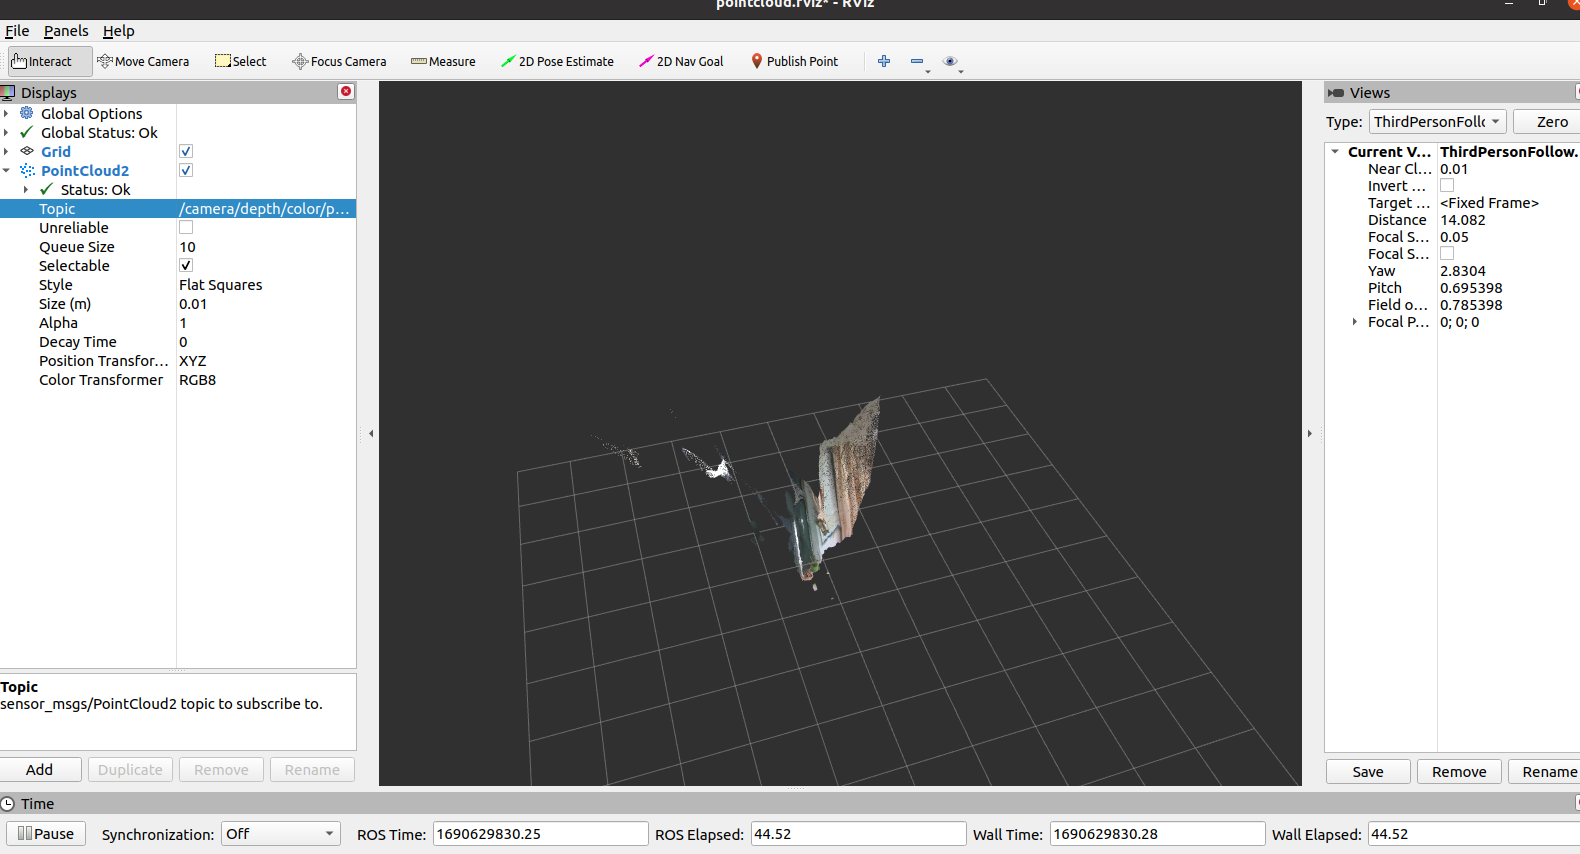
rviz显示点云
roslaunch realsense2_camera demo_pointcloud.launch
- 1
Python接口安装
pip install pyrealsense2
- 1
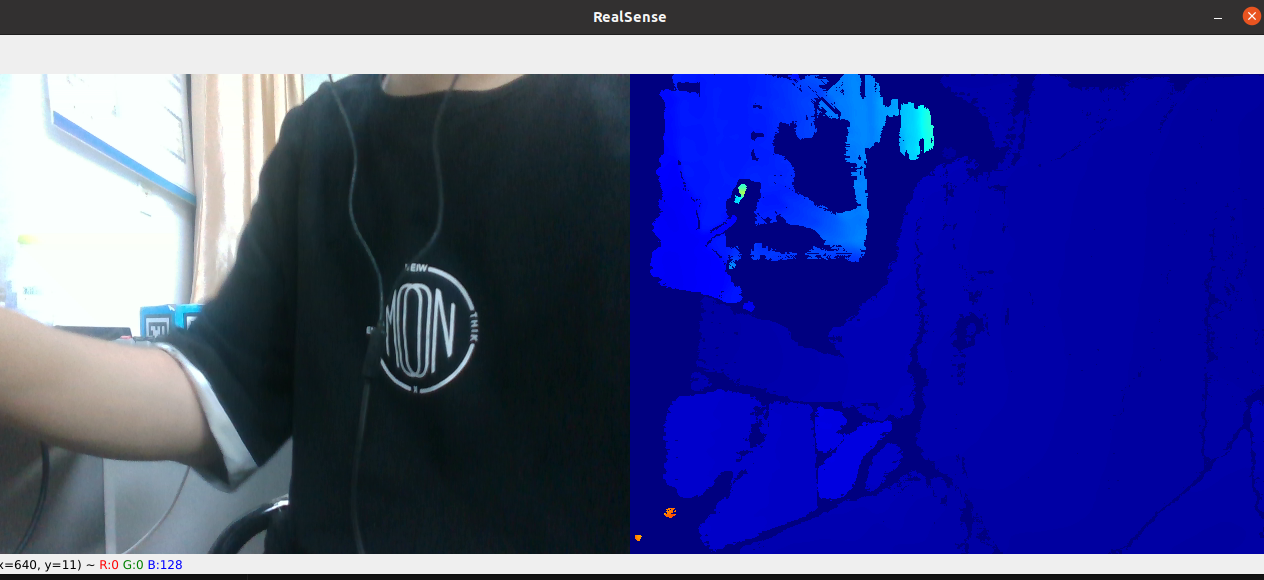
import pyrealsense2 as rs
import numpy as np
import cv2

if __name__ == "__main__":
    # Configure depth and color streams
    pipeline = rs.pipeline()
    config = rs.config()
    config.enable_stream(rs.stream.depth, 640, 480, rs.format.z16, 30)
    config.enable_stream(rs.stream.color, 640, 480, rs.format.bgr8, 30)
    # Start streaming
    pipeline.start(config)
    try:
        while True:
            # Wait for a coherent pair of frames: depth and color
            frames = pipeline.wait_for_frames()
            depth_frame = frames.get_depth_frame()
            color_frame = frames.get_color_frame()
            if not depth_frame or not color_frame:
                continue
            # Convert images to numpy arrays

            depth_image = np.asanyarray(depth_frame.get_data())

            color_image = np.asanyarray(color_frame.get_data())

            # Apply colormap on depth image (image must be converted to 8-bit per pixel first)
            depth_colormap = cv2.applyColorMap(cv2.convertScaleAbs(depth_image, alpha=0.03), cv2.COLORMAP_JET)
            # Stack both images horizontally
            images = np.hstack((color_image, depth_colormap))
            # Show images
            cv2.namedWindow('RealSense', cv2.WINDOW_AUTOSIZE)
            cv2.imshow('RealSense', images)
            key = cv2.waitKey(1)
            # Press esc or 'q' to close the image window
            if key & 0xFF == ord('q') or key == 27:
                cv2.destroyAllWindows()
                break
    finally:
        # Stop streaming
        pipeline.stop()

- 1
- 2
- 3
- 4
- 5
- 6
- 7
- 8
- 9
- 10
- 11
- 12
- 13
- 14
- 15
- 16
- 17
- 18
- 19
- 20
- 21
- 22
- 23
- 24
- 25
- 26
- 27
- 28
- 29
- 30
- 31
- 32
- 33
- 34
- 35
- 36
- 37
- 38
- 39
- 40
- 41