
热门标签
热门文章
- 1这12种方法轻松合并Python中的列表_把子列表的元素合并为一个列表、
- 2Linux系统漏洞本地提权_linux提权漏洞
- 3JVM专题五:类加载器与双亲委派机制
- 4OpenAI重磅发布 GPT-4o!向免费客户开放,GPT-4o官方使用指南分享_gpt 4o 计费
- 5如何定制属于自己的stable diffusion?Dreambooth原理详解和代码实战
- 6Hadoop之MapReduce基础
- 7网络协议安全:TCP/IP协议栈的安全问题和解决方案_网络层安全问题分析
- 8华为OD机试-二叉树的中序遍历(java& c++& python & javascript & golang & c# & c)_生成哈夫曼树 c++ od
- 9mapreduce的setup方法_MapReduce setup map(reduce) cleanup示例
- 10工控网络中网络威胁情报与物理安全的关联
当前位置: article > 正文
node+vue3+websocket实现简易的聊天功能_客服聊天vue3
作者:正经夜光杯 | 2024-06-27 04:41:46
赞
踩
客服聊天vue3
后台接口代码
1、首先我们可以通过Express 应用程序生成器快速搭建一个后台框架。(这快可以参考官网)
2、安装ws
npm install express-ws
- 1
3、编写后台代码接口
简单逻辑说明:
1.创建连接
2.每个用户都有一个conn 那把conn存入到数组里方便以后广播所接受到的消息,去传达到其他用户
3.对用户数量做一个统计
4.接收到前端传来设置的用户名
代码如下:
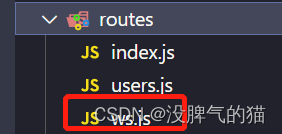
在routes文件下新建一个ws.js文件
let express = require("express")
const expressWs = require("express-ws")
let router = express.Router()
expressWs(router)
let count = 0
//存放所有连接的用户
let connections = []
router.ws("/", (conn) => {
  //每个用户都有一个conn
  count++
  console.log(`游客进入聊天室,当前在线人数${count}`)
  sendMsg(conn, "count", count)
  //接收用户发来的数据
  conn.on("message", function (msg) {
    let obj = JSON.parse(msg)
    console.log(obj)
    if (obj.type === "name") {
      conn.userName = obj.author
      connections.push(conn)
      console.log(`用户的名字为${conn.userName},当前在线人数${count}`)
    } else if (obj.type === "submit") {
      broadcast("message", obj)
    }
  })
  //监听关闭状态
  conn.on("close", function () {
    count--
    // broadcast(JSON.stringify({ type: "count", data: count }))
    broadcast(
      JSON.stringify({
        type: "toast",
        data: `${conn.userName}离开了聊天室,当前在线人数${count}`
      })
    )
    console.log(
      `用户:${
        conn.userName ? conn.userName : "游客"
      }离开了聊天室,当前在线人数${count}`
    )
  })
})

function broadcast(type, data) {
  // 群发消息给所有用户
  connections.forEach((item) => {
    item.send(JSON.stringify({ type: type, data: data }))
  })
}
//单独发送给一个用户
function sendMsg(conn, type, data) {
  conn.send(JSON.stringify({ type: type, data: data }))
}
module.exports = router

- 1
- 2
- 3
- 4
- 5
- 6
- 7
- 8
- 9
- 10
- 11
- 12
- 13
- 14
- 15
- 16
- 17
- 18
- 19
- 20
- 21
- 22
- 23
- 24
- 25
- 26
- 27
- 28
- 29
- 30
- 31
- 32
- 33
- 34
- 35
- 36
- 37
- 38
- 39
- 40
- 41
- 42
- 43
- 44
- 45
- 46
- 47
- 48
- 49
- 50
- 51
- 52
- 53
4、注册路由
在app.js文件注册路由
var wsRouter = require('./routes/ws');
app.use('/wss', wsRouter);
- 1
- 2
5、bin/www 配置
由于 express-ws 在默认不添加server 参数情况下,使用的是app.listen 创建的httpserver,而express 脚手架将 app和server初始化分离了,所以需要再次配置express-ws
var expressWs = require('express-ws')(app, server);
- 1
前端代码
效果展示
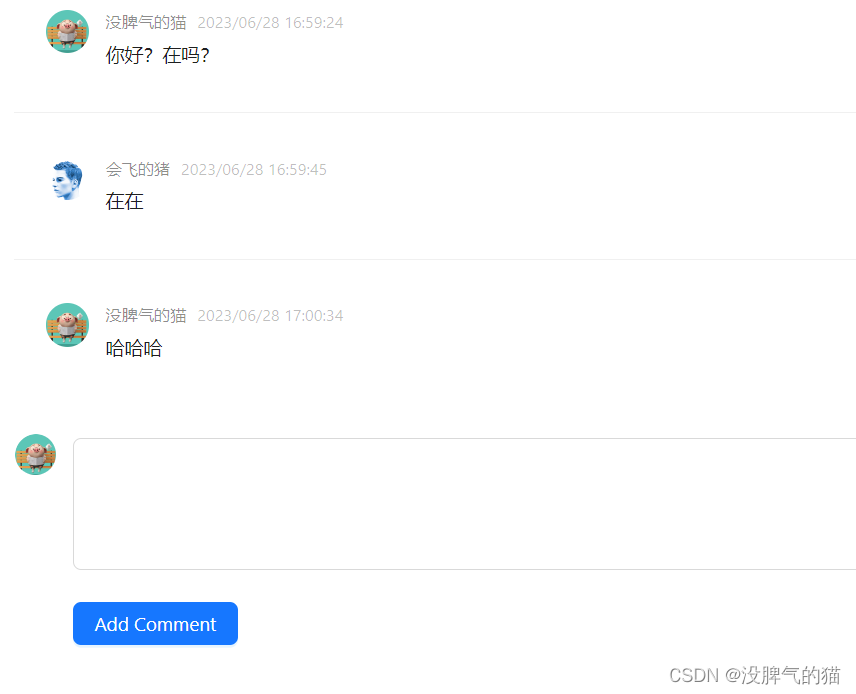
UI用的Ant Design of Vue Comment组件
类似一个实时评论回复的效果
代码展示:
<template>
    <a-list class="show-box" v-if="comments.length" :data-source="comments" item-layout="horizontal">
        <template #renderItem="{ item }">
            <a-list-item>
                <a-comment :author="item.author" :avatar="item.avatar" :content="item.content" :datetime="item.datetime" />
            </a-list-item>
        </template>
    </a-list>
    <a-comment>
        <template #avatar>
            <a-avatar :src="userInfo?.avatar" />
        </template>
        <template #content>
            <a-form-item>
                <a-textarea v-model:value="value" :rows="4" />
            </a-form-item>
            <a-form-item>
                <a-button html-type="submit" :loading="submitting" type="primary" @click="handleSubmit">
                    Add Comment
                </a-button>
            </a-form-item>
        </template>
    </a-comment>
</template>
<script lang="ts" setup>
import { ref, onUnmounted, onMounted } from 'vue';
import dayjs from 'dayjs';
import relativeTime from 'dayjs/plugin/relativeTime';
dayjs.extend(relativeTime);
type Comment = Record<string, string>;
const userInfo = JSON.parse(localStorage.getItem('userInfo') as string)
// 建立连接
const wsUrl = `ws://${location.host}/socket/wss`
const websock = new WebSocket(wsUrl);
// 建立连接后发送给后台存用户名
websock.onopen = (evt) => {
    console.log("Connection open ...");
    websock.send(JSON.stringify({
        type: 'name',
        author: userInfo?.nickName,
    }));
};
// 监听后台推送的信息(渲染评论)
websock.onmessage = (e) => {
    const res = JSON.parse(e?.data)
    console.log(res);
    if (res.type === 'message') {
        setTimeout(() => {
            submitting.value = false;
            comments.value = [
                ...comments.value,
                res.data,
            ];
            value.value = '';
        }, 1000);
    }
}
const comments = ref<Comment[]>([]);
const submitting = ref<boolean>(false);
const value = ref<string>('');
// 提交评论发送后台
const handleSubmit = () => {
    if (!value.value) {
        return;
    }
    submitting.value = true;
    const obj = {
        type: 'submit',
        author: userInfo?.nickName,
        avatar: userInfo?.avatar,
        content: value.value,
        datetime: dayjs().format('YYYY/MM/DD HH:mm:ss'),
    }
    websock.send(JSON.stringify(obj));
};
// 断开连接
onUnmounted(() => {
    websock.close();
});
</script>
<style lang="less" scoped>
.show-box {
    max-height: 520px;
    overflow: auto;
}
</style>
- 1
- 2
- 3
- 4
- 5
- 6
- 7
- 8
- 9
- 10
- 11
- 12
- 13
- 14
- 15
- 16
- 17
- 18
- 19
- 20
- 21
- 22
- 23
- 24
- 25
- 26
- 27
- 28
- 29
- 30
- 31
- 32
- 33
- 34
- 35
- 36
- 37
- 38
- 39
- 40
- 41
- 42
- 43
- 44
- 45
- 46
- 47
- 48
- 49
- 50
- 51
- 52
- 53
- 54
- 55
- 56
- 57
- 58
- 59
- 60
- 61
- 62
- 63
- 64
- 65
- 66
- 67
- 68
- 69
- 70
- 71
- 72
- 73
- 74
- 75
- 76
- 77
- 78
- 79
- 80
- 81
- 82
- 83
- 84
- 85
- 86
代理转发
vite.config.js
server:{
    proxy:{
       '/api':{
           target: "http://localhost:3000", //跨域地址
           changeOrigin: true, //支持跨域
           rewrite: (path) => path.replace(/^\/api/, "")//重写路径,替换/api
       },
       '/socket': {
        target: 'ws://localhost:3000',
        ws: true,
        rewrite: (path) => path.replace(/^\/socket/, "")
      },
    }
 }
- 1
- 2
- 3
- 4
- 5
- 6
- 7
- 8
- 9
- 10
- 11
- 12
- 13
- 14
声明:本文内容由网友自发贡献,不代表【wpsshop博客】立场,版权归原作者所有,本站不承担相应法律责任。如您发现有侵权的内容,请联系我们。转载请注明出处:https://www.wpsshop.cn/w/正经夜光杯/article/detail/761350
推荐阅读
- 1.所需依赖
org.apache.flink [详细] 赞
踩
相关标签

