
- 1logstash通过kafka通道采集日志信息_logstash kafka consumer_threads
- 2NLP未来,路在何方?从学术前沿和业界热点谈起
- 3Resource punkt not found. Please use the NLTK Downloader to obtain安装nltk包(报错缺失punkt error 11004)报错_resource averaged_perceptron_tagger not found. ple
- 4类脑计算芯片:机器学习的新硬件革命
- 5java读取txt文件乱码解决方案
- 6自然语言处理(NLP)之三:语言模型_生成式语言模型文本特征
- 7linux驱动 平台设备驱动模型_linux设备驱动模型
- 8设计模式总结-外观模式(门面模式)
- 9OpenCV最全函数用法_opencv函数用法
- 10来自GitHub的系列渗透测试工具_ctf magic unicorn
Stereolabs ZED - YOLO 安装_zed yolov3
赞
踩
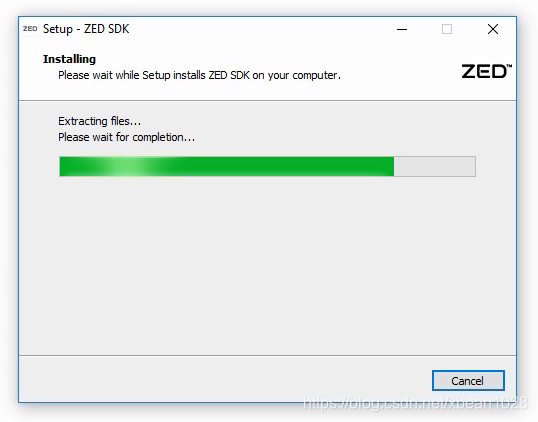
一. Stereolabs ZED SDK下载安装
1.下载适合平台的SDK https://www.stereolabs.com/developers/release/
2.安装SDK
Windows:
下载适用于Windows 的ZED SDK并运行安装程序。
Linux(Ubuntu):
在Linux上,下载适用于Linux 的ZED SDK并从终端启动.run文件。
    chmod +x ZED_SDK_Linux_*.run
  ./ZED_SDK_Linux_*.run
- 1
- 2
安装完成后,从NVIDIA网站下载CUDA 9或CUDA 10(取决于所选的SDK安装程序)并将其安装在您的系统上。
重新启动计算机以完成安装。
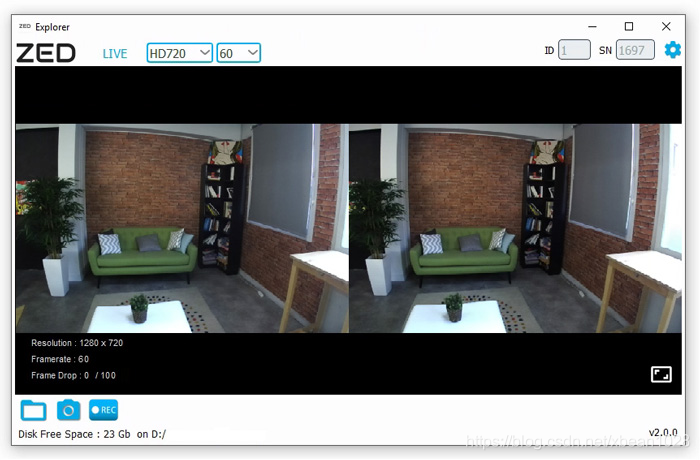
3. 启动 ZED Explorer 测试
位置:
Windows: C:\Program Files (x86)\ZED SDK\tools\ZED Explorer.exe
Ubuntu: /usr/local/zed/tools/ZED Explorer
4.启动 ZED Depth Viewer
位置:
Windows: C:\Program Files (x86)\ZED SDK\tools\ZED Depth Viewer.exe
Ubuntu: /usr/local/zed/tools/ZED Depth Viewer

更多例子:https://github.com/stereolabs/zed-examples
二. Stereolabs ZED - YOLO 3D in Python
ZED 的YOLO识别
有两种方案
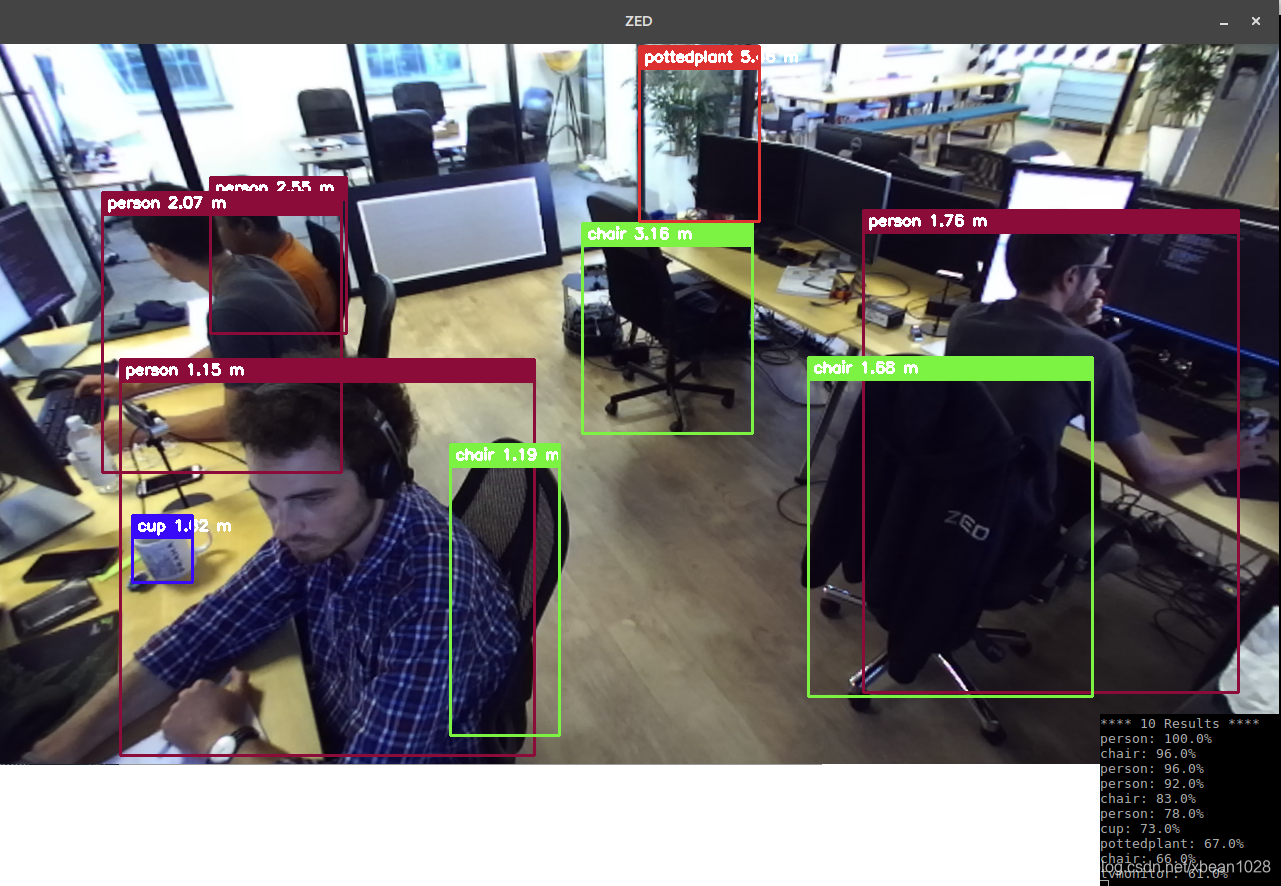
方案一:YOLO现在支持ZED!直接使用,可以识别,但是没有距离
具体安装过程参照 https://github.com/stereolabs/zed-yolo
前提条件:安装cudnn,OPencv,Cmake,ZED SDK
1.安装 yolo v3
2.在yolov3的darknet 文件夹下运行下面命令 (-c 0是默认摄像头,-c 1 是ZED)
./darknet detector demo cfg/coco.data cfg/yolov3.cfg yolov3.weights -c 1
- 1
方案二:stereolabs的驱动可以识别并测距离
安装过程参照如下
前期准备
- Windows 7 64bits or later, Ubuntu 16.04
- ZED SDK https://www.stereolabs.com/developers and its dependencies (CUDA)
- ZED Python 3 wrapper
(参照上述网址可解决)
安装 ZED Python
下载安装 ZED Python wrapper ,
可以使用这些示例 sample.
安装 Darknet
安装stereolabs提供的yolo https://github.com/stereolabs/zed-yolo
-
下载
-
编译
cd libdarknet make -j4- 1
- 2
下载权重
-
使用 Yolov3 tiny 权重
wget https://pjreddie.com/media/files/yolov3-tiny.weights- 1
运行程序
启动脚本:
python3 darknet_zed.py
- 1
可以改变参数:
python3 darknet_zed.py -c <config> -w <weight> -m <meta> -t <threshold> -s <svo_file>
- 1
例如:
python3 darknet_zed.py -c cfg/yolov3.cfg -w yolov3.weights -m cfg/coco.data -t 0.5
- 1
展示帮助:
python3 darknet_zed.py -h
- 1

