
- 1【云原生】Docker如何构建镜像
- 2D*(Dynamic A*)路径规划算法_d*算法
- 3mac- docker desktop 安装单体Kubernetes_mac docker desktop
- 4Java使用Selenium+ChromeDriver 爬取中国知网_java爬取知网
- 5linux shell脚本 条件语句
- 6Docker本地部署开源浏览器Firefox并远程访问进行测试
- 7C语言基础:static的使用_static在c语言中的用法
- 8图解最详细的项目研发全流程及各阶段核心问题表
- 9GEC6818开发板上音乐播放器
- 10windows环境下无法默认git运行.sh文件,选择在git中直接运行_sh脚本默认变成git的图标了
Python3 flask-socketio 整合vue_vue.js python flask 实现websocket会话通信
赞
踩
1. 前端说明
前端追加了vue-socket.io的依赖
更新package.json及package-lock.json后,需要补充库
2. 后端说明
服务端需要安装的python包
- suse python 3.6.12
Flask_SocketIO-4.3.1-py2.py3-none-any.whl
python_socketio-4.6.0-py2.py3-none-any.whl
python_engineio-3.13.2-py2.py3-none-any.whl
cffi-1.15.1-cp36-cp36m-manylinux_2_5_x86_64.manylinux1_x86_64.whl
zope.event-4.6-py2.py3-none-any.whl
zope.interface-5.5.2-cp36-cp36m-manylinux_2_5_x86_64.manylinux1_x86_64.manylinux_2_12_x86_64.manylinux2010_x86_64.whl
greenlet-1.1.3-cp36-cp36m-manylinux1_x86_64.whl
gevent_websocket-0.10.1-py3-none-any.whl
gevent-20.12.1.tar.gz
- 1
- 2
- 3
- 4
- 5
- 6
- 7
- 8
- 9
- windows python 3.8.10
Flask_SocketIO-4.3.1-py2.py3-none-any.whl
python_socketio-4.6.0-py2.py3-none-any.whl
python_engineio-3.13.2-py2.py3-none-any.whl
zope.event-4.6-py2.py3-none-any.whl
zope.interface-6.0-cp38-cp38-win_amd64.whl
cffi-1.15.1-cp38-cp38-win_amd64.whl
greenlet-2.0.2-cp38-cp38-win_amd64.whl
gevent_websocket-0.10.1-py3-none-any.whl
 其中gevent-20.12.1.tar.gz 需要最后手动解压然后 执行setup.py
- 1
- 2
- 3
- 4
- 5
- 6
- 7
- 8
- 9
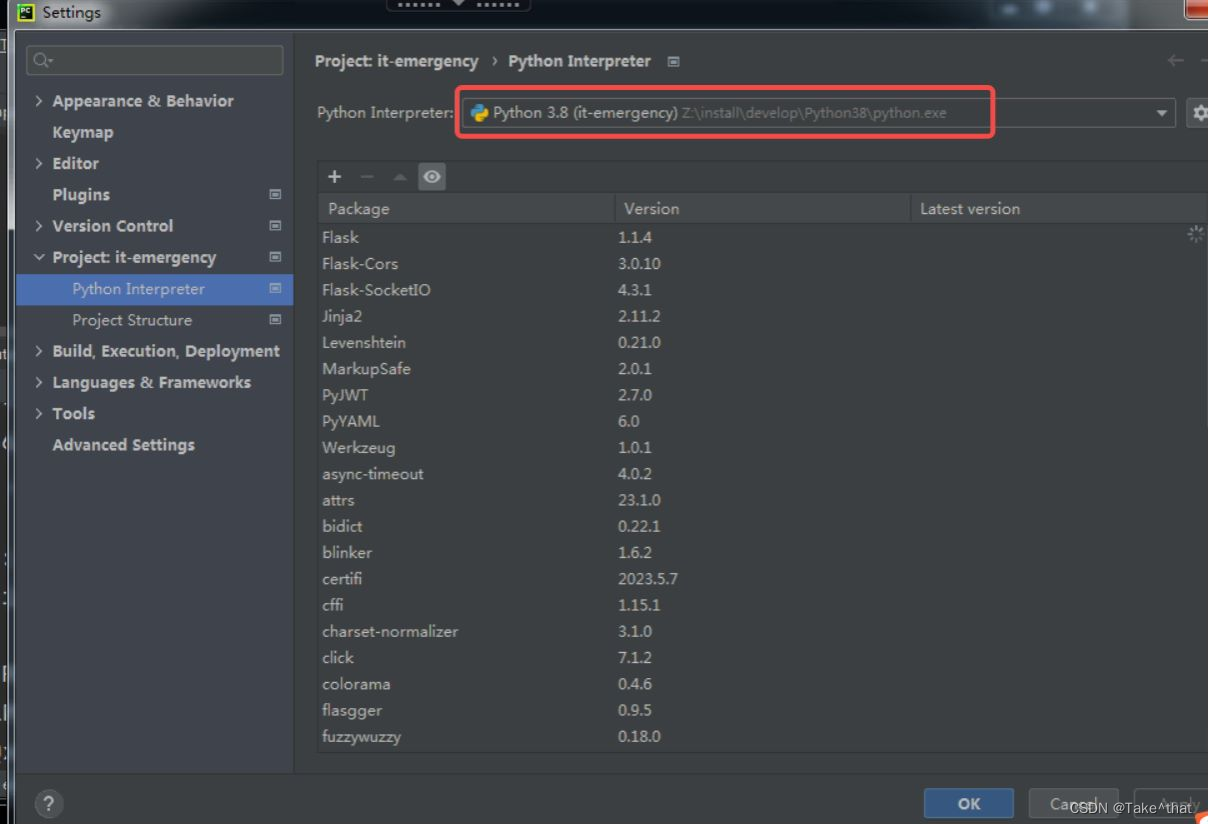
3. whl依赖包下载
如有网环境,可以采用以下安装方式:
先在有网环境下,PyCharm工具里面下载,如下图:
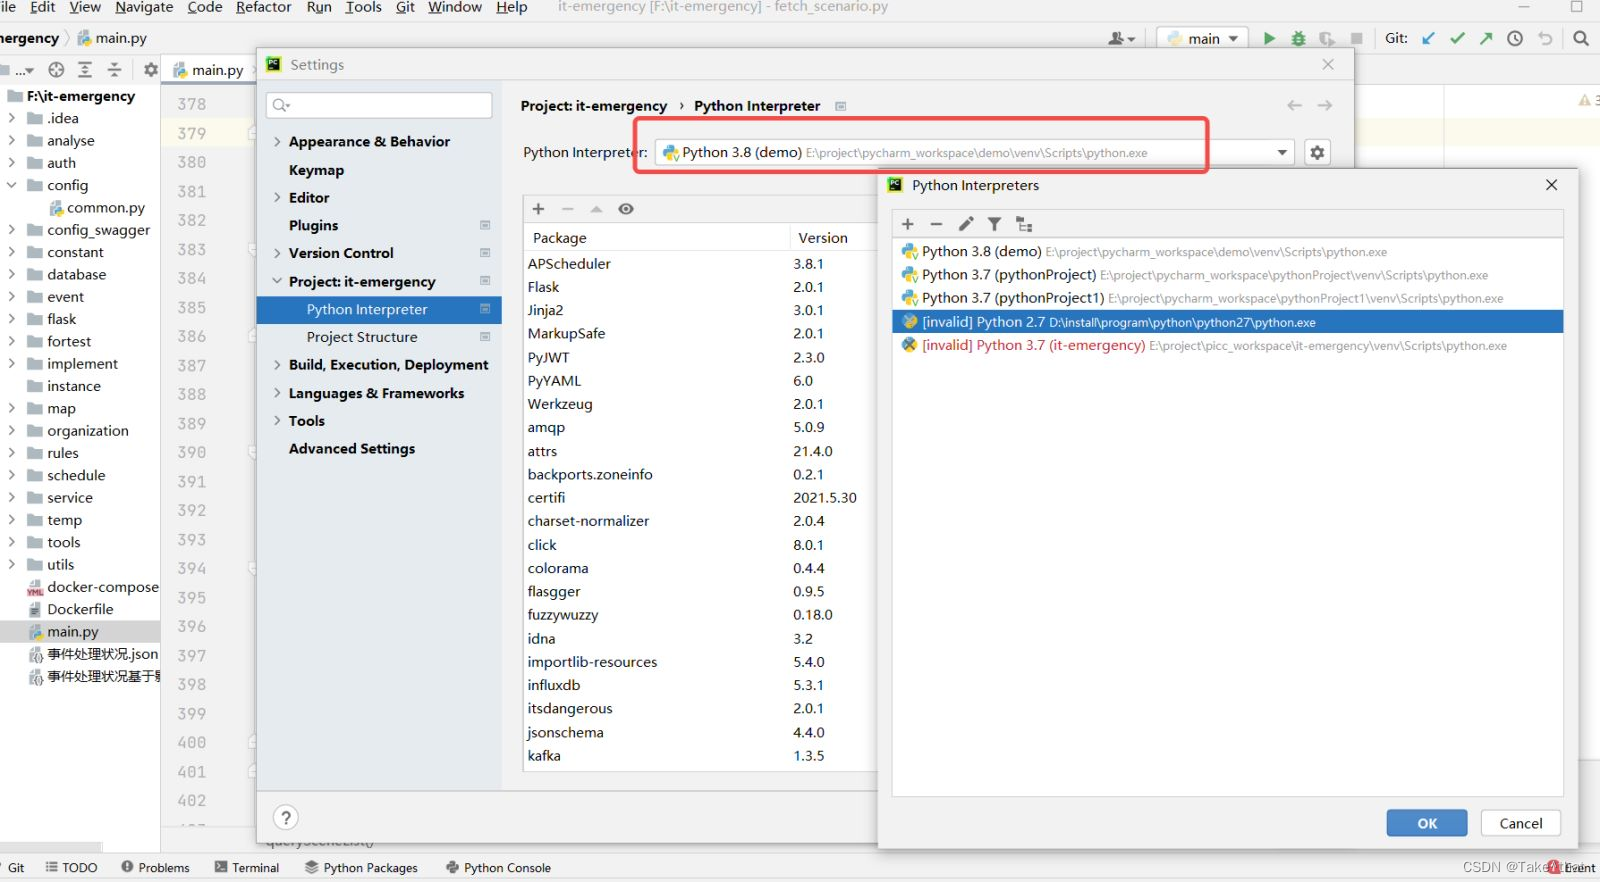
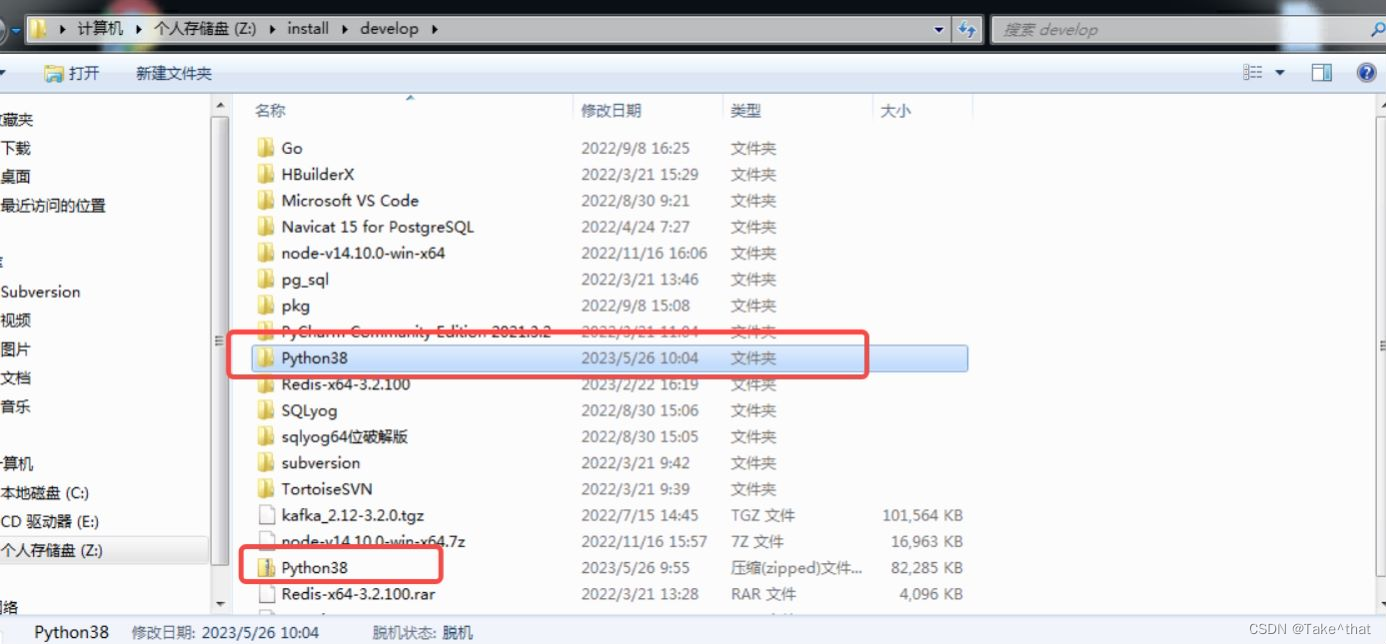
然后在无网环境下直接使用现成的即可:
备注:有网环境下也可采用下面的方式按照依赖
# 后端依赖安装
pip install flask-socketio
pip install flask-cors

# 前端依赖安装
npm install socket.io-client --also=dev
npm install  vue-socket.io --also=dev
npm install  echarts --also=dev
- 1
- 2
- 3
- 4
- 5
- 6
- 7
- 8
后端依赖安装
pip install flask-socketio
pip install flask-cors
前端依赖安装
npm install socket.io-client --also=dev
npm install vue-socket.io --also=dev
npm install echarts --also=dev
4. 报错问题
Linux 手动安装python setuptools时报错缺少zlib模块解决办法
python操作kafka报错:return ‘<SimpleProducer batch=%s>‘ % self.async
python ERROR: Could not find a version that satisfies the requirement XXX解决方法
【frida】lxhToolHTTPDecrypt安装使用问题
Python ThreadPoolExecutor线程池:
Python ThreadPoolExecutor线程池
5. 实现过程
前端代码
vue.config.js (只列出相关代码)
'use strict'
const path = require('path')
const defaultSettings = require('./src/settings.js')

function resolve(dir) {
  return path.join(__dirname, dir)
}

const name = defaultSettings.title || 'vue Admin Template' // page title


// All configuration item explanations can be find in https://cli.vuejs.org/config/
module.exports = {
  /**
   * You will need to set publicPath if you plan to deploy your site under a sub path,
   * for example GitHub Pages. If you plan to deploy your site to https://foo.github.io/bar/,
   * then publicPath should be set to "/bar/".
   * In most cases please use '/' !!!
   * Detail: https://cli.vuejs.org/config/#publicpath
   */
  publicPath: '/',
  outputDir: 'dist',
  assetsDir: 'static',
  lintOnSave: process.env.NODE_ENV === 'development',
  productionSourceMap: false,
  devServer: {
    host: '0.0.0.0',
    port: port,
    overlay: {
      warnings: false,
      errors: true
    },
    before: require('./mock/mock-server.js'),
    proxy: {
      // 本地使用代理  线上使用nginx
      '/dev-api/api': {
        target: `http://127.0.0.1:5100`,
        changeOrigin: true,
        onProxyReq:function (proxyReq, req, res, options) {
          if (req.body) {
            let bodyData = JSON.stringify(req.body);
            // incase if content-type is application/x-www-form-urlencoded -> we need to change to application/json
            proxyReq.setHeader('Content-Type','application/json');
            proxyReq.setHeader('Content-Length', Buffer.byteLength(bodyData));
            // stream the content
            proxyReq.write(bodyData);
          }
        },
        pathRewrite: {
          '^/dev-api/api': '/api'
        }
      },
      '/dev-api/upload/api': {
        target: `http://127.0.0.1:5100`,
        changeOrigin: true,
        onProxyReq:function (proxyReq, req, res, options) {
          if (req.body) {
            let bodyData = JSON.stringify(req.body);
            proxyReq.write(bodyData);
          }
        },
        pathRewrite: {
          '^/dev-api/upload/api': '/api'
        }
      },
      '/socket.io': {
        target: `http://127.0.0.1:5100`,
        ws: true,
        changeOrigin: true
       },
    }
  },

}

- 1
- 2
- 3
- 4
- 5
- 6
- 7
- 8
- 9
- 10
- 11
- 12
- 13
- 14
- 15
- 16
- 17
- 18
- 19
- 20
- 21
- 22
- 23
- 24
- 25
- 26
- 27
- 28
- 29
- 30
- 31
- 32
- 33
- 34
- 35
- 36
- 37
- 38
- 39
- 40
- 41
- 42
- 43
- 44
- 45
- 46
- 47
- 48
- 49
- 50
- 51
- 52
- 53
- 54
- 55
- 56
- 57
- 58
- 59
- 60
- 61
- 62
- 63
- 64
- 65
- 66
- 67
- 68
- 69
- 70
- 71
- 72
- 73
- 74
- 75
- 76
页面发起请求的按钮示例代码:
        <!-- 从架构平台同步应用系统数据-->
        <el-button type="primary" icon="el-icon-refresh" @click="updateAppList()">从架构平台同步</el-button>
- 1
- 2
- 3
import { getApplicationList, putApplicationItem, UpdateApplicationList, getApplicationDetail } from '@/api/organization'
import VueSocketIO from 'vue-socket.io'
- 1
- 2
后端代码
flask main.py
import os
import sys
import json
import time
# from crypt import methods
import queue
import xlrd
import threading
from concurrent.futures import ThreadPoolExecutor

from flask import Flask, Response, make_response, send_file, send_from_directory
from flask import request
from flask_socketio import SocketIO, send, emit

# sys.path.append("/app/app")

from service.service_websocket import update_business_list_webscoket, import_duty_info_websocket
- 1
- 2
- 3
- 4
- 5
- 6
- 7
- 8
- 9
- 10
- 11
- 12
- 13
- 14
- 15
- 16
- 17
app = Flask(__name__, instance_relative_config=True)
app.config['SECRET_KEY'] = 'secret!'
socketio = SocketIO(app, cors_allowed_origins="*")
executor = ThreadPoolExecutor(max_workers=2)
Swagger(app)
- 1
- 2
- 3
- 4
- 5
def update_business_list_thread(msg_queue):
    update_business_list_webscoket(msg_queue)

@socketio.on('connect', namespace='/update_application_list')
def connect_update_application_list():
    print("=============================update_application_list connect..")
    token = request.headers.get('X-Token')  # 获取token
    condition = {'update_by': ""}
    if token and token != '':
        user_info = get_user_data(token)
        user_id = user_info['id']
        condition['update_by'] = user_id
    print(condition)
    timeout = 120
    msg_queue = queue.Queue()
    # 在上面最开始程序中,executor = ThreadPoolExecutor(max_workers=2)
    # 表示创建一个线程池,而它的管理者就是实例对象executor,executor有一个submit() 方法,
    # 它会将线程提交给线程池,与原本直接使用Thread类的多线程编程不同,线程池中的线程提交后,若线程数量不超过max_workers,就会启动新提交的线程,
    # 而使用Thread类需要调用start() 方法去启动

    # 在执行update_business_list_webscoket(msg_queue)任务期间,实时的向队列msg_queue放入当前的执行状态信息
    thread = executor.submit(update_business_list_thread, msg_queue)
    #  threading.Timer 是 threading.Thread 的一个派生类,是在指定的时间 n 秒后执行一个函数功能。它会集成 threading.Thread 的很多属性和方法。
    threading.Timer(timeout, thread_timeout, args=(thread, msg_queue, ))

    # 使用 flask_socketio 默认提供的方法 start_background_task 伪同步的执行一个后台任务,该任务需要持续存在
    # 由于 app 上下文在伪同步中被保持,所以可以正确主动执行发送 emit / send
    socketio.start_background_task(target=handle_queue, namespace='update_application_list', msg_queue=msg_queue)


def thread_timeout(thread, msg_queue):
    try:
        if not thread.done():
            thread.cancel()
            msg_queue.put({'message': '应用信息同步超时', 'status': 'error'})
    except Exception as r:
        print('未知错误 %s' % (r))

# 同时在执行的这个后台任务,一旦发现msg_queue里面有更新的状态信息,就会立即将响应返回给前端予以展示
def handle_queue(namespace, msg_queue):
    while True:
        socketio.sleep(1)
        while msg_queue.empty() == False:
            msg = msg_queue.get()
            socketio.emit(namespace, msg, namespace='/' + namespace)
            if msg['status'] == 'finished':
                print(namespace + ' is finished.')
                return

@socketio.on('connect')
def connect():
    print("=============================connect..")
    # socketio.emit("response", {'percentage': 18})

@socketio.on('disconnect')
def disconnect():
    print("===========================disconnect...")

@socketio.on_error()        # Handles the default namespace
def error_handler(e):
    print('=====================received error: ' + str(e))
    pass

@socketio.on_error_default  # handles all namespaces without an explicit error handler
def default_error_handler(e):
    print('=====================received error: ' + str(e))
    pass


if __name__ == '__main__':

    app.config.from_mapping(
        SECRET_KEY='dev',
        # DATABASE=os.path.join(app.instance_path, 'flaskr.sqlite'),
    )

    # if test_config is None:
    #     # load the instance config, if it exists, when not testing
    #     app.config.from_pyfile('config.py', silent=True)
    # else:
    #     # load the test config if passed in
    #     app.config.from_mapping(test_config)

    # ensure the instance folder exists
    try:
        os.makedirs(app.instance_path)
    except OSError:
        pass

    socketio.run(app, port=port_flask, host="0.0.0.0")
- 1
- 2
- 3
- 4
- 5
- 6
- 7
- 8
- 9
- 10
- 11
- 12
- 13
- 14
- 15
- 16
- 17
- 18
- 19
- 20
- 21
- 22
- 23
- 24
- 25
- 26
- 27
- 28
- 29
- 30
- 31
- 32
- 33
- 34
- 35
- 36
- 37
- 38
- 39
- 40
- 41
- 42
- 43
- 44
- 45
- 46
- 47
- 48
- 49
- 50
- 51
- 52
- 53
- 54
- 55
- 56
- 57
- 58
- 59
- 60
- 61
- 62
- 63
- 64
- 65
- 66
- 67
- 68
- 69
- 70
- 71
- 72
- 73
- 74
- 75
- 76
- 77
- 78
- 79
- 80
- 81
- 82
- 83
- 84
- 85
- 86
- 87
- 88
- 89
- 90
- 91
- 92
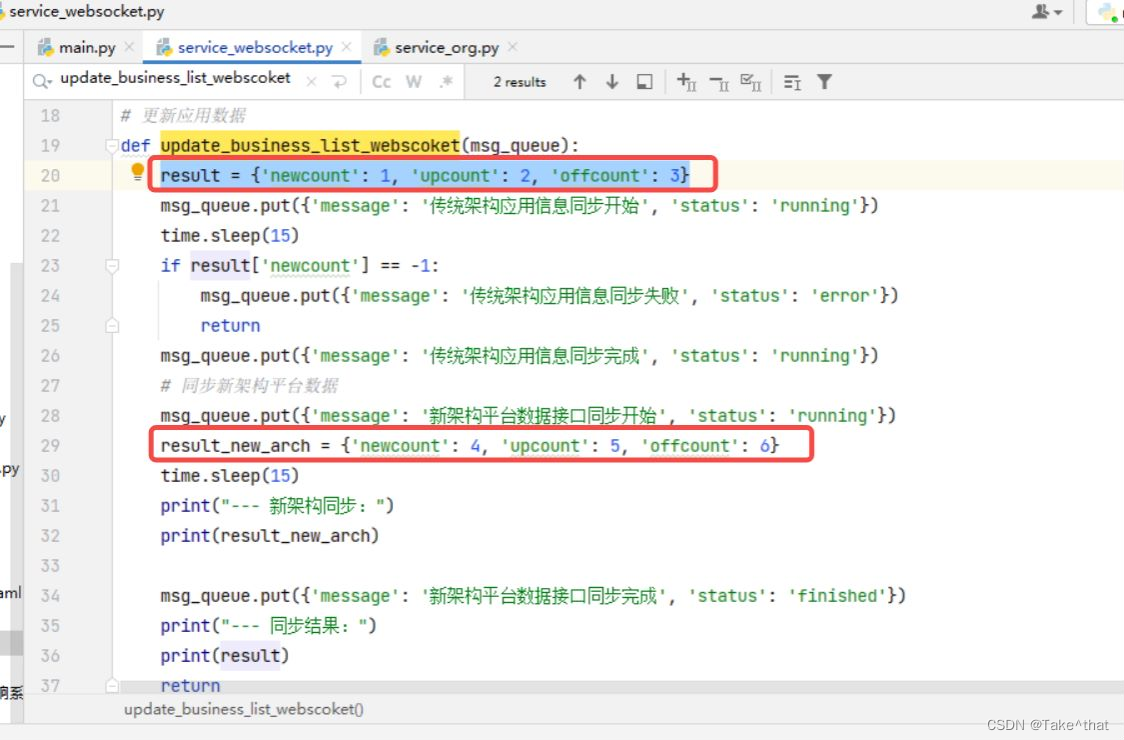
6. 效果演示:
先简单构造一个测试数据:
下面开始发起请求:

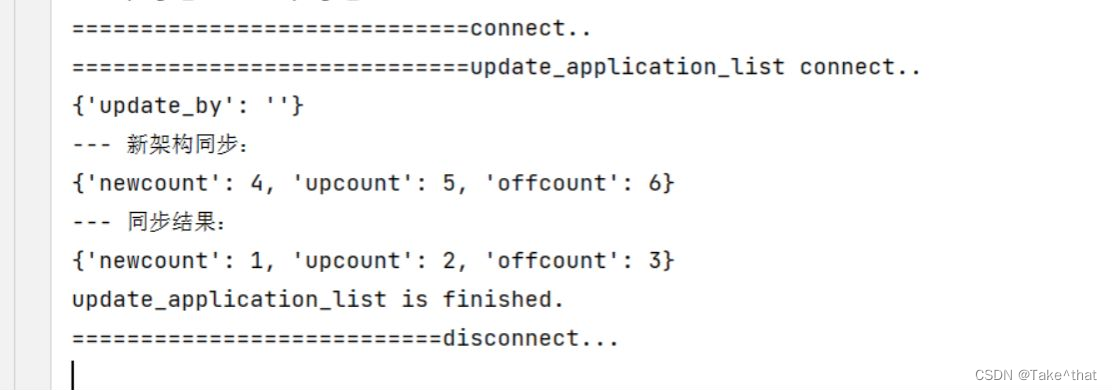
后端代码Print打印出来日志如下:
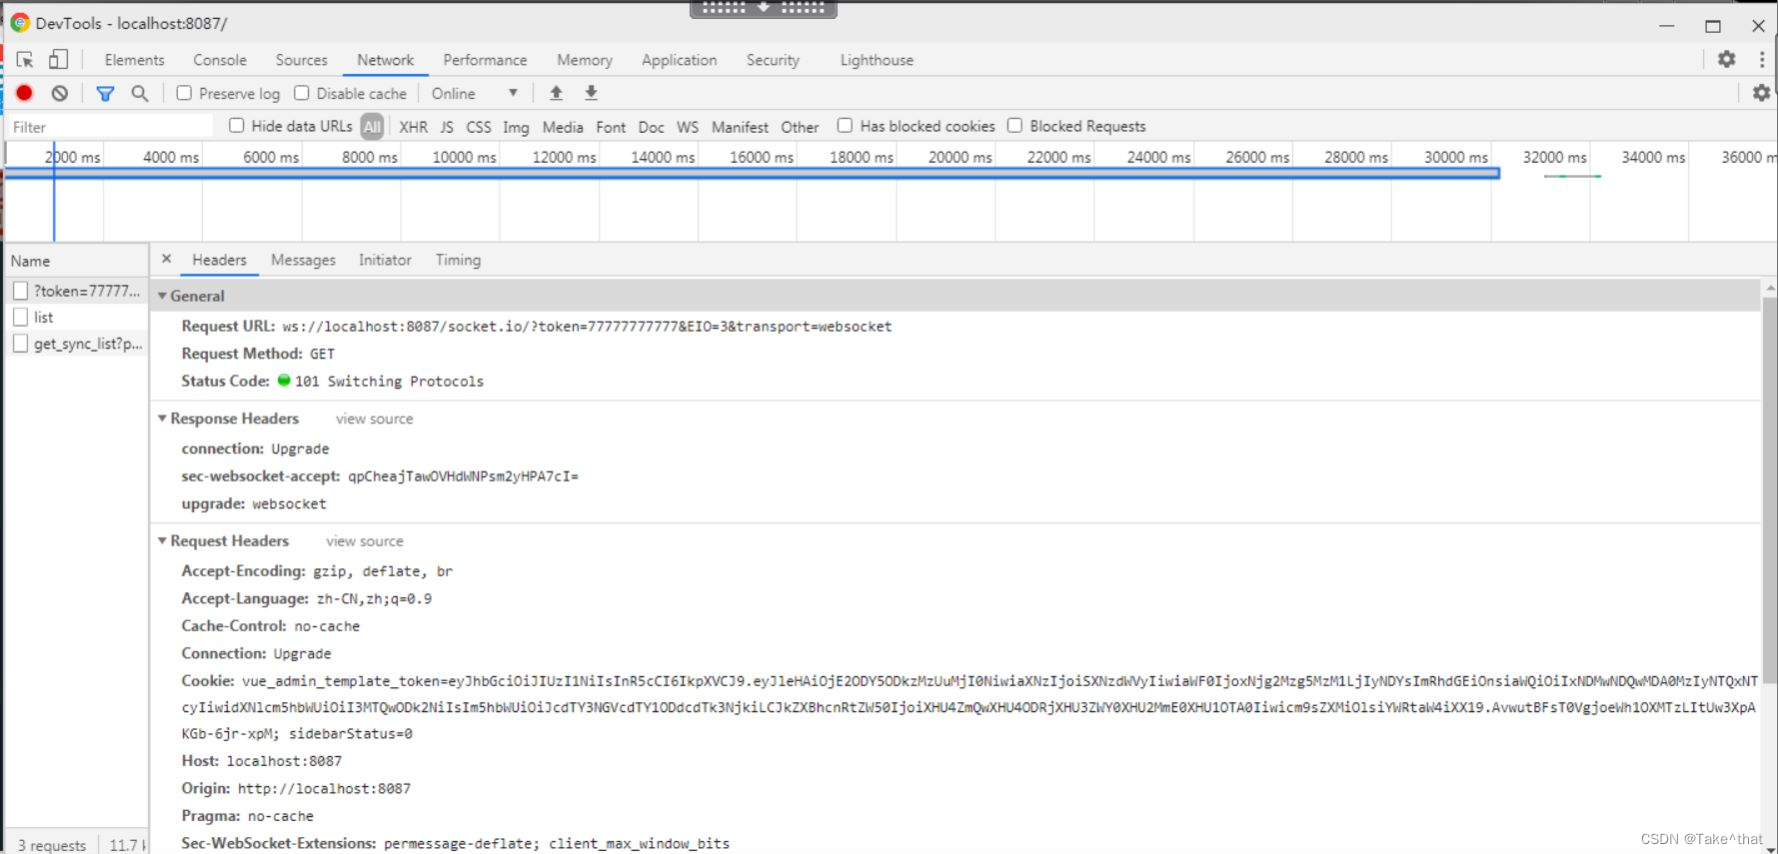
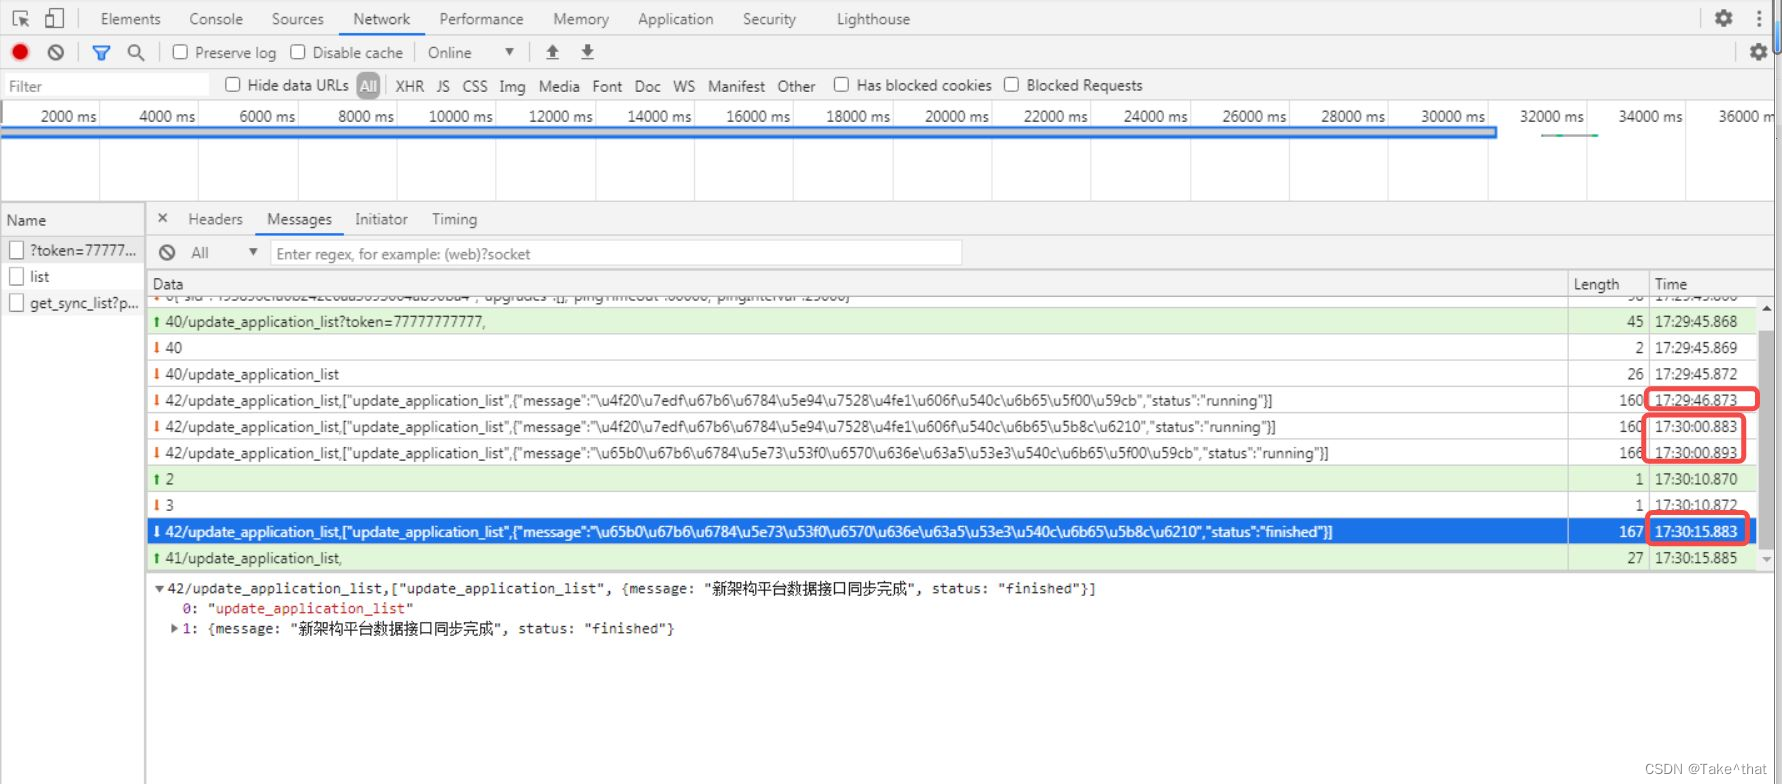
前端请求栏详细信息如下:

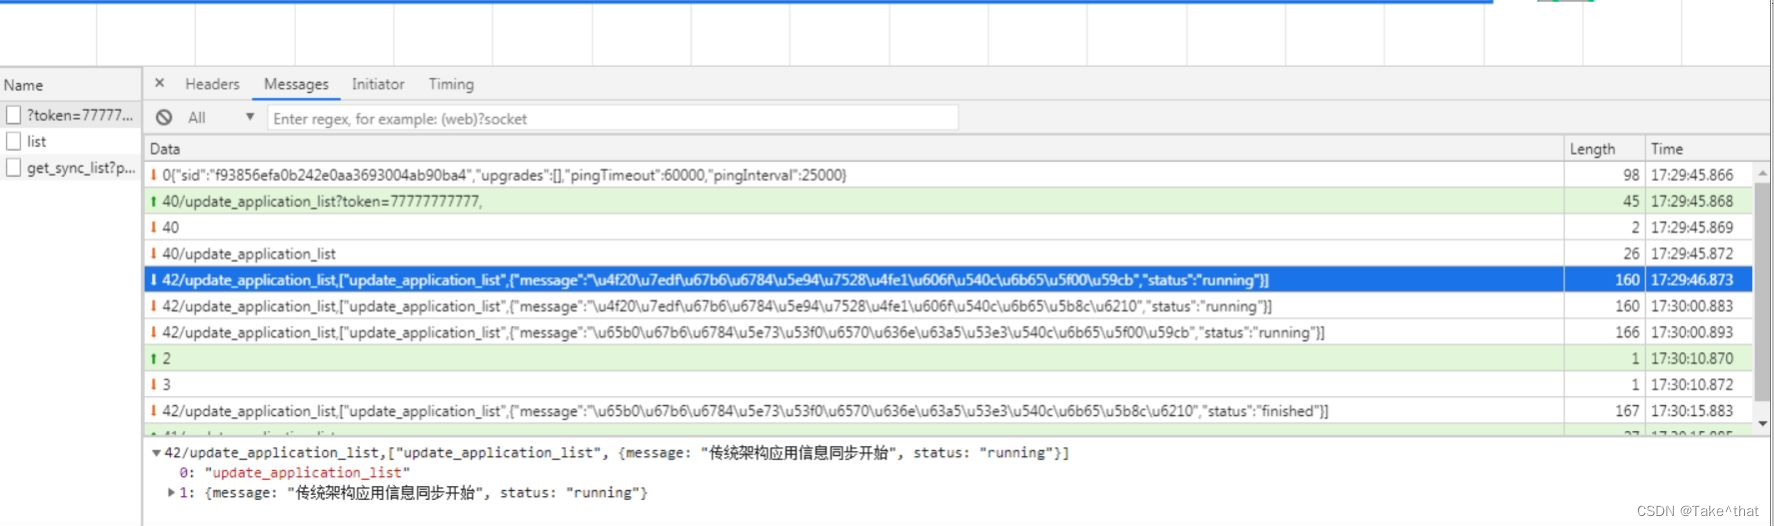
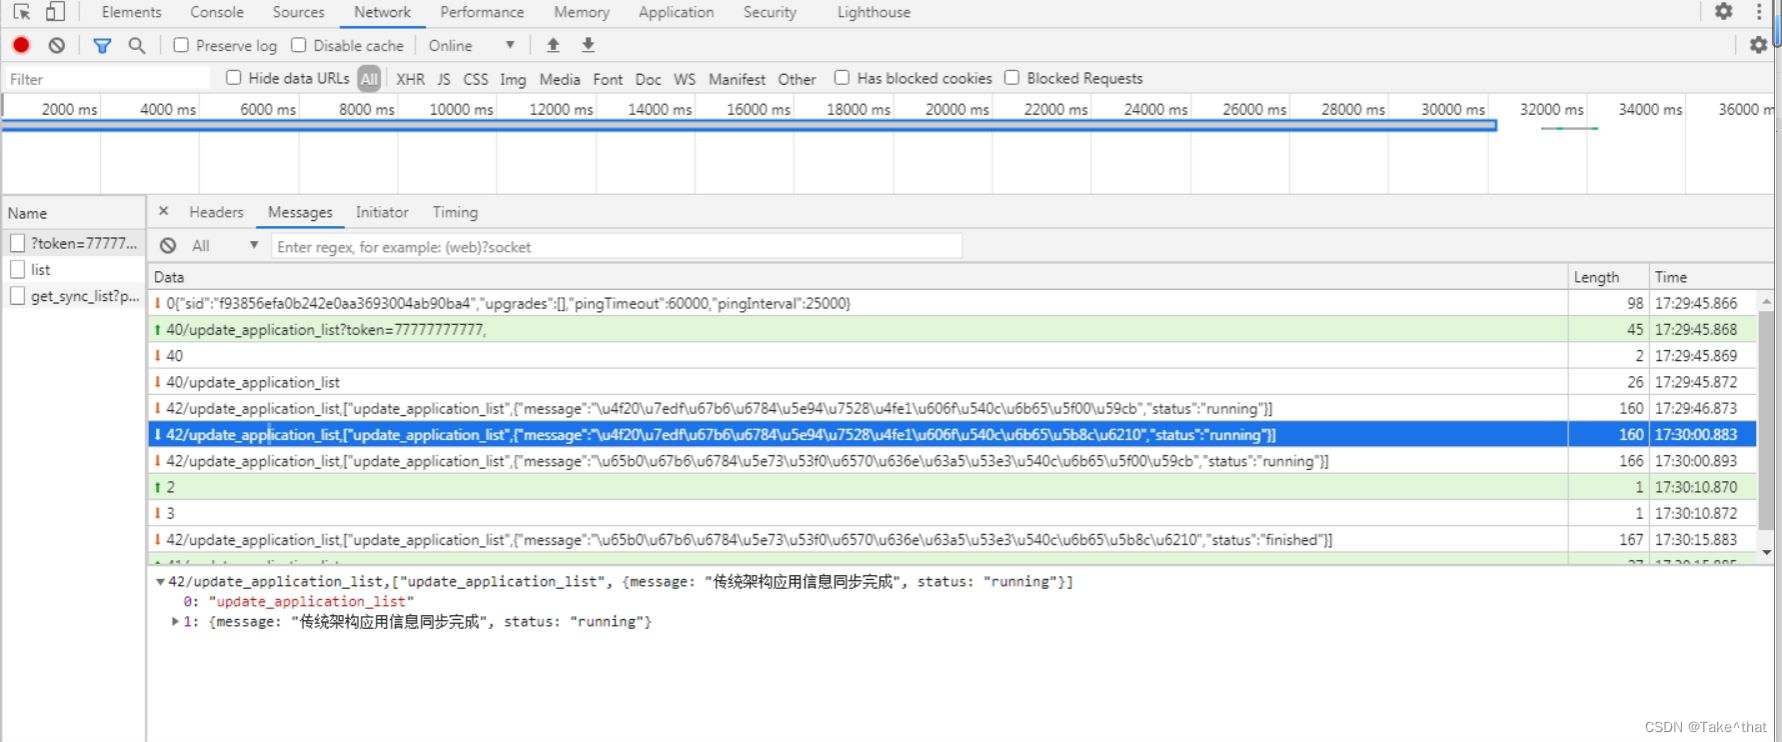
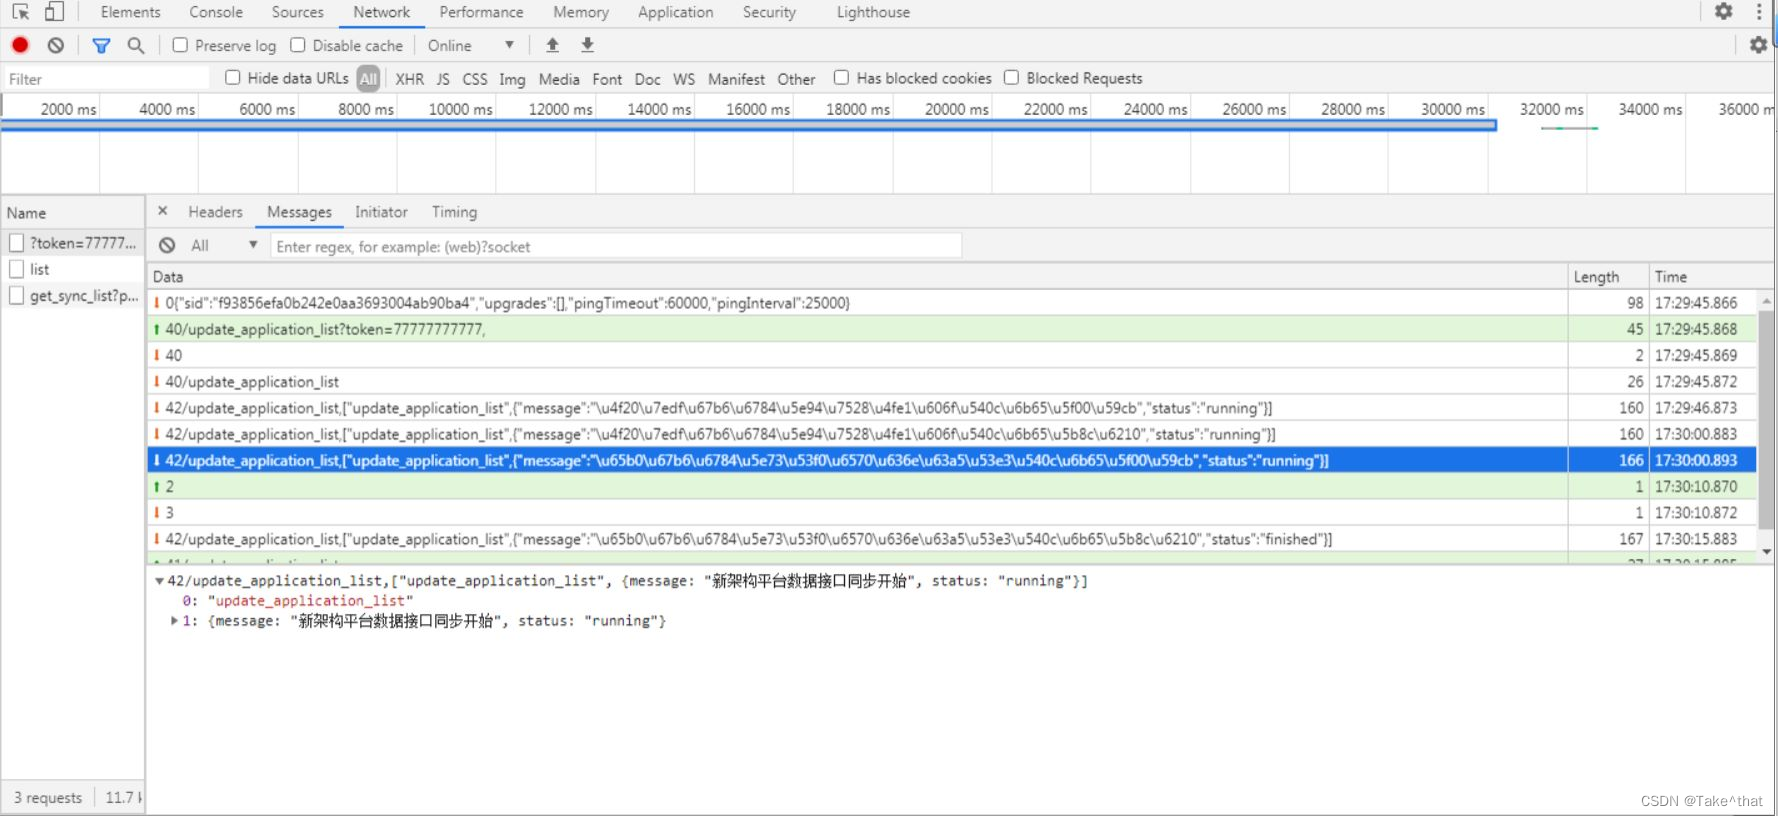
可以看到下面的时间间隔为15秒左右:
7. 参考文章:
vue使用 vue-socket.io三种方式及踩坑实例解析
https://github.com/xugaoxiang/FlaskTutorial
python socketio 服务器编程:
http://www.taodudu.cc/news/show-5726096.html?action=onClick
python socketio 服务器编程 源码:
https://github.com/yicaifenchen8/socketio
其他了解一下:
Flask教程(十九)SocketIO:
https://blog.csdn.net/djstavaV/article/details/112261889
Flask-SocketIO 中文文档:
http://juzizhou.net/article/112


