
热门标签
热门文章
- 1Python —— 捕获异常(try-except、raise)&日志模块(logguru)_loguru try except
- 2SSD模型 (单发多框目标检测) 原理+代码
- 3halcon中动态阈值分割以及使用偏差模型法检测缺陷_动态阙值分割
- 4flink: 自定义表函数的用法
- 5DrawerLayout的使用 侧滑加载Listview,首页使用Fragment和处理点击触摸冲突、穿透事件和监听菜单滑动状态的改变的详细介绍_fragment中open drawerlayout
- 6mysql中时间格式datetime、timestamp的区别_datetime和timestamp的区别 是否有精度问题
- 7安卓连接mysql8.0_MySQL连接在Android Studio MySQL版本8.0.13中不起作用
- 8centos常用操作_-bash: firewall-cmd: command not found
- 9一文看懂鸿蒙手机操作系统。和安卓、iOS 有何区别?_苹果,安卓,鸿蒙有什么区别
- 10常见前端项目性能优化方案_前端项目优化
当前位置: article > 正文
HarmonyOS应用开发-qrcode二维码生成_qrcodetype
作者:菜鸟追梦旅行 | 2024-03-15 16:40:50
赞
踩
qrcodetype
一.创建项目
二.示例代码
Hml代码:
- <div class="container">
- <text class="txt">Type</text>
- <switch showtext="true" checked="true" texton="rect" textoff="circle" onchange="setType"></switch>
- <qrcode value="{{qr_value}}" type="{{qr_type}}"
- style="color: {{qr_col}};background-color: {{qr_bcol}};width: {{qr_size}};height: {{qr_size}};margin-bottom: 70px;">
- </qrcode>
- <text class="txt">Color</text>
- <select onchange="setColor">
- <option for="{{col_list}}" value="{{$item}}">{{$item}}</option>
- </select>
- <text class="txt">Background Color</text>
- <select onchange="setColorB">
- <option for="{{bcol_list}}" value="{{$item}}">{{$item}}</option>
- </select>
- </div>
Css代码:
- .container {
- flex-direction: column;
- justify-content: center;
- align-items: center;
- }
- .txt {
- color: orangered;
- }
Js代码:
- export default {
- data: {
- qr_value:"这里是扫出的二维码内容",
- qr_type: 'rect',
- qr_size: '200px',
- qr_col: '#333',
- col_list: ['#87ceeb','#fa8072','#da70d6','#80ff00ff','#00ff00ff'],
- qr_bcol: '#f0ffff',
- bcol_list: ['#f0ffff','#ffffef','#d8bfd8']
- },
- setType(e) {
- if (e.checked) {
- this.qr_type = 'rect'
- } else {
- this.qr_type = 'circle'
- }
- },
- setColor(e) {
- this.qr_col = e.newValue
- },
- setColorB(e) {
- this.qr_bcol = e.newValue
- }
- }

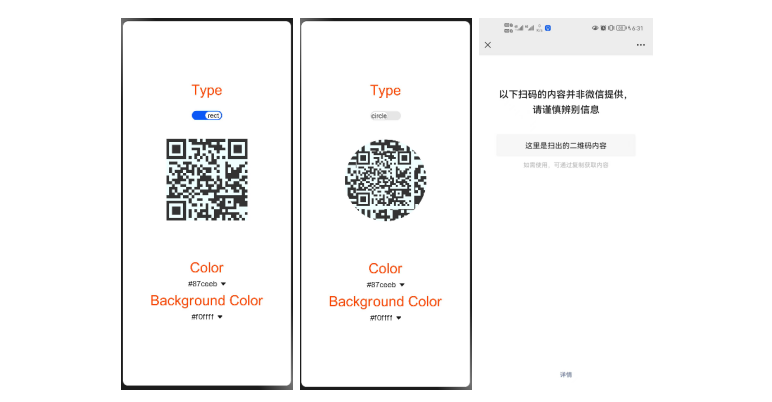
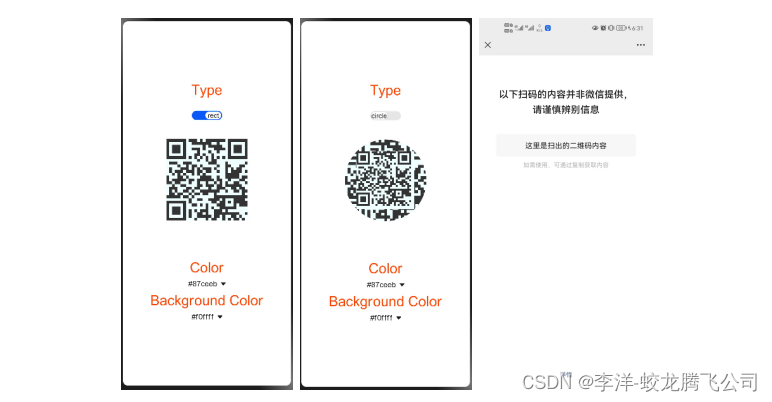
- 实例效果
声明:本文内容由网友自发贡献,不代表【wpsshop博客】立场,版权归原作者所有,本站不承担相应法律责任。如您发现有侵权的内容,请联系我们。转载请注明出处:https://www.wpsshop.cn/w/菜鸟追梦旅行/article/detail/242951
推荐阅读
相关标签

