
热门标签
热门文章
- 1风控图算法之中心性算法(小数据集Python版)
- 2【项目】仿牛客网社区开发 第8章 项目发布与总结 5 常见面试题_仿牛客论坛项目面试题
- 3【建议收藏】Android面试必备:掌握常见题型和答题技巧_安卓开发面试问题回答技巧
- 4Java语言学习总结 高级篇 ArrayList类的创建和使用_编程建立一字符串对列(arraylist),依次添加字符串("one"), ,"three","fo
- 52024年最新Python Web开发从入门到放弃_pythonweb开发需要学什么(1),2024年最新面试必问的几大问题_python web技术栈
- 6华为OD机试C卷-- 结队编程(Java & JS & Python & C)_python 某部门计划通过结队编程来进行项目开发
- 7C语言力扣刷题1——最长回文字串[双指针]_力扣最长回文子串c语言
- 8Github 2024-06-27开源项目日报Top10
- 9python与excel结合-python3与Excel的完美结合
- 10VSCode常用技巧_vscode parameter
当前位置: article > 正文
android studio 制作app欢迎界面-两种方法(功能)(备忘)_用android studio做手机上面有欢迎使用
作者:知新_RL | 2024-06-28 06:20:40
赞
踩
用android studio做手机上面有欢迎使用
android studio版本:Android Studio Chipmunk | 2021.2.1 Patch 2
例程名称:welcomeUI和welcomuibutton
app启动的时候一般都会有一个欢迎界面,可以展示功能,也可以作为功能入口。
两种方法(功能):
方法一:显示页面4秒钟,自动跳到主页面。
1、新建项目WelcomeUi
2、新建一个activity,命名为Welcome.
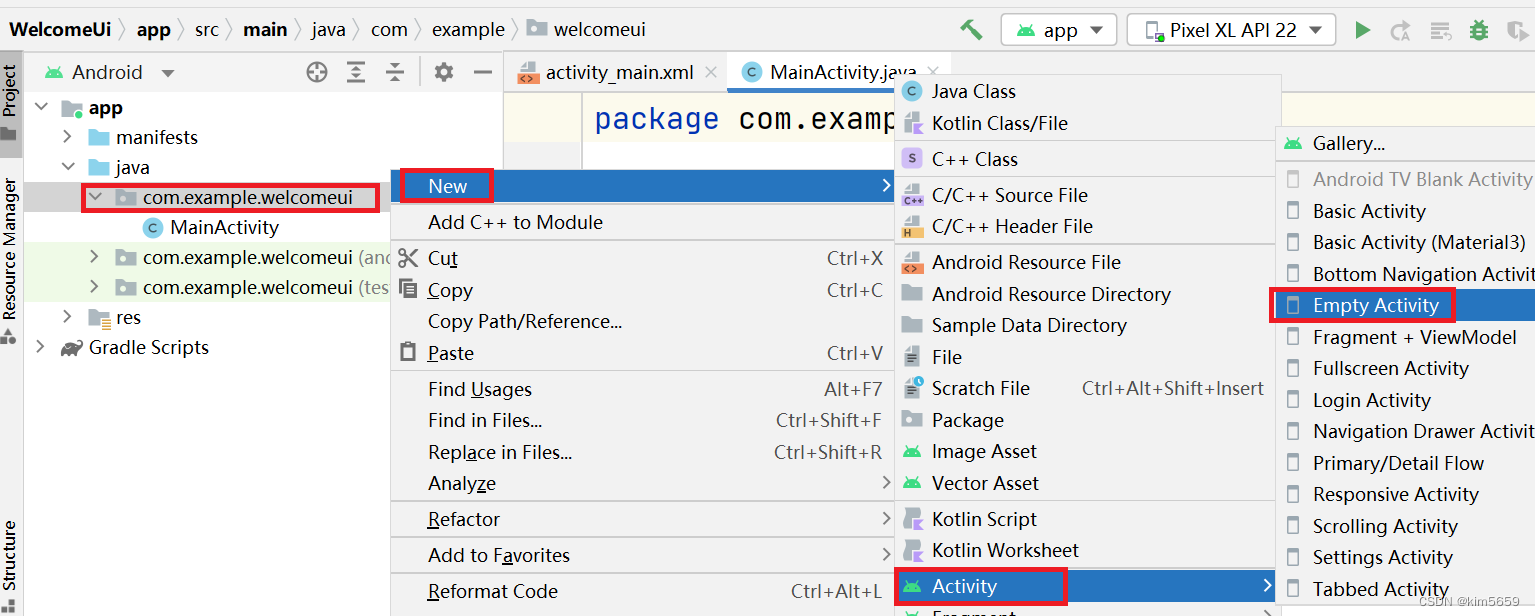
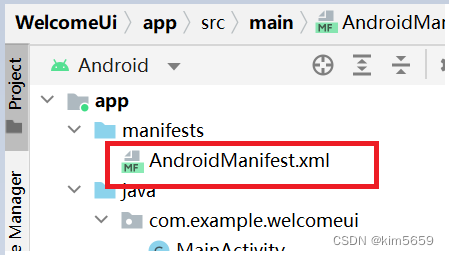
3、打开AndroidManifest.xml文件。
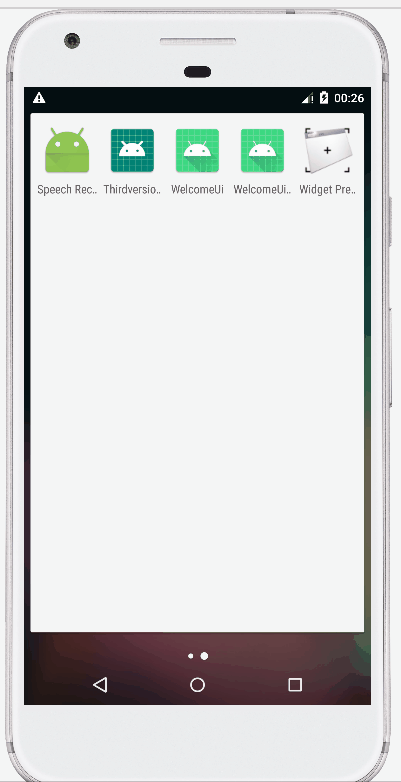
4、把原来的MainActivity修改为Welcome(Welcome已自动生成),把原来的Welcome修改为MainActivity,其他不动。如图:
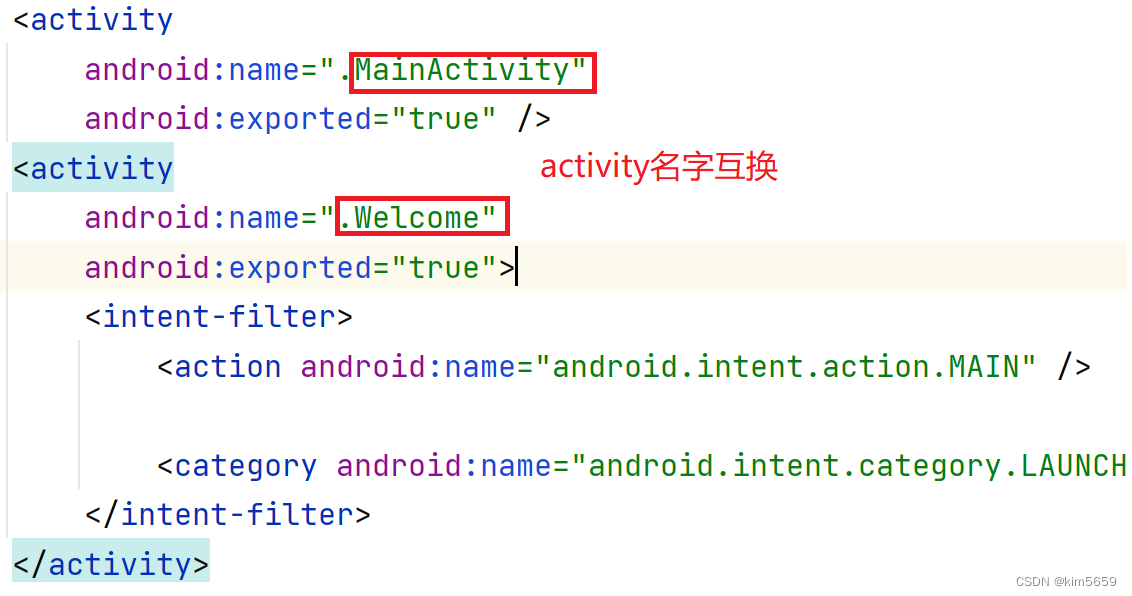
注:这种方法有时会出问题,其实在建立welcomeUI的时候选择launcher activity就自然先启动welcome这个activity了。如下图(2022.11.12):

5、在Welcome.java里面重写handle方法。
- private Handler handler=new Handler(){
- @Override
- public void handleMessage(Message msg){
- Intent intent=new Intent(Welcome.this,MainActivity.class);//实际是页面跳转
- startActivity(intent);
- finish();//销毁welcome页面。
- super.handleMessage(msg);
- }
- };
6、在Welcome.java 的onCreate()添加延迟代码。
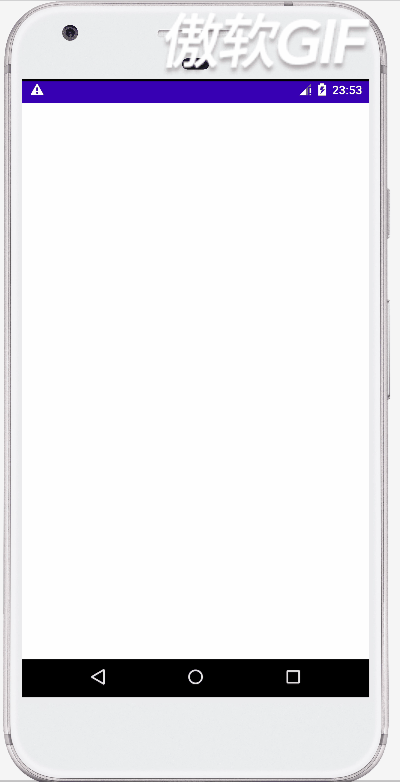
handler.sendEmptyMessageDelayed(0,4000);//4000毫秒动图演示:
全部代码:
MainActivity.java(无任何新代码)。
activity_main.xml
- <?xml version="1.0" encoding="utf-8"?>
- <androidx.constraintlayout.widget.ConstraintLayout xmlns:android="http://schemas.android.com/apk/res/android"
- xmlns:app="http://schemas.android.com/apk/res-auto"
- xmlns:tools="http://schemas.android.com/tools"
- android:layout_width="match_parent"
- android:layout_height="match_parent"
- tools:context=".MainActivity">
-
- <TextView
- android:id="@+id/textView3"
- android:layout_width="wrap_content"
- android:layout_height="wrap_content"
- android:text="我是主页面"
- android:textColor="#E91E63"
- android:textSize="30sp"
- app:layout_constraintBottom_toBottomOf="parent"
- app:layout_constraintEnd_toEndOf="parent"
- app:layout_constraintStart_toStartOf="parent"
- app:layout_constraintTop_toTopOf="parent" />
-
- </androidx.constraintlayout.widget.ConstraintLayout>

welcome.java(关键代码)
- package com.example.welcomeui;
-
- import androidx.appcompat.app.AppCompatActivity;
-
- import android.content.Intent;
- import android.os.Bundle;
- import android.os.Handler;
- import android.os.Message;
-
- public class Welcome extends AppCompatActivity {
-
- @Override
- protected void onCreate(Bundle savedInstanceState) {
- super.onCreate(savedInstanceState);
- setContentView(R.layout.activity_welcome);
- handler.sendEmptyMessageDelayed(0,4000);
- }
- private Handler handler=new Handler(){
- @Override
- public void handleMessage(Message msg){
- Intent intent=new Intent(Welcome.this,MainActivity.class);
- startActivity(intent);
- finish();
- super.handleMessage(msg);
- }
- };
- }
activity_welcome.xml
- <?xml version="1.0" encoding="utf-8"?>
- <androidx.constraintlayout.widget.ConstraintLayout xmlns:android="http://schemas.android.com/apk/res/android"
- xmlns:app="http://schemas.android.com/apk/res-auto"
- xmlns:tools="http://schemas.android.com/tools"
- android:layout_width="match_parent"
- android:layout_height="match_parent"
- tools:context=".Welcome">
-
- <TextView
- android:id="@+id/textView"
- android:layout_width="wrap_content"
- android:layout_height="wrap_content"
- android:text="我是欢迎界面"
- android:textColor="#2196F3"
- android:textSize="30sp"
- app:layout_constraintBottom_toBottomOf="parent"
- app:layout_constraintEnd_toEndOf="parent"
- app:layout_constraintStart_toStartOf="parent"
- app:layout_constraintTop_toTopOf="parent" />
-
- <TextView
- android:id="@+id/textView2"
- android:layout_width="wrap_content"
- android:layout_height="wrap_content"
- android:text="我4秒后消失"
- android:textColor="#2196F3"
- android:textSize="30sp"
- app:layout_constraintBottom_toBottomOf="parent"
- app:layout_constraintEnd_toEndOf="parent"
- app:layout_constraintStart_toStartOf="parent"
- app:layout_constraintTop_toTopOf="@+id/guideline2" />
-
- <androidx.constraintlayout.widget.Guideline
- android:id="@+id/guideline2"
- android:layout_width="wrap_content"
- android:layout_height="wrap_content"
- android:orientation="horizontal"
- app:layout_constraintGuide_begin="95dp" />
- </androidx.constraintlayout.widget.ConstraintLayout>
androidmanifest.xml
- <?xml version="1.0" encoding="utf-8"?>
- <manifest xmlns:android="http://schemas.android.com/apk/res/android"
- xmlns:tools="http://schemas.android.com/tools"
- package="com.example.welcomeui">
-
- <application
- android:allowBackup="true"
- android:dataExtractionRules="@xml/data_extraction_rules"
- android:fullBackupContent="@xml/backup_rules"
- android:icon="@mipmap/ic_launcher"
- android:label="@string/app_name"
- android:roundIcon="@mipmap/ic_launcher_round"
- android:supportsRtl="true"
- android:theme="@style/Theme.WelcomeUi"
- tools:targetApi="31">
- <activity
- android:name=".MainActivity"
- android:exported="true" />
- <activity
- android:name=".Welcome"
- android:exported="true">
- <intent-filter>
- <action android:name="android.intent.action.MAIN" />
-
- <category android:name="android.intent.category.LAUNCHER" />
- </intent-filter>
- </activity>
-
- </application>
-
- </manifest>
方法二:按钮跳转。
上例中其他代码都不动,把welcome.java里面的
- private Handler handler=new Handler(){
- @Override
- public void handleMessage(Message msg){
- Intent intent=new Intent(Welcome.this,MainActivity.class);
- startActivity(intent);
- finish();
- super.handleMessage(msg);
- }
- };
和
handler.sendEmptyMessageDelayed(0,4000);
删除。
在activity_welcome.xml里面添加一个按钮。
再在welcome.java里添加按钮的onclick事件即可。
- button.setOnClickListener(new View.OnClickListener() {
- @Override
- public void onClick(View v) {
- Intent intent = new Intent();
- intent.setClass(Welcome.this,MainActivity.class);
- startActivity(intent);
- finish();
- }
-
- });
Welcome.java代码:
- package com.example.welcomeui;
-
- import androidx.appcompat.app.AppCompatActivity;
-
- import android.content.Intent;
- import android.os.Bundle;
- import android.view.View;
- import android.widget.Button;
-
- public class Welcome extends AppCompatActivity {
- private Button button;
- @Override
- protected void onCreate(Bundle savedInstanceState) {
- super.onCreate(savedInstanceState);
- setContentView(R.layout.activity_welcome);
- Button button=(Button)findViewById(R.id.button);
- button.setOnClickListener(new View.OnClickListener() {
- @Override
- public void onClick(View v) {
- Intent intent = new Intent();
- intent.setClass(Welcome.this,MainActivity.class);
- startActivity(intent);
- finish();
- }
-
- });
- }
- }
动图展示:
声明:本文内容由网友自发贡献,不代表【wpsshop博客】立场,版权归原作者所有,本站不承担相应法律责任。如您发现有侵权的内容,请联系我们。转载请注明出处:https://www.wpsshop.cn/w/知新_RL/article/detail/765134
推荐阅读
相关标签

