
热门标签
当前位置: article > 正文
openCV实战练习(5)—— 物体检测_opencv物体检测
作者:盐析白兔 | 2024-06-28 06:18:33
赞
踩
opencv物体检测
项目Introduce:
项目名称:
在冰红茶的博客看到的这个实战,物体检测应该是对于视觉在实用性上的一门基础课,上手实践的时候做了一些小小的改动,顺利让代码跑起来了
Opencv项目实战:05 物体检测_opencv物体检测_夏天是冰红茶的博客-CSDN博客
视频转图像-cv2.VideoCapture()用法_宁然也的博客-CSDN博客
运行报错error: (-215:Assertion failed) !ssize.empty() in function ‘cv::resize‘_努力搬砖的小菜鸟的博客-CSDN博客
项目流程预览:
1.读取GIF or 调用摄像头
2.读取文件‘coco.name’(一个放了各种物体名词的文件)
3.调用库,实行匹 配
4.展示
项目与知识衔接:
Object Detection OpenCV Python Easy and Fast (2020).jpg
ssd_mobilenet_v3_large_coco_2020_01_14.pbtxt
NMS
...
具体操作步骤以及代码:
1.读取GIF or 调用摄像头 cv2.VideoCapture()
- thres = 0.45# threshold to detect object
- #use nms to avoid cover and flash
- nms_threshold = 0.2 #较大抑制效果
- #if =1 没有效果
- cap = cv2.VideoCapture(0)
- cap.set(3,1280)
- cap.set(4,720)
- cap.set(10,150)
2.读取文件
- classNames = []
- classFile = 'coco.names'
- with open(classFile,'rt') as f:
- classNames= f.read().rstrip('\n').split('\n')
3.调用
Object Detection OpenCV Python Easy and Fast (2020).jpg
ssd_mobilenet_v3_large_coco_2020_01_14.pbtxt
- configPath = 'ssd_mobilenet_v3_large_coco_2020_01_14.pbtxt'
- weightsPath = 'frozen_inference_graph.pb'
-
- net = cv2.dnn_DetectionModel(weightsPath,configPath)
- net.setInputSize(320,320)
- net.setInputScale(1.0/ 127.5)
- net.setInputMean((127.5,127.5,127.5))
- net.setInputSwapRB(True)
4.展示结果
- while True:
- success,img = cap.read()
- classIds,confs,bbox = net.detect(img,confThreshold=thres)
- bbox = list(bbox)
- #bbox 本为numpy数组,后将其改为list
- confs = list(np.array(confs).reshape(1,-1)[0])
- #将内容转化为一个列表,使用np.array()是因为元组不可reshape
- confs = list(map(float,confs))
- #confs 本为float32,使用map()将float映射于confs上
- # print(type(confs[0]))
- # print(confs)
- indices = cv2.dnn.NMSBoxes(bbox, confs, thres, nms_threshold)
- print(indices)
- print(type(indices))
- for i in indices:
- print(type(i))
- # i=i[0]
- #打印(indices)的内容是[[0]]
- box = bbox[i]
- x,y,w,h = box[0],box[1],box[2],box[3]
- cv2.rectangle(img,(x,y),(x+w,y+h),color=(0,255,0),thickness=2)
- cv2.putText(img,classNames[classIds[i]-1].upper(),(box[0]+10,box[1]+30),cv2.FONT_HERSHEY_COMPLEX,1,(0,255,0),2)
- #此处classIds拥有特殊索引i,且已有[],所以是[i]
-
- cv2.imshow("Output",img)
- if cv2.waitKey(1) & 0xFF ==27:
- break
-

项目所需要的工具以及预设参数:
关于文件调用的Github可以在冰红茶的blog里找,很详细
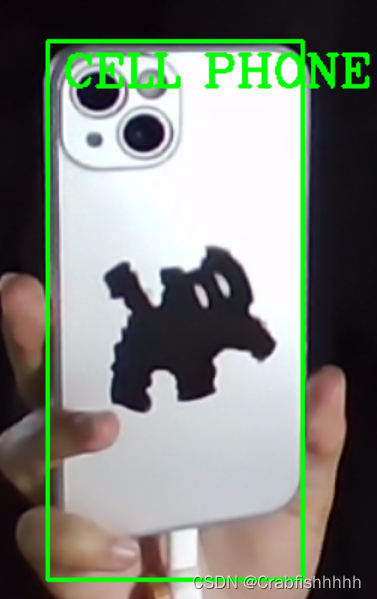
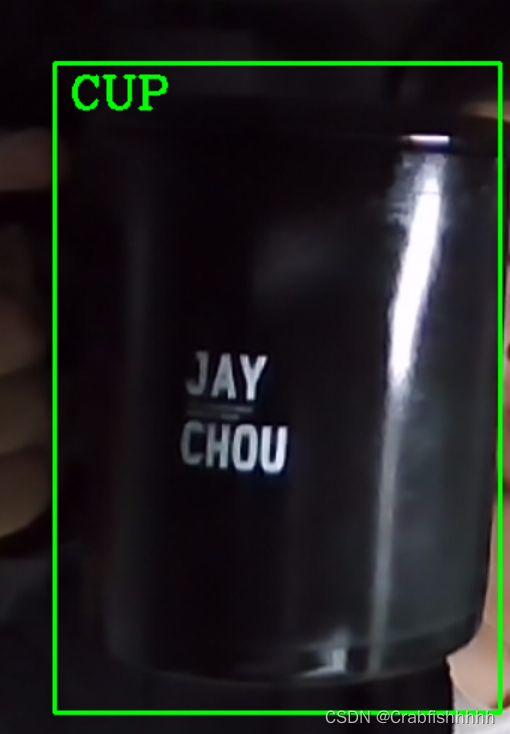
实现结果展示:

代码整体展示:
- import cv2
- import numpy as np
-
- thres = 0.45# threshold to detect object
- #use nms to avoid cover and flash
- nms_threshold = 0.2 #较大抑制效果
- #if =1 没有效果
- cap = cv2.VideoCapture(0)
- cap.set(3,1280)
- cap.set(4,720)
- cap.set(10,150)
-
- classNames = []
- classFile = 'coco.names'
- with open(classFile,'rt') as f:
- classNames= f.read().rstrip('\n').split('\n')
-
- # print(classNames)
- configPath = 'ssd_mobilenet_v3_large_coco_2020_01_14.pbtxt'
- weightsPath = 'frozen_inference_graph.pb'
-
- net = cv2.dnn_DetectionModel(weightsPath,configPath)
- net.setInputSize(320,320)
- net.setInputScale(1.0/ 127.5)
- net.setInputMean((127.5,127.5,127.5))
- net.setInputSwapRB(True)
-
- while True:
- success,img = cap.read()
- classIds,confs,bbox = net.detect(img,confThreshold=thres)
- bbox = list(bbox)
- #bbox 本为numpy数组,后将其改为list
- confs = list(np.array(confs).reshape(1,-1)[0])
- #将内容转化为一个列表,使用np.array()是因为元组不可reshape
- confs = list(map(float,confs))
- #confs 本为float32,使用map()将float映射于confs上
- # print(type(confs[0]))
- # print(confs)
- indices = cv2.dnn.NMSBoxes(bbox, confs, thres, nms_threshold)
- print(indices)
- print(type(indices))
- for i in indices:
- print(type(i))
- # i=i[0]
- #打印(indices)的内容是[[0]]
- box = bbox[i]
- x,y,w,h = box[0],box[1],box[2],box[3]
- cv2.rectangle(img,(x,y),(x+w,y+h),color=(0,255,0),thickness=2)
- cv2.putText(img,classNames[classIds[i]-1].upper(),(box[0]+10,box[1]+30),cv2.FONT_HERSHEY_COMPLEX,1,(0,255,0),2)
- #此处classIds拥有特殊索引i,且已有[],所以是[i]
-
- cv2.imshow("Output",img)
- if cv2.waitKey(1) & 0xFF ==27:
- break
-
- #检测物体
-
-
代码运用是上手很快的,总体运行的步骤很简单(虽然有些算法看不懂,但发觉一点就是,在出现报错的时候,我对报错类型的反应变快了,debug的效率提高了很多,感觉有在进步的。
声明:本文内容由网友自发贡献,不代表【wpsshop博客】立场,版权归原作者所有,本站不承担相应法律责任。如您发现有侵权的内容,请联系我们。转载请注明出处:https://www.wpsshop.cn/w/盐析白兔/article/detail/765127
推荐阅读
相关标签

