
- 1考幼师资格证之前需要考计算机等级证书吗?_幼儿园老师计算机必须考吗
- 2微信小程序分享好友和朋友圈的功能_微信朋友圈分享按钮灰色
- 3DVWA之SQL Injection_dvwa前端是什么意思
- 4青藤云——安全服务工程师面经(北京升鑫网络科技有限公司)_北京升鑫网络科技有限公司 hvv面试
- 5java基础知识【第15期】-- 异常_日常编程中最好实现新的error子类来说明当前错误的情况
- 6小程序H5 vue页面禁止分享功能_在微信小程序可以只屏蔽某一个页面的分享吗
- 7uio驱动编写 实例1_uio_mem_virtual
- 8PCL点云处理之双边滤波(一百四十四)_pcl双边滤波
- 9实现浏览器兼容版的window.getComputedStyle_getcomputedstyle的兼容写法
- 10Linux下载GEO数据,教你3种方法下载NCBI GEO数据
.NetCore项目nginx发布_.net core nginx
赞
踩

目录
准备服务器【Alibaba Cloud Linux 3.2104 LTS 64位 快速启动版】
我之前写过docker的,这里写一下nginx的发布方法:
环境:
系统:win10专业版
开发工具:Visual Studio 2019
.NET环境:.NET Core 3.1
项目:ASP.NET Core Web API
运行系统:Alibaba Cloud Linux 3.2104 LTS 64位 快速启动版
服务器:nginx
服务器型号

项目创建:
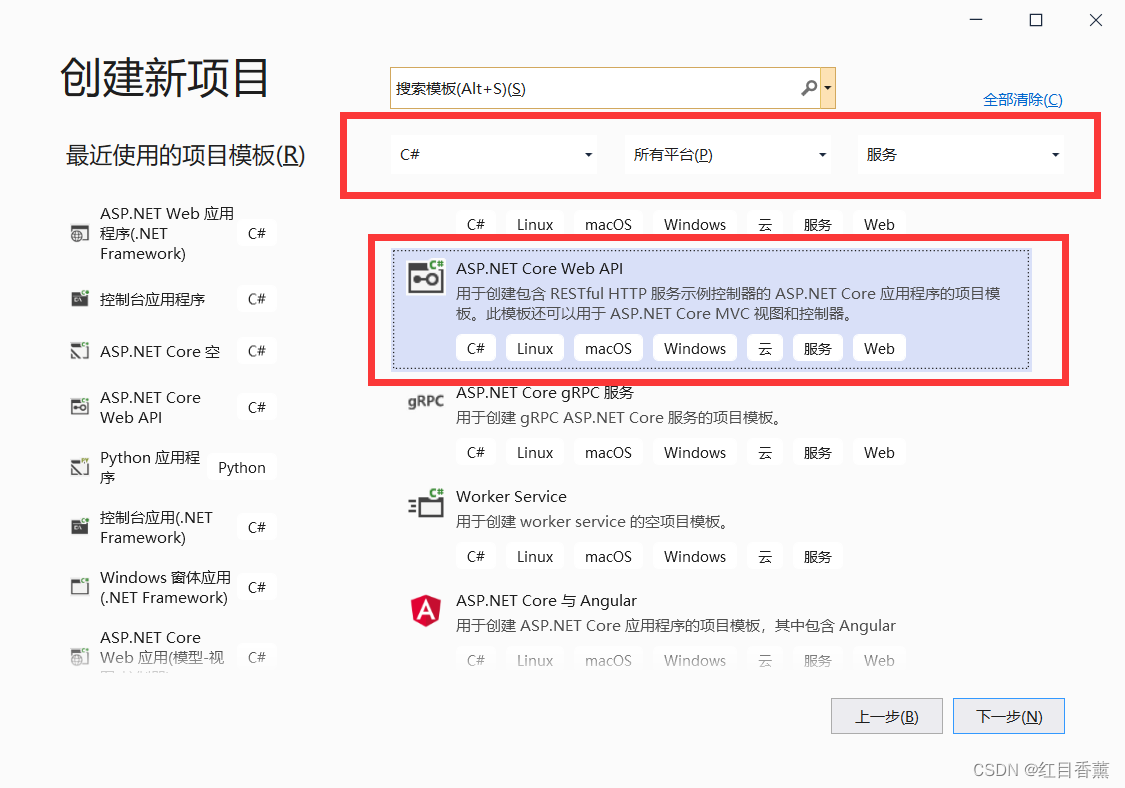

这里选择.NET Core 3.1版本,因为只有它是长期支持的,如果是vs2022版本是.NET Core 6.0那个很麻烦找配套。

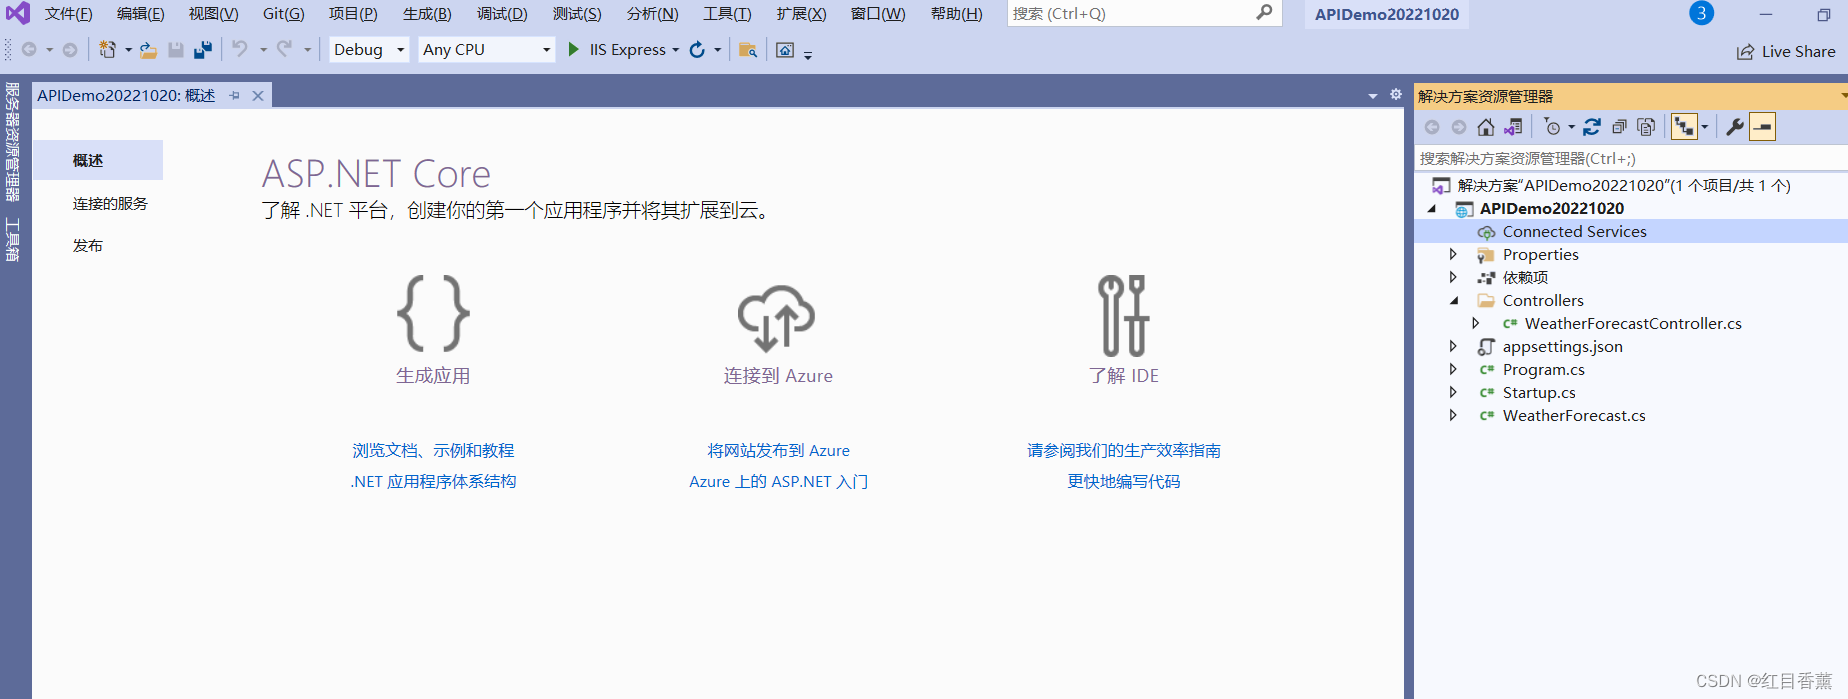
创建完毕
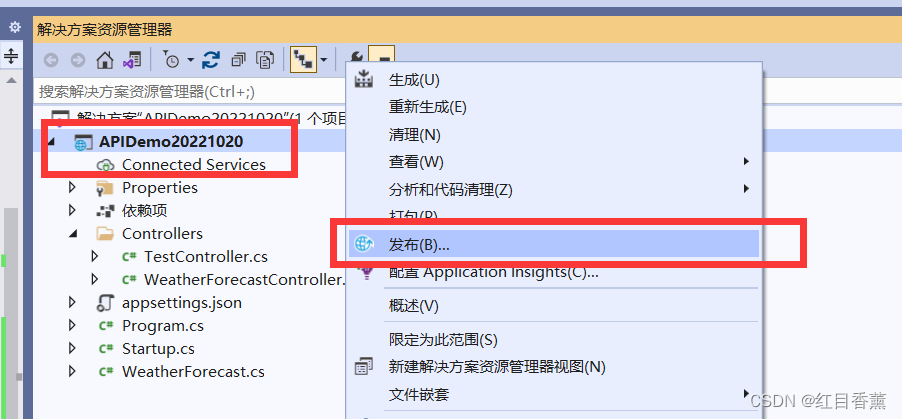
添加自定义的API控制器

这里我用Test作为控制器名称。

修改访问路径
【*】代表所有IP都能访问
示例代码
- using Microsoft.AspNetCore.Http;
- using Microsoft.AspNetCore.Mvc;
- using System;
- using System.Collections.Generic;
- using System.Linq;
- using System.Threading.Tasks;
-
- namespace APIDemo20221020.Controllers
- {
- [Route("api/[controller]/[action]")]
- [ApiController]
- public class TestController : ControllerBase
- {
- public Object GetInfo() {
- Dictionary<String, Object> map = new Dictionary<string, object>();
- map.Add("state",true);
- map.Add("message","访问成功");
- List<string> list=new List<string>();
- for (int i = 0; i < 100; i++)
- {
- list.Add(((char)(30000 + i)).ToString());
- }
- map.Add("result", list);
- return map;
- }
- }
- }

配置跨域
ASP.NET Core微服务(三)——【跨域配置】_红目香薰的博客-CSDN博客
直接在Startup.cs中添加代码即可。

启动测试


访问:http://localhost:5000/api/Test/GetInfo
访问成功

项目发布


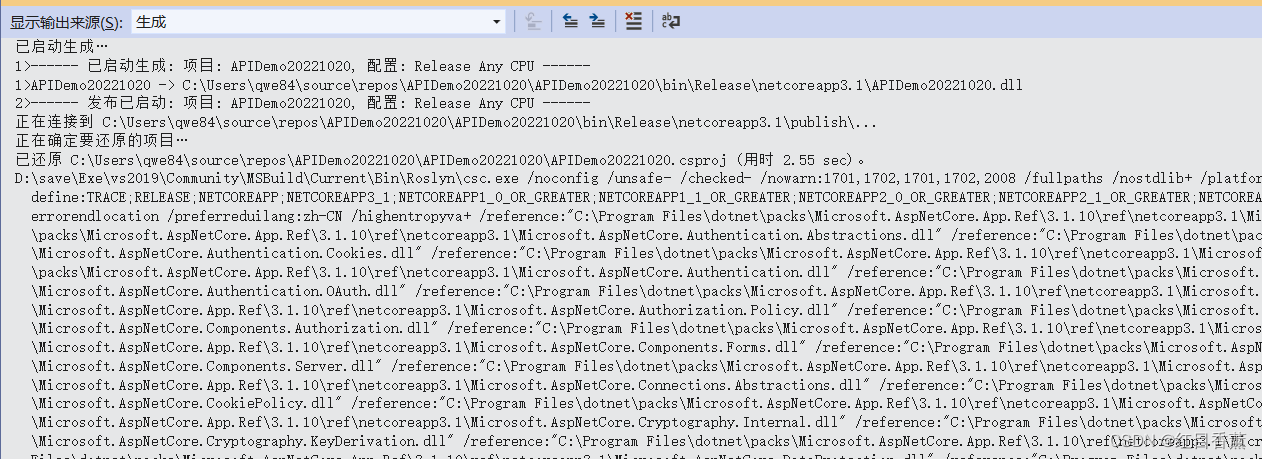

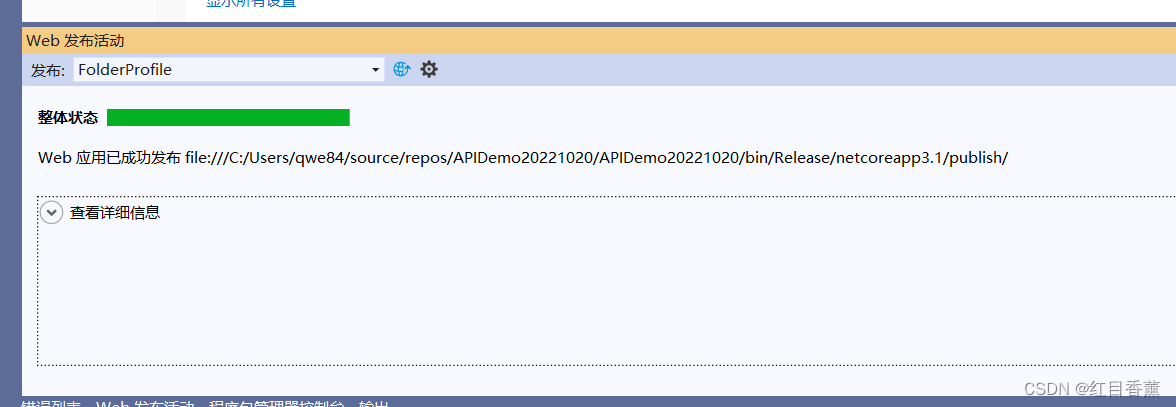

发布的项目
我的项目名叫做【APIDemo20221020】所以,应用程序叫做【APIDemo20221020.dll】
准备服务器【Alibaba Cloud Linux 3.2104 LTS 64位 快速启动版】

链接linux服务器

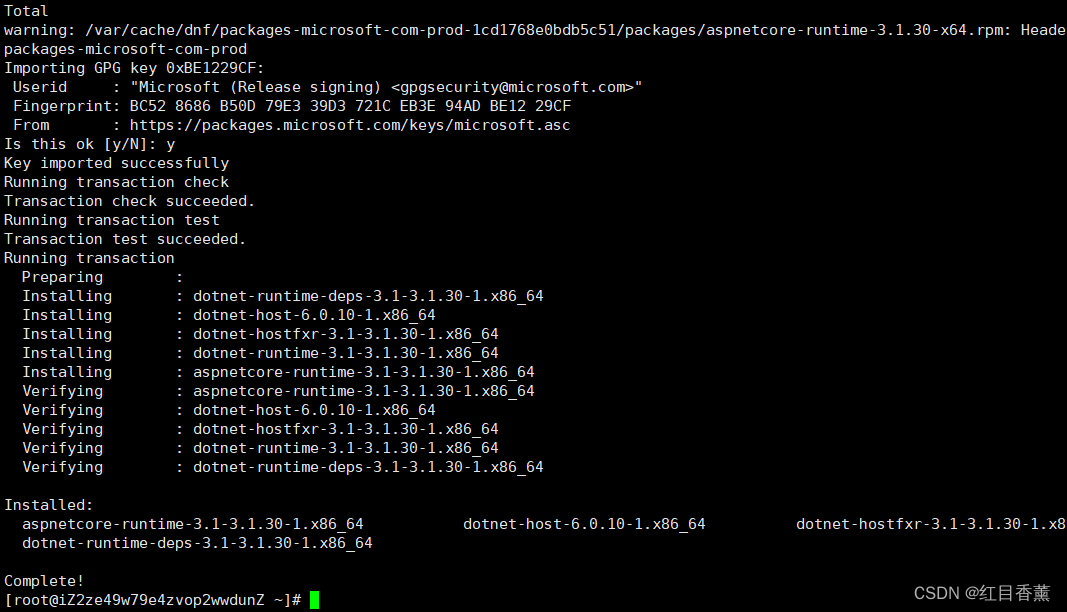
安装ASP.Net Core3.1环境
Download .NET (Linux, macOS, and Windows)

选择.NET Core 3.1版本

选择图片中标注红色外框的选项。

选择脚本安装
将 Microsoft 包签名密钥添加到受信任密钥列表,并添加 Microsoft 包存储库。

sudo rpm -Uvh https://packages.microsoft.com/config/centos/7/packages-microsoft-prod.rpm
安装 SDK
.NET SDK 使你可以通过 .NET 开发应用。 如果安装 .NET SDK,则无需安装相应的运行时。 若要安装 .NET SDK,请运行以下命令:这个版本支持.NET Core
sudo yum install aspnetcore-runtime-3.1 -y
不是很大,一会就安装完毕了。
.NET版本验证
dotnet --list-runtimes

上传linux-x64位版本的项目包
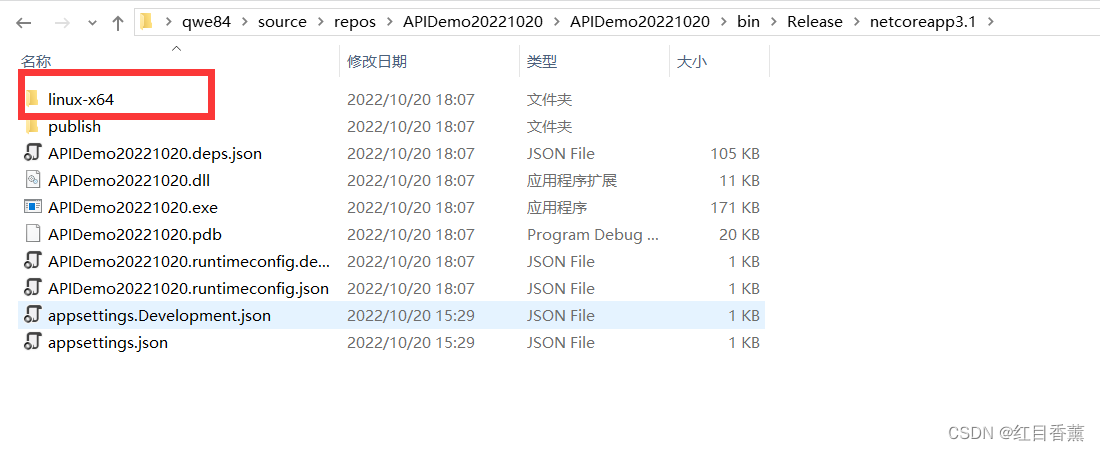
使用XFTP上传

直接启动

安装nginx
yum install nginx -y

由于nginx不是自动启动的,需要咱们启动一下。
查看nginx.service状态命令:
systemctl status nginx.service
启动nginx.service
- systemctl start nginx.service
- systemctl status nginx.service

nginx文件位置
nginx 日志文件 /var/log/nginx
nginx配置文件目录 /etc/nginx
nginx 可执行文件 /usr/sbin/nginx
nginx环境配置 /etc/sysconfig/nginx
nginx默认站点目录 /usr/share/nginx/html
公网访问

修改配置
vi /etc/nginx/nginx.conf
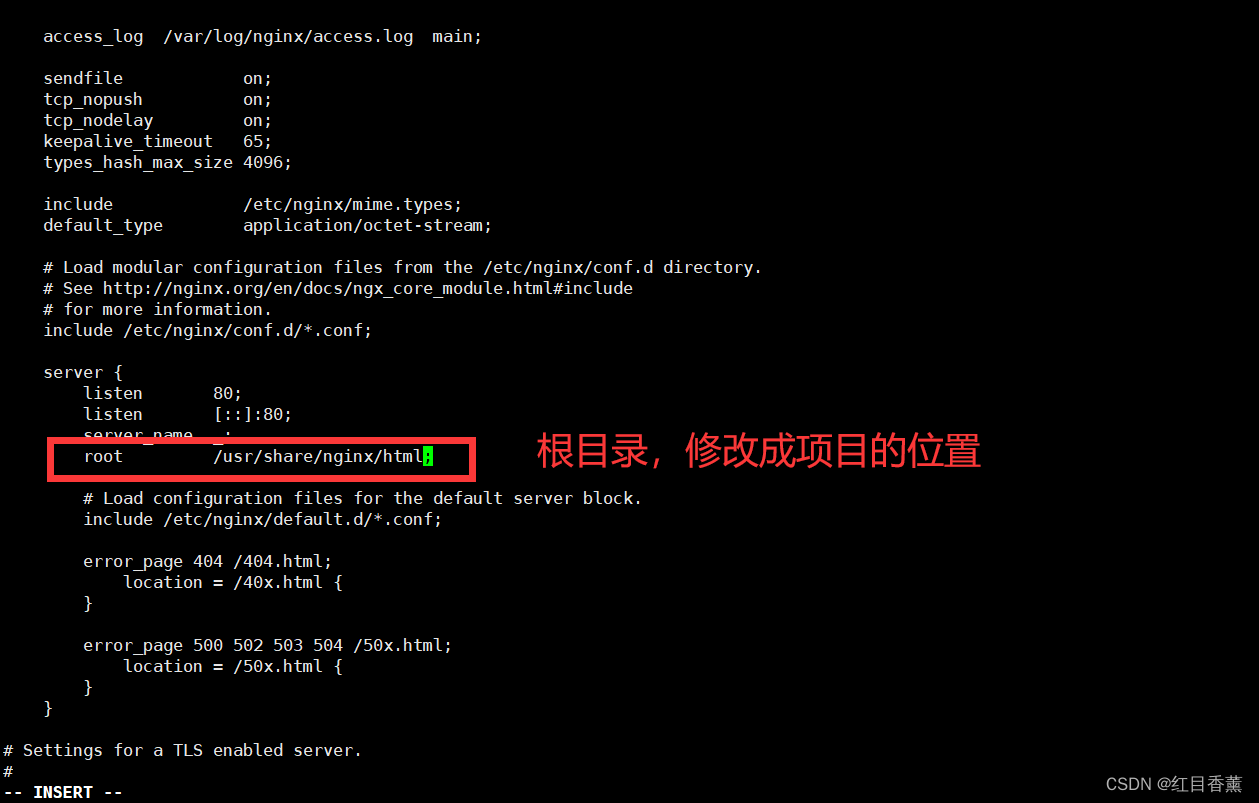
修改到项目路径,输入【i】进行insert模式,修改完毕后按【ESC】加【:wq】进行保存。
这里看到有【;】,不要忘记。保存并重新启动。
这里我给了我修改server的全部编码。当然,端口号是65535里找不常用的随便用都行。
- server {
- listen 8080;
- # listen [::]:80;
- server_name _;
- # root /usr/share/nginx/html;
- location / {
- proxy_pass http://localhost:5000;
- proxy_http_version 1.1;
- proxy_set_header Upgrade $http_upgrade;
- proxy_set_header Connection keep-alive;
- proxy_set_header Host $host;
- proxy_cache_bypass $http_upgrade;
- }
- root /root/linux-x64;
- # Load configuration files for the default server block.
- include /etc/nginx/default.d/*.conf;
- error_page 404 /404.html;
- location = /40x.html {
- }
- error_page 500 502 503 504 /50x.html;
- location = /50x.html {
- }
- }

重新启动并运行【do】
- systemctl restart nginx.service
- dotnet APIDemo20221020.dll

访问成功

如果访问不了就行没开安全组:
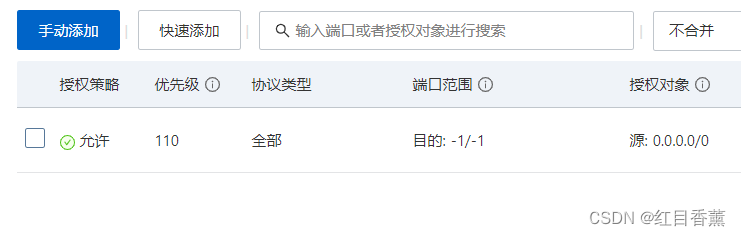
我这里是全部,肯定是能访问的。

