
热门标签
热门文章
- 1Excel判断CD两列在EF两列的列表中是否存在
- 2GPU平台并行计算_gpu并行计算
- 3substring-with-concatenation-of-all-words
- 4compose--修饰符Modifier
- 5访问共享盘,无法访问,您可能没有权限使用网络资源,请与这台服务器的管理员联系以查明您是否有访问权限。...
- 6C++多线程有必要加volatile么?_c++ 多线程使用volatile
- 7使用wget下载需要用户名和密码访问的网站资源
- 8mac for m1(arm):安装mysql的三种方式(本机安装、虚拟机安装、docker安装)_mac m1安装mysql
- 9Unix运维_CMake教程_CMake中的link_libraries指令
- 10解决打开AndroidStudio多次提示Untrusted Server‘s certificate 证书不可用( Server‘s certificate is not trusted )_unstructured server's certificate
当前位置: article > 正文
nginx +apisix+k8s 实现测试环境项目部署访问_apisix 配置域名访问
作者:小小林熬夜学编程 | 2024-03-09 08:00:37
赞
踩
apisix 配置域名访问
实现原理,又nginx进行跳转到apisix网关,在由apisix的上游、路由服务转发到k8s。
环境:
| k8s集群 | 10.0.0.101,102,103 |
| nginx | 10.0.0.5 |
| apisix | 部署到k8s上 |
apisix
Apache APISIX是一个动态的、实时的、高性能的 API 网关.
使用Helm Chart安装
所有的pod,svc等都放到了default的namespace下
apisix
- helm repo add apisix https://charts.apiseven.com
- helm repo update
- helm install apisix apisix/apisix
apisix-dashboard
helm install apisix-dashboard apisix/apisix-dashboard
apisix-ingress-controler
不用安装
安装成功后截图
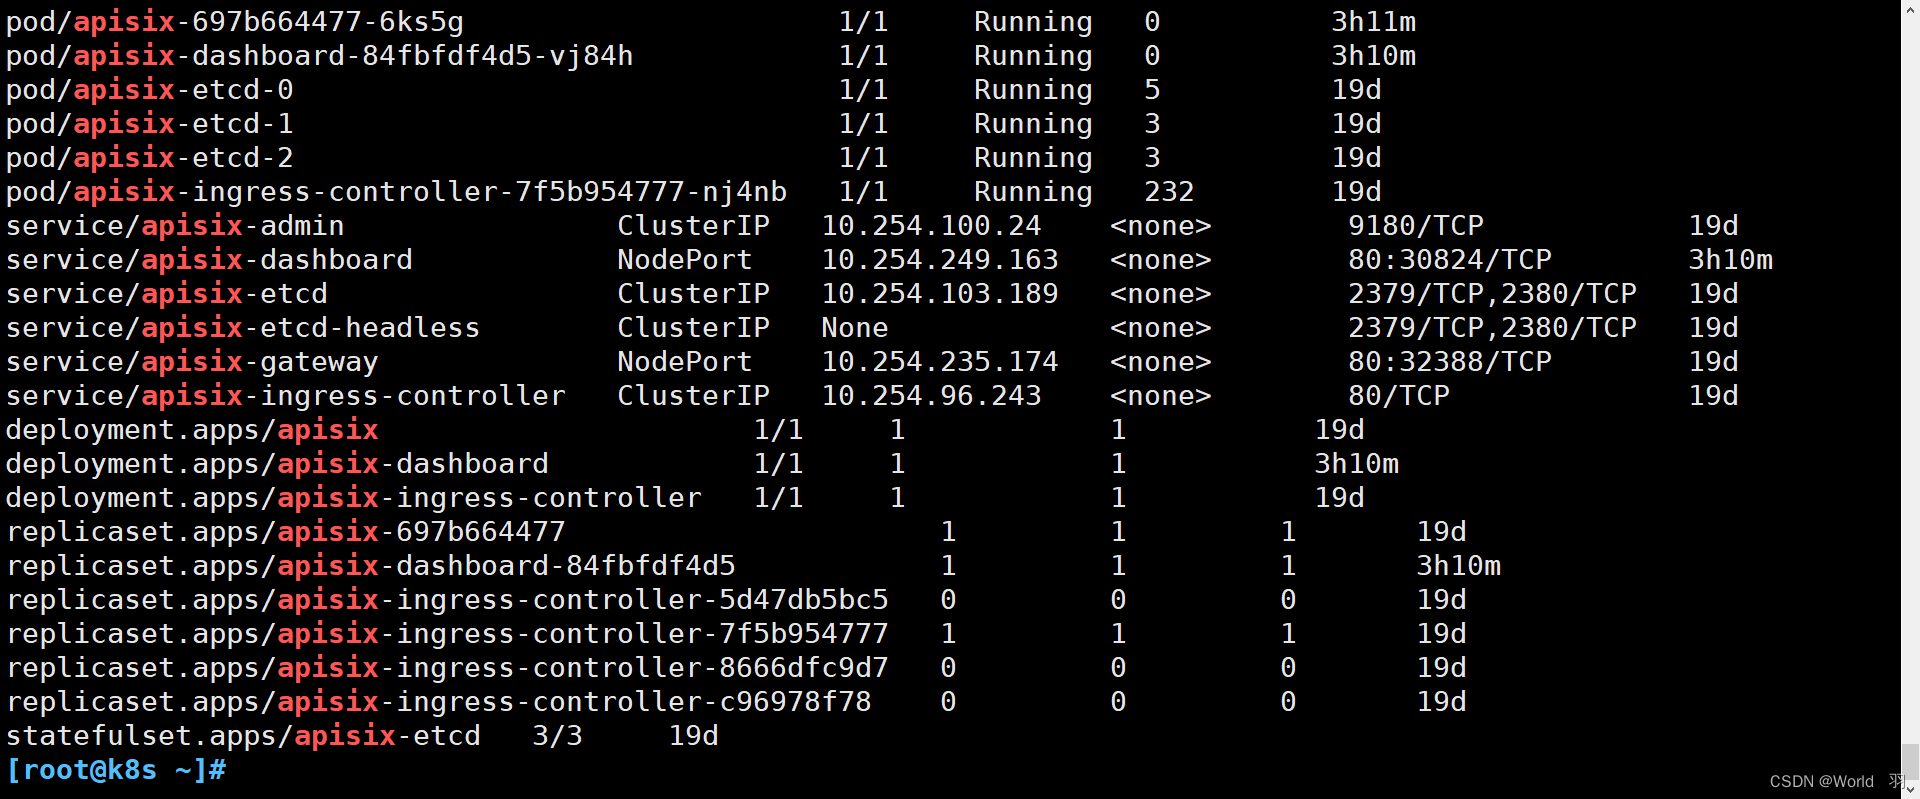
部署whoami
- apiVersion: apps/v1
- kind: Deployment
- metadata:
- name: whoami
- spec:
- selector:
- matchLabels:
- run: whoami
- replicas: 2
- template:
- metadata:
- labels:
- run: whoami
- spec:
- containers:
- - name: whoami
- image: containous/whoami
- ports:
- - containerPort: 80
- ----------------------------
- apiVersion: v1
- kind: Service
- metadata:
- name: whoami
- labels:
- run: whoami
- spec:
- ports:
- - port: 80
- protocol: TCP
- selector:
- run: whoami


进入nginx负载均衡服务器
vim apisix.conf 32388是apisix-gateway的暴露端口;
- upstream upstream-test3-apisix {
- server 10.0.0.101:32388;
- }
-
-
- server {
- listen 80;
- server_name ~^(.+)?-test-4.apisix.xthklocal.cn;
- client_max_body_size 200M;
-
- location / {
- proxy_set_header X-Forwarded-For $remote_addr;
- proxy_set_header X-Real-IP $remote_addr;
- proxy_set_header X-Forwarded-For $proxy_add_x_forwarded_for;
- proxy_set_header Host $host;
- proxy_redirect off;
- proxy_read_timeout 600;
- proxy_connect_timeout 600;
- proxy_pass http://upstream-test3-apisix;
- proxy_buffers 256 4k;
- proxy_max_temp_file_size 0;
- proxy_cache_valid 200 302 10m;
- proxy_cache_valid 301 1h;
- proxy_cache_valid any 1m;
- }
-
- }
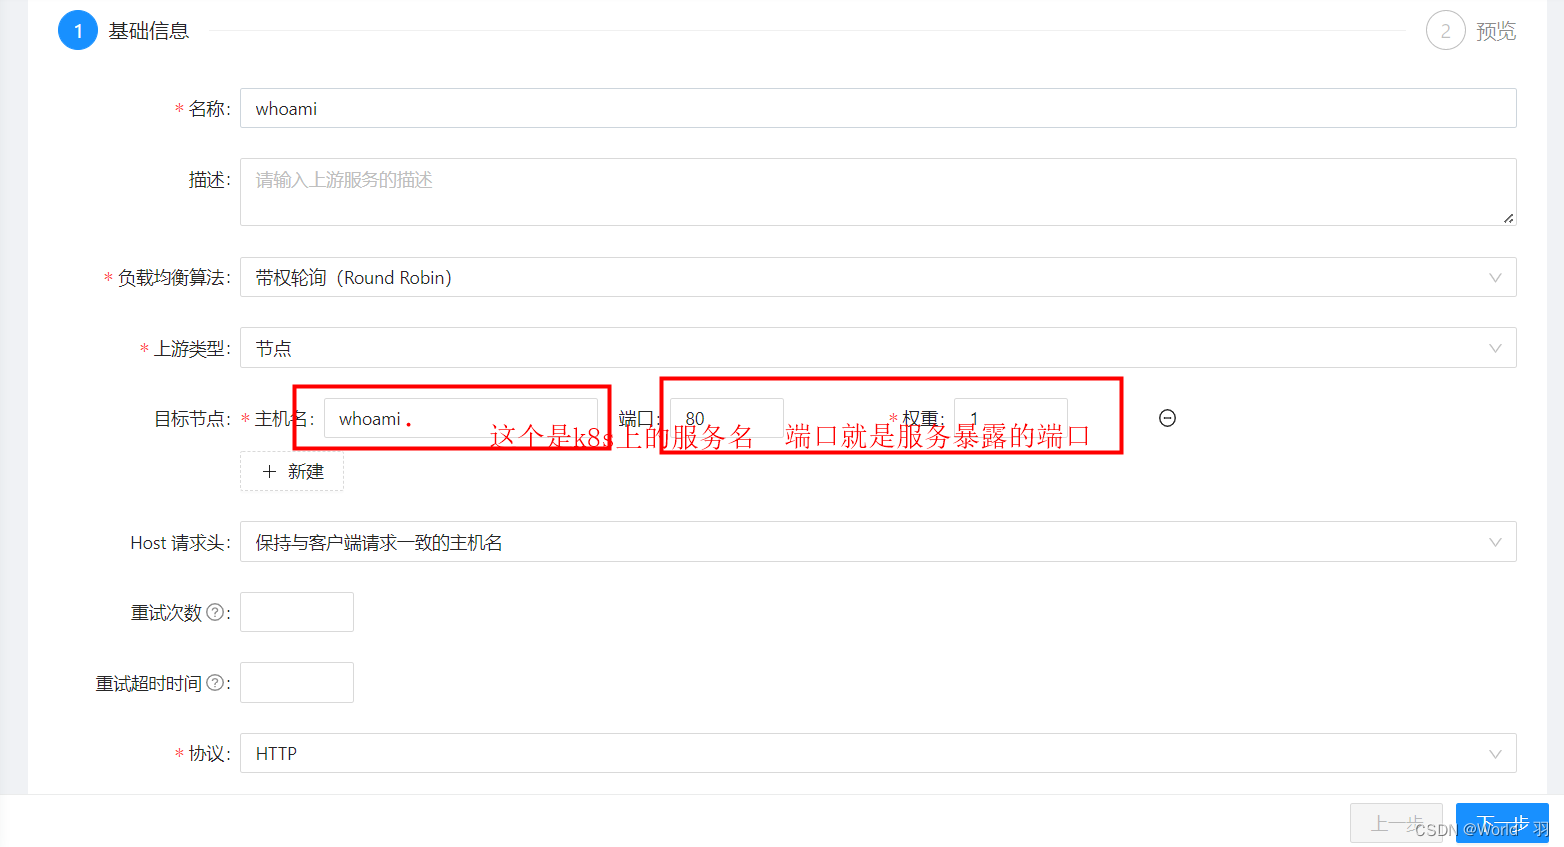
然后登录apisix-dashboard
点击上游-新增
点击 路由 -新增:名称 随便填写,域名填上

点击下一步
选择 我们建立的上游
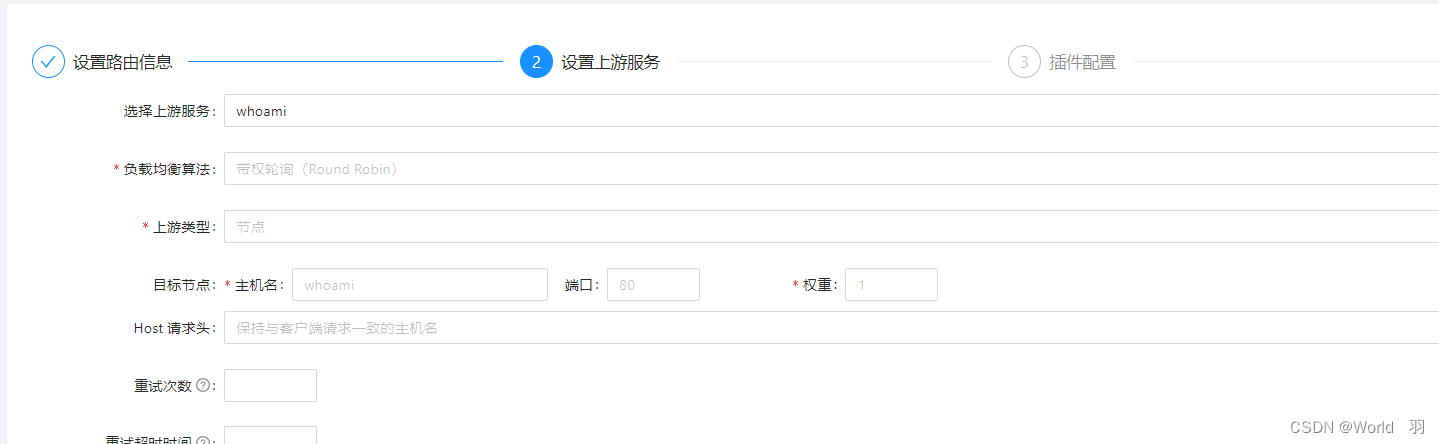
一直下一步到完成即可
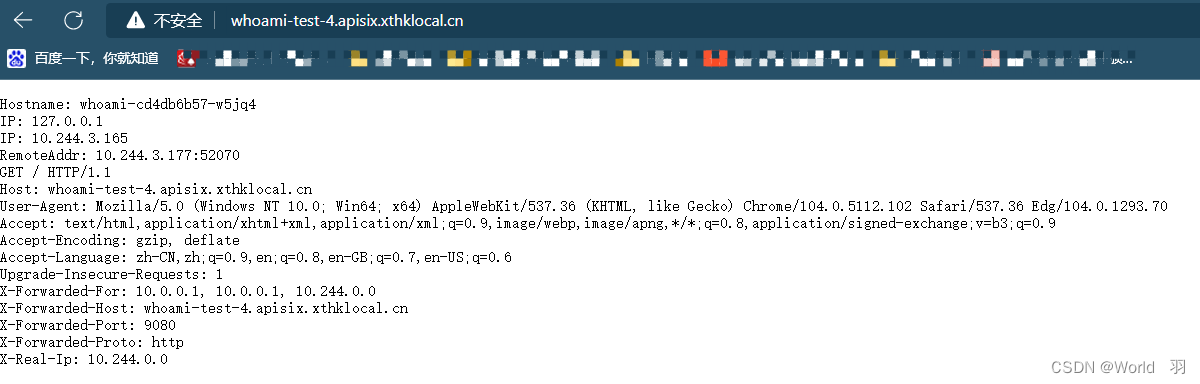
将域名解析添加到本地hosts
10.0.0.5 whoami-test-4.apisix.xthklocal.cn访问即可
声明:本文内容由网友自发贡献,不代表【wpsshop博客】立场,版权归原作者所有,本站不承担相应法律责任。如您发现有侵权的内容,请联系我们。转载请注明出处:https://www.wpsshop.cn/w/小小林熬夜学编程/article/detail/214086
推荐阅读
相关标签

