
【大模型指令微调实战】小说创作,一键直达天池挑战赛Top50_优酷x天池 「酷文」小说创作大模型挑战赛 微调
赞
踩
写在前面
最近,阿里天池新上了一个挑战赛:优酷x天池 「酷文」小说创作大模型挑战赛。
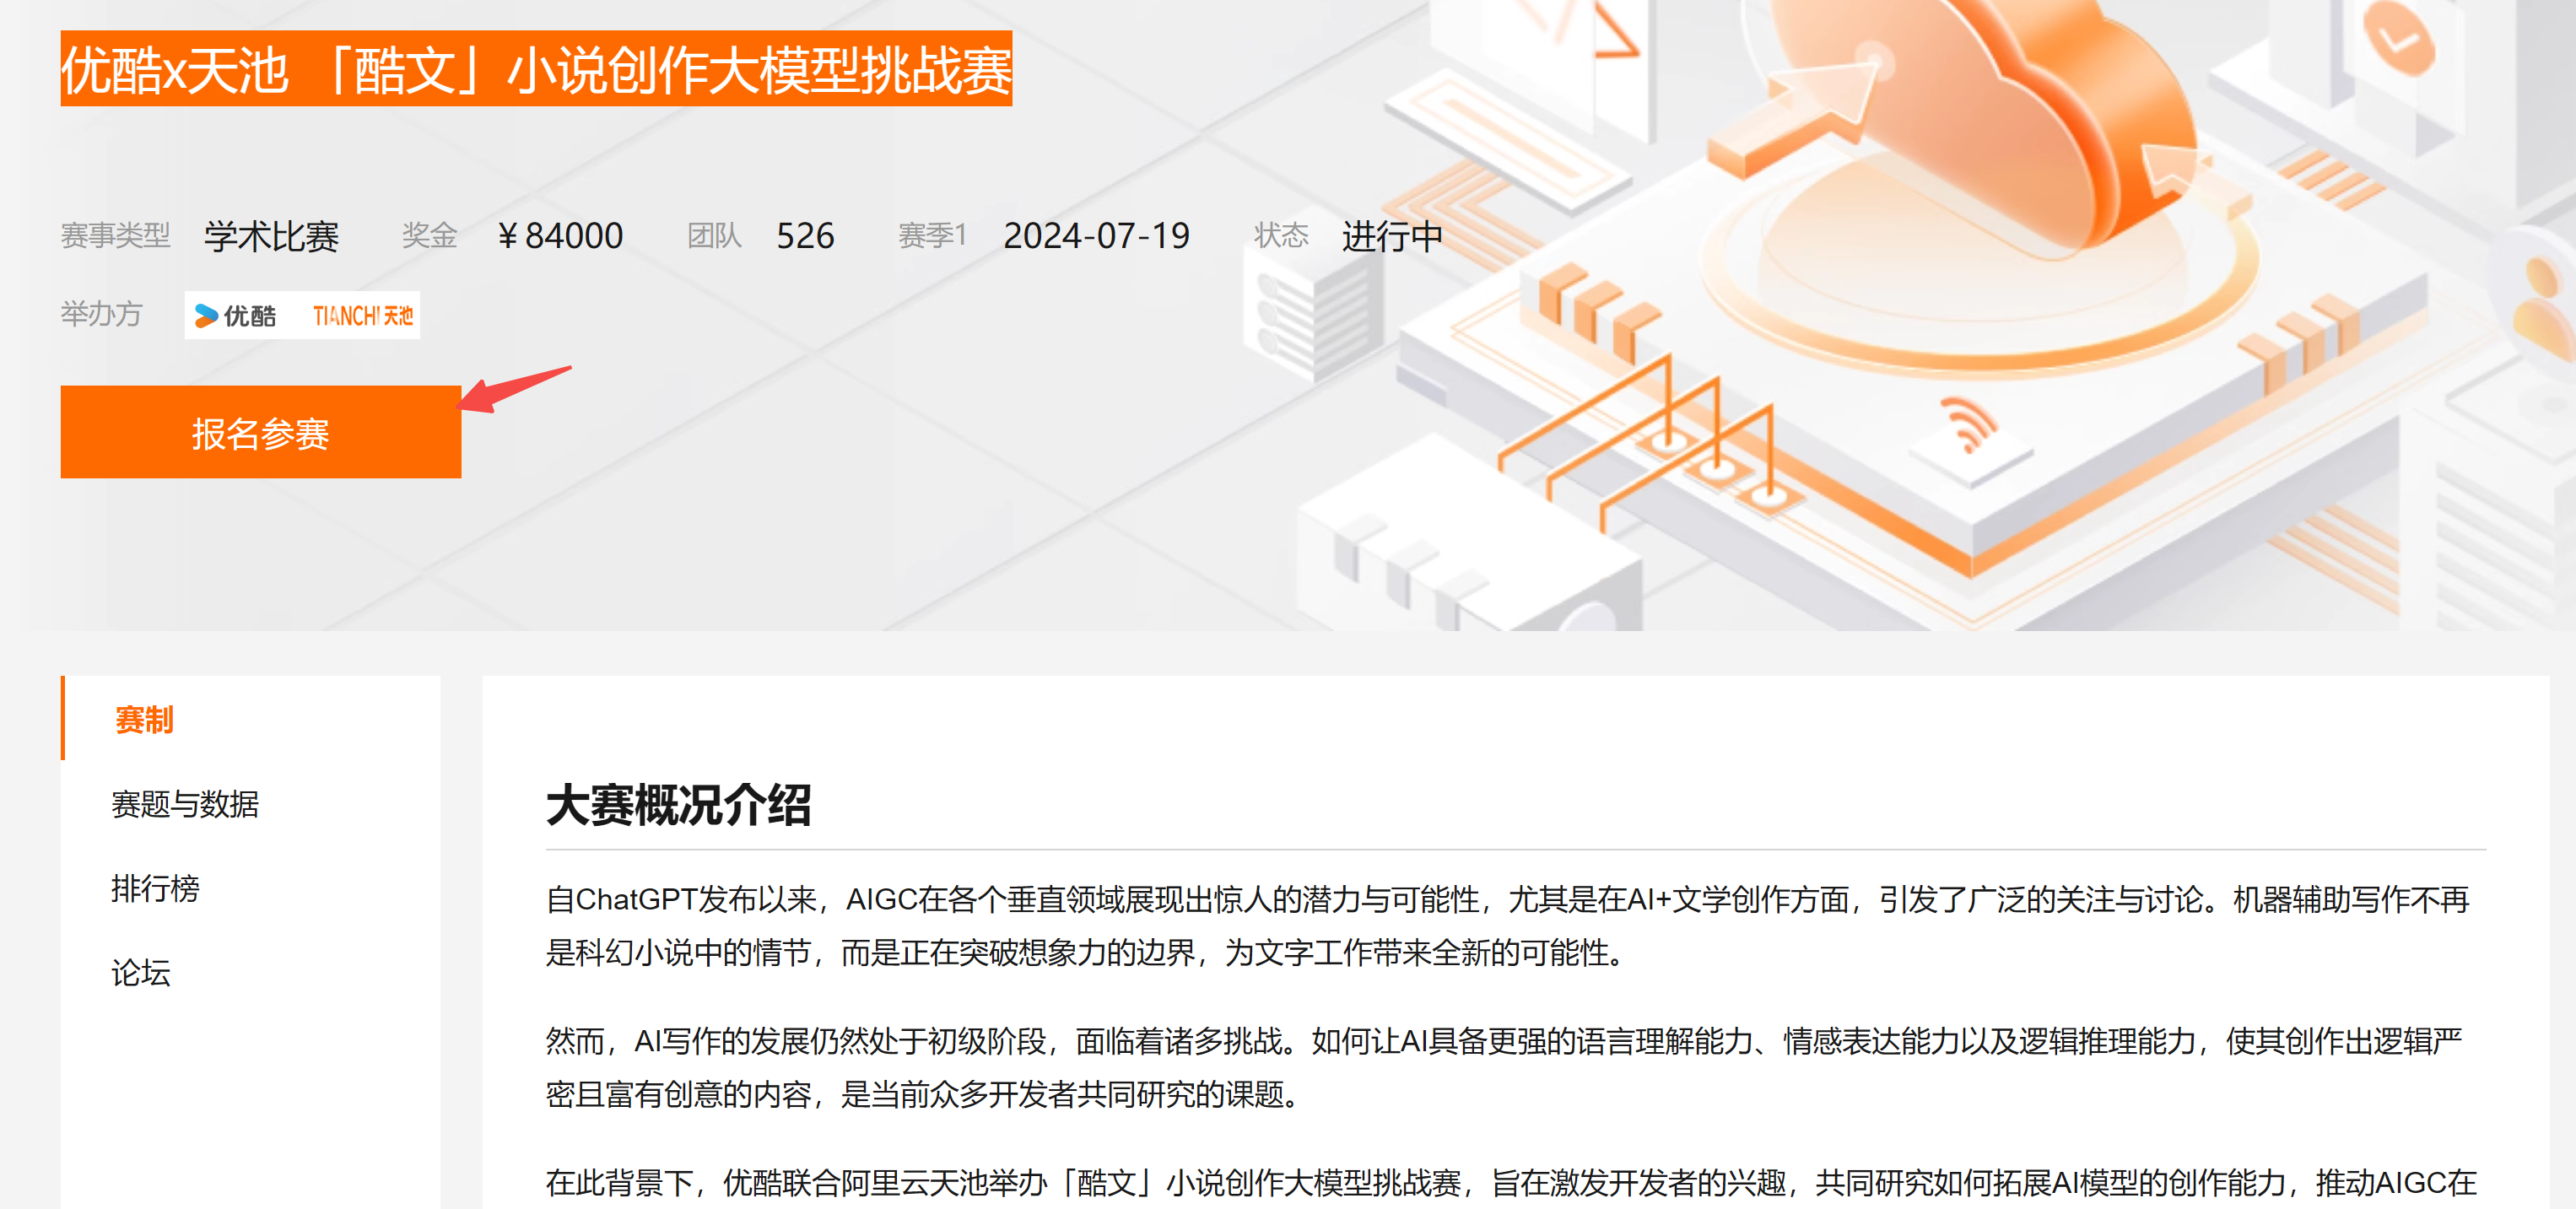
该挑战赛,希望选手能够采用已有的大模型,通过微调的方式,完美实现一个优质的【小说创作】大模型。
前几天,关于大模型指令微调,猴哥分享过一个入门级教程:B站大模型指令微调入门实战(完整代码),一键打造你的数字分身。
这不,又一个适用于指令微调的场景应用就来了?
小说创作这个任务,对于已有的大模型来说还是很有挑战,但是如果通过搜集优质小说数据 + 指令微调技术,相信一定可以提高模型的创作能力~
话不多说,我们上实操。
目前初赛正在进行中,本文将梳理一个完整的参赛方案 Baseline,期待给感兴趣的小伙伴带来一点点帮助!
Baseline 方案
0. 前置要求
Linux 环境,需要至少一张 16G 显存的显卡,如果本地没有,可以租用云端GPU。
1. 数据准备
1.1 数据分析
首先,我们先把官方提供的数据下载到本地,包括训练集和测试集,

下载后,保存在 data/ 目录下。
训练集包好了17部经典小说数据,数据量较大,我们可以通过如下代码解析出来看一下:
def get_novel_data():    # 读取小说数据集
    novel_data = []
    with open('./data/train.json', 'r',encoding='utf-8') as file:
        for line in file:
            novel_data.append(json.loads(line))
    for i, data in enumerate(novel_data):
        print(f"{i}《{data['name']}》的字数为: {len(data['text'])} 字")
- 1
- 2
- 3
- 4
- 5
- 6
- 7
测试集是一个列表,如下所示,其中 output 就是需要模型输出的结果:
{"instruction": "", "input": "现代励志故事,一个失业青年如何克服生活困境,终于实现自我突破,成为行业翘楚的心路历程。", "output": ""}
{"instruction": "", "input": "现代励志故事,一个失业青年如何克服生活困境,终于实现自我突破,成为行业翘楚的心路历程。", "output": ""}
{"instruction": "", "input": "现代励志故事,一个失业青年如何克服生活困境,终于实现自我突破,成为行业翘楚的心路历程。", "output": ""}
- 1
- 2
- 3
1.2 训练数据准备
指令微调的数据,通常需要遵循 Stanford Alpaca 格式,示例如下:
{"instruction" : ...,
   "input" : ...,
   "output" : ...},
- 1
- 2
- 3
仿照官方提供的测试集,对于这个任务而言,“input” 就是让大模型写小说的提示词,比如 现代励志故事,一个失业青年如何克服生活困境,终于实现自我突破,成为行业翘楚的心路历程。
而 “output” 就是小说内容,不超过八百字。
为此,我们需要首先制作这样格式的数据集。
step 1 : 获取 “output”:切割整篇小说,获取八百字左右的片段
def get_novel_text(data):
    data = data['text']
    sentences = []
    for sentence in data.split('。'):  # 使用句号作为切分符
        sentences.append(sentence)
    # 将句子合并成800字一段的段落
    paragraphs = []
    current_paragraph = ''
    for sentence in sentences:
        if len(current_paragraph) + len(sentence) <= 800:
            current_paragraph += sentence+'。'
        else:
            paragraphs.append(current_paragraph.strip())
            current_paragraph = sentence
    # 将最后一段加入到段落列表中
    if current_paragraph:
        paragraphs.append(current_paragraph.strip())
    return paragraphs

- 1
- 2
- 3
- 4
- 5
- 6
- 7
- 8
- 9
- 10
- 11
- 12
- 13
- 14
- 15
- 16
- 17
- 18
step 2: 获取 “input”:调用LLM模型获取小说的摘要
为了让 LLM 更好地输出摘要,提示词非常重要,所以这里给了它几个示例 examples。
examples = [
    '现代励志故事,一个失业青年如何克服生活困境,终于实现自我突破,成为行业翘楚的心路历程。',
    '一个现代女性穿越到古代某朝代后发生的传奇故事',
    '现代背景,一名神探警察遇到了一桩棘手的连环失踪案并将其侦破的故事。',
    '古代背景,皇家侍卫和公主历经层层考验,突破身份桎梏的爱情故事。'
]
examples_str = '\n'.join([f'{i+1}.{exe}' for i, exe in enumerate(examples)])

def get_summary(paragraph):
    messages = [{"role": "system", "content": f"示例:{examples_str}。\n请严格仿照上面的示例,简短总结user提供的内容,不超过30字,不要回答其他任何内容。"}]
    messages.append({"role": "user", "content": paragraph})
    llm_response = llm(messages,temperature=0.3)
    instruction_prompt = "你是一个熟读各类小说的专家,请你根据要求写一段800字左右的小说。"
    result = {
        "instruction": instruction_prompt,
        "input": llm_response,
        "output": paragraph
    }
    return result
- 1
- 2
- 3
- 4
- 5
- 6
- 7
- 8
- 9
- 10
- 11
- 12
- 13
- 14
- 15
- 16
- 17
- 18
- 19
此外,LLM 同样非常重要,为了帮助大家使用免费的 LLM API,猴哥之前分享过:国产大模型All In One。
比如我们这里可以选用 Qwen2-7B-Instruct ,调用示例如下:
from openai import OpenAI

# 枚举所有可用的模型服务
model_dict = {
    'qwen2-7b-sf': {
        'api_key': 'sk-xxx',
        'base_url': 'https://api.siliconflow.cn/v1',
        'model_name': 'Qwen/Qwen2-7B-Instruct'
    },
}
class LLM_API:
    def __init__(self, api_key, base_url, model):
        self.client =  OpenAI(
            api_key=api_key,
            base_url=base_url,
        )
        self.model = model

    def __call__(self, messages, temperature=0.7):
        completion = self.client.chat.completions.create(
            model=self.model,
            messages=messages,
            temperature=temperature,
        )
        return completion.choices[-1].message.content
if __name__ == '__main__':
    model = 'qwen2-7b-sf'
    llm = LLM_API(model_dict[model]['api_key'], model_dict[model]['base_url'], model=model_dict[model]['model_name'])
- 1
- 2
- 3
- 4
- 5
- 6
- 7
- 8
- 9
- 10
- 11
- 12
- 13
- 14
- 15
- 16
- 17
- 18
- 19
- 20
- 21
- 22
- 23
- 24
- 25
- 26
- 27
- 28
step 3: 生成每部小说的训练数据
这里简单做一个数据过滤,在前两步的基础上,我们只选用白话文的小说数据,因为文言文小说反而会干扰模型训练。
def generate_dataset():
    novel_data = get_novel_data()
    for i, data in enumerate(novel_data):
        if i in [4,6,7,10,15,16]:
            print(f"{i}《{data['name']}》的字数为: {len(data['text'])} 字")
            paragraphs = get_novel_text(data)
            results = []
            for i, paragraph in enumerate(tqdm(paragraphs)):
                result = get_summary(paragraph)
                results.append(result)
                time.sleep(0.3)
                # break
            os.makedirs('./data/train/', exist_ok=True)
            with open(f'./data/train/{data["name"]}_qwen.json', 'w', encoding='utf-8') as file:
                json.dump(results, file, ensure_ascii=False, indent=4)
- 1
- 2
- 3
- 4
- 5
- 6
- 7
- 8
- 9
- 10
- 11
- 12
- 13
- 14
- 15
step 4: 合并训练数据
把文件夹下所有小说的数据合并成一个数据文件:
def merge_dataset():
    datafiles = os.listdir('./data/train/')
    datafiles = [f for f in datafiles if f.endswith('.json')]
    merged_data = []
    for datafile in datafiles:
        with open(f'./data/train/{datafile}', 'r', encoding='utf-8') as file:
            data = json.load(file)
            merged_data.extend(data)
    with open(f'./data/train/merged.json', 'w', encoding='utf-8') as file:
        json.dump(merged_data, file, ensure_ascii=False, indent=4)
- 1
- 2
- 3
- 4
- 5
- 6
- 7
- 8
- 9
- 10
2. 微调模型
2.1 环境准备
完成数据准备后,安装训练训练的第三方依赖包:
pip install modelscope==1.9.5
pip install "transformers>=4.40.0"
pip install streamlit==1.24.0
pip install sentencepiece==0.1.99
pip install accelerate==0.29.3
pip install datasets==2.19.0
pip install peft==0.10.0
pip install tiktoken==0.7.0
pip install flash-attn==2.5.8
pip install vllm
- 1
- 2
- 3
- 4
- 5
- 6
- 7
- 8
- 9
- 10
2.2 模型下载
实测发现 16G 显卡 无法微调 7B 及以上的模型,为了快速跑通,本次训练采用 Qwen2-1.5B-Instruct。
sudo apt-get install git-lfs
git clone https://www.modelscope.cn/qwen/Qwen2-1.5B-Instruct.git
- 1
- 2
2.3 开始训练
一切准备就绪后,就可以通过如下脚本,开启一键 LoRA 训练,更多细节可参考:B站大模型指令微调入门实战(完整代码),一键打造你的数字分身
import os
import torch
import pandas as pd
from datasets import Dataset
from transformers import AutoTokenizer, AutoModelForCausalLM, DataCollatorForSeq2Seq, TrainingArguments, Trainer, GenerationConfig
from peft import LoraConfig, TaskType, get_peft_model, PeftModel

def train_lora(model, tokenizer):
    model.enable_input_require_grads() # 开启梯度检查点时,要执行该方法
    # LoRA模型
    config = LoraConfig(
        task_type=TaskType.CAUSAL_LM,
        target_modules=["q_proj", "k_proj", "v_proj", "o_proj", "gate_proj", "up_proj", "down_proj"], # 需要微调的参数
        inference_mode=False, # 训练模式
        r=8, # Lora 秩
        lora_alpha=32, # Lora alaph,具体作用参见 Lora 原理
        lora_dropout=0.1# Dropout 比例
    )
    model = get_peft_model(model, config)
    print(model.print_trainable_parameters())

    # 准备训练数据
    df_train = pd.read_json('data/train/merged.json')
    ds_train = Dataset.from_pandas(df_train)

    def process_func(example):
        MAX_LENGTH = 2048    # 分词器会将一个中文字切分为多个token,因此需要放开一些最大长度,保证数据的完整性
        input_ids, attention_mask, labels = [], [], []
        instruction = tokenizer(f"<im_start>system\n{example['instruction']}<|im_end|>\n<|im_start|>user{example['input']}<|im_end|>\n<|im_start|>assistant\n", add_special_tokens=False)  # add_special_tokens 不在开头加 special_tokens
        response = tokenizer(f"{example['output']}", add_special_tokens=False)
        input_ids = instruction["input_ids"] + response["input_ids"] + [tokenizer.pad_token_id]
        attention_mask = instruction["attention_mask"] + response["attention_mask"] + [1]  # 因为eos token咱们也是要关注的所以 补充为1
        labels = [-100] * len(instruction["input_ids"]) + response["input_ids"] + [tokenizer.pad_token_id]
        if len(input_ids) > MAX_LENGTH:  # 做一个截断
            input_ids = input_ids[:MAX_LENGTH]
            attention_mask = attention_mask[:MAX_LENGTH]
            labels = labels[:MAX_LENGTH]
        return {
            "input_ids": input_ids,
            "attention_mask": attention_mask,
            "labels": labels
        }

    tokenized_id = ds_train.map(process_func, remove_columns=ds_train.column_names)

    # 训练参数配置
    lora_path = "./output/qwen2_1.5b_novel"
    args = TrainingArguments(
        output_dir=lora_path,
        per_device_train_batch_size=4,
        gradient_accumulation_steps=4,
        logging_steps=50,
        num_train_epochs=2,
        save_steps=1000,
        learning_rate=1e-4,
        save_on_each_node=True,
        gradient_checkpointing=True
    )

    trainer = Trainer(
        model=model,
        args=args,
        train_dataset=tokenized_id,
        data_collator=DataCollatorForSeq2Seq(tokenizer=tokenizer, padding=True),
    )

    trainer.train()
    trainer.save_model(lora_path + "/final")
if __name__ == '__main__':
    os.environ["CUDA_VISIBLE_DEVICES"] = "0" # 指定使用的GPU ID
    # 底座模型
    model_path = "path/to/models/Qwen2-1.5B-Instruct/"
    tokenizer = AutoTokenizer.from_pretrained(model_path, use_fast=False, trust_remote_code=True)
    model = AutoModelForCausalLM.from_pretrained(model_path, device_map="auto", torch_dtype=torch.bfloat16, trust_remote_code=True)
    train_lora(model, tokenizer)
- 1
- 2
- 3
- 4
- 5
- 6
- 7
- 8
- 9
- 10
- 11
- 12
- 13
- 14
- 15
- 16
- 17
- 18
- 19
- 20
- 21
- 22
- 23
- 24
- 25
- 26
- 27
- 28
- 29
- 30
- 31
- 32
- 33
- 34
- 35
- 36
- 37
- 38
- 39
- 40
- 41
- 42
- 43
- 44
- 45
- 46
- 47
- 48
- 49
- 50
- 51
- 52
- 53
- 54
- 55
- 56
- 57
- 58
- 59
- 60
- 61
- 62
- 63
- 64
- 65
- 66
- 67
- 68
- 69
- 70
- 71
- 72
- 73
- 74
- 75
需要注意的是其中的数据处理部分 process_func,不同模型的 Prompt 模板是不一样的,那么怎么查看一个模型的 Prompt 模板?
model_path = "path/to/models/Qwen2-1.5B-Instruct/"
tokenizer = AutoTokenizer.from_pretrained(model_path, use_fast=False, trust_remote_code=True)
messages = [
    {"role": "system", "content": "你是一个有用的助手。"},
    {"role": "user", "content": "你是谁"}
]
text = tokenizer.apply_chat_template(
    messages,
    tokenize=False,
    add_generation_prompt=True
)
print(text)
# 输出
<|im_start|>system
你是一个有用的助手。<|im_end|>
<|im_start|>user
你是谁<|im_end|>
<|im_start|>assistant
- 1
- 2
- 3
- 4
- 5
- 6
- 7
- 8
- 9
- 10
- 11
- 12
- 13
- 14
- 15
- 16
- 17
- 18
3. 模型推理
3.1 模型合并
训练好的 LoRA 模型是相对独立的,为了后续采用 vllm 加速推理,还需要把 LoRA 模型 和底座大模型合并成一个单独的模型,代码如下:
def merge_model(model):
    lora_path = "./output/qwen2_1.5b_novel/final"
    merge_path = "./output/qwen2_1.5b_novel/merged"
    # 加载lora权重
    model = PeftModel.from_pretrained(model, model_id=lora_path)
    merged_model = model.merge_and_unload()
    # 将权重保存为safetensors格式的权重, 且每个权重文件最大不超过2GB(2048MB)
    merged_model.save_pretrained(merge_path, max_shard_size="2048MB", safe_serialization=True)

if __name__ == '__main__':
    # 底座模型
    model_path = "path/to/models/Qwen2-1.5B-Instruct/"
    tokenizer = AutoTokenizer.from_pretrained(model_path, use_fast=False, trust_remote_code=True)
    model = AutoModelForCausalLM.from_pretrained(model_path, device_map="auto", torch_dtype=torch.bfloat16, trust_remote_code=True)
    merge_model(model)
- 1
- 2
- 3
- 4
- 5
- 6
- 7
- 8
- 9
- 10
- 11
- 12
- 13
- 14
- 15
此外,还需要将底座大模型中的 tokenizer 等相关文件,复制一份到合并模型中:
cp models/Qwen2-1.5B-Instruct/tokenizer.json output/qwen2_1.5b_novel/merged/
cp models/Qwen2-1.5B-Instruct/tokenizer_config.json output/qwen2_1.5b_novel/merged/
cp models/Qwen2-1.5B-Instruct/vocab.json output/qwen2_1.5b_novel/merged/
cp models/Qwen2-1.5B-Instruct/merges.txt output/qwen2_1.5b_novel/merged/
- 1
- 2
- 3
- 4
3.2 vllm 推理
vllm 是一个大模型加速推理库,可以通过 pip 一键安装 (最新版会默认安装torch 2.3.0)。
其推理也有两种方式:
方式一: OpenAI API
Qwen 兼容 OpenAI API 协议,可以直接使用 vLLM 创建 OpenAI API 服务器。默认会在 http://localhost:8000 启动服务器,实现列表模型、completions 和 chat completions 等功能。其中,completions是基本的文本生成任务,模型会在给定的提示后生成一段文本,通常用于生成文章、故事、邮件等;chat completions是面向对话的任务,模型需要理解和生成对话,通常用于构建聊天机器人。
- –host 和 --port 参数指定地址。
- –model 参数指定模型名称。
- –served-model-name 指定服务模型的名称。
- –max-model-len 指定模型的最大长度。
# 命令行一键启动 OpenAI 服务
python -m vllm.entrypoints.openai.api_server --model ./merged_model  --served-model-name Qwen2-1.5B-Instruct-lora --max-model-len=2048
# 调用方式和 OpenAI 的方式一致
- 1
- 2
- 3
方式二: Python 脚本
import json
from tqdm import tqdm
from vllm import LLM, SamplingParams
from transformers import AutoTokenizer

def init_model(model, tokenizer=None, max_tokens=512, temperature=0.7, top_p=0.7, max_model_len=2048):
    stop_token_ids = [151329, 151336, 151338]
    sampling_params = SamplingParams(temperature=temperature, top_p=top_p, max_tokens=max_tokens, stop_token_ids=stop_token_ids)
    # 初始化 vLLM 推理引擎
    llm = LLM(model=model, tokenizer=tokenizer, max_model_len=max_model_len,trust_remote_code=True)
    return llm, sampling_params

def complete(llm, sampling_params, texts=["你好。", "你可以给我将一个有趣的童话故事吗?"]):
    outputs = llm.generate(texts, sampling_params)
    for output in outputs:
        prompt = output.prompt
        generated_text = output.outputs[0].text
        print(f"Prompt: {prompt!r}, Generated text: {generated_text!r}")

def chat_complete(llm, sampling_params, messages=[], model_path=''):
    tokenizer = AutoTokenizer.from_pretrained(model_path, use_fast=False, trust_remote_code=True)
    texts = tokenizer.apply_chat_template(
        messages,
        tokenize=False,
        add_generation_prompt=True
    )
    outputs = llm.generate(texts, sampling_params)
    return outputs[0].outputs[0].text

if __name__ == "__main__":
    # 初始化 vLLM 推理引擎
    model_path = "./output/qwen2_1.5b_novel/merged/"
    llm, sampling_params = init_model(model_path)
    messages = [
        {"role": "system", "content": "你是一个有用的助手。"},
        {"role": "user", "content": "你是谁"}
    ]
    chat_complete(llm, sampling_params, messages, model_path)
- 1
- 2
- 3
- 4
- 5
- 6
- 7
- 8
- 9
- 10
- 11
- 12
- 13
- 14
- 15
- 16
- 17
- 18
- 19
- 20
- 21
- 22
- 23
- 24
- 25
- 26
- 27
- 28
- 29
- 30
- 31
- 32
- 33
- 34
- 35
- 36
- 37
- 38
4. 结果提交
在上述推理脚本准备好之后,就可以采用如下代码一键得到可以提交的 json 文件:
def get_sumbmit_result():
    model_path = "./output/qwen2_1.5b_novel/merged/"
    llm, sampling_params = init_model(model_path, max_tokens=2048)
    data = open("data/test.json", "r", encoding="utf-8").readlines()
    results = []
    for line in tqdm(data):
        d = json.loads(line)
        messages = [
            {"role": "system", "content": "你是一个熟读各类小说的专家,请你根据要求写一段800字左右的小说。注意:不要重复!"},
            {"role": "user", "content": d['input']}
        ]
        response = chat_complete(llm, sampling_params, messages, model_path)
        d['output'] = response
        results.append(d)
    with open("submit.json", "w") as file:
        for item in results:
            file.write(json.dumps(item, ensure_ascii=False) + "\n")
- 1
- 2
- 3
- 4
- 5
- 6
- 7
- 8
- 9
- 10
- 11
- 12
- 13
- 14
- 15
- 16
- 17
其中 test.json 就是官方提供的测试数据,共1000条数据,在本地 4080 显卡上推理完成,共需要 3.5 小时左右,供大家参考。
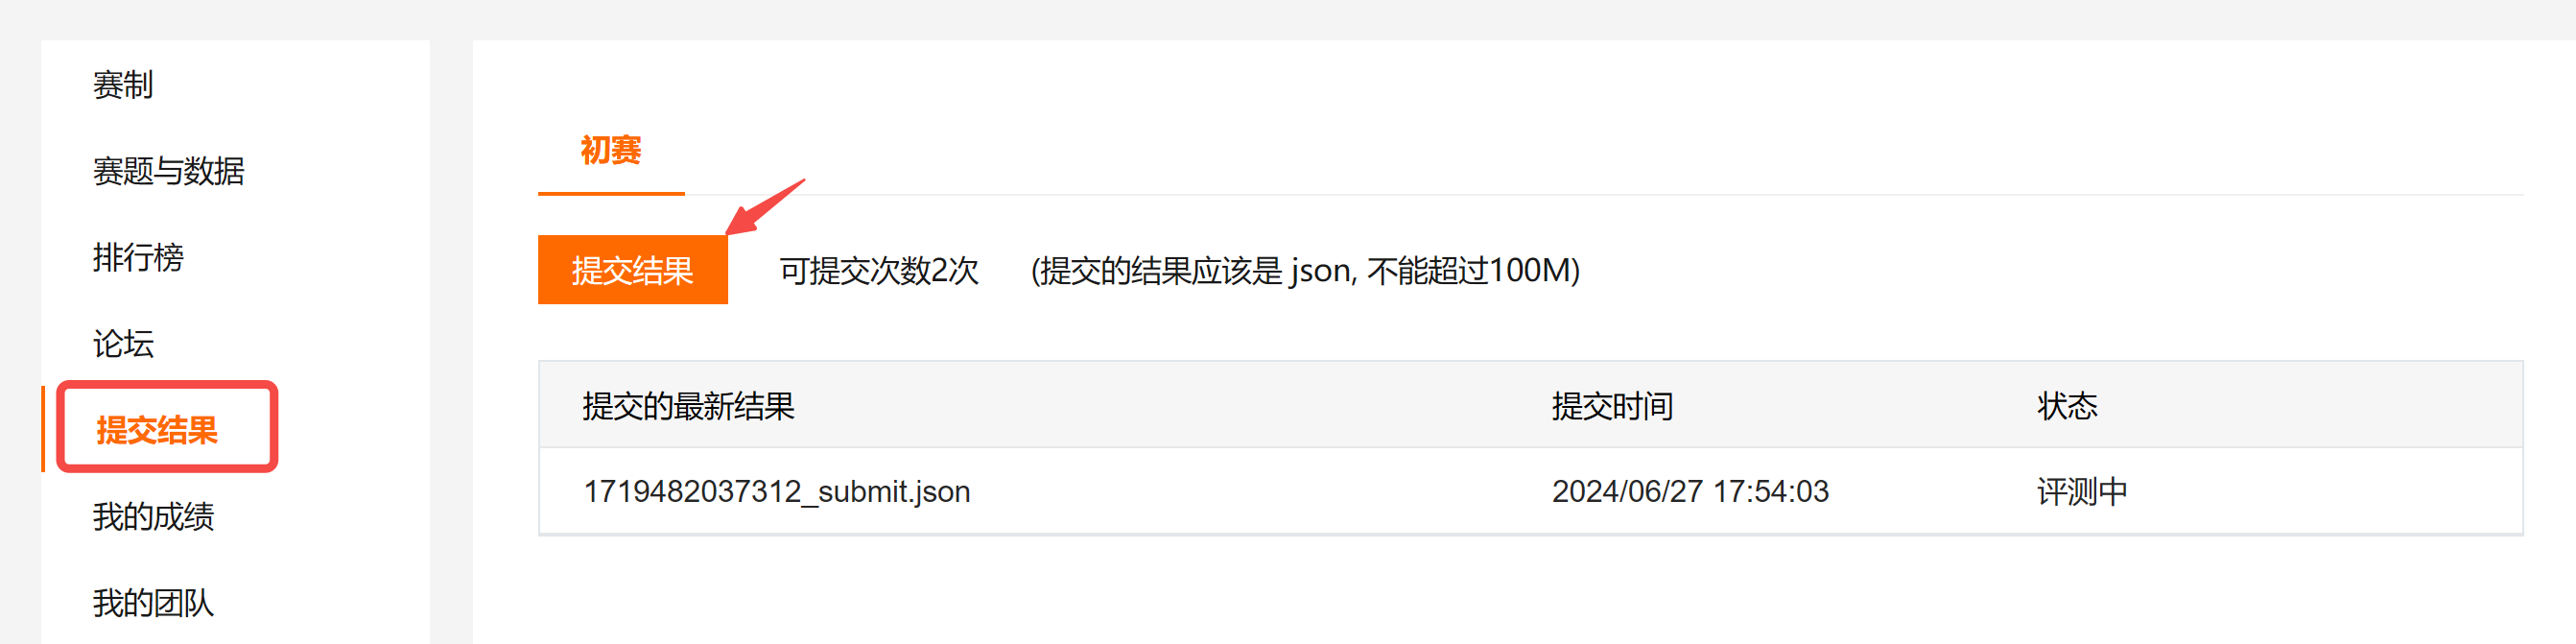
将生成的 “submit.json” 通过如下方式提交,如果没什么问题,右侧状态栏会显示 “评测中”,稍等片刻,就会在榜单中看到自己的排名。
5. 结果展示
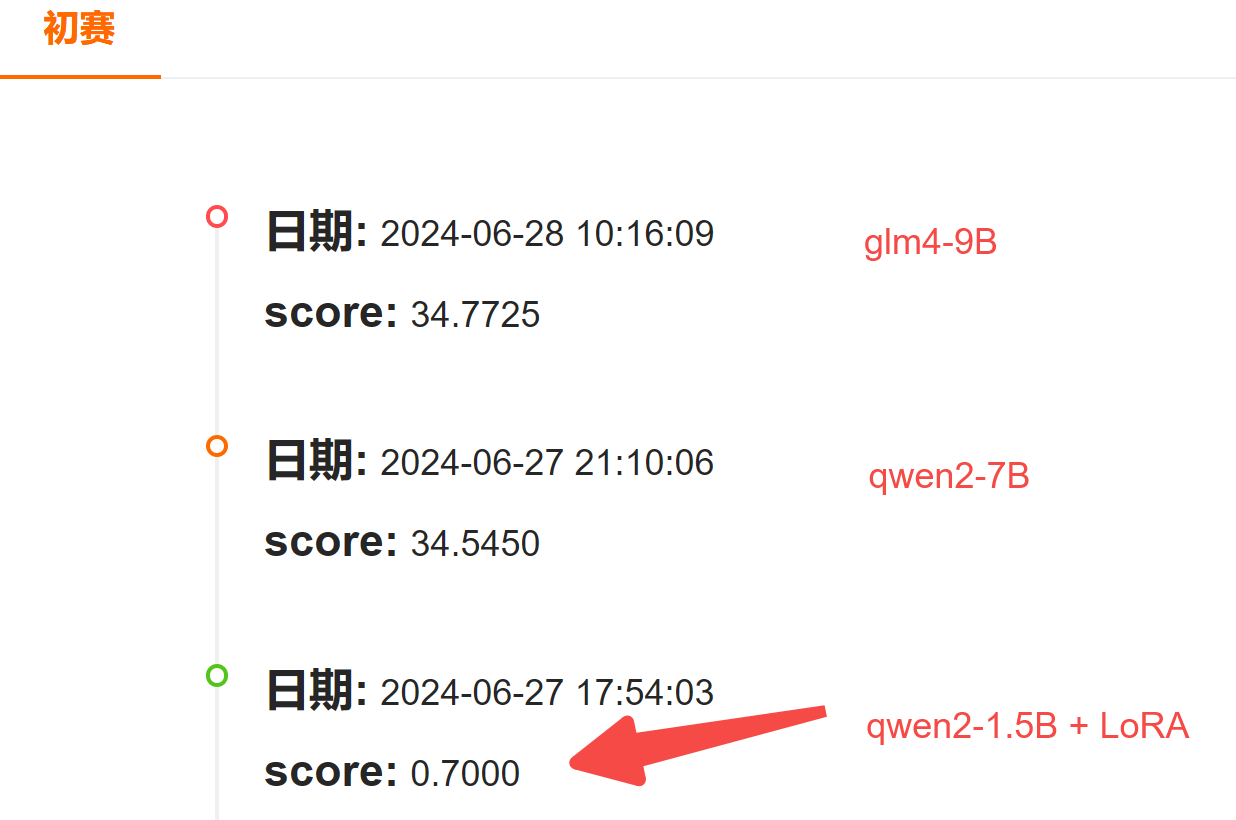
提交系统评测后,得分只有0.7;
于是,立刻用更大参数量的模型测了下,Qwen2-7B 和 GLM4-9B 都能拿到 34 分左右,充分说明大模型的必要性。
这里Qwen2-7B 和 GLM4-9B 都是调用的 API,不知道上哪找免费 API 的, 可以看这篇:国产大模型All In One,API免费用,开发者的福音
感兴趣且有计算资源的小伙伴,可以直接采用 7B 以上的模型进行微调了~
写在后面
至此,我们就一起走完了:大模型指令微调,实现小说创作任务的场景应用。
当然,如果需要在比赛中取得更好的成绩,可能还需要:
- 获取更优质的数据,比如从网络上爬取短篇小说内容作为训练数据
- 尝试更大的模型和微调参数设置;
如果本文对你有帮助,欢迎点赞收藏备用!
我是猴哥,一直在做 AI 领域的研发和探索,会陆续跟大家分享路上的思考和心得,以及干货教程。
需要完整源码的同学,可以在 “猴哥的AI知识库” 公众号后台回复 ‘小说创作’。

