
热门标签
热门文章
- 1Ajax从零到实战
- 2fastjson2可用jackson注解的说明_fastjson2 注解
- 3android课程设计总结,android开发者模式_andriod通用课程设计总结
- 4Reader开发(一)电子书分页,翻页效果,字体大小调整和基本功能实现_textkit 分页
- 5Hadoop集群的安装_invalid dfs.datanode.data.dir
- 6SQL--limit用法_使用limit查出前三条数据
- 7使用Github Desktop将代码上传到Github_githubdesktop 上传
- 8PyCharm查看运行状态的步骤及方式!_pycharm 运行进度
- 9(一)Pytorch快速搭建神经网络模型(代码+详细注解)_pytorch代码教程
- 10(22)采集微信通讯录好友明细信息-微信UI自动化(.Net+C#)_c#客户端获取通讯录好友wxid和名字
当前位置: article > 正文
qml学习之qwidget与qml结合使用并调用信号槽交互_qwidget 嵌入qquickview 如何和 qml通信
作者:天景科技苑 | 2024-07-15 22:58:35
赞
踩
qwidget 嵌入qquickview 如何和 qml通信
学习qml系列之一
- 1
说明:
学习qml系列之qwiget和qml信号槽的交互使用,并在qwidget中显示qml界面
在qml中发送信号到qwidget里
在qwidget里发送信号给qml
在qwidget里面调用qml界面方式
方式一:使用QQuickView
这个是Qt5.0中提供的一个类,继承自QQickWindow中,用来显示qt quick用户界面:
QQuickView *view = new QQuickView;
view->setSource(QUrl::fromLocalFile("main.qml"));
view->show();
- 1
- 2
- 3
QQuickView基于QWindow,需要转换成 QWidget才能使用,还需要如下转换
     QQuickView *pView = new QQuickView();
     QWidget *Widget = QWidget::createWindowContainer(pView, this);
     pView->setResizeMode(QQuickView::SizeRootObjectToView);
     pView->setSource(QUrl("qrc:/main.qml"));
- 1
- 2
- 3
- 4
这样后面能直接调用由qml转换成的QWidget界面了。
方式二:使用QQuickWidget
QQuickWidget *pWidget = new QQuickWidget();
pWidget->setResizeMode(QQuickWidget::SizeRootObjectToView);
pWidget->setSource(QUrl("qrc:/main.qml"));
- 1
- 2
- 3
该方法在Qt5.3中提供的一个类,继承自QWidget,是QQuickWidget一个很方便的包装器,用于显示Qt Quick用户界面
源码:
qml文件源码:
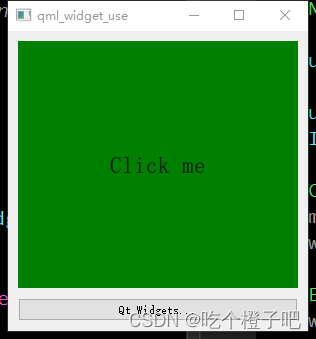
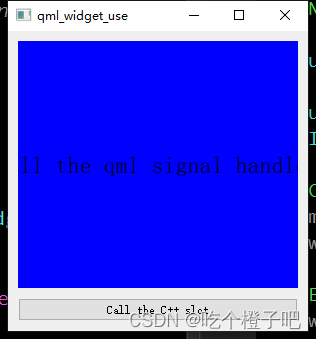
import QtQuick 2.1

Rectangle {
    id: root
    color: "green"
    width: 200
    height: 200

    // 发送给 Qt Widgets 的信号
    signal qmlSignal
    // 从 Qt Widgets 接收到的信号
    signal cSignal//信号的名称不能以大写开头

    Text {
        id: myText
        text: "Click me"
        font.pointSize: 14
        anchors.centerIn: parent
    }

    MouseArea {
        anchors.fill: parent
        onClicked: qmlSignal()
    }

    // 信号处理程序(处理从 Qt Widgets 接收到的信号)
    onCSignal: {
        root.color = "blue"
        myText.text = "Call the qml signal handler"
    }
}

- 1
- 2
- 3
- 4
- 5
- 6
- 7
- 8
- 9
- 10
- 11
- 12
- 13
- 14
- 15
- 16
- 17
- 18
- 19
- 20
- 21
- 22
- 23
- 24
- 25
- 26
- 27
- 28
- 29
- 30
- 31
- 32
注意:qml中信号的名称不能以大写开头,然后添加到Qt的资源文件中
添加qml quick
QT += core gui qml quick
- 1
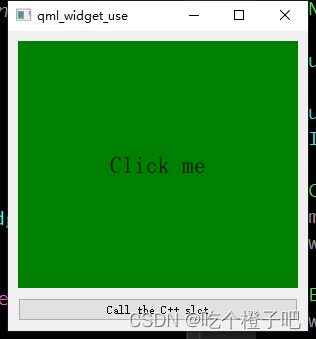
#include "widget.h"
#include "ui_widget.h"
#include "widget.h"
#include <QQuickView>
#include <QVBoxLayout>
//#include <QQuickWidget>

Widget::Widget(QWidget *parent)
    : QWidget(parent)
    , ui(new Ui::Widget)
{
//    ui->setupUi(this);
    resize(300, 300);

    // 方式一
     QQuickView *pView = new QQuickView();
     QWidget *pWidget = QWidget::createWindowContainer(pView, this);
     pView->setResizeMode(QQuickView::SizeRootObjectToView);
     pView->setSource(QUrl("qrc:/main.qml"));

    // 方式二
//    QQuickWidget *pWidget = new QQuickWidget();
//    pWidget->setResizeMode(QQuickWidget::SizeRootObjectToView);
//    pWidget->setSource(QUrl("qrc:/main.qml"));

    m_pButton = new QPushButton(this);
    m_pButton->setText("Qt Widgets...");

    QVBoxLayout *pLayout = new QVBoxLayout();
    pLayout->addWidget(pWidget);
    pLayout->addWidget(m_pButton);
    pLayout->setSpacing(10);
    pLayout->setContentsMargins(10, 10, 10, 10);
    setLayout(pLayout);

    // QML 与 Qt Widgets 通信
     QObject *pRoot = (QObject*)pView->rootObject();
//    QObject *pRoot = (QObject*)pWidget->rootObject();
    if (pRoot != NULL) {
        connect(pRoot, SIGNAL(qmlSignal()), this, SLOT(receiveFromQml()));
        connect(m_pButton, SIGNAL(clicked(bool)), pRoot, SIGNAL(cSignal()));
    }

}

Widget::~Widget()
{
    delete ui;
}

void Widget::receiveFromQml()
{
    m_pButton->setText("Call the C++ slot");
}
- 1
- 2
- 3
- 4
- 5
- 6
- 7
- 8
- 9
- 10
- 11
- 12
- 13
- 14
- 15
- 16
- 17
- 18
- 19
- 20
- 21
- 22
- 23
- 24
- 25
- 26
- 27
- 28
- 29
- 30
- 31
- 32
- 33
- 34
- 35
- 36
- 37
- 38
- 39
- 40
- 41
- 42
- 43
- 44
- 45
- 46
- 47
- 48
- 49
- 50
- 51
- 52
- 53
- 54
- 55
由于我使用的版本时5.14.1版本,用的QQuickView类
效果如下图
声明:本文内容由网友自发贡献,不代表【wpsshop博客】立场,版权归原作者所有,本站不承担相应法律责任。如您发现有侵权的内容,请联系我们。转载请注明出处:https://www.wpsshop.cn/w/天景科技苑/article/detail/831292
推荐阅读
相关标签

