
- 1Window系统下安装python并运行hello world_python releases for windows
- 2Gradle 设置代理及不代理_gradle 配置代理
- 3slowfast实现行为识别_slowfast行为
- 4FreeCAD傻瓜式教程之约束设定、构建实体、开孔、调整颜色、透明度、参考距离、任意修改尺寸、保持开孔居中、外部图形、基准平面等_freecad 教程
- 5【0002day】citespace知网教程_citespace知网文献导出
- 6测试必备技能:如何才能正确解读并发数?
- 7神器级别的BT磁力搜索网站_btdigg
- 82024(20届)数据科学与大数据专业毕业设计选题合集_数据科学与大数据技术 专业 本科论文选题方向_数据科学与大数据技术专业毕业论文题目,论文题目
- 9使用FastAPI同时搭建WebSocket服务端和HTTP服务端
- 10创建一个简单的区块链,并使用 Flask 框架提供一个简单的 Web 接口来与区块链交互。(持续更新)_区块链接口
Android Studio的笔记--SerialPort串口通讯学习和使用_android serialport
赞
踩
摘要:本篇介绍android中SerialPort串口通讯学习和使用。主要用到android-serialport-api。
SerialPort
几个工程参考学习使用
android-serialport-api
Google开源的Android串口通信Demo android-serialport-api
源码下载
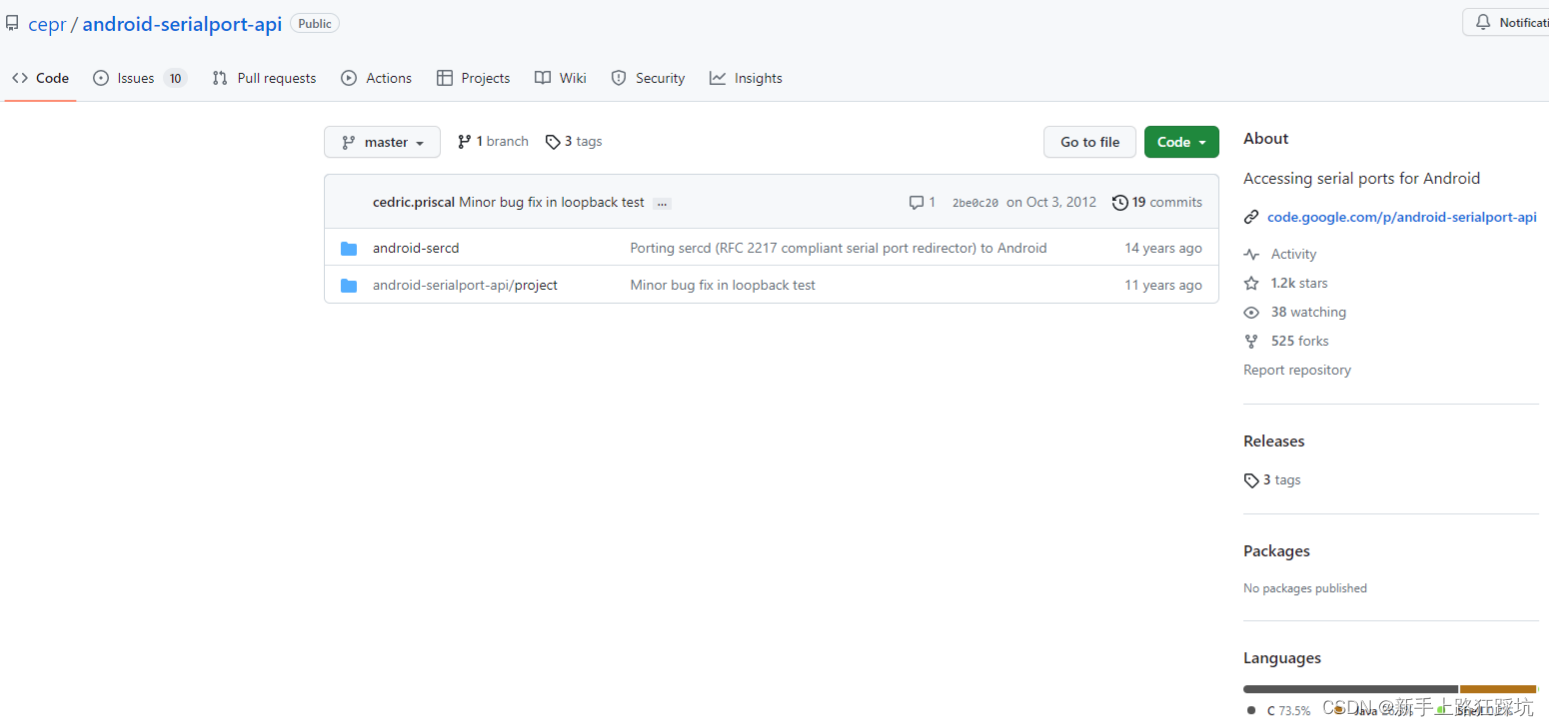
cepr/android-serialport-api
SerialPort获取串口输入输出流
SerialPortFinder获取硬件地址
可以推荐看android串口通信——android-serialport-api 源
Android-SerialPort-API
源码下载
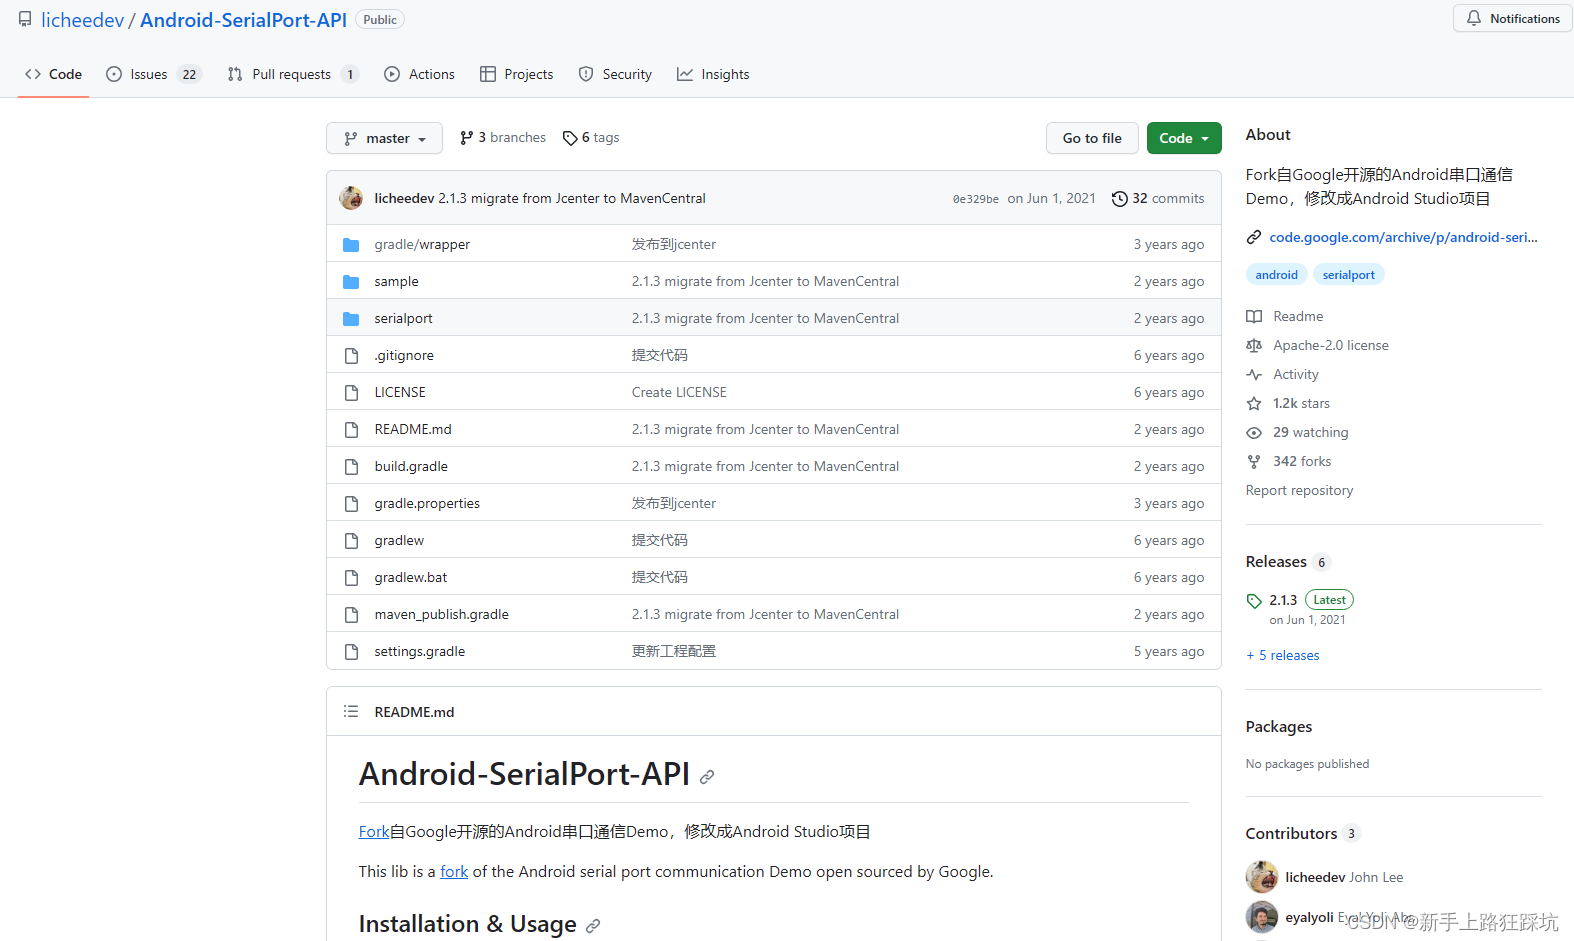
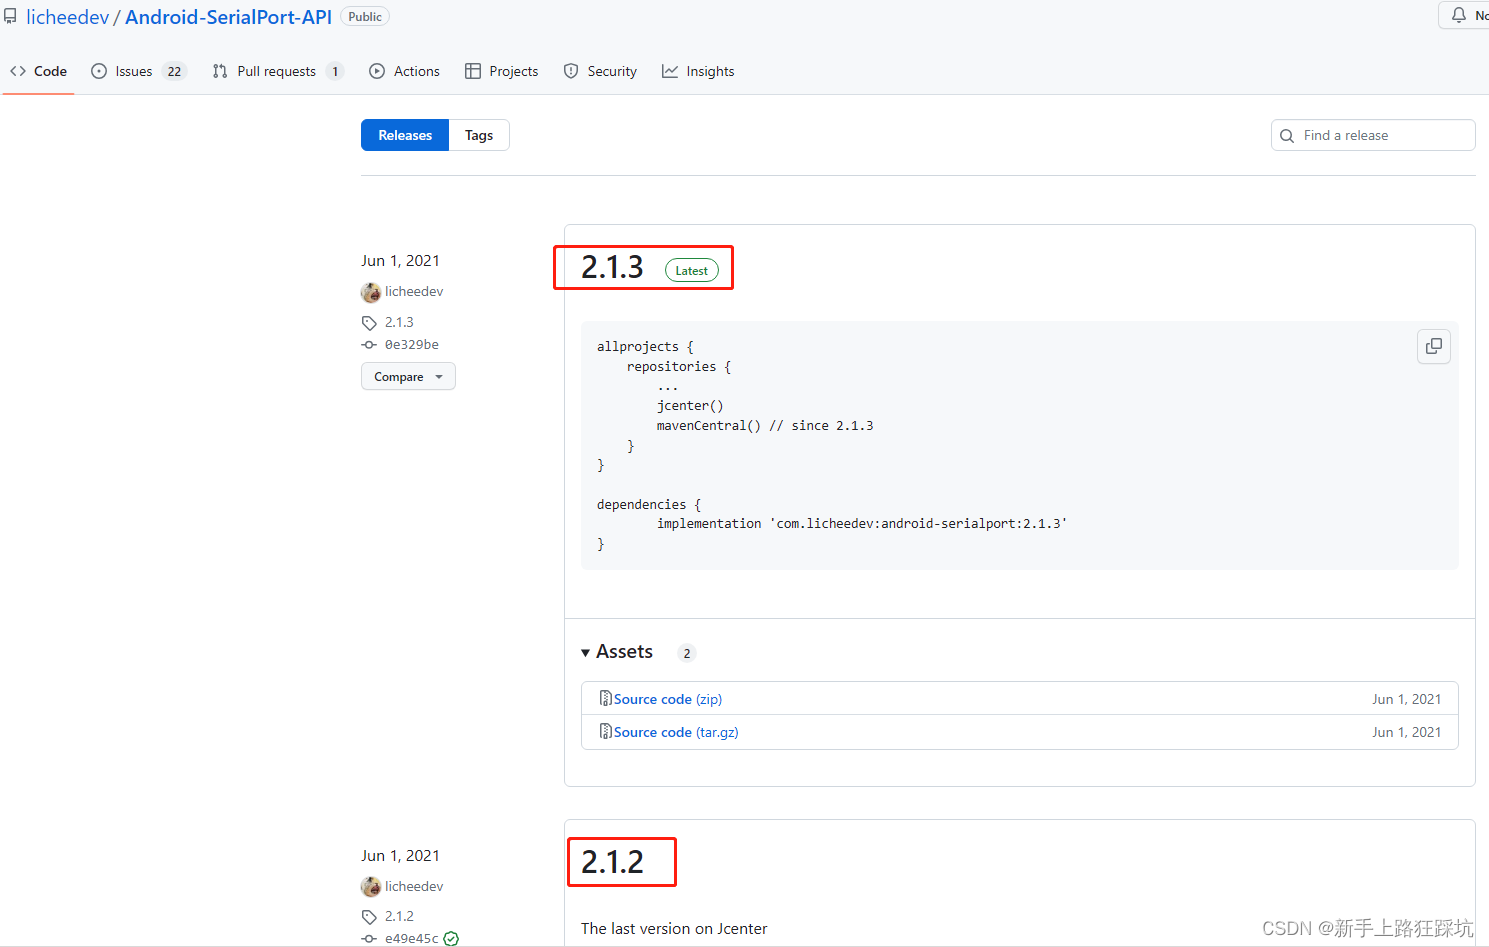
licheedev/Android-SerialPort-API
readme
版本
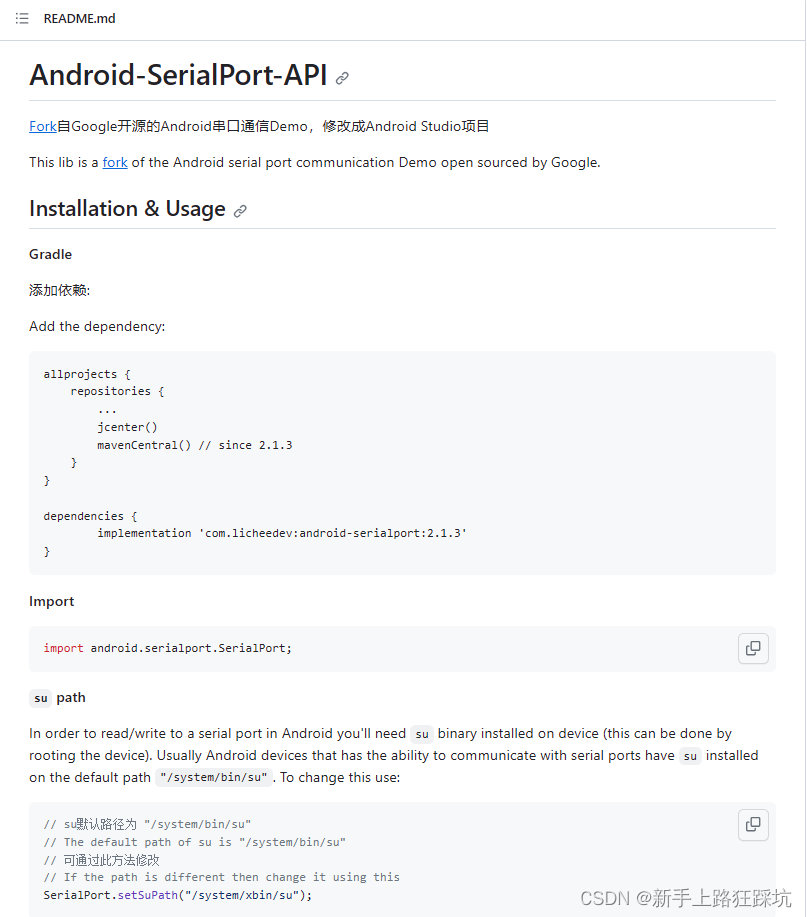
添加依赖:implementation ‘com.licheedev:android-serialport:2.1.3’
allprojects {
    repositories {
        ...
        jcenter()
        mavenCentral() // since 2.1.3
    }
}
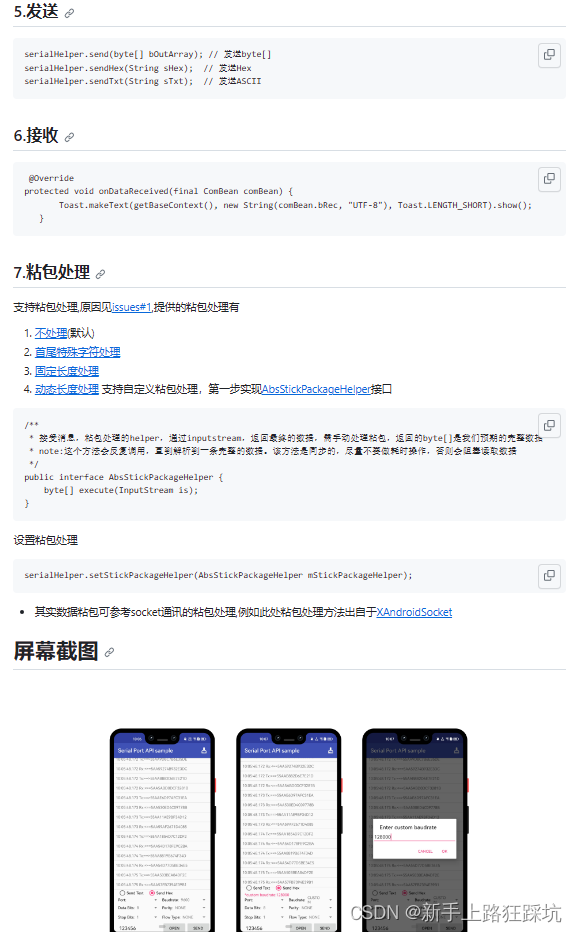
- 1
- 2
- 3
- 4
- 5
- 6
- 7
dependencies {
        implementation 'com.licheedev:android-serialport:2.1.3'
}
- 1
- 2
- 3
除了选择2.1.3版本,还可以看 releases 选择其他版本。
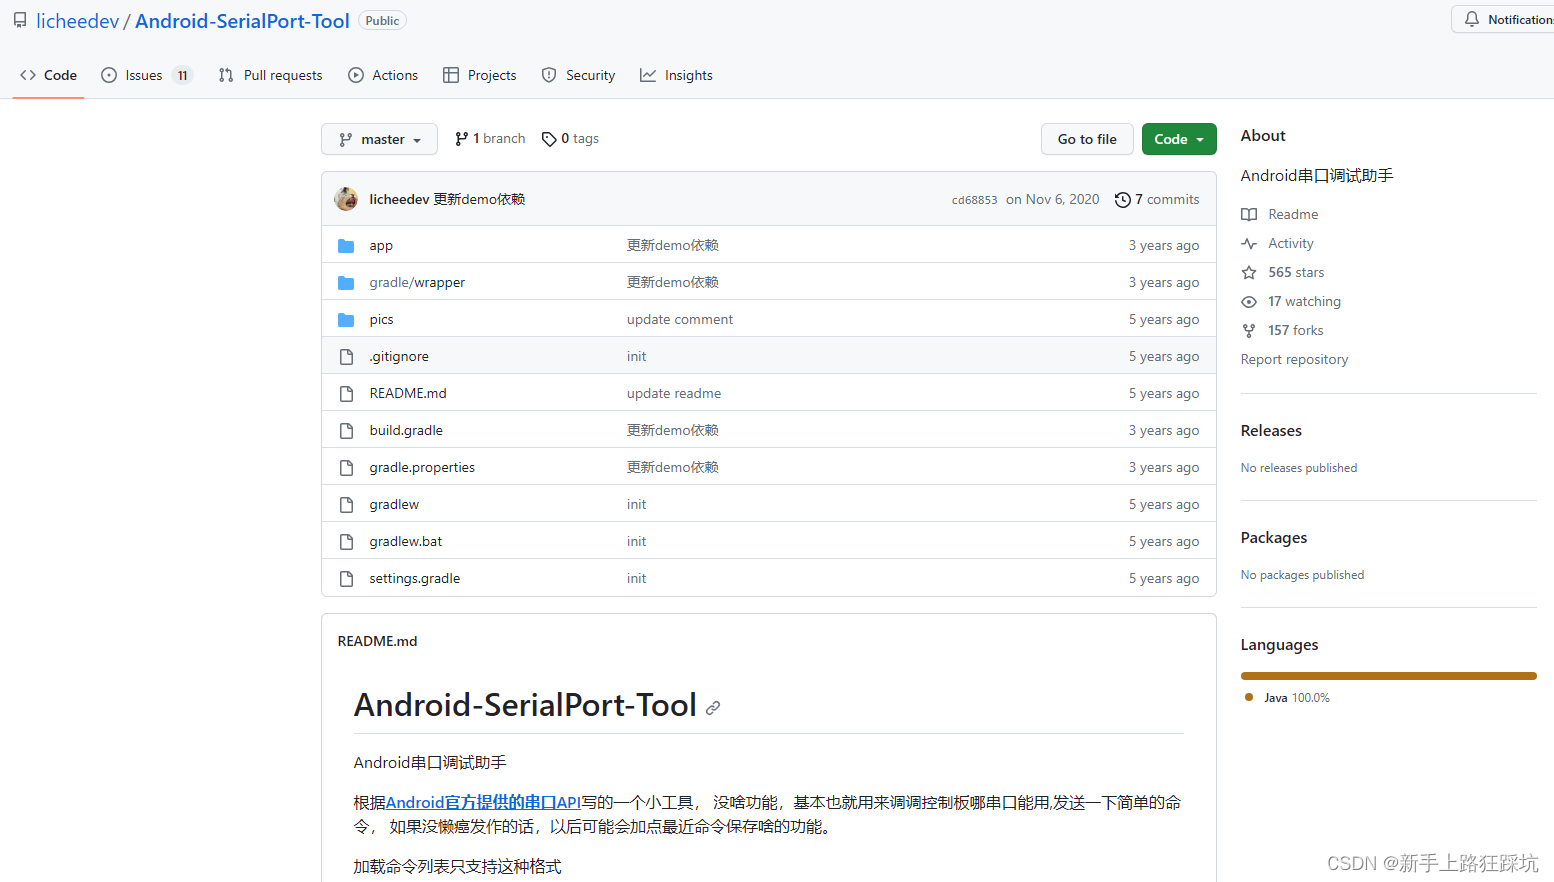
Android-SerialPort-Tool
源码下载
licheedev/Android-SerialPort-Tool
Android-Serialport
源码下载
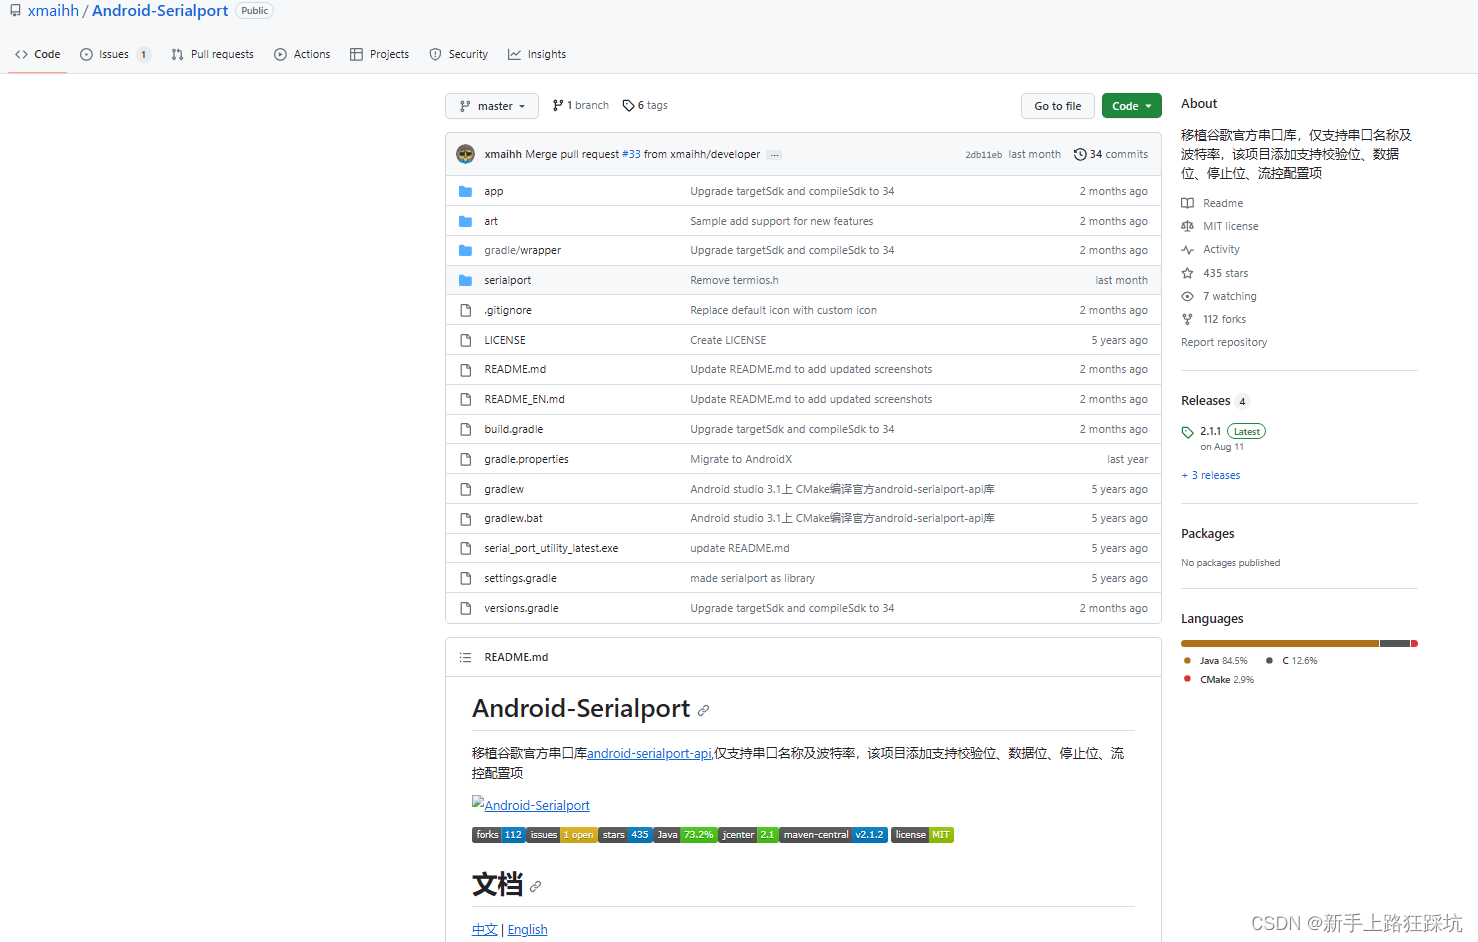
使用方法
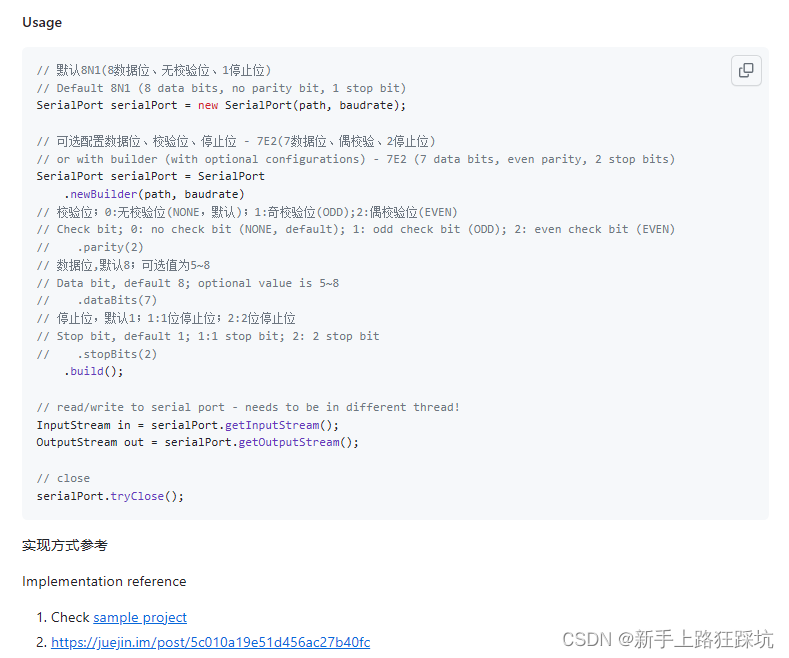
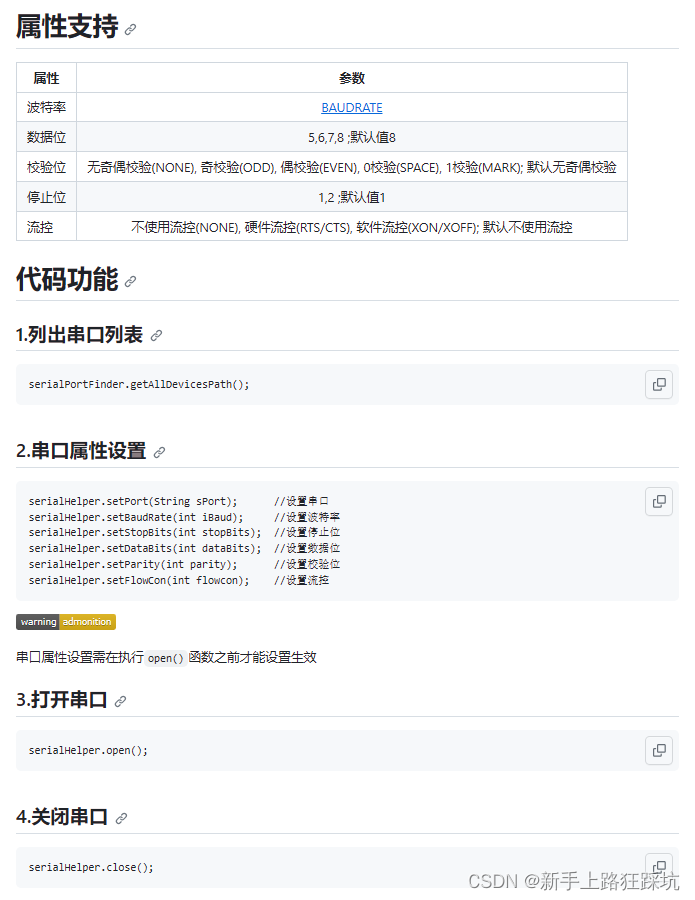
Android移植谷歌官方串口库支持校验位、数据位、停止位、流控配置
1. 检验参数合法性
    /* Check arguments */
    {
        speed = getBaudrate(baudrate);
        if (speed == -1) {
            /* TODO: throw an exception */
            LOGE("Invalid baudrate");
            return NULL;
        }
    }
2. 打开串口
    /* Opening device */
    {
        jboolean iscopy;
        const char *path_utf = (*env)->GetStringUTFChars(env, path, &iscopy);
        LOGD("Opening serial port %s with flags 0x%x", path_utf, O_RDWR | flags);
        fd = open(path_utf, O_RDWR | flags);
        LOGD("open() fd = %d", fd);
        (*env)->ReleaseStringUTFChars(env, path, path_utf);
        if (fd == -1) {
            /* Throw an exception */
            LOGE("Cannot open port");
            /* TODO: throw an exception */
            return NULL;
        }
    }
3.配置波特率
    /* Configure device */
    {
        struct termios cfg;
        LOGD("Configuring serial port");
        if (tcgetattr(fd, &cfg)) {
            LOGE("tcgetattr() failed");
            close(fd);
            /* TODO: throw an exception */
            return NULL;
        }

        cfmakeraw(&cfg);
        cfsetispeed(&cfg, speed);
        cfsetospeed(&cfg, speed);
4.配置数据位
        cfg.c_cflag &= ~CSIZE;
        switch (dataBits) {
            case 5:
                cfg.c_cflag |= CS5;    //使用5位数据位
                break;
            case 6:
                cfg.c_cflag |= CS6;    //使用6位数据位
                break;
            case 7:
                cfg.c_cflag |= CS7;    //使用7位数据位
                break;
            case 8:
                cfg.c_cflag |= CS8;    //使用8位数据位
                break;
            default:
                cfg.c_cflag |= CS8;
                break;
        }
5.配置校验位
        switch (parity) {
            case 0:
                cfg.c_cflag &= ~PARENB;    //无奇偶校验
                break;
            case 1:
                cfg.c_cflag |= (PARODD | PARENB);   //奇校验
                break;
            case 2:
                cfg.c_iflag &= ~(IGNPAR | PARMRK); // 偶校验
                cfg.c_iflag |= INPCK;
                cfg.c_cflag |= PARENB;
                cfg.c_cflag &= ~PARODD;
                break;
            default:
                cfg.c_cflag &= ~PARENB;
                break;
        }
6.配置停止位
        switch (stopBits) {
            case 1:
                cfg.c_cflag &= ~CSTOPB;    //1位停止位
                break;
            case 2:
                cfg.c_cflag |= CSTOPB;    //2位停止位
                break;
            default:
                break;
        }
7.配置流控
        switch (flowCon) {
            case 0:
                cfg.c_cflag &= ~CRTSCTS;    //不使用流控
                break;
            case 1:
                cfg.c_cflag |= CRTSCTS;    //硬件流控
                break;
            case 2:
                cfg.c_cflag |= IXON | IXOFF | IXANY;    //软件流控
                break;
            default:
                cfg.c_cflag &= ~CRTSCTS;
                break;
        }

- 1
- 2
- 3
- 4
- 5
- 6
- 7
- 8
- 9
- 10
- 11
- 12
- 13
- 14
- 15
- 16
- 17
- 18
- 19
- 20
- 21
- 22
- 23
- 24
- 25
- 26
- 27
- 28
- 29
- 30
- 31
- 32
- 33
- 34
- 35
- 36
- 37
- 38
- 39
- 40
- 41
- 42
- 43
- 44
- 45
- 46
- 47
- 48
- 49
- 50
- 51
- 52
- 53
- 54
- 55
- 56
- 57
- 58
- 59
- 60
- 61
- 62
- 63
- 64
- 65
- 66
- 67
- 68
- 69
- 70
- 71
- 72
- 73
- 74
- 75
- 76
- 77
- 78
- 79
- 80
- 81
- 82
- 83
- 84
- 85
- 86
- 87
- 88
- 89
- 90
- 91
- 92
- 93
- 94
- 95
- 96
- 97
- 98
- 99
- 100
- 101
- 102
- 103
- 104
readme

android中使用串口通信
使用android-serialport-api方式
import android.serialport.SerialPort;
- 1
第1种 链接
在gradle/build.gradle中添加
maven { url "https://jitpack.io" }
- 1
在app/build.gradle文件配置中的dependencies,加上
implementation 'com.github.licheedev.Android-SerialPort-API:serialport:1.0.1'
- 1
第2种 导入SerialPort库
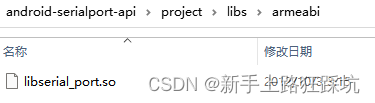
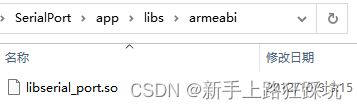
1、将android-serialport-api中的libs的so库资源放到项目libs中
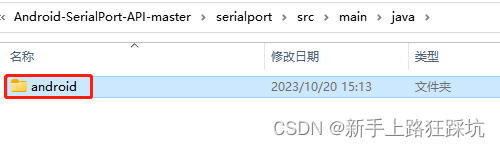
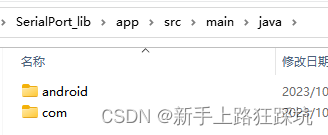
2、将Android-SerialPort-API中的java下的文件复制到项目中java
3、修改app的build.gradle文件,在android {}里添加支持的cpu架构
    defaultConfig {
        ndk {
            abiFilters "armeabi","armeabi-v7a"  // "x86", "arm64-v8a"
        }
    }
- 1
- 2
- 3
- 4
- 5
第3种 编译SerialPort模块
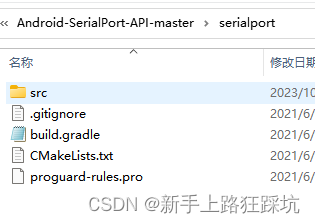
1、将Android-SerialPort-API中的serialport模块复制到工程中,目录与app文件同级
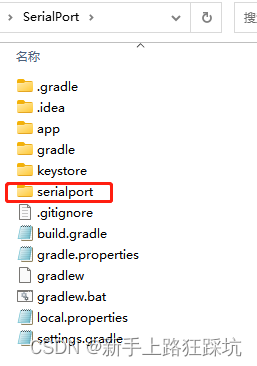
2、修改settings.gradle,将改成如下,即增加serialport模块
rootProject.name = "SerialPort"
include ':app',':serialport'
- 1
- 2
3、修改app的build.gradle文件,在dependencies{}中添加project
dependencies {
    implementation fileTree(include: ['*.jar'], dir: 'libs')
    implementation project(':serialport')
}
- 1
- 2
- 3
- 4
串口通信部分代码
待续
好的文章推荐参考
Android串口通讯SerialPort(使用篇)
与君共勉!待续
欢迎指错,一起学习

