
- 1LangChain实现AgentExecutor调用tools_langchain agentexecutor
- 2Nodejs 第八十章(Kafka高级)
- 3MATLAB仿真UR5机器人simulink simscape 自制建模 正向运动学,逆向运动学关节空间轨迹规划 五次多项式轨迹规划_采用五次多项式进行轨迹规划,采用逆动力学进行两自由度机器人的控制
- 42021回顾 | AI 领域十大研究趋势及必读论文
- 5Python PyQt5对象类型的判定对象删除操作详细介绍
- 6前端开发者的酷炫数据可视化大屏秘籍:亲手打造视觉盛宴
- 7Vue学习笔记2——MvVM模式和第一个Vue程序_html 运用mvvm模式实现vue data 和method
- 8防御跨站请求伪造(CSRF)攻击:前端开发者的安全指南_跨站请求伪造怎么解决
- 9ubantu20.04下配置hadoop环境详细教程(包含可能遇到的问题以及解决方法)_ubuntu解压hadoop后不显示版本信息
- 10NodeManager启动错误_error nodemanager.nodemanager: error starting node
【python】python制作 连连看 游戏脚本(一)_连连看python文件夹
赞
踩
【python】python制作 连连看 游戏脚本(一)_sunriver2000的博客-CSDN博客
【python】python制作 连连看 游戏脚本(二)_sunriver2000的博客-CSDN博客
【python】python制作 连连看 游戏脚本(三)_sunriver2000的博客-CSDN博客
【python】python制作 连连看 游戏脚本(四)_sunriver2000的博客-CSDN博客
在游戏中学习编程,即享受了游戏的乐趣,有提升了编程能力,可谓一举两得。
本文以【宠物连连看经典版2】为例,讲述使用python制作简单的游戏脚本。
游戏网址:宠物连连看经典版2
代码下载:GitHub - sunriver2000/LinkGameAss
环境
系统:win10 x64
Python版本:V3.6.6
主要模块:win32gui(识别窗口、窗口置顶等操作)、pillow(屏幕截图)、numpy(创建矩阵)、operator(比较值)、pymouse(模拟鼠标点击)。
安装参考:
【Python】安装pyuserinput_sunriver2000的博客-CSDN博客
【Python】安装pillow与numpy_sunriver2000的博客-CSDN博客
1、建立数学模型
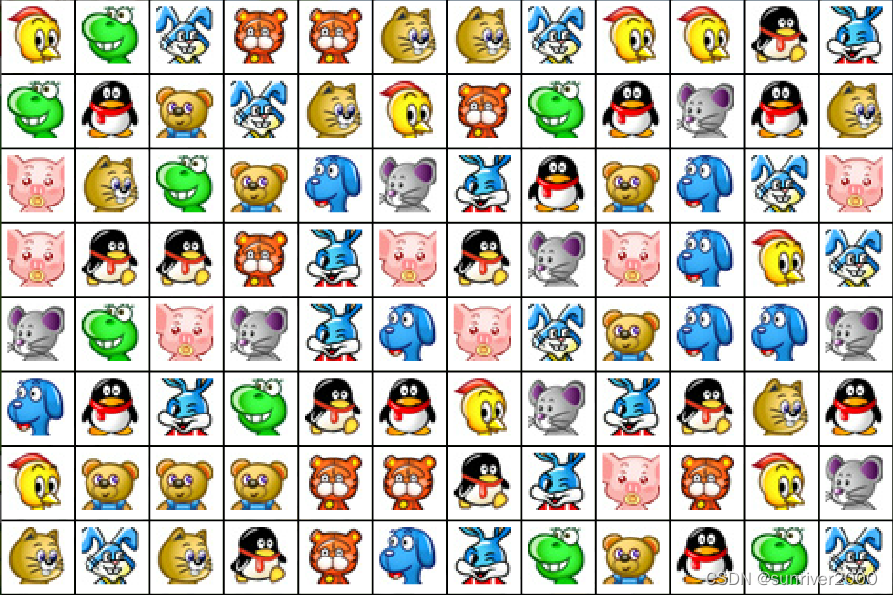
【宠物连连看经典版2】游戏目标:需要消除的是8*12的图标矩阵,如下图所示。
实际8*12图标矩阵外围有一圈空白通道,所以实际矩阵规格是10*14,如下图。

空白通道用0表示,图标有12种分别用1至12数字表示,上图可以抽象为如下矩阵。
- [[ 0 0 0 0 0 0 0 0 0 0 0 0 0 0]
- [ 0 1 2 3 4 4 5 5 3 1 1 6 7 0]
- [ 0 2 8 9 3 5 1 4 2 8 10 8 5 0]
- [ 0 11 5 2 9 12 10 7 8 9 12 3 11 0]
- [ 0 11 6 6 4 7 11 6 10 11 12 1 3 0]
- [ 0 10 2 11 10 7 12 11 3 9 12 12 10 0]
- [ 0 12 8 7 2 6 8 1 10 7 6 5 8 0]
- [ 0 1 9 9 9 4 4 6 7 11 4 1 10 0]
- [ 0 5 3 5 6 4 12 7 2 9 8 2 3 0]
- [ 0 0 0 0 0 0 0 0 0 0 0 0 0 0]]
A图标通过两次90度拐弯到达B图标,则AB图标消除。消除后,矩阵内原来位置补零,变成通道。
综上,脚本主要涉及图像识别、图标消除等两种算法。
2、初始化
2.1、获取游戏窗口标题
打开【连连看】游戏网页后,使用EnumChildWindows()函数枚举所有窗口并保存为文本文件。浏览文件,确定窗口标题为【宠物连连看经典版2小游戏,在线玩,4399小游戏 - 360极速浏览器 13.5】。

- import win32gui, win32ui, win32con, win32api
-
- # 打开文件
- f = open('winlist.txt', 'w', encoding='utf-8')
- #f = open('winlist.txt', 'w')
-
- # GetDesktopWindow 获得代表整个屏幕的一个窗口(桌面窗口)句柄
- hd = win32gui.GetDesktopWindow()
-
- # 获取所有子窗口
- hwndChildList = []
-
- win32gui.EnumChildWindows(hd, lambda hwnd, param: param.append(hwnd), hwndChildList)
-
- for hwnd in hwndChildList:
- print("句柄:",hwnd,"标题:",win32gui.GetWindowText(hwnd))
- f.write("句柄:" + str(hwnd) + " 标题:" + win32gui.GetWindowText(hwnd) + '\n')
-
- f.close()

以上代码可以独立执行。
2.2、前置游戏窗口
前置游戏窗口的代码放在GameAssist类初始化中,类声明对象后,自动前置游戏窗口。
- class GameAssist:
-
- def __init__(self, wdname):
- #初始化
-
- # 取得窗口句柄
- self.hwnd = win32gui.FindWindow(None, wdname)
-
- if not self.hwnd:
- print("can't find window, name is : 【%s】" % wdname)
- exit()
-
- print("find window, name is : 【%s】" % wdname)
-
- # 窗口显示最前面
- win32gui.SetForegroundWindow(self.hwnd)
在主函数中,调用方式如下。
- if __name__ == "__main__":
- wdname = u'宠物连连看经典版2小游戏,在线玩,4399小游戏 - 360极速浏览器 13.5'
-
- demo = GameAssist(wdname)
3、图像识别算法
3.1、确定参数
第一个参数是图标矩阵的坐标,包括:左上角和右下角两个点位。
左上角( 360,258)
右下角(1253,853)
获取方法:抓屏,使用画图进行编辑。这两个坐标必须精确,会影响到后续图像识别。
第二个参数是图标的高度(高度与宽度相等)。
width = (1253 - 360)/ 12 = 74.41
- def __init__(self, wdname):
- #初始化
-
- # 取得窗口句柄
- self.hwnd = win32gui.FindWindow(None, wdname)
-
- if not self.hwnd:
- print("can't find window, name is : 【%s】" % wdname)
- exit()
-
- print("find window, name is : 【%s】" % wdname)
-
- # 窗口显示最前面
- win32gui.SetForegroundWindow(self.hwnd)
-
- # 小图标标号矩阵
- self.im2num_arr = []
-
- # 截图的左上角坐标和右下角坐标
- self.screen_left_and_right_point = (360, 258, 1253, 853)
-
- # 小图标宽高
- self.im_width = 74.41
-
- self.mouse = PyMouse()
3.2、截取图标矩阵
- def screenshot(self):
- image = ImageGrab.grab(self.screen_left_and_right_point)
- save_im(image, 'image')
- return image_list
使用ImageGrab.grab()截取屏幕后,可以保存为图片进行调试。
- def save_im(image, name):
- # 创建存储路径
- screen_path = os.path.join(os.path.dirname(__file__), 'screen')
- if not os.path.exists(screen_path):
- os.makedirs(screen_path)
-
- # 保存图片到存储路径
- image_name = os.path.join(screen_path, name)
-
- #print("image_name: %", image_name)
- t = time.strftime('%Y%m%d_%H%M%S', time.localtime())
- image.save('%s_%s.png' % (image_name, t)) # 文件名name后面加了个时间戳,避免重名
矩阵外围的长方形线宽保留1个像素,效果如下。
3.3、分解为12*8个图标
分解图标后,存入image_list列表中。
- def screenshot(self):
- image = ImageGrab.grab(self.screen_left_and_right_point)
-
- save_im(image, 'image')
-
- image_list = {}
- offset = self.im_width
-
- for x in range(8):
- image_list[x] = {}
- for y in range(12):
- top = round(x * offset)
- left = round(y * offset)
- bottom = round((x + 1) * offset)
- right = round((y + 1) * offset)
-
- im = image.crop((left, top, right, bottom))
- image_list[x][y] = im
-
- #print("top = {}, left = {}".format(top, left))
- save_im(image_list[x][y], str(x).zfill(2)+str(y).zfill(2))
-
- return image_list
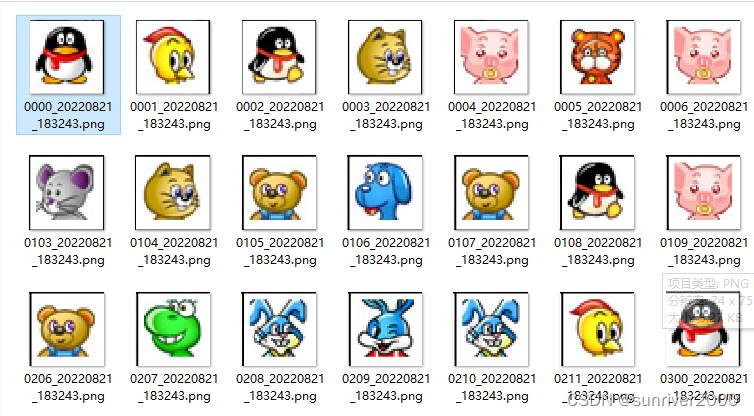
保存为图片,分解效果如下图所示,应该有12*8个,图片没有截全。
3.4、图像数字化
现在已经得到图标图像的列表,但是计算机无法直接对比两个图标是否一致,需要图像数字化。
第一步,彩色转为黑白灰度。
image1 = im1.resize((20, 20), Image.ANTIALIAS).convert("L")第二步,转为为一串01序列
- # 降灰度图标转成01串,即二进制数据
- pixels1 = list(image1.getdata())
-
- avg1 = sum(pixels1) / len(pixels1)
- hash1 = "".join(map(lambda p: "1" if p > avg1 else "0", pixels1))
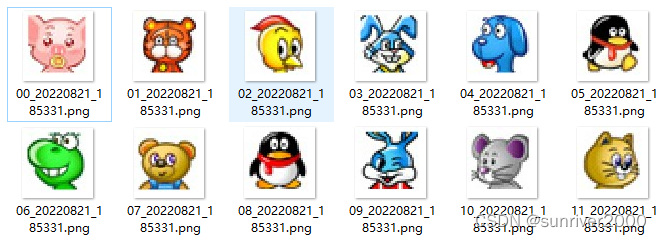
第三步,对比完成后,存入 image_type_list列表。这里是考验前期参数与算法的地方了,理论上mage_type_list只会存入12个元素。调试时,放开如下代码。
- for i in range(len(image_type_list)):
- save_im(image_type_list[i], str(i).zfill(2))
涉及函数
- def image2num(self, image_list):
- # 1、创建全零矩阵和空的一维数组
- arr = np.zeros((10, 14), dtype=np.int32)
- image_type_list = []
-
- # 2、识别出不同的图片,将图片矩阵转换成数字矩阵
- for i in range(len(image_list)):
- for j in range(len(image_list[0])):
- im = image_list[i][j]
-
- # 验证当前图标是否已存入
- index = self.getIndex(im, image_type_list)
-
- # 不存在,则存入image_type_list
- if index < 0:
- image_type_list.append(im)
- arr[i + 1][j + 1] = len(image_type_list)
- else:
- arr[i + 1][j + 1] = index + 1
-
- print("图标数:", len(image_type_list))
-
- for i in range(len(image_type_list)):
- save_im(image_type_list[i], str(i).zfill(2))
-
- self.im2num_arr = arr
- return arr
-
- # 检查数组中是否有图标,如果有则返回索引
- def getIndex(self, im, im_list):
- for i in range(len(im_list)):
- if self.isMatch(im, im_list[i]):
- return i
-
- return -1
-
- # 汉明距离判断两个图标是否一样
- def isMatch(self, im1, im2):
- # 缩小图标,转成灰度
- image1 = im1.resize((20, 20), Image.ANTIALIAS).convert("L")
- image2 = im2.resize((20, 20), Image.ANTIALIAS).convert("L")
-
- # 降灰度图标转成01串,即二进制数据
- pixels1 = list(image1.getdata())
- pixels2 = list(image2.getdata())
-
- avg1 = sum(pixels1) / len(pixels1)
- avg2 = sum(pixels2) / len(pixels2)
- hash1 = "".join(map(lambda p: "1" if p > avg1 else "0", pixels1))
- hash2 = "".join(map(lambda p: "1" if p > avg2 else "0", pixels2))
-
- # 统计两个01串不同数据的个数
- match = sum(map(operator.ne, hash1, hash2))
-
- # 阀值设为10
- return match < 40
- np.save ...
赞
踩

