
热门标签
热门文章
- 13D-DIC数字图像相关法测量流程介绍-数字图像采集_视觉软件中触发周期是什么意思
- 2【windows】亲测-win11系统跳过联网和微软账户登录,实现本地账户登录_win11跳过联网激活
- 3【数据结构和算法初阶(C语言)】时间复杂度(衡量算法快慢的高端玩家,搭配例题详细剖析)_衡量一个算法好坏一般以最坏的时间复杂度为标准
- 4如何在群晖NAS搭建bitwarden密码管理软件并实现无公网IP远程访问_群晖怎么安装bitwarden
- 5基于Hadoop的区块链海量数据存储的设计与实现_区块链 hdfs
- 6iOS(一):Swift纯代码模式iOS开发入门教程_swift 开发ios入门教程
- 7学懂C语言系列(三):C语言基本语法
- 8kafka架构深入
- 9Langchain-chatchat: Langchain核心组件及应用_langchain chatchat
- 10【爬虫】1.4 POST 方法向网站发送数据_网页爬虫 post数据
当前位置: article > 正文
三、Unity编辑器开发之CustomEditor_unity customeditor
作者:Li_阴宅 | 2024-07-10 14:19:02
赞
踩
unity customeditor
CustomEditor特性,允许我们自定义组件的Inspect检视面板。
- public CustomEditor (Type inspectedType);
- public CustomEditor (Type inspectedType, bool editorForChildClasses);
param1: inspectedType 检视的类型,即自定义哪个类型的Inspector。
param2: editorForChildClasses 默认为false,为true时表明其子类使用同样的Inspector。
例如,我们创建一个Person组件:
- using UnityEngine;
-
- public class Person : MonoBehaviour
- {
- public string Name;
- public int Age;
- public float Weight;
- }
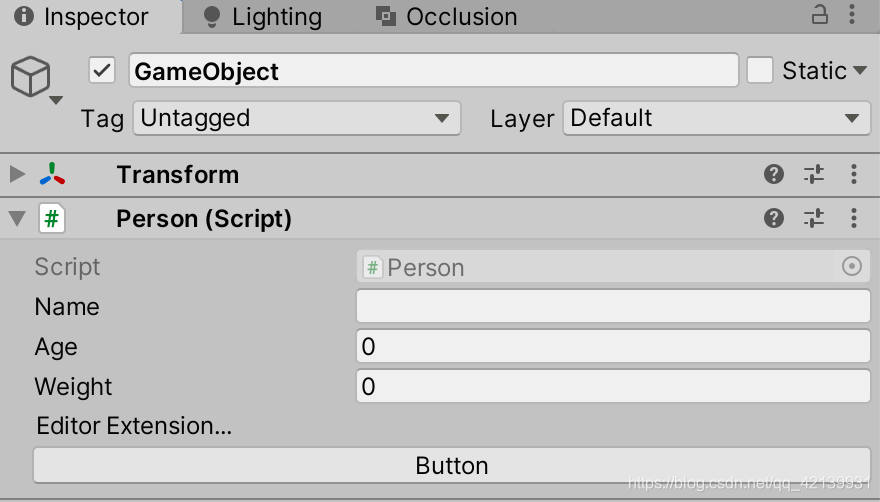
检视面板显示了Person组件中的三个公开字段:

接下来自定义该组件的检视面板,首先需要在Editor文件夹中创建一个PersonInspector.cs脚本
引入命名空间UnityEditor后,为该类添加CustomEditor特性,并继承Editor类:
- using UnityEditor;
-
- [CustomEditor(typeof(Person))]
- public class PersonInspector : Editor {}
接下来重写OnInspectorGUI方法来自定义我们所需要的内容:
比如在面板上显示一个字符串:
- using UnityEngine;
- using UnityEditor;
-
- [CustomEditor(typeof(Person))]
- public class PersonInspector : Editor
- {
- public override void OnInspectorGUI()
- {
- base.OnInspectorGUI();
- GUILayout.Label("Editor Extension...");
- }
- }

再比如在面板上添加一个按钮:
- using UnityEngine;
- using UnityEditor;
-
- [CustomEditor(typeof(Person))]
- public class PersonInspector : Editor
- {
- public override void OnInspectorGUI()
- {
- base.OnInspectorGUI();
- GUILayout.Label("Editor Extension...");
- GUILayout.Button("Button");
- }
- }
具体如何绘制自定义检视面板,在后续文章中进行介绍。
声明:本文内容由网友自发贡献,不代表【wpsshop博客】立场,版权归原作者所有,本站不承担相应法律责任。如您发现有侵权的内容,请联系我们。转载请注明出处:https://www.wpsshop.cn/w/Li_阴宅/article/detail/806558
推荐阅读
相关标签

