- 1【图像融合】基于多模态实现CT图像无缝融合附matlab代码_不同期ct图像算多模态
- 2【已解决】git clone 报错:Could not read from remote repository. Please make sure you have the correct acce_fatal: could not read from remote repository. plea
- 3go interface类型转换_go语言学习总结(四十七)Go Interface 源码剖析
- 4linux nfs 多个ip,linux基础之NFS
- 5Autodesk AutoCAD 2025 for Mac v2025.0.58.214 - cad设计绘图软件_auto cad 2025 mac
- 6(计算机视觉实战)迁移学习VGG16_vgg16迁移学习
- 7使用postman发请求报错Error: connect ECONNREFUSED 127.0.0.1:33210_postman error: connect econnrefused
- 8【随笔】Git -- 常用命令(四)_git clone --force
- 9开源项目OpenChat安装教程
- 10最详细的IP地址及子网划分_ip规划及ip分配表
OpenCv_could not locate the image
赞
踩
目录
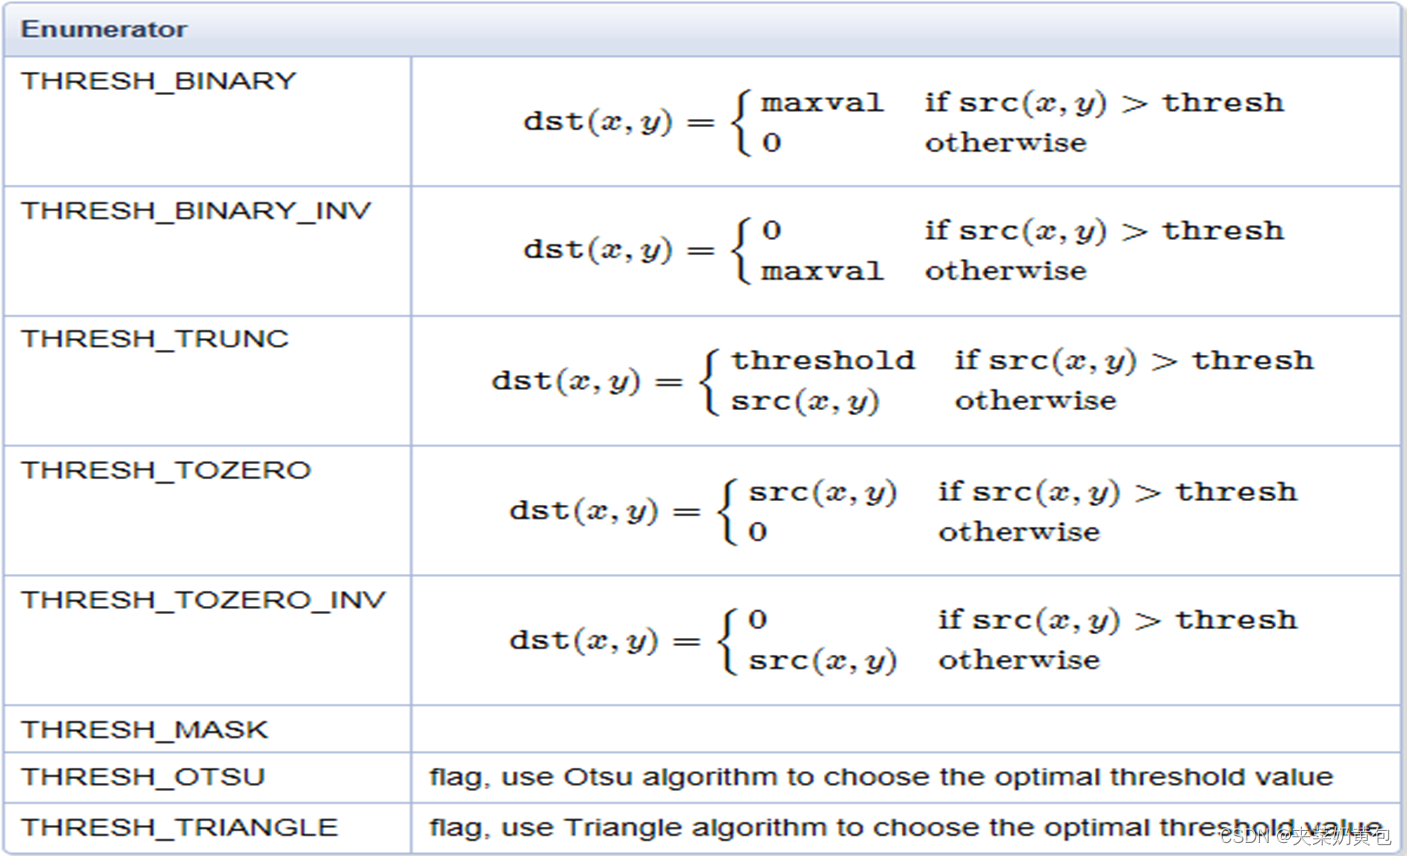
一:阈值
阈值:把图像分割的标尺
阈值类型:


API
代码
- #include<opencv2/opencv.hpp>
- #include<iostream>
- #include<math.h>
- using namespace cv;
- Mat src, dst, dst1;
- int threshold_value = 127;
- int threshold_max = 255;
- int type = 2;
- int type_max =4;
- char result[] = "threshold image";
- //或者定义一个指针形式:const char* result="threshold image";
- void threshold_Demo(int, void*);
- int main(int argc, int argv)
- {
- src = imread("D:/opencvtu/1.jpg");
- if (!src.data)
- {
- printf("could not load image...\n");
- return -1;
- }
- else
- {
- printf("ok....");
- }
- namedWindow("input", CV_WINDOW_AUTOSIZE);
- imshow("input", src);
- namedWindow(result, CV_WINDOW_AUTOSIZE);
- createTrackbar("threshold value:", result, &threshold_value, threshold_max, threshold_Demo);
- createTrackbar("threshold type:", result, &type, type_max, threshold_Demo);
- threshold_Demo(0, 0);
- waitKey(0);
- return 0;
- }
- //阈值化实现函数
- void threshold_Demo(int, void*)
- {
- cvtColor(src, dst, CV_BGR2GRAY);
- imshow("GRAY", dst);
- threshold(dst, dst1, threshold_value, threshold_max, type);
- imshow(result, dst1);
- }

效果: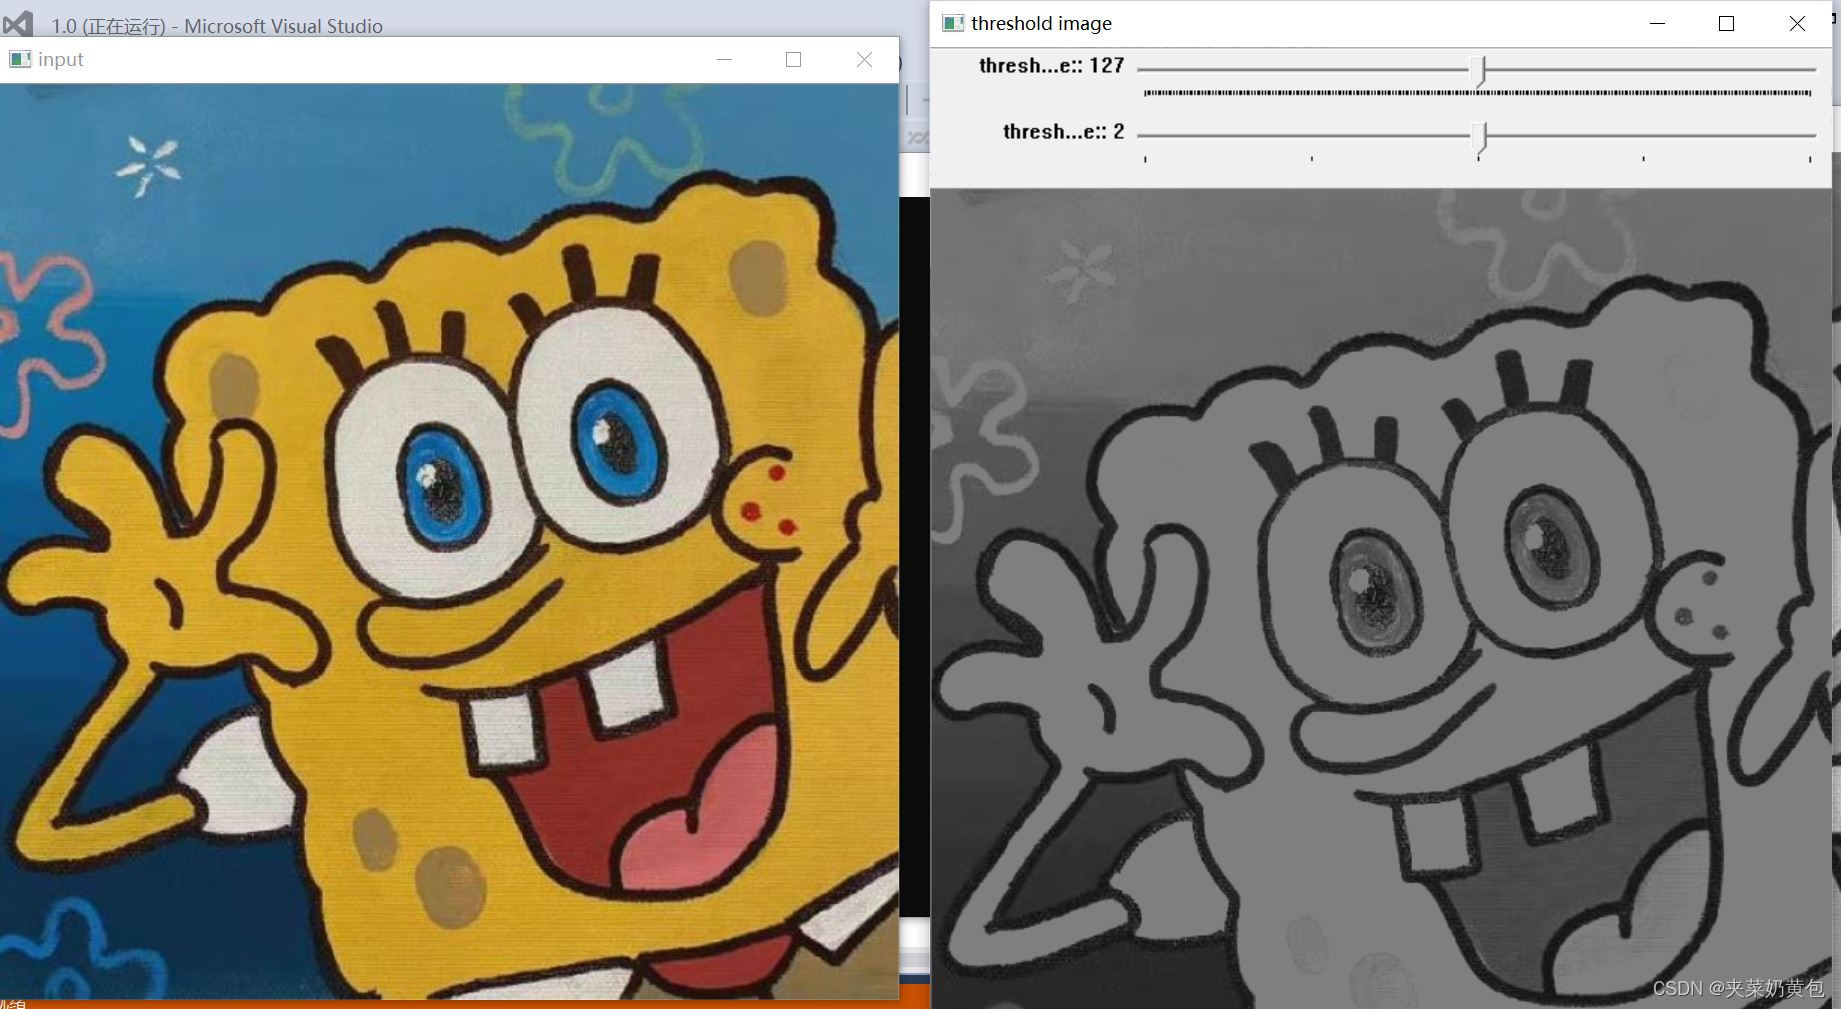
二:自定义线性滤波
1.定义
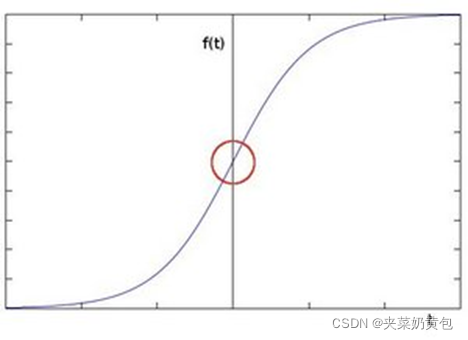
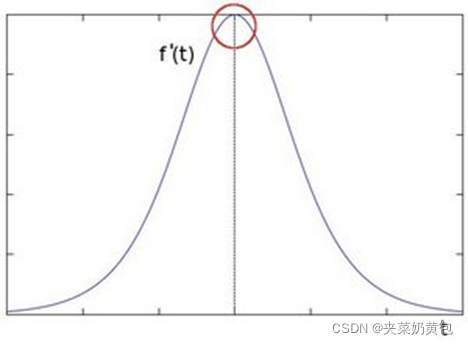
卷积是图像处理中一个操作,是kernel在图像的每个像素上的操作。
Kernel本质上一个固定大小的矩阵数组,其中心点称为锚点(anchor point);
把kernel放到像素数组之上,求锚点周围覆盖的像素乘积之和(包括锚点),用来替换锚点覆盖下像素点值称为卷积处理。数学表达如下:

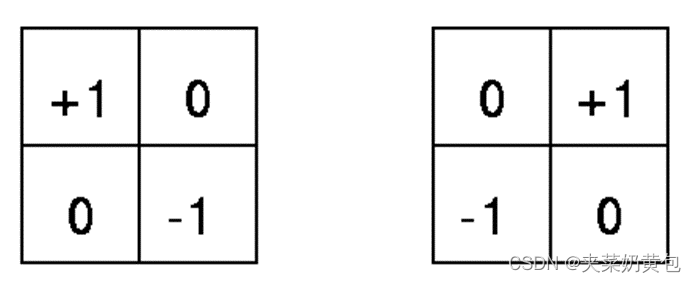
2.常见算子
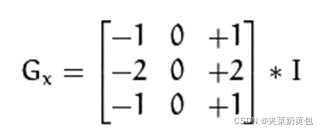
Robert算子
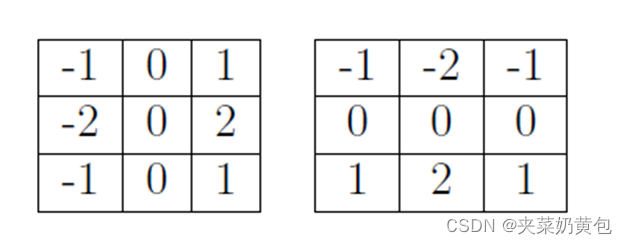
Sobel算子
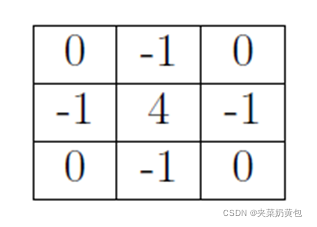
拉普拉斯算子
3.自定义卷积模糊
filter2D方法filter2D(
Mat src, //输入图像
Mat dst, // 模糊图像
int depth, // 图像深度32/8
Mat kernel, // 卷积核/模板
Point anchor, // 锚点位置
double delta // 计算出来的像素+delta
)
其中 kernel是可以自定义的卷积核
代码
- #include<opencv2/opencv.hpp>
- #include<iostream>
- #include<math.h>
- using namespace cv;
- Mat src, dst;
- int main(int argc, int argv)
- {
- src = imread("D:/opencvtu/1.jpg");
- if (!src.data)
- {printf("could not load image...\n");
- return -1;}
- else
- {printf("ok....");}
- namedWindow("input", CV_WINDOW_AUTOSIZE);
- imshow("input", src);
- //namedWindow("output_x", CV_WINDOW_AUTOSIZE);
- //namedWindow("output_y", CV_WINDOW_AUTOSIZE);
- //卷积:kernel在图像的每个像素上的操作
- //kernel是一个固定大小的矩阵数组,中心点=锚点;求锚点周围覆盖的像素乘积之和
- //替换锚点覆盖下的像素点值;
- /*x方向*/
- //Mat kernel = (Mat_<int>(3,3) << -1,0,1,-2,0,2,-1,0,1);//算子
- //filter2D(src, dst, -1, kernel,Point(-1, -1), 0.0);
- //imshow("output_x", dst);
- y
- //Mat kernel2 = (Mat_<int>(2, 2) << 0,1,-1,0);//算子
- //filter2D(src, dst1, -1, kernel2, Point(-1, -1), 0.0);
- //imshow("output_y", dst1);
- int c = 0;
- int index = 0;
- int ksize = 0;
- while (true)
- {
- c = waitKey(500);
- if ((char)c == 27) // ESC
- {
- break;
- }
- ksize = 5 + (index % 8) * 2;
- Mat kernel = Mat::ones(Size(ksize, ksize), CV_32F) / (float)(ksize * ksize);
- filter2D(src, dst, -1, kernel, Point(-1, -1));
- index++;
- imshow("output", dst);
- }
- return 0;
- }
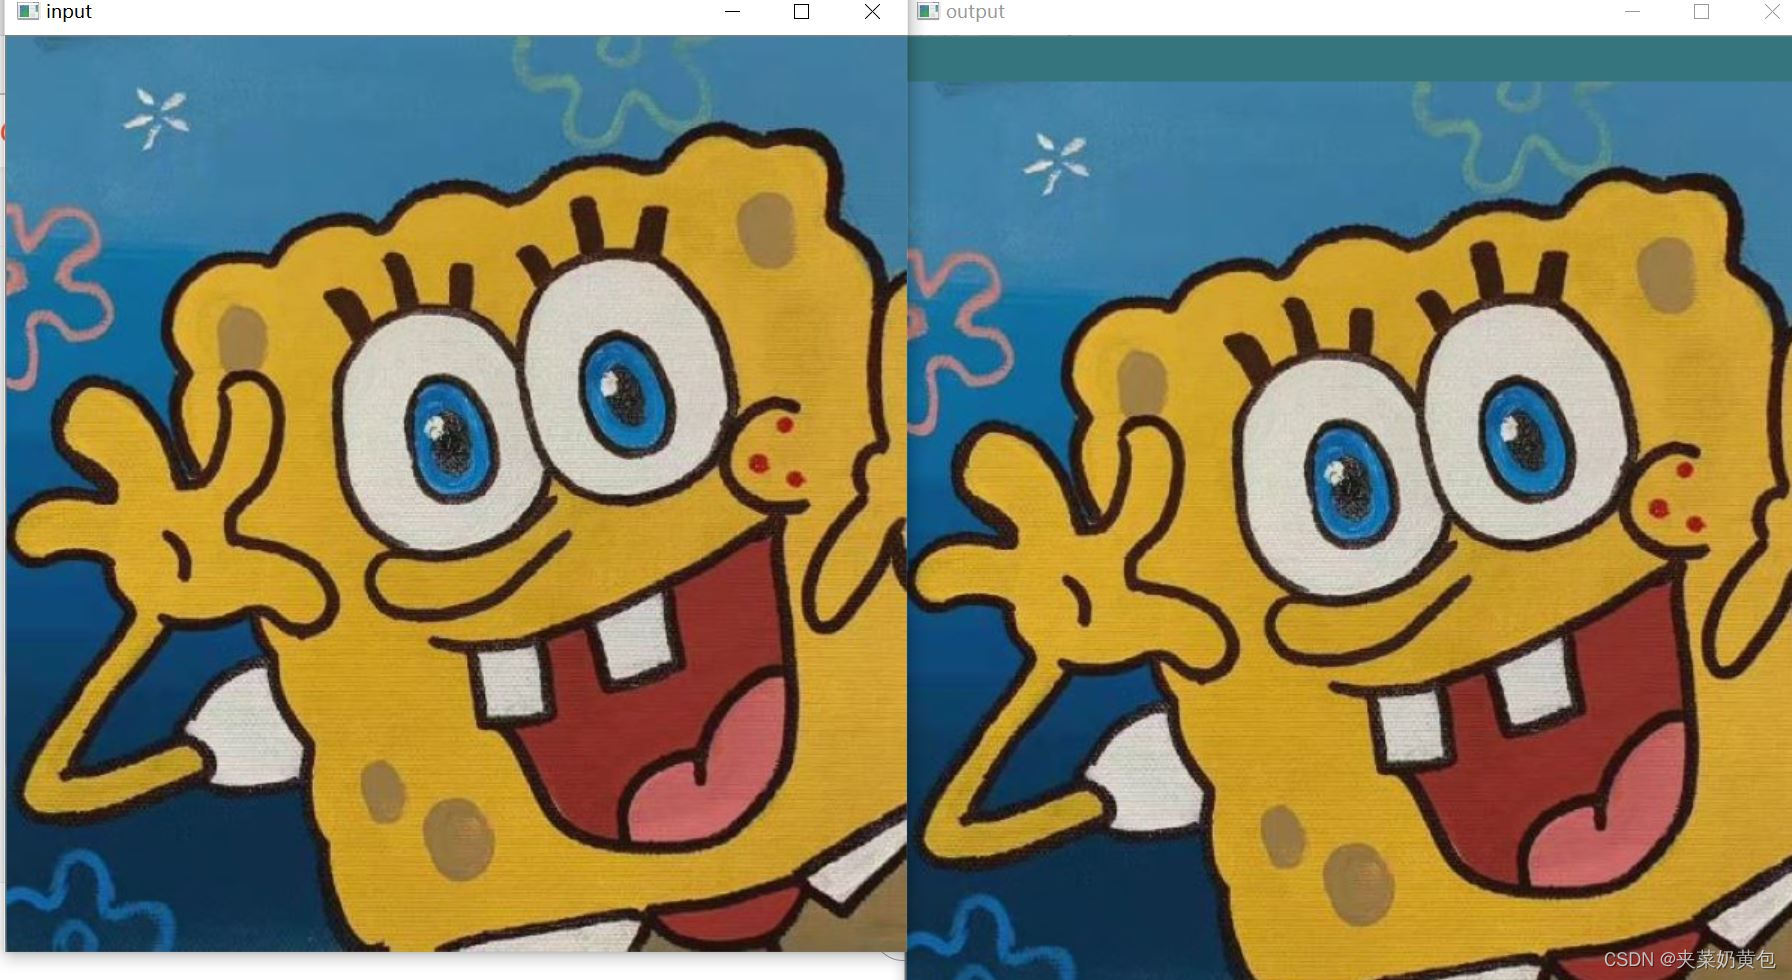
效果:
三:处理边缘
图像卷积的时候边界像素,不能被卷积操作,原因在于边界像素没有完全跟kernel重叠,所以当3x3滤波时候有1个像素的边缘没有被处理,5x5滤波的时候有2个像素的边缘没有被处理。
API:
- BORDER_CONSTANT – 填充边缘用指定像素值
- BORDER_REPLICATE – 填充边缘像素用已知的边缘像素值。
- BORDER_WRAP – 用另外一边的像素来补偿填充
- #include<opencv2/opencv.hpp>
- #include<iostream>
- #include<math.h>
- using namespace cv;
- Mat src, dst;
- int main(int argc, int argv)
- {
- src = imread("D:/opencvtu/1.jpg");
- if (!src.data)
- {printf("could not load image...\n");
- return -1;}
- else
- {printf("ok....");}
- namedWindow("input", CV_WINDOW_AUTOSIZE);
- imshow("input", src);
- namedWindow("output", CV_WINDOW_AUTOSIZE);
- int top = 0.05*src.rows;
- int bottom =(int) 0.05*src.rows;
- int left =(int) 0.05*src.cols;
- int right = (int)0.05*src.cols;
- RNG rng(12345);
- int bordertype = BORDER_DEFAULT;
- int c = 0;
- while (true){
- c = waitKey(500);
- if ((char)c == 27){
- break;
- }
- if ((char)c == 'r'){
- bordertype = BORDER_REPLICATE;
- }
- else if ((char)c == 'v'){
- bordertype =BORDER_WRAP;
- }
- else if ((char)c == 'c'){
- bordertype = BORDER_CONSTANT;
- }
- Scalar color = Scalar(rng.uniform(0, 255), rng.uniform(0, 255), rng.uniform(0, 255));
- copyMakeBorder(src, dst, top, bottom, left, right, bordertype, color);
- imshow("output", dst);
- }
- //GaussianBlur(src, dst, Size(5, 5), 0, 0, BORDER_CONSTANT);
- imshow("output", dst);
- waitKey(0);
- return 0;
- }
输入c的效果:随机变换颜色
输入r的效果:
输入v的效果
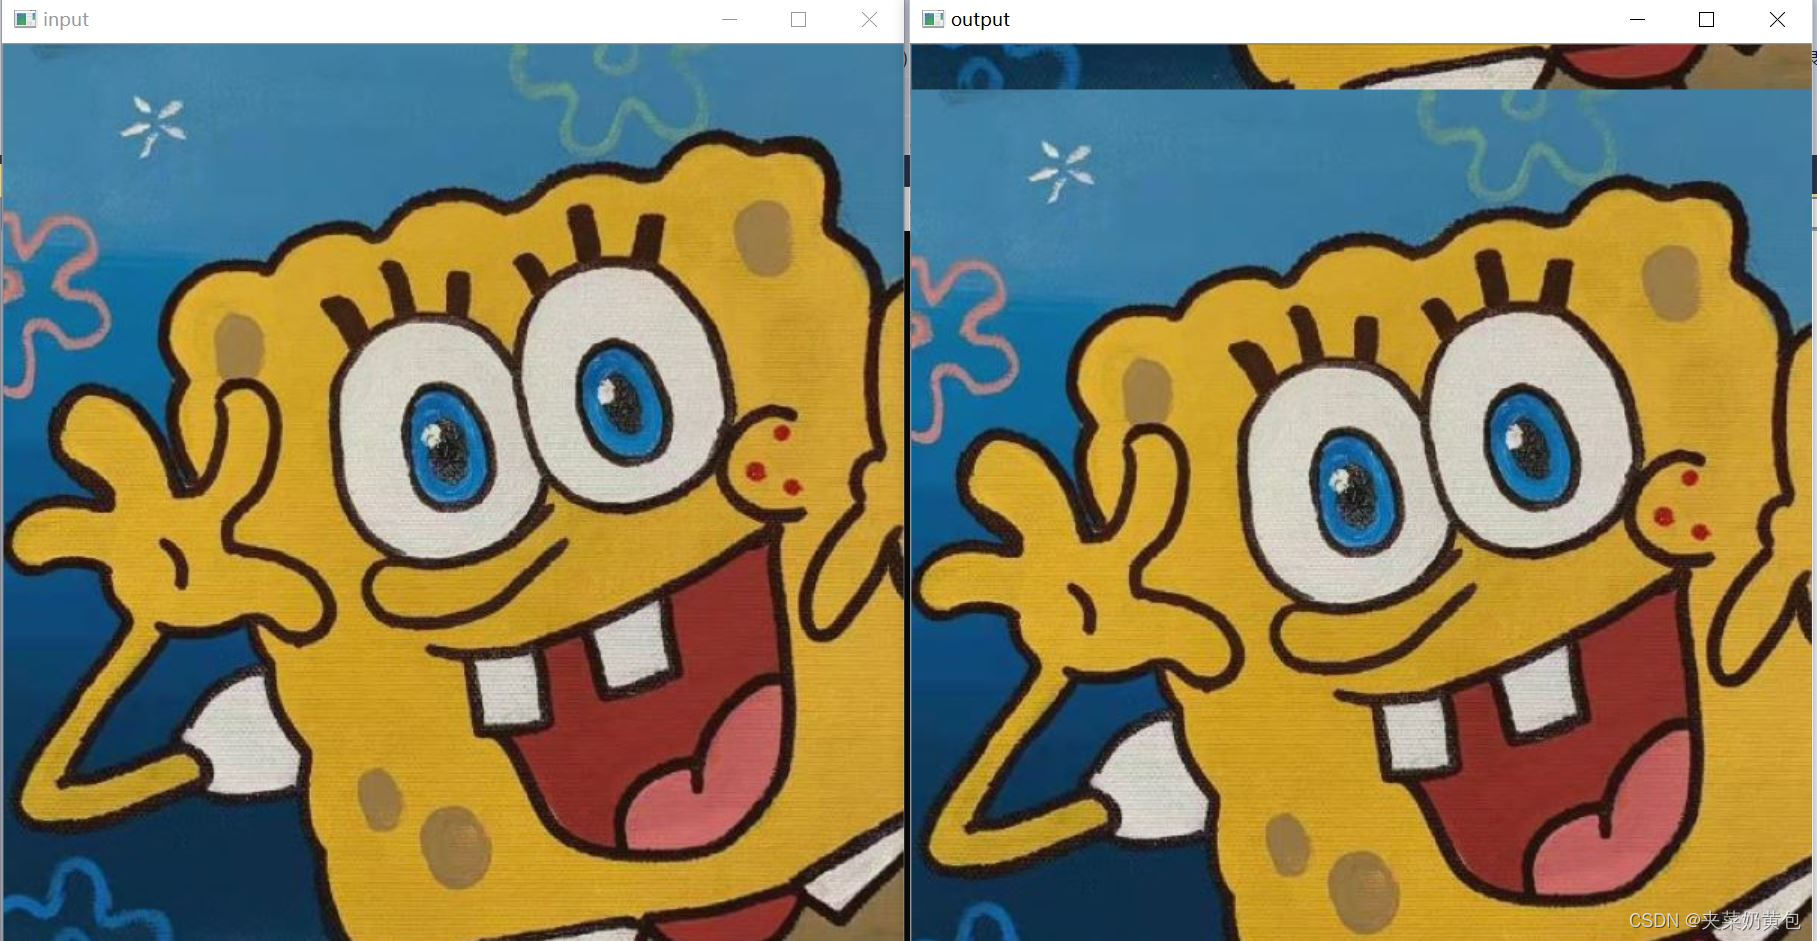
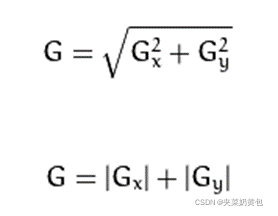
四:Sobel算子
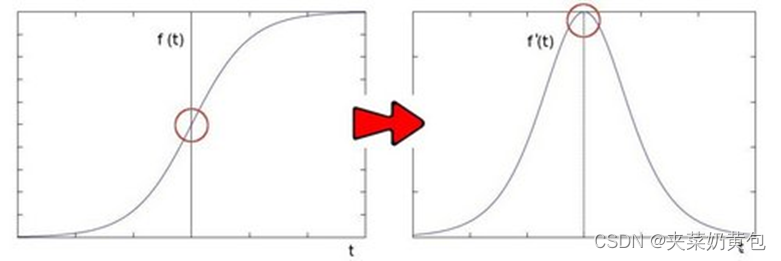
边缘是什么 – 是像素值发生跃迁的地方,是图像的显著特征之一,在图像特征提取、对象检测、模式识别等方面都有重要的作用。
又被称为一阶微分算子,求导算子,在水平和垂直两个方向上求导,得到图像X方法与Y方向梯度图像
水平梯度
垂直梯度
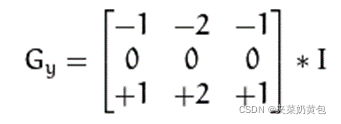
最终图像梯度
Scharr函数
API:
cv::Sobel (
InputArray Src // 输入图像
OutputArray dst// 输出图像,大小与输入图像一致
int depth // 输出图像深度.
Int dx. // X方向,几阶导数
int dy // Y方向,几阶导数.
int ksize, SOBEL算子kernel大小,必须是1、3、5、7、
double scale = 1
double delta = 0
int borderType = BORDER_DEFAULT
)
convertScaleAbs(A, B)// 计算图像A的像素绝对值,输出到图像B
代码:
- #include<opencv2/opencv.hpp>
- #include<iostream>
- #include<math.h>
- using namespace cv;
- Mat src, dst;
- int main(int argc, int argv)
- {
- src = imread("D:/opencvtu/2.jpg");
- if (!src.data)
- {printf("could not load image...\n");
- return -1;}
- else
- {printf("ok....");}
- namedWindow("input", CV_WINDOW_AUTOSIZE);
- imshow("input", src);
- //namedWindow("output", CV_WINDOW_AUTOSIZE);
- /*提取边缘,求一阶导数*/
- GaussianBlur(src, dst, Size(3, 3), 0, 0);
- Mat gray_src;
- cvtColor(src, gray_src, CV_BGR2GRAY);
- //imshow("output", gray_src);
- Mat x, y;
- //Scharr(gray_src, x, CV_16S, 1, 0);
- //Scharr(gray_src, y, CV_16S, 0, 1);
- Sobel(gray_src, x, CV_16S, 1, 0, 3);//x梯度
- Sobel(gray_src, y,CV_16S ,0, 1, 3);
- convertScaleAbs(x, x);
- convertScaleAbs(y, y);
- Mat xy = Mat(x.size(), x.type());
- int width = x.cols;
- int height = y.rows;
- for (int row = 0; row < height; row++) {
- for (int col = 0; col < width; col++) {
- int xg = x.at<uchar>(row, col);
- int yg = y.at<uchar>(row, col);
- int xy2 = xg + yg;
- xy.at<uchar>(row, col) = saturate_cast<uchar>(xy2);
- }
- }
- //addWeighted(x, 0.5, y, 0.5, 0,xy);
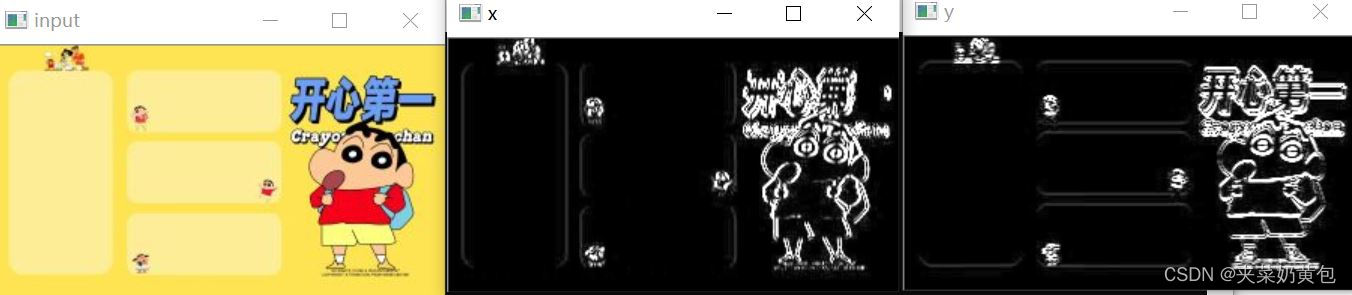
- imshow("xy", xy);
- imshow("x", x);
- imshow("y", y);
- waitKey(0);
- return 0;
- }
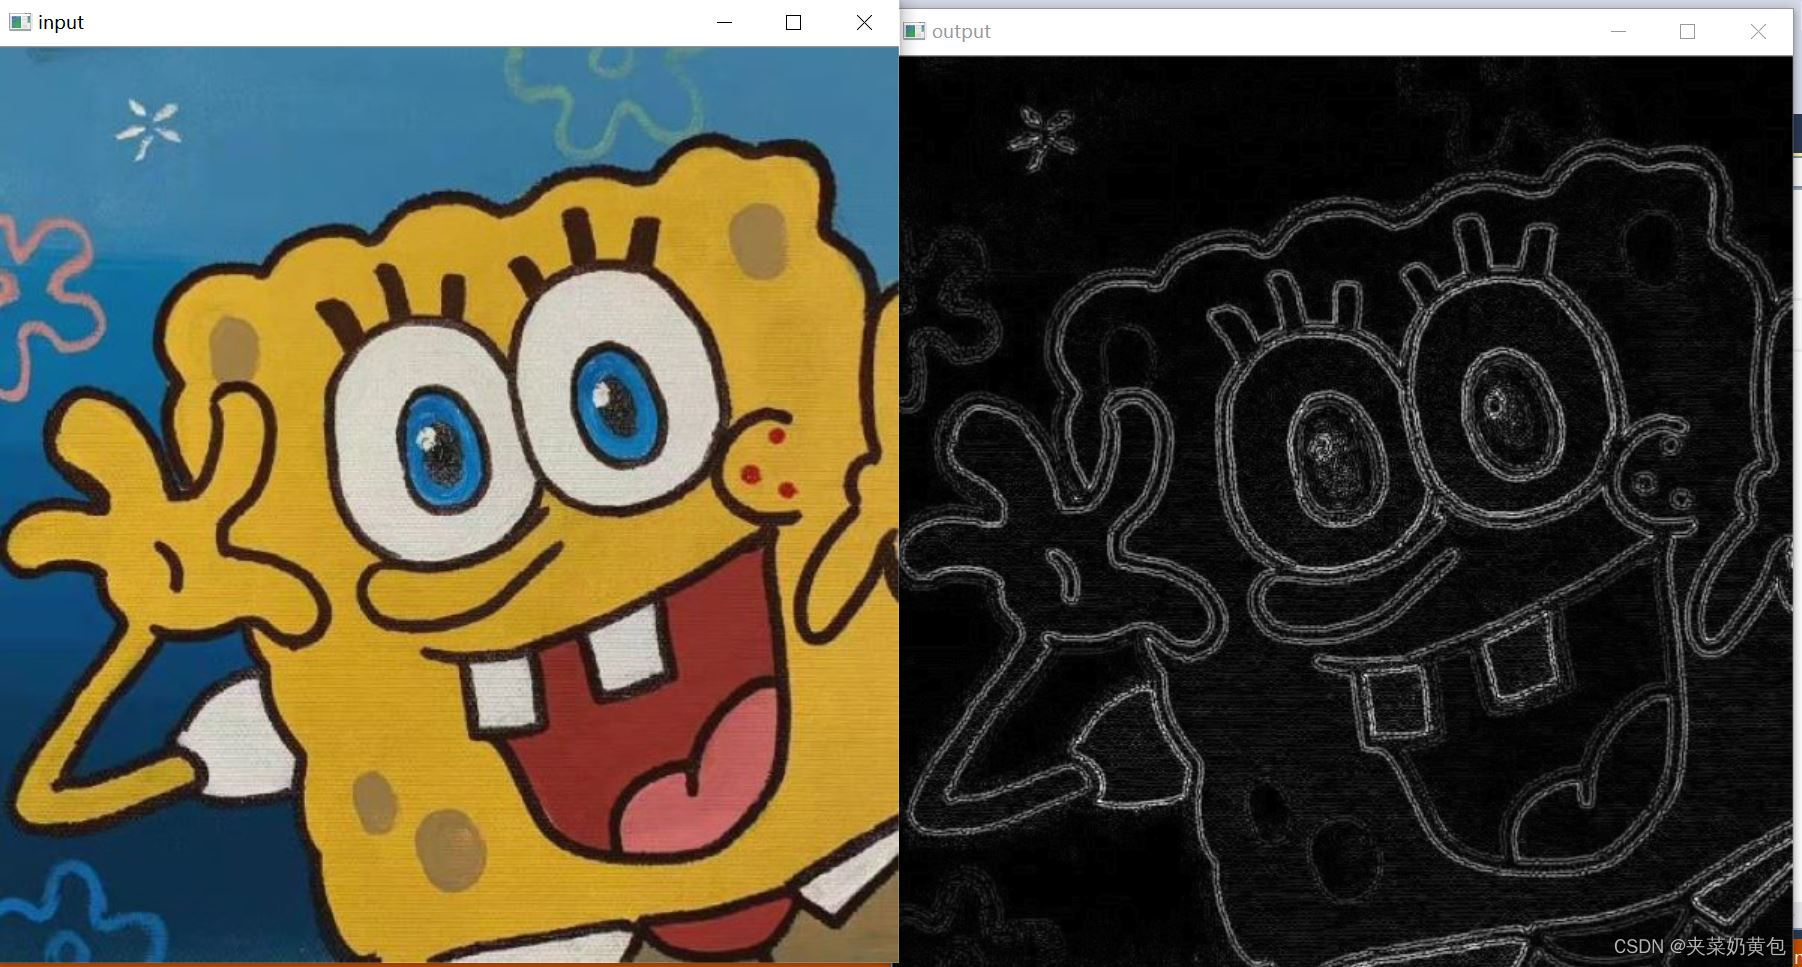
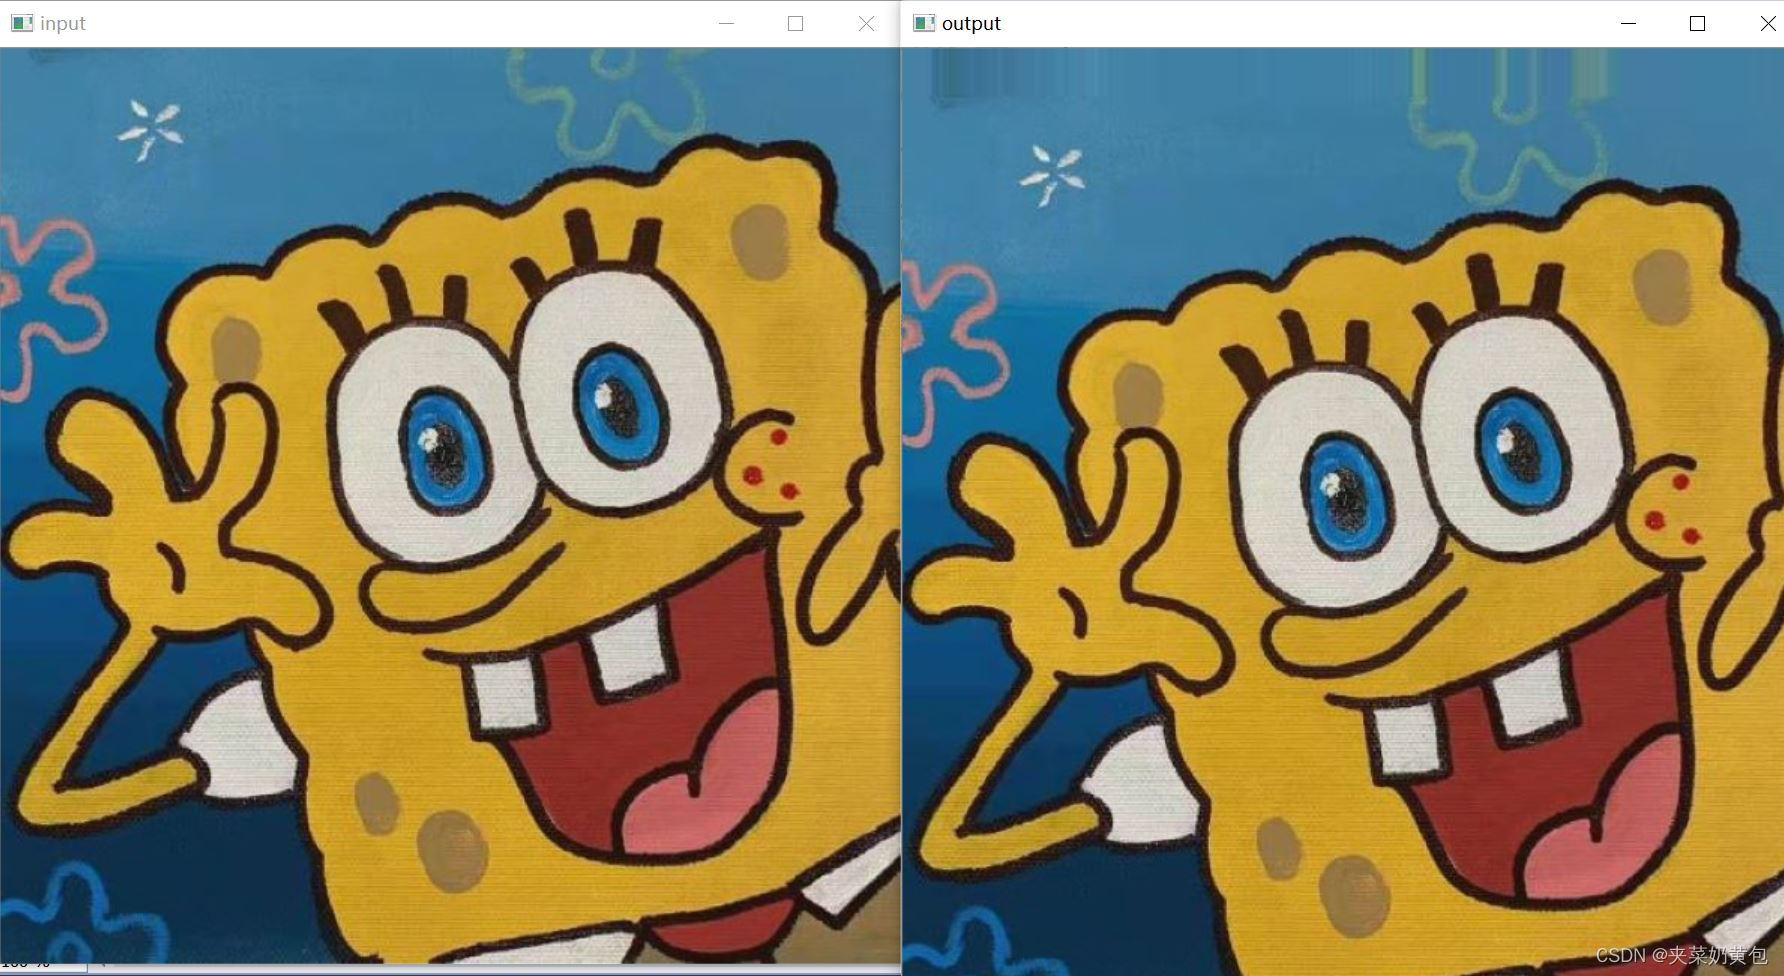
效果
(1)通过addweighted达到的效果
(2)
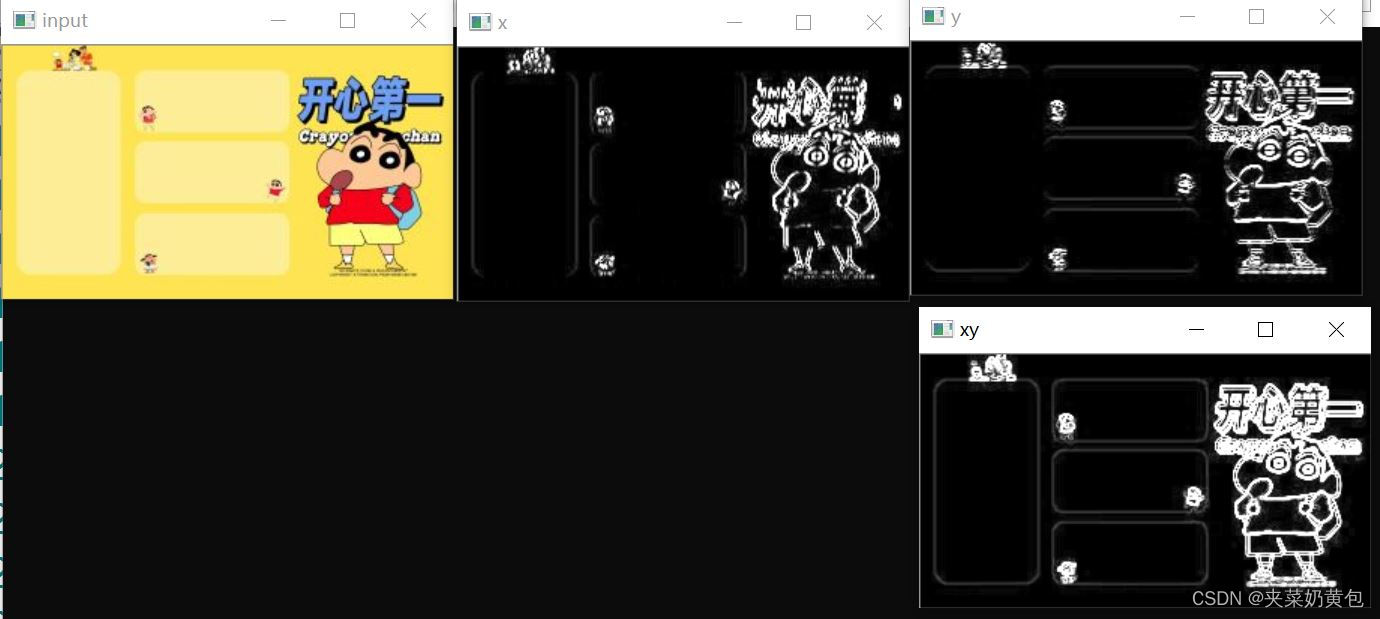
通过对比,第二种方法更好;
五:Laplance算子
计算二阶导数
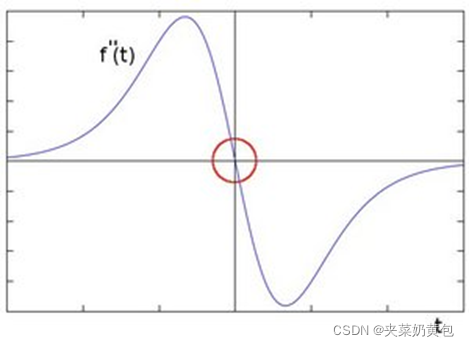
过程
高斯模糊 – 去噪声GaussianBlur()
转换为灰度图像cvtColor()
拉普拉斯 – 二阶导数计算Laplacian()
取绝对值convertScaleAbs()
显示结果
API
Laplacian(
InputArray src,
OutputArray dst,
int depth, //深度CV_16S
int kisze, // 3
double scale = 1,
double delta =0.0,
int borderType = 4
)
代码
- #include<opencv2/opencv.hpp>
- #include<iostream>
- #include<math.h>
- using namespace cv;
- Mat src, dst, dst1,dst2;
- int main(int argc, int argv)
- {
- src = imread("D:/opencvtu/1.jpg");
- if (!src.data)
- {printf("could not load image...\n");
- return -1;}
- else
- {printf("ok....");}
- namedWindow("input", CV_WINDOW_AUTOSIZE);
- imshow("input", src);
- /*高斯模糊,转换为灰度图像,拉普拉斯算法,取绝对值,显示*/
- GaussianBlur(src, dst, Size(3, 3), 0, 0);
- cvtColor(dst, dst1, CV_BGR2GRAY);
- Laplacian(dst1, dst2, CV_16S, 3);
- convertScaleAbs(dst2, dst2);
- imshow("output", dst2);
- waitKey(0);
- return 0;
- }
效果: