
热门标签
热门文章
- 1edge浏览器如何通过控制台下载CSDN文章_网页怎么在控制台下载
- 2新知实验室 - 腾讯TRTC实时音视频产品体验_trtc 回音
- 3EasyExcel导出的时候,需要动态修改表头@ExcelProperty的值_@excelproperty 给表头赋值
- 4java jar 环境变量_java-jar jar包带环境变量(参数)启动
- 5linux找出占用内存,占用CPU资源最多的前10个进程_linux top 前10资源
- 6Django框架全面讲解 -- 中间件(MiddleWare)_django middleware 只管一个app
- 7单片机学习笔记---串口通信(1)
- 8ZStack(CC2530) 断电存储(NV)方法_cc2530网络参数断电保存
- 9字节跳动技术支持面试小记
- 10QueryRunner的使用_queryrunner runner = new queryrunner(jdbcutils.get
当前位置: article > 正文
Vue3+ElementPlus+axios+暗黑模式_asp.net core axios vue3 elementplus
作者:IT小白 | 2024-02-14 22:22:19
赞
踩
asp.net core axios vue3 elementplus
目录
(1):创建一个基础配置文件src/assets/less/reset.less
(3):新建 http 请求封装类 src/api/http.js
1:新建Vue3的项目
2:导入element-plus库
element-plus官网:https://element-plus.gitee.io/
(1):安装
npm install element-plus --save // --save 表示生产环境也需要
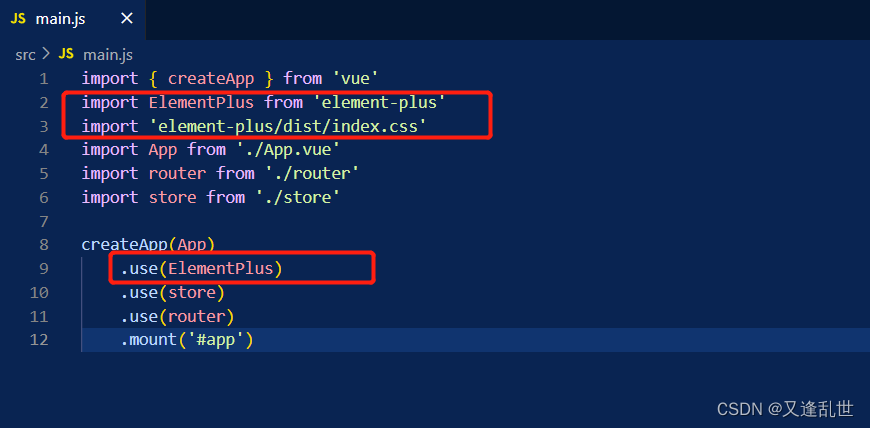
(2):配置main.js
以完整引入的方式
(3):查看引入效果
在组件中引入一个按钮,确认是否引入成功
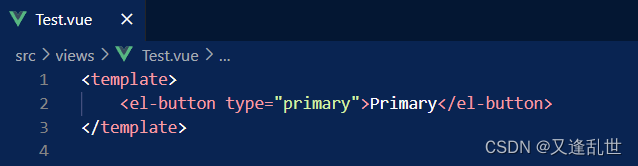
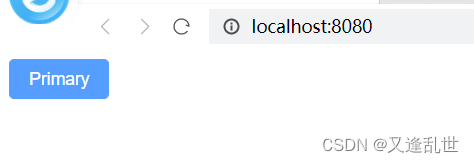
上图可以看到引入成功
3:全局注册element-plus图标库
// 不全局注册的话,使用的话就要一个一个的 import 很麻烦
(1):安装
npm install @element-plus/icons-vue
(2):配置 main.js
- import * as ElementPlusIconsVue from '@element-plus/icons-vue'
-
- const app = createApp(App)
-
- for (const [key, component] of Object.entries(ElementPlusIconsVue)) {
- app.component(key, component)
- }
4:集成Less
(1):安装
npm install less less-loader style-resources-loader vue-cli-plugin-style-resources-loader -S
(2):配置vue.config.js
- const { defineConfig } = require('@vue/cli-service')
- const path = require("path"); // 引入path
-
- module.exports = defineConfig({
- transpileDependencies: true,
- pluginOptions: {
- "style-resources-loader": {
- preProcessor: "less",
- patterns: [path.resolve(__dirname, "./src/assets/less/_variable.less")], // 指定全局变量的配置文件
- },
- }
- })
(3):创建less全局变量文件

(4):使用全局变量

5:css全局基础配置
(1):创建一个基础配置文件src/assets/less/reset.less
- * {
- margin: 0;
- padding: 0;
- border: 0;
- }
- html,
- body,
- div,
- span,
- applet,
- object,
- iframe,
- h1,
- h2,
- h3,
- h4,
- h5,
- h6,
- p,
- blockquote,
- pre,
- a,
- abbr,
- acronym,
- address,
- big,
- cite,
- code,
- del,
- dfn,
- em,
- img,
- ins,
- kbd,
- q,
- s,
- samp,
- small,
- strike,
- strong,
- sub,
- sup,
- tt,
- var,
- b,
- u,
- i,
- center,
- dl,
- dt,
- dd,
- ol,
- ul,
- li,
- fieldset,
- form,
- label,
- legend,
- table,
- caption,
- tbody,
- tfoot,
- thead,
- tr,
- th,
- td,
- article,
- aside,
- canvas,
- details,
- embed,
- figure,
- figcaption,
- footer,
- header,
- hgroup,
- menu,
- nav,
- output,
- ruby,
- section,
- summary,
- time,
- mark,
- audio,
- video {
- font-size: 100%;
- font: inherit;
- vertical-align: baseline;
- box-sizing: border-box;
- }
- /* HTML5 display-role reset for older browsers */
- article,
- aside,
- details,
- figcaption,
- figure,
- footer,
- header,
- hgroup,
- menu,
- nav,
- section {
- display: block;
- }
- body {
- line-height: 1;
- }
- ol,
- ul {
- list-style: none;
- }
- blockquote,
- q {
- quotes: none;
- }
- blockquote:before,
- blockquote:after,
- q:before,
- q:after {
- content: "";
- content: none;
- }
- a,
- a:hover {
- color: inherit;
- text-decoration: none;
- }
- table {
- border-collapse: collapse;
- border-spacing: 0;
- }
- html,
- body {
- width: 100%;
- height: 100%;
- background-color: #f5f5f5;
- font-family: "PingFangSC-Light", "PingFang SC", "STHeitiSC-Light",
- "Helvetica-Light", "Arial", "sans-serif";
- }
-
- // 公共样式
- .fl {
- float: left;
- }
- .fr {
- float: right;
- .button-group-item {
- padding-left: 3px;
- }
- }
- //清除浮动
- .clearfix {
- zoom: 1;
- &:after {
- display: block;
- clear: both;
- content: "";
- visibility: hidden;
- height: 0;
- }
- }
(2):引入css全局基础配置
// main.js 中引入
import "./assets/less/reset.less"
6:集成axios
(1):安装
npm install axios
(2):配置axios全局实例
新建文件 src/api/request.js
- import axios from "axios"; // 引入 axios
-
-
- // 创建一个 axios 实例对象
- const service = axios.create({
- // 请求超时事件,单位毫秒
- timeout: 3000
- });
-
- // 添加一个请求拦截器,接收两个函数,第一个成功函数,第二个失败函数
- // 作用,可以在请求接口之前添加一些公共的请求参数,例如token
- service.interceptors.request.use(
- config => {
- console.log("请求拦截器");
- return config;
- },
- err => {
- console.log("请求失败:", err);
- }
- )
-
- // 添加一个响应拦截器,接收两个函数,第一个成功函数,第二个失败函数
- // 作用,拦截响应的操作
- service.interceptors.response.use(
- response => {
- console.log("响应拦截器");
- let res = {};
- res.status = response.status;
- res.data = response.data;
- return res;
- },
- err => {
- console.log("响应失败:", err);
- }
- )
-
- export default service;
(3):新建 http 请求封装类 src/api/http.js
- import request from '@/api/request.js'
-
- let http = {
- // 这里定义 post json 请求
- postJson: (url, data) => {
- return new Promise((resolve, reject) => {
- request({
- method: 'post',
- url: url,
- data: data,
- }).then((response) => {
- resolve(response.data);
- }).catch((error) => {
- reject(error);
- })
- });
- },
- // 下面可以定义 get、post、put、patch、delete、download等请求
- }
-
- export default http;
(4):配置main.js
- import http from '@/api/http.js' // 导入 http 全局实例
-
- const app = createApp(App)
-
- app.config.globalProperties.$http = http; // 把 http 配置到vue的全局属性上,$符号是为了防止重名
-
- app.mount('#app')
(5):使用 http 调用接口请求后端真实数据
- import { reactive, getCurrentInstance } from "vue";
- const { proxy } = getCurrentInstance();
-
- let url = "http://localhost:8080/test";
- // 调用
- function postTest() {
- proxy.$http.postJson(url).then((res) => {
- console.log("res = ", res);
- }, (e) => {
- console.log(e);
- })
- }
7:配置 element-plus 暗黑主题动态切换
(1):添加个开关按钮用于动态切换
- <template>
- <el-switch v-model="theme" inline-prompt :active-icon="MySun" :inactive-icon="MyMoon" style="--el-switch-on-color: #f2f2f2; --el-switch-off-color: #2c2c2c" @change="toggleDark()" />
- </template>
(2):js 代码
- <script setup>
- import { ref } from "vue";
- import { useDark, useToggle, useStorage } from '@vueuse/core';
-
- const isDark = ref(useDark())
-
- // 如果需要更细粒度的指定样式,可以这样写
- /* const isDark = ref(useDark({
- selector: 'body',
- attribute: 'color-scheme',
- valueDark: 'dark',
- valueLight: 'light',
- }))*/
-
- const toggleDark = useToggle(isDark)
-
- // 切换按钮 localStorage 中的值,保证刷新不重置
- const vueuseColorScheme = useStorage('vueuse-color-scheme')
- const theme = vueuseColorScheme.value === 'dark' ? ref(false) : ref(true);
- </script>
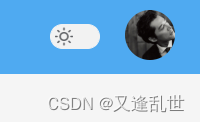
(3):查看效果

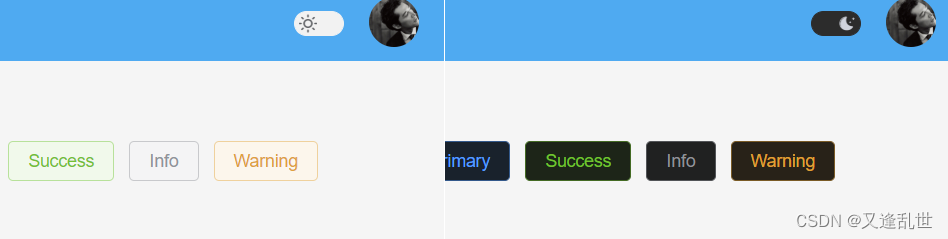
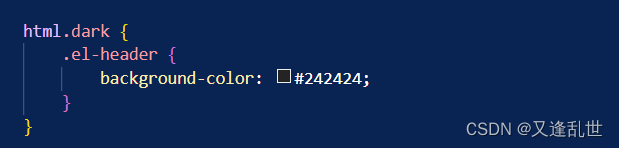
(4):自定义 css 样式
可以看到上图中的 header 部分的蓝色背景没有改变,这里就需要自定义样式了。新建一个文件,然后导入到全局
效果如下
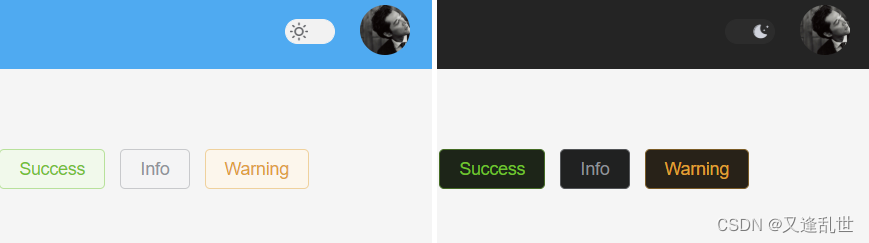

源码已上传,需要的童鞋自取
推荐阅读
相关标签

