
- 1物联网MQTT框架开源框架推荐~_mqtt开发框架
- 2How To Ask Questions The Smart Way - Eric Steven Raymond_howtoaskquestionsthesmartwaybyeric
- 3自然语言处理-BM25相关度打分_语言相关度数学公式
- 4verilog实现pwm呼吸灯_呼吸灯verilog代码
- 5玩转Eclipse开发工具(七)_怎么玩转eclipse?
- 6Spark学习(8)-SparkSQL的运行流程,Spark On Hive_spark on hive 详细教程
- 7人工智能基础概念1:模型、拟合、线性回归、sigmoid函数、逻辑回归_ai拟合
- 8我的Python教程:Tkinter组件布局管理的3种方式_python tkinter布局
- 9SQLAlchemy(alembic)和Flask-SQLAlchemy入门教程
- 102024年网络安全最全从零开始学习大模型-第一章-大模型是什么(2),一文搞懂_网络安全大模型
2024AIWIN 手写体 OCR 识别竞赛总结(任务一)_手写字体ocr识别竞赛
赞
踩
三、赛题任务
本次赛题将提供手写体图像切片数据集,数据集从真实业务场景中,经过切片脱敏得到,参赛队伍通过识别技术,获得对应的识别结果。即:
输入:手写体图像切片数据集
输出:对应的识别结果
赛题在赛程中分设为两个独立任务,各自设定不同条件的训练集、测试集和建模环境,概述如下:
任务一:提供开放可下载的训练集及测试集,允许线下建模或线上提供 Notebook 环境及 Terminal 容器环境(脱网)建模,输出识别结果完成赛题。
任务二:提供不可下载的训练集,要求线上通过 Terminal 容器环境(脱网)建模后提交模型,由系统输入测试集(即对选手不可见),输出识别结果完成赛题。
上述两个任务的更具体情况请参见第五节赛题赛程的详细说明。
四、赛题数据
A. 数据规模和内容覆盖
| | 任务一 | 任务二 |
| — | — | — |
| 训练集(含验证集,请自行划分) | 8 千张图像,包含年份、金额2种信息 | 3 万张图像,包含银行名称、年份、月份、日期、金额5 种信息。 |
| 测试集 | 2 千张图像 | 设定 AB榜:A 榜:5 千张图像B 榜:5 千张图像 |
B.数据内容示例:
原始手写体图像共分为三类,分别涉及银行名称、年月日、金额三大类,分别示意如下:
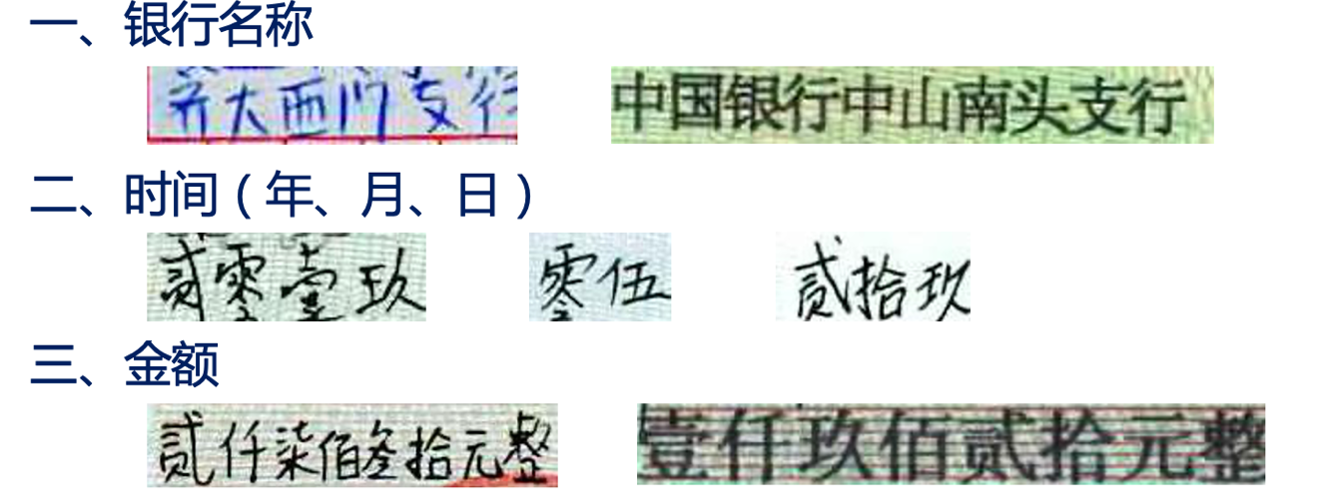
相应图片切片中可能混杂有一定量的干扰信息,分别示例如下;

识别结果 JSON 在训练集中的格式如下(请注意选手提交的结果文件 JSON 和训练集中的 JSON 格式不同):
json 文件内容规范:
{
“image1”: “陆万捌千零贰拾伍元整”,
“image2”: “付经管院工资”,
“image3”: “”,
…
}
五、赛题赛程和提交要求
本赛题共分成三个大阶段:
线上比赛(包含任务一和任务二) ———— 解决方案复审 ———— 终选答辩
赛程总览示意如下:

===============================================================
通过在网上查阅资料,得知OCR比赛最常用的模型是CRNN+CTC。所以我最开始也是采用这个方案。

上图是我找到的资料,有好多个版本。因为是第一次做OCR的项目,所以我优先选择有数据集的项目,这样可以快速的了解模型的输入输出。
所以我选择的第一个Attention_ocr.pytorch-master.zip,从名字上可以看出这个是加入注意力机制,感觉效果会好一些。
下图是Attention_ocr.pytorch-master.zip自带的数据集截图,从截图上可以看出,数据的格式:“图片路径+空格+标签”。我们也需要按照这样的格式构建数据集。

新建makedata.py文件,插入下面的代码。
import os
import json
#官方给的数据集
image_path_amount = “./data/train/amount/images”
image_path_date = “./data/train/date/images”
#增强数据集
image_path_test=‘./data/gan_test_15000/images/0’
image_path_train=‘./data/gan_train_15500_0/images/0’
amount_list = os.listdir(image_path_amount)
amount_list = os.listdir(image_path_amount)
new_amount_list = []
for filename in amount_list:
new_amount_list.append(image_path_amount + “/” + filename)
date_list = os.listdir(image_path_date)
new_date_list = []
for filename in date_list:
new_date_list.append(image_path_date + “/” + filename)
new_test_list = []
for filename in amount_list:
new_test_list.append(image_path_amount + “/” + filename)
new_train_list = []
for filename in amount_list:
new_train_list.append(image_path_amount + “/” + filename)
image_path_amount和image_path_date是官方给定的数据集路径。
image_path_test和image_path_train是增强的数据集(在后面会讲如何做增强)
创建建立list,保存图片的路径。
amount_json = “./data/train/amount/gt.json”
date_json = “./data/train/date/gt.json”
train_json = “train_data.json”
test_json = “test_data.json”
with open(amount_json, “r”, encoding=‘utf-8’) as f:
load_dict_amount = json.load(f)
with open(date_json, “r”, encoding=‘utf-8’) as f:
load_dict_date = json.load(f)
with open(train_json, “r”, encoding=‘utf-8’) as f:
load_dict_train = json.load(f)
with open(test_json, “r”, encoding=‘utf-8’) as f:
load_dict_test = json.load(f)
四个json文件对应上面的四个list,json文件存储的是图片的名字和图片的标签,把json解析出来存到字典中。
#聚合list
all_list = new_amount_list + new_date_list+new_test_list+new_train_list
from sklearn.model_selection import train_test_split
#切分训练集合和验证集
train_list, test_list = train_test_split(all_list, test_size=0.15, random_state=42)
#聚合字典
all_dic = {}
all_dic.update(load_dict_amount)
all_dic.update(load_dict_date)
all_dic.update(load_dict_train)
all_dic.update(load_dict_test)
with open(‘train.txt’, ‘w’) as f:
for line in train_list:
f.write(line + " " + all_dic[line.split(‘/’)[-1]]+“\n”)
with open(‘val.txt’, ‘w’) as f:
for line in test_list:
f.write(line + " " + all_dic[line.split(‘/’)[-1]]+“\n”)
将四个list聚合为一个list。
使用train_test_split切分训练集和验证集。
聚合字典。
然后分别遍历trainlist和testlist,将其写入train.txt和val.txt。
到这里数据集就制作完成了。得到train.txt和val.txt
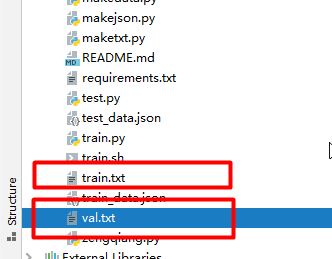
查看train.txt

数据集和自带的数据集格式一样了,然后我们就可以开始训练了。
==================================================================
新建getclass.py文件夹,加入以下代码:
import json
amount_json = “./data/train/amount/gt.json”
date_json = “./data/train/date/gt.json”
with open(amount_json, “r”, encoding=‘utf-8’) as f:
load_dict_amount = json.load(f)
with open(date_json, “r”, encoding=‘utf-8’) as f:
load_dict_date = json.load(f)
all_dic = {}
all_dic.update(load_dict_amount)
all_dic.update(load_dict_date)
list_key=[]
for keyline in all_dic.values():
for key in keyline:
if key not in list_key:
list_key.append(key)
with open(‘data/char_std_5990.txt’, ‘w’) as f:
for line in list_key:
f.write(line+“\n”)
执行完就可以得到存储class的txt文件。打开char_std_5990.txt,看到有21个类。

===============================================================
crnn的卷积部分类似VGG,我对模型的改进主要有一下几个方面:
1、加入激活函数Swish。
2、加入BatchNorm。
3、加入SE注意力机制。
4、适当加深模型。
代码如下:
self.cnn = nn.Sequential(
nn.Conv2d(nc, 64, 3, 1, 1), Swish(), nn.BatchNorm2d(64),
nn.MaxPool2d(2, 2), # 64x16x50
nn.Conv2d(64, 128, 3, 1, 1), Swish(), nn.BatchNorm2d(128),
nn.MaxPool2d(2, 2), # 128x8x25
nn.Conv2d(128, 256, 3, 1, 1), nn.BatchNorm2d(256), Swish(), # 256x8x25
nn.Conv2d(256, 256, 3, 1, 1), nn.BatchNorm2d(256), Swish(), # 256x8x25
SELayer(256, 16),
nn.MaxPool2d((2, 2), (2, 1), (0, 1)), # 256x4x25
nn.Conv2d(256, 512, 3, 1, 1), nn.BatchNorm2d(512), Swish(), # 512x4x25
nn.Conv2d(512, 512, 1), nn.BatchNorm2d(512), Swish(),
nn.Conv2d(512, 512, 3, 1, 1), nn.BatchNorm2d(512), Swish(), # 512x4x25
SELayer(512, 16),
nn.MaxPool2d((2, 2), (2, 1), (0, 1)), # 512x2x25
nn.Conv2d(512, 512, 2, 1, 0), nn.BatchNorm2d(512), Swish()) # 512x1x25
SE和Swish
class SELayer(nn.Module):
def init(self, channel, reduction=16):
super(SELayer, self).init()
self.avg_pool = nn.AdaptiveAvgPool2d(1)
self.fc = nn.Sequential(
nn.Linear(channel, channel // reduction, bias=True),
nn.LeakyReLU(inplace=True),
nn.Linear(channel // reduction, channel, bias=True),
nn.Sigmoid()
)
def forward(self, x):
b, c, _, _ = x.size()
y = self.avg_pool(x).view(b, c)
y = self.fc(y).view(b, c, 1, 1)
return x * y.expand_as(x)
class Swish(nn.Module):
def forward(self, x):
return x * torch.sigmoid(x)
打开train.py ,在训练之前,我们还要调节一下参数。
parser = argparse.ArgumentParser()
parser.add_argument(‘–trainlist’, default=‘train.txt’)
parser.add_argument(‘–vallist’, default=‘val.txt’)
parser.add_argument(‘–workers’, type=int, help=‘number of data loading workers’, default=0)
parser.add_argument(‘–batchSize’, type=int, default=4, help=‘input batch size’)
parser.add_argument(‘–imgH’, type=int, default=32, help=‘the height of the input image to network’)
parser.add_argument(‘–imgW’, type=int, default=512, help=‘the width of the input image to network’)
parser.add_argument(‘–nh’, type=int, default=512, help=‘size of the lstm hidden state’)
parser.add_argument(‘–niter’, type=int, default=300, help=‘number of epochs to train for’)
parser.add_argument(‘–lr’, type=float, default=0.00005, help=‘learning rate for Critic, default=0.00005’)
parser.add_argument(‘–beta1’, type=float, default=0.5, help=‘beta1 for adam. default=0.5’)
parser.add_argument(‘–cuda’, action=‘store_true’, help=‘enables cuda’, default=True)
parser.add_argument(‘–ngpu’, type=int, default=1, help=‘number of GPUs to use’)
parser.add_argument(‘–encoder’, type=str, default=‘’, help=“path to encoder (to continue training)”)
parser.add_argument(‘–decoder’, type=str, default=‘’, help=‘path to decoder (to continue training)’)
parser.add_argument(‘–experiment’, default=‘./expr/attentioncnn’, help=‘Where to store samples and models’)
parser.add_argument(‘–displayInterval’, type=int, default=100, help=‘Interval to be displayed’)
parser.add_argument(‘–valInterval’, type=int, default=1, help=‘Interval to be displayed’)
parser.add_argument(‘–saveInterval’, type=int, default=1, help=‘Interval to be displayed’)
parser.add_argument(‘–adam’, default=True, action=‘store_true’, help=‘Whether to use adam (default is rmsprop)’)
parser.add_argument(‘–adadelta’, action=‘store_true’, help=‘Whether to use adadelta (default is rmsprop)’)
parser.add_argument(‘–keep_ratio’,default=True, action=‘store_true’, help=‘whether to keep ratio for image resize’)
parser.add_argument(‘–random_sample’, default=True, action=‘store_true’, help=‘whether to sample the dataset with random sampler’)
parser.add_argument(‘–teaching_forcing_prob’, type=float, default=0.5, help=‘where to use teach forcing’)
parser.add_argument(‘–max_width’, type=int, default=129, help=‘the width of the featuremap out from cnn’)
parser.add_argument(“–output_file”, default=‘deep_model.log’, type=str, required=False)
opt = parser.parse_args()
trainlist:训练集,默认是train.txt。
vallist:验证集路径,默认是val.txt。
batchSize:批大小,根据显存大小设置。
imgH:图片的高度,crnn模型默认为32,这里不需要修改。
imgW:图片宽度,我在这里设置为512。
文末有福利领取哦~
Copyright © 2003-2013 www.wpsshop.cn 版权所有,并保留所有权利。

