
热门标签
热门文章
- 1一、Docker部署GitLab(详细步骤)
- 2Mybatis--TypeHandler使用手册
- 3latex 模板使用技巧——参考文献篇_latex参考文献
- 4思科模拟器CISCO/华为模拟器ENSP配置一个完整的校园网(网络安全、数据冗余)_思科校园网络搭建拓扑图简单
- 5Apache Doris (Incubating) 原理与实践
- 6SQL Server 详细安装教程——根据SQL Server 2022进行演示_sql server 2022功能选择
- 74.机器学习-十大算法之一线性回归算法(LinearRegression)案例讲解
- 8写代码神器!48个主流代码生成LLM大模型盘点,包含专用、微调等4大类Code llama
- 9chatgpt赋能python:Python打开JPG照片简介
- 10基于SpringBoot+Vue的宠物领养系统(附开题报告)_.“爱宠e+”宠物综合服务平台开发模式研究[j].电脑知识与技
当前位置: article > 正文
Chat-GLM 详细部署(GPU显存>=12GB)_chatglm
作者:AllinToyou | 2024-04-01 10:49:37
赞
踩
chatglm

建议配置: ( Windows OS 11 部署 )
CPU-i7 13700F ~ 13700KF
RAM: 16GB DDR4
GPU: RTX3080(12G)
安装 conda:
1. 下载安装 miniconda3 :
https://docs.conda.io/en/latest/miniconda.html
conda是一个包和环境管理工具,它不仅能管理包,还能隔离和管理不同python版本的环境。类似管理nodejs环境的nvm工具。
2. conda环境变量:
新建 CONDA_HOME :conda安装路径
- 在Path中添加 :%CONDA_HOME%
- 在Path中添加 :%CONDA_HOME%\Scripts
- 在Path中添加 :%CONDA_HOME%\Miniconda3\Library\bin
3. 激活conda:
打开CMD执行conda init
4. 测试conda安装是否成功:
打开CMD输入conda -V 回车后显示版本号表示Conda安装成功。
5. 更换源:
- conda config --add channels https://mirrors.tuna.tsinghua.edu.cn/anaconda/cloud/msys2/
- conda config --add channels https://mirrors.tuna.tsinghua.edu.cn/anaconda/cloud/conda-forge/
- conda config --add channels https://mirrors.tuna.tsinghua.edu.cn/anaconda/pkgs/free/
- conda config --set show_channel_urls yes
6. 问题解决:
如果创建环境时报错:
- An HTTP error occurred when trying to retrieve this URL.
- HTTP errors are often intermittent, and a simple retry will get you on your way.
找到C盘:.condarc 文件(一般是在 C:\Users\你电脑的用户名 下,没有的话全盘搜索下)
打开.condarc 文件并替换内容为:
- channels:
- - defaults
- show_channel_urls: true
- default_channels:
- - http://mirrors.tuna.tsinghua.edu.cn/anaconda/pkgs/main
- - http://mirrors.tuna.tsinghua.edu.cn/anaconda/pkgs/free
- - http://mirrors.tuna.tsinghua.edu.cn/anaconda/pkgs/r
- custom_channels:
- conda-forge: http://mirrors.tuna.tsinghua.edu.cn/anaconda/cloud
- msys2: http://mirrors.tuna.tsinghua.edu.cn/anaconda/cloud
- bioconda: http://mirrors.tuna.tsinghua.edu.cn/anaconda/cloud
- menpo: http://mirrors.tuna.tsinghua.edu.cn/anaconda/cloud
- pytorch: http://mirrors.tuna.tsinghua.edu.cn/anaconda/cloud
- simpleitk: http://mirrors.tuna.tsinghua.edu.cn/anaconda/cloud
打开CMD输入conda clean -i 回车。
安装 CUDA与Torch:
1. 确认CUDA版本号:
在CMD中输入nvidia-smi 查询CUDA版本号。

2. 下载CUDA:
去官网下载对应的CUDA版本(CUDA Toolkit)
https://developer.nvidia.com/cuda-toolkit-archive
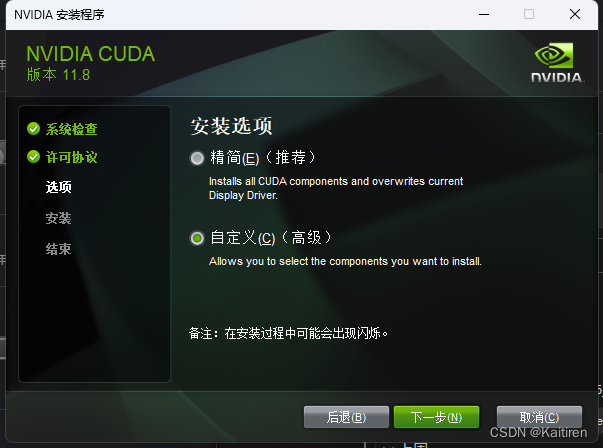
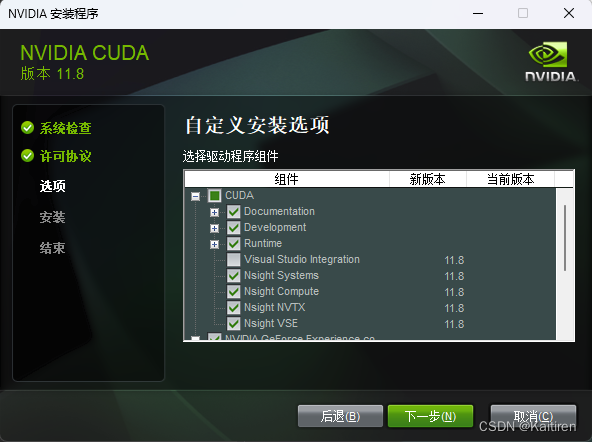
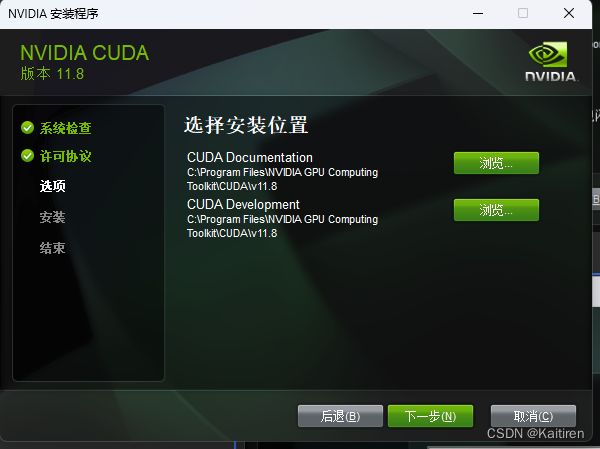
3. 安装CUDA:
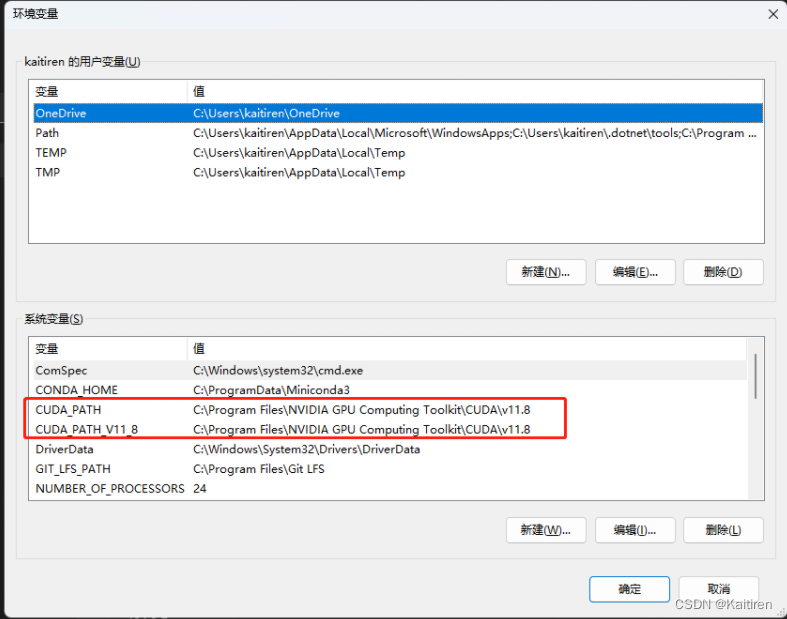
4. CUDA环境变量:
一般来说安装完成后会自动添加环境变量,可以检查一下,如果没添加则需要添加一下:
CUDA_PATH
CUDA_PATH_V11_8
值为上一步选择安装位置的路径。
5. 测试CUDA安装是否成功:
打开CMD输入nvcc --version 回车显示版本号代表安装完成。

6. 安装Torch:
下载对应CUDA版本的Torch(这里用的版本是11.8)
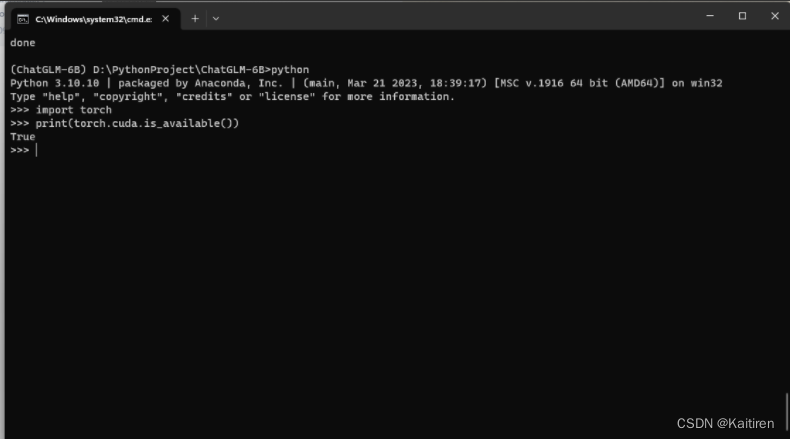
conda install pytorch torchvision torchaudio pytorch-cuda=11.8 -c pytorch -c nvidia用python代码测试torch是否生效,如果不生效找对应cuda版本下载torch(torch.cuda.is_available()返回false则不生效)
- import torch
- print(torch.__version__)
- print(torch.cuda.is_available())
安装配置 ChatGLM
1. 克隆项目到本地:
如果没git需要安装git
CD到目标文件夹内执行命令:git clone https://github.com/THUDM/ChatGLM-6B.git
2. 创建conda工程:
打开CMD将目录CD到工程内。

执行命令:conda create --name ChatGLM-6B python=3.10.10
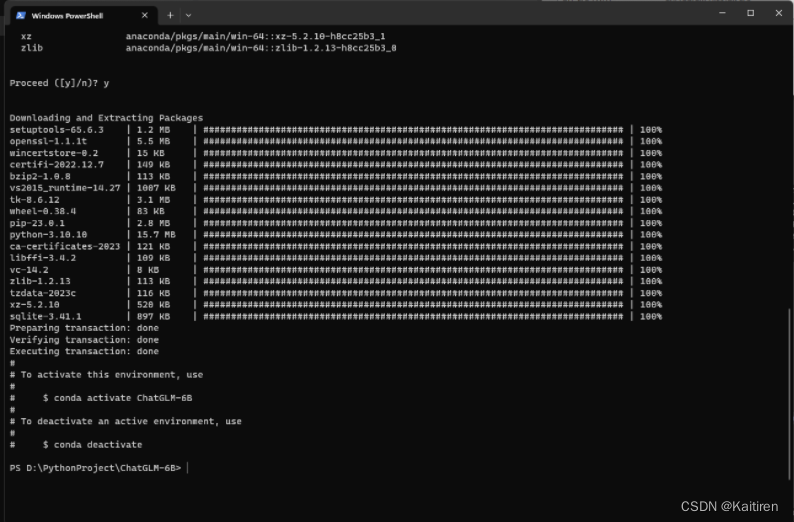
激活conda工程:conda activate ChatGLM-6B

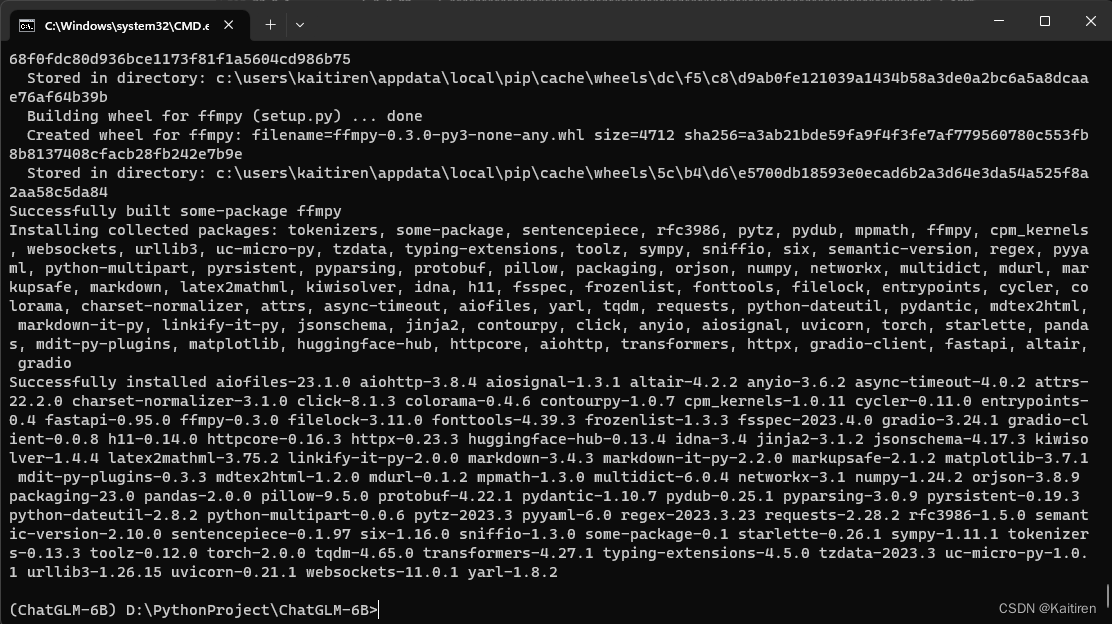
3. 安装支持库
执行命令 ( 清华源 ) :
- pip install pip -U
- pip install -r requirements.txt -i https://pypi.tuna.tsinghua.edu.cn/simple some-package
这里在国内使用清华源加速
4. 启动web测试:
安装库 (清华源)
- pip install streamlit -i https://pypi.tuna.tsinghua.edu.cn/simple some-package
- pip install streamlit_chat -i https://pypi.tuna.tsinghua.edu.cn/simple some-package
- pip install chardet -i https://pypi.tuna.tsinghua.edu.cn/simple some-package
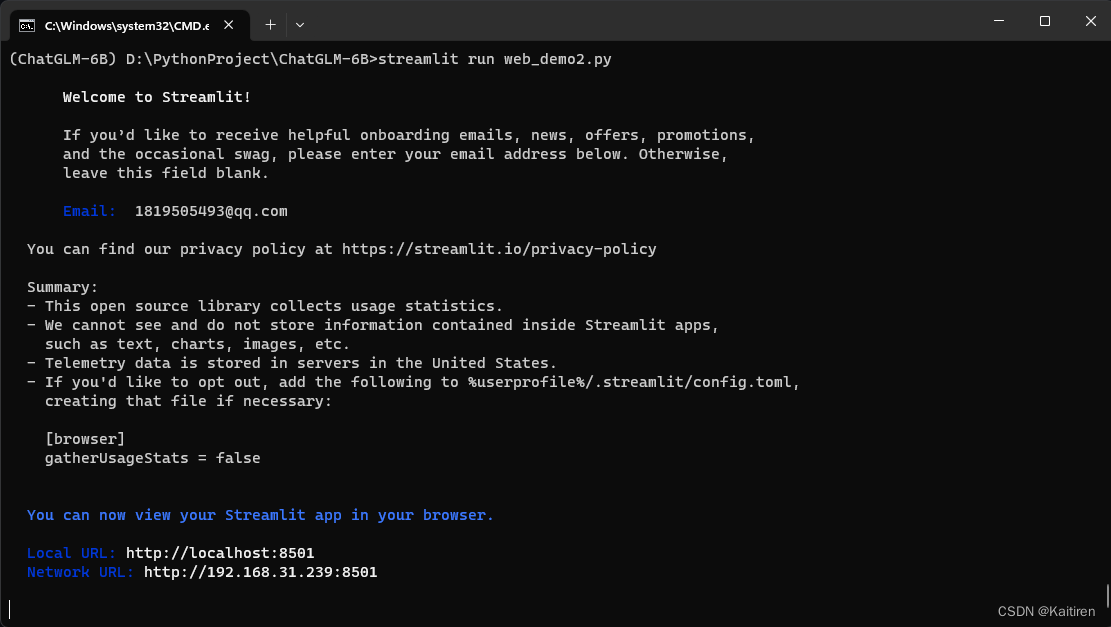
执行Demo :streamlit run web_demo2.py 输入Email。
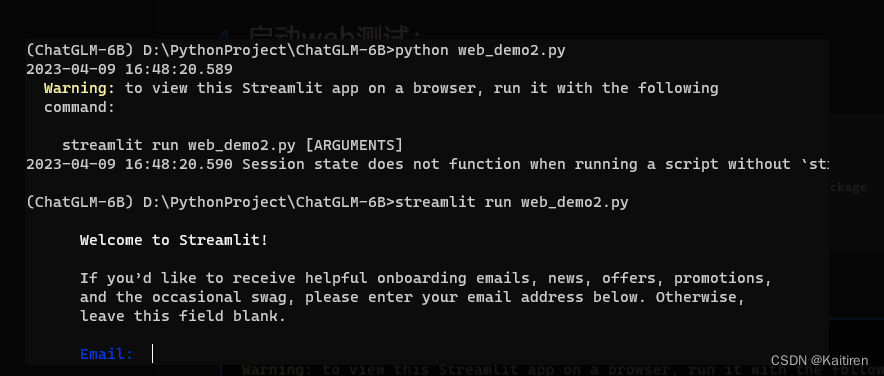
复制URL到浏览器则可以预览:
模型下载完成才可以正常对话,如果报错换下VPN节点多试几次

5. API部署
首先需要安装额外的依赖 pip install fastapi uvicorn,然后运行仓库中的 api.py:
python api.py默认部署在本地的 8000 端口,通过 POST 方法进行调用
- curl -X POST "http://127.0.0.1:8000" \
- -H 'Content-Type: application/json' \
- -d '{"prompt": "你好", "history": []}'
得到的返回值为
- {
- "response":"你好 本文内容由网友自发贡献,转载请注明出处:https://www.wpsshop.cn/w/AllinToyou/article/detail/348575推荐阅读
相关标签
Copyright © 2003-2013 www.wpsshop.cn 版权所有,并保留所有权利。

