
热门标签
热门文章
- 1Bert 得到中文词向量_bert获取词向量
- 2spring配置数据库连接池datasource三种方式详解_通过jndiname属性指定引用的jndidhjju
- 3HardFault异常调试总结_使用stm32cubemx配置的工程进入hardfault
- 4大数据与云计算总结篇_itemsf算法推荐的是那些和目标用户之前喜欢的物品类似的其他物品
- 5Python标准库re的使用(正则化匹配)
- 6字符串的输入输出_scanf("%s",str);
- 7STM32输出PWM实现呼吸灯_stm32f103c8t6输出pwm方波
- 8Hutool导入导出用法
- 9CVPR2023 即插即用系列 | 一种高效轻量的自注意力机制助力图像恢复网络问鼎SOTA!_特征网络轻量化自注意力机制
- 10stm32cube出现Hardfault的调试方法(emwin死机)_stm32 ide hardfault
当前位置: article > 正文
【Vue3+TS】Axios拦截器封装及跨域 [cors] 解决方案_vue3 cors
作者:prog456 | 2024-02-03 15:16:14
赞
踩
vue3 cors
简述
我的项目采用 Vue3+TypeScript+Vite+Element Plus 的组合,这个组合也是Vue版本退出3.x后官方推荐版本,给出的理由是Vue3的底层实现用的是TypeScript。
我这里用的包管理器是pnpm
Axios官方介绍:
Axios 是一个基于promise网络请求库,作用于node.js和 浏览器 中。 它是 isomorphic 的(即同一套代码可以运行在浏览器和node.js中)。在服务端它使用原生 node.js http 模块, 而在客户端 (浏览端) 则使用XMLHttpRequests。
Axios 包的安装
pnpm install axios --save
封装过程
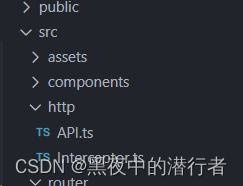
文件路径
在项目的
src文件夹下创建http文件夹
http文件夹包含Interceptor.ts和API.ts两个文件
拦截器封装 —— Interceptor.ts
import axios from 'axios';
import { ElMessage } from 'element-plus';

// 创建axios实例
const $http = axios.create({
  // 请求的域名,基本地址,proxy 代理时会将“/api”以及前置字符串会被替换为真正域名
  baseURL: '/api',
  // 跨域请求时发送Cookie
  // withCredentials: true, // 视情况而定
  // 超时时间
  timeout: 5000,
  headers: {
    'content-type': 'application/json; charset=utf-8'
  }
});

// 请求拦截器
$http.interceptors.request.use((config) => {
  config.headers = config.headers || {};
  if (localStorage.getItem("token")) {
    config.headers.token = localStorage.getItem("token") || "";
  }
  return config;
});

// 响应拦截器
$http.interceptors.response.use((response) => {
  return response;
}, (error) => {
  ResponseProcessing(error);
});

/**
 * 响应处理
 * @param error
 * @returns
 */
const ResponseProcessing = (error: { response: { state: any; data: any; }; }) => {
  if (error.response) {
    switch (error.response.state) {
      case 401:
        ElMessage.warning("资源没有访问权限!");
        break;
      case 404:
        ElMessage.warning("接口不存在,请检查接口地址是否正确!");
        break;
      case 500:
        ElMessage.warning("内部服务器错误,请联系系统管理员!");
        break;
      default:
        return Promise.reject(error.response.data); // 返回接口返回的错误信息
    }
  } else {
    ElMessage.error("遇到跨域错误,请设置代理或者修改后端允许跨域访问!");
  }
};

export default $http;
- 1
- 2
- 3
- 4
- 5
- 6
- 7
- 8
- 9
- 10
- 11
- 12
- 13
- 14
- 15
- 16
- 17
- 18
- 19
- 20
- 21
- 22
- 23
- 24
- 25
- 26
- 27
- 28
- 29
- 30
- 31
- 32
- 33
- 34
- 35
- 36
- 37
- 38
- 39
- 40
- 41
- 42
- 43
- 44
- 45
- 46
- 47
- 48
- 49
- 50
- 51
- 52
- 53
- 54
- 55
- 56
- 57
- 58
进行最基础的封装,我个人认为易于调用的封装便是好的封装,适度即可以免造成过度封装。
API请求管理
import $http from './Interceptor';

export default {
  WeatherForecast() {
    return $http({ url: "/WeatherForecast", method: "get" });
  }
};
- 1
- 2
- 3
- 4
- 5
- 6
- 7
前端跨域的解决方案
在vite.config.ts文件中添加
proxy配置
import { defineConfig } from 'vite';
import vue from '@vitejs/plugin-vue';

// https://vitejs.dev/config/
export default defineConfig({
  plugins: [
    vue(),
  ],
  server: {
    proxy: {
      "/api": { // “/api” 以及前置字符串会被替换为真正域名
        target: "https://localhost:7166/", // 请求域名
        secure: false, // 请求是否为https
        changeOrigin: true, // 是否跨域
        rewrite: (path) => path.replace(/^\/api/, "")
      }
    }
  }
});
- 1
- 2
- 3
- 4
- 5
- 6
- 7
- 8
- 9
- 10
- 11
- 12
- 13
- 14
- 15
- 16
- 17
- 18
- 19
proxy 配置中:坑爹的地方
secure配置请求是否为https,这里指的是发起的请求,不是目标接口的请求是否为 https
后端跨域的解决方案
这里后端用的是 【C#】.net6 web api 默认项目模板为例。这么用的主要原因是,C#是我使用最熟练的编程语言。
.net6 中解决跨域也是十分的便捷,我这里配置允许所有,下面一起来看看吧
- 在Program.cs文件中进行配置
需要注意两点:
1、添加cors配置
2、注册中间件// 添加配置 builder.Services.AddCors(option => { option.AddPolicy("cors", builder => { builder.AllowAnyMethod().SetIsOriginAllowed(_ => >true).AllowAnyHeader().AllowCredentials(); }); }); // 注册中间件 AddPolicyName 要与前面一致 app.UseCors("cors");
- 1
- 2
- 3
- 4
- 5
- 6
- 7
- 8
- 9
- 10
- 11
- 注意:如果需要用到
UseMvc()中间件那么 UseCors() 一定要在 UseMvc() 之前,我这里没有用到所以注释掉
完整配置及插入点
var builder = WebApplication.CreateBuilder(args);

// Add services to the container.

builder.Services.AddControllers();
// Learn more about configuring Swagger/OpenAPI at https://aka.ms/aspnetcore/swashbuckle
builder.Services.AddEndpointsApiExplorer();
builder.Services.AddSwaggerGen();

// cors 跨域配置
builder.Services.AddCors(option =>
{
    option.AddPolicy("cors", builder =>
    {
        builder.AllowAnyMethod().SetIsOriginAllowed(_ => true).AllowAnyHeader().AllowCredentials();
    });
});

var app = builder.Build();

// Configure the HTTP request pipeline.
if (app.Environment.IsDevelopment())
{
    app.UseSwagger();
    app.UseSwaggerUI();
}

// 注册中间件 AddPolicyName 要与前面一致
app.UseCors("cors");
// app.UseMvc();
app.UseHttpsRedirection();

app.UseAuthorization();

app.MapControllers();

app.Run();
- 1
- 2
- 3
- 4
- 5
- 6
- 7
- 8
- 9
- 10
- 11
- 12
- 13
- 14
- 15
- 16
- 17
- 18
- 19
- 20
- 21
- 22
- 23
- 24
- 25
- 26
- 27
- 28
- 29
- 30
- 31
- 32
- 33
- 34
- 35
- 36
- 37
效果


结语
跨域问题弄明白了还是很容易解决的,一般来说,只需要在一端解决跨域即可,并且一般建议使用后端跨域解决方案。
后面会单独出一篇后端跨域的多种解决方案和各种方案的适用范围以及如何选择最佳方案。
声明:本文内容由网友自发贡献,不代表【wpsshop博客】立场,版权归原作者所有,本站不承担相应法律责任。如您发现有侵权的内容,请联系我们。转载请注明出处:https://www.wpsshop.cn/article/detail/57136?site
推荐阅读
![[DNS网络] 网页无法打开、显示不全、加载卡顿缓慢 | 解决方案](https://img-blog.csdnimg.cn/direct/057eae5c083548c292c2cf24475aa0e6.png?x-oss-process=image/resize,m_fixed,h_300,image/format,png)

相关标签

