
热门标签
热门文章
- 1机器学习硬件十年:性能变迁与趋势
- 2分布式事务管理:Seata_seata go 分布式事务
- 3C++类(Class)的定义与实现_c++ class
- 4python flask实现博客系统_基于Flask的博客网站设计与实现
- 5《OpenCV3编程入门》学习笔记9 直方图与匹配(一&二) 图像直方图概述&直方图的计算与绘制_opencv3第9章
- 6软件史上的绝地反击战!“开源是一场不可逆转的社会运动!” | 新程序员
- 7提取数据_python pdf文件提取表格数据
- 8ISFP型人格的优势和劣势分析(mbti性格测试)_mbti职业性格测试isfp计算机
- 9Java 8的新特性简单分享(后续有系列篇~敬请期待)
- 10【Linux】命令lsof使用详解_lsof linux
当前位置: article > 正文
OpenCV—python 图像修复(去除水印)_深度学习去水印方案
作者:编程领航者 | 2024-02-02 12:03:27
赞
踩
深度学习去水印方案
基于OpenCV的两种去水印方案(不具有普适性)
可以使用深度学习方法来去修复图像
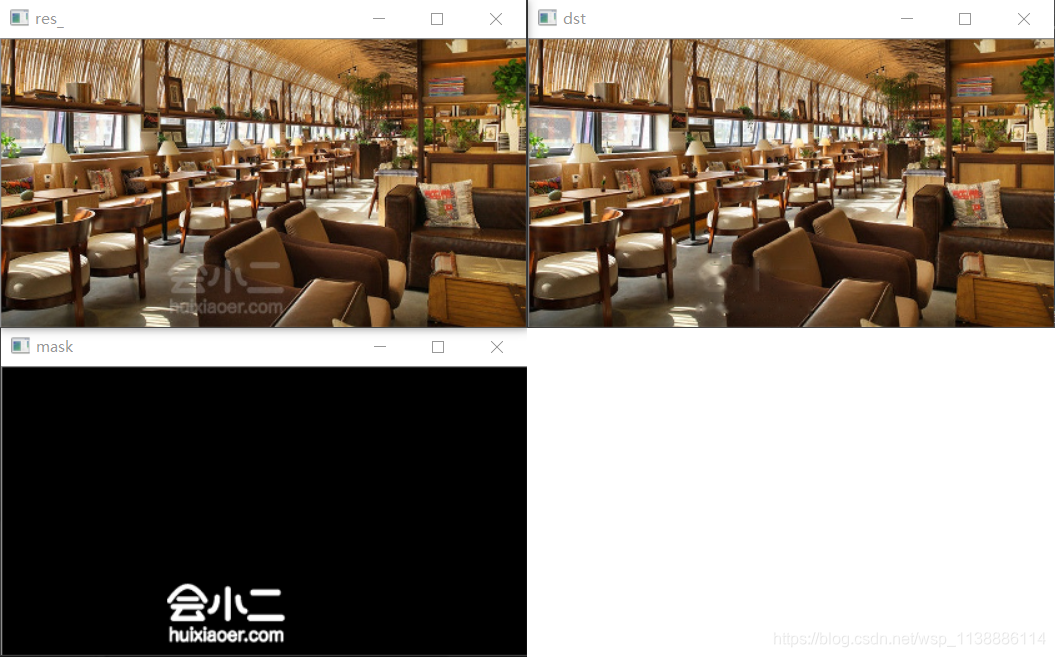
一、基于 inpaint 方法(网上的方法,处理质量较低)
算法理论:基于Telea在2004年提出的基于快速行进的修复算法(FMM算法),先处理待修复区域边缘上的像素点,然后层层向内推进,直到修复完所有的像素点
处理方式:由ui人员制作出黑底白色水印且相同位置的水印蒙版图(必须单通道灰度图),然后使用inpaint方法处理原始图像,具体使用时可把水印区放粗,这样处理效果会好点
# -*- coding: utf-8 -*-

"""
cv2.inpaint(src, inpaintMask, 3, cv2.INPAINT_TELEA)
参数:
目标修复图像;
蒙版图(定位修复区域);
选取邻域半径;
修复算法(INPAINT_TELEA:基于快速行进算法 算法效果较好
        INPAINT_NS:基于流体动力学并使用了偏微分方程)
"""

import cv2

src_ = cv2.imread('1111.png')
mask = cv2.imread('2222.png', cv2.IMREAD_GRAYSCALE)
res_ = cv2.resize(src_,None,fx=0.6, fy=0.6, interpolation = cv2.INTER_CUBIC)
mask = cv2.resize(mask,None,fx=0.6, fy=0.6, interpolation = cv2.INTER_CUBIC)
dst = cv2.inpaint(res_, mask, 3, cv2.INPAINT_TELEA)

cv2.imshow('res_', res_)
cv2.imshow('mask', mask)
cv2.imshow('dst', dst)
cv2.waitKey(0)
cv2.destroyAllWindows()

- 1
- 2
- 3
- 4
- 5
- 6
- 7
- 8
- 9
- 10
- 11
- 12
- 13
- 14
- 15
- 16
- 17
- 18
- 19
- 20
- 21
- 22
- 23
- 24
- 25
测试一张发票图片(不要动歪心思,发票已脱敏)
import cv2
import numpy as np


def Remove_watermark(image):
    hue_image = cv2.cvtColor(image, cv2.COLOR_BGR2HSV)
    low_range = np.array([140, 100, 90])
    high_range = np.array([185, 255, 255])
    mask = cv2.inRange(hue_image, low_range, high_range)

    kernel = np.ones((3, 3), np.uint8)
    dilate_img = cv2.dilate(mask, kernel, iterations=1)
    res = cv2.inpaint(image,dilate_img,5,flags=cv2.INPAINT_TELEA)

    cv2.imshow('mask_img',mask)
    cv2.imshow('res', res)
    cv2.waitKey(0)
    cv2.destroyAllWindows()

if __name__ == '__main__':
    image = cv2.imread('C:\\Users\\xxxx\\Desktop\\piaoju/201920100013253001_30302_01_.jpg')
    Remove_watermark(image)
- 1
- 2
- 3
- 4
- 5
- 6
- 7
- 8
- 9
- 10
- 11
- 12
- 13
- 14
- 15
- 16
- 17
- 18
- 19
- 20
- 21
- 22
- 23

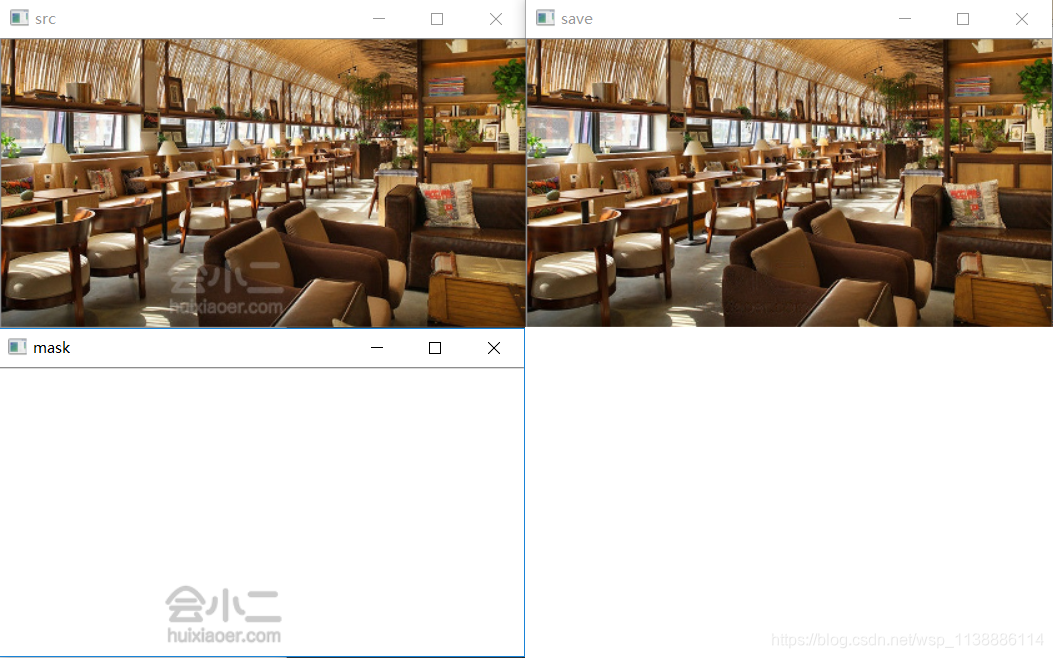
二、基于像素的反色中和(处理质量较高)
参考自ps去水印原理,通过一张白底的反色水印图来中和原图水印
# -*- coding: utf-8 -*-
import cv2
import numpy

src = cv2.imread('1111.png')
mask = cv2.imread('2222.png')
src = cv2.resize(src,None,fx=0.6, fy=0.6, interpolation = cv2.INTER_CUBIC)
mask = cv2.resize(mask,None,fx=0.6, fy=0.6, interpolation = cv2.INTER_CUBIC)
save = numpy.zeros(src.shape, numpy.uint8) #创建一张空图像用于保存

for row in range(src.shape[0]):
    for col in range(src.shape[1]):
        for channel in range(src.shape[2]):
            if mask[row, col, channel] == 0:
                val = 0
            else:
                reverse_val = 255 - src[row, col, channel]
                val = 255 - reverse_val * 256 / mask[row, col, channel]
                if val < 0: val = 0
            save[row, col, channel] = val

cv2.imshow('src', src)
cv2.imshow('mask', mask)
cv2.imshow('save', save)
cv2.waitKey(0)
cv2.destroyAllWindows()
- 1
- 2
- 3
- 4
- 5
- 6
- 7
- 8
- 9
- 10
- 11
- 12
- 13
- 14
- 15
- 16
- 17
- 18
- 19
- 20
- 21
- 22
- 23
- 24
- 25
- 26
代码有问题,处理完黑片,不知道哪里出问题了,万望大神不吝赐教
# -*- coding: utf-8 -*-
import numpy as np
from numpy import NaN
import cv2


def __make_mask__(image):
    hue_image = cv2.cvtColor(image, cv2.COLOR_BGR2HSV)
    low_range = np.array([140, 100, 90])
    high_range = np.array([185, 255, 255])
    th = cv2.inRange(hue_image, low_range, high_range)
    index1 = th == 255

    mask_img = np.zeros(image.shape, np.uint8)
    mask_img[:, :] = (255, 255, 255)
    mask_img[index1] = image[index1]
    cv2.imshow('mask_img',mask_img)
    cv2.waitKey(0)
    return image,mask_img

def Remove_watermark(image):
    image, mask = __make_mask__(image)
    h, w = image.shape[:2]

    image = [image[:, :, 0], image[:, :, 1], image[:, :, 2]]
    mask =  [mask[:, :, 0],  mask[:, :, 1],  mask[:, :, 2]]
    index = [0,1,2]
    array_255 = np.full((h, w), 255.0, dtype=np.float32)

    result = []
    for i,array,mask in zip(index,image,mask):
        reverse_val = array_255-array
        value = array_255-reverse_val * 256 / mask
        value = np.nan_to_num(value)

        value = np.where(0 < value, 0,value)         # 防止像素溢出
        value = np.where(value > 255, 255,value)     # 防止像素溢出
        value.astype(np.int16)
        cv2.imshow('img'+str(i),value)
        cv2.waitKey(0)
        result.append(value)
    return result


if __name__ == '__main__':
    img_path = 'C:\\Users\\xxxxx\\Desktop\\piaoju/201920100013253001_30302_01_.jpg'

    image = cv2.imread(img_path)
    image = cv2.resize(image, None, fx=0.5, fy=0.5, interpolation=cv2.INTER_CUBIC)
    result = Remove_watermark(image)
    result_img = cv2.merge([result[0],result[1],result[2]])
    cv2.imshow('img',image)
    cv2.imshow('result_img',result_img)
    cv2.waitKey(0)
    cv2.destroyAllWindows()
- 1
- 2
- 3
- 4
- 5
- 6
- 7
- 8
- 9
- 10
- 11
- 12
- 13
- 14
- 15
- 16
- 17
- 18
- 19
- 20
- 21
- 22
- 23
- 24
- 25
- 26
- 27
- 28
- 29
- 30
- 31
- 32
- 33
- 34
- 35
- 36
- 37
- 38
- 39
- 40
- 41
- 42
- 43
- 44
- 45
- 46
- 47
- 48
- 49
- 50
- 51
- 52
- 53
- 54
- 55
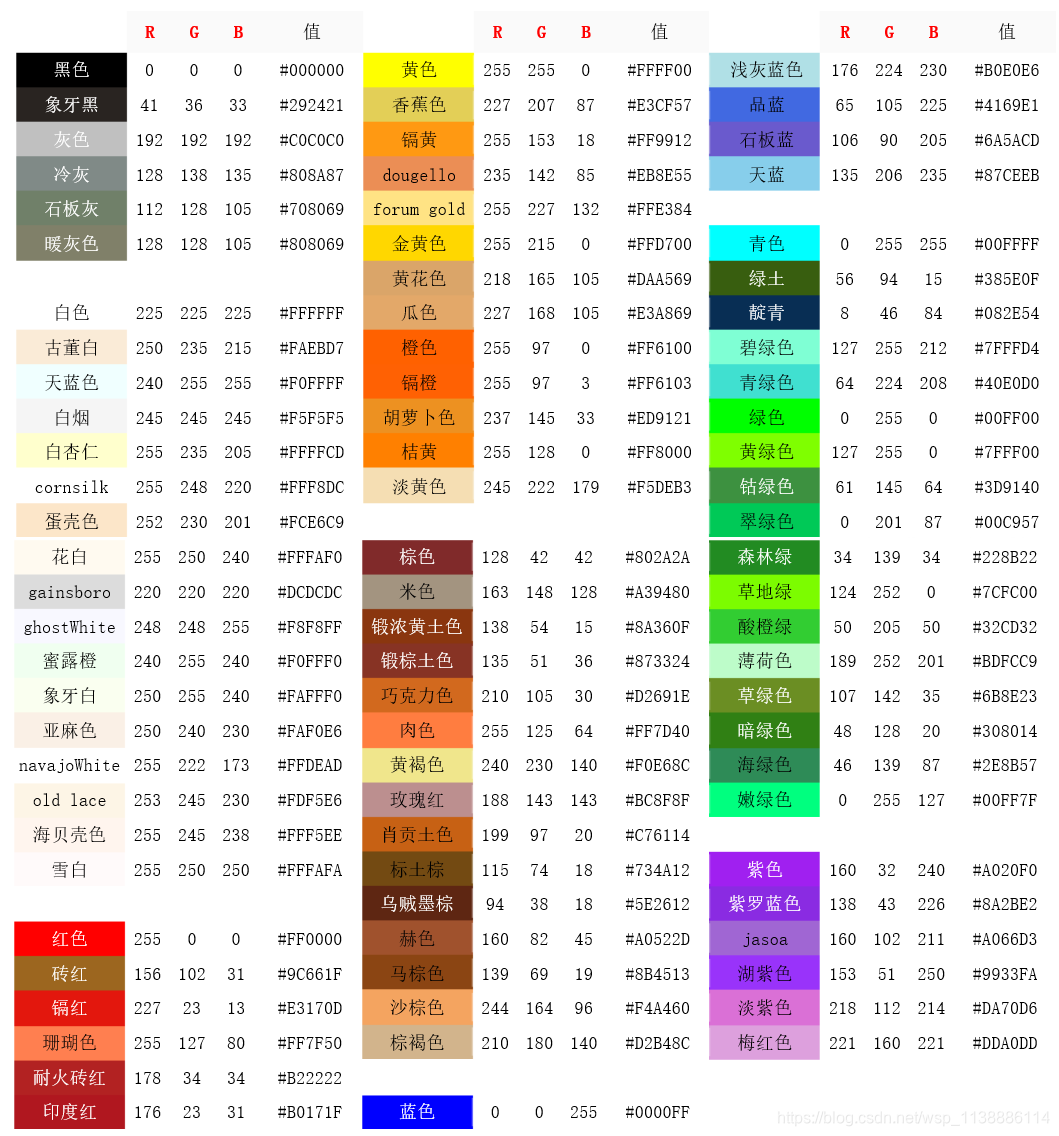
三、颜色库
鸣谢
https://my.oschina.net/u/2400083/blog/732321
https://www.cnblogs.com/lgh344902118/p/7928054.html
https://baijiahao.baidu.com/s?id=1624984669133154216&wfr=spider&for=pc
https://blog.csdn.net/Maximun/article/details/85064274
声明:本文内容由网友自发贡献,转载请注明出处:【wpsshop博客】
推荐阅读


相关标签

