
- 1信息安全基础知识点_ipdrr各个字母是什么意思
- 2粤嵌学习笔记(三)_粤嵌数码管显示
- 3说说react diff的原理是什么_react diff算法原理
- 4kali下载安装_kail下载
- 5python idle怎么设置中文_python IDLE 背景以及字体大小的修改方法
- 6vue使用最新版font-awesome字体图标库(内附花式玩法)_@fortawesome/fontawesome-svg-core
- 7爬取去哪网旅游攻略信息
- 8【pip安装包时gcc编译错误】pip subprocess to install build dependencies did not run successfully.
- 9[C/C++]virtual关键字_c语言中virtual
- 10分页也可 记录 已勾选的_分页全部勾选
手把手教你使用tensorrt layer api组装scaled yolov4_tensorrt layernorm reformatting
赞
踩
概要
经过几年的飞速发展,pytorch已经成为了深度学习研究和开发人员喜欢的深度学习框架, 但作为pytorch推理后端的C++ libtorch推理效率一直不高,很多工程师喜欢通过pytorch–>onnx–>tensorrt实现模型的转换和部署,但让人苦恼的是,由于pytorch版本的不一致,导致使用torch onnx转换过程总是BUG重重。本博客将讲述一种终极解决方案,即通过python保存pytorch模型参数文件,然后调用tensorrt layer api方式手动组装网络,这样就可避免各种平台版本不一致的问题。并以scaled_yolov4模型为例,讲述这个“踩坑”之旅。
当然,本文也参考了其他开源方案,在此感谢:https://github.com/wang-xinyu/tensorrtx
总体流程
我将模型转换过程分为三个部分,
- 通过python脚本获取模型权重文件;
- 通过onnx模型转换,然后使用Netron工具查看模型结构;
- 通过tensorrt C++ api组装模型;
本文也将通过以上几大部分展开讲解。
模型参数(key-value)获取
模型参数获取的python脚本代码非常简单,其核心功能函数如下,本质上是读取模型参数的键值字典,并记录到文件。
例如,获取scaled_yolov4的脚本如下:
import argparse

import torch
import torch.nn as nn

import models
from models.experimental import attempt_load
from utils.activations import Mish

def get_wts(model, output_ts):
    f = open(output_ts, 'w')
    f.write('{}\n'.format(len(model.state_dict().keys())))
    for k, v in model.state_dict().items():
        print(k)
        vr = v.reshape(-1).cpu().numpy()
        f.write('{} {} '.format(k, len(vr)))
        for vv in vr:
            f.write(' ')
            f.write('%.5e'%float(vv))
        f.write('\n')

if __name__ == '__main__':
    parser = argparse.ArgumentParser()
    parser.add_argument('--weights', type=str, default='', help='weights path')
    parser.add_argument('--output', type=str, default='', help='output key value path')
    opt = parser.parse_args()

    model = attempt_load(opt.weights, map_location=torch.device('cpu'))  # load FP32 model

    # 把模型中batchnorm层给替换成非并发的
    for k, m in model.named_modules():
        m._non_persistent_buffers_set = set()  # pytorch 1.6.0 compatability
        if isinstance(m, models.common.Conv) and isinstance(m.act, models.common.Mish):
            m.act = Mish()  # assign activation
        if isinstance(m, models.common.BottleneckCSP) or isinstance(m, models.common.BottleneckCSP2) \
                or isinstance(m, models.common.SPPCSP):
            if isinstance(m.bn, nn.SyncBatchNorm):
                bn = nn.BatchNorm2d(m.bn.num_features, eps=m.bn.eps, momentum=m.bn.momentum)
                bn.training = False
                bn._buffers = m.bn._buffers
                bn._parameters = m.bn._parameters #不要漏掉了
                bn._non_persistent_buffers_set = set()
                m.bn = bnx
            if isinstance(m.act, models.common.Mish):
                m.act = Mish()  # assign activation
        # if isinstance(m, models.yolo.Detect):
        #     m.forward = m.forward_export  # assign forward (optional)
    model.eval()
    model.model[-1].export = True  # set Detect() layer export=True

    get_wts(model, output)

- 1
- 2
- 3
- 4
- 5
- 6
- 7
- 8
- 9
- 10
- 11
- 12
- 13
- 14
- 15
- 16
- 17
- 18
- 19
- 20
- 21
- 22
- 23
- 24
- 25
- 26
- 27
- 28
- 29
- 30
- 31
- 32
- 33
- 34
- 35
- 36
- 37
- 38
- 39
- 40
- 41
- 42
- 43
- 44
- 45
- 46
- 47
- 48
- 49
- 50
- 51
通过以上脚本,最终能够获取到模型的具体参数, 在此需要指出的scaled_yolov4中包含了所以可把SyncBatchNorm层,用于多卡并行训练,但实际部署时候是单卡,所以可把SyncBatchNorm层转成普通batchnorm层,本质上参数都是一样的,只是换了个结构。
通过以上脚本,就能获得如下面所示的模型权重文件:
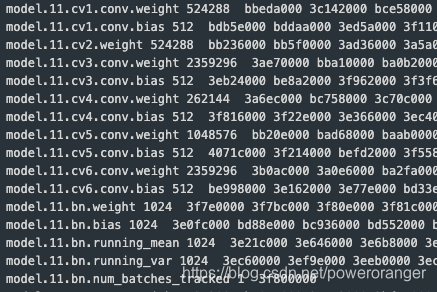
每行表示一个参数,第一个是键名,表示对应的模型中的权重值,第二个是权重参数的数量,最后一个是对应的模型参数。
对于卷积层, weight对应的数量是 kernel_sizekernel_sizeinput_channel*output_channel,例如,第一层卷积核是3x3, 输入是3通道,输出是32通道,那么卷积的size是3x3x3x32, 864
bias对应偏至,和输出通道数相当,是32
转换onnx模型
转换onnx模型的目的是通过Netron工具进行可视化,直观的显示模型结构以及模型参数文件的参数对应位置。
import argparse

import torch
import torch.nn as nn

import models
from models.experimental import attempt_load
from utils.activations import Mish


if __name__ == '__main__':
    parser = argparse.ArgumentParser()
    parser.add_argument('--weights', type=str, default='/home/lic/git/ScaledYOLOv4-yolov4-large/runs/exp111_yolov4-p5-cylinder/weights/best.pt', help='weights path')  # from yolov5/models/
    parser.add_argument('--img_size', nargs='+', type=int, default=[416, 768], help='image size')  # height, width
    opt = parser.parse_args()
    opt.img_size *= 2 if len(opt.img_size) == 1 else 1  # expand
    print(opt)

    # Input
    img_size = opt.img_size
    img = torch.zeros((opt.batch_size, 3, img_size[1], img_size[0]))  # image size(1,3,320,192) iDetection
    model = attempt_load(opt.weights, map_location=torch.device('cpu'))  # load FP32 model


    # Update model
    for k, m in model.named_modules():
        m._non_persistent_buffers_set = set()  # pytorch 1.6.0 compatability
        if isinstance(m, models.common.Conv) and isinstance(m.act, models.common.Mish):
            m.act = Mish()  # assign activation
        if isinstance(m, models.common.BottleneckCSP) or isinstance(m, models.common.BottleneckCSP2) \
                or isinstance(m, models.common.SPPCSP):
            if isinstance(m.bn, nn.SyncBatchNorm):
                bn = nn.BatchNorm2d(m.bn.num_features, eps=m.bn.eps, momentum=m.bn.momentum)
                bn.training = False
                bn._buffers = m.bn._buffers
                bn._parameters = m.bn._parameters
                bn._non_persistent_buffers_set = set()
                m.bn = bn
            if isinstance(m.act, models.common.Mish):
                m.act = Mish()  # assign activation

    model.eval()
    model.model[-1].export = True  # set Detect() layer export=True

    try:
        import onnx
        print('\nStarting ONNX export with onnx %s...' % onnx.__version__)
        f = opt.weights.replace('.pt', '.onnx')  # filename
        torch.onnx.export(model, img, f, verbose=True, opset_version=12, input_names=['images'],
                          output_names=['output1','output2', 'output3'])

        # print(onnx.helper.printable_graph(onnx_model.graph))  # print a human readable model
        print('ONNX export success, saved as %s' % f)
    except Exception as e:
        print('ONNX export failure: %s' % e)

    # Finish
    print('\nExport complete. Visualize with https://github.com/lutzroeder/netron.')
- 1
- 2
- 3
- 4
- 5
- 6
- 7
- 8
- 9
- 10
- 11
- 12
- 13
- 14
- 15
- 16
- 17
- 18
- 19
- 20
- 21
- 22
- 23
- 24
- 25
- 26
- 27
- 28
- 29
- 30
- 31
- 32
- 33
- 34
- 35
- 36
- 37
- 38
- 39
- 40
- 41
- 42
- 43
- 44
- 45
- 46
- 47
- 48
- 49
- 50
- 51
- 52
- 53
- 54
- 55
- 56
- 57
- 58
- 59
以上脚本中和保存模型参数一样,替换了SyncBatchNorm中的模型参数。得到了onnx模型,通过Netron工具可视化。

有了模型结构图和对应的参数文件列表,就能开始组装网络了。
模型组装
模型组装流程
1.通过IBuilder创建一个Network
INetworkDefinition* network = builder->createNetworkV2(0U);
- 1
2.往网络里添加层,主要是各种add_layer操作
3.标志模型的输出
    yolo->getOutput(0)->setName(output_blob_name_.c_str());
    network->markOutput(*yolo->getOutput(0));
- 1
- 2
4.其他设定,包括最大batch size,workspace size, 设定是否半精度标志
5.创建引擎
ICudaEngine* engine = builder->buildEngineWithConfig(*network, *config);
- 1
以上流程比较简单,可参考开源工程代码
几个核心层的添加
在谈模型参数之前,需要了解下几个相关的数据结构:
模型权重
//!
//! \class Weights
//!
//! \brief An array of weights used as a layer parameter.
//!
//! The weights are held by reference until the engine has been built. Therefore the data referenced
//! by \p values field should be preserved until the build is complete.
//!
class Weights
{
public:
    DataType type;      //!< The type of the weights. 参数数据类型
    const void* values; //!< The weight values, in a contiguous array. 模型参数
    int64_t count;      //!< The number of weights in the array. 参数数量
};

//!
//! \enum DataType
//! \brief The type of weights and tensors.
//! 数据类型
enum class DataType : int
{
    kFLOAT = 0, //!< FP32 format.
    kHALF = 1,  //!< FP16 format.
    kINT8 = 2,  //!< quantized INT8 format.
    kINT32 = 3, //!< INT32 format.
    kBOOL = 4   //!< BOOL format.
};


//!
//! \class Dims
//! \brief Structure to define the dimensions of a tensor.
//! 向量的维度描述
//!
//! \note: Currently the following formats are supported for layer inputs and outputs:
//! * zero or more index dimensions followed by one channel and two spatial dimensions (e.g. CHW)
//! * one time series dimension followed by one index dimension followed by one channel dimension (i.e. TNC)
//!
//! TensorRT can also return an invalid dims structure. This structure is represented by nbDims == -1
//! and d[i] == 0 for all d.
//!
class Dims
{
public:
    static const int MAX_DIMS = 8; //!< The maximum number of dimensions supported for a tensor.
    int s;                    //!< The number of dimensions. 维度数量
    int d[MAX_DIMS];               //!< The extent of each dimension. 每个维度的d
    TRT_DEPRECATED DimensionType type[MAX_DIMS];  //!< The type of each dimension.
};
- 1
- 2
- 3
- 4
- 5
- 6
- 7
- 8
- 9
- 10
- 11
- 12
- 13
- 14
- 15
- 16
- 17
- 18
- 19
- 20
- 21
- 22
- 23
- 24
- 25
- 26
- 27
- 28
- 29
- 30
- 31
- 32
- 33
- 34
- 35
- 36
- 37
- 38
- 39
- 40
- 41
- 42
- 43
- 44
- 45
- 46
- 47
- 48
- 49
- 50
- 51
对应的层
1.卷积层 对应的函数接口如下:
    //! \brief Add a multi-dimension convolution layer to the network.
    //!
    //! \param input The input tensor to the convolution. 模型的输入向量
    //! \param nbOutputMaps The number of output feature maps for the convolution. 输出特征层的数量
    //! \param kernelSize The multi-dimensions of the convolution kernel. 模型核的大小
    //! \param kernelWeights The kernel weights for the convolution. 模型权重值,使用Weights结构体
    //! \param biasWeights The optional bias weights for the convolution. 模型偏至值
    //!
    //! \see IConvolutionLayer
    //!
    //! \warning It is an error to specify a wildcard value for the 'C' dimension of the input tensor.
    //! \warning Int32 tensors are not valid input tensors.
    //! \warning Only 2D or 3D convolution is supported.
    //!
    //! \return The new convolution layer, or nullptr if it could not be created.
virtual IConvolutionLayer* addConvolutionNd(
    ITensor& input, int nbOutputMaps, Dims kernelSize, Weights kernelWeights, Weights biasWeights) TRTNOEXCEPT = 0;
- 1
- 2
- 3
- 4
- 5
- 6
- 7
- 8
- 9
- 10
- 11
- 12
- 13
- 14
- 15
- 16
- 17
以下是实际添加卷积的两种情况:有bias和无bias;
a.有bias
    IConvolutionLayer* conv = network->addConvolutionNd(input, outch, DimsHW{ksize, ksize}, weightMap[weight_name], weightMap[bias_name]);
    assert(conv1);
    conv->setStrideNd(DimsHW{s, s}); #设置stried
    conv->setPaddingNd(DimsHW{p, p}); #设置padding
    Dims dims_conv = conv->getOutput(0)->getDimensions();
    LOG(INFO)<<"conv outputdims "<<dims_conv.nbDims<<": "<<dims_conv.d[0]<<" "<<dims_conv.d[1]<<" "<<dims_conv.d[2]<<" "<<dims_conv.d[3];
- 1
- 2
- 3
- 4
- 5
- 6
b.无bias
    std::string weight_name = "model."+to_string(major_idx)+sub_module_name+".weight";
    LOG(INFO) << "load conv weight from "<<weight_name;
    Weights emptywts{DataType::kFLOAT, nullptr, 0};
    conv = network->addConvolutionNd(input, outch, DimsHW{ksize, ksize}, weightMap[weight_name], emptywts);
- 1
- 2
- 3
- 4
添加完网络层之后,就可以利用返回的层指针,获取该层的输出ITensor,作为后续层的输入,这样,一层一层叠加起来完成网络搭建。
- BatchNorm层
TensortRT中并没有直接的BatchNorm层,该层实际上是通过转换系数依托Scaled层完成。关于数学推导的部分可参考链接:https://blog.csdn.net/github_28260175/article/details/103515033。
BatchNorm一定要注意eps这个系数的设定和网络保持一致,例如开源工程里的yolov3-spp采用的1e-5, 此处使用的是1e-3。
    std::string lname = "model."+to_string(major_idx)+".bn";
    LOG(INFO) << "load batchnorm from "<<lname;
    std::string mish_name = "model."+to_string(major_idx)+".mish";
    float *gamma = (float*)weightMap[lname + ".weight"].values;
    float *beta = (float*)weightMap[lname + ".bias"].values;
    float *mean = (float*)weightMap[lname + ".running_mean"].values;
    float *var = (float*)weightMap[lname + ".running_var"].values;
    int len = weightMap[lname + ".running_var"].count;


    float *scval = reinterpret_cast<float*>(malloc(sizeof(float) * len));
    for (int i = 0; i < len; i++) {
        scval[i] = gamma[i] / sqrt(var[i] + eps);
    }
    Weights scale{DataType::kFLOAT, scval, len};

    float *shval = reinterpret_cast<float*>(malloc(sizeof(float) * len));
    for (int i = 0; i < len; i++) {
        shval[i] = beta[i] - mean[i] * gamma[i] / sqrt(var[i] + eps);
    }
    Weights shift{DataType::kFLOAT, shval, len};

    float *pval = reinterpret_cast<float*>(malloc(sizeof(float) * len));
    for (int i = 0; i < len; i++) {
        pval[i] = 1.0;
    }
    Weights power{DataType::kFLOAT, pval, len};

    weightMap[lname + ".scale"] = scale;
    weightMap[lname + ".shift"] = shift;
    weightMap[lname + ".power"] = power;
    IScaleLayer* scale_1 = network->addScale(input, ScaleMode::kCHANNEL, shift, scale, power);
- 1
- 2
- 3
- 4
- 5
- 6
- 7
- 8
- 9
- 10
- 11
- 12
- 13
- 14
- 15
- 16
- 17
- 18
- 19
- 20
- 21
- 22
- 23
- 24
- 25
- 26
- 27
- 28
- 29
- 30
- 31
- 32
- 33
- upSample层
同样的,TensorRT里没有直接的上采样层,部署时是通过addDeconvolutionNd完成的。例如工程中常见的两倍上采样就是通过如下代码实现的。
    float *deval = reinterpret_cast<float*>(malloc(sizeof(float) * channels * 2 * 2));
    for (int i = 0; i < channels * 2 * 2; i++) {
        deval[i] = 1.0;
    }
    Weights deconvwts{DataType::kFLOAT, deval, channels * 2 * 2};
    Weights emptywts{DataType::kFLOAT, nullptr, 0};
    IDeconvolutionLayer* deconv = network->addDeconvolutionNd(input, channels, DimsHW{2, 2}, deconvwts, emptywts);
    deconv->setStrideNd(DimsHW{2, 2});
    deconv->setNbGroups(channels);
- 1
- 2
- 3
- 4
- 5
- 6
- 7
- 8
- 9
- 插件层
sacaled_yolov4中主要使用了两种类型的插件,一种是Mish激活函数,另一个是输出层。插件开发本身可作为一个独立的问题进行讲解,为不脱离主线,所以本文暂时不展开描述。在此给出一个插件层的添加过程。
    auto creator = getPluginRegistry()->getPluginCreator("Mish_TRT", "1"); #获取插件creator
    const PluginFieldCollection* pluginData = creator->getFieldNames(); #插件参数
    IPluginV2 *pluginObj = creator->createPlugin(mish_name.c_str(), pluginData);#获取插件
    ITensor* inputTensors[] = {scale_1->getOutput(0)};#获取插件的输入
    auto mish = network->addPluginV2(&inputTensors[0], 1, *pluginObj); #插件添加
    assert(mish);
- 1
- 2
- 3
- 4
- 5
- 6
基础层上的模块封装
scaled_yolov4通过配置文件的方式实现模型的组装,具体的配置如下:
# parameters
nc: 80  # number of classes
depth_multiple: 1.0  # model depth multiple
width_multiple: 1.0  # layer channel multiple

# anchors
anchors:
  - [13,17,  31,25,  24,51, 61,45]  # P3/8
  - [48,102,  119,96, 97,189, 217,184]  # P4/16
  - [171,384, 324,451, 616,618, 800,800]  # P5/32

# csp-p5 backbone
backbone:
  # [from, number, module, args]
  [[-1, 1, Conv, [32, 3, 1]],  # 0
   [-1, 1, Conv, [64, 3, 2]],  # 1-P1/2
   [-1, 1, BottleneckCSP, [64]],
   [-1, 1, Conv, [128, 3, 2]],  # 3-P2/4
   [-1, 3, BottleneckCSP, [128]],
   [-1, 1, Conv, [256, 3, 2]],  # 5-P3/8
   [-1, 15, BottleneckCSP, [256]],
   [-1, 1, Conv, [512, 3, 2]],  # 7-P4/16
   [-1, 15, BottleneckCSP, [512]],
   [-1, 1, Conv, [1024, 3, 2]], # 9-P5/32
   [-1, 7, BottleneckCSP, [1024]],  # 10
  ]

# yolov4-p5 head
# na = len(anchors[0])
head:
  [[-1, 1, SPPCSP, [512]], # 11
   [-1, 1, Conv, [256, 1, 1]],
   [-1, 1, nn.Upsample, [None, 2, 'nearest']],
   [8, 1, Conv, [256, 1, 1]], # route backbone P4
   [[-1, -2], 1, Concat, [1]],
   [-1, 3, BottleneckCSP2, [256]], # 16
   [-1, 1, Conv, [128, 1, 1]],
   [-1, 1, nn.Upsample, [None, 2, 'nearest']],
   [6, 1, Conv, [128, 1, 1]], # route backbone P3
   [[-1, -2], 1, Concat, [1]],
   [-1, 3, BottleneckCSP2, [128]], # 21
   [-1, 1, Conv, [256, 3, 1]],
   [-2, 1, Conv, [256, 3, 2]],
   [[-1, 16], 1, Concat, [1]],  # cat
   [-1, 3, BottleneckCSP2, [256]], # 25
   [-1, 1, Conv, [512, 3, 1]],
   [-2, 1, Conv, [512, 3, 2]],
   [[-1, 11], 1, Concat, [1]],  # cat
   [-1, 3, BottleneckCSP2, [512]], # 29
   [-1, 1, Conv, [1024, 3, 1]],

   [[22,26,30], 1, Detect, [nc, anchors]],   # Detect(P3, P4, P5)
  ]
- 1
- 2
- 3
- 4
- 5
- 6
- 7
- 8
- 9
- 10
- 11
- 12
- 13
- 14
- 15
- 16
- 17
- 18
- 19
- 20
- 21
- 22
- 23
- 24
- 25
- 26
- 27
- 28
- 29
- 30
- 31
- 32
- 33
- 34
- 35
- 36
- 37
- 38
- 39
- 40
- 41
- 42
- 43
- 44
- 45
- 46
- 47
- 48
- 49
- 50
- 51
- 52
- 53
- 54
以上模块可分为几个模块,Conv(实际上是卷积+mish激活), BottleneckCSP, SPPCSP, BottleneckCSP2, 本文通过基础层叠加,完成了以上模块的开发,为后续模型组装提供了遍历。
ILayer* convMish(INetworkDefinition *network,
                 std::map<std::string, Weights>& weightMap,
                 ITensor& input,
                 int outch,
                 int ksize,
                 int s,
                 int p,
                 int module_idx,
                 std::string sub_module_name);

ILayer* basicBottleNeck(INetworkDefinition *network,
                   std::map<std::string, Weights>& weightMap,
                   ITensor& input,
                   std::vector<int> out_channels,
                   std::vector<int> ksizes,
                   std::vector<int> strides,
                   std::vector<int> paddings,
                   std::vector<int> module_idxs,
                   std::vector<std::string> sub_module_names,
                   bool short_cut);

ILayer* BottleneckCSP(INetworkDefinition *network,
                   std::map<std::string, Weights>& weightMap,
                   ITensor& input,
                   int channels,
                   int module_idx,
                   int module_count);

ILayer* BottleneckCSP2(INetworkDefinition *network,
                   std::map<std::string, Weights>& weightMap,
                   ITensor& input,
                   int channels,
                   int module_idx,
                   int module_count);

ILayer* SPPCSP(INetworkDefinition *network,
                   std::map<std::string, Weights>& weightMap,
                   ITensor& input,
                   int channels,
                   int module_idx);

ILayer* conv(INetworkDefinition *network,
                 std::map<std::string, Weights>& weightMap,
                 ITensor& input,
                 int outch,
                 int ksize,
                 int s,
                 int p,
                 int major_idx,
                 std::string sub_module_name,
                 bool bias,
                 bool use_conv_prefix=true);


ILayer* bnMish(INetworkDefinition *network,
                 std::map<std::string, Weights>& weightMap,
                 ITensor& input,
                 int major_idx,
                 float eps);

ILayer* upSample(INetworkDefinition *network,
                 std::map<std::string, Weights>& weightMap,
                 ITensor& input,
                 int channels);
- 1
- 2
- 3
- 4
- 5
- 6
- 7
- 8
- 9
- 10
- 11
- 12
- 13
- 14
- 15
- 16
- 17
- 18
- 19
- 20
- 21
- 22
- 23
- 24
- 25
- 26
- 27
- 28
- 29
- 30
- 31
- 32
- 33
- 34
- 35
- 36
- 37
- 38
- 39
- 40
- 41
- 42
- 43
- 44
- 45
- 46
- 47
- 48
- 49
- 50
- 51
- 52
- 53
- 54
- 55
- 56
- 57
- 58
- 59
- 60
- 61
- 62
- 63
- 64
例如Conv对应的convMish层,其代码如下:
ILayer* convMish(INetworkDefinition *network,
                    std::map<std::string, Weights>& weightMap,
                    ITensor& input,
                    int outch,
                    int ksize,
                    int s,
                    int p,
                    int module_idx,
                    std::string sub_module_name)
{
    using namespace std;
    std::string weight_name = "model."+to_string(module_idx)+sub_module_name+".conv.weight";
    std::string bias_name = "model."+to_string(module_idx)+sub_module_name+".conv.bias";
    std::string mish_name = "mish."+to_string(module_idx)+sub_module_name;
    LOG(INFO) << "[1]load conv weight from "<<weight_name;
    LOG(INFO) << "[2]load conv bias from "<<bias_name;

    IConvolutionLayer* conv = network->addConvolutionNd(input, outch, DimsHW{ksize, ksize}, weightMap[weight_name], weightMap[bias_name]);
    assert(conv1);
    conv->setStrideNd(DimsHW{s, s});
    conv->setPaddingNd(DimsHW{p, p});
    Dims dims_conv = conv->getOutput(0)->getDimensions();
    LOG(INFO)<<"conv outputdims "<<dims_conv.nbDims<<": "<<dims_conv.d[0]<<" "<<dims_conv.d[1]<<" "<<dims_conv.d[2]<<" "<<dims_conv.d[3];
    //LOG(INFO)<<"conv "<<conv->getOutput(0)->getDimensions().nbDims;
    //IScaleLayer* bn1 = addBatchNorm2d(network, weightMap, *conv1->getOutput(0), "module_list." + std::to_string(linx) + ".BatchNorm2d", 1e-4);

    auto creator = getPluginRegistry()->getPluginCreator("Mish_TRT", "1");
    const PluginFieldCollection* pluginData = creator->getFieldNames();
    IPluginV2 *pluginObj = creator->createPlugin(mish_name.c_str(), pluginData);
    ITensor* inputTensors[] = {conv->getOutput(0)};
    auto mish = network->addPluginV2(&inputTensors[0], 1, *pluginObj);
    assert(mish);
    Dims dims = mish->getOutput(0)->getDimensions();
    LOG(INFO)<<"mish outputdims "<<mish->getOutput(0)->getDimensions().nbDims<<": "<<dims.d[0]<<" "<<dims.d[1]<<" "<<dims.d[2]<<" "<<dims.d[3]<<endl;
    //auto merge = network->addElementWise(*conv->getOutput(0), *mish->getOutput(0), ElementWiseOperation::kPROD);
    //LOG(INFO)<<"merge "<<merge->getOutput(0)->getDimensions().nbDims;
    //assert(merge);

    return mish;
}
- 1
- 2
- 3
- 4
- 5
- 6
- 7
- 8
- 9
- 10
- 11
- 12
- 13
- 14
- 15
- 16
- 17
- 18
- 19
- 20
- 21
- 22
- 23
- 24
- 25
- 26
- 27
- 28
- 29
- 30
- 31
- 32
- 33
- 34
- 35
- 36
- 37
- 38
- 39
- 40
最终模型的组装
ICudaEngine* ScaledYolov4::BuildEngine(unsigned int maxBatchSize, IBuilder* builder, IBuilderConfig* config, DataType dt)
{

    INetworkDefinition* network = builder->createNetworkV2(0U);

    // Create input tensor of shape {3, INPUT_H, INPUT_W} with name INPUT_BLOB_NAME
    ITensor* data = network->addInput(input_blob_name_.c_str(), dt, Dims4{1, 3, input_height_, input_width_});
    assert(data);

    string weight_file = model_prefix_ + ".wts";
    std::map<std::string, Weights> weightMap = loadWeights(weight_file);
    Weights emptywts{DataType::kFLOAT, nullptr, 0};

    /* backbone
    # [from, number, module, args]
    [[-1, 1, Conv, [32, 3, 1]],  # 0
    [-1, 1, Conv, [64, 3, 2]],  # 1-P1/2
    [-1, 1, BottleneckCSP, [64]], 2
    [-1, 1, Conv, [128, 3, 2]],  # 3-P2/4
    [-1, 3, BottleneckCSP, [128]], 4
    [-1, 1, Conv, [256, 3, 2]],  # 5-P3/8
    [-1, 15, BottleneckCSP, [256]],6
    [-1, 1, Conv, [512, 3, 2]],  # 7-P4/16
    [-1, 15, BottleneckCSP, [512]],8
    [-1, 1, Conv, [1024, 3, 2]], # 9-P5/32
    [-1, 7, BottleneckCSP, [1024]],10
    ]
    */
    //oksp module_idx sub_modeul_name
    auto lr_0 = convMish(network, weightMap, *data, 32, 3, 1, 1, 0, "");

    //oksp module_idx sub_modeul_name
    auto lr_1 = convMish(network, weightMap, *lr_0->getOutput(0), 64, 3, 2, 1, 1, "");

    //channels module_idx, num_of_basicBottleNeck
    auto lr_2 = BottleneckCSP(network, weightMap, *lr_1->getOutput(0), 64, 2, 1);

    //oksp module_idx sub_modeul_name subsample
    auto lr_3 = convMish(network, weightMap, *lr_2->getOutput(0), 128, 3, 2, 1, 3, "");

    //channels module_idx, num_of_basicBottleNeck
    auto lr_4 = BottleneckCSP(network, weightMap, *lr_3->getOutput(0), 128, 4, 3);

    //oksp module_idx sub_modeul_name subsample
    auto lr_5 = convMish(network, weightMap, *lr_4->getOutput(0), 256, 3, 2, 1, 5, "");
    //channels module_idx, num_of_basicBottleNeck, 引出一个分支去和下面合并
    auto lr_6 = BottleneckCSP(network, weightMap, *lr_5->getOutput(0), 256, 6, 15);

    //channels module_idx, num_of_basicBottleNeck
    auto lr_7 = convMish(network, weightMap, *lr_6->getOutput(0), 512, 3, 2, 1, 7, "");

    //channels module_idx, num_of_basicBottleNeck
    auto lr_8 = BottleneckCSP(network, weightMap, *lr_7->getOutput(0), 512, 8, 15);

    //channels module_idx, num_of_basicBottleNeck
    auto lr_9 = convMish(network, weightMap, *lr_8->getOutput(0), 1024, 3, 2, 1, 9, "");

    //channels module_idx, num_of_basicBottleNeck
    auto lr_10 = BottleneckCSP(network, weightMap, *lr_9->getOutput(0), 1024, 10, 7);


    LOG(INFO)<<"-----------------------------------------------------------------";
    LOG(INFO)<<"-----------------------------------------------------------------";
    LOG(INFO)<<"------------------------load backbone done-----------------------";
    LOG(INFO)<<"-----------------------------------------------------------------";
    LOG(INFO)<<"-----------------------------------------------------------------";

    //head

    //[-1, 1, SPPCSP, [512]], # 11
    auto lr_11 = SPPCSP(network, weightMap, *lr_10->getOutput(0), 512, 11);

    //[-1, 1, Conv, [256, 1, 1]],
    auto lr_12 = convMish(network, weightMap, *lr_11->getOutput(0), 256, 1, 1, 0, 12, "");

    //[-1, 1, nn.Upsample, [None, 2, 'nearest']],
    auto lr_13 = upSample(network, weightMap, *lr_12->getOutput(0), 256);


    //[8, 1, Conv, [256, 1, 1]], # route backbone P4
    auto lr_14 = convMish(network, weightMap, *lr_8->getOutput(0), 256, 1, 1, 0, 14, "");

    ITensor* concat_tensors1[] = {lr_14->getOutput(0), lr_13->getOutput(0)};
    auto lr_15 = network->addConcatenation(concat_tensors1, 2);


    //[-1, 1, Conv, [128, 1, 1]],
    auto lr_16 = BottleneckCSP2(network, weightMap, *lr_15->getOutput(0), 256, 16, 3);

    //[-1, 1, Conv, [128, 1, 1]]
    auto lr_17 = convMish(network, weightMap, *lr_16->getOutput(0), 128, 1, 1, 0, 17, "");

    //[-1, 1, nn.Upsample, [None, 2, 'nearest']],
    auto lr_18 = upSample(network, weightMap, *lr_17->getOutput(0), 128);
    auto lr_19 = convMish(network, weightMap, *lr_6->getOutput(0), 128, 1, 1, 0, 19, "");
    ITensor* concat_tensors2[] = {lr_19->getOutput(0), lr_18->getOutput(0)};
    auto lr_20 = network->addConcatenation(concat_tensors2, 2);

    //[-1, 1, Conv, [128, 1, 1]],
    auto lr_21 = BottleneckCSP2(network, weightMap, *lr_20->getOutput(0), 128, 21, 3);

    auto lr_22 = convMish(network, weightMap, *lr_21->getOutput(0), 256, 3, 1, 1, 22, "");
    Dims dims_det1 = lr_22->getOutput(0)->getDimensions();
    LOG(INFO)<<"-------------->det1 outputdims "<<dims_det1.nbDims<<": "<<dims_det1.d[0]<<" "<<dims_det1.d[1]<<" "<<dims_det1.d[2]<<" "<<dims_det1.d[3];


    auto lr_23 = convMish(network, weightMap, *lr_21->getOutput(0), 256, 3, 2, 1, 23, "");
    ITensor* concat_tensors3[] = {lr_23->getOutput(0), lr_16->getOutput(0)};
    auto lr_24 = network->addConcatenation(concat_tensors3, 2);

    auto lr_25 = BottleneckCSP2(network, weightMap, *lr_24->getOutput(0), 256, 25, 3);
    auto lr_26 = convMish(network, weightMap, *lr_25->getOutput(0), 512, 3, 1, 1, 26, "");
    Dims dims_det2 = lr_26->getOutput(0)->getDimensions();
    LOG(INFO)<<"-------------->det2 outputdims "<<dims_det2.nbDims<<": "<<dims_det2.d[0]<<" "<<dims_det2.d[1]<<" "<<dims_det2.d[2]<<" "<<dims_det2.d[3];

    auto lr_27 = convMish(network, weightMap, *lr_25->getOutput(0), 512, 3, 2, 1, 27, "");
    ITensor* concat_tensors4[] = {lr_27->getOutput(0), lr_11->getOutput(0)};
    auto lr_28 = network->addConcatenation(concat_tensors4, 2);

    auto lr_29 = BottleneckCSP2(network, weightMap, *lr_28->getOutput(0), 512, 29, 3);
    auto lr_30 = convMish(network, weightMap, *lr_29->getOutput(0), 1024, 3, 1, 1, 30, "");
    Dims dims_det3 = lr_30->getOutput(0)->getDimensions();
    LOG(INFO)<<"-------------->det3 outputdims "<<dims_det3.nbDims<<": "<<dims_det3.d[0]<<" "<<dims_det3.d[1]<<" "<<dims_det3.d[2]<<" "<<dims_det3.d[3];

    // lr_30->getOutput(0)->setName(output_blob_name_.c_str());
    // network->markOutput(*lr_30->getOutput(0));


    //output conv
    LOG(INFO)<<"-----------------------------------------------------------------";
    LOG(INFO)<<"-----------------------------------------------------------------";
    LOG(INFO)<<"------------------------load head done---------------------------";
    LOG(INFO)<<"-----------------------------------------------------------------";
    LOG(INFO)<<"-----------------------------------------------------------------";
    int out_channels = num_anchors_*(5+num_classes_);
    auto lr_det_conv1 = conv(network, weightMap, *lr_22->getOutput(0), out_channels, 1, 1, 0, 31, ".m.0", true, false);
    auto lr_det_conv2 = conv(network, weightMap, *lr_26->getOutput(0), out_channels, 1, 1, 0, 31, ".m.1", true, false);
    auto lr_det_conv3 = conv(network, weightMap, *lr_30->getOutput(0), out_channels, 1, 1, 0, 31, ".m.2", true, false);

    // lr_det_conv2->getOutput(0)->setName(output_blob_name_.c_str());
    // network->markOutput(*lr_det_conv2->getOutput(0));

    auto creator = getPluginRegistry()->getPluginCreator("ScaledYoloLayer_TRT", "1");
    const PluginFieldCollection* pluginData = creator->getFieldNames();
    IPluginV2 *pluginObj = creator->createPlugin("yololayer", pluginData);
    ITensor* inputTensors_yolo[] = {lr_det_conv3->getOutput(0), lr_det_conv2->getOutput(0), lr_det_conv1->getOutput(0)};
    auto yolo = network->addPluginV2(inputTensors_yolo, 3, *pluginObj);

    //yolo->getOutput(0)->setName(output_blob_name_.c_str());
    //network->markOutput(*yolo->getOutput(0));

    // Build engine
    builder->setMaxBatchSize(maxBatchSize);
    config->setMaxWorkspaceSize(16 * (1 << 20));  // 16MB

    if(use_fp16_){
        config->setFlag(BuilderFlag::kFP16);
    }
    std::cout << "Building engine, please wait for a while..." << std::endl;
    ICudaEngine* engine = builder->buildEngineWithConfig(*network, *config);
    std::cout << "Build engine successfully!" << std::endl;

    // Don't need the network any more
    network->destroy();
    // Release host memory
    for (auto& mem : weightMap)
    {
        free((void*) (mem.second.values));
    }

    return engine;

}
- 1
- 2
- 3
- 4
- 5
- 6
- 7
- 8
- 9
- 10
- 11
- 12
- 13
- 14
- 15
- 16
- 17
- 18
- 19
- 20
- 21
- 22
- 23
- 24
- 25
- 26
- 27
- 28
- 29
- 30
- 31
- 32
- 33
- 34
- 35
- 36
- 37
- 38
- 39
- 40
- 41
- 42
- 43
- 44
- 45
- 46
- 47
- 48
- 49
- 50
- 51
- 52
- 53
- 54
- 55
- 56
- 57
- 58
- 59
- 60
- 61
- 62
- 63
- 64
- 65
- 66
- 67
- 68
- 69
- 70
- 71
- 72
- 73
- 74
- 75
- 76
- 77
- 78
- 79
- 80
- 81
- 82
- 83
- 84
- 85
- 86
- 87
- 88
- 89
- 90
- 91
- 92
- 93
- 94
- 95
- 96
- 97
- 98
- 99
- 100
- 101
- 102
- 103
- 104
- 105
- 106
- 107
- 108
- 109
- 110
- 111
- 112
- 113
- 114
- 115
- 116
- 117
- 118
- 119
- 120
- 121
- 122
- 123
- 124
- 125
- 126
- 127
- 128
- 129
- 130
- 131
- 132
- 133
- 134
- 135
- 136
- 137
- 138
- 139
- 140
- 141
- 142
- 143
- 144
- 145
- 146
- 147
- 148
- 149
- 150
- 151
- 152
- 153
- 154
- 155
- 156
- 157
- 158
- 159
- 160
- 161
- 162
- 163
- 164
- 165
- 166
- 167
- 168
- 169
- 170
- 171
- 172
- 173
- 174
- 175
- 176
调试技巧
模型转换过程不会是一次成功的,会遇到各种问题,一个保险的做法是固化scaled_yolov4 pytorch模型和tensorrt版本模型的输入,进行逐层输出比对校准,例如我的做法是这样的:
在pytorch版本中嵌入了如下代码,保存固定图片输入的每层输出:
    def forward_once(self, x, profile=False):
        y, dt = [], []  # outputs
        i = 0
        for m in self.model:
            if m.f != -1:  # if not from previous layer
                x = y[m.f] if isinstance(m.f, int) else [x if j == -1 else y[j] for j in m.f]  # from earlier layers

            if profile:
                try:
                    import thop
                    o = thop.profile(m, inputs=(x,), verbose=False)[0] / 1E9 * 2  # FLOPS
                except:
                    o = 0
                t = time_synchronized()
                for _ in range(10):
                    _ = m(x)
                dt.append((time_synchronized() - t) * 100)
                print('%10.1f%10.0f%10.1fms %-40s' % (o, m.np, dt[-1], m.type))

            x = m(x)  # run
            debug = True #保存每层输出
            if debug: #保存每层输出
                i += 1
                print("output %d"%i)
                d = x.detach().cpu().numpy().flatten().reshape(-1,1)
                np.savetxt("test_py_output_%d.txt"%i, d, fmt="%.4f")
            y.append(x if m.i in self.save else None)  # save output
- 1
- 2
- 3
- 4
- 5
- 6
- 7
- 8
- 9
- 10
- 11
- 12
- 13
- 14
- 15
- 16
- 17
- 18
- 19
- 20
- 21
- 22
- 23
- 24
- 25
- 26
- 27
而在tensorrt版本中,注释掉其他代码,仅保存其中当截止到当前层的输出,然后进行比对, 例如我想查看lr2层输出是否和原模型一致,就需要如下做:
    auto lr_0 = convMish(network, weightMap, *data, 32, 3, 1, 1, 0, "");


    //oksp module_idx sub_modeul_name
    auto lr_1 = convMish(network, weightMap, *lr_0->getOutput(0), 64, 3, 2, 1, 1, "");

    //channels module_idx, num_of_basicBottleNeck
    auto lr_2 = BottleneckCSP(network, weightMap, *lr_1->getOutput(0), 64, 2, 1);

    lr_2->getOutput(0)->setName(output_blob_name_.c_str());
    lr_2->markOutput(*lr_0->getOutput(0));
- 1
- 2
- 3
- 4
- 5
- 6
- 7
- 8
- 9
- 10
- 11
写代码保存好输出后,然后写个脚本进行数据比对:
import os
import numpy as np


def read_file(file):
    data = []
    with open(file, 'r') as f:
        lines = f.readlines()
    for line in lines:
        #print(line)
        try:
            data.append(float(line.strip()))
        except ValueError:
            print(line)
    return data

def compare_txt(file1, file2):
    data1 = read_file(file1)
    data2 = read_file(file2)
    assert len(data1)==len(data2)
    diff_count = 0
    for i in range(len(data1)):
        d1, d2 = data1[i], data2[i]
        if abs(d1-d2) > 0.01:
            #print("line %d:%f %f"%(i, d1, d2))
            diff_count += 1
    return diff_count, len(data1)

if __name__ =="__main__":
    d1 = "/trt_output.txt"
    d2 = "pytorch_output.txt"
    diff_count, total_count = compare_txt(d1, d2)
    print("error count %d"%diff_count)
    print("total count %d"%total_count)
- 1
- 2
- 3
- 4
- 5
- 6
- 7
- 8
- 9
- 10
- 11
- 12
- 13
- 14
- 15
- 16
- 17
- 18
- 19
- 20
- 21
- 22
- 23
- 24
- 25
- 26
- 27
- 28
- 29
- 30
- 31
- 32
- 33
- 34
小结
至此,就基本上pytorch版本scaled_yolov4的tensorrt模型转换过程梳理了一遍,重要的是掌握了其中的开发方法,后续遇到新的问题时能够自己依照这个思路解决。如果点赞数多的话,可以开源。

