
- 1字节跳动安全工程师校招一面面经_字节跳动技术支持安全岗面试
- 2LLM推理部署(五):AirLLM使用4G显存即可在70B大模型上进行推理_airllm 部署
- 3在有向图中找出所有简单环--Johnson算法_有向图找环
- 4计算机体系结构——虚拟内存技术_虚拟存储技术
- 5java基础之数据类型_java,nextdouble什么意思
- 6从零开始:构建高效的 JMeter 集群压测环境
- 7MySQL英语不好能学吗_英语不好,我能学好编程语言吗
- 8使用NodeJs模拟接口联调_nodejs请求第三方接口
- 9signature=1a4f4cc2a4cb36682d90c0d4c84ca5da,dweb-mirror/yarn.lock at master · internetarchive/dweb-mi...
- 10com.netflix.discovery.DiscoveryClient - DiscoveryClient_UNKNOWN/_com.netflix.discovery.discoveryclient : discoveryc
主控开发(一)Jetson nano环境搭建_jetson nano 安装vim
赞
踩
1、基础设置
1.1、使用sudo免密码
1.打开终端,输入命令:
sudo visudo
- 1
2.在文档最后一行添加如下内容:
xxx ALL=(ALL) NOPASSWD:ALL
jetson ALL=(ALL) NOPASSWD:ALL
保存退出即可,其中XXX为登入用户名
- 1
- 2
- 3
1.2、终端输出IP地址
打开.bashrc文件
sudo vim .bashrc
- 1
最后面添加以下内容
alias python=python3
ip=$(ip addr show eth0 | grep -o 'inet [0-9]\+\.[0-9]\+\.[0-9]\+\.[0-9]\+' | grep -o [0-9].*)
if [ -z $ip ]; then
  ip=$(ip addr show wlan0 | grep -o 'inet [0-9]\+\.[0-9]\+\.[0-9]\+\.[0-9]\+' | grep -o [0-9].*)
fi
if [ -z $ip ]; then
  ip=$(ip addr show lo | grep -o 'inet [0-9]\+\.[0-9]\+\.[0-9]\+\.[0-9]\+' | grep -o [0-9].*)
fi
export ROS_IP=$ip
export ROS_MASTER_URI=http://$ROS_IP:11311
echo "-----------------------"
echo -e "MY_IP: \033[32m$ROS_IP\033[0m"
echo -e "ROS_MASTER_URI: "
echo -e "\033[32m$ROS_MASTER_URI\033[0m"
echo "-----------------------"
- 1
- 2
- 3
- 4
- 5
- 6
- 7
- 8
- 9
- 10
- 11
- 12
- 13
- 14
- 15
1.3、system program problem detected
如何解决Ubuntu下的的“system program problem detected”
删除crash文件
sudo rm /var/crash/*
- 1
关闭pop up功能
sudo gedit /etc/default/apport
sudo vim /etc/default/apport
- 1
- 2
将其中的enable=1改为enable=0即可
2、移除无用软件
移除LibreOffice会为系统省很多空间,这个软件对做深度学习和计算机视觉算法也没有太多用
sudo apt-get --purge remove docker* libreoffice* thunderbird totem rhythmbox empathy brasero simple-scan gnome-mahjongg aisleriot gnome-mines cheese transmission-common gnome-orca webbrowser-app gnome-sudoku
- 1
清除
sudo rm -rf /etc/systemd/system/docker.service.d /var/lib/docker /var/run/docker
sudo ifconfig docker0 down
sudo brctl delbr docker0
sudo apt-get clean
sudo apt-get update
sudo apt-get upgrade
sudo apt autoremove
- 1
- 2
- 3
- 4
- 5
- 6
- 7
这样系统就基本上干净了。
- 卸载火狐firefox浏览器
查看火狐浏览器相关内容
dpkg --get-selections |grep firefox
- 1
卸载上述指令中的所有文件
sudo apt-get purge firefox unity-scope-firefoxbookmarks
- 1
执行结果如下,便成功卸载火狐浏览器。
3、更换国内源
sudo gedit /etc/apt/sources.list
sudo vim /etc/apt/sources.list
sudo vi /etc/apt/sources.list
- 1
- 2
- 3
然后删除所有内容,复制
deb http://mirrors.tuna.tsinghua.edu.cn/ubuntu-ports/ bionic main multiverse restricted universe
deb http://mirrors.tuna.tsinghua.edu.cn/ubuntu-ports/ bionic-security main multiverse restricted universe
deb http://mirrors.tuna.tsinghua.edu.cn/ubuntu-ports/ bionic-updates main multiverse restricted universe
deb http://mirrors.tuna.tsinghua.edu.cn/ubuntu-ports/ bionic-backports main multiverse restricted universe
deb-src http://mirrors.tuna.tsinghua.edu.cn/ubuntu-ports/ bionic main multiverse restricted universe
deb-src http://mirrors.tuna.tsinghua.edu.cn/ubuntu-ports/ bionic-security main multiverse restricted universe
deb-src http://mirrors.tuna.tsinghua.edu.cn/ubuntu-ports/ bionic-updates main multiverse restricted universe
deb-src http://mirrors.tuna.tsinghua.edu.cn/ubuntu-ports/ bionic-backports main multiverse restricted universe
- 1
- 2
- 3
- 4
- 5
- 6
- 7
- 8
中科大的镜像源
deb http://mirrors.ustc.edu.cn/ubuntu-ports/ bionic-updates main restricted
deb http://mirrors.ustc.edu.cn/ubuntu-ports/ bionic universe
deb http://mirrors.ustc.edu.cn/ubuntu-ports/ bionic-updates universe
deb http://mirrors.ustc.edu.cn/ubuntu-ports/ bionic multiverse
deb http://mirrors.ustc.edu.cn/ubuntu-ports/ bionic-updates multiverse
deb http://mirrors.ustc.edu.cn/ubuntu-ports/ bionic-backports main restricted universe multiverse
deb http://mirrors.ustc.edu.cn/ubuntu-ports/ bionic-security main restricted
deb http://mirrors.ustc.edu.cn/ubuntu-ports/ bionic-security universe
deb http://mirrors.ustc.edu.cn/ubuntu-ports/ bionic-security multiverse
- 1
- 2
- 3
- 4
- 5
- 6
- 7
- 8
- 9
到sources.list后保存,之后打开终端输入
sudo apt-get update
sudo apt-get upgrade
- 1
- 2
4、安装必要软件
安装vim、terminator、fast、pip、rar、zip、nmap等。
添加软件源和秘钥
sudo apt-add-repository ppa:apt-fast/stable
- 1
安装
sudo apt install vim terminator net-tools python-pip nano python3-pip ffmpeg v4l2loopback-dkms unar unrar p7zip* apt-fast nmap tree
- 1
卸载pip的方法
python -m pip uninstall pip
python3 -m pip uninstall pip
- 1
- 2
升级 pip
python2 -m pip install -U pip
python3 -m pip install -U pip
- 1
- 2
- pip永久加速
创建 ~/.pip/pip.conf配置文件,
mkdir ~/.pip && vim ~/.pip/pip.conf
- 1
内容如下:
[global]
timeout = 6000
index-url = https://pypi.tuna.tsinghua.edu.cn/simple
[install]
trusted-host = https://pypi.tuna.tsinghua.edu.cn
- 1
- 2
- 3
- 4
- 5
5、安装jupyter lab
5.1、添加依赖
sudo apt install nodejs libssl1.0-dev nodejs-dev node-gyp npm libffi-dev
- 1
5.2、安装jupyter/jupyterlab
pip3 install jupyter jupyterlab
- 1
5.3、生成相应配置文件
jupyter server --generate-config
- 1
5.4、设置密码
(这里会设置两次,第二次为确认输入的密码)
jupyter server password
- 1
5.5、修改配置文件
首先输入ipython生成秘钥
ipython
from notebook.auth import passwd
passwd()
- 1
- 2
- 3
打开配置文件
sudo vim ~/.jupyter/jupyter_server_config.py
- 1
找到下面的三句语句,修改成相应的变化
#c.ServerApp.ip = 'localhost'
#c.ServerApp.open_browser = True
#c.ServerApp.port = 8888
#c.ServerApp.notebook_dir = ‘’
- 1
- 2
- 3
- 4
修改为
# 允许远程访问
c.ServerApp.allow_remote_access = True  #82行
c.ServerApp.ip='0.0.0.0'   #194行
c.ServerApp.open_browser = False    #255行
c.ServerApp.password = u'argon2:$argon2id$v=19$m=10240,t=10,p=8$RMkLlF34taue89xXnsmPfhJAmY0eVS989lGeUJJsEw'
  #264行
c.ServerApp.port =8888      #275行
- 1
- 2
- 3
- 4
- 5
- 6
- 7
5.6、开启服务
jupyter lab --port 8080 --ip=0.0.0.0
- 1
5.7、设置开机启动Jupyter lab
方法一:
创建jupyterlab.service文件
sudo vim /etc/systemd/system/jupyterlab.service
- 1
删除命令
sudo rm /etc/systemd/system/jupyterlab.service
- 1
加入以下内容
[Unit]
Description=jupyter lab start service
After=multi-user.target

[Service]
Type=idle
User=jetson
ExecStart=/bin/sh -c "jupyter lab"
WorkingDirectory=/home/jetson

[Install]
WantedBy=multi-user.target
- 1
- 2
- 3
- 4
- 5
- 6
- 7
- 8
- 9
- 10
- 11
- 12
更新|启动
sudo systemctl daemon-reload
sudo systemctl start jupyterlab.service
sudo systemctl enable jupyterlab.service
sudo systemctl status jupyterlab.service
- 1
- 2
- 3
- 4
方法二:
sudo vim ~/.config/autostart/jupyterlab.desktop
- 1
添加
[Desktop Entry]
Type=Application
Name=jupyter lab server
Exec=jupyter lab
NoDisplay=true
- 1
- 2
- 3
- 4
- 5
方法三:
- 首先创建一个jupyterlab.sh
sudo vim ~/jupyterlab.sh
- 1
- 添加如下内容
export PATH="$PATH:~/.local/bin/"
jupyter lab
- 1
- 2
- 修改/etc/rc.local,在 exit 0 之前 添加
sudo vim /etc/rc.local
su pi -c 'bash ~/jupyterlab.sh'
- 1
- 2
例如如下:
#!/bin/sh -e
#
# rc.local
#
# This script is executed at the end of each multiuser runlevel.
# Make sure that the script will "exit 0" on success or any other
# value on error.
#
# In order to enable or disable this script just change the execution
# bits.
#
# By default this script does nothing.
# Print the IP address
_IP=$(hostname -I) || true
if [ "$_IP" ]; then
  printf "My IP address is %s\n" "$_IP"
fi
# Start Jupyter Notebook Server at boot
su pi -c 'bash /home/jetson/jupyterlab.sh’
exit 0

- 1
- 2
- 3
- 4
- 5
- 6
- 7
- 8
- 9
- 10
- 11
- 12
- 13
- 14
- 15
- 16
- 17
- 18
- 19
- 20
sudo apt-get install libopencv* libzbar-dev python-sklearn python-scikits-learn python3-scipy python-scipy

python3 -m pip install qrcode pyzbar scikit-image
python3 -m pip install --upgrade --force pip numpy==1.19.3 protobuf
python3 -m pip install opencv-python==3.4.13.47 opencv-contrib-python==3.4.13.47
python2 -m pip install opencv-python==3.4.13.47 opencv-contrib-python==3.4.13.47

python3 -m pip uninstall opencv-python opencv-contrib-python numpy protobuf
- 1
- 2
- 3
- 4
- 5
- 6
- 7
- 8
6、安装VNC
树莓派和jetson nano的VNC远程桌面配置流程完全一样,只需按以下步骤依次执行即可。
6.1、安装vino
sudo apt install vino
- 1
6.2、配置VNC 服务
(此时手动可打开vnc server)
sudo ln -s ../vino-server.service /usr/lib/systemd/user/graphical-session.target.wants
- 1
配置VNC server:
gsettings set org.gnome.Vino prompt-enabled false
gsettings set org.gnome.Vino require-encryption false
- 1
- 2
编辑org.gnome,恢复丢失的“enabled”参数,输入一下命令进入文件,将下方key内容添加到文件的最后面。保存并退出。
sudo vim /usr/share/glib-2.0/schemas/org.gnome.Vino.gschema.xml
- 1
格式要对齐
	<key name='enabled' type='b'>
        <summary>Enable remote access to the desktop</summary>
        <description>
        	If true, allows remote access to the desktop via the RFB
        	protocol. Users on remote machines may then connect to the
        	desktop using a VNC viewer
        </description>
        <default>false</default>
	</key>
- 1
- 2
- 3
- 4
- 5
- 6
- 7
- 8
- 9
设置为Gnome编译模式
sudo glib-compile-schemas /usr/share/glib-2.0/schemas
- 1
将网卡加入VINO服务 ; 执行,查看网卡UUID
nmcli connection show
- 1
将UUID拷贝粘贴到如下命令的单引号[‘ ’]之间,并执行
dconf write /org/gnome/settings-daemon/plugins/sharing/vino-server/enabled-connections "['e27c8ddd-b660-4e0b-a70d-78a39fd5c9c3 ']"
export DISPLAY=:0
- 1
- 2
6.4、设置VNC登陆密码
(此处密码设置为‘mima’)
gsettings set org.gnome.Vino authentication-methods "['vnc']"
gsettings set org.gnome.Vino vnc-password $(echo -n 'mima'|base64)
- 1
- 2
6.5、启动VNC Server
- 手动启动
/usr/lib/vino/vino-server
- 1
- 开机自启动
VNC服务器只有在您本地登录到Jetson之后才可用。如果您希望VNC自动可用,请使用系统设置应用程序来启用自动登录。
gsettings set org.gnome.Vino enabled true
mkdir -p ~/.config/autostart
sudo vim  ~/.config/autostart/vino-server.desktop
- 1
- 2
- 3
将下面的内容添加到该文件中,保存并退出。
[Desktop Entry]
Type=Application
Name=Vino VNC server
Exec=/usr/lib/vino/vino-server
NoDisplay=true
- 1
- 2
- 3
- 4
- 5
如果系统设置为需要输入用户密码才可以进入桌面,以上的改脚本需要等进入桌面后才会启动,建议将系统设置为用户自动登录到桌面。
- 关闭
ps -ef | grep vino
- 1
得到以下信息
jetbot        7096     1  0 13:39 pts/0    00:00:00 /usr/lib/vino/vino-server
jetbot       10082  6770  0 13:48 pts/0    00:00:00 grep --color=auto vino
- 1
- 2
kill掉当前vnc服务程序运行的编号7096:
kill 7096
- 1
- 重启测试
验证是否设置vnc 成功
sudo reboot
- 1
使用vnc viewer软件远程连接,,输入IP地址后点击键盘【Enter】,双击对应的VNC用户输入密码,选中记住密码,下次IP不变的情况下无需再次输入密码。最后进入到VNC界面。
6.6、调整分辨率
- Jetson nano
命令行调整,只是在本次启动中有效。
xrandr --fb 1920x1080
xrandr --fb 800x600
xrandr --fb 1024x600
xrandr --fb 1900x1000
- 1
- 2
- 3
- 4
设置开机启动,点击右上角,搜索中找到启动应用程序
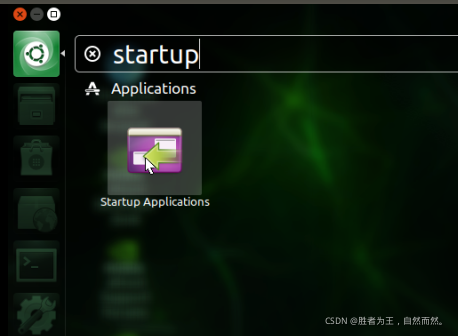
打开启动应用程序后,点击添加;添加名称,命令以及注释
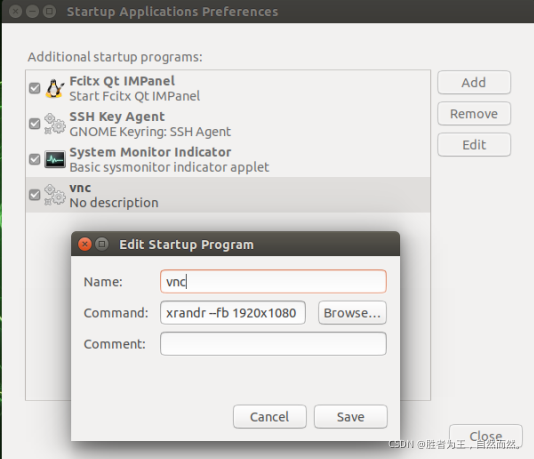
在这里我们输入分辨率的修改指令,其中1920x1080是分辨率,可根据自己的需求进行改变
xrandr --fb 1920x1080
- 1
开机重启即可。
- 树莓派
修改config.txt文件,永久有效
sudo vim /boot/firmware/config.txt
- 1
例如在最下面添加(设置分辨率为1920x1080)
--------------------1920x1080-----------------------
hdmi_force_hotplug=1
config_hdmi_boost=4
hdmi_group=2
hdmi_mode=82
hdmi_drive=2
hdmi_ignore_edid=0xa5000080
disable_overscan=1
--------------------1024x600-----------------------
max_usb_current=1
hdmi_group=2
hdmi_mode=1
hdmi_mode=87
hdmi_drive=1
hdmi_cvt 1024 600 60 6 0 0 0
- 1
- 2
- 3
- 4
- 5
- 6
- 7
- 8
- 9
- 10
- 11
- 12
- 13
- 14
- 15
PS:树莓派不连接显示器启动失败的解决方法,把hdmi_force_hotplug=1这句的注释去掉
7、中文输入法安装
7.1、pinyin
sudo apt-get install ibus-pinyin
- 1
然后打开系统设置选择language support,选择ibus,点击应用到整个系统,重启系统后,输入
ibus-setup
- 1
输入法界面点击添加汉语,intelligent Pinyin,完成后输入
ibus restart
- 1
7.2、googlepinyin
sudo apt-get install fcitx-googlepinyin fcitx-module-cloudpinyin fcitx-sunpinyin -y
或者
sudo apt-get install fcitx-googlepinyin -y
- 1
- 2
- 3
安装完成后,在ubuntu右上角的系统设置里面点击 语言支持,选择fcitx,系统初始默认为ibus;在终端输入 reboot
配置 fcitx:
点击右上方小键盘,左键单击 配置 fcitx
切换输入法时:按 shift 或者 ctrl+ space
8、将cuda环境写入环境变量
查看cuda版本
ll /usr/local/cuda
- 1
打开.bashrc
sudo vim ~/.bashrc
- 1
在最后添加
export PATH=/usr/local/cuda-10.2/bin${PATH:+:${PATH}}
export LD_LIBRARY_PATH=/usr/local/cuda-10.2/lib64${LD_LIBRARY_PATH:+:${LD_LIBRARY_PATH}}
export CUDA_ROOT=/usr/local/cuda
- 1
- 2
- 3
激活
source ~/.bashrc
- 1
查看cuda版本
nvcc -V
- 1
9、配置jtop实现nvidia-smi教程
jetson nano 是arm架构的,实现nvidia-smi查看GPU占用情况可以安装jtop!!!
安装
sudo pip3 install jetson-stats
- 1
查看使用情况
sudo jtop
- 1
开启服务
sudo systemctl restart jetson_stats.service
- 1
关闭服务
sudo systemctl disable jetson_stats.service
- 1
存在路径
cd /etc/systemd/system/
或者
cd /usr/lib/systemd
- 1
- 2
- 3
查看服务列表
systemctl list-sockets
- 1
10、显示管理器
gdm3,kdm 和 lightdm 都是显示管理器。 它们提供图形化登录并处理用户身份验证。显示管理器向用户显示登录屏幕。 当用户成功输入用户名和密码的有效组合时,会话开始。
KDM,SDDM是KDE系列的图形管理器;kdm 是kde管理器的显示。 但在KDE5中,它被否决为 SDDM,它更适合作为显示管理器,因此在默认情况下,它是在屏幕。
LightDM用于显示管理器的规范解决方案。 它应该是轻量级的,默认情况下是 Ubuntu。Xubuntu和 Lubuntu。 它是可以配置的,有多种欢迎主题可用。
sudo apt-get install gdm3 lightdm sddm
- 1
卸载命令,系统中至少存在一个显示管理器,否则无法进入图形化界面。
sudo apt-get --purge remove gdm3 lightdm sddm
- 1
配置和切换,可在它们之间进行选择。 必须重新启动才生效。
sudo dpkg-reconfigure gdm3
- 1
检查当前正在使用的显示管理器
cat /etc/X11/default-display-manager
- 1
查看当前系统安装了几个桌面
ls /usr/share/xsessions
- 1
11、问题收集
11.1、错误 apt
Could not get lock /var/lib/dpkg/lock-frontend - open (11: Resource temporarily unavailable)
- 找到并且杀掉所有的apt-get 和apt进程
ps -A | grep apt
- 1
找出所有的 apt 以及 apt-get 进程
sudo kill -9 进程ID
- 1
- 删除锁定文件
sudo rm -r /var/lib/dpkg/lock-frontend /var/lib/dpkg/lock
- 1
11.2、添加串口到用户名
sudo adduser jetson tty
sudo gpasswd --add jetson dialout
- 1
- 2
linux下/dev/ttyUSB*添加权限
sudo usermod -aG dialout $USER
- 1
11.3、jetson找不到opencv
CMake Error at /opt/ros/melodic/share/image_geometry/cmake/image_geometryConfig.cmake:113 (message): Project 'image_geometry' specifies '/usr/include/opencv' as an include dir, which is not found.
- 1
解决
安装的是opencv4,位置命名成了/usr/include/opencv4
sudo vim /opt/ros/melodic/share/cv_bridge/cmake/cv_bridgeConfig.cmake
改掉第96行
- 1
- 2
- 3
12、乱码问题
12.1、vim乱码
修改.vimrc文件
sudo gedit .vimrc
sudo vim .vimrc
- 1
- 2
添加下面一行代码
set fileencodings=ucs-bom,utf-8,cp936,gb18030,big5,euc-jp,euc-kr,latin1
- 1
12.2、gedit乱码
gsettings set org.gnome.gedit.preferences.encodings candidate-encodings "['GB18030', 'UTF-8', 'CURRENT', 'ISO-8859-15', 'UTF-16']"
- 1
参考:https://www.linuxidc.com/Linux/2012-07/65713.htm
12.3、zip解压乱码
修改环境变量
sudo vim /etc/environment
- 1
最下面添加
UNZIP="-O CP936"
ZIPINFO="-O CP936"
- 1
- 2
命令lsar查看压缩文件内文件名
lsar 智能.zip
- 1
命令unar解压
unar 智能.zip
- 1
命令unzip解压
unzip -O CP936 xxx.zip (用GBK, GB18030也可以)
- 1
12.4、系统中文乱码
首先,安装中文支持包language-pack-zh-hans:
sudo apt-get install language-pack-zh-hans
- 1
然后,修改
sudo gedit /etc/environment
- 1
在末尾追加
LANG="zh_CN.UTF-8"
LANGUAGE="zh_CN:zh:en_US:en"
- 1
- 2
再修改
sudo gedit /var/lib/locales/supported.d/local
- 1
在末尾追加
en_US.UTF-8 UTF-8
zh_CN.UTF-8 UTF-8
zh_CN.GBK GBK
zh_CN GB2312
- 1
- 2
- 3
- 4
最后,执行命令:
sudo locale-gen
- 1


