
- 1MySql数据库_mysql中通过年份月份求当前年龄大于18的
- 2发布原子化服务&HarmonyOS 3.0应用开发系列课_信息中心 2.0支持获取harmonyos和openharmony的资源
- 3typora mac版本激活_mac typora激活
- 4GPT-4 插件和插件化的思考_gpt4插件
- 5Postman传递@requestbody标注的List集合的传参遇到的问题_@requestbody list
- 6Jmeter 之 https接口 性能测试_jmeter测试https
- 72023 年 亚太赛 APMCM (B题)国际大学生数学建模挑战赛 |数学建模完整代码+建模过程全解全析
- 8ACL介绍及基本命令配置_acl配置命令详解
- 9计算机视觉之手势、面部、姿势捕捉以Python Mediapipe为工具
- 10【愚公系列】2023年11月 Java教学课程 203-RabbitMQ(SpringAMQP)
Day57——SpringBoot2.x整合MyBatis_basicpackage mapper
赞
踩
一. 问题背景
前面学习了Day56——SpringBoot2.x整合Druid&配置数据源监控,今天来学习整合MyBatis
二. 整合MyBatis
2.1 搭建环境
首先搭建好druid数据源,这个步骤与Day56——SpringBoot2.x整合Druid&配置数据源监控一样,步骤如下:
引入依赖:
 <!--引入druid数据源-->
 <dependency>
      <groupId>com.alibaba</groupId>
      <artifactId>druid-spring-boot-starter</artifactId>
      <version>1.1.17</version>
  </dependency>
- 1
- 2
- 3
- 4
- 5
- 6
配置Druid:
创建application.yaml,在druid属性以下的属性,都是druid-starter依赖所需要配置的。 schema属性以及initialization-mode属性是创建表时要用到的,因此创建完表后应该将schema和initialization-mode 注释掉如下:
spring:
  datasource:
    #   数据源基本配置
    username: root
    password: 123456
    driver-class-name: com.mysql.cj.jdbc.Driver
    url: jdbc:mysql://192.168.32.103:3306/mybatis
    type: com.alibaba.druid.pool.DruidDataSource
    #首次运行完创建表后,应该将schema和initialization-mode注释掉
#    # 指定sql脚本文件路径
#    schema:
#      - classpath:sql/department.sql
#      - classpath:sql/employee.sql
#    #设置SpringBoot启动后执行脚本文件
#    initialization-mode: always
    druid:
      initial-size: 5
      max-active: 20
      min-idle: 5
      max-wait: 60000
      pool-prepared-statements: true
      max-pool-prepared-statement-per-connection-size: 20
      validation-query: SELECT 1 FROM DUAL
      test-on-borrow: false
      test-on-return: false
      test-while-idle: true
      time-between-eviction-runs-millis: 60000
      min-evictable-idle-time-millis: 300000
      filter:
        stat:
          enabled: true
          db-type: mysql
          log-slow-sql: true
          slow-sql-millis: 2000
        wall:
          enabled: true
        slf4j:
          enabled: true
      keep-alive: true
      # 监控过滤器
      web-stat-filter:
        enabled: true
        exclusions:
          - "*.js"
          - "*.gif"
          - "*.jpg"
          - "*.png"
          - "*.css"
          - "*.ico"
          - "/druid/*"
      #exclusions可以是list格式配置,也可以是String格式
      #        exclusions: "*.js,*.gif,*.jpg,*.png,*.css,*.ico,/druid/*"
      # druid 监控页面
      stat-view-servlet:
        enabled: true
        url-pattern: /druid/*
        reset-enable: false
        login-username: admin
        login-password: 123456
        #拒绝本机连接(自行修改自己的本机连接)
        deny: 192.168.32.103

- 1
- 2
- 3
- 4
- 5
- 6
- 7
- 8
- 9
- 10
- 11
- 12
- 13
- 14
- 15
- 16
- 17
- 18
- 19
- 20
- 21
- 22
- 23
- 24
- 25
- 26
- 27
- 28
- 29
- 30
- 31
- 32
- 33
- 34
- 35
- 36
- 37
- 38
- 39
- 40
- 41
- 42
- 43
- 44
- 45
- 46
- 47
- 48
- 49
- 50
- 51
- 52
- 53
- 54
- 55
- 56
- 57
- 58
- 59
- 60
- 61
配置Druid数据源:
@Configuration
public class DruidConfig {

    @Bean
    @Primary
    @ConfigurationProperties(prefix = "spring.datasource.druid")
    public DruidDataSource druidDataSource(){
        return DruidDataSourceBuilder.create().build();
    }
}
- 1
- 2
- 3
- 4
- 5
- 6
- 7
- 8
- 9
- 10
引入两个sql脚本:
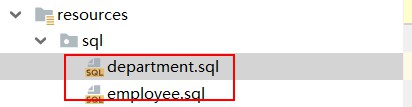
department.sql
SET FOREIGN_KEY_CHECKS=0;

-- ----------------------------
-- Table structure for department
-- ----------------------------
DROP TABLE IF EXISTS `department`;
CREATE TABLE `department` (
  `id` int(11) NOT NULL AUTO_INCREMENT,
  `departmentName` varchar(255) DEFAULT NULL,
  PRIMARY KEY (`id`)
) ENGINE=InnoDB AUTO_INCREMENT=1 DEFAULT CHARSET=utf8;
- 1
- 2
- 3
- 4
- 5
- 6
- 7
- 8
- 9
- 10
- 11
employee.sql
SET FOREIGN_KEY_CHECKS=0;

-- ----------------------------
-- Table structure for employee
-- ----------------------------
DROP TABLE IF EXISTS `employee`;
CREATE TABLE `employee` (
  `id` int(11) NOT NULL AUTO_INCREMENT,
  `lastName` varchar(255) DEFAULT NULL,
  `email` varchar(255) DEFAULT NULL,
  `gender` int(2) DEFAULT NULL,
  `d_id` int(11) DEFAULT NULL,
  PRIMARY KEY (`id`)
) ENGINE=InnoDB AUTO_INCREMENT=1 DEFAULT CHARSET=utf8;
- 1
- 2
- 3
- 4
- 5
- 6
- 7
- 8
- 9
- 10
- 11
- 12
- 13
- 14
首次运行完创建完表后,将yaml文件中的schema属性以及initialization-mode属性注释掉,然后创建Bean:
Employee.java
package com.atguigu.springboot.bean;

public class Employee {

    private Integer id;
    private String lastname;
    private Integer gender;
    private String email;
    private Integer dId;

    public Integer getId() {
        return id;
    }

    public void setId(Integer id) {
        this.id = id;
    }

    public String getLastname() {
        return lastname;
    }

    public void setLastname(String lastname) {
        this.lastname = lastname;
    }

    public Integer getGender() {
        return gender;
    }

    public void setGender(Integer gender) {
        this.gender = gender;
    }

    public String getEmail() {
        return email;
    }

    public void setEmail(String email) {
        this.email = email;
    }

    public Integer getdId() {
        return dId;
    }

    public void setdId(Integer dId) {
        this.dId = dId;
    }
}
- 1
- 2
- 3
- 4
- 5
- 6
- 7
- 8
- 9
- 10
- 11
- 12
- 13
- 14
- 15
- 16
- 17
- 18
- 19
- 20
- 21
- 22
- 23
- 24
- 25
- 26
- 27
- 28
- 29
- 30
- 31
- 32
- 33
- 34
- 35
- 36
- 37
- 38
- 39
- 40
- 41
- 42
- 43
- 44
- 45
- 46
- 47
- 48
- 49
- 50
- 51
Department.java
package com.atguigu.springboot.bean;

public class Department {

    private Integer id;
    private String departmentName;

    public Integer getId() {
        return id;
    }

    public void setId(Integer id) {
        this.id = id;
    }

    public String getDepartmentName() {
        return departmentName;
    }

    public void setDepartmentName(String departmentName) {
        this.departmentName = departmentName;
    }
}
- 1
- 2
- 3
- 4
- 5
- 6
- 7
- 8
- 9
- 10
- 11
- 12
- 13
- 14
- 15
- 16
- 17
- 18
- 19
- 20
- 21
- 22
- 23
- 24
至此搭建环境完成
2.2 注解版MyBatis
2.2.1 步骤
使用注解配置mybatis非常简单,只需创建interface并加上@Mapper注释即可,步骤如下:
首先创建一个interface:
DepartmentMapper.java
//指定这是一个操作数据库的mapper
@Mapper
public interface DepartmentMapper {

    @Select("select * from department where id = #{id}")
    public Department getDeptById(Integer id);

    @Delete("delete from department where id = #{id}")
    public int deleteDeptById(Integer id);

    @Options(useGeneratedKeys = true,keyProperty = "id")//插入后返回主键
    @Insert("insert into department(department_name) values(#{departmentName})")
    public int insertDept(Department department);

    @Update("update department set department_name = #{departmentName} where id = #{id}")
    public int updateDept(Department department);
}
- 1
- 2
- 3
- 4
- 5
- 6
- 7
- 8
- 9
- 10
- 11
- 12
- 13
- 14
- 15
- 16
- 17
解释: 所有的增删改查只需使用@Insert、@Delete、@Update、@Select书写sql语句,如果插入数据后需要返回主键,只需使用@Option(useGeneratedKeys=true, keyProperty="id")。
为了方便讲述,这里不再创建Service这些,直接创建Controller:
DeptController.java
@RestController
public class DeptController {

    @Autowired
    DepartmentMapper departmentMapper;

    @GetMapping("/dept/{id}")
    public Department getDepartment(@PathVariable("id") Integer id){
        return departmentMapper.getDeptById(id);
    }

    @GetMapping("/dept")
    public Department insertDept(Department department){
        departmentMapper.insertDept(department);
        return department;
    }
}
- 1
- 2
- 3
- 4
- 5
- 6
- 7
- 8
- 9
- 10
- 11
- 12
- 13
- 14
- 15
- 16
- 17
至此就完成了整合MyBatis。
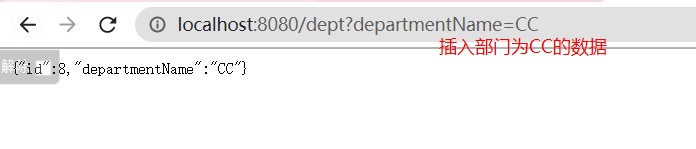
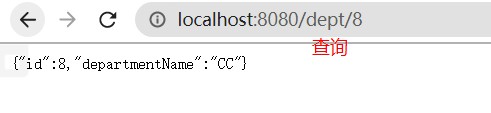
测试:
2.2.2 配置驼峰命名
2.2.2.1 问题背景
假如将数据库字段名改成有下划线的格式,比如将departmentName改成department_name,执行sql语句还成功吗?

修改sql语句对应的数据库字段名为下划线格式,如下:
@Options(useGeneratedKeys = true,keyProperty = "id")//插入后返回主键
@Insert("insert into department(department_name) values(#{departmentName})")
public int insertDept(Department department);

@Update("update department set department_name = #{departmentName} where id = #{id}")
public int updateDept(Department department);
- 1
- 2
- 3
- 4
- 5
- 6

2.2.2.2 解决方案
只需创建一个配置类,并注册一个ConfigurationCustomizer到容器中,重写customize()方法,在方法里面开启驼峰命名规则,如下:
@Configuration
public class MyBatisConfig {

    @Bean
    public ConfigurationCustomizer configurationCustomizer(){
        return new ConfigurationCustomizer() {
            @Override
            public void customize(org.apache.ibatis.session.Configuration configuration) {
                configuration.setMapUnderscoreToCamelCase(true);//开启驼峰命名法
            }
        };
    }
}
- 1
- 2
- 3
- 4
- 5
- 6
- 7
- 8
- 9
- 10
- 11
- 12
- 13
2.2.2.3 原理
按2下shift搜索并打开MyBatisAutoConfiguration,有一个注册SqlSessionFactory的方法,如下:
@Bean
    @ConditionalOnMissingBean
    public SqlSessionFactory sqlSessionFactory(DataSource dataSource)
                                                     throws Exception {
        ...
        this.applyConfiguration(factory);//关键方法
        ...
}
- 1
- 2
- 3
- 4
- 5
- 6
- 7
- 8
applyConfiguration()方法非常关键,如下:
private void applyConfiguration(SqlSessionFactoryBean factory) {
    if (configuration != null && !CollectionUtils.isEmpty(this.configurationCustomizers)) {
            Iterator var3 = this.configurationCustomizers.iterator();

            while(var3.hasNext()) {
                //拿到的ConfigurationCustomizer并调用它的customize()方法
                ConfigurationCustomizer customizer = (ConfigurationCustomizer)var3.next();
                customizer.customize(configuration);
            }
        }
}
- 1
- 2
- 3
- 4
- 5
- 6
- 7
- 8
- 9
- 10
- 11
解释: 可以看到,注册SqlSessionFactory的时候,会拿到的ConfigurationCustomizer并调用它的customize()方法
2.2.3 指定扫描mapper包
情景: 一个一个地给每个Mapper加@Mapper注解很繁琐,我们可以使用@MapperScan(basicPackage="xxx")指定mapper包的路径。
步骤:
在主配置类上加上@MapperScan(value = "com.atguigu.springboot.mapper"),如下:
@MapperScan(value = "com.atguigu.springboot.mapper")
@SpringBootApplication
public class SpringBoot06DataMybatisApplication {
- 1
- 2
- 3
2.3 配置版MyBatis
2.3.1 步骤
首先创建EmployeeMapper.java,如下:
//@Mapper或者@MapperScan将接口扫描到容器中
//@Mapper
public interface EmployeeMapper {

    public Employee getEmpById(Integer id);

    public void insertEmp(Employee employee);
}
- 1
- 2
- 3
- 4
- 5
- 6
- 7
- 8
创建EmployeeMapper.xml,如下:
<?xml version="1.0" encoding="UTF-8" ?>
<!DOCTYPE mapper
        PUBLIC "-//mybatis.org//DTD Mapper 3.0//EN"
        "http://mybatis.org/dtd/mybatis-3-mapper.dtd">
<mapper namespace="com.atguigu.springboot.mapper.EmployeeMapper">
    <!--    public Employee getEmpById(Integer id);

     public void insertEmp(Employee employee);-->
    <select id="getEmpById" resultType="com.atguigu.springboot.bean.Employee">
        SELECT * FROM employee WHERE id=#{id}
    </select>

    <insert id="insertEmp">
        INSERT INTO employee(lastName,email,gender,d_id)
        VALUES (#{lastName},#{email},#{gender},#{dId})
    </insert>
</mapper>
- 1
- 2
- 3
- 4
- 5
- 6
- 7
- 8
- 9
- 10
- 11
- 12
- 13
- 14
- 15
- 16
- 17
创建mybatis-config.xml,如下:
<?xml version="1.0" encoding="UTF-8" ?>
<!DOCTYPE configuration
        PUBLIC "-//mybatis.org//DTD Config 3.0//EN"
        "http://mybatis.org/dtd/mybatis-3-config.dtd">
<configuration>
    <!--设置驼峰命名映射-->
    <settings>
        <setting name= "mapUnderscoreToCamelCase" value="true"/>
    </settings>

</configuration>
- 1
- 2
- 3
- 4
- 5
- 6
- 7
- 8
- 9
- 10
- 11
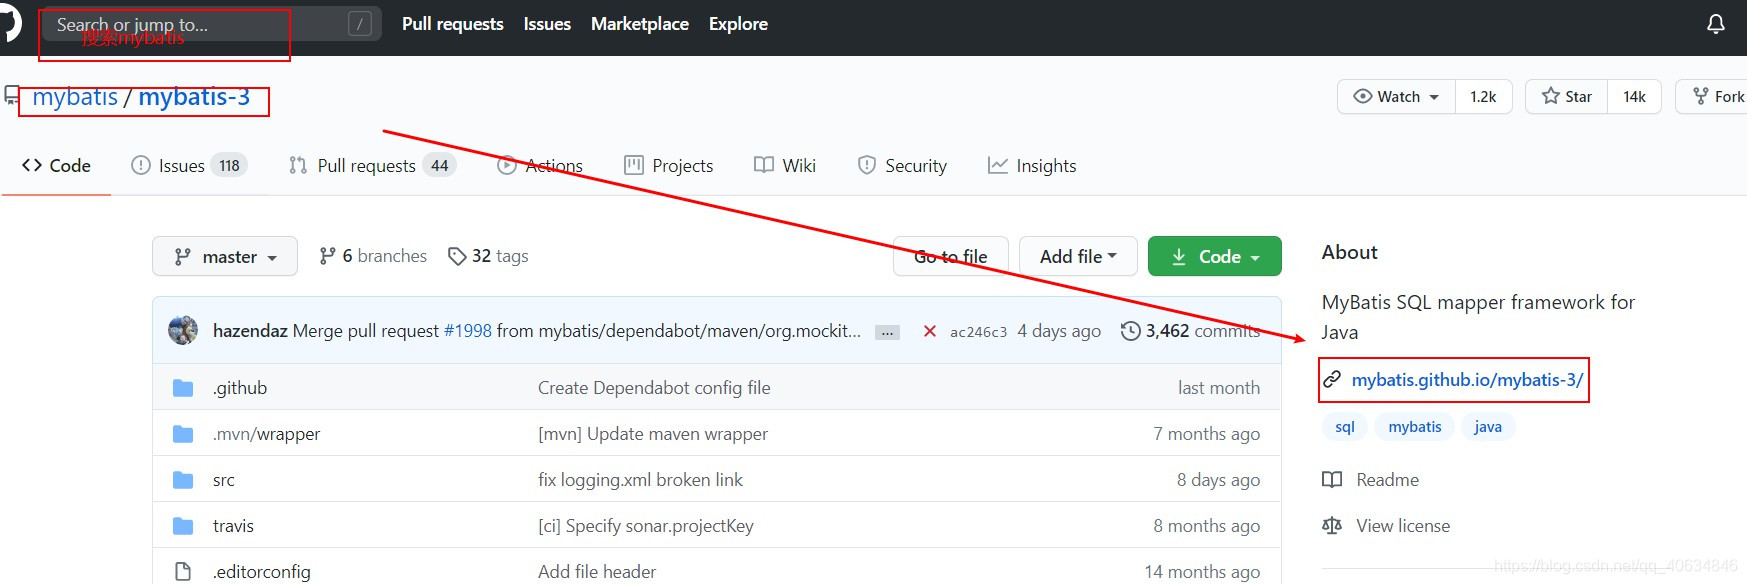
以上两个mybatis的xml文件模板可以去mybatis官方文档查看,如下:

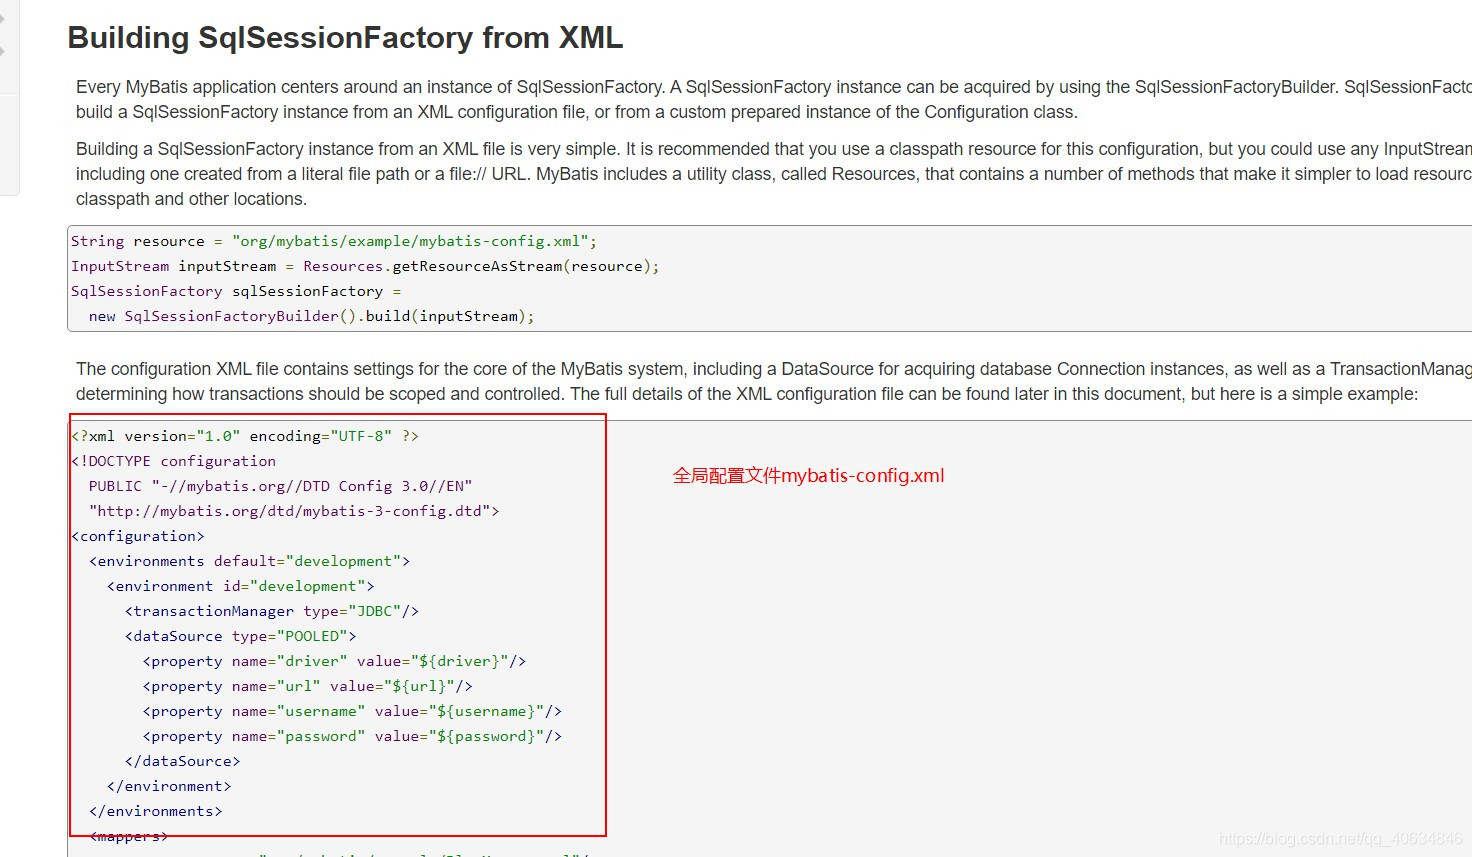
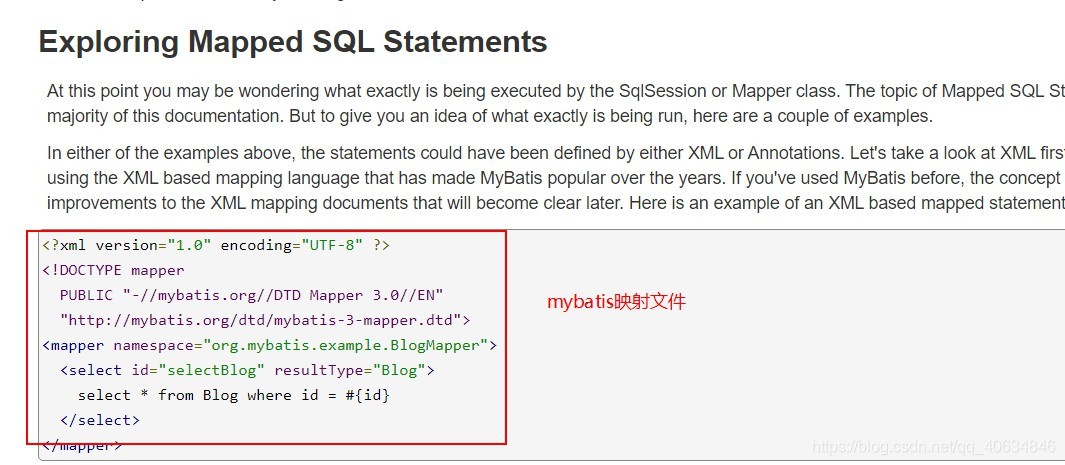
指定mybatis的xml映射文件以及全局配置文件的位置:
mybatis:
  # 指定全局配置文件位置
  config-location: classpath:mybatis/mybatis-config.xml
  # 指定sql映射文件位置
  mapper-locations: classpath:mybatis/mapper/*.xml
- 1
- 2
- 3
- 4
- 5
创建controller,如下:
@RestController
public class DeptController {

    @Autowired
    EmployeeMapper employeeMapper;

    @GetMapping("/emp/{id}")
    public Employee getEmpById(@PathVariable("id") Integer id){
        return employeeMapper.getEmpById(id);
    }
}
- 1
- 2
- 3
- 4
- 5
- 6
- 7
- 8
- 9
- 10
- 11
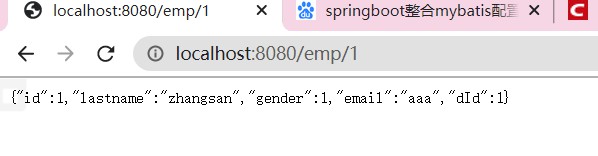
给数据表employee添加数据:
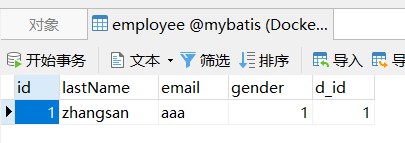
测试:
2.3.2 报错Invalid statment xxx not found
如果所有的配置无误但就是报错,而且是Invalid statement xxx not found,那么可以看看proeprties文件是否也配置了mybatis相关的配置,详情看:SpringBoot整合Mybatis启动报错Invalid Statement xxx not found


