
- 1P4770 [NOI2018] 你的名字 洛谷黑题题解详解
- 2Python-模块与包_关于包相关的导入语句也分为import和from ... import ...两种,但是无论哪种,无
- 3C语言实现(封装、继承和多态)_c实现继承
- 4linux磁盘空间查看及空间满的处理,linux磁盘空间占满问题快速定位并解决
- 5VScode 中 Python 代码不高亮显示怎么办?_vscode的python语法不高亮
- 6Failed to obtain JDBC Connection; nested exception is java.sql.SQLException_failed to obtain jdbc connection; nested exception
- 7怎么让linux支持yum,如何安装和使用'yum-utils'来维护Yum并提高其性能
- 8向爬虫而生---Redis 拓宽篇6<redis分布式锁 ---ZooKeeper>
- 9AIGC|AGI究竟是什么?为什么大家都在争先入场?
- 10Docker入门安装、镜像与容器下载 —— 基本操作
配置bond4详细步骤
赞
踩
简介
bond是多块物理网卡虚拟为一块网卡,使多块网卡看起来像一块网卡。linux系统下配置bond,通过网卡绑定可增加服务器可靠性,同时可增加网络带宽,提供稳定的网络服务。
环境信息
CentOS Linux release 7.9.2009 (Core)
配置过程
1.前置准备
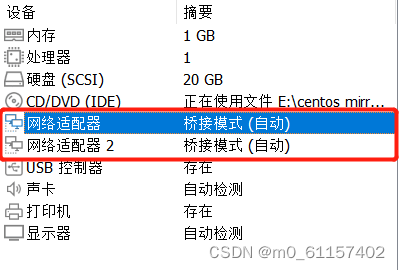
1.1 在vmware开虚拟机时,配置两块网卡
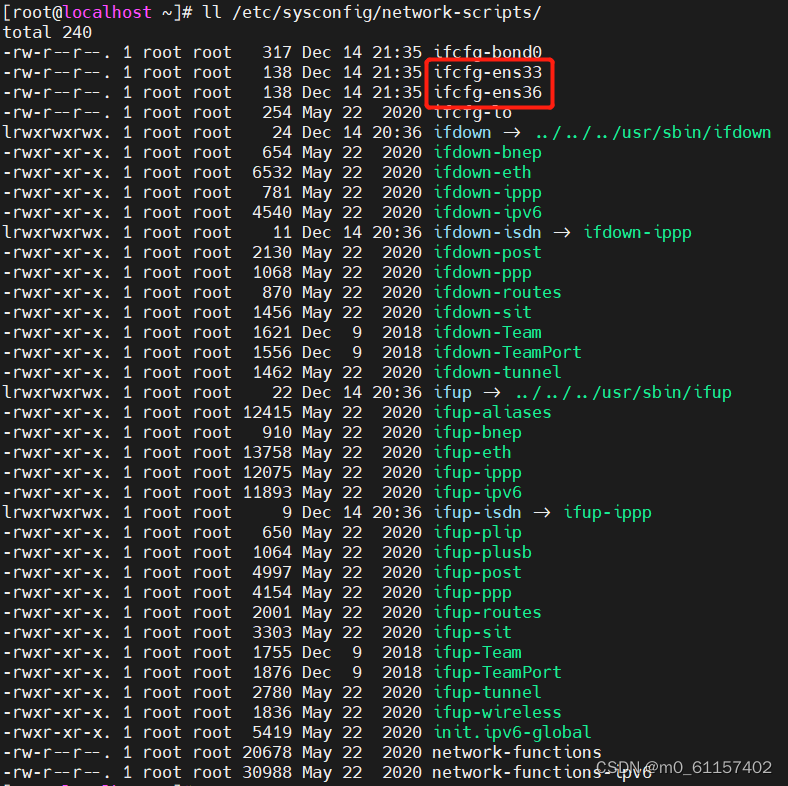
打开虚机,输入命令 ll /etc/sysconfig/network-scripts/ ,从下图中,我们可以看到我们实验所需要的两块网卡,名称分别为:ifcfg-ens33、ifcfg-ens36
1.2 关闭网络管理器
systemctl stop NetworkManager
systemctl disable NetworkManager
systemctl status NetworkManager

1.3 关闭防火墙和selinux
# 关闭防火墙
systemctl stop firewalld
systemctl disable firewalld
# 关闭selinux
setenforce 0
vim /etc/selinux/config
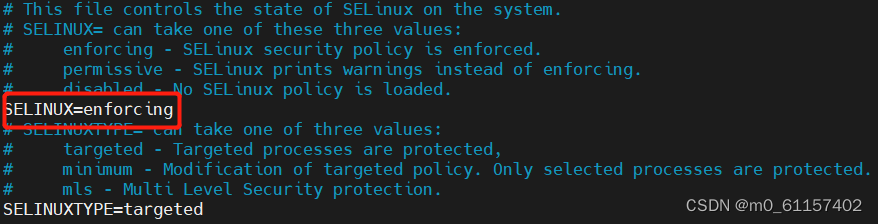
如上图,将 SELINUX=enforcing 修改为 SELINUX=disabled,保存退出
1.4 加载bonding模块
modprobe bonding
lsmod | grep bonding

1.5 修改网卡配置
1.5.1 修改第一块网卡(ifcfg-ens33)配置
cd /etc/sysconfig/network-scripts/
vim ifcfg-ens33
BOOTPROTO=none
DEVICE=ens33 #设备名称,注意不加ifcfg-
HWADDR=00:0c:29:30:00:61 #网卡的mac,可通过 ip a 命令进行查看
MASTER=bond0 #虚拟网卡bond的名称
MTU=1500
NM_CONTROLLED=no
ONBOOT=yes
SLAVE=yes
TYPE=Ethernet
USERURL=no
1.5.2 修改第二块网卡(ifcfg-ens36)配置
cd /etc/sysconfig/network-scripts/
vim ifcfg-ens36
BOOTPROTO=none
DEVICE=ens36
HWADDR=00:0c:29:30:00:6b
MASTER=bond0
MTU=1500
NM_CONTROLLED=no
ONBOOT=yes
SLAVE=yes
TYPE=Ethernet
USERURL=no
1.5.3 增加bond网卡(ifcfg-bond0)配置
BONDING_MASTER=yes
BONDING_OPT="mode=802.3ad xmit_hash_policy=layer3+4 miimon=100" #mode4
BONDING_SLAVE0=ens33 #网卡一名称
BONDING_SLAVE1=ens36 #网卡二名称
BOOTPROTO=none
DEFROUTE=yes
DEVICE=bond0 #bond名称
IPADDR=192.168.124.110 #bond的ip地址
MACADDR=00:0c:29:30:00:61 #第一块网卡mac
GATEWAY=192.168.124.1 #网关
MTU=1500
NETMASK=255.255.255.0 #子网掩码
NM_CONTROLLED=no
ONBOOT=yes
TYPE=Bond #网卡类型Bond
USERURL=no
1.6 重启网络
systemctl restart network
1.7 查看bond配置结果
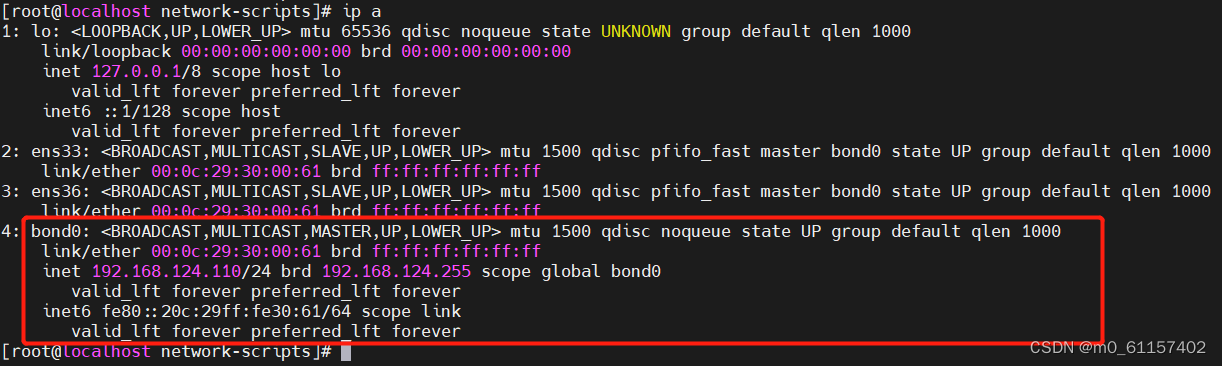
方法一:通过命令 ip a ,找到bond0,查看配置信息
方法二:通过命令 cat /proc/net/bonding/bond0 ,查看bond
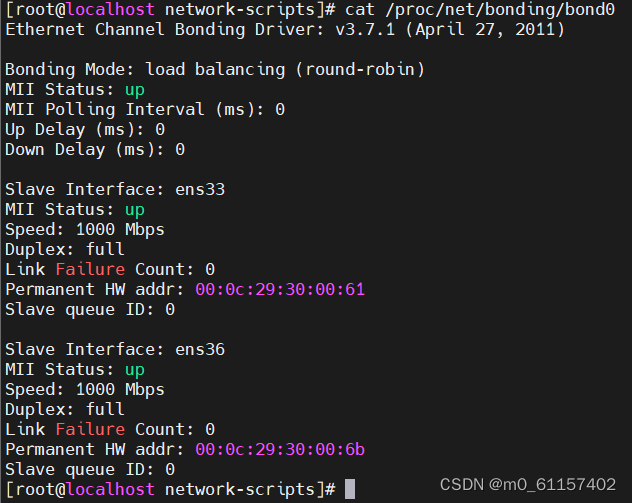
若结果和上图一致,则表示配置成功
1.8 设置开机自动加载 bonding
方法一(不好用):
编辑 /etc/rc.local
# 编辑以下内容
modprobe bonding
方法二(好用):
1.编辑 /etc/sysconfig/modules/bonding.modules
# 编辑以下内容
modprobe bonding
保存退出
2.设置权限
chmod 755 /etc/sysconfig/modules/bonding.modules
3.重启,并查看 bonding 模块是否成功加载
reboot
lsmod | grep bonding


