
- 1【大模型搭建】部署Ollama,pull失败,手动构建方案_ollama pull
- 2PostgreSQL 配置远程访问_postgresql配置远程访问
- 3《KyLin学习理解》-01-KyLin麒麟的简介及其思想_麒麟kycp桌面真题
- 4C++ leetcode(边做边整理)_leetcode c++
- 5go语言包系列之structs:struct转map[string]interface{}_go struct 转 map[string]interface{}
- 6matlab的if函数语句结构,Matlab—结构化程式与自定函数
- 7android 广播BroadcastReceiver,充电、断电、下载、开屏、锁屏、解锁的监听及service初始化广播的监听事件,获取充电状态,cpu温度,service的适配_broadcastreceiver 只有充电时候才能执行
- 8Welcome to MySQL Workbench:MySQL 索引_workbench建立索引
- 9基于 Vue3打造前台+中台通用提效解决方案(上)_前端中台项目
- 10IntelliJ IDEA 和 Eclipse的区别_eclipse intellij对比
尝试使用JavaScript实现一个简单的区块链_js 区块链
赞
踩
本文使用JavaScript实现一个简单的区块链,主要在node.js环境中运行。使用crypto-js来为区块链中的块创建哈希加密,使用express.js来创建用于与区块链交互的API。
以下是实现区块链的步骤:
- 创建一个新的Node.js项目并安装必要的库:crypto-js、express。
- 定义区块链中的区块结构。每个块应该包含唯一的索引、时间戳和想要存储在块中的数据。
- 创建一个区块链类,包含一些操作区块的方法,例如向链中添加新块。
- 使用 express.js 创建api,可以使用postman查询区块链,添加交易,以及执行挖矿操作。
- 使用 postman 测试区块链。
1. 创建一个新的Node.js项目并安装必要的库:crypto-js、express。
首先初始化一个node项目:
npm init在package.json文件中,添加type字段:
"type": "module"安装crypto-js和express:
- npm install crypto-js
- npm install express
- npm install body-parser
在index.js中写入:
- import express from "express";
- import bodyParser from "body-parser";
-
- const app = express();
- const port = 3000;
-
- app.listen(port, () => {
- console.log(`Example app listening on port ${port}`);
- });
在terminal中输入:
node index.js你将看到:
Server running on port 3000.到这里,基本的node.js设置搞定。
2. 定义区块链中的区块结构。每个块应该包含唯一的索引、时间戳和想要存储在块中的数据。
新建blockchain.js文件,定义我们的区块结构:

Block类包含6个属性,2个方法。
index:数字,区块的索引。timestamp:数字,时间戳。transactions:数组,储存每一笔交易信息。previousHash:哈希值,记录上一个区块的哈希值。hash:哈希值,记录当前区块的哈希值。nonce:数字,用于找到满足特定条件的哈希值的随机数,pow相关。calcHash:函数,计算哈希值,将index,timestamp,transactions,previousHash,nonce拼接在一起输出哈希值。mineBlock:函数,用于工作量证明的方法,接受一个代表复杂度的数字。本文对于工作量证明的计算条件为:寻找前4位为0的哈希值。
3. 创建一个区块链类,包含一些操作区块的方法,例如向链中添加新块。
同样在blockchain.js文件中,定义一个区块链类:
Blockchain类包含3个属性,4个方法。
difficulty:数字,代表复杂度的数字。pendingTrasactions:数组,资源池,用于存储每一笔交易。当新的区块产生时,会将资源池中的交易信息存入新区块中。chain:数组,储存每一个区块。createGenesisBlock:函数,创建第一个区块(创世块)。createBlock:函数,创建新区块。getLatestBlock:函数,返回最后一个区块。createTransaction:函数,创建一笔交易,返回将被写入区块的索引值。
4. 使用 express.js 创建api,可以使用postman查询区块链,添加交易,以及执行挖矿操作。
接下来需要实现三个api,分别是:
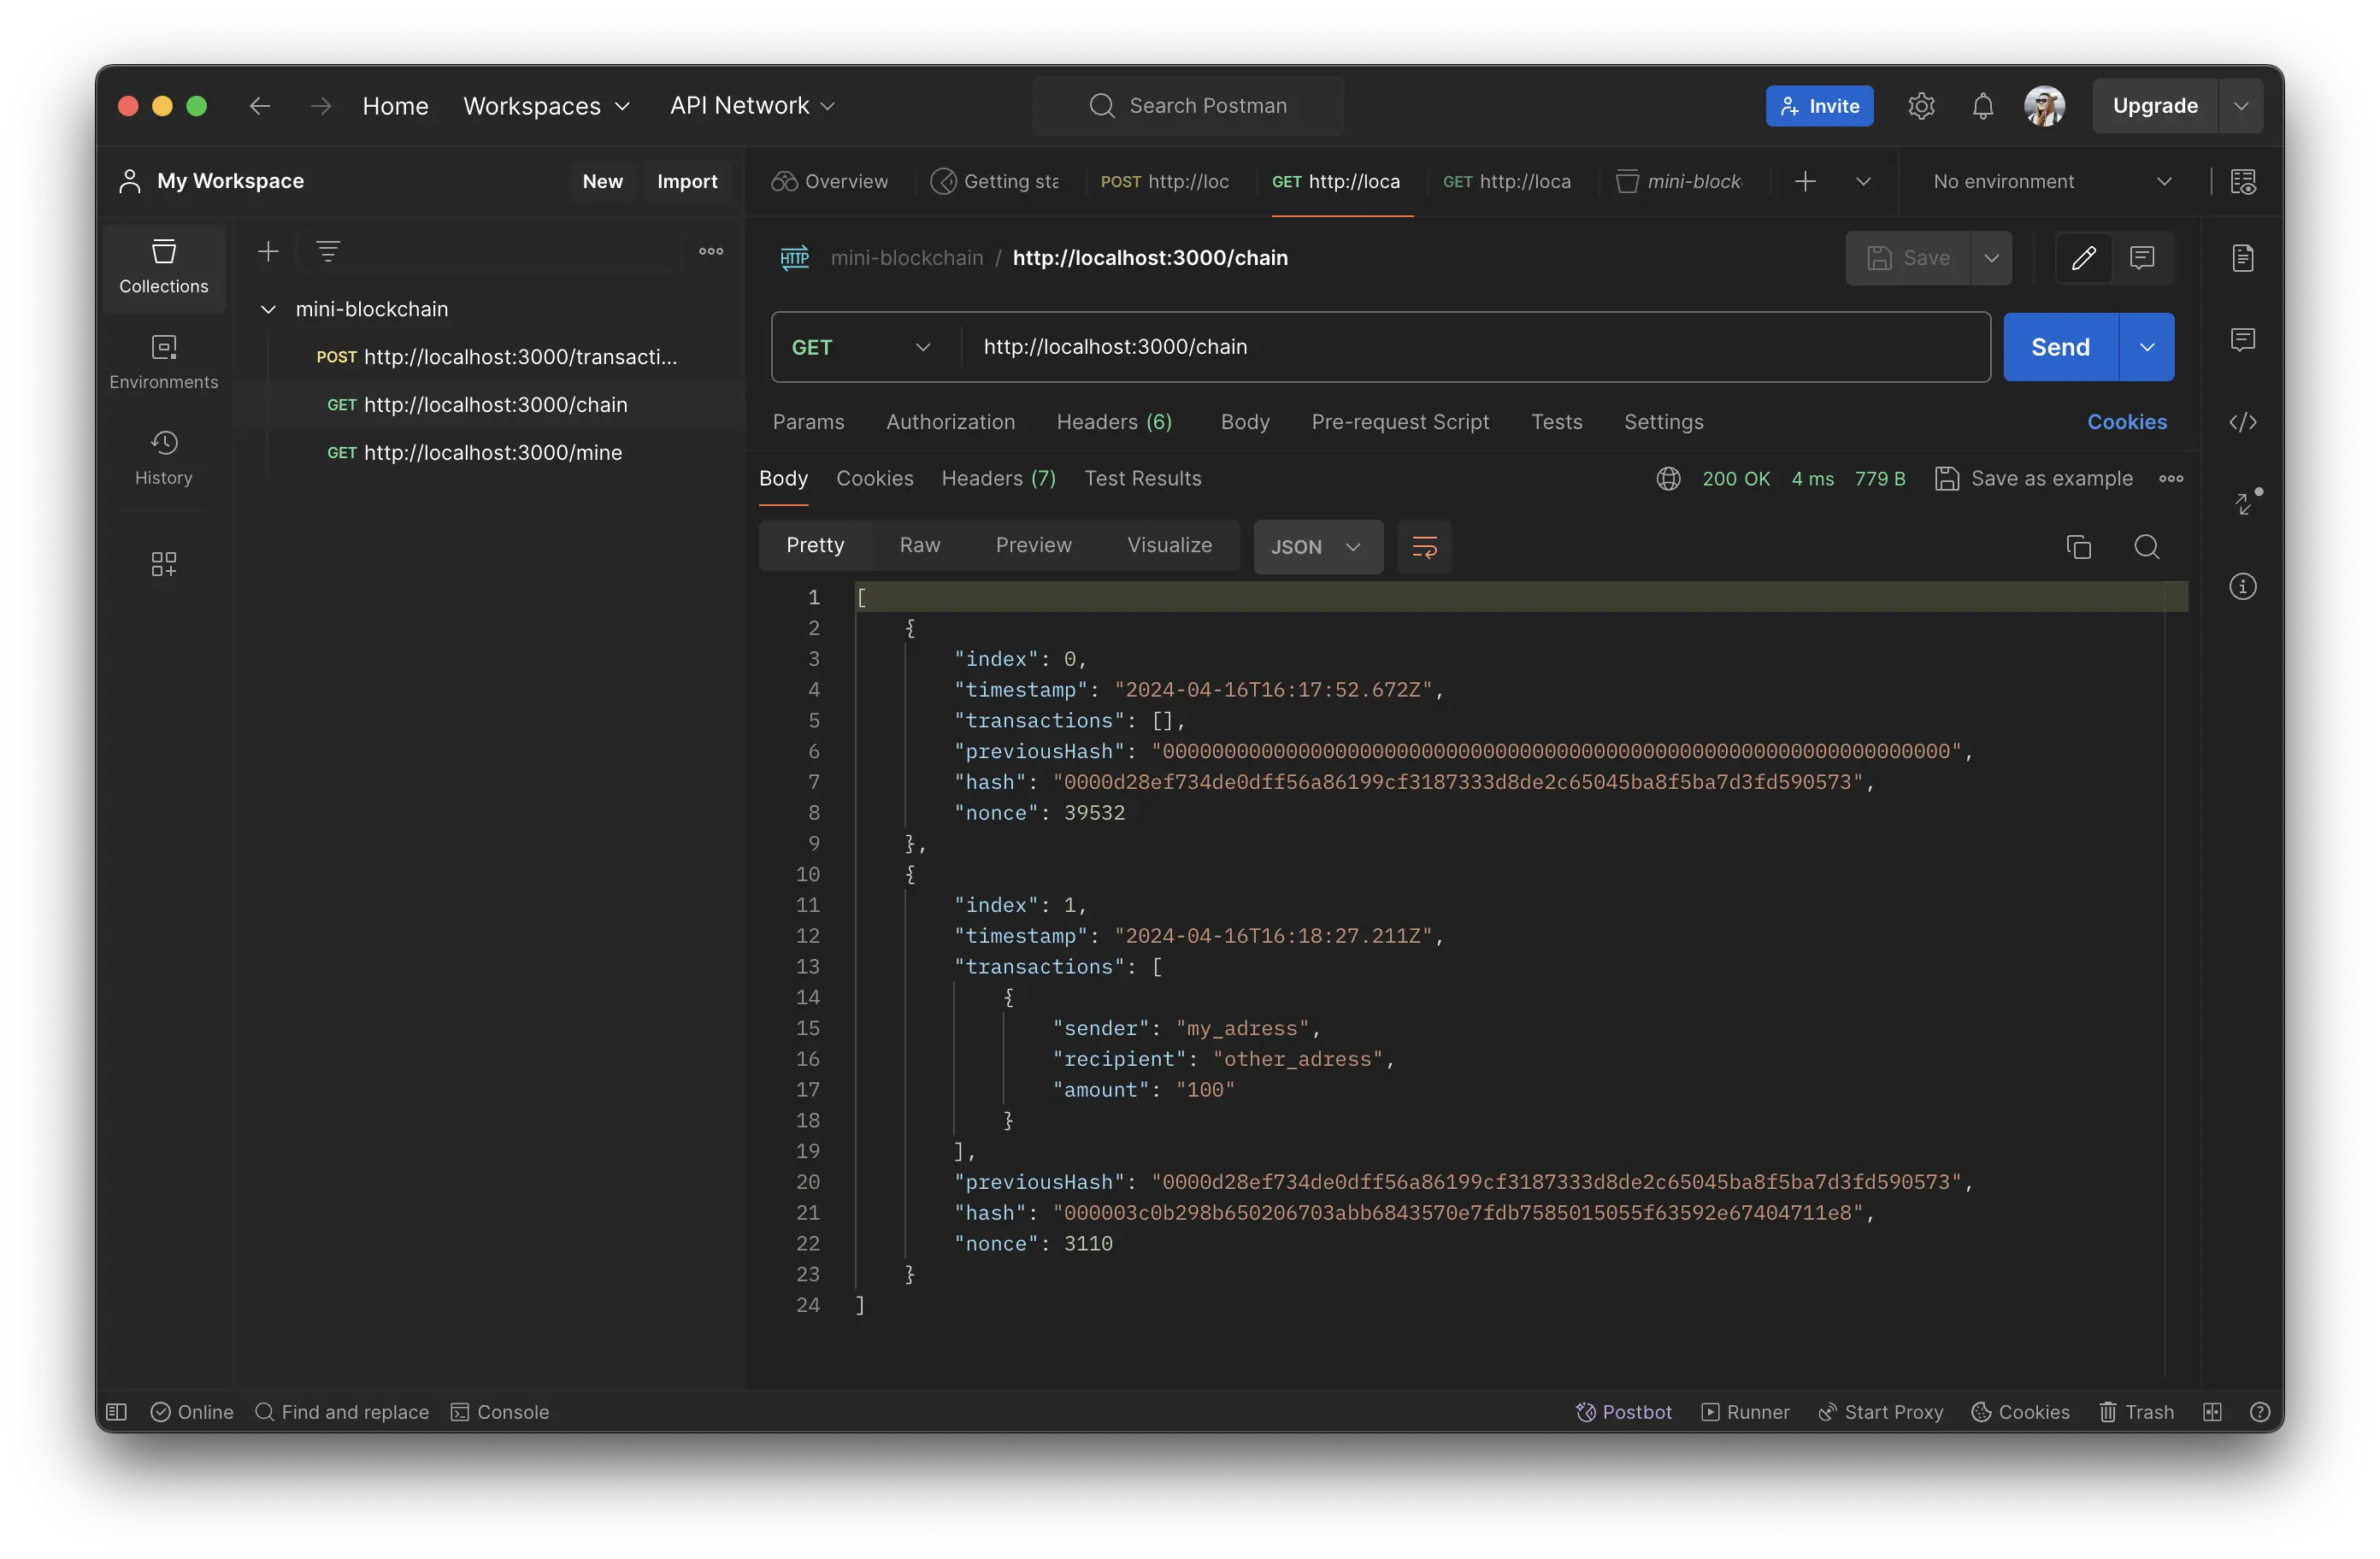
- GET /chain //查看区块链
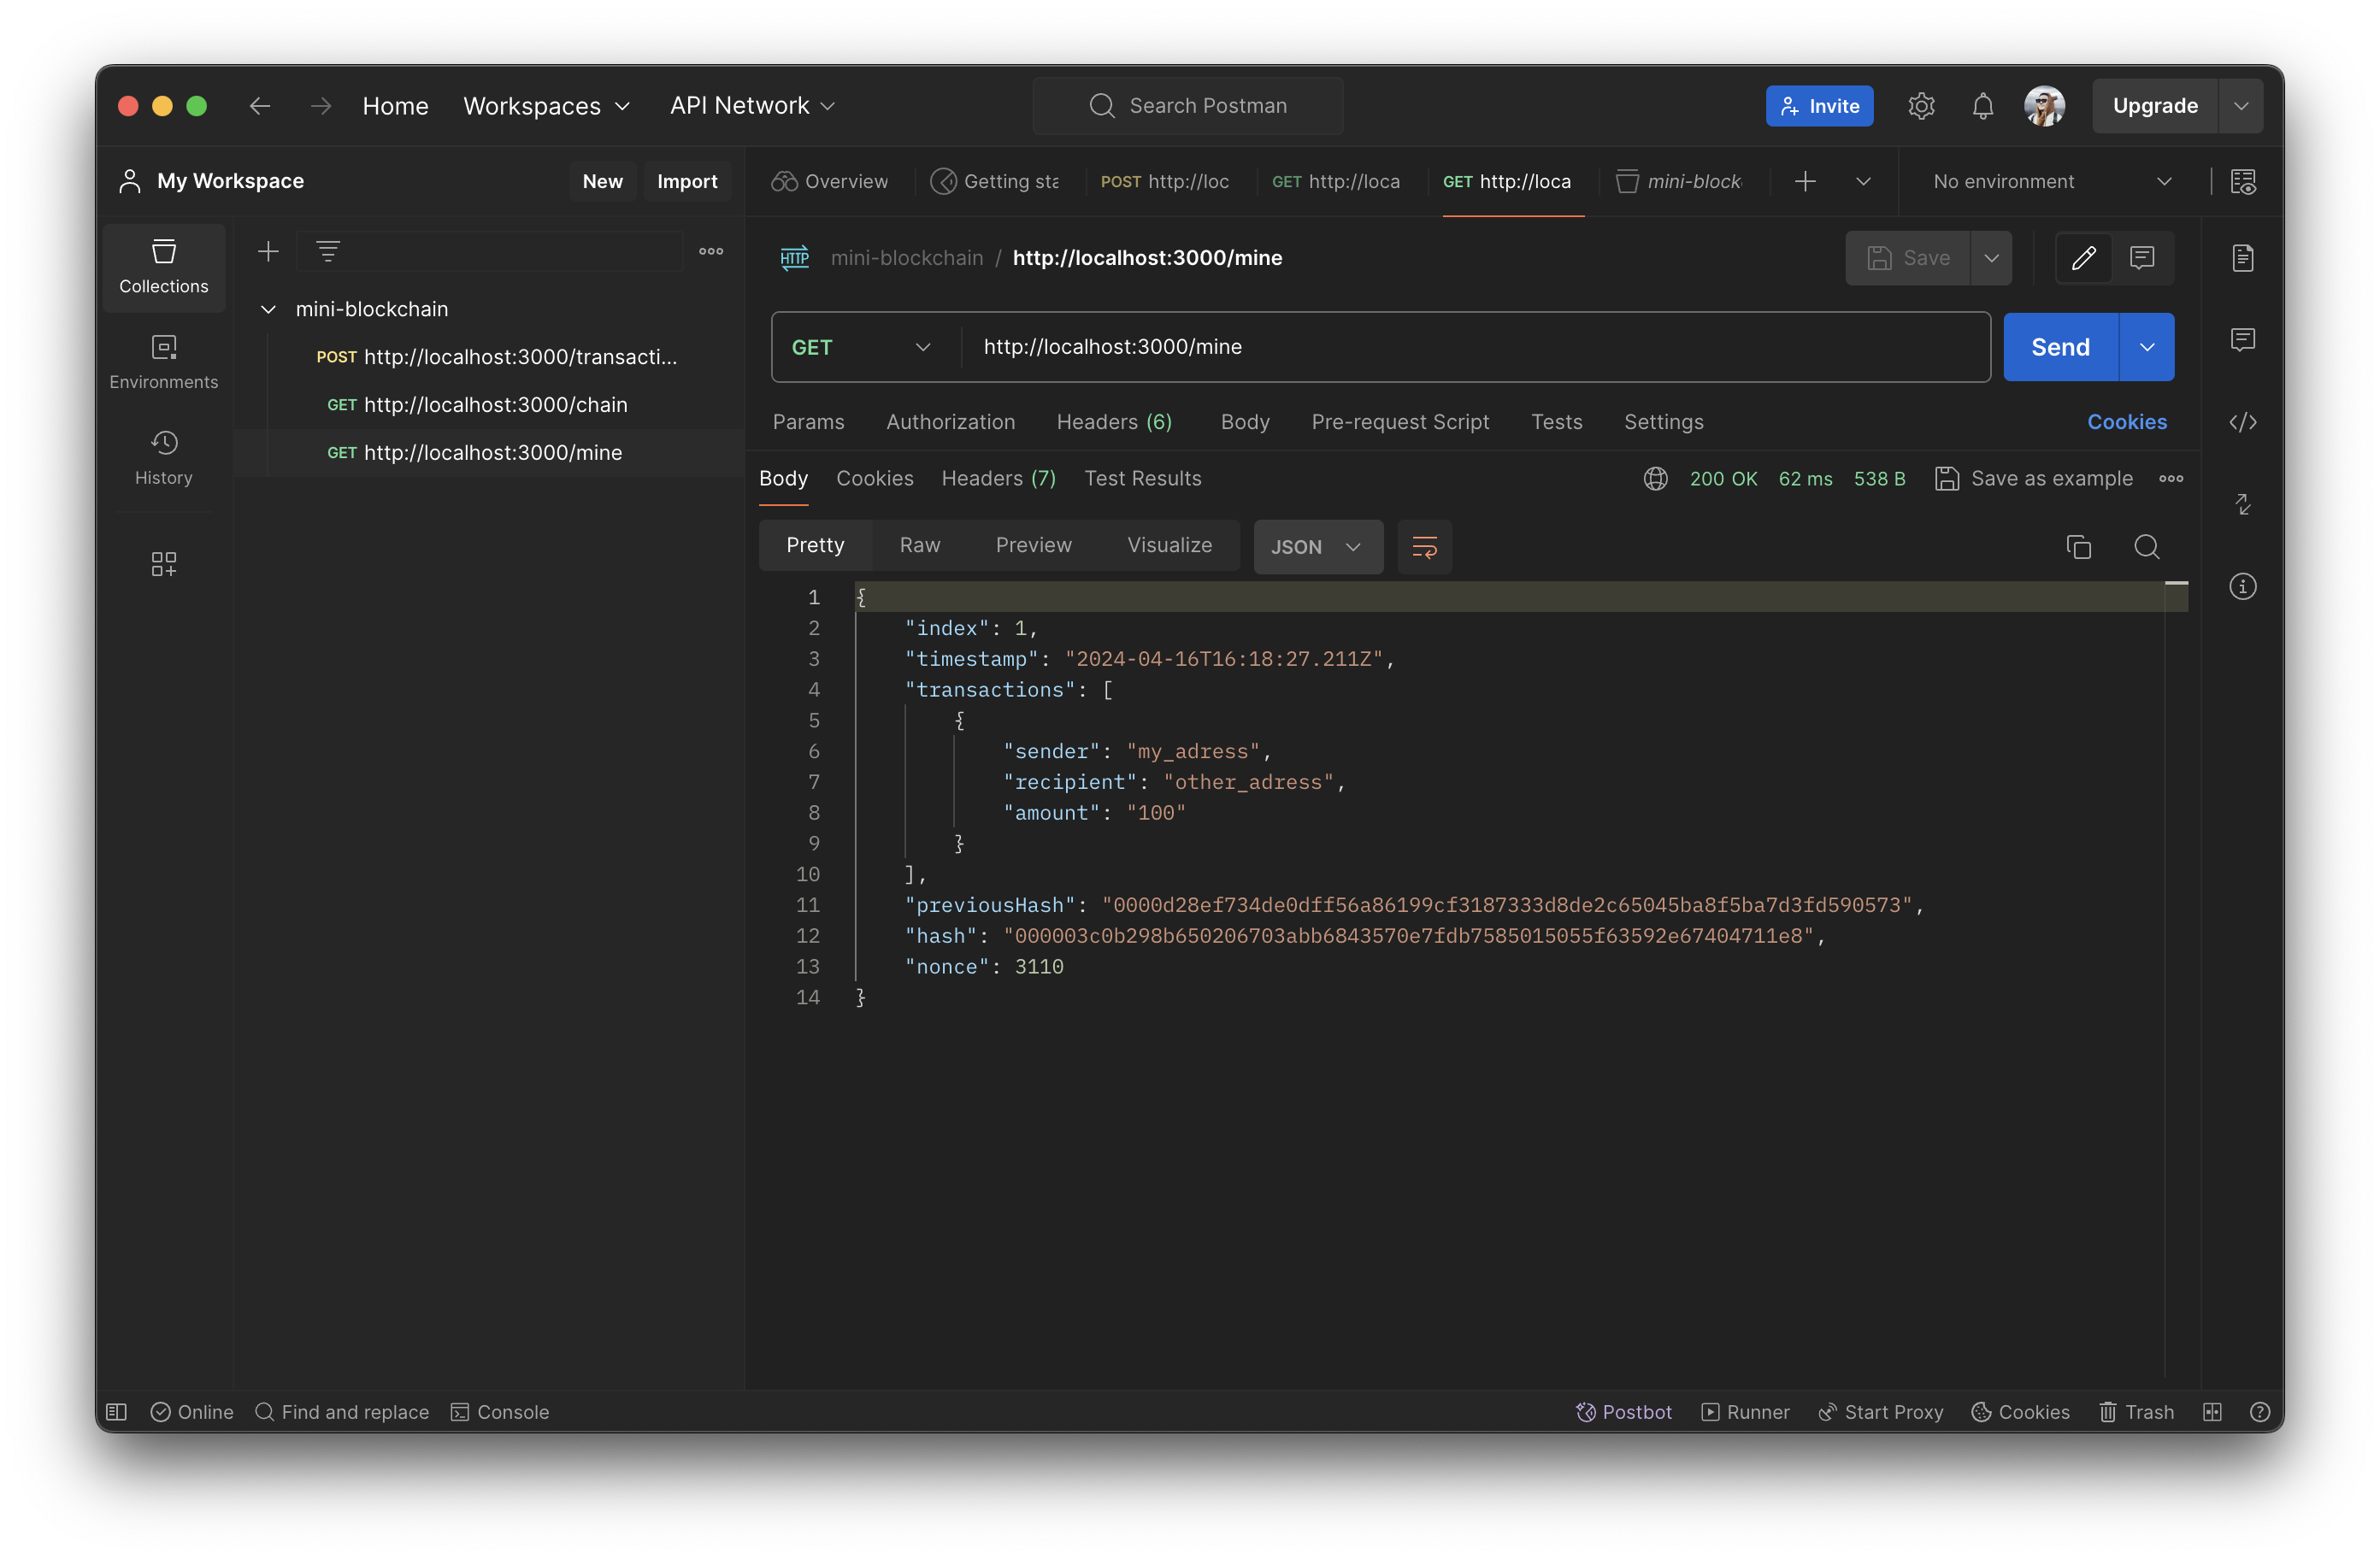
- GET /mine //执行挖矿,成功后增加一个区块
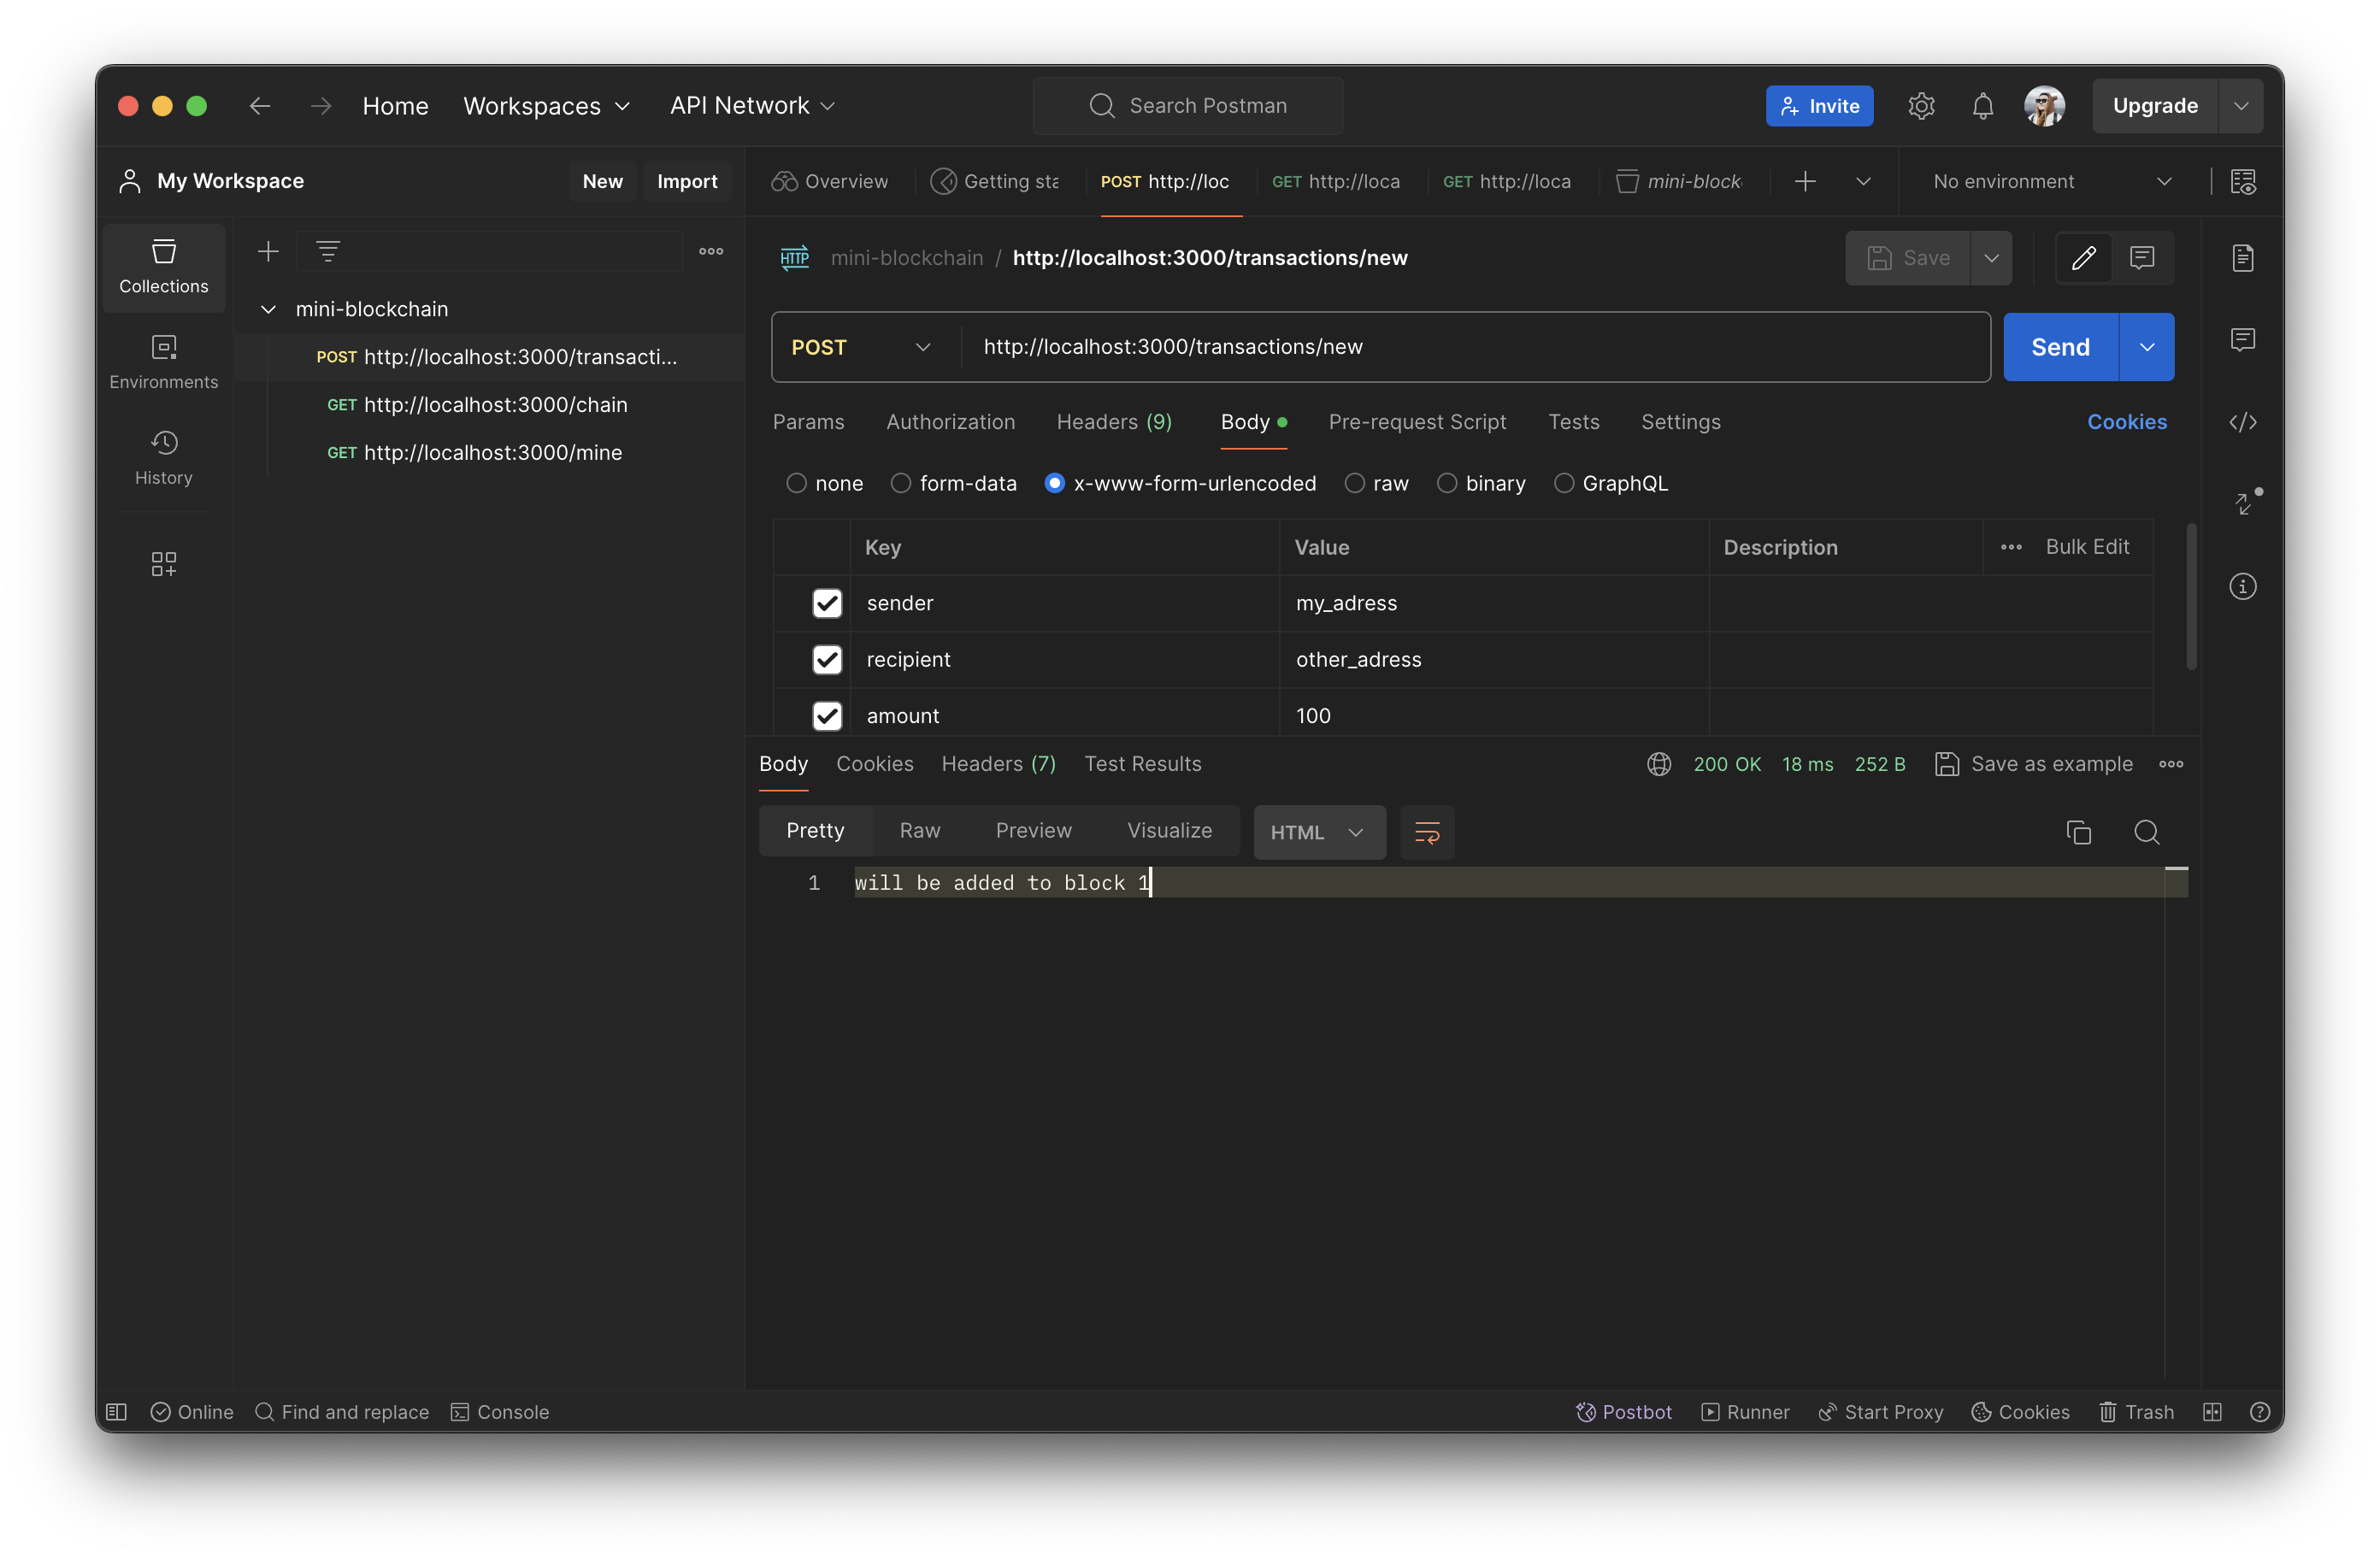
- POST /transactions/new //添加一笔交易
回到index.js中,导入blockchain.js,并添加route:
5. 使用 postman 测试区块链。
测试 GET http://localhost:3000/chain:
测试 GET http://localhost:3000/mine:
测试 POST http://localhost:3000/transactions/new:
文章不断跟新,欢迎长期关注,同时如有错误请评论区或私信纠正互相研究学习!
VX:LALAKO_2
免责声明:我们研究和内容中提供的信息仅供参考,不应被视为财务或投资建议。投资或参与金融活动的任何决定完全由你负责。我们不认可或推荐任何特定的投资策略,个人在做出任何投资决策之前应进行自己的研究并寻求专业建议。我们不对因将我们的内容用于投资目的而导致的任何财务损失、损害或不便承担责任。请始终注意与金融市场相关的风险,并在做出任何投资选择之前仔细考虑你的财务状况和风险承受能力。
- ...
赞
踩

