
- 12024字节社招测试开发岗一面、二面、三面、交叉面面经
- 2IoTDB使用学习笔记(一)_iotdb数据库基本操作
- 3Bert遇见文本分类_bert输入可以为时序特征,而非文本
- 4Gitee码云注册和提交代码_码云代码
- 5windows下添加conda源出现404错误解决方案。
- 6java Autowired 注释报错问题解决_报错泛型autiware报错
- 7树莓派与stm32通信超详细解答过程_树莓派 stm32 总线通讯
- 8Intellij IDEA在controller中使用@Autowired注解,出现could not autowire错误,解决办法_控制器无法autowire
- 9算法学习笔记2:双指针
- 10llama3入门训练和部署_ollama 训练
SpringBoot集成Swagger2_springboot 集成swagger2
赞
踩
一 Swagger简介
Swagger是专门为RestFul 风格而诞生的一个服务框架,前后端都按照Swagger生成的接口文档来写各自的业务,最大限度的降低了前后端之间的耦合度;
二 SpringBoot集成Swagger2
在项目里使用swagger,需要使用springfox,涉及到如下两个jar包
- swagger2
- swaggerUI
在maven官网搜索找到上边的两个jar
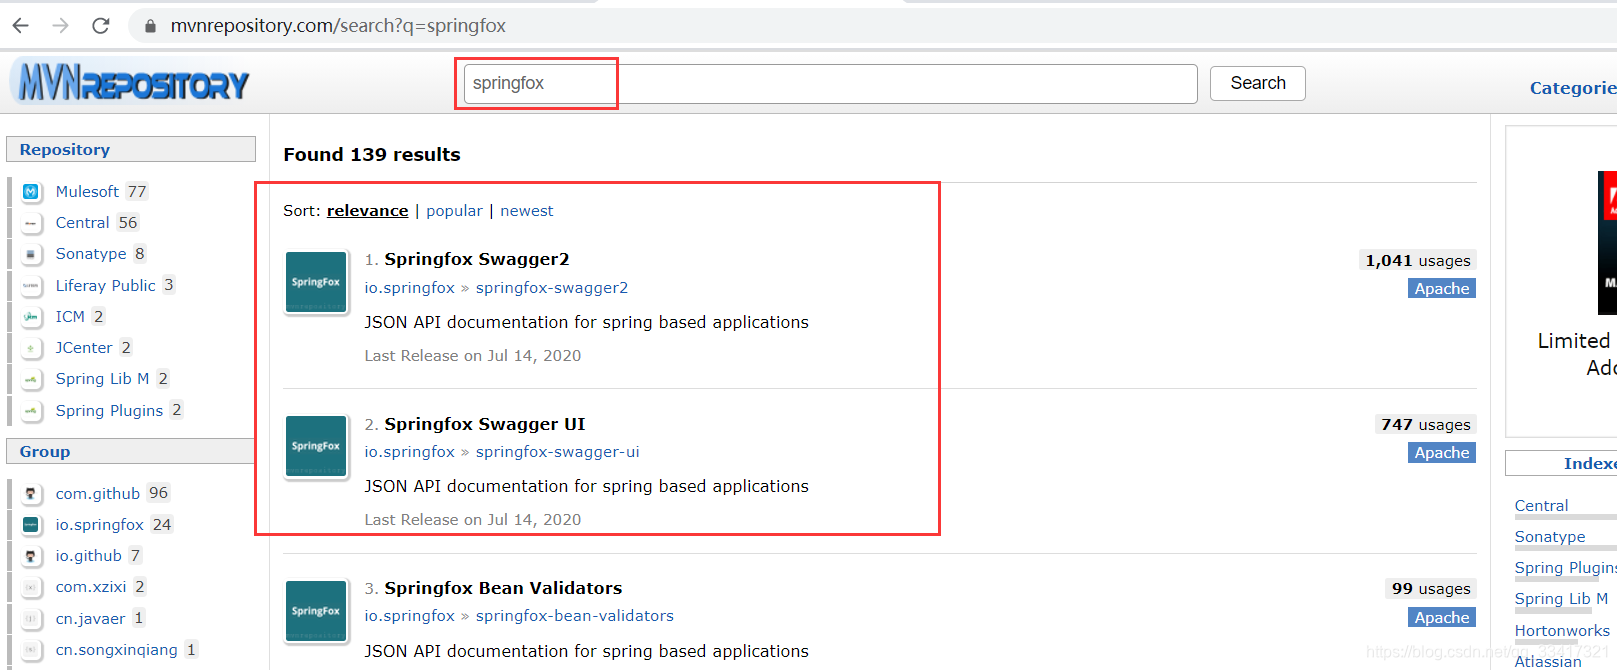
找到2.X的版本
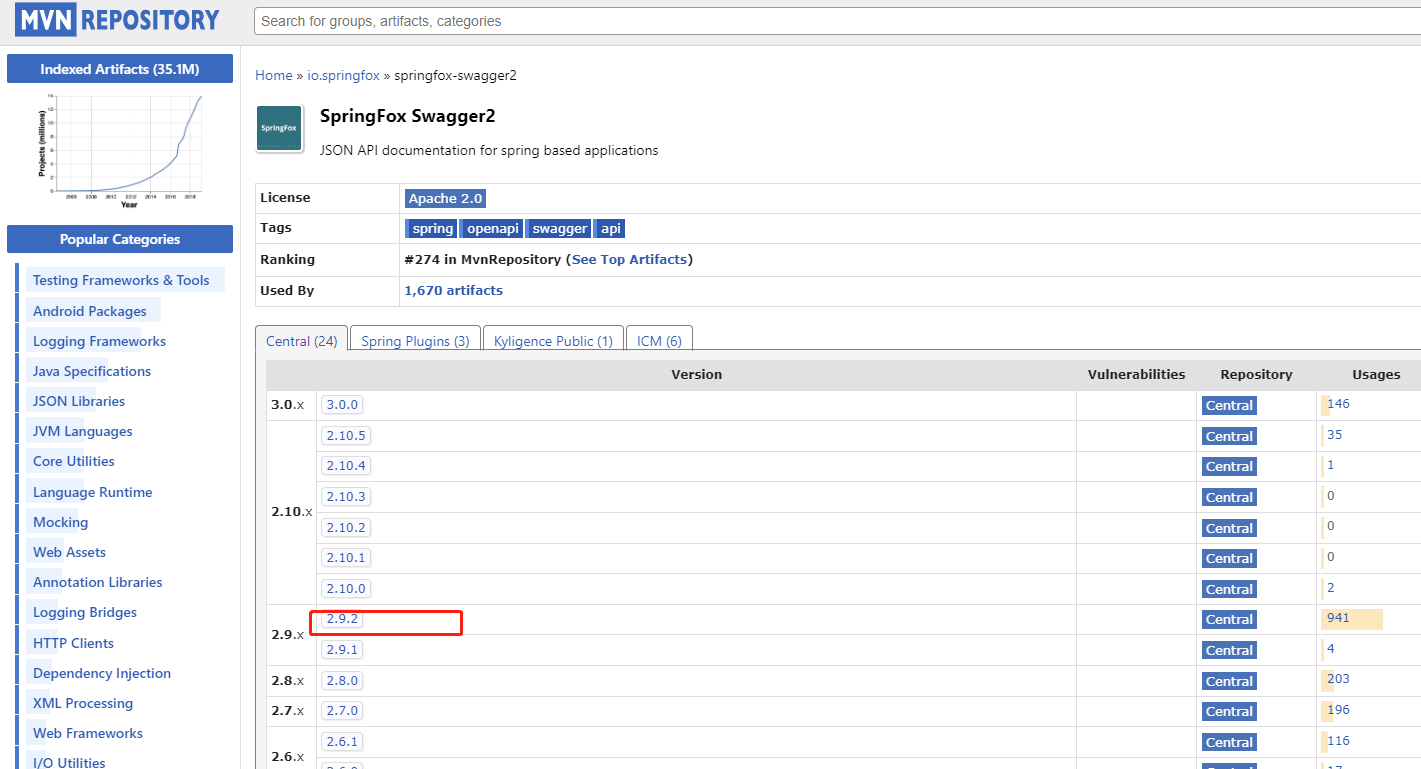
添加依赖

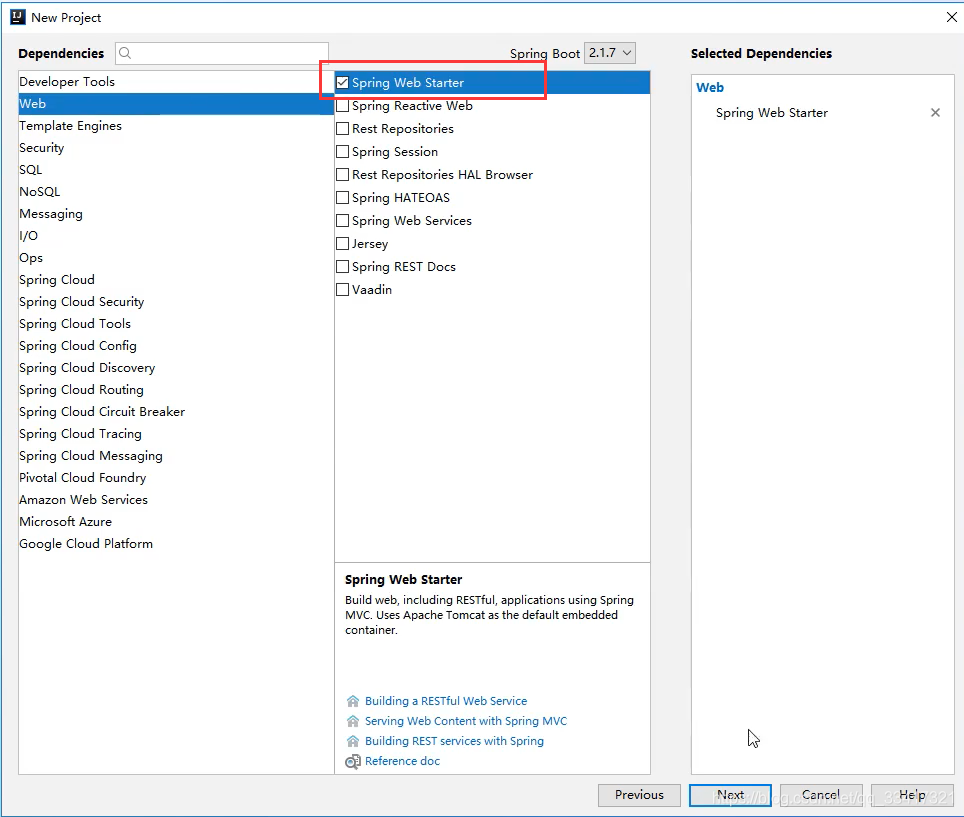
2.1 新建SpringBoot项目
如果不知道怎么新建SpringBoot项目的同学,可以参考:SpringBoot基础
由于是web项目,这里选择spring web starter
2.2 添加依赖
<dependency>
    <groupId>io.springfox</groupId>
    <artifactId>springfox-swagger2</artifactId>
    <version>2.9.2</version>
</dependency>

<dependency>
    <groupId>io.springfox</groupId>
    <artifactId>springfox-swagger-ui</artifactId>
    <version>2.9.2</version>
</dependency>
- 1
- 2
- 3
- 4
- 5
- 6
- 7
- 8
- 9
- 10
- 11
如果是swagger3.0版以上,则只需要添加如下依赖即可
 <dependency>
   <groupId>io.springfox</groupId>
   <artifactId>springfox-boot-starter</artifactId>
   <version>3.0.0</version>
</dependency>
- 1
- 2
- 3
- 4
- 5
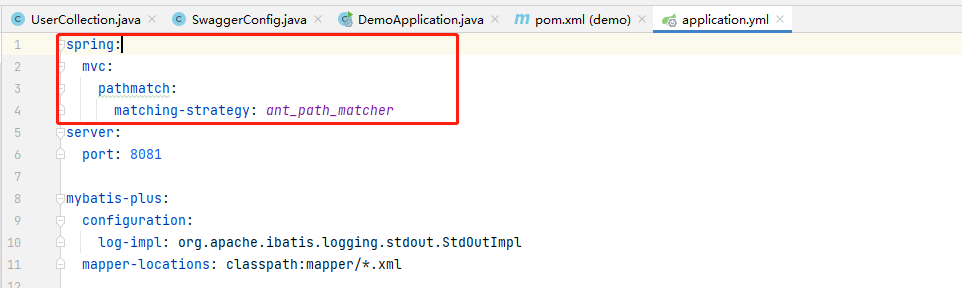
如果是swagger3,打包时可能会报错如下

解决办法:在配置文件里进行如下配置即可
2.3 新建Controller
package com.swagger.demo.controller;

import org.springframework.web.bind.annotation.RequestMapping;
import org.springframework.web.bind.annotation.RestController;

@RestController
public class HelloController {
    @RequestMapping("hello")
    public String hello(){
        return "hello";
    }
}
- 1
- 2
- 3
- 4
- 5
- 6
- 7
- 8
- 9
- 10
- 11
- 12
- 13
2.4 Swagger配置类
package com.swagger.demo.config;

import org.springframework.context.annotation.Configuration;
import springfox.documentation.swagger2.annotations.EnableSwagger2;

@Configuration
@EnableSwagger2
public class SwaggerConfig {

}
- 1
- 2
- 3
- 4
- 5
- 6
- 7
- 8
- 9
- 10
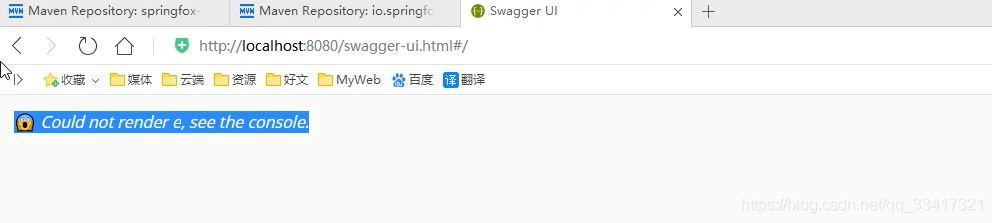
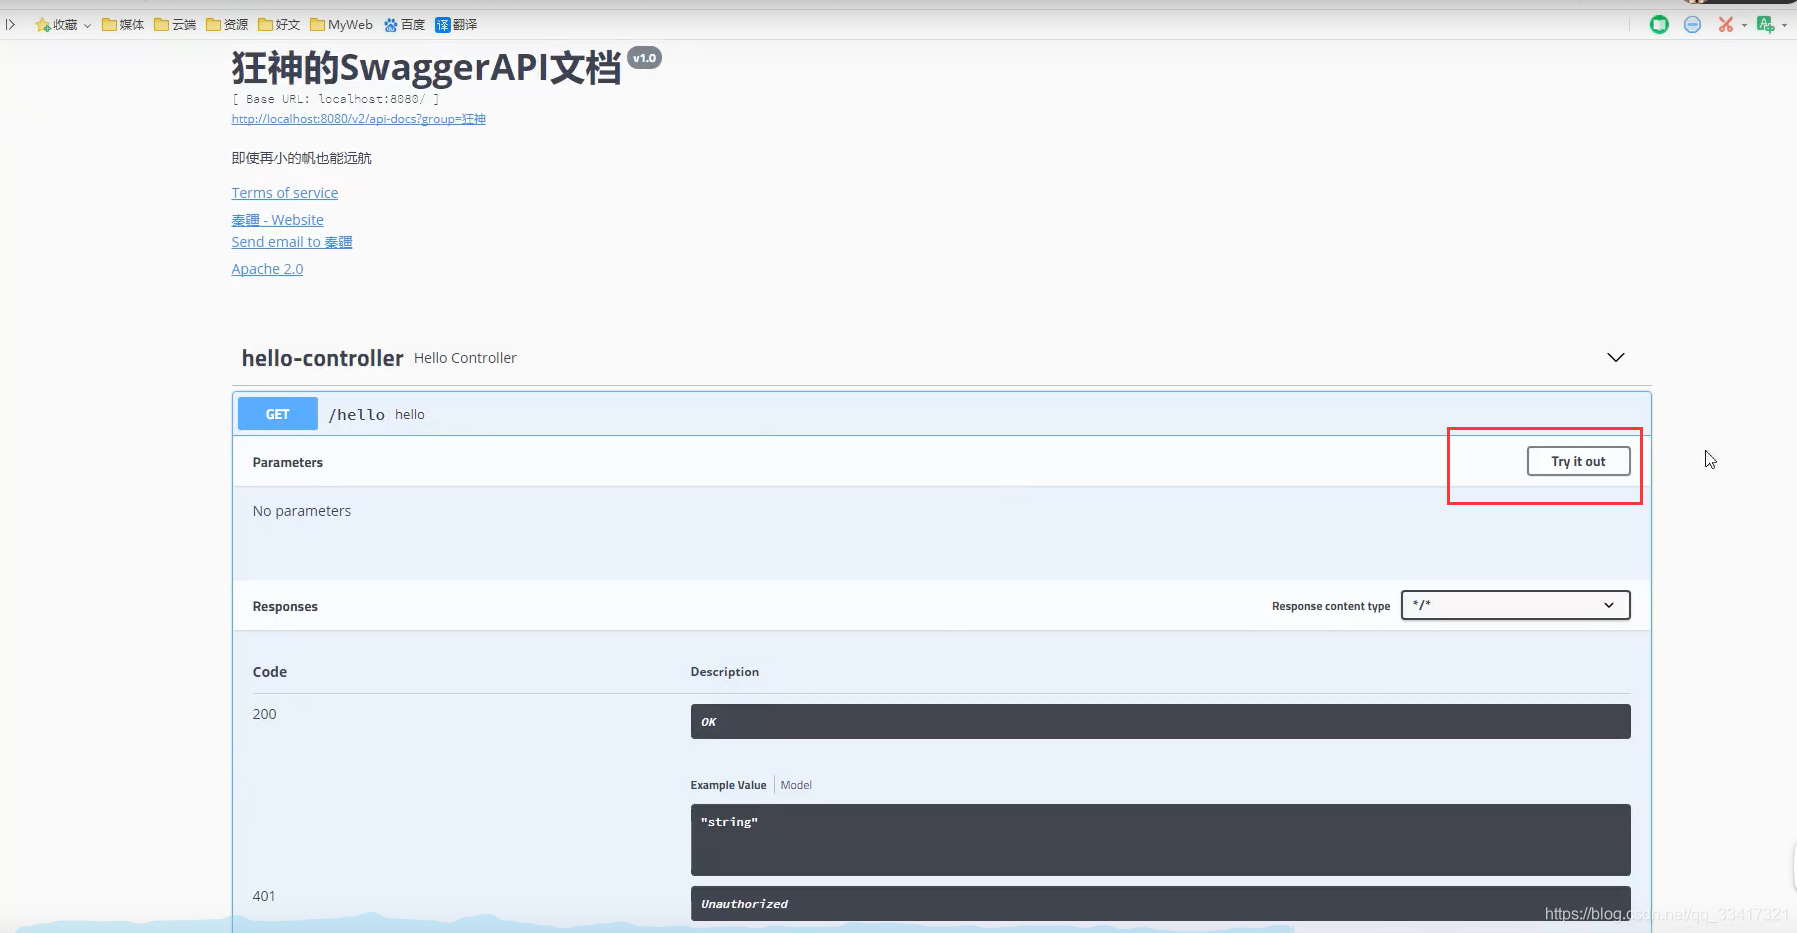
访问swagger页面
Swagger默认访问地址
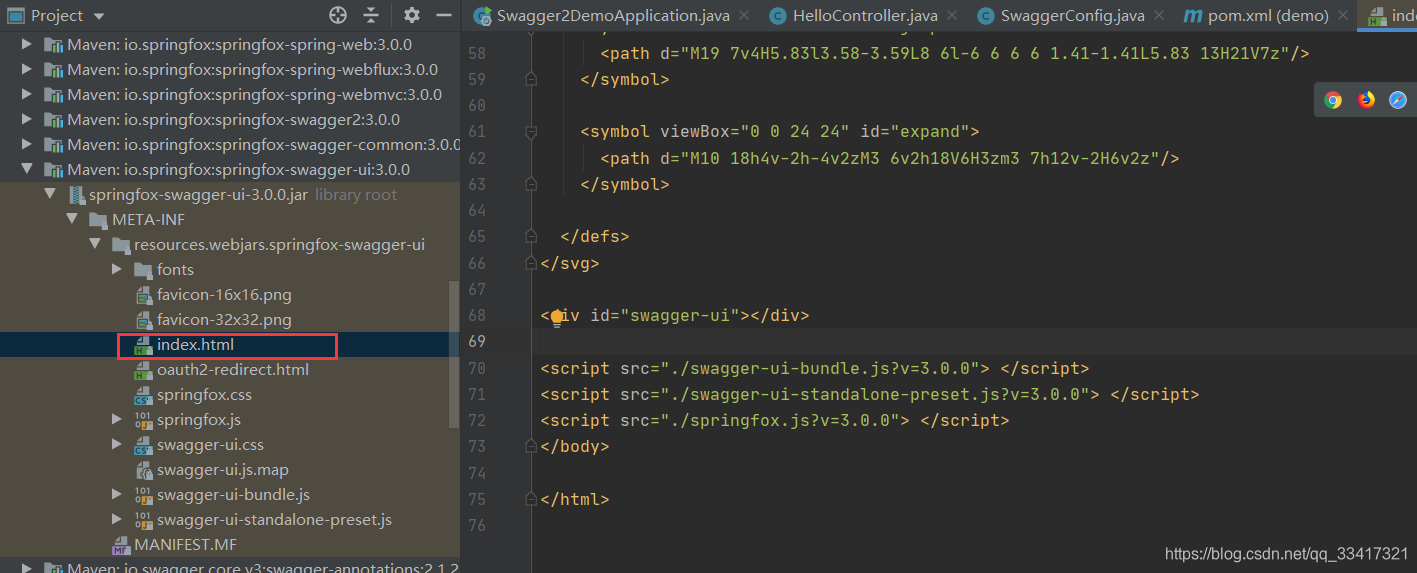
swagger3.0以上版本:http://localhost:8080/swagger-ui/index.html
swagger3.0以下版本:http://localhost:8080/swagger-ui.html,http://localhost:8080/v3/api-docs
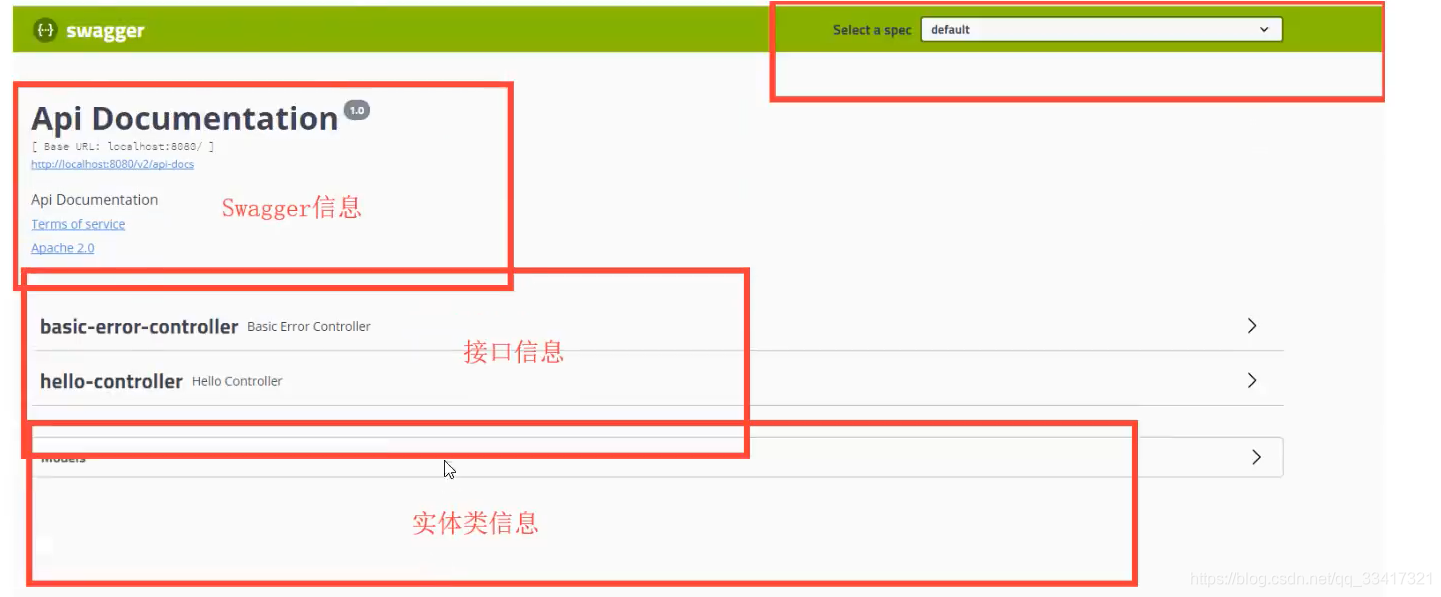
上边页面的位置:
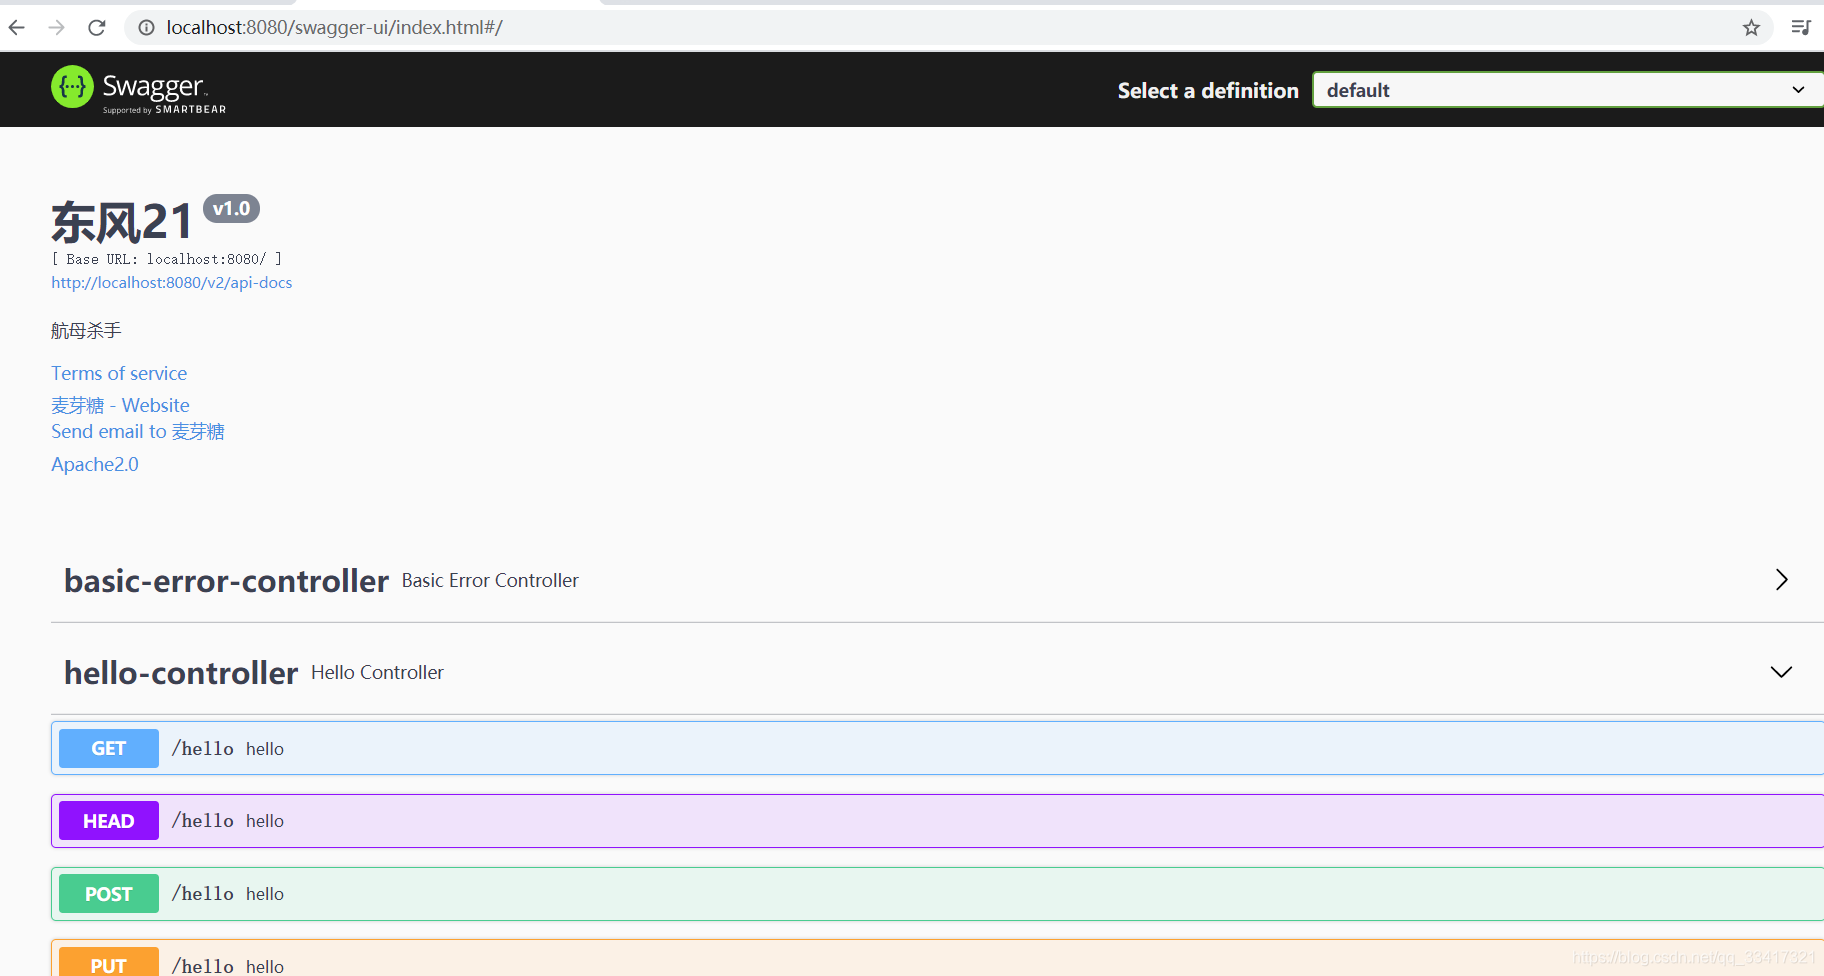
三 配置Swagger2
Swagger的bean实例Docket
package com.swagger.demo.config;


import org.springframework.context.annotation.Bean;
import org.springframework.context.annotation.Configuration;

import springfox.documentation.service.ApiInfo;
import springfox.documentation.service.Contact;
import springfox.documentation.spi.DocumentationType;
import springfox.documentation.spring.web.plugins.Docket;
import springfox.documentation.swagger2.annotations.EnableSwagger2;

import java.util.ArrayList;

@Configuration
@EnableSwagger2
public class SwaggerConfig {
    /**
     * 配置Swagger的Docket的bean实例
     *
     * @return
     */
    @Bean
    public Docket docket() {
        return new Docket(DocumentationType.SWAGGER_2).apiInfo(apiInfo());
    }

    public ApiInfo apiInfo() {
        Contact contact = new Contact("麦芽糖", "https://blog.csdn.net/qq_33417321", "826340416@qq.com");
        return new ApiInfo("东风21", "航母杀手", "v1.0", "https://blog.csdn.net/qq_33417321",
                contact,
                "Apache2.0",
                "https://blog.csdn.net/qq_33417321",
                new ArrayList());

    }
}

- 1
- 2
- 3
- 4
- 5
- 6
- 7
- 8
- 9
- 10
- 11
- 12
- 13
- 14
- 15
- 16
- 17
- 18
- 19
- 20
- 21
- 22
- 23
- 24
- 25
- 26
- 27
- 28
- 29
- 30
- 31
- 32
- 33
- 34
- 35
- 36
- 37
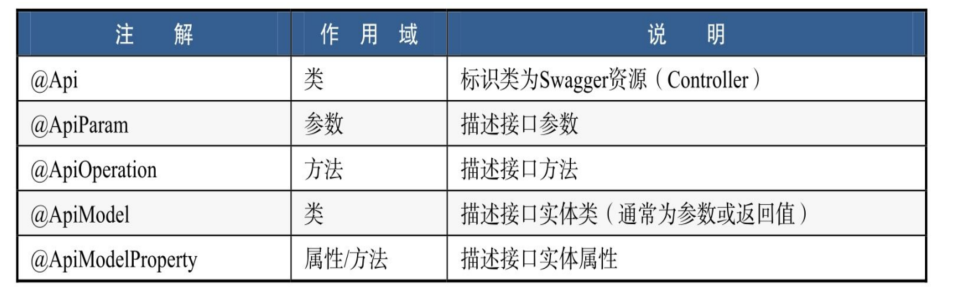
四 配置Swagger扫描接口
第三章搭建的swagger,把所有的接口都扫描了,这里我们做配置,只扫描指定的接口,swagger常用注解有下边五个
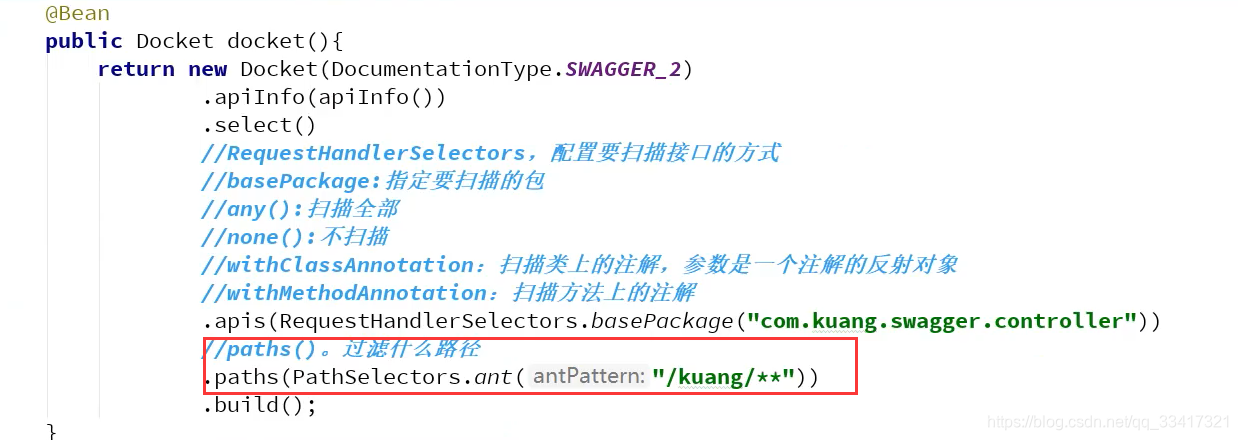
4.1 扫描指定的包下的接口
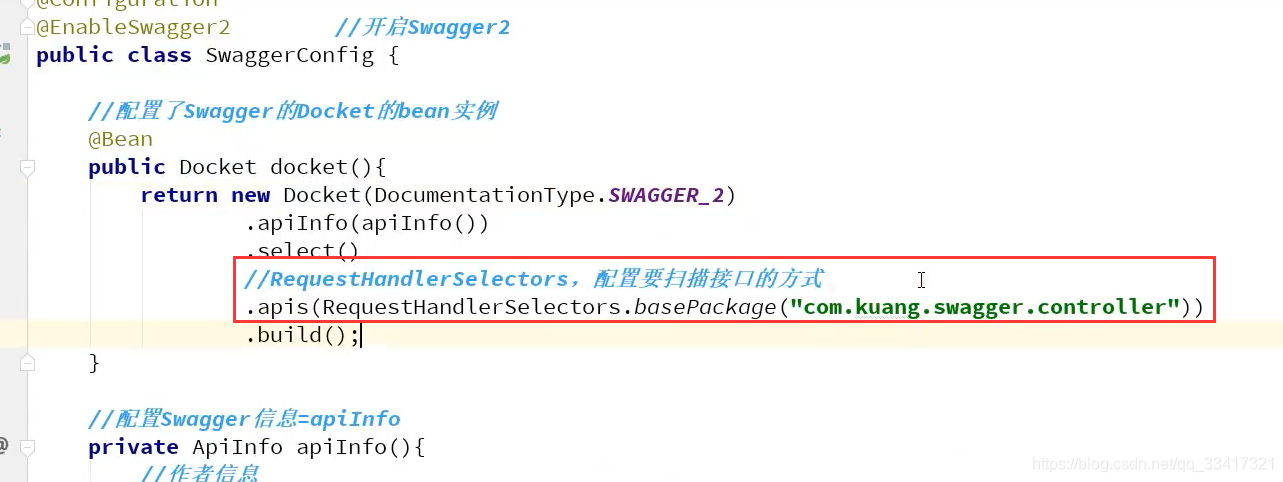
配置扫描过滤的路径
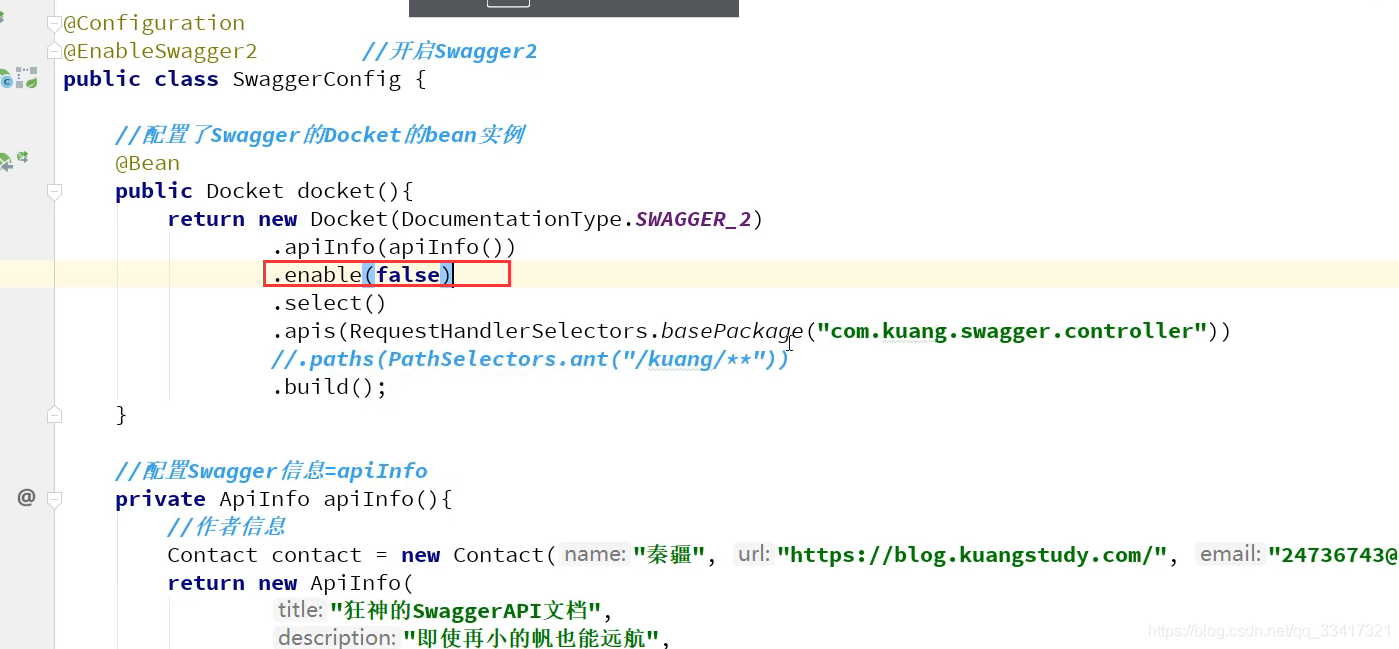
4.2 配置是否启用Swagger
默认是true(启用)
访问swagger
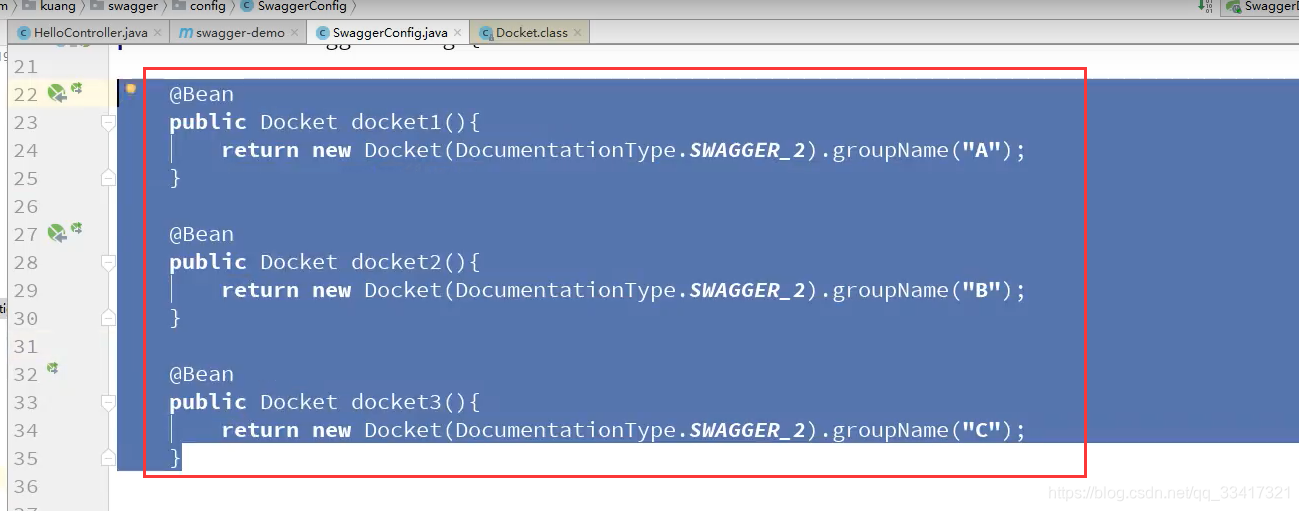
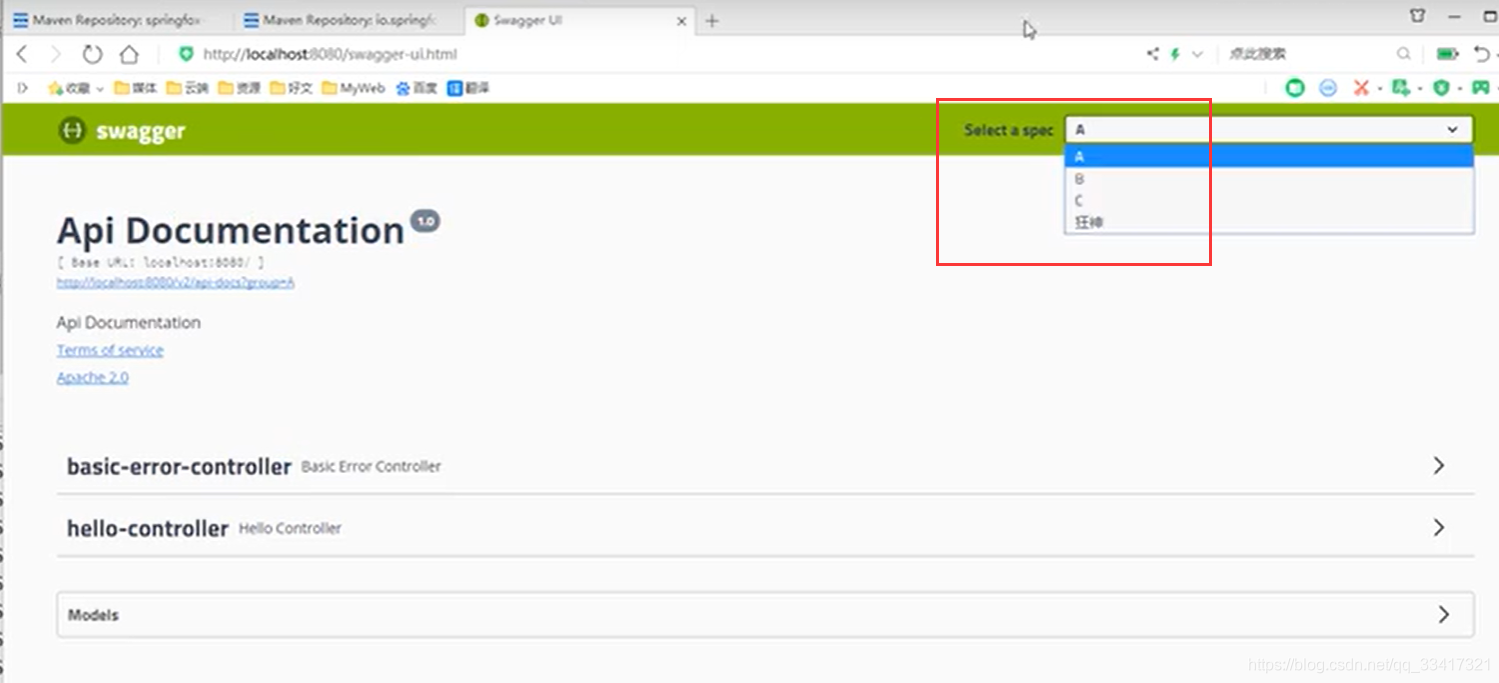
4.3 配置多个分组
多个团队开发的话,各自使用各自的swagger
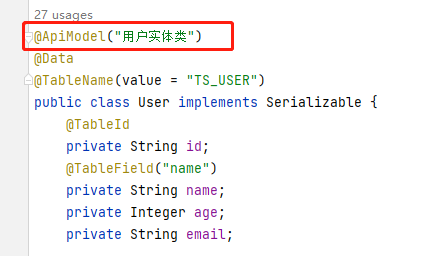
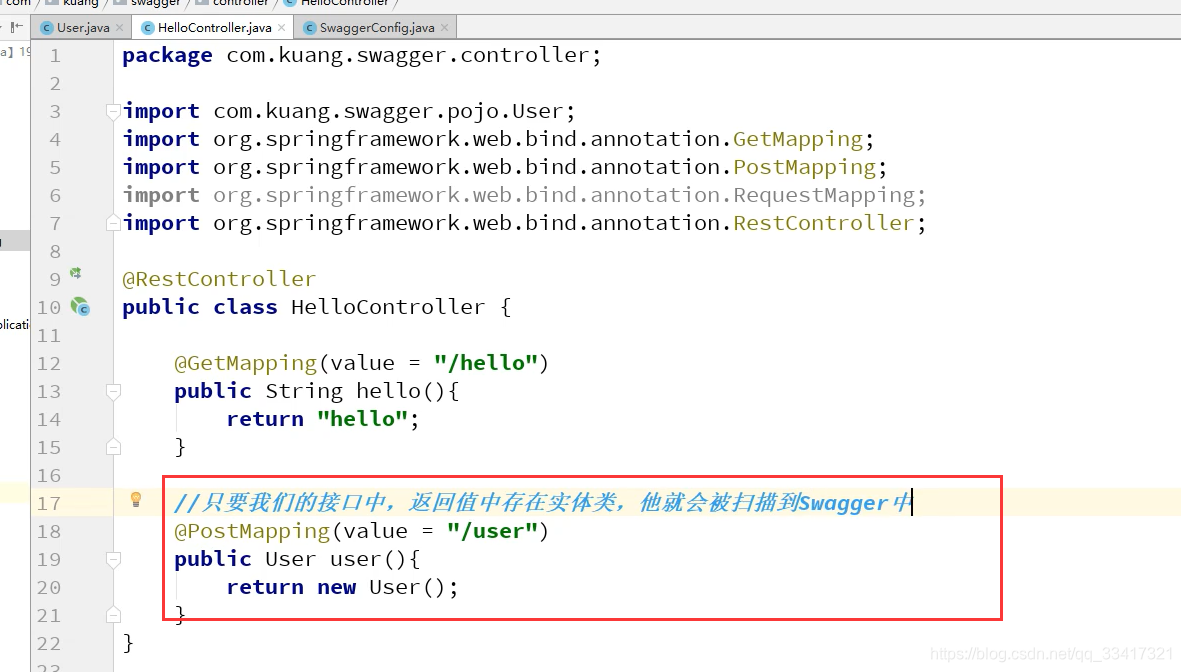
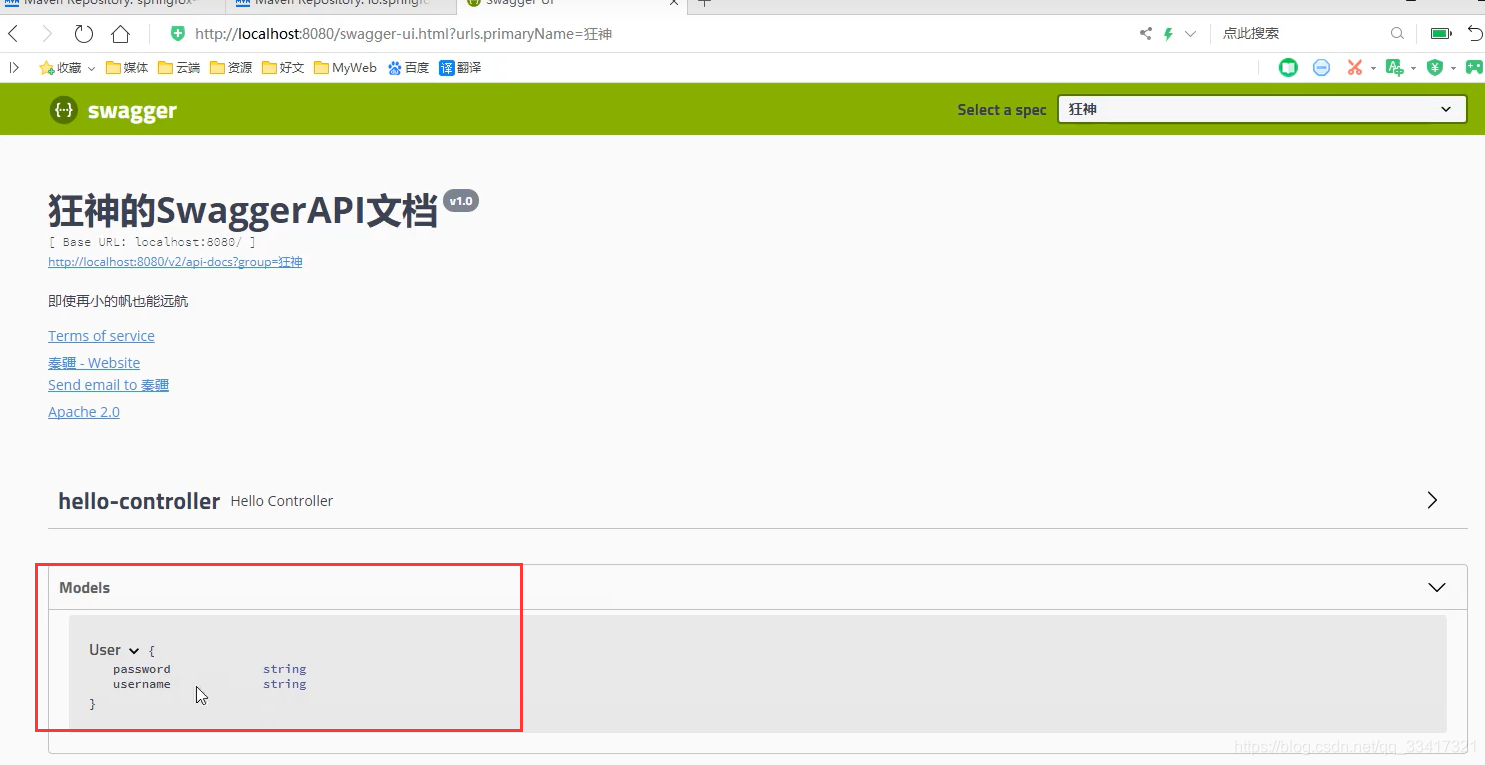
4.4 实体类配置
新建实体类User
controller:
swagger:
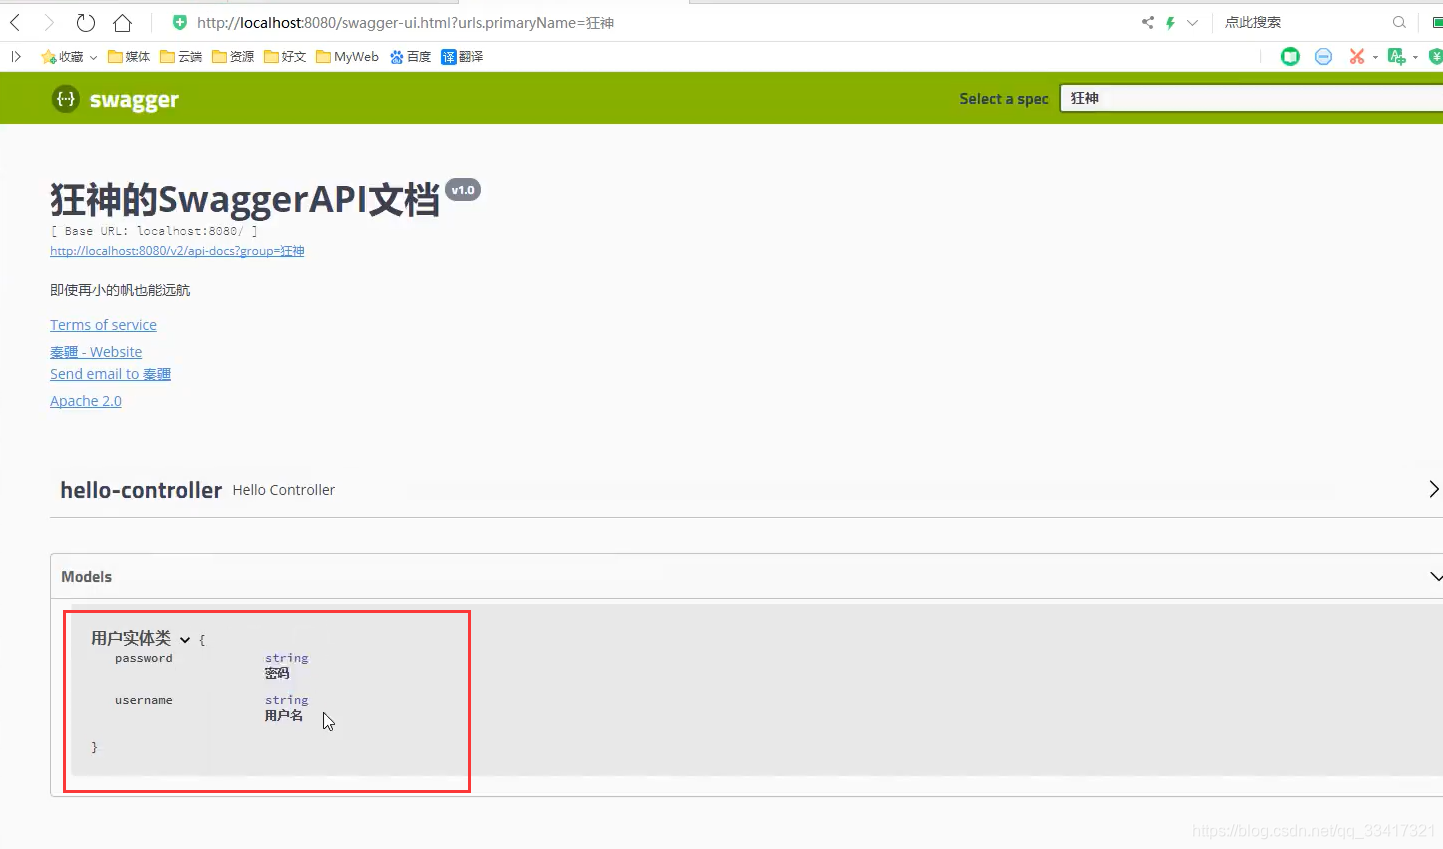
给swagger里的实体类加注释

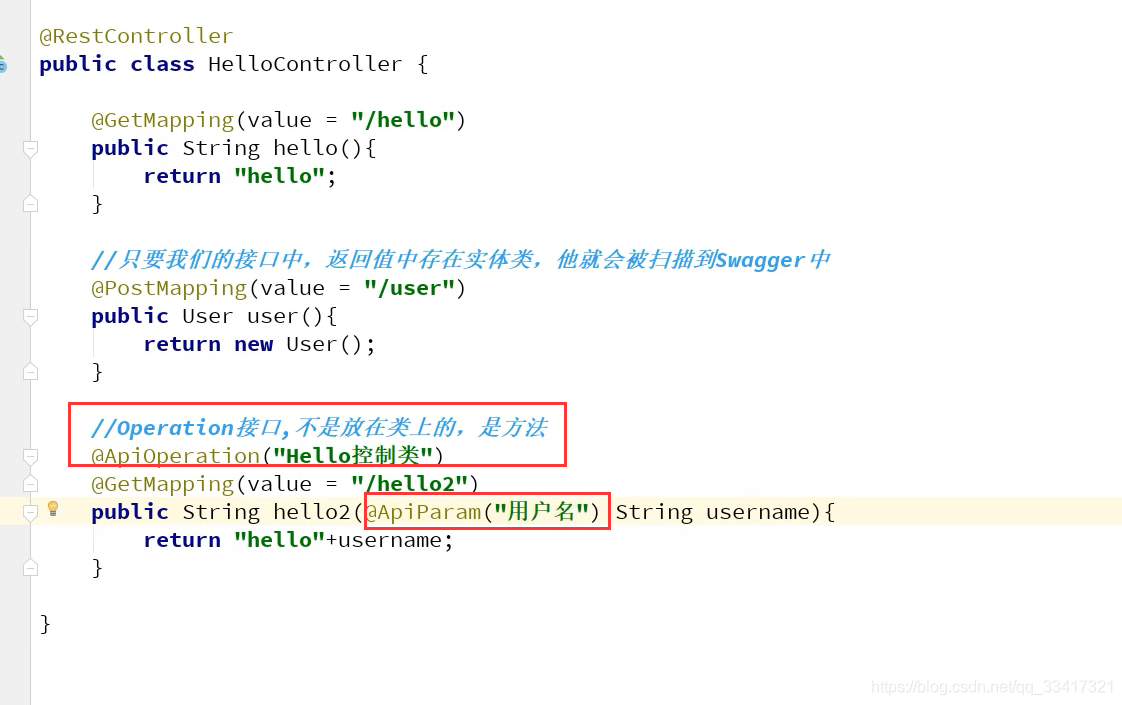
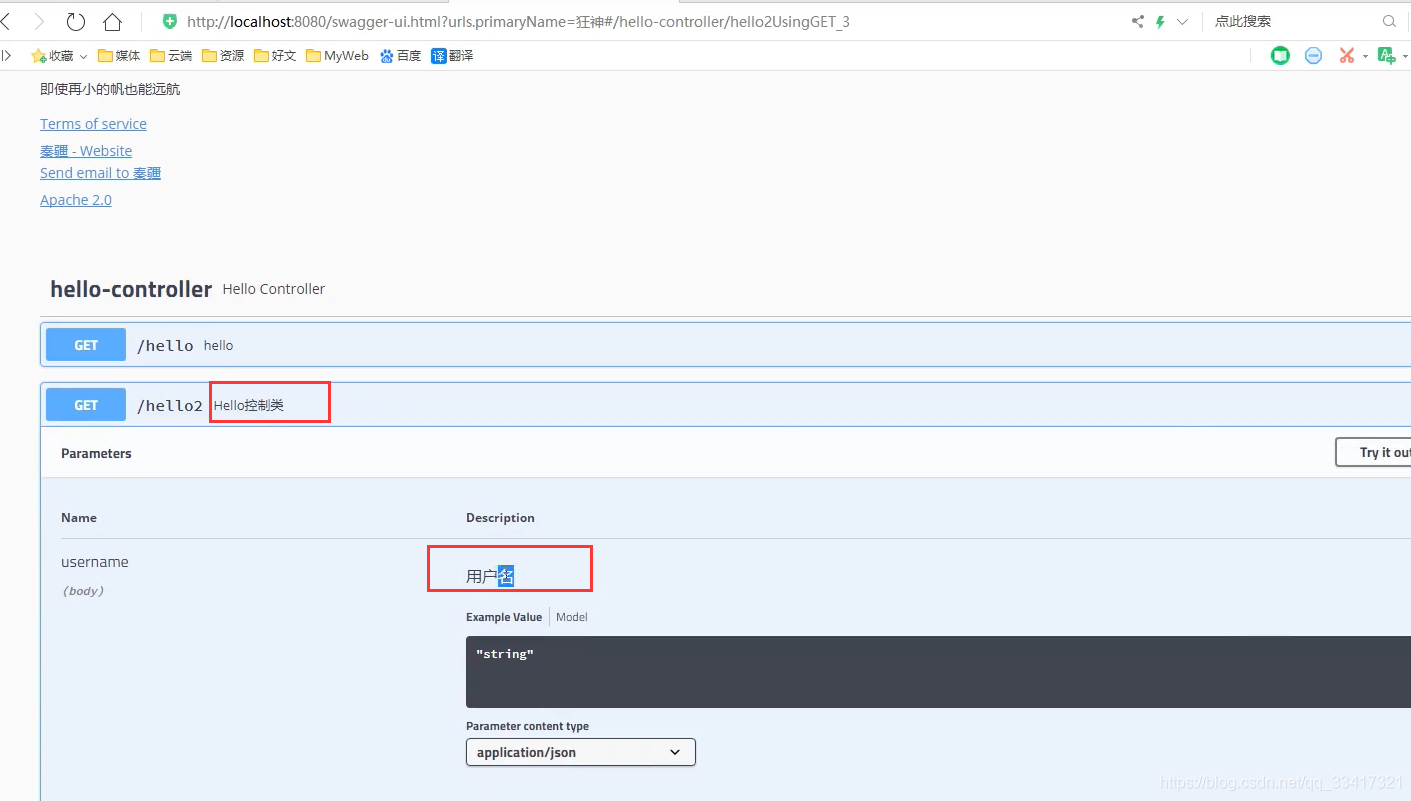
4.5 swagger里的controller方法加注释
五 使用swagger进行测试
类似于postMan的功能
执行:
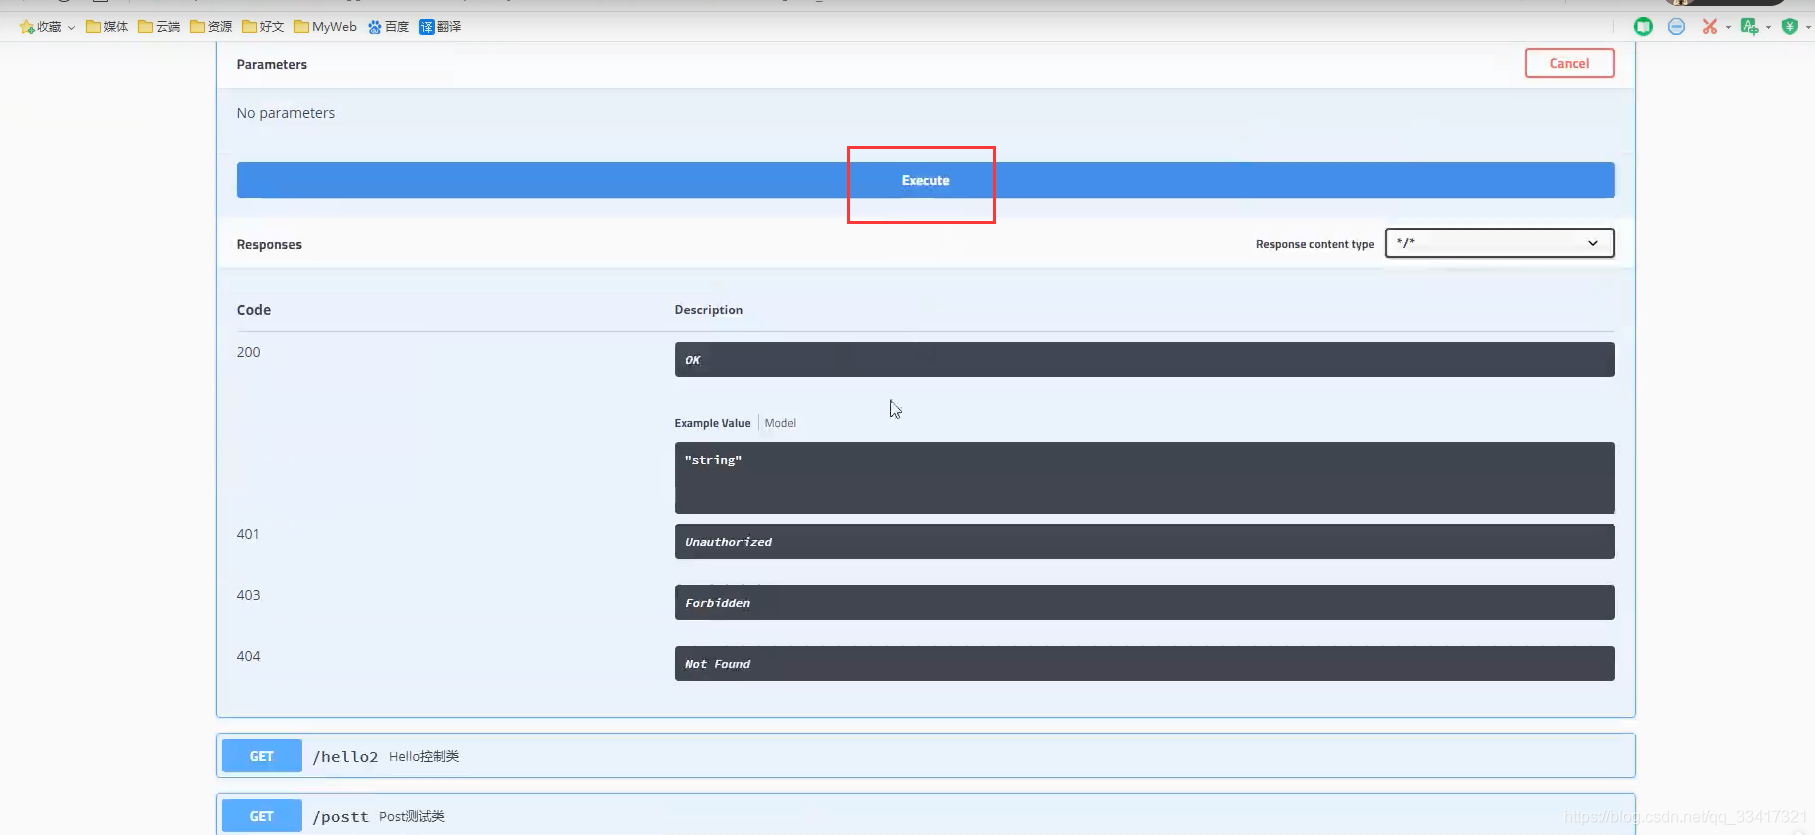
结果:

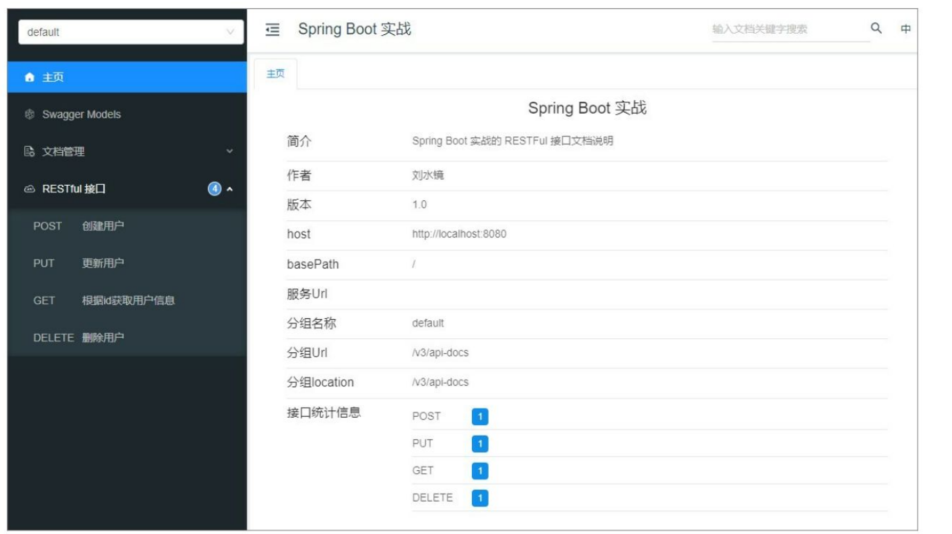
六 knife4j
Swagger作为接口文档来说已经非常好了,如实时更新、接口说明、参数及返回值示例等一应俱全。但它在使用体验和调试接口方面有些弱。幸运的是,有一款增强版的工具能够弥补原生Swagger的不足——knife4j。
要使用knife4j也非常简单,和集成Swagger没有太大区别,只需要将依赖替换成如下内容即可:
<dependency>
     <groupId>com.github.xiaoymin</groupId>
     <artifactId>knife4j-spring-boot-starter</artifactId>
     <version>3.0.2</version>
</dependency>
- 1
- 2
- 3
- 4
- 5
使用knife4j时,记得删除之前的Swagger依赖,因为knife4j依赖已经包含了Swagger依赖。
修改完依赖后,就完成了升级。启动工程并访问knife4j的默认地址(http://localhost:8080/doc.html),你将会看到如图所示的效果。
除了Swagger的基础功能,knife4j还有很多增强功能,如全局参数、请求参数缓存、接口排序、导出离线文档等非常实用的功能。总体来说,这款Swagger的增强工具非常不错,强烈推荐读者试一试

