
热门标签
热门文章
- 1【计算机视觉】ICCV2023放榜!一起看看CV最新热门研究方向!
- 2Qwen2在Java项目中如何实现优雅的Function_Call工具调用_qwen2 function call
- 3爱星物联——利用爱星物联服务脚手架实现定制服务
- 4边玩边学,13个Python小游戏(含源码)_python 13个游戏
- 5MacBook 使用teminal通过ssh连接云服务器(密钥对形式以及普通形式)_mac ssh2 链接服务器
- 6java中的线程池_线程池达到最大线程数会怎样
- 7ubuntu安装docker以及docker安装mysql、redis、rabbitmq、elasticsearch、zookeeper全教程_ubuntu安装docker及在docker下安装zk mq
- 8git克隆github(以中科院学术专用ChatGPT:chatgpt_academic项目为例)_中科院chatgptgitub
- 9程序员创业前要做哪些准备?
- 10SpringBoot POM web开发(spring-boot-starter-web)_springboot web pom
当前位置: article > 正文
【纯小白/0基础】在阿里云上部署LangChain-Chatchat
作者:繁依Fanyi0 | 2024-07-13 21:15:29
赞
踩
langchain-chatchat
注意:阿里云可以白嫖三个月,直接在csdn搜索领取。
LangChain-Chatchat:https://github.com/chatchat-space/Langchain-Chatchat?tab=readme-ov-file
(下面开始实操了)
1.创建一个DSW实例。
2.检查一下python版本,需在3.8-3.11(官方推荐3.11,本人3.10也没啥问题)**
python --version
- 1
3.拉取仓库,并安装依赖。**
git clone https://github.com/chatchat-space/Langchain-Chatchat.git
- 1
进入目录
cd Langchain-Chatchat
- 1
安装依赖(看一下有几个依赖安装几个,我安装时有四个依赖!)
pip install -r requirements.txt
- 1
pip install -r requirements_api.txt
- 1
pip install -r requirements_webui.txt
- 1
pip install -r requirements_lite.txt
- 1
4.模型下载
我们需要建一个model文件夹,放置我们下载的模型。
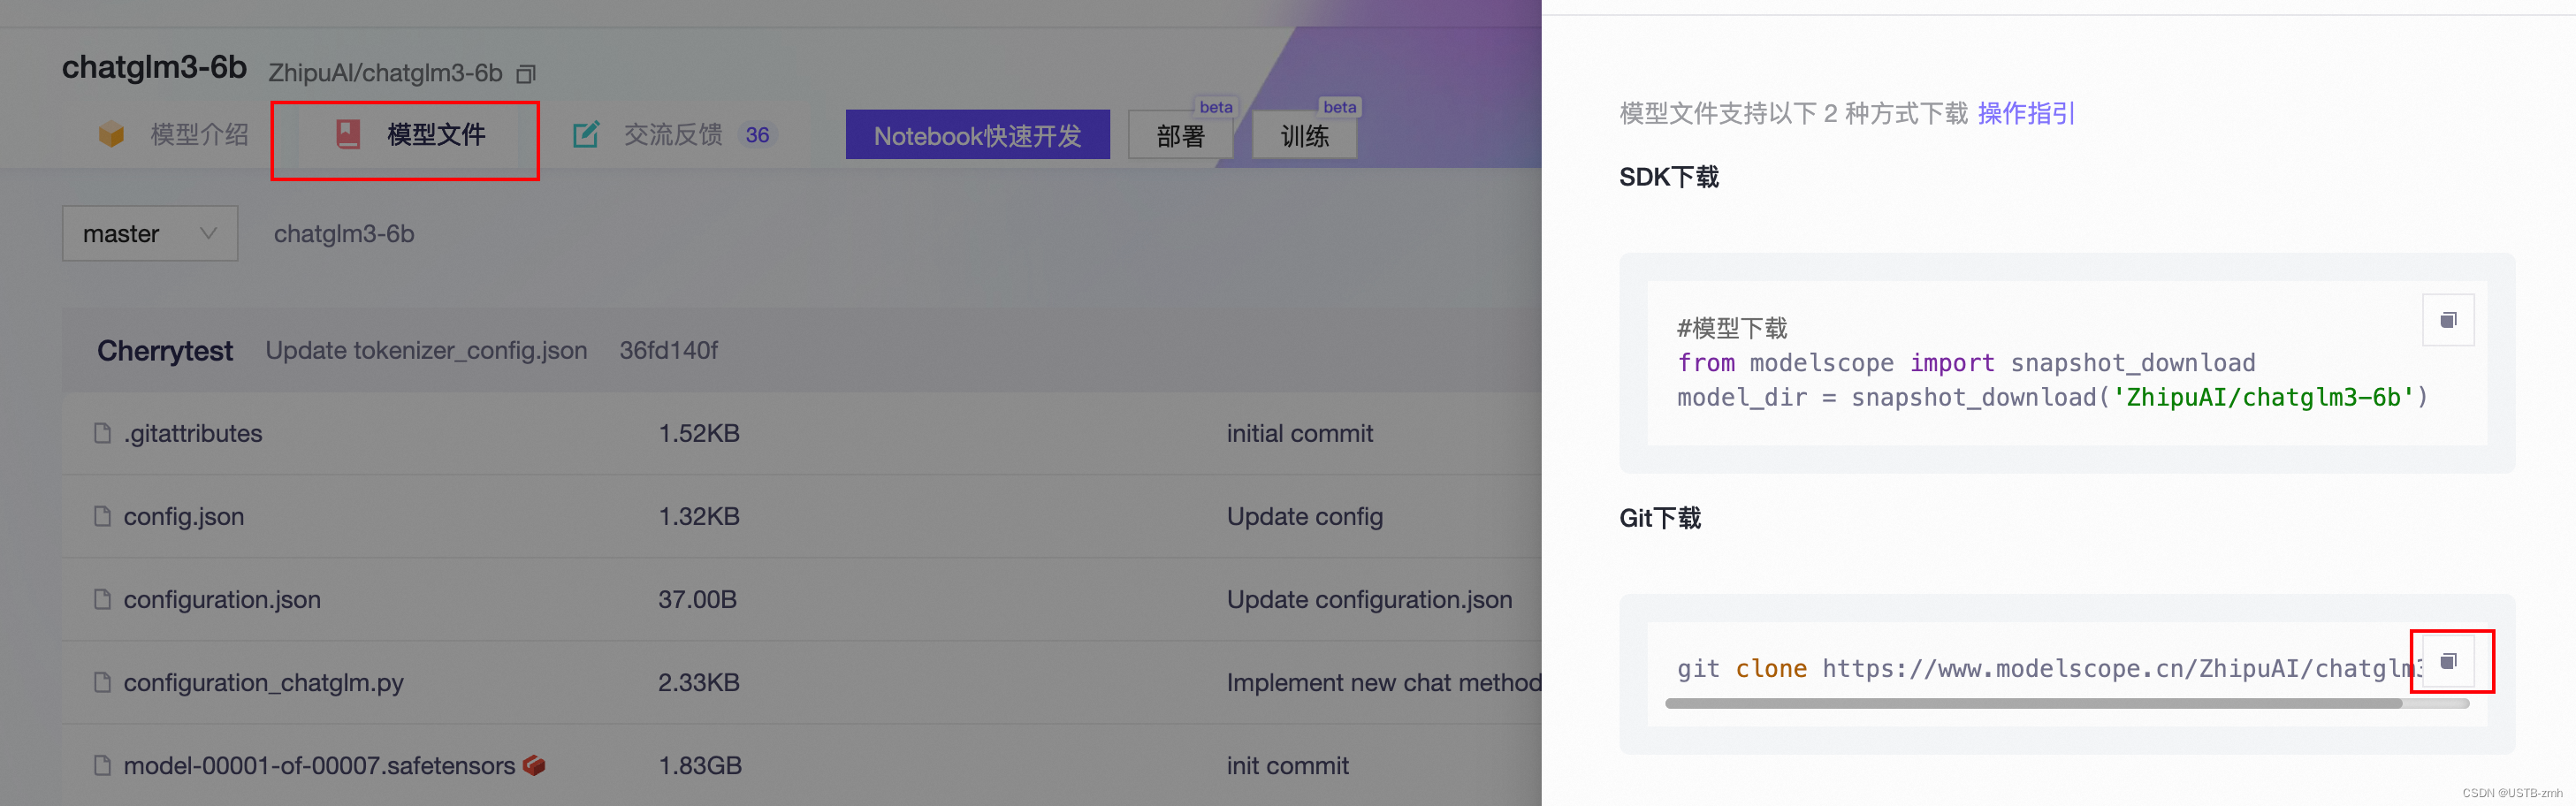
官方给的是下载模型chatglm3-6b,Embedding模型bge-large-zh。因为HuggingFace需要进行一些设置才能连接上,所以我们直接选择曲线救国去魔塔:https://modelscope.cn/my/overview
搜索chatglm-6b,点击模型库,点击chatglm3-6b,点击模型文件,点击下载模型。
进入model文件夹
cd model
- 1
git clone https://www.modelscope.cn/ZhipuAI/chatglm3-6b.git
- 1
同理搜索bge-large-zh-v1.5
git clone https://www.modelscope.cn/Xorbits/bge-large-zh-v1.5.git
- 1
现在你就可以在model文件夹看到它们了!
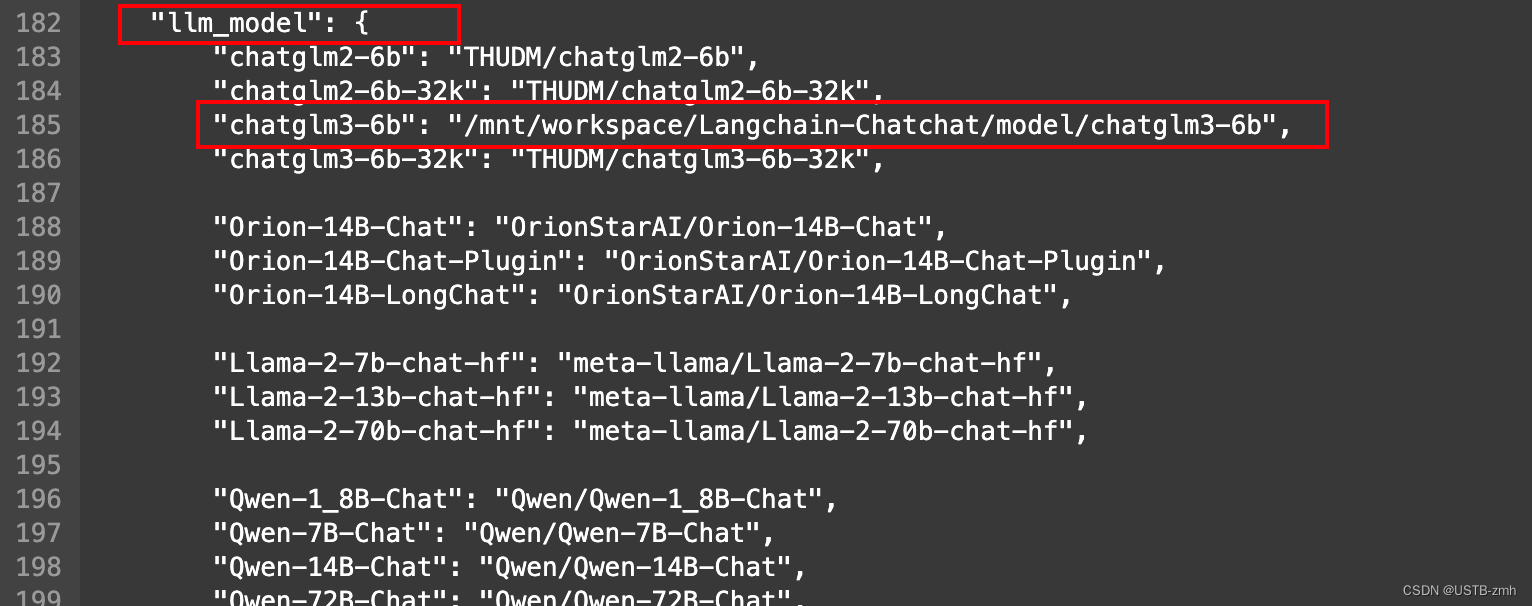
5.修改模型所在路径
找到configs/model_config.py.example,点击打开,修改为
/mnt/workspace/Langchain-Chatchat/model/bge-large-zh-v1.5
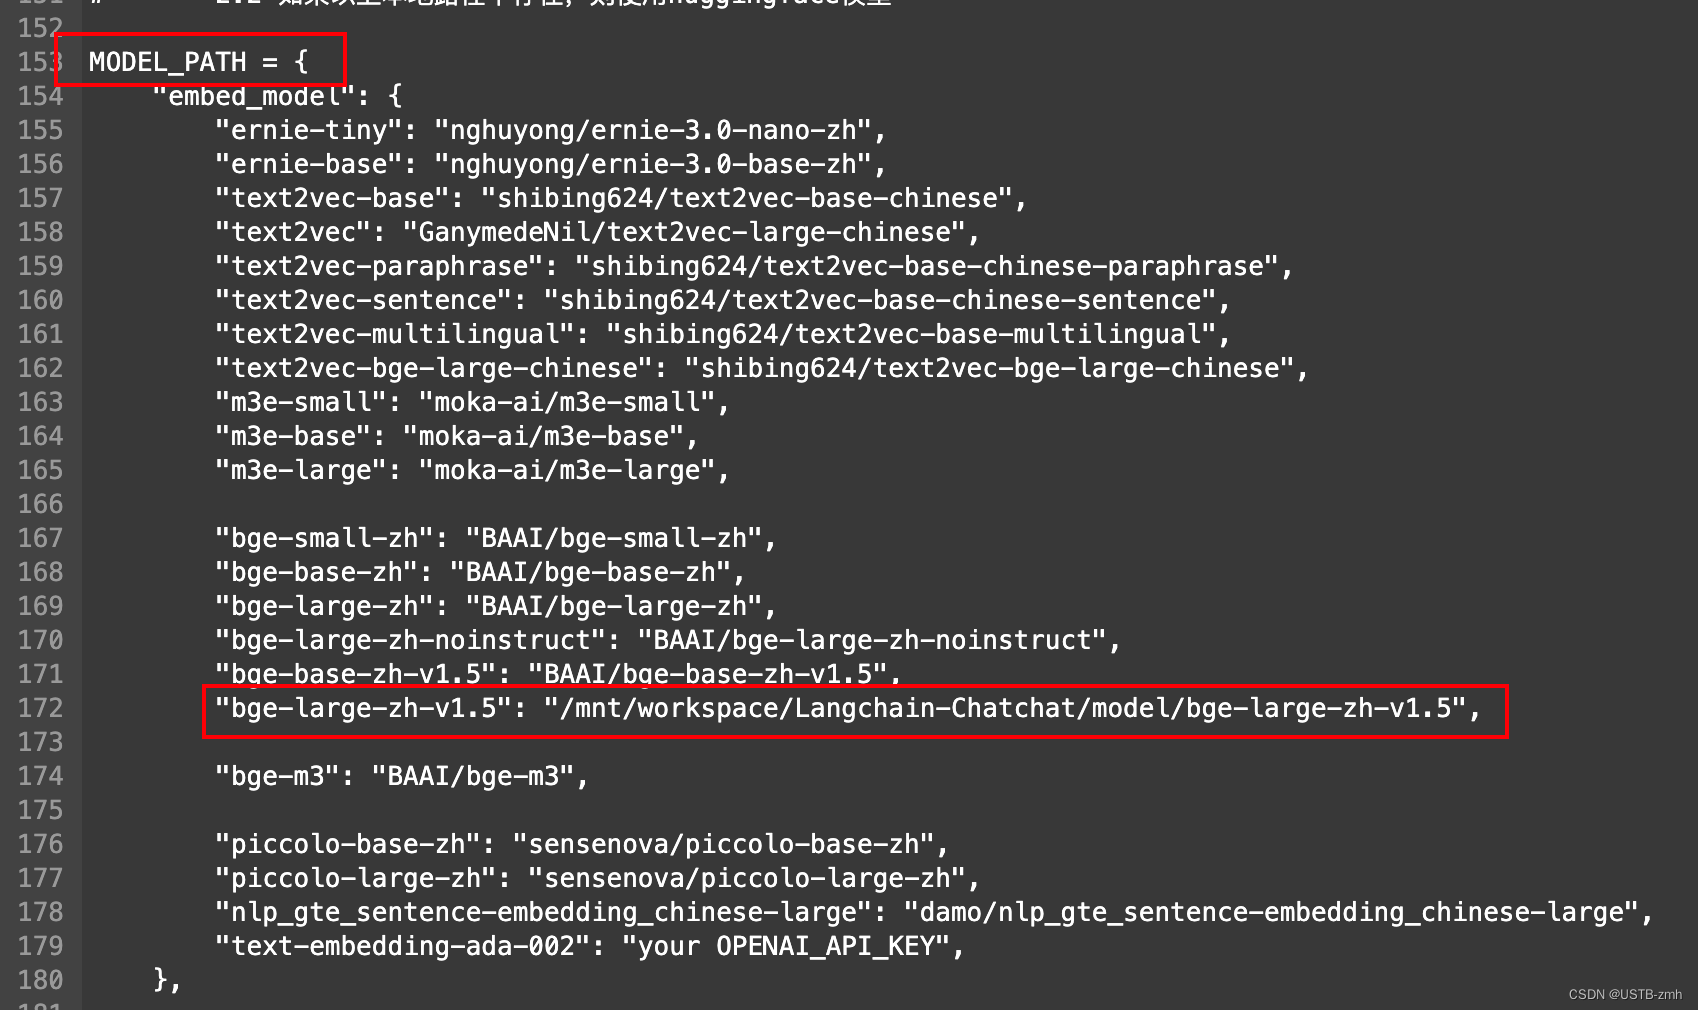
/mnt/workspace/Langchain-Chatchat/model/chatglm3-6b
6.初始化知识库和配置文件
返回上一级目录
cd ..
- 1
python copy_config_example.py
- 1
python init_database.py --recreate-vs
- 1
7.运行
python startup.py -a
- 1
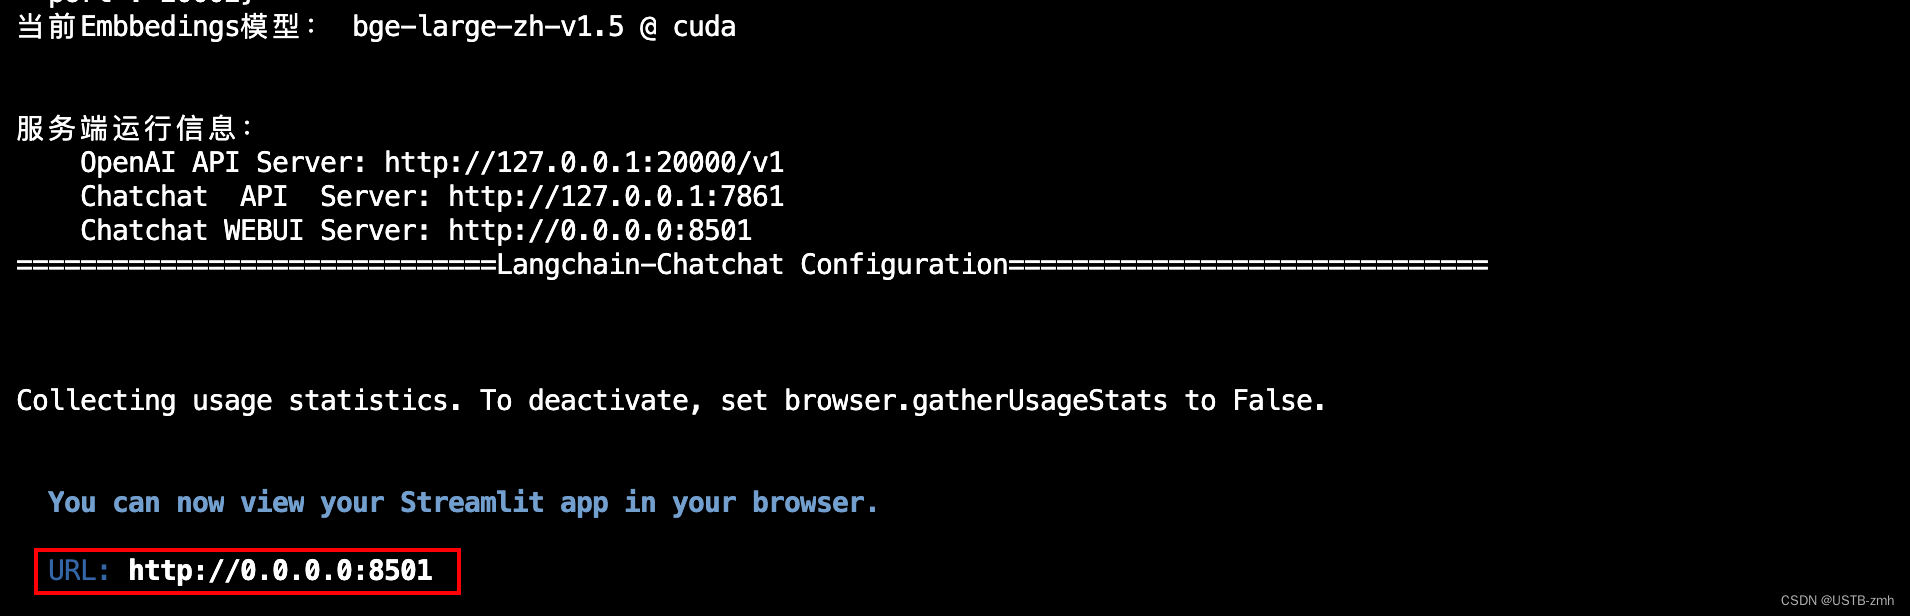
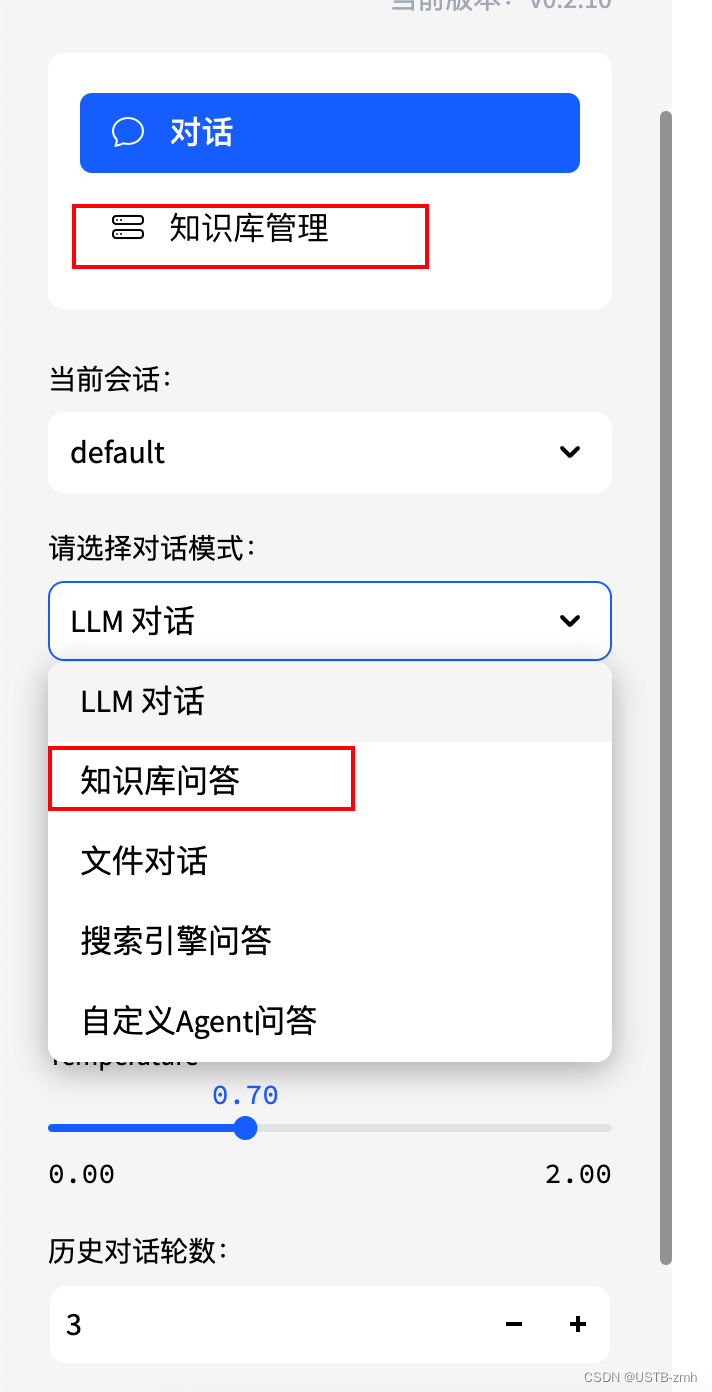
点击链接即可。你可以创建自己的知识库,并选择知识库问答进行匹配。
8.遇到的Bug
上传知识文件时出现错误:
AxiosError: Request failed with status code 403
解决办法:http://t.csdnimg.cn/ldUNT
声明:本文内容由网友自发贡献,不代表【wpsshop博客】立场,版权归原作者所有,本站不承担相应法律责任。如您发现有侵权的内容,请联系我们。转载请注明出处:https://www.wpsshop.cn/w/繁依Fanyi0/article/detail/821605
推荐阅读
相关标签

