
热门标签
热门文章
- 12023!七大最佳Python书籍,入门到精通推荐!_python官方推荐的三本书
- 2Python程序设计与算法基础教程·第八章上机实践_python第八章实战
- 3设计模式简单整理_具有客户端所需简化单个类的设计模式,并调用委托给这些方法处理请求
- 4按键精灵脚本学习-关于天猫抢红包_安卓按键精灵自动抢红包脚本
- 5frp客户端连接出现报错:login to server failed: dial tcp x.x.x.x:7000: i/o timeout_login to the server failed: session shutdown. with
- 6Flink(六)—— Data Source 介绍_flink xadatasource
- 7Android编程:底部弹出的对话框_android studio 底部半屏对话框
- 8MIT6.1810/Fall 2022(which was called 6.S081 then) Lab8-10_mit6.1810 2022
- 9仿牛客论坛项目全面大总结_牛客项目亮点
- 10豆瓣评分预测(如何用自己的数据集进行文本分类)——基于pytorch的 BERT中文文本分类,超详细教程必会(1)_中文文本分类数据
当前位置: article > 正文
PacketTracer—Onenet云平台_onenet packettracer
作者:繁依Fanyi0 | 2024-06-25 02:24:34
赞
踩
onenet packettracer
目标:实现PacketTracer中的设备连接到MCU芯片,并通过MCU微控制器实现数据上传至云平台、通过云平台控制设备、云平台应用搭建等功能。
1:进入Onenet官网
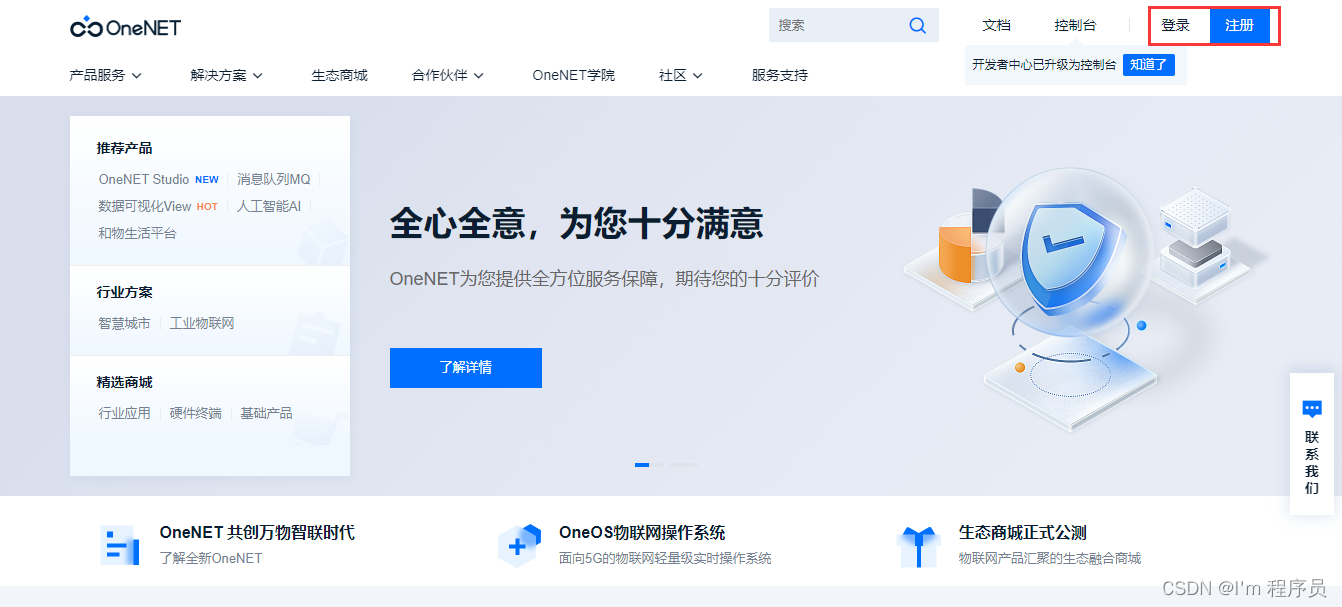
2:注册登录
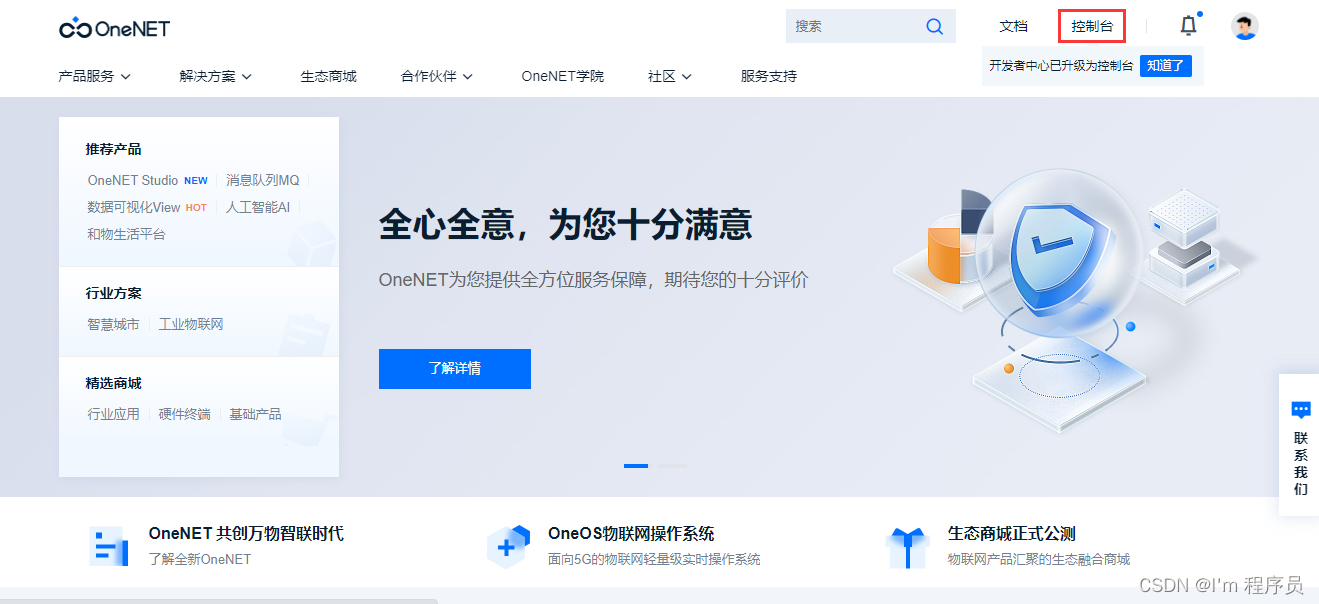
3:点击首页控制台
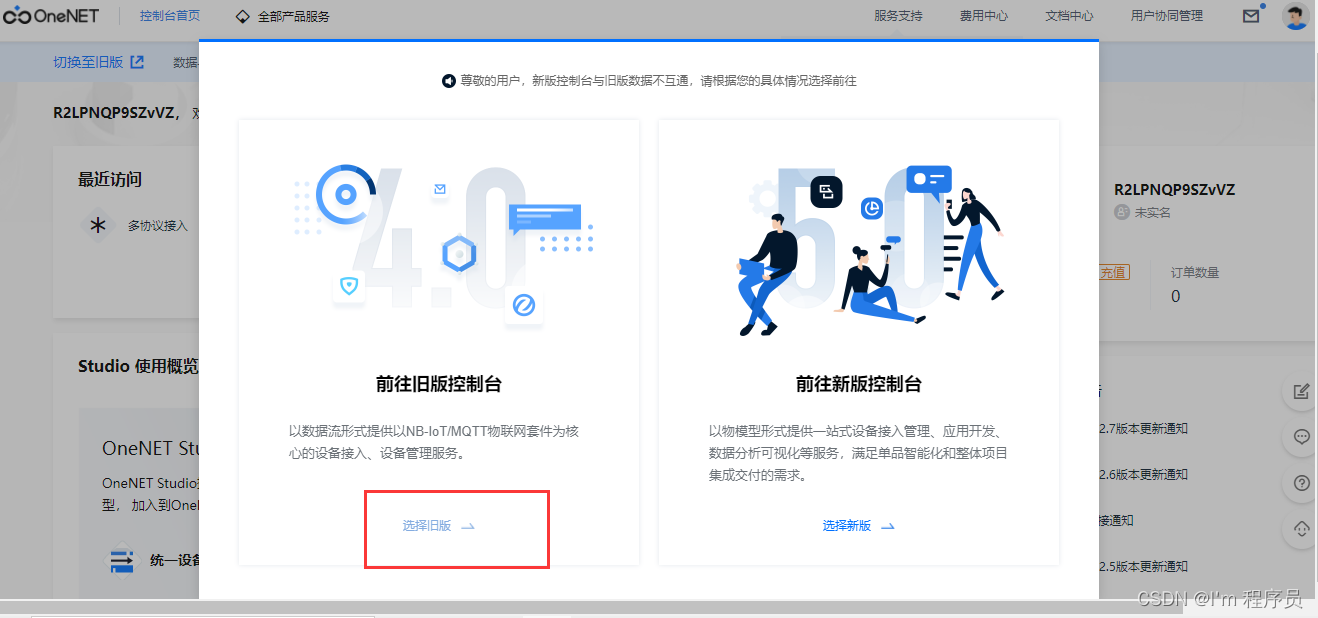
 4:点击旧版
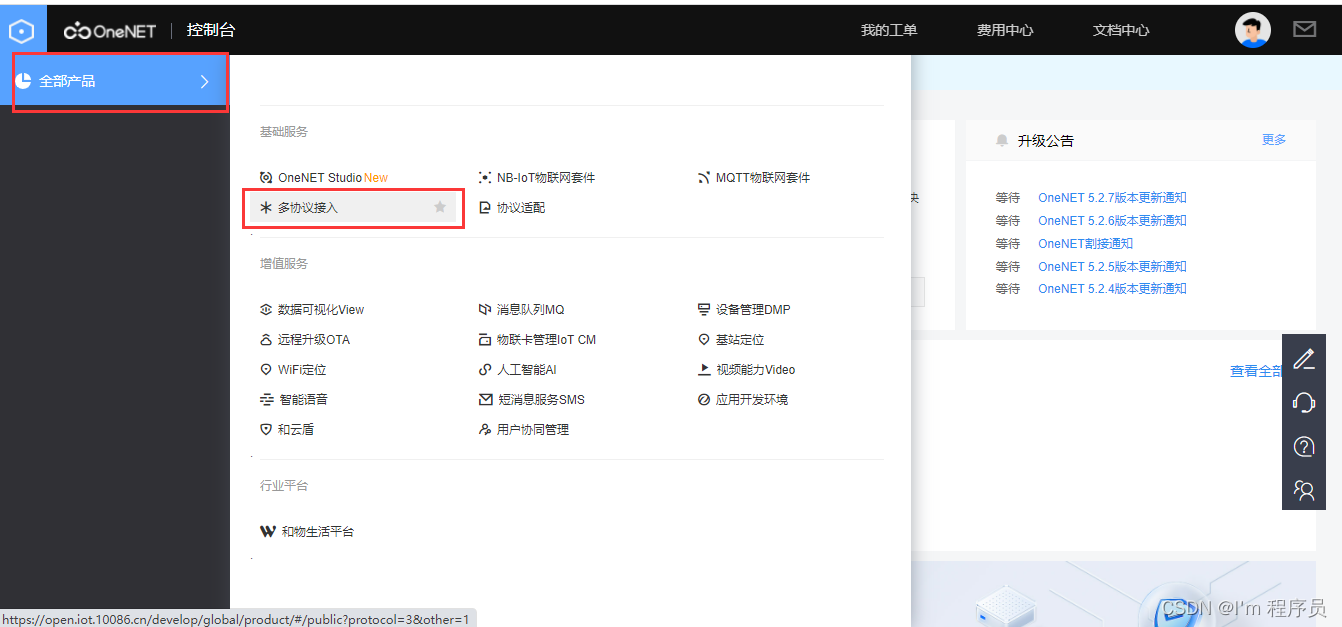
5:点击左侧全部产品→多协议接入
6:点击TCP透传→添加产品

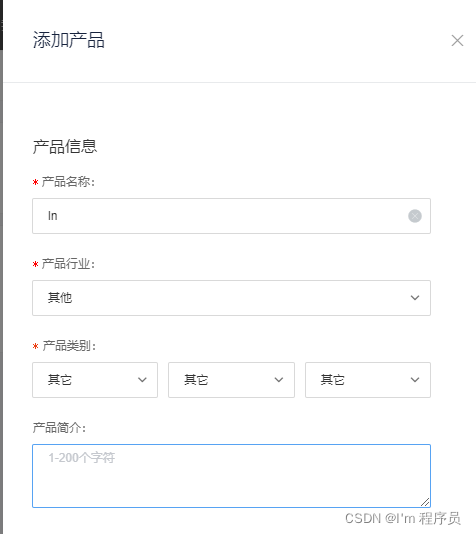
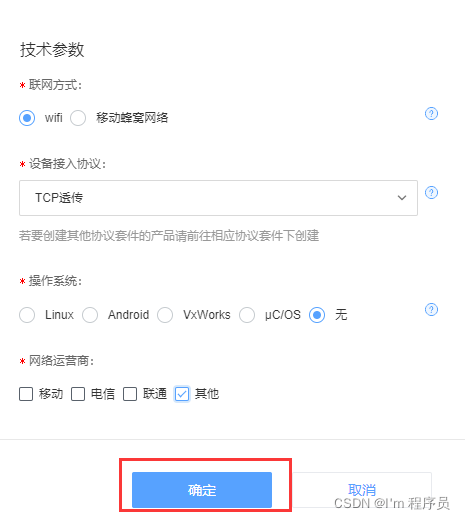
7:设置您的产品名称,其余根据下图进行选择,然后点击确定
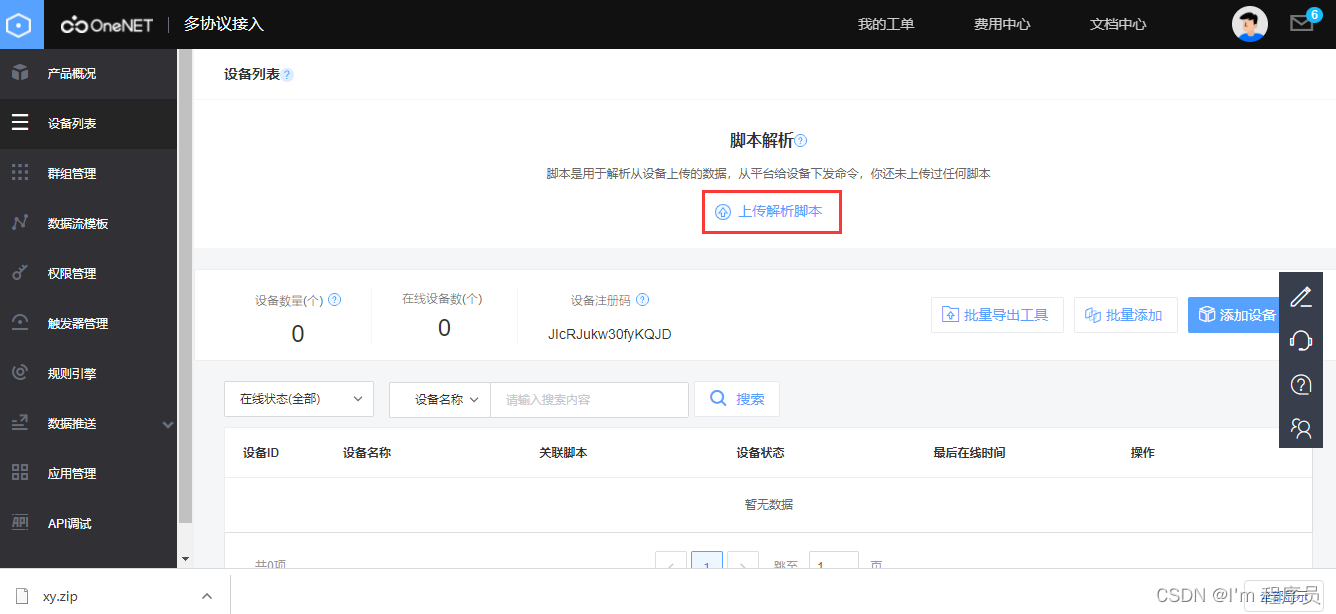
8:点击立即添加设备

9:鼠标放在脚本解析旁的问号上,下载脚本验证工具

10:下载后找到sample.lua文件,不需要打开,这个文件就是我们需要的文件
11:点击上传脚本解析,选择sample.lua文件


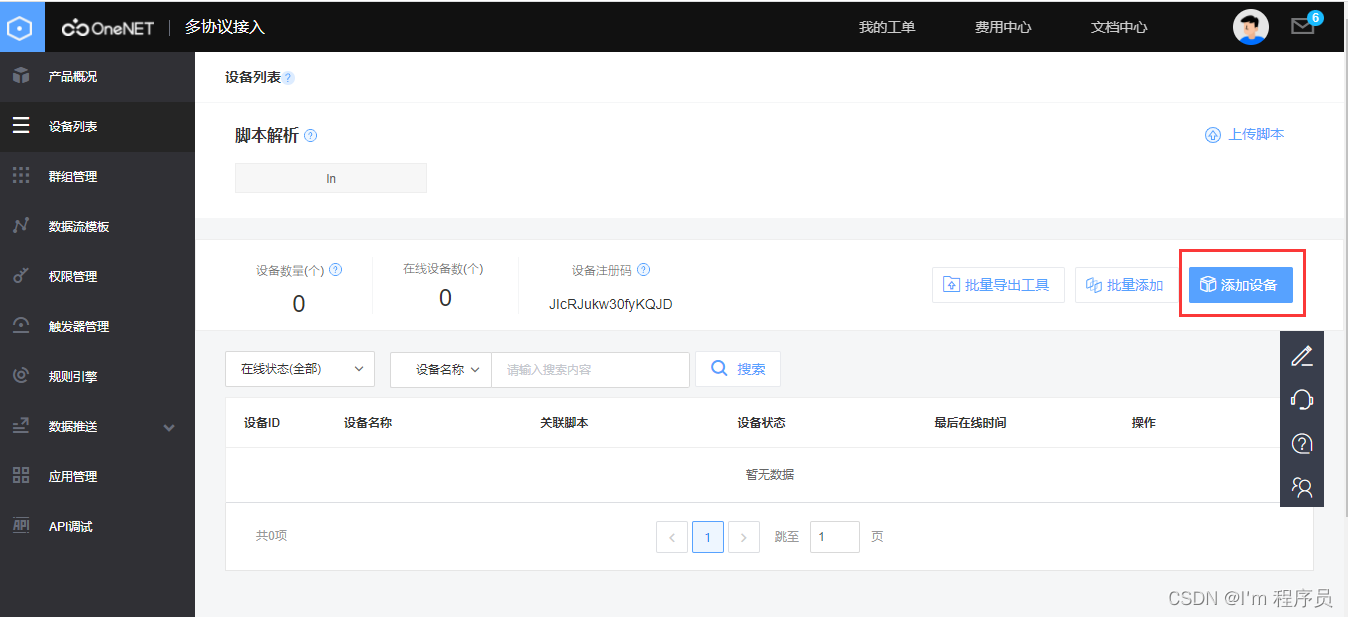
12:点击添加设备
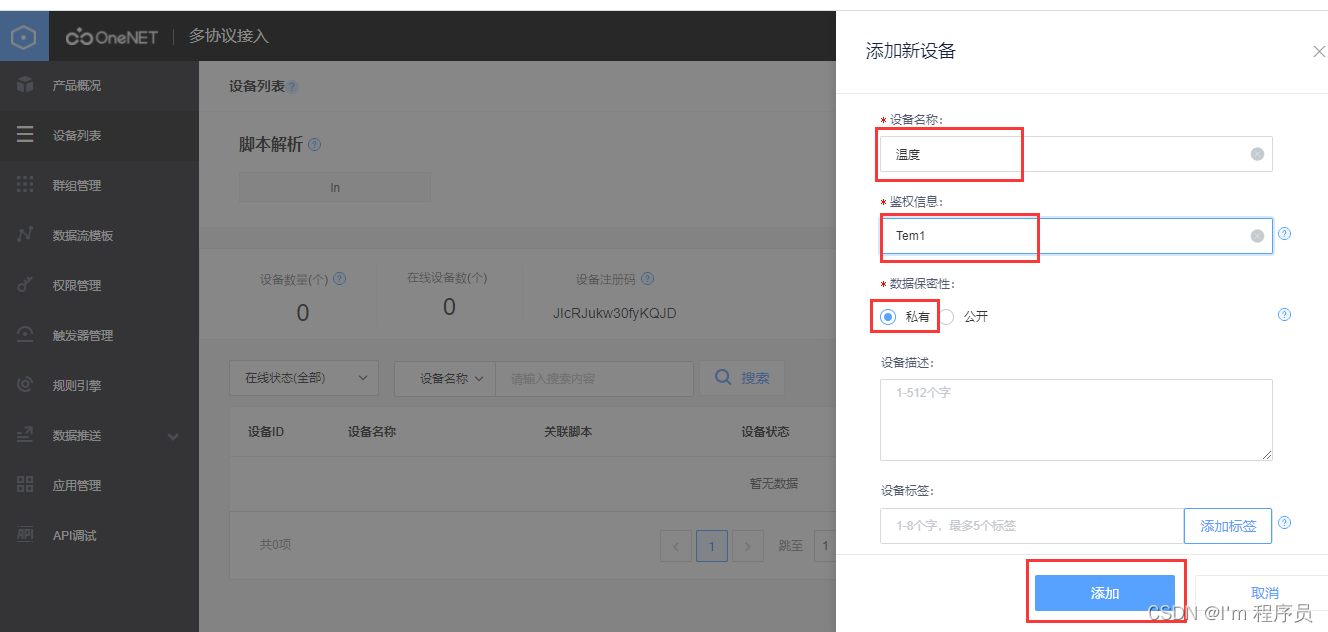
13:设备名称根据需要填写,鉴权信息一定要记住,勾选私有,添加
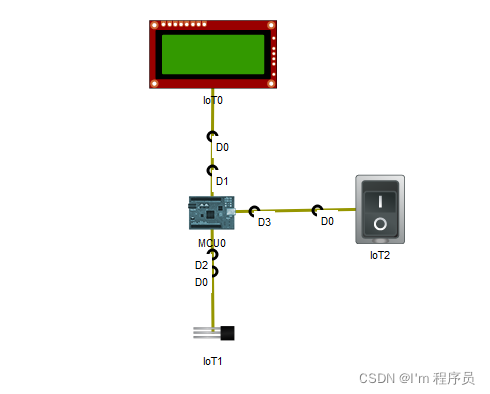
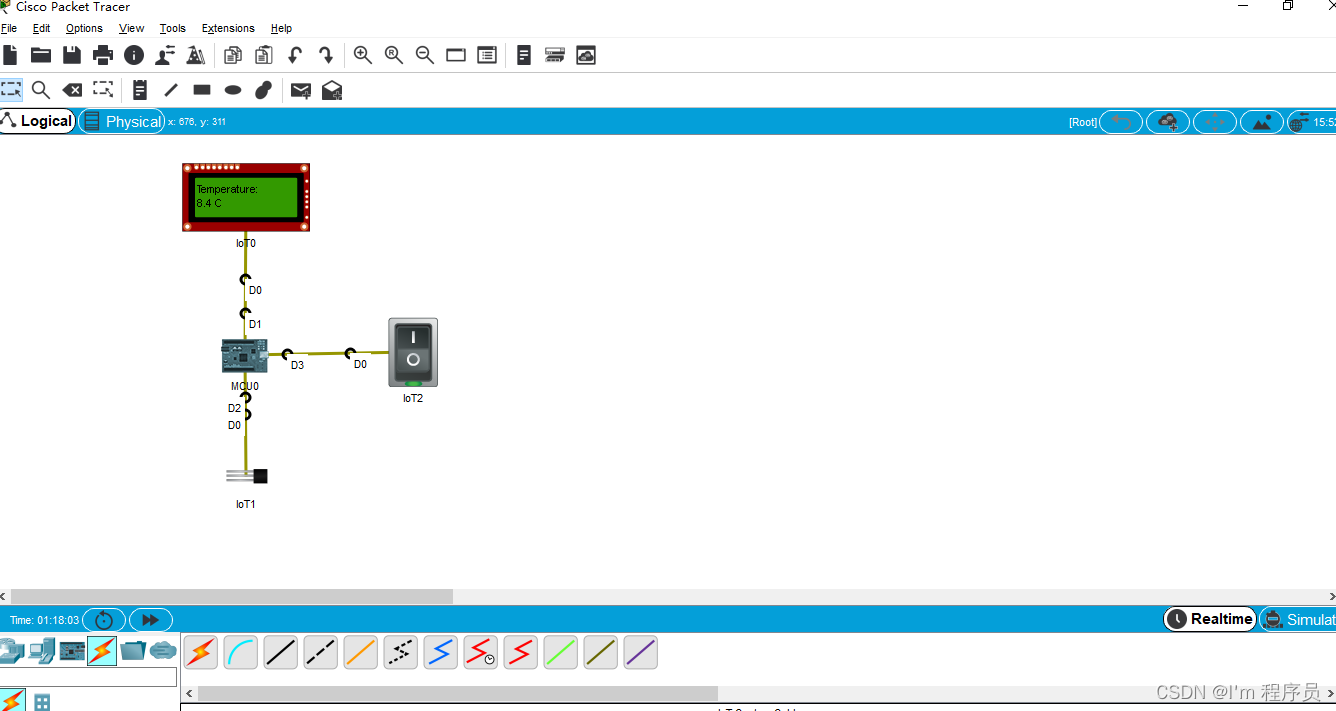
14:按照实验,构造拓扑图如下
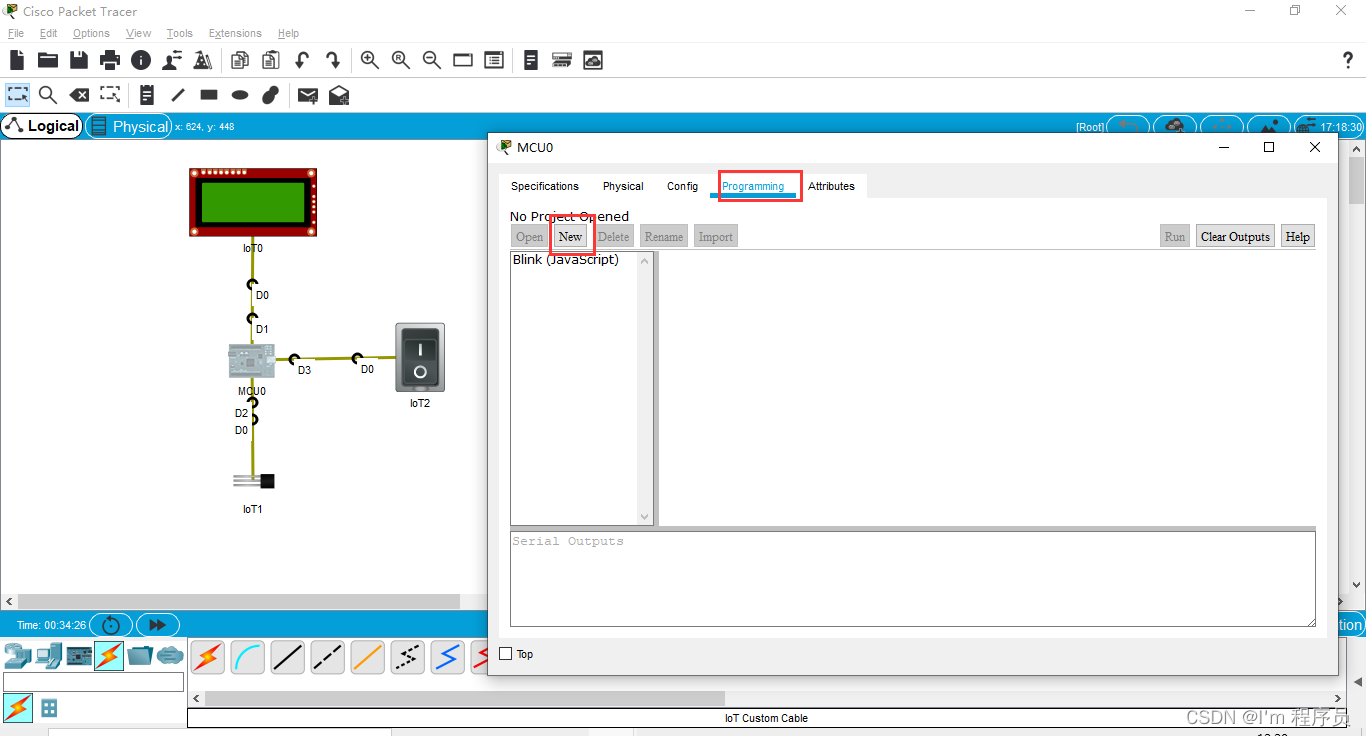
15:编写如下代码,并根据图示修改为自己的信息

补充:
1)创建文件
2)编辑代码

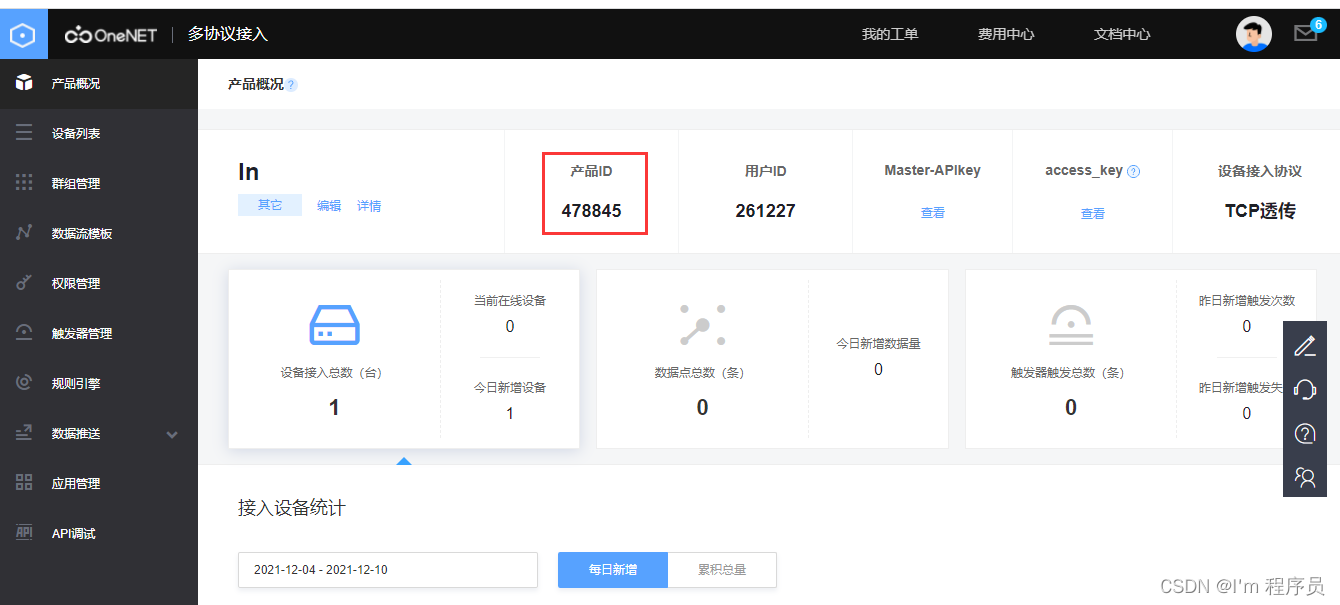
3)获取产品ID
4)获取鉴权信息

5)获取api-key

6)开启

7)代码:
from gpio import *
from time import *

from realtcp import *
url = 'http://api.heclouds.com/devices/xx/datapoints?type=3'
head={"api-key":"xx","Content-Type":"application/json"}
serverIP="dtu.heclouds.com"
serverPort=1811
auth='*xx#xx#xx*'
client=RealTCPClient()

on=[1]

def onTCPConnectionChange(type):
	if int(type)==3:
		client.send(auth)


def onTCPReceive(data):
	if data=="Open":
		on[0]=1
	elif data=="Close":
		on[0]=0


client.onConnectionChange(onTCPConnectionChange)
client.onReceive(onTCPReceive)
client.connect(serverIP,serverPort)

sleep(1)
while True:
	switch=analogRead(3)
	tem=analogRead(2)
	print("Switch:",switch)
	tem=round((tem-511)/5.12,2)
	print("tem:",tem)
	s1=str(tem)
	s="Temperature:\n"+s1+" C"
	if(switch != 0 and on[0]!=0):
		customWrite(1,s)
	elif (switch != 0 and on[0]==0):
		customWrite(1,"")
	elif (switch ==0):
		customWrite(1,"")
	client.send(tem)
	sleep(1)

- 1
- 2
- 3
- 4
- 5
- 6
- 7
- 8
- 9
- 10
- 11
- 12
- 13
- 14
- 15
- 16
- 17
- 18
- 19
- 20
- 21
- 22
- 23
- 24
- 25
- 26
- 27
- 28
- 29
- 30
- 31
- 32
- 33
- 34
- 35
- 36
- 37
- 38
- 39
- 40
- 41
- 42
- 43
- 44
- 45
- 46
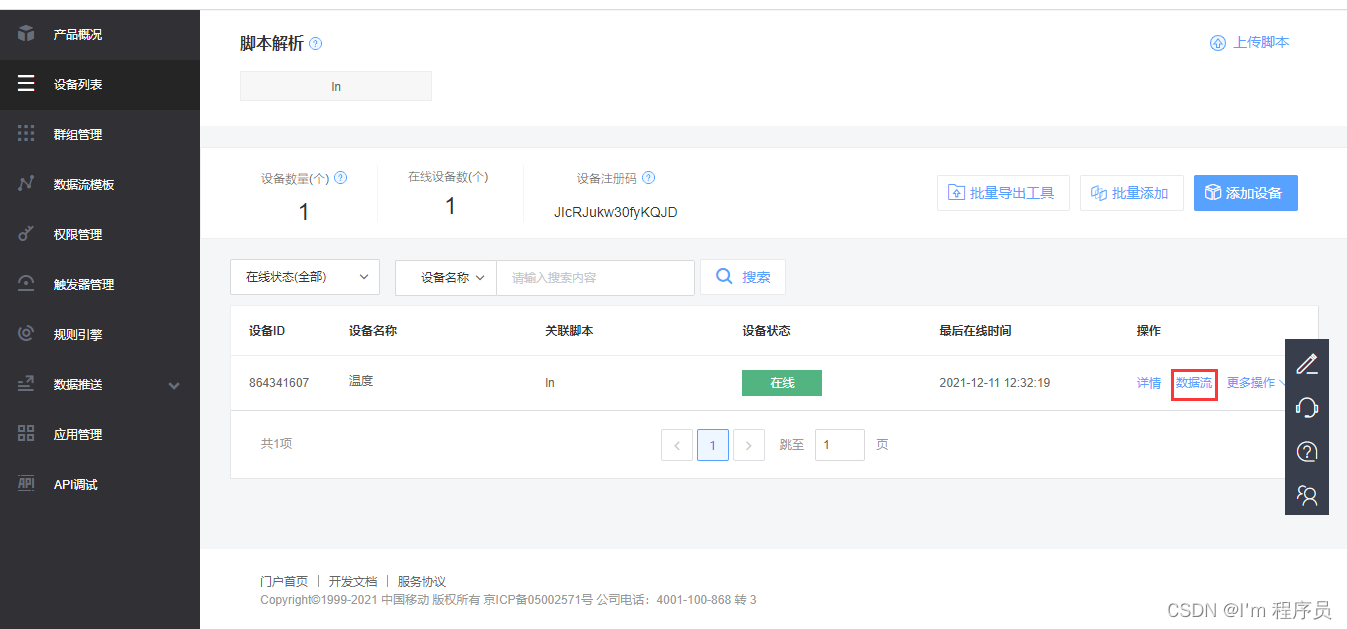
16:运行代码后设备成功在线

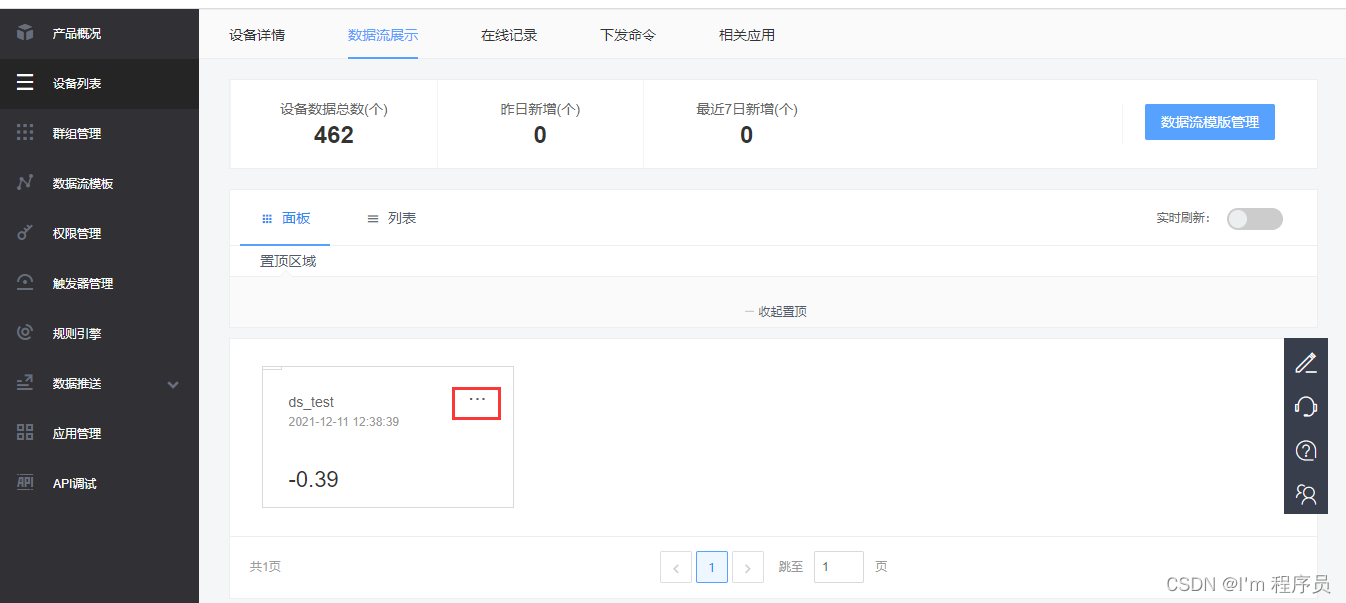
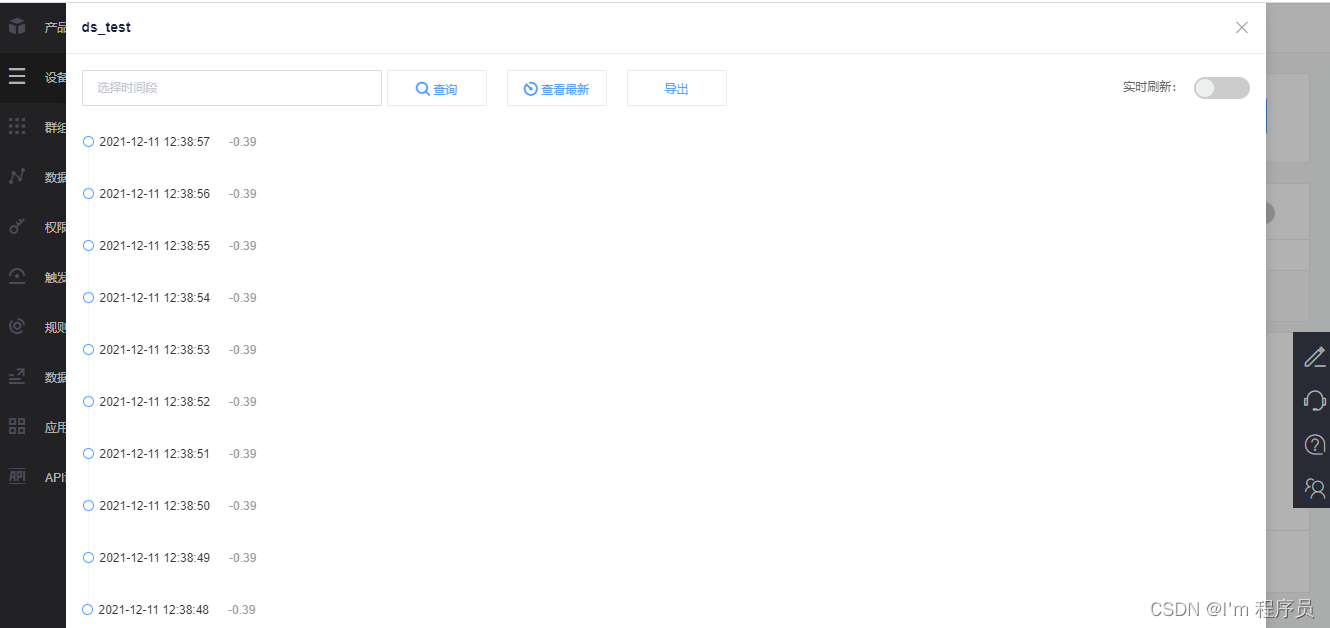
17:点击数据流可以查看接收到的数据
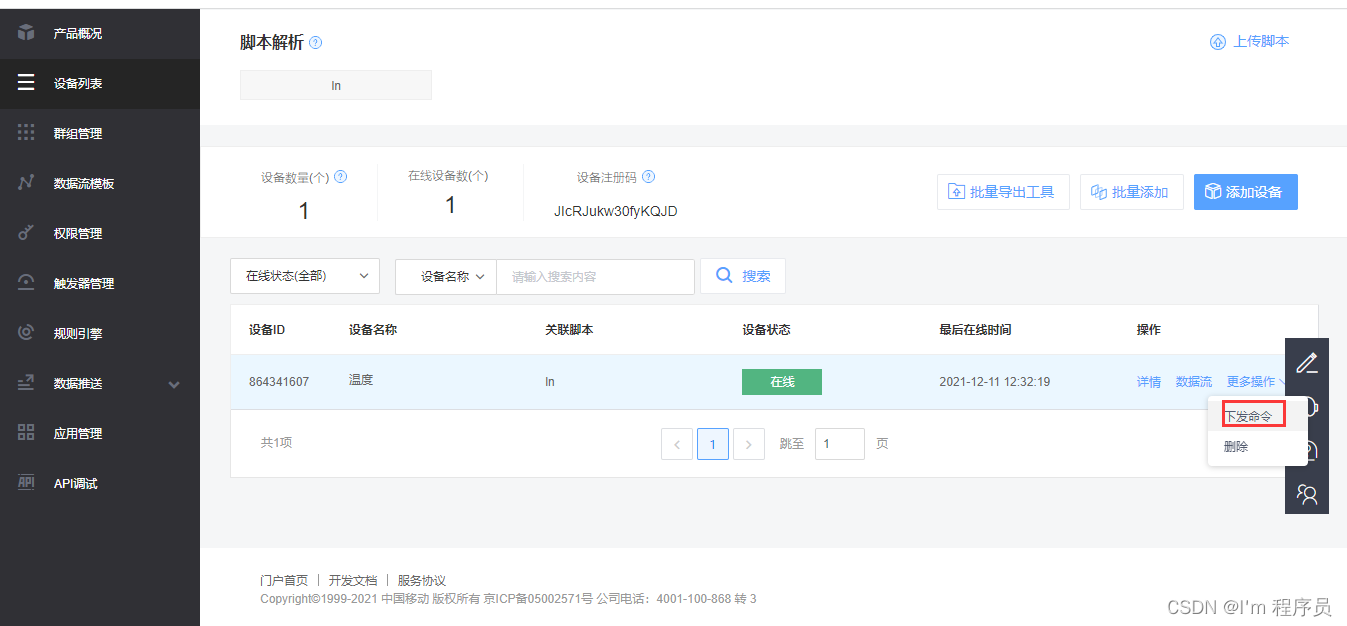
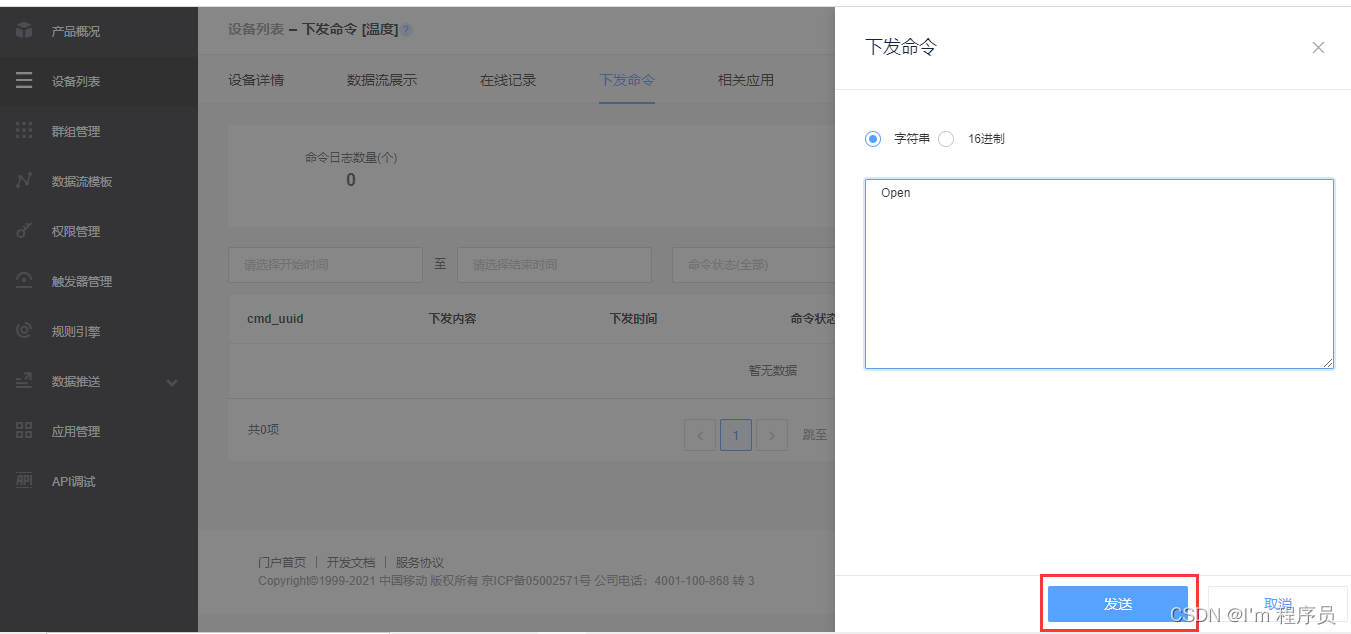
18:点击更多操作中的下发命令→下发命令→发送字符串便可以控制mcu芯片了

声明:本文内容由网友自发贡献,不代表【wpsshop博客】立场,版权归原作者所有,本站不承担相应法律责任。如您发现有侵权的内容,请联系我们。转载请注明出处:https://www.wpsshop.cn/w/繁依Fanyi0/article/detail/754677
推荐阅读
相关标签

