
热门标签
热门文章
- 1测试时报错 RuntimeError: CUDA out of memory._训练了两个epoch后cuda out of memory
- 2基于SPRINGBOOT搜房网设计与实现_基于spring boot的在线选房网站设计与实现
- 3nodejs中unzip时js报错ENOENT not found in或者Invalid package_node.js uncaught error: invalid package
- 4Android系统启动系列5 SystemServer进程下_android systemserver
- 5Android Gradle 开发与应用 (六) : 创建buildSrc插件和使用命令行创建Gradle插件
- 6在 M1/M2 Mac 上,让 Windows 11 免费“跑”起来!_mac m2 win11arm usb
- 7事务注解放到类上面 下面私有方法有效吗_Spring声明式事务,你用对了吗
- 8Mac安装鸿蒙系统,搭建MAC系统下的Wi-Fi loT Hi3861鸿蒙开发环境
- 9身份证批量识别 免费 身份证OCR识别 如何用python实现身份证识别_python使用tesseract ocr识别身份证
- 10python现在排第几名_2019 编程语言排行榜:C 排名衰退,python即将问鼎
当前位置: article > 正文
论文工具——ChatGPT结合PlotNeuralNet快速出神经网络深度学习模型图_chatgpt可以输出神经网络模型吗
作者:繁依Fanyi0 | 2024-03-06 20:58:56
赞
踩
chatgpt可以输出神经网络模型吗
引言
- 介绍如何安装PlotNeuralNet工具,并结合chatGPT减少学习成本,快速出图。
- 将按照软件安装和软件使用,以及最终使用结果四个部分进行介绍。
正文
PlotNeuralNet
- PlotNeuralNet是一个带有python借口的latex包,能够生成任何你需要的神经网络的可视化图片。生成的图片质量很高,可以用于课程汇报,或者学术论文。
- 你可以直接使用latex编译程序,编写相关的代码,自动会生成对应的图片。我一般是使用overleaf写的latex代码,线上可以直接渲染,并下载对应的pdf文件
- overleaf链接:Overleaf
安装
- 1、在ubuntu系统中安装如下包
- Ubuntu 16.04系统
sudo apt-get install texlive-latex-extra
- 1
- Ubuntu 18.04.2输入如下指令进行安装
- 这里是需要你安装一个叫做pdflatex的软件,能够将latex的代码tex转成对应的pdf。具体安装指令如下
sudo apt-get install texlive-latex-base
sudo apt-get install texlive-fonts-recommended
sudo apt-get install texlive-fonts-extra
sudo apt-get install texlive-latex-extra
- 1
- 2
- 3
- 4
- 将latex代码文件tex后缀的,转成对应的pdf文件,具体指令见下方
pdflatex latex_source_name.tex
- 1
-
windows平台
- 下载并安装MikeTex软件,下载链接
- 下载并安装windows上运行的bash运行工具,推荐使用git的bash工具或者Cygwin
-
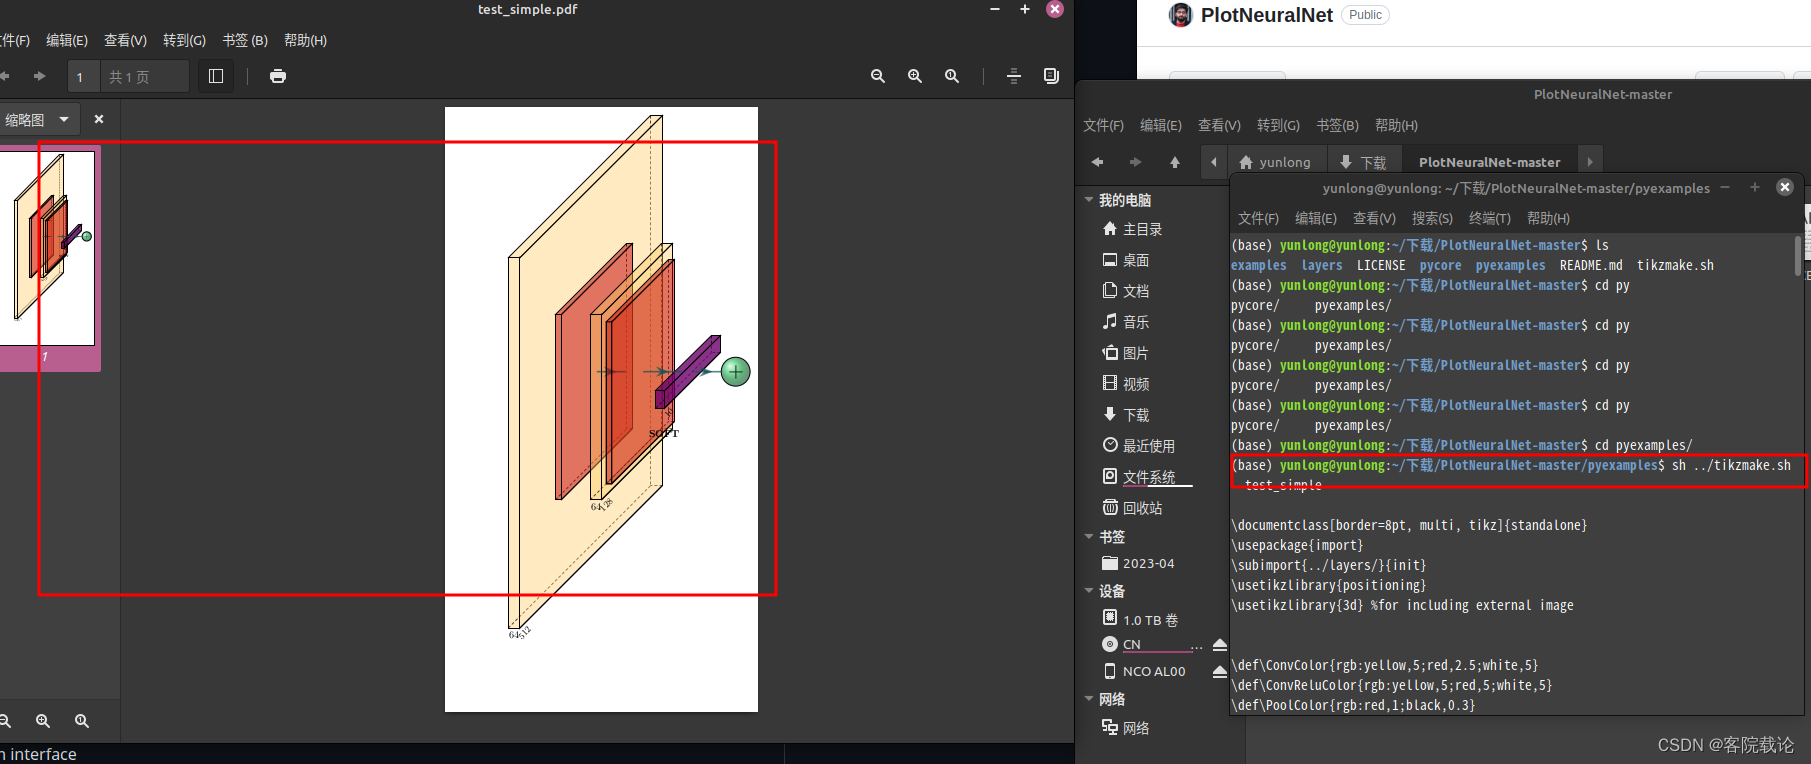
2、运行如下指令
cd pyexamples/
bash ../tikzmake.sh test_simple
- 1
- 2
-
这里可以看一下测试样例的python代码
-
完整的图片对应的latex代码
\documentclass[border=8pt, multi, tikz]{standalone}
\usepackage{import}
\subimport{../layers/}{init}
\usetikzlibrary{positioning}
\usetikzlibrary{3d} %for including external image

\def\ConvColor{rgb:yellow,5;red,2.5;white,5}
\def\ConvReluColor{rgb:yellow,5;red,5;white,5}
\def\PoolColor{rgb:red,1;black,0.3}
\def\UnpoolColor{rgb:blue,2;green,1;black,0.3}
\def\FcColor{rgb:blue,5;red,2.5;white,5}
\def\FcReluColor{rgb:blue,5;red,5;white,4}
\def\SoftmaxColor{rgb:magenta,5;black,7}
\def\SumColor{rgb:blue,5;green,15}

\newcommand{\copymidarrow}{\tikz \draw[-Stealth,line width=0.8mm,draw={rgb:blue,4;red,1;green,1;black,3}] (-0.3,0) -- ++(0.3,0);}

\begin{document}
\begin{tikzpicture}
\tikzstyle{connection}=[ultra thick,every node/.style={sloped,allow upside down},draw=\edgecolor,opacity=0.7]
\tikzstyle{copyconnection}=[ultra thick,every node/.style={sloped,allow upside down},draw={rgb:blue,4;red,1;green,1;black,3},opacity=0.7]

\pic[shift={(0,0,0)}] at (0,0,0)
    {Box={
        name=conv1,
        caption= ,
        xlabel={{64, }},
        zlabel=512,
        fill=\ConvColor,
        height=64,
        width=2,
        depth=64
        }
    };

\pic[shift={ (0,0,0) }] at (conv1-east)
    {Box={
        name=pool1,
        caption= ,
        fill=\PoolColor,
        opacity=0.5,
        height=32,
        width=1,
        depth=32
        }
    };

\pic[shift={(1,0,0)}] at (pool1-east)
    {Box={
        name=conv2,
        caption= ,
        xlabel={{64, }},
        zlabel=128,
        fill=\ConvColor,
        height=32,
        width=2,
        depth=32
        }
    };

\draw [connection]  (pool1-east)    -- node {\midarrow} (conv2-west);

\pic[shift={ (0,0,0) }] at (conv2-east)
    {Box={
        name=pool2,
        caption= ,
        fill=\PoolColor,
        opacity=0.5,
        height=28,
        width=1,
        depth=28
        }
    };

\pic[shift={(3,0,0)}] at (pool1-east)
    {Box={
        name=soft1,
        caption=SOFT,
        xlabel={{" ","dummy"}},
        zlabel=10,
        fill=\SoftmaxColor,
        opacity=0.8,
        height=3,
        width=1.5,
        depth=25
        }
    };

\draw [connection]  (pool2-east)    -- node {\midarrow} (soft1-west);

\pic[shift={(1.5,0,0)}] at (soft1-east)
    {Ball={
        name=sum1,
        fill=\SumColor,
        opacity=0.6,
        radius=2.5,
        logo=$+$
        }
    };

\draw [connection]  (soft1-east)    -- node {\midarrow} (sum1-west);

\end{tikzpicture}
\end{document}

- 1
- 2
- 3
- 4
- 5
- 6
- 7
- 8
- 9
- 10
- 11
- 12
- 13
- 14
- 15
- 16
- 17
- 18
- 19
- 20
- 21
- 22
- 23
- 24
- 25
- 26
- 27
- 28
- 29
- 30
- 31
- 32
- 33
- 34
- 35
- 36
- 37
- 38
- 39
- 40
- 41
- 42
- 43
- 44
- 45
- 46
- 47
- 48
- 49
- 50
- 51
- 52
- 53
- 54
- 55
- 56
- 57
- 58
- 59
- 60
- 61
- 62
- 63
- 64
- 65
- 66
- 67
- 68
- 69
- 70
- 71
- 72
- 73
- 74
- 75
- 76
- 77
- 78
- 79
- 80
- 81
- 82
- 83
- 84
- 85
- 86
- 87
- 88
- 89
- 90
- 91
- 92
- 93
- 94
- 95
- 96
- 97
- 98
- 99
- 100
- 101
- 102
- 103
- 104
使用
使用python进行编辑
- 具体的python编写代码
import sys
sys.path.append('../')
from pycore.tikzeng import *

# defined your arch
arch = [
    to_head( '..' ),
    to_cor(),
    to_begin(),
    to_Conv("conv1", 512, 64, offset="(0,0,0)", to="(0,0,0)", height=64, depth=64, width=2 ),
    to_Pool("pool1", offset="(0,0,0)", to="(conv1-east)"),
    to_Conv("conv2", 128, 64, offset="(1,0,0)", to="(pool1-east)", height=32, depth=32, width=2 ),
    to_connection( "pool1", "conv2"),
    to_Pool("pool2", offset="(0,0,0)", to="(conv2-east)", height=28, depth=28, width=1),
    to_SoftMax("soft1", 10 ,"(3,0,0)", "(pool1-east)", caption="SOFT"  ),
    to_connection("pool2", "soft1"),
    to_Sum("sum1", offset="(1.5,0,0)", to="(soft1-east)", radius=2.5, opacity=0.6),
    to_connection("soft1", "sum1"),
    to_end()
    ]

def main():
    namefile = str(sys.argv[0]).split('.')[0]
    to_generate(arch, namefile + '.tex' )

if __name__ == '__main__':
    main()
- 1
- 2
- 3
- 4
- 5
- 6
- 7
- 8
- 9
- 10
- 11
- 12
- 13
- 14
- 15
- 16
- 17
- 18
- 19
- 20
- 21
- 22
- 23
- 24
- 25
- 26
- 27
- 注意切换到当前python对应的路径下方,运行如下指令
cd pyexamples/
bash ../tikzmake.sh test_simple
- 1
- 2
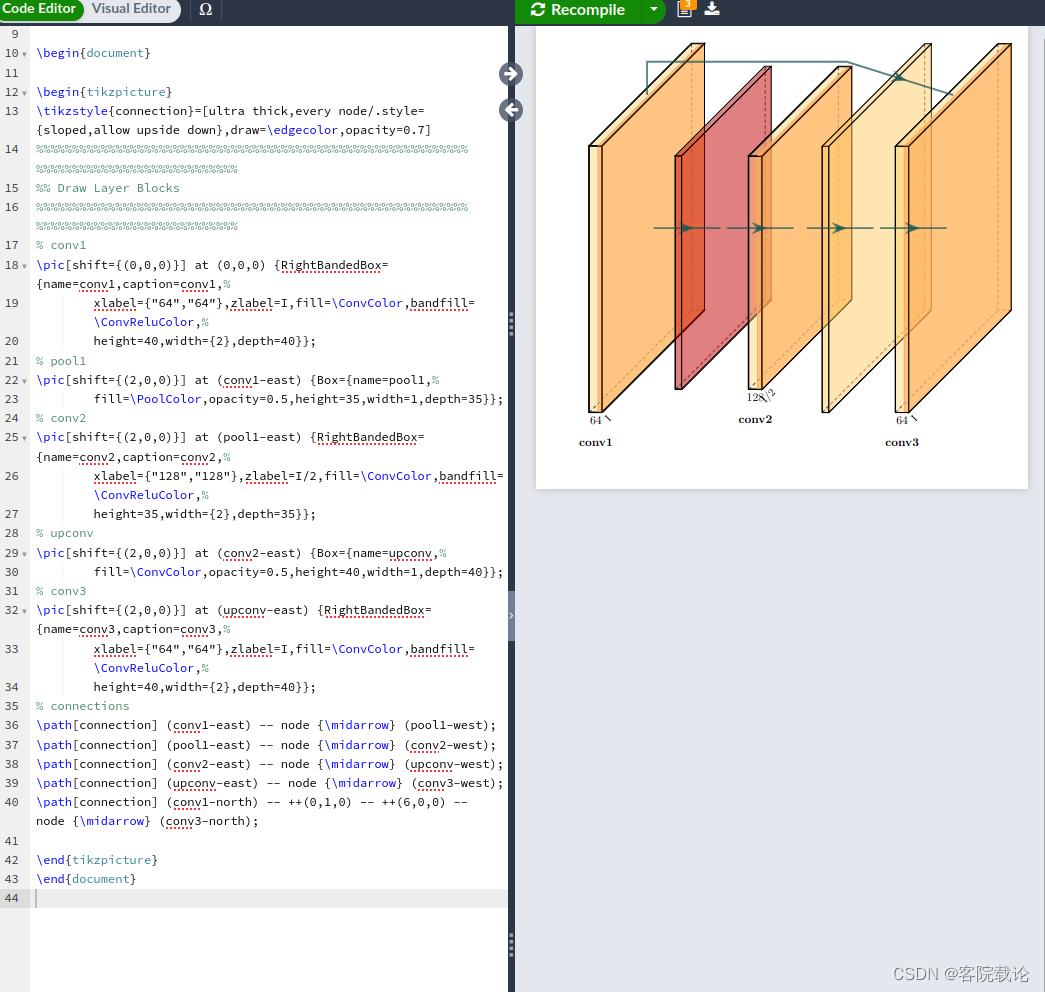
使用latex进行编辑
- 这里我是使用overleaf进行编辑的,也是参考了别人的模板,具体链接
- overleaf模板:链接
- 不要动layers中的包,只需要改变main.tex就可
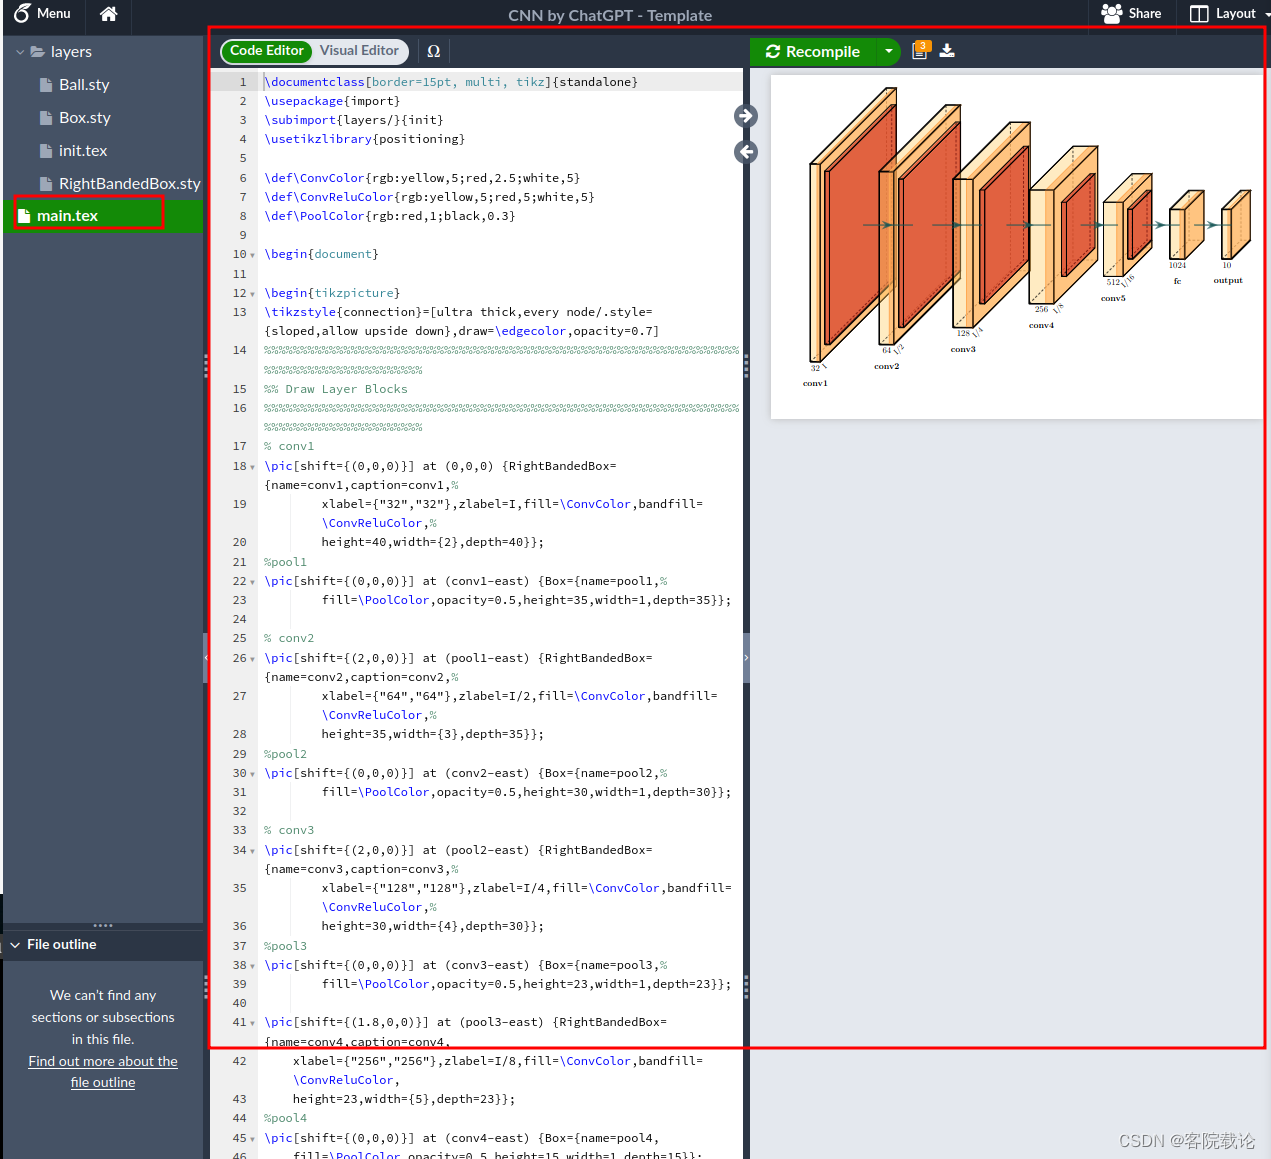
样例
利用chatGPT
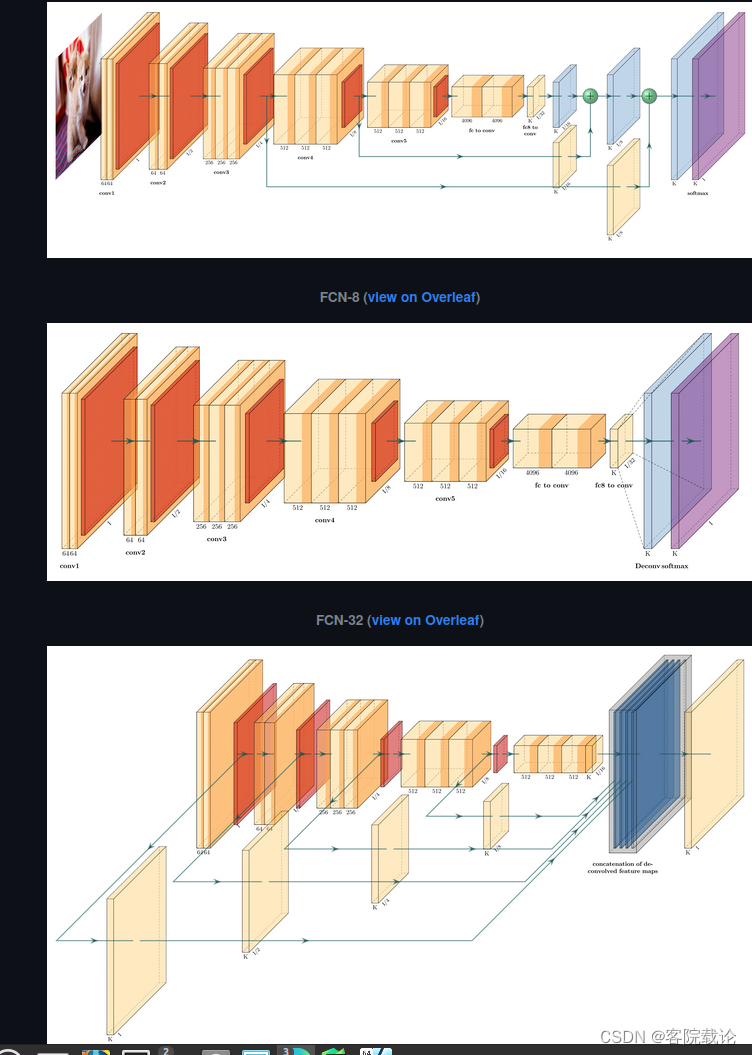
使用chatGPT生成Latex代码
- 按照网上的教程,这里需要先给他一个样例,并且这个样例和你需要画的文件具有一定的相似性,然后让chatGPT帮你生成,具体指令如下
这是生成CNN的latex代码,使用的是PlotNeuralNet的Latex包,根据这个代码,帮我写一下FCN的latex代码
- 1
- 生成效果如下
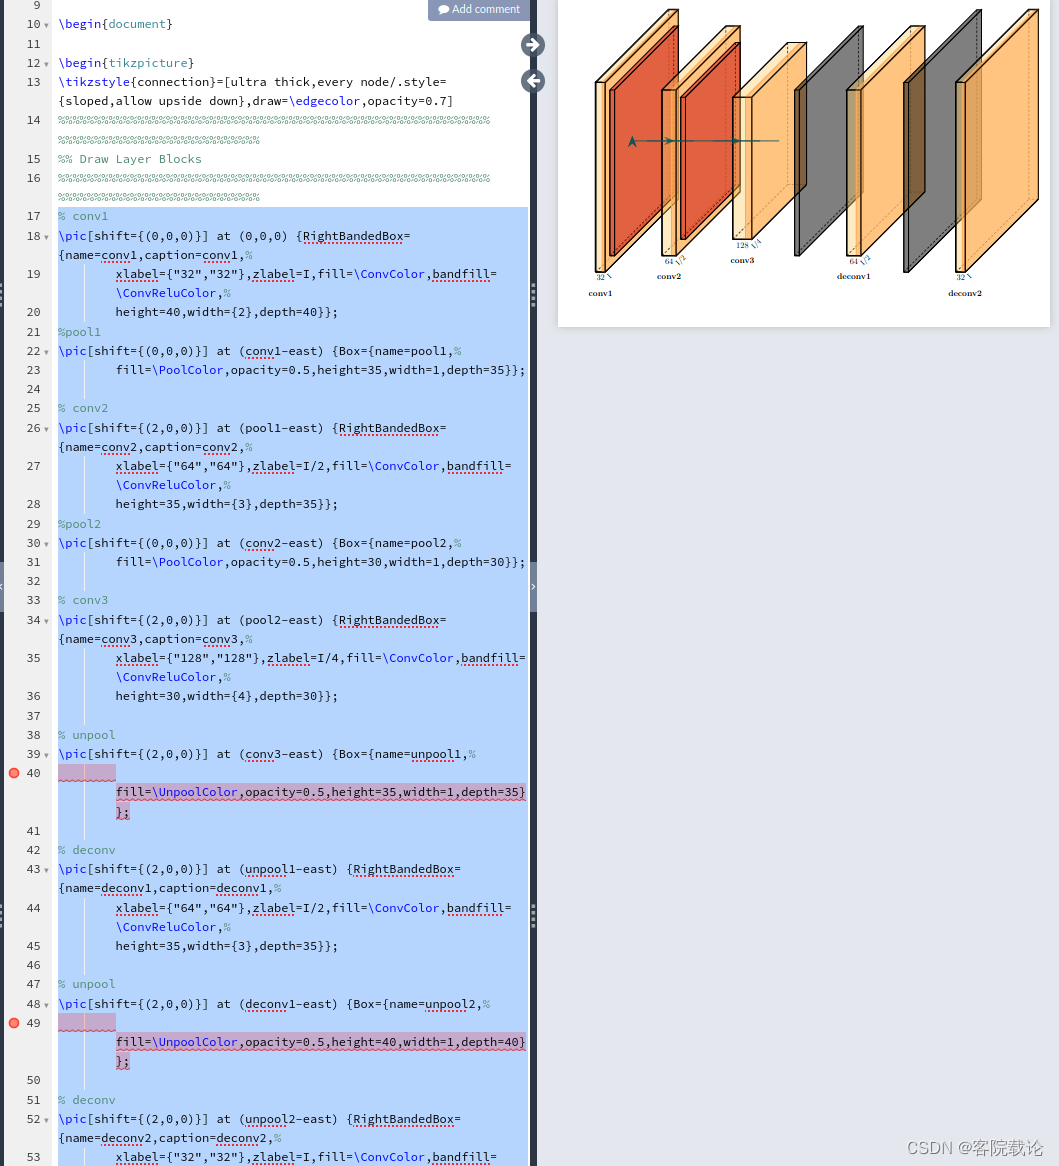
- 他生成的总归有一些问题,这个时候,你需要根据模型的实际内容进行修改。
- 我也试验了直接生成对应的模型,看了一下具体的效果
- 这里直接让他生成unet模型,它只能生成特定的模块,并不能生成完整的网络模型
- 根据具体的操作过程,在后续的过程中,会更新
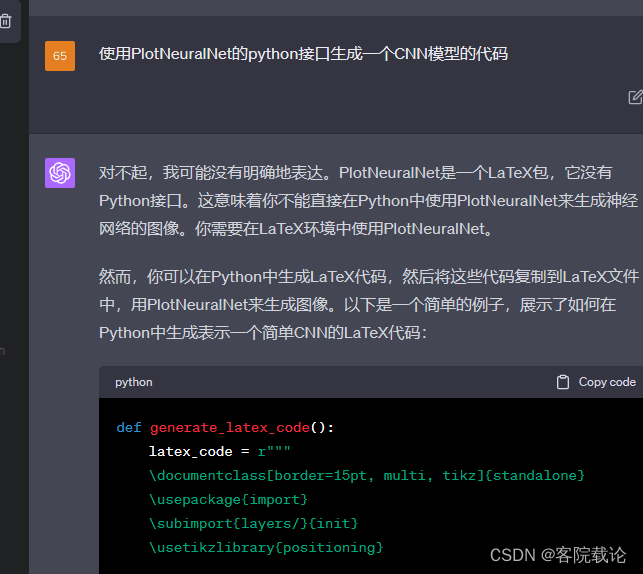
利用chatGPT生成对应的python代码
- chatGPT默认的PlotNeuralNet是一个Latex包,其中并没有python的接口,所以并不能生成对应的代码。直接生成不现实。
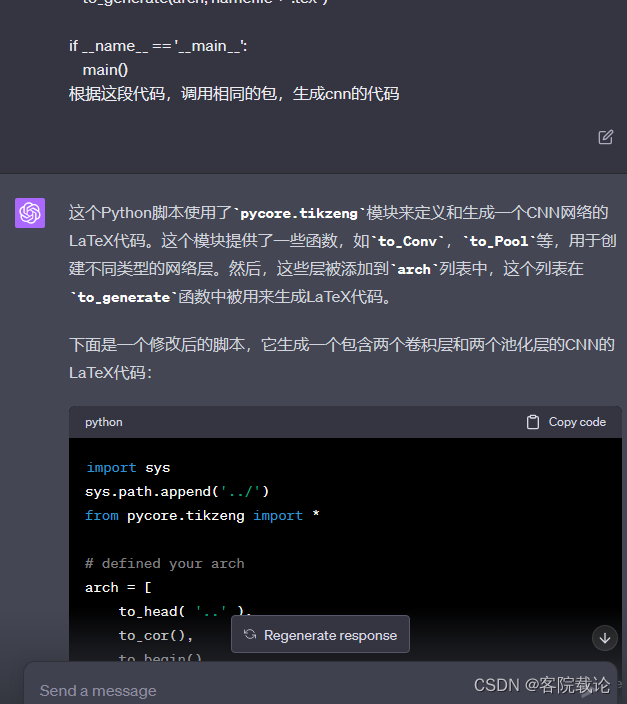
- 这里还是尝试先给他一个代码样例,然后在提出对应的要求。效果良好。
- 但是,注意,PlotNeuralNet的python接口支持的组件不多,有一部分的模型画不出来,仅仅支持一下的几种
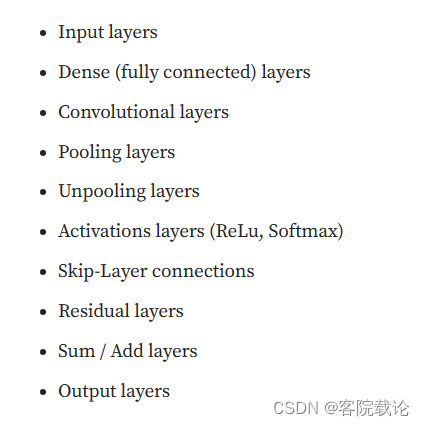
总结
- 使用这个工具,虽然不能完全不需要写代码 ,但是尽可能减少了我所需要写的编码量,只需要编写局部就行了。不过还是需要能看懂,然后才能进行改错。
引用
声明:本文内容由网友自发贡献,不代表【wpsshop博客】立场,版权归原作者所有,本站不承担相应法律责任。如您发现有侵权的内容,请联系我们。转载请注明出处:https://www.wpsshop.cn/w/繁依Fanyi0/article/detail/201482
推荐阅读
相关标签

