
- 1李德毅 | 人工智能看哲学
- 2解读大数据技术在金融行业中的应用_金融证券大数据项目
- 3推荐8个宝藏软件,每一款都十分良心!
- 4使用代理下载huggingface的evaluate load metrics_huggingface代理
- 5【每日积累】echarts饼图联动效果_echarts两个饼图联动
- 6深入分析 Android Service (二)
- 7sqlserver两行数据合并为一行_sqlserver两行数据合并成一行
- 8【实习之路】三本的我字节实习转正,终于尘埃落定——分享我的大学四年_字节转正结果
- 9Error: Google Play requires that apps target API level 26 or higher. 两种解决办法_google play requires that apps target api level 31
- 10正则表达式表
vue项目:集成富文本编辑器 - 百度ueditor(vue-ueditor-wrap)
赞
踩
一、背景
集成百度ueditor,实现图文编辑
二、项目介绍
vue2-nuxt2项目
vue项目:ueditor(vue-ueditor-wrap)
三、集成步骤
3.1、下载富文本编辑器
GitHub - fex-team/ueditor: rich text 富文本编辑器
3.2、下载后放在static目录下

3.3、vue项目 安装插件vue-ueditor-wrap
yarn add vue-ueditor-wrap
3.4、创建配置文件

- import cookie from 'js-cookie'
-
- export const a = 1
- // 百度富文本配置项
- export const ueditorConfig = {
- //是否开启字数统计
- wordCount:true,
- //允许输入的最大字符数
- maximumWords:50000,
- // 编辑器不自动被内容撑高
- autoHeightEnabled: false,
- // 初始容器高度
- initialFrameHeight: 240,
- // 初始容器宽度
- initialFrameWidth: '100%',
- // 上传文件接口
- serverUrl: 'XXXXX/api/v1/files/upload',
- // UEditor 资源文件的存放路径,通常Nuxt项目设置为/UEditor/即可
- // UEDITOR_HOME_URL: `/UEditor/`,
- UEDITOR_HOME_URL: `UEditor/`,
- // 配合最新编译的资源文件,你可以实现添加自定义Request Headers,详情https://github.com/HaoChuan9421/ueditor/commits/dev-1.4.3.3
- headers: {
- Authorization: `Bearer ${cookie.get('token')}`,
- tenantId: cookie.get('tenantId')
- },
- readonly: false,
- focus: true
- }
四、使用步骤
4.1、在开发的业务文件引入vue-ueditor-wrap、配置文件

import VueUeditorWrap from 'vue-ueditor-wrap';
import { ueditorConfig } from '../ueditor/index';
4.2、使用
- <vue-ueditor-wrap
- ref="ueditor_v"
- v-model="msg"
- class="preview"
- :config="config"
- @ready="ready"
- />
4.3、数据、配置

ready()
- // 可以在ready方法中拿到editorInstance实例,所有API和官方的实例是一样了。http://fex.baidu.com/ueditor/#api-common
- ready(editorInstance) {
- console.log(`实例${editorInstance.key}已经初始化:`, editorInstance);
- },
四、配置插入图片
4.1、ueditor.config.js
- imageActionName: 'uploadimage',
- imageAllowFiles: [".png", ".jpg", ".jpeg", ".gif", ".bmp"],
- imageUrlPrefix: "", /* 图片访问路径前缀 */
- imagePathFormat: "/editor/upload/image/{yyyy}{mm}{dd}/{time}{rand:6}", /* 上传保存路径,可以自定义保存路径和文件名格式 */
4.2、上文3.4配置serverurl,文件上传地址
4.3、上传接口返回数据结构应为:
- {
- state: 'SUCCESS'
- url: 'https://123.png'
- }
五、 至此配置完毕,可以进行编辑、插入图片。

六、设置禁止编辑
6.1、需求
内容区域设置禁止编辑

6.2、实现思路(一)
6.2.1、通过编辑器提供的方法进行配置,没找到方法
6.2.2、通过JS去设置
6.2.2.1、打开元素后发现是一个iframe,那么我们首先获取iframe

document.getElementById('ueditor_0')
6.2.2.2、获取iframe内body
document.getElementById('ueditor_0').contentWindow.document.getElementsByTagName('body')[0]
6.2.2.3、body上属性contentEditable显示为true,,设置为false即可禁止编辑
document.getElementById('ueditor_0').contentWindow.document.getElementsByTagName('body')[0].contentEditable = false
6.2.2.4、在ready方法调用(递归)方法,同时处理ueditor编辑器id后最不为0的情况

- // 可以在ready方法中拿到editorInstance实例,所有API和官方的实例是一样了。http://fex.baidu.com/ueditor/#api-common
- ready(editorInstance) {
- console.log(`实例${editorInstance.key}已经初始化:`, editorInstance);
- // 不是编辑状态,禁用编辑,隐藏工具栏
- this.isEditUeditor();
- },
- isEditUeditor() {
- if (!this.edit && document.getElementById(`ueditor_${this.editIndex}`)) {
- document.getElementById('edui1_toolbarbox').style.display = 'none';
- document
- .getElementById('ueditor_0')
- .contentWindow.document.getElementsByTagName(
- 'body'
- )[0].contentEditable = false;
- }
- // ueditor_0 通常id后缀为0,处理不为0的情况
- if (
- !this.edit &&
- !document.getElementById(`ueditor_${this.editIndex}`) &&
- this.editIndex < 20
- ) {
- this.editIndex += 1;
- this.isEditUeditor();
- }
- },
6.2.2.5、效果

6.3、实现思路(二)
通过组件的ref属性,逐层找到contentEditable,设置为false


- <vue-ueditor-wrap
- ref="ueditor_v"
- v-model="addContentForm.articleContent"
- class="preview"
- :config="config"
- @ready="ready"
- />
- ready(editorInstance) {
- console.log(`实例${editorInstance.key}已经初始化:`, editorInstance);
- // 不是编辑状态,禁用编辑,隐藏工具栏
- console.log('377this.$refs.ueditor_v', this.$refs.ueditor_v)
- this.$refs.ueditor_v.editor.body.contentEditable = false
- document.getElementById('edui1_toolbarbox').style.display = 'none';
- },
同样可以实现,效果如图:

七、过程记录
7.1、解决section标签没有style、class的问题,否则加了样式也不能生效
section:['class', 'style'],
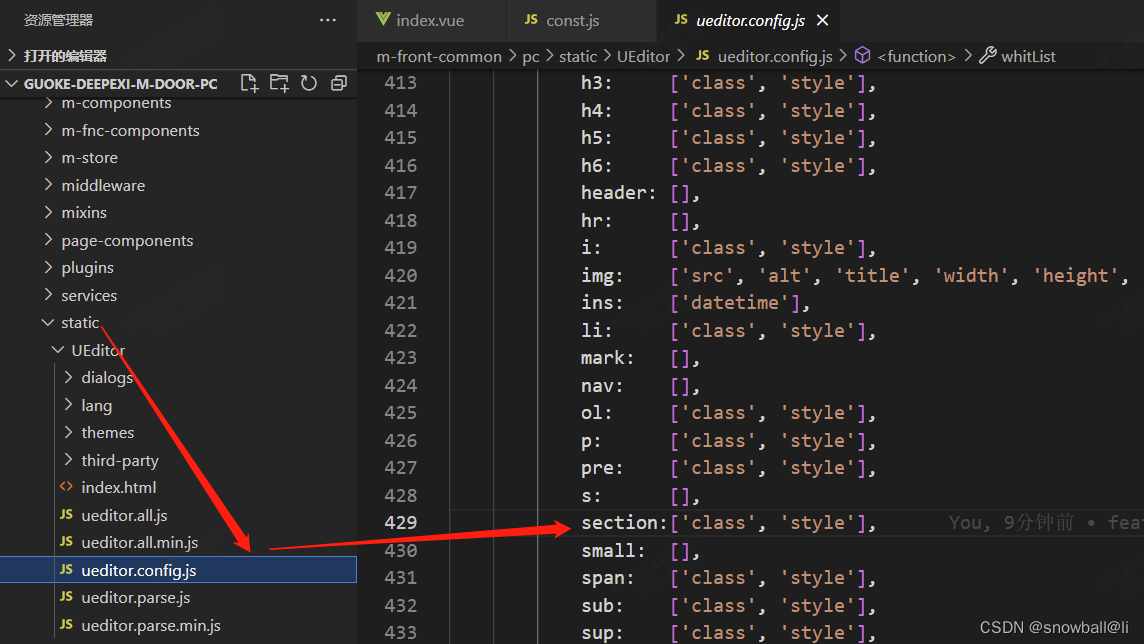
经过测试,成功。
八、欢迎关注、点赞、评论、交流指正。
- 1:添加配置依赖
[详细] 赞
踩

