
热门标签
热门文章
- 15G基础学习1、5G网络架构、网络接口及协议栈_5g网络拓扑图
- 22020-10-24 文件系统
- 3[大模型]GLM-4-9B-Chat vLLM 部署调用
- 4git版本回退和分支_master 分支回退
- 5记一次阿里java实习生面试(失败)_孩子华为阿里实习面试失败了都
- 6吾辈楷模!国人开源的Redis客户端被Redis官方收购了!_ioredis多少钱被收购
- 7SwiftUI 控件_swiftui控件介绍
- 8如何在 SwiftUI 中以编程方式滚动列表?_swiftui scrollviewreader scrollto
- 9vulnhub靶机渗透 FRISTILEAKS: 1.3_vulnhub: fristileaks安装
- 10Linux下Signal信号_linux中又是如何等待信号到来的
当前位置: article > 正文
《网页设计基础——表格与表单》_网页表格
作者:笔触狂放9 | 2024-06-16 02:06:10
赞
踩
网页表格
网页设计基础——表格与表单
一、表格的基础框架;
规则:
- table:表示整个表格。
- caption:定义表格的标题
- tr:表示表格的一行。
- td:表示行中的一个列,需要嵌套在
<tr>标签内。 - th:表示表头单元格. 会居中加粗。
格式:
<table border="x">					<!-- 边框宽度为x -->
    <caption>标题</caption>
    <tr>
    <th></th>
    <td></td>
    <td></td>
    </tr>
</table>
- 1
- 2
- 3
- 4
- 5
- 6
- 7
- 8
例如:
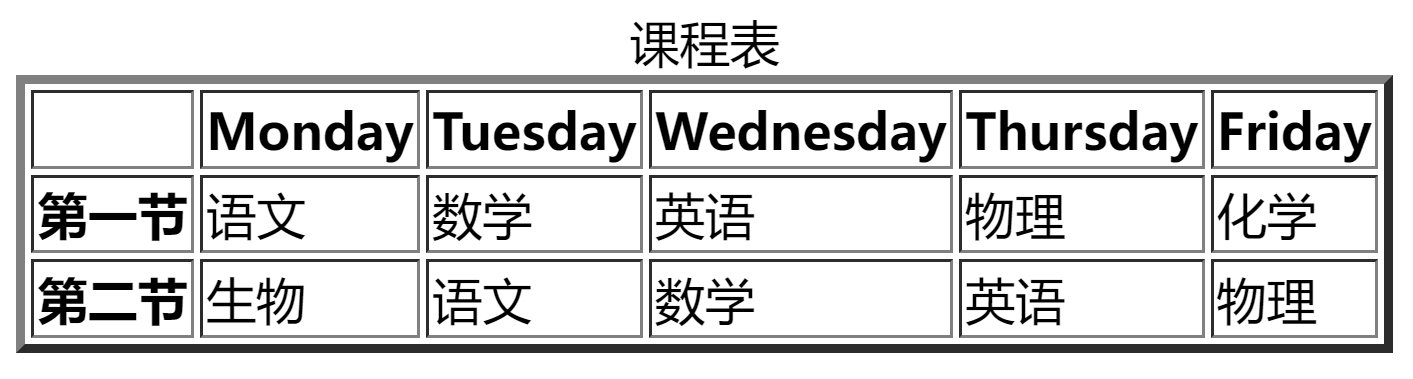
<html>
	<head>
		<title>表格</title>
	</head>
	<body>
		<table border="3">					<!-- 边框宽度为3 -->
    		<caption>课程表</caption>
    		<tr>
    			<th></th>
    			<th>Monday</th>
    			<th>Tuesday</th>
				<th>Wednesday</th>
				<th>Thursday</th>
				<th>Friday</th>
    		</tr>
			<tr>
				<th>第一节</th>
				<td>语文</td>
				<td>数学</td>
				<td>英语</td>
				<td>物理</td>
				<td>化学</td>
			</tr>
			<tr>
				<th>第二节</th>
				<td>生物</td>
				<td>语文</td>
				<td>数学</td>
				<td>英语</td>
				<td>物理</td>
			</tr>
		</table>
	</body>
</html>

- 1
- 2
- 3
- 4
- 5
- 6
- 7
- 8
- 9
- 10
- 11
- 12
- 13
- 14
- 15
- 16
- 17
- 18
- 19
- 20
- 21
- 22
- 23
- 24
- 25
- 26
- 27
- 28
- 29
- 30
- 31
- 32
- 33
- 34
网页效果:
二、表格的常用样式;
1.表格边框的合并与分离
border-collapse: collapse;		/* 边框合并 */
border-collapse: separate;		/* 边框分离 */
- 1
- 2
2.表格边框的间距大小
border-collapse: separate;		/* 边框分离 */
border-spacing: 5px 10px		/* 横向 纵向*/
- 1
- 2
3.表格标题的位置
caption-side: top; 				/* 把标题放在表格上面。*/
caption-side: bottom; 			/* 把标题放在表格下面。*/
- 1
- 2
4.表头的标识
<tr>
	<th scope="col">星期一</th>		<!-- 把<th>标识为列的表头-->
	<th scope="col">星期二</th>		<!-- 把<th>标识为列的表头-->
</tr>
<tr>
	<th scope="row">第一节</th>		<!-- 把<th>标识为行的表头-->
    <td>语文</td>
</tr>
- 1
- 2
- 3
- 4
- 5
- 6
- 7
- 8
三、表单的基础框架;
规则:
<form>:定义供用户输入的表单标签。<input>:输入标签。action属性:规定当提交表单时,向何处发送表单数据——用于动态网页,了解即可。method属性:规定发送表单数据的方式 【URL 变量(method=“get”)或者 HTTP post (method=“post”)】——用于动态网页,了解即可。type属性:定义输入类型,如文本域text、密码字段password、提交按钮submit。name属性:定义表单的名称,用于在表单提交之后引用表单数据,或者在 JavaScript 中引用元素——用于动态网页,了解即可。placeholder属性:定义输入框中的提示信息。
格式:
<form>
    <input type="~~~" name="~~~" placeholder="~~~">
</form>
- 1
- 2
- 3
例如:
<html>
<head>
<title>表单</title>
</head>
<body>
<form>
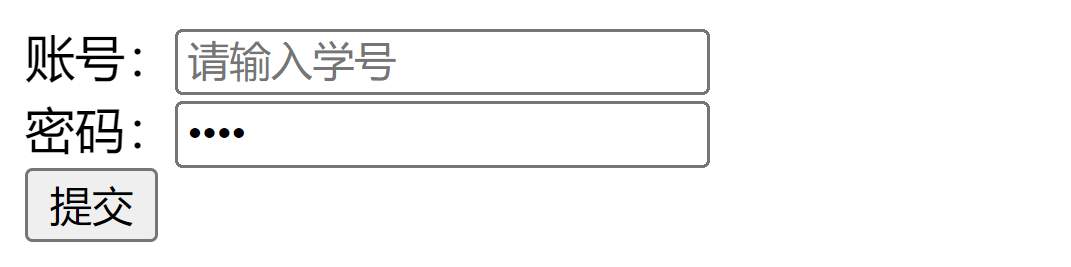
账号:<input type="text" name="user_acount" placeholder="请输入学号"><br>
密码:<input type="password" name="user_password"><br> <!-- 默认隐藏输入的内容 -->
<input type="submit" value="提交"> <!-- 此处的value用于定义按钮上的文字 -->
</form>
</body>
</html>
- 1
- 2
- 3
- 4
- 5
- 6
- 7
- 8
- 9
- 10
- 11
- 12
网页效果:
四、表单的常用样式;
例一:文本域(Text Fields)
<html>
<head>
<title>文本域</title>
</head>
<body>
<form>
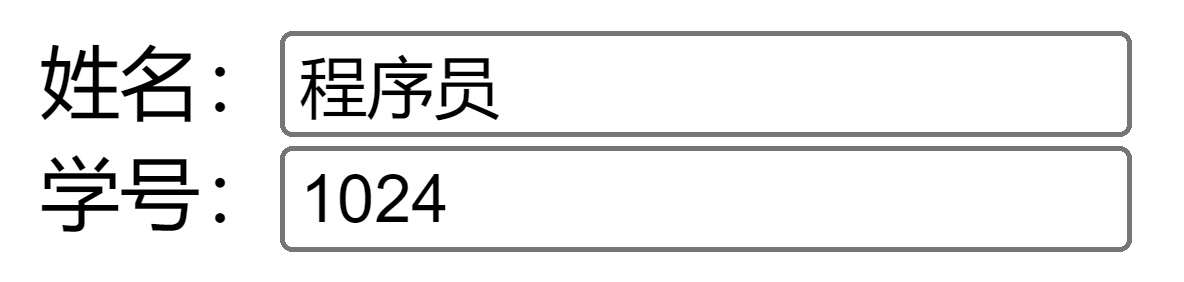
姓名:<input type="text" name="user_name"><br>
学号:<input type="text" name="user_id">
</form>
</body>
</html>
- 1
- 2
- 3
- 4
- 5
- 6
- 7
- 8
- 9
- 10
- 11
网页效果:
例二:密码字段(Password)
<html>
<head>
<title>密码字段</title>
</head>
<body>
<form>
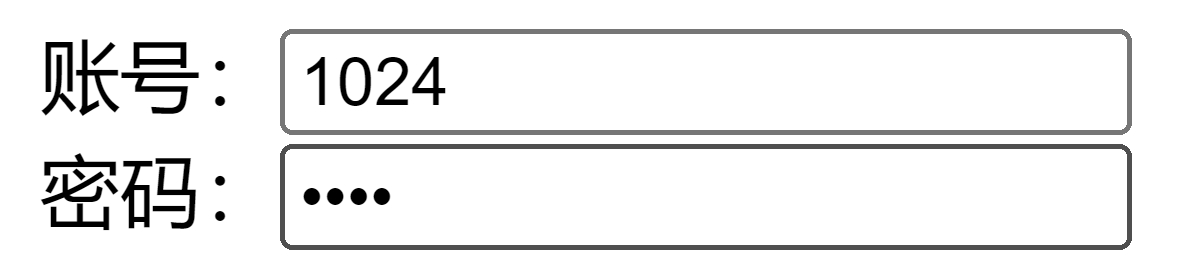
账号:<input type="text" name="user_accound"><br>
密码:<input type="password" name="user_password"> <!-- 默认隐藏输入的内容 -->
</form>
</body>
</html>
- 1
- 2
- 3
- 4
- 5
- 6
- 7
- 8
- 9
- 10
- 11
网页效果:
例三:单选按钮(Radio Buttons)
<html>
	<head>
		<title>表单</title>
	</head>
	<body>
		<form>
    		<input type="radio" name="user_sex" value="Man">男<br>	<!-- 选择此项后提交的值即为value的值 -->
    		<input type="radio" name="user_sex" value="Woman">女
		</form>
	</body>
</html>
- 1
- 2
- 3
- 4
- 5
- 6
- 7
- 8
- 9
- 10
- 11
网页效果:

例四:复选框(Checkboxes)
<html>
	<head>
		<title>表单</title>
	</head>
	<body>
		<form>
    		<input type="checkbox" name="user_career" value="Programmer">我是程序员<br>	<!-- 选择此项后提交的值即为value的值 -->
    		<input type="checkbox" name="user_career" value="Superhero">我是超级英雄
		</form>
	</body>
</html>
- 1
- 2
- 3
- 4
- 5
- 6
- 7
- 8
- 9
- 10
- 11
网页效果:

例五:下拉选择框(option)
<html>
    <head>
        <title>表单——下拉选择框</title>
    </head>
    <body>
        <form>
            你喜欢的水果是:
            <select>
                <option value="苹果">苹果</option>
                <option value="香蕉">香蕉</option>
                <option value="葡萄">葡萄</option>
            </select>
        </form>
    </body>
</html>
- 1
- 2
- 3
- 4
- 5
- 6
- 7
- 8
- 9
- 10
- 11
- 12
- 13
- 14
- 15
网页效果:

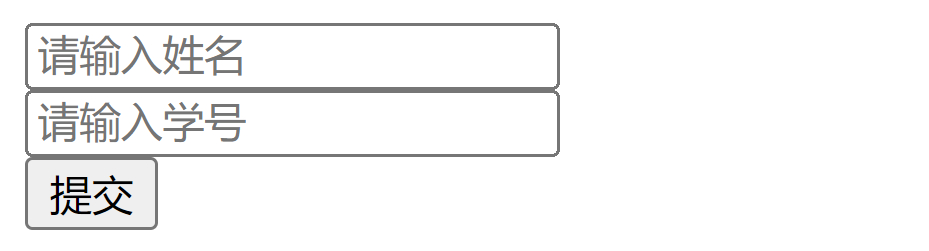
例六:提交按钮(Submit)
<html>
	<head>
		<title>表单</title>
	</head>
	<body>
		<form>
			<input type="text" name="user_name" placeholder="请输入姓名"><br>		<!-- 与例一的区别就是通过 placeholder 设置了提示信息 -->
    		<input type="text" name="user_id" placeholder="请输入学号"><br>
    		<input type="submit" value="提交">
		</form>
	</body>
</html>
- 1
- 2
- 3
- 4
- 5
- 6
- 7
- 8
- 9
- 10
- 11
- 12
网页效果:
声明:本文内容由网友自发贡献,不代表【wpsshop博客】立场,版权归原作者所有,本站不承担相应法律责任。如您发现有侵权的内容,请联系我们。转载请注明出处:https://www.wpsshop.cn/w/笔触狂放9/article/detail/724717
推荐阅读
相关标签

