
热门标签
热门文章
- 1我所理解的委托和匿名函数_委托与函数名
- 2打造自己的专属--VSCode主题(仿HBuilderX绿柔主题配色)_vscode绿色主题
- 3RabbitMQ(一)Windows下载安装_rabbitmq下载
- 4C++:十大排序
- 5Cloudstack_cloudstack系统架构
- 6软件测试到底在学什么_软件测试能学到什么
- 72024年安卓最新面试 100% 完全掌握:重新认识 View 的绘制流程(1),字节跳动面试官级别_view的绘制流程
- 8“心脏滴血漏洞”测评经验分享_heartbleed 测试方式
- 9力扣(leetcode)第168题Excel表列名称(Python)_力扣168
- 10【Java】【JDK】使用JDK自带的mail API实现邮件发送_java 邮件接口
当前位置: article > 正文
微信小程序自定义tabbar_微信小程序 自定义 tabbar
作者:知新_RL | 2024-06-11 20:07:56
赞
踩
微信小程序 自定义 tabbar
使用步骤
1.配置信息
在 app.json 中的 tabBar 项指定 custom 字段,同时其余 tabBar 相关配置也补充完整。
所有 tab 页的 json 里需声明 usingComponents 项,也可以在 app.json 全局开启。
代码如下(示例):
	//app.json
{
	//...
 "tabBar": {
    "custom": true,
    "color": "#7A7E83",
    "selectedColor": "#3cc51f",
    "borderStyle": "black",
    "backgroundColor": "#ffffff",
    "list": [
      {
        "pagePath": "index/index",
        "iconPath": "image/icon_component.png",
        "selectedIconPath": "image/icon_component_HL.png",
        "text": "组件"
      },
      {
        "pagePath": "index/index2",
        "iconPath": "image/icon_API.png",
        "selectedIconPath": "image/icon_API_HL.png",
        "text": "接口"
      }
    ]
  },
  "usingComponents": {}
  //...
 }

- 1
- 2
- 3
- 4
- 5
- 6
- 7
- 8
- 9
- 10
- 11
- 12
- 13
- 14
- 15
- 16
- 17
- 18
- 19
- 20
- 21
- 22
- 23
- 24
- 25
- 26
- 27
2.添加 tabBar 代码文件
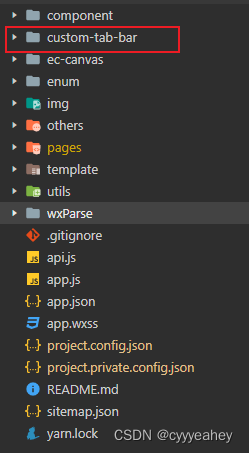
在代码根目录下添加入口文件:
代码如下(示例):
custom-tab-bar/index.js
custom-tab-bar/index.json
custom-tab-bar/index.wxml
custom-tab-bar/index.wxss
- 1
- 2
- 3
- 4
3.编写 tabBar 代码
custom-tab-bar/index.js
Component({
  data: {
    selected: 0,
    color: "#7A7E83",
    selectedColor: "#3cc51f",
    list: [{
      pagePath: "/index/index",
      iconPath: "/image/icon_component.png",
      selectedIconPath: "/image/icon_component_HL.png",
      text: "组件"
    }, {
      pagePath: "/index/index2",
      iconPath: "/image/icon_API.png",
      selectedIconPath: "/image/icon_API_HL.png",
      text: "接口"
    }]
  },
  attached() {
  },
  methods: {
    switchTab(e) {
      const data = e.currentTarget.dataset
      const url = data.path
      wx.switchTab({url})
      this.setData({
        selected: data.index
      })
    }
  }
})
- 1
- 2
- 3
- 4
- 5
- 6
- 7
- 8
- 9
- 10
- 11
- 12
- 13
- 14
- 15
- 16
- 17
- 18
- 19
- 20
- 21
- 22
- 23
- 24
- 25
- 26
- 27
- 28
- 29
- 30
custom-tab-bar/index.json
{
  "component": true
}
- 1
- 2
- 3
custom-tab-bar/index.wxml
<view class="tab-bar">
  <view class="tab-bar-border"></view>
  <view wx:for="{{list}}" wx:key="index" class="tab-bar-item" data-path="{{item.pagePath}}" data-index="{{index}}" bindtap="switchTab">
    <image src="{{selected === index ? item.selectedIconPath : item.iconPath}}"></image>
    <view style="color: {{selected === index ? selectedColor : color}}">{{item.text}}</view>
  </view>
</view>
- 1
- 2
- 3
- 4
- 5
- 6
- 7
- 8
custom-tab-bar/index.wxss
.tab-bar {
  position: fixed;
  bottom: 0;
  left: 0;
  right: 0;
  height: 48px;
  background: white;
  display: flex;
  padding-bottom: env(safe-area-inset-bottom);
}

.tab-bar-border {
  background-color: rgba(0, 0, 0, 0.33);
  position: absolute;
  left: 0;
  top: 0;
  width: 100%;
  height: 1px;
  transform: scaleY(0.5);
}

.tab-bar-item {
  flex: 1;
  text-align: center;
  display: flex;
  justify-content: center;
  align-items: center;
  flex-direction: column;
}

.tab-bar-item image {
  width: 27px;
  height: 27px;
}

.tab-bar-item view {
  font-size: 10px;
}
- 1
- 2
- 3
- 4
- 5
- 6
- 7
- 8
- 9
- 10
- 11
- 12
- 13
- 14
- 15
- 16
- 17
- 18
- 19
- 20
- 21
- 22
- 23
- 24
- 25
- 26
- 27
- 28
- 29
- 30
- 31
- 32
- 33
- 34
- 35
- 36
- 37
- 38
- 39
- 40
页面生命周期为onShow时
 if (typeof this.getTabBar === 'function' &&
        this.getTabBar()) {
        this.getTabBar().setData({
          selected: 'xxxxxxxx'
          //这个填custom-tab-bar/index.js中list的位数,第一个就填0,Number型
        })
      }
- 1
- 2
- 3
- 4
- 5
- 6
- 7
声明:本文内容由网友自发贡献,不代表【wpsshop博客】立场,版权归原作者所有,本站不承担相应法律责任。如您发现有侵权的内容,请联系我们。转载请注明出处:https://www.wpsshop.cn/w/知新_RL/article/detail/704628
推荐阅读
相关标签

