
- 1Mac没有winnt格式_mac音频格式转换器哪个好?小编推荐这几款,总有一款适合你!...
- 2Linux shell 脚本编程-高级篇 (一)_shell高级编程
- 3轻松理解 Transformers (4) :Decoder 和 Output 部分_transformer output
- 4Github中进行fork后,原仓库更新了如何与原仓库同步_github上fork项目后 原项目更新了
- 5hive-4(分区、分桶、视图)
- 6当代大学生应该如何学习计算机科学
- 7LVGL使用GUI Guider配置STM32界面详细笔记教程_lvgl stm32f103 gui guider
- 8其实并不难!几分钟带你分析python爬虫入门简单基础!_python爬虫难吗
- 9【软考中级】系统集成项目管理工程师—案例分析基础_系统集成项目管理中级计算题主要考什么
- 10计算电磁吐血整理_计算电磁学
Centos7安装mysql_root@localhost ~]# yum install -y mysql-community-
赞
踩
自己琢磨了好几天装了一半又放弃,各种百度都是装一半不是这问题就是这个过期,总结一下截止今天安装成功记录一下:
1、下载安装Mysql官网的YumRepository
wget http://dev.mysql.com/get/mysql57-community-release-el7-8.noarch.rpm
注意: 我是刚装好了Centos7就开始装Mysql遇到了问题如下
![]()
执行命令:
- [root@localhost ~]# yum -y install wget
- 已加载插件:fastestmirror
- base | 3.6 kB 00:00:00
- extras | 2.9 kB 00:00:00
- updates | 2.9 kB 00:00:00
- (1/4): base/7/x86_64/group_gz | 153 kB 00:00:00
- (2/4): extras/7/x86_64/primary_db | 249 kB 00:00:00
- (3/4): updates/7/x86_64/primary_db | 17 MB 00:00:03
- (4/4): base/7/x86_64/primary_db | 6.1 MB 00:00:25
- Determining fastest mirrors
- * base: mirrors.163.com
- * extras: mirrors.163.com
- * updates: mirrors.163.com
- 正在解决依赖关系
- --> 正在检查事务
- ---> 软件包 wget.x86_64.0.1.14-18.el7_6.1 将被 安装
- --> 解决依赖关系完成
-
- 依赖关系解决
-
- ==============================================================================================================================================================================
- Package 架构 版本 源 大小
- ==============================================================================================================================================================================
- 正在安装:
- wget x86_64 1.14-18.el7_6.1 base 547 k
-
- 事务概要
- ==============================================================================================================================================================================
- 安装 1 软件包
-
- 总下载量:547 k
- 安装大小:2.0 M
- Downloading packages:
- 警告:/var/cache/yum/x86_64/7/base/packages/wget-1.14-18.el7_6.1.x86_64.rpm: 头V3 RSA/SHA256 Signature, 密钥 ID f4a80eb5: NOKEY ] 0.0 B/s | 337 kB --:--:-- ETA
- wget-1.14-18.el7_6.1.x86_64.rpm 的公钥尚未安装
- wget-1.14-18.el7_6.1.x86_64.rpm | 547 kB 00:00:00
- 从 file:///etc/pki/rpm-gpg/RPM-GPG-KEY-CentOS-7 检索密钥
- 导入 GPG key 0xF4A80EB5:
- 用户ID : "CentOS-7 Key (CentOS 7 Official Signing Key) <security@centos.org>"
- 指纹 : 6341 ab27 53d7 8a78 a7c2 7bb1 24c6 a8a7 f4a8 0eb5
- 软件包 : centos-release-7-4.1708.el7.centos.x86_64 (@anaconda)
- 来自 : /etc/pki/rpm-gpg/RPM-GPG-KEY-CentOS-7
- Running transaction check
- Running transaction test
- Transaction test succeeded
- Running transaction
- 正在安装 : wget-1.14-18.el7_6.1.x86_64 1/1
- 验证中 : wget-1.14-18.el7_6.1.x86_64 1/1
-
- 已安装:
- wget.x86_64 0:1.14-18.el7_6.1
-
- 完毕!
- [root@localhost ~]# mv /etc/yum.repos.d/CentOS-Base.repo /etc/yum.repos.d/CentOS-Base.repo.backup
- [root@localhost ~]# sudo yum -y install wget
- 已加载插件:fastestmirror
- Loading mirror speeds from cached hostfile
- There are no enabled repos.
- Run "yum repolist all" to see the repos you have.
- To enable Red Hat Subscription Management repositories:
- subscription-manager repos --enable <repo>
- To enable custom repositories:
- yum-config-manager --enable <repo>
- [root@localhost ~]# yum clean all
- 已加载插件:fastestmirror
- Loading mirror speeds from cached hostfile
- There are no enabled repos.
- Run "yum repolist all" to see the repos you have.
- To enable Red Hat Subscription Management repositories:
- subscription-manager repos --enable <repo>
- To enable custom repositories:
- yum-config-manager --enable <repo>

安装成功后在执行:wget http://dev.mysql.com/get/mysql57-community-release-el7-8.noarch.rpm
执行成功在执行:yum localinstall mysql57-community-release-el7-8.noarch.rpm -y
上面操作成功以后执行命令:
[root@localhost mysql-server]# yum install mysql-community-server -y好家伙又出问题:
mysql-community-libs-compat-5.7.39-1.el7.x86_64.rpm 的公钥尚未安装
失败的软件包是:mysql-community-libs-compat-5.7.39-1.el7.x86_64
GPG 密钥配置为:file:///etc/pki/rpm-gpg/RPM-GPG-KEY-mysql
那就给他配置一个公钥:
- rpm --import https://repo.mysql.com/RPM-GPG-KEY-mysql-2022
- yum -y install mysql-community-server
结果如下:
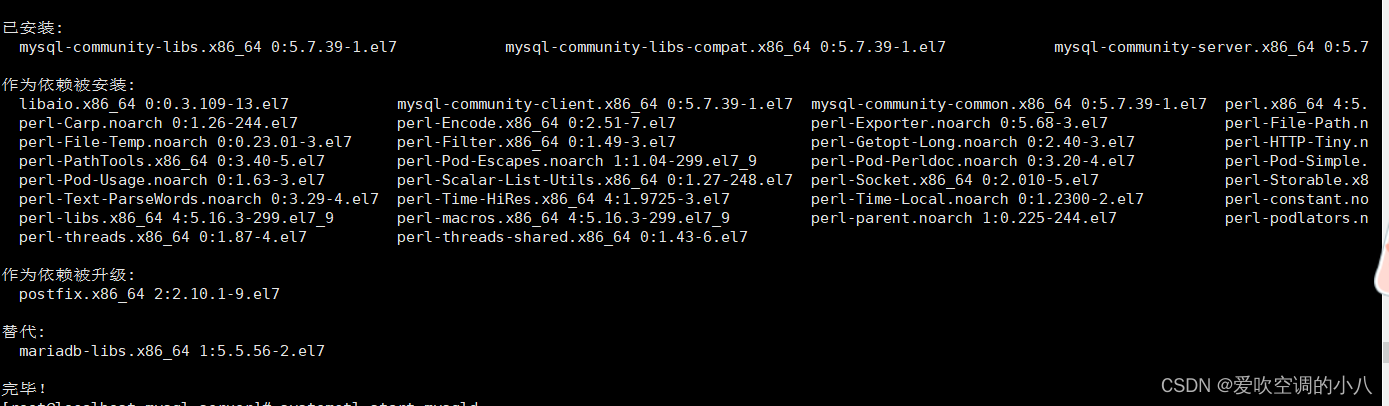
好目前为止是下好Mysql了接下来启动Mysql
[root@localhost mysql-server]# systemctl start mysqld
查看MySQL运行状态,运行状态如图:
[root@localhost mysql-server]# systemctl status mysqld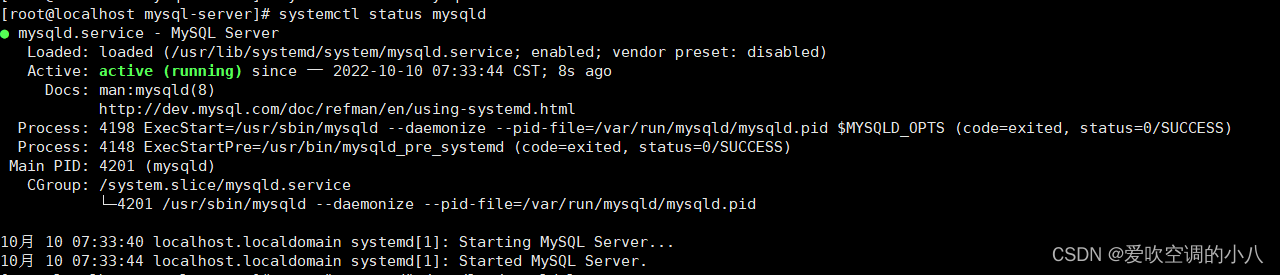
目前为止Mysql终于可以正常跑起来了,Mysql要求是必须要重置密码,那就先找出当前root用户的密码,命令如下:
[root@localhost mysql-server]# grep "password" /var/log/mysqld.log
然后进入Mysql数据库:
- [root@localhost mysql-server]# mysql -uroot -p
- Enter password: 输入上图框出来的初始密码即可
现在要修改初始密码的刚刚也说了如果不修改初始密码是不能操作数据库的,上图框出来的就是当前查到的初始密码:
- mysql> ALTER USER 'root'@'localhost' IDENTIFIED BY '输入要修改的密码';
- //密码要求大小数字即符号组成

修改成功如上图,开启远程方便后续想用Navicat连接数据库
grant all privileges on *.* to 'root'@'%' identified by 'password' with grant option;%代表开启所有,可自行将%改为IP
- 然后再输入下面两行命令
-
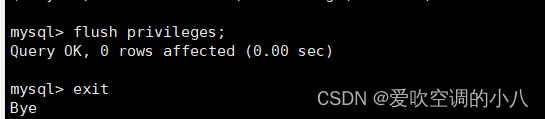
- mysql> flush privileges;
- mysql> exit
为firewalld添加开放端口
添加mysql端口3306和Tomcat端口8080
- [root@localhost ~]# firewall-cmd --zone=public --add-port=3306/tcp --permanent
- [root@localhost ~]# firewall-cmd --zone=public --add-port=8080/tcp --permanent
重新开启
[root@localhost mysql-server]# firewall-cmd --reload

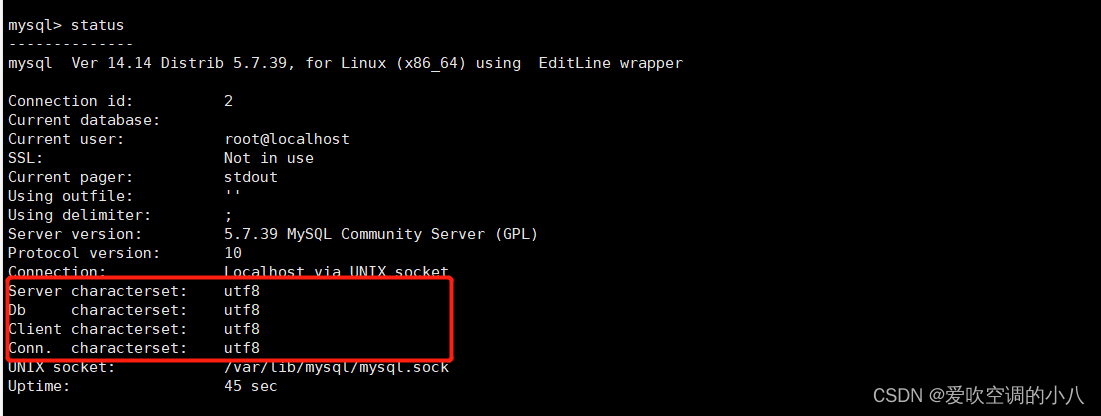
配置成功以后需要把Mysql语言修改成Utf8
- [root@localhost mysql-server]# mysql -uroot -p //进入数据库
- Enter password: //输入密码
- Welcome to the MySQL monitor. Commands end with ; or \g.
- Your MySQL connection id is 3
- Server version: 5.7.39 MySQL Community Server (GPL)
-
- Copyright (c) 2000, 2022, Oracle and/or its affiliates.
-
- Oracle is a registered trademark of Oracle Corporation and/or its
- affiliates. Other names may be trademarks of their respective
- owners.
-
- Type 'help;' or '\h' for help. Type '\c' to clear the current input statement.
-
- mysql> status //查看
- --------------
- mysql Ver 14.14 Distrib 5.7.39, for Linux (x86_64) using EditLine wrapper
-
- Connection id: 3
- Current database:
- Current user: root@localhost
- SSL: Not in use
- Current pager: stdout
- Using outfile: ''
- Using delimiter: ;
- Server version: 5.7.39 MySQL Community Server (GPL)
- Protocol version: 10
- Connection: Localhost via UNIX socket
- Server characterset: latin1 //改成utf8
- Db characterset: latin1 //改成utf8
- Client characterset: utf8
- Conn. characterset: utf8
- UNIX socket: /var/lib/mysql/mysql.sock
- Uptime: 10 min 51 sec
-
- Threads: 1 Questions: 13 Slow queries: 0 Opens: 113 Flush tables: 1 Open tables: 106 Queries per second avg: 0.019
- --------------
exit退出Mysql,再到目录下修改对应内容
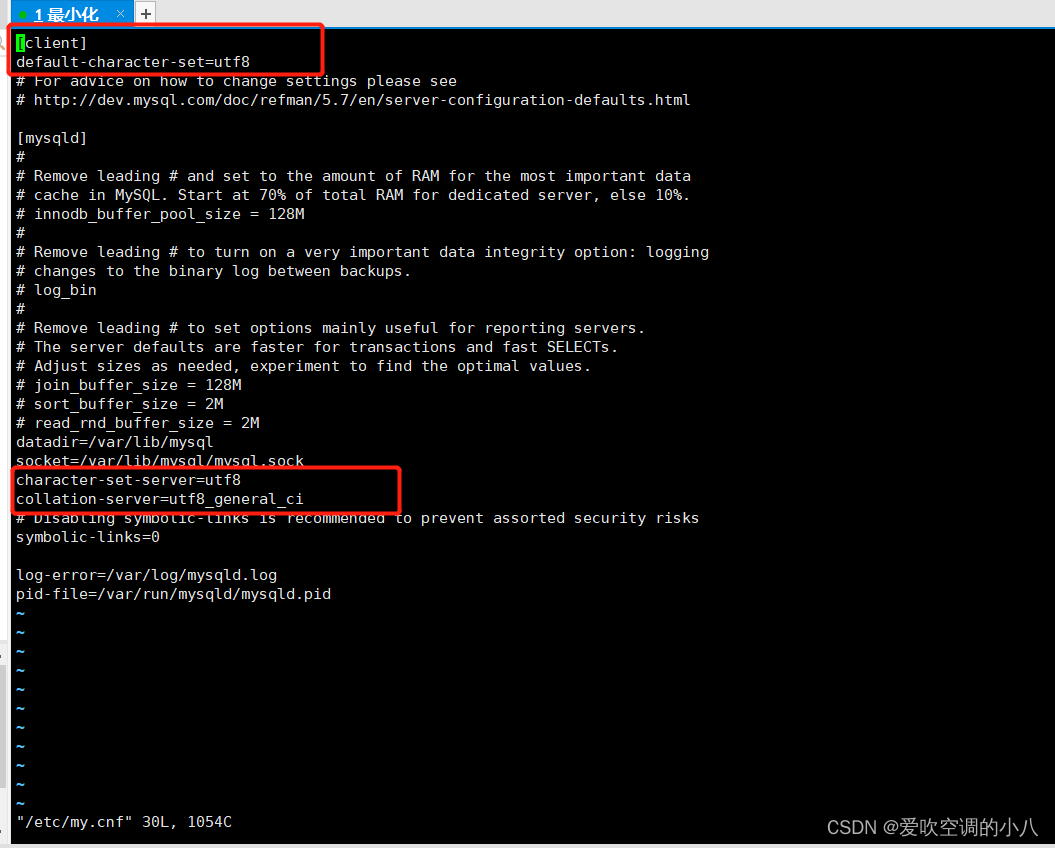
将框起来的代码加上去保存更改然后退出:
注:此模式下操作命令如下
- 保存命令
- 按ESC键 跳到命令模式,然后:
- :w 保存文件但不退出vi
-
- :w file 将修改另外保存到file中,不退出vi
-
- :w! 强制保存,不推出vi
-
- :wq 保存文件并退出vi
-
- :wq! 强制保存文件,并退出vi
-
- :q 不保存文件,退出vi
-
- :q! 不保存文件,强制退出vi
-
- :e! 放弃所有修改,从上次保存文件开始再编辑
以上操作后在去查看
到此为止Centos就安装及部署成功Mysql了!
接下来就是用Navicat连接Mysql啦:
查看当前的IP地址:输入ip addr
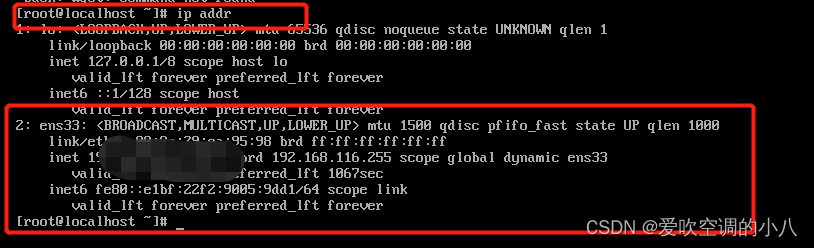
2下面的就是当前的IP地址啦
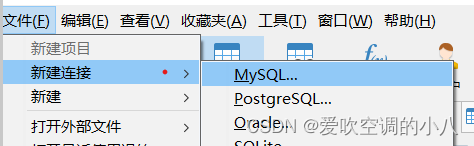
然后打开Navicat
输入以下内容:
连接名:随意想起什么起什么
主机:就是刚刚Centos中查到的Ip地址
端口:因为刚刚设置的端口为3306,如果你做别的修改就填你修改的
用户名:root
密码:就是刚刚修改的密码
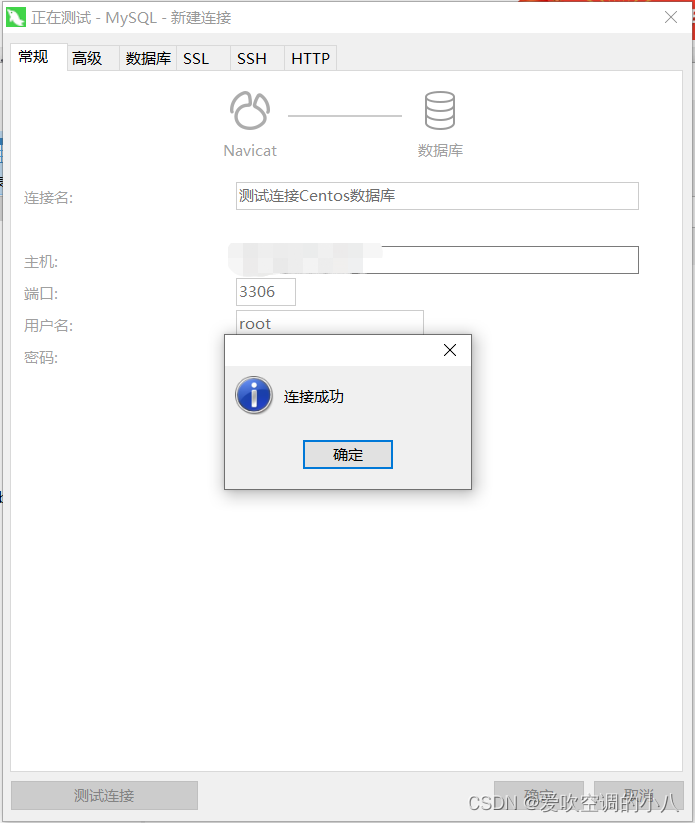
到此为止就全部搞定了!

