
- 1C语言12之什么是字符串类型?_.c文件 字符串是什么类型
- 2【rtthread番外】第一篇:文件系统dfs_rtthread filesystemtype
- 3用深度学习实现命名实体识别(NER)_领域命名实体识别语料库
- 4【Flink】DataStream API使用之源算子(Source)_datastreamsource
- 5docker安装sqlserver2019
- 6python图书大厦图书管理系统的设计与实现flask-django-nodejs-php_flask python图书馆管理系统
- 7人工智能与大数据:新时代的技术融合与未来展望_人工智能大数据
- 8Linux文本处理四剑客awk指令-man帮助手册_awk: fatal: `-n' is not a legal variable name
- 92024年charles对iOS手机的https进行抓包(图文教程)(3),2024年最新覆盖所有面试知识点_charles 苹果手机抓包配置
- 10Vue 项目上线优化,2024年最新微信小程序页面跳转方法总结_vue 跳转小程序
HarmonyOS角落里的知识:一杯冰美式的时间 -- DragView
赞
踩
一、前言
在学习API9的时候就写了一个DragView,用于展示某个页面的悬浮可拖动的入口,特意丰富了许多的功能,今天分享给大家~。Demo基于API11。
二、思路
因为API本身就带有拖拽的手势,所以直接使用:PanGesture,根据拖拽返回的坐标,动态的更新DragView的position坐标。即可实现拖拽的功能。
除了拖拽,还需要的是从停留位置,吸附到某个位置。我们使用animateTo,结合坐标值即可完成很好的吸附效果。
三、准备容器
使用.position(this.curPosition)来控制拖拽的UI位置。dragContentBuilder方便自定义内容,组件的复用。
- @State private curPosition: Position = { x: 0, y: 0 };
- build() {
- Stack() {
- if (this.dragContentBuilder) {
- this.dragContentBuilder()
- } else {
- this.defDragView()
- }
- }
- )
- .position(this.curPosition)
- .onClick(this.onClickListener)
- }
四、边界
一般而言,拖拽的边界肯定是当前屏幕中的,但是如果需求需要限制在某个区域,或者需要规避一些位置。所以我们准备一个边界对象,来更好的管理拖拽的边界。
- boundArea: BoundArea = new BoundArea(0, 0, px2vp(display.getDefaultDisplaySync()
- .width), px2vp(display.getDefaultDisplaySync().height))
- export class BoundArea {
- readonly start: number = 0
- readonly end: number = 0
- readonly top: number = 0
- readonly bottom: number = 0
- readonly width: number = 0
- readonly height: number = 0
- readonly centerX: number = 0
- readonly centerY: number = 0
-
- constructor(start: number, top: number, end: number, bottom: number) {
- this.start = start
- this.top = top
- this.end = end
- this.bottom = bottom
- this.width = this.end - this.start
- this.height = this.bottom - this.top
- this.centerX = this.width / 2 + this.start
- this.centerY = this.height / 2 + this.top
- }
- }

boundArea默认使用了整个屏幕的坐标。
五、容器大小
因为具体的UI是从外部传入的,所以宽高不确定,需要计算。我们这里使用onAreaChange,绑定到容器上:
- .onAreaChange((oldValue: Area, newValue: Area) => {
- let height = newValue.height as number
- let width = newValue.width as number
- if ((this.dragHeight != height || this.dragWidth != width) && (height != 0 && width != 0)) {
- this.dragHeight = height
- this.dragWidth = width
- }
- })
可以看到,在容器发生改变的时候,我们保存它的宽高。
六、拖拽
拖拽手势使用起来还是很简单的:
private panOption: PanGestureOptions = new PanGestureOptions({ direction: PanDirection.All });
direction决定了可以在哪个方向拖,我们显然需要所有方向。当然如果后续需要限制拖动方向,修改即可。
将拖动事件绑定到容器上:
- .gesture( // 绑定PanGesture事件,监听拖拽动作
- PanGesture(this.panOption)
- .onActionStart((event: GestureEvent) => {
- this.changePosition(event.offsetX, event.offsetY)
- })
- .onActionUpdate((event: GestureEvent) => {
- this.changePosition(event.offsetX, event.offsetY)
- })
- .onActionEnd((event: GestureEvent) => {
- this.endPosition = this.curPosition
- this.adsorbToEnd(this.endPosition.x, this.endPosition.y)
- })
- )
分别处理三个事件,onActionStart和onActionUpdate事件是独立的,但是逻辑一致所以全部使用this.changePosition(event.offsetX, event.offsetY)处理。
- private changePosition(offsetX: number, offsetY: number) {
- let targetX = this.endPosition.x + offsetX;
- let targetY = this.endPosition.y + offsetY;
- targetX = Math.max(this.boundArea.start, Math.min(targetX, this.boundArea.end - this.dragHeight));
- targetY = Math.max(this.boundArea.top, Math.min(targetY, this.boundArea.bottom - this.dragWidth));
- this.curPosition = { x: targetX, y: targetY };
- }
因为存在边界,所以我们需要限制curPosition的变化,在当前拖动的坐标和边界值之间取合理的值。因为容器存在宽高,所以我们需要考虑到其宽高。
当手指抬起的时候,需要做动画吸附:
- private adsorbToEnd(startX: number, startY: number) {
- let targetX = 0
- let targetY = 0
- if (startX <= (this.boundArea.centerX)) {
- targetX = this.boundArea.start + ((this.dragMargin.left ?? 0) as number)
- } else {
- targetX = this.boundArea.end - ((this.dragMargin.right ?? 0) as number) - this.dragWidth
- }
- let newTopBound = this.boundArea.top + ((this.dragMargin.top ?? 0) as number)
- let newBottomBound = this.boundArea.bottom - ((this.dragMargin.bottom ?? 0) as number) - this.dragWidth
- if (startY <= newTopBound) {
- targetY = newTopBound
- } else if (startY >= newBottomBound) {
- targetY = newBottomBound
- } else {
- targetY = startY
- }
- this.startMoveAnimateTo(targetX, targetY)
- }
-
- private startMoveAnimateTo(x: number, y: number) {
- animateTo({
- duration: 300,
- curve: Curve.Smooth,
- iterations: 1,
- playMode: PlayMode.Normal,
- onFinish: () => {
- this.endPosition = this.curPosition
- }
- }, () => {
- this.curPosition = { x: x, y: y }
- })
- }
startX <= (this.boundArea.centerX)用于判断在边界的位置,根据位置来决定吸附到左边还是右边。计算出吸附的位置之后,只需要使用animateTo来触发this.curPosition的更新即可。
七、初始位置
如果不能控制一开始的显示位置,对于使用者的体验非常不好,所以我们可以新增一个参数Alignment来更改初始位置:
dragAlign: Alignment = Alignment.BottomStart
可能还要微调位置,所以再加一个margin:
dragMargin: Margin = {}
在onAreaChange的时候进行更新:
- .onAreaChange((oldValue: Area, newValue: Area) => {
- //.....
- if (this.isNotInit) {
- this.initAlign()
- }
- })
-
- private initAlign() {
- this.isNotInit = false
- let x = 0
- let y = 0
- let topMargin: number = (this.dragMargin.top ?? 0) as number
- let bottomMargin: number = (this.dragMargin.bottom ?? 0) as number
- let startMargin: number = (this.dragMargin.left ?? 0) as number
- let endMargin: number = (this.dragMargin.right ?? 0) as number
- switch (this.dragAlign) {
- case Alignment.Start:
- x = this.boundArea.start + startMargin
- break;
- case Alignment.Top:
- y = this.boundArea.top + topMargin
- break;
- case Alignment.End:
- x = this.boundArea.end - this.dragWidth - endMargin
- break;
- case Alignment.Bottom:
- y = this.boundArea.bottom - this.dragHeight - bottomMargin
- break;
- case Alignment.TopStart:
- x = this.boundArea.start + startMargin
- y = this.boundArea.top + topMargin
- break;
- case Alignment.BottomStart:
- x = this.boundArea.start + startMargin
- y = this.boundArea.bottom - this.dragHeight - bottomMargin
- break;
- case Alignment.BottomEnd:
- x = this.boundArea.end - this.dragWidth - endMargin
- y = this.boundArea.bottom - this.dragHeight - bottomMargin
- break;
- case Alignment.Center:
- x = this.boundArea.centerX - this.dragWidth / 2 + startMargin - endMargin
- y = this.boundArea.centerY - this.dragHeight / 2 + topMargin - bottomMargin
- break;
- }
- this.curPosition = { x: x, y: y }
- this.endPosition = this.curPosition
- }
只要稍微考虑容器宽高并计算下就好了。
八、使用
非常简单
- DragView({
- dragAlign: Alignment.Center,
- dragMargin: bothway(10),
- dragContentBuilder:this.defDragView()
- })
-
- @Builder
- defDragView() {
- Stack() {
- Text("拖我")
- .width(50)
- .height(50)
- .fontSize(15)
- }
- .shadow({
- radius: 1.5,
- color: "#80000000",
- offsetX: 0,
- offsetY: 1
- })
- .padding(18)
- .borderRadius(30)
- .backgroundColor(Color.White)
- .animation({ duration: 200, curve: Curve.Smooth })
- }
当然你想往里面塞任何东西都行~
九、总结
当然还有很多人需要跨页面的悬浮窗,这可以参考应用内消息通知,活用subWindow.moveWindowTo(0, 0);
因为我使用的是Navigation路由方案,所以放在顶层直接是跨页面的。
完整的代码:(懒得上传了,只有一个import,复制即用)
- import { display, Position } from '@kit.ArkUI';
-
- @Preview
- @Component
- export struct DragView {
- private panOption: PanGestureOptions = new PanGestureOptions({ direction: PanDirection.All });
- private endPosition: Position = { x: 0, y: 0 }
- private dragHeight: number = 0
- private dragWidth: number = 0
- private dragMargin: Margin = {}
- boundArea: BoundArea = new BoundArea(0, 0, px2vp(display.getDefaultDisplaySync()
- .width), px2vp(display.getDefaultDisplaySync().height))
- private isNotInit: boolean = true
- @State private curPosition: Position = { x: 0, y: 0 };
- dragAlign: Alignment = Alignment.BottomStart
- onClickListener?: (event: ClickEvent) => void
- @BuilderParam dragContentBuilder: CustomBuilder
-
- build() {
- Stack() {
- if (this.dragContentBuilder) {
- this.dragContentBuilder()
- } else {
- this.defDragView()
- }
- }
- .onAreaChange((oldValue: Area, newValue: Area) => {
- let height = newValue.height as number
- let width = newValue.width as number
- if ((this.dragHeight != height || this.dragWidth != width) && (height != 0 && width != 0)) {
- this.dragHeight = height
- this.dragWidth = width
- }
- if (this.isNotInit) {
- this.initAlign()
- }
- })
- .gesture( // 绑定PanGesture事件,监听拖拽动作
- PanGesture(this.panOption)
- .onActionStart((event: GestureEvent) => {
- this.changePosition(event.offsetX, event.offsetY)
- })
- .onActionUpdate((event: GestureEvent) => {
- this.changePosition(event.offsetX, event.offsetY)
- })
- .onActionEnd((event: GestureEvent) => {
- this.endPosition = this.curPosition
- this.adsorbToEnd(this.endPosition.x, this.endPosition.y)
- })
- )
- .position(this.curPosition)
- .onClick(this.onClickListener)
- }
-
- private adsorbToEnd(startX: number, startY: number) {
- let targetX = 0
- let targetY = 0
- if (startX <= (this.boundArea.centerX)) {
- targetX = this.boundArea.start + ((this.dragMargin.left ?? 0) as number)
- } else {
- targetX = this.boundArea.end - ((this.dragMargin.right ?? 0) as number) - this.dragWidth
- }
- let newTopBound = this.boundArea.top + ((this.dragMargin.top ?? 0) as number)
- let newBottomBound = this.boundArea.bottom - ((this.dragMargin.bottom ?? 0) as number) - this.dragWidth
- if (startY <= newTopBound) {
- targetY = newTopBound
- } else if (startY >= newBottomBound) {
- targetY = newBottomBound
- } else {
- targetY = startY
- }
- this.startMoveAnimateTo(targetX, targetY)
- }
-
- private changePosition(offsetX: number, offsetY: number) {
- let targetX = this.endPosition.x + offsetX;
- let targetY = this.endPosition.y + offsetY;
-
- targetX = Math.max(this.boundArea.start, Math.min(targetX, this.boundArea.end - this.dragHeight));
- targetY = Math.max(this.boundArea.top, Math.min(targetY, this.boundArea.bottom - this.dragWidth));
-
- this.curPosition = { x: targetX, y: targetY };
- }
-
- private startMoveAnimateTo(x: number, y: number) {
- animateTo({
- duration: 300, // 动画时长
- curve: Curve.Smooth, // 动画曲线
- iterations: 1, // 播放次数
- playMode: PlayMode.Normal, // 动画模式
- onFinish: () => {
- this.endPosition = this.curPosition
- }
- }, () => {
- this.curPosition = { x: x, y: y }
- })
- }
-
- private initAlign() {
- this.isNotInit = false
- let x = 0
- let y = 0
- let topMargin: number = (this.dragMargin.top ?? 0) as number
- let bottomMargin: number = (this.dragMargin.bottom ?? 0) as number
- let startMargin: number = (this.dragMargin.left ?? 0) as number
- let endMargin: number = (this.dragMargin.right ?? 0) as number
- switch (this.dragAlign) {
- case Alignment.Start:
- x = this.boundArea.start + startMargin
- break;
- case Alignment.Top:
- y = this.boundArea.top + topMargin
- break;
- case Alignment.End:
- x = this.boundArea.end - this.dragWidth - endMargin
- break;
- case Alignment.Bottom:
- y = this.boundArea.bottom - this.dragHeight - bottomMargin
- break;
- case Alignment.TopStart:
- x = this.boundArea.start + startMargin
- y = this.boundArea.top + topMargin
- break;
- case Alignment.BottomStart:
- x = this.boundArea.start + startMargin
- y = this.boundArea.bottom - this.dragHeight - bottomMargin
- break;
- case Alignment.BottomEnd:
- x = this.boundArea.end - this.dragWidth - endMargin
- y = this.boundArea.bottom - this.dragHeight - bottomMargin
- break;
- case Alignment.Center:
- x = this.boundArea.centerX - this.dragWidth / 2 + startMargin - endMargin
- y = this.boundArea.centerY - this.dragHeight / 2 + topMargin - bottomMargin
- break;
- }
-
- this.curPosition = { x: x, y: y }
- this.endPosition = this.curPosition
- }
-
- @Builder
- defDragView() {
- Stack()
- .width(100)
- .height(100)
- .backgroundColor(Color.Orange)
- }
- }
-
- export class BoundArea {
- readonly start: number = 0
- readonly end: number = 0
- readonly top: number = 0
- readonly bottom: number = 0
- readonly width: number = 0
- readonly height: number = 0
- readonly centerX: number = 0
- readonly centerY: number = 0
-
- constructor(start: number, top: number, end: number, bottom: number) {
- this.start = start
- this.top = top
- this.end = end
- this.bottom = bottom
- this.width = this.end - this.start
- this.height = this.bottom - this.top
- this.centerX = this.width / 2 + this.start
- this.centerY = this.height / 2 + this.top
- }
- }
最后
有很多小伙伴不知道学习哪些鸿蒙开发技术?不知道需要重点掌握哪些鸿蒙应用开发知识点?而且学习时频繁踩坑,最终浪费大量时间。所以有一份实用的鸿蒙(HarmonyOS NEXT)资料用来跟着学习是非常有必要的。
鸿蒙HarmonyOS Next全套学习资料←点击领取!(安全链接,放心点击)
这份鸿蒙(HarmonyOS NEXT)资料包含了鸿蒙开发必掌握的核心知识要点,内容包含了(ArkTS、ArkUI开发组件、Stage模型、多端部署、分布式应用开发、音频、视频、WebGL、OpenHarmony多媒体技术、Napi组件、OpenHarmony内核、Harmony南向开发、鸿蒙项目实战等等)鸿蒙(HarmonyOS NEXT)技术知识点。
希望这一份鸿蒙学习资料能够给大家带来帮助,有需要的小伙伴自行领取,限时开源,先到先得~无套路领取!!
鸿蒙(HarmonyOS NEXT)最新学习路线
有了路线图,怎么能没有学习资料呢,小编也准备了一份联合鸿蒙官方发布笔记整理收纳的一套系统性的鸿蒙(OpenHarmony )学习手册(共计1236页)与鸿蒙(OpenHarmony )开发入门教学视频,内容包含:ArkTS、ArkUI、Web开发、应用模型、资源分类…等知识点。
获取以上完整版高清学习路线,请点击→纯血版全套鸿蒙HarmonyOS学习资料
HarmonyOS Next 最新全套视频教程
《鸿蒙 (OpenHarmony)开发基础到实战手册》
OpenHarmony北向、南向开发环境搭建
《鸿蒙开发基础》
- ArkTS语言
- 安装DevEco Studio
- 运用你的第一个ArkTS应用
- ArkUI声明式UI开发
- .……

《鸿蒙开发进阶》
- Stage模型入门
- 网络管理
- 数据管理
- 电话服务
- 分布式应用开发
- 通知与窗口管理
- 多媒体技术
- 安全技能
- 任务管理
- WebGL
- 国际化开发
- 应用测试
- DFX面向未来设计
- 鸿蒙系统移植和裁剪定制
- ……
《鸿蒙进阶实战》
- ArkTS实践
- UIAbility应用
- 网络案例
- ……
大厂面试必问面试题

鸿蒙南向开发技术
鸿蒙APP开发必备
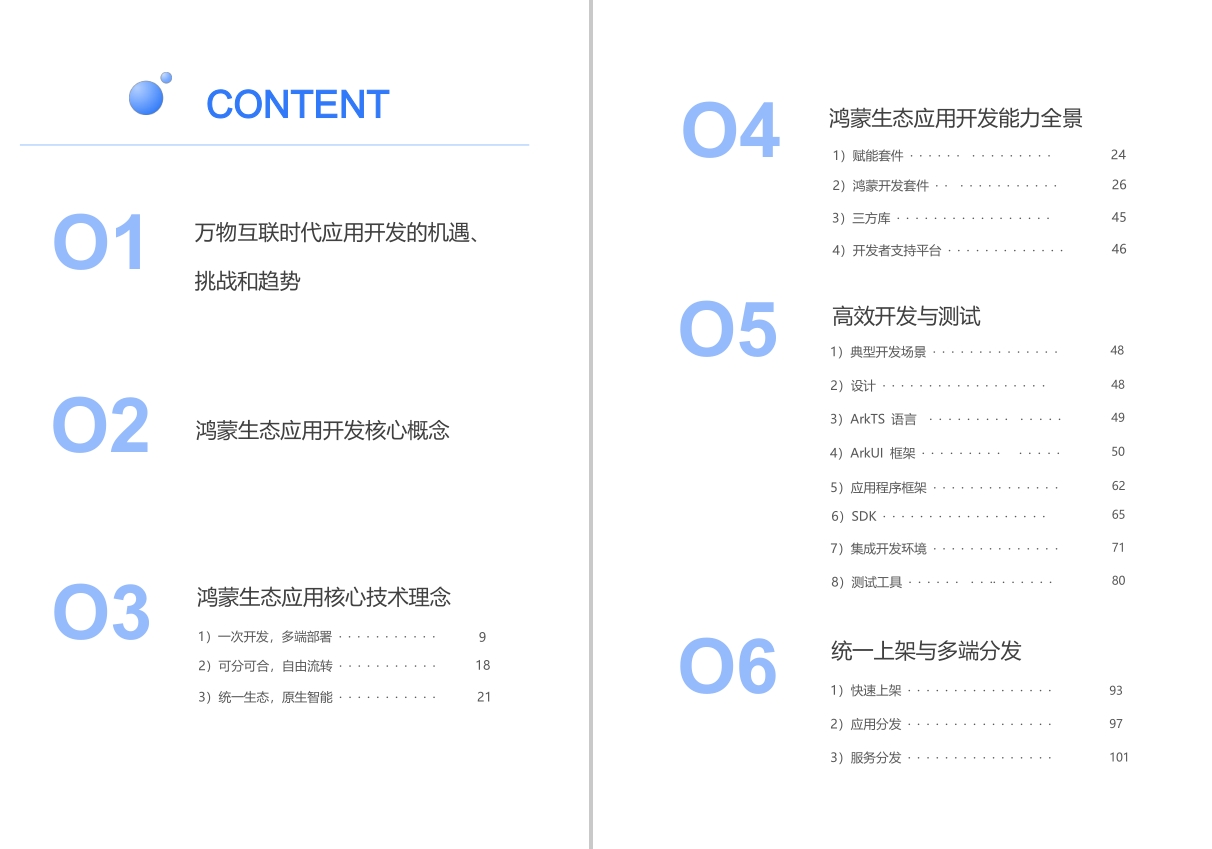
鸿蒙生态应用开发白皮书V2.0PDF
总结
总的来说,华为鸿蒙不再兼容安卓,对中年程序员来说是一个挑战,也是一个机会。只有积极应对变化,不断学习和提升自己,他们才能在这个变革的时代中立于不败之地。

