
- 1Sublime Text 4 中文汉化教程(Version: Build 4169)_sublime汉化
- 2将数据库数据导入excel_导出数据到excel表格有什么好处
- 3Python-Django毕业设计线上手机销售系统(程序+LW).
- 4Hadoop学习笔记(一):大数据导论_大数据导论有用吗
- 5大模型的不足与解决方案_通用大模型的不足
- 6Hostname lookup failed: host not found
- 7支付宝开放平台-开发者社区——AI 大事记「第四期」
- 8Spark数据倾斜和调优_sparksql数据倾斜调优
- 9探索安全的基础设施即代码(IaC):Terrascan 深度解析
- 10蓝桥杯-环形链表-力扣_蓝桥杯 连接环
Python反反爬系列(一)----K近邻算法与CSS动态字体加密_shape反爬
赞
踩
声明:文章仅源自个人兴趣爱好,不涉及他用,侵权联系删。
网站不好直接给出,给出论坛无法过审,观看破解过程即可。
1.字体反爬
字体反爬也就是自定义字体加密映射,通过调用自定义的字体文件来渲染网页中的文字,而网页中的文字不再是文字,而是相应的字体编码,通过复制或者简单的采集是无法采集到编码后的文字内容的。
2.查看字体软件font creator 点我下载,也可不下载,借助网页版工具
3.CSS处理前后的字体
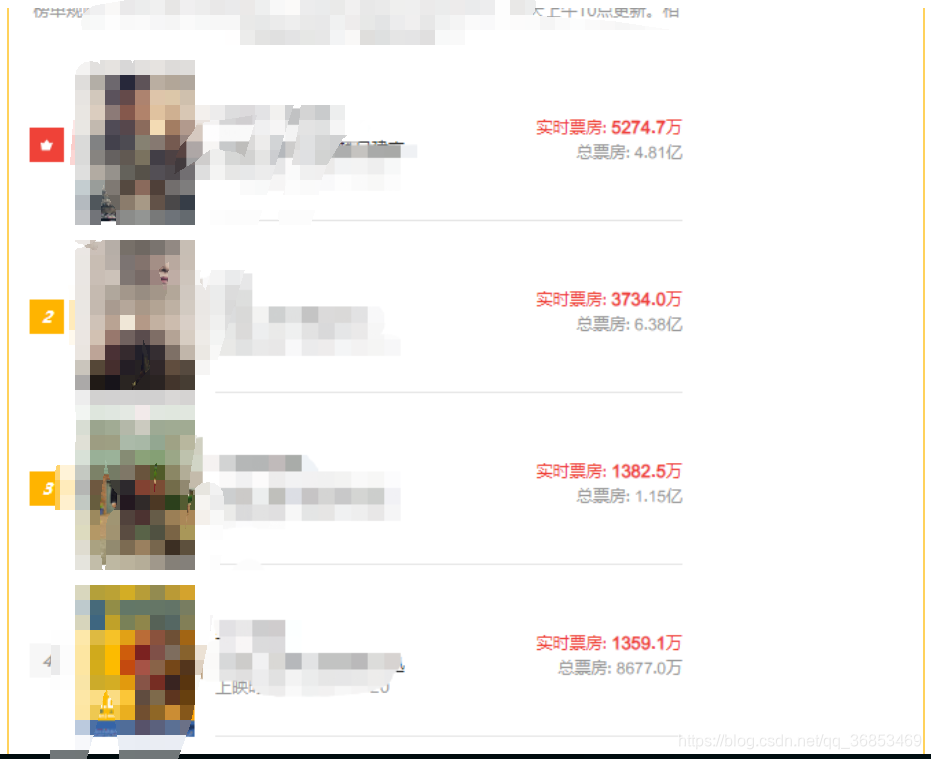
我们看到的网页上的数据是正常的
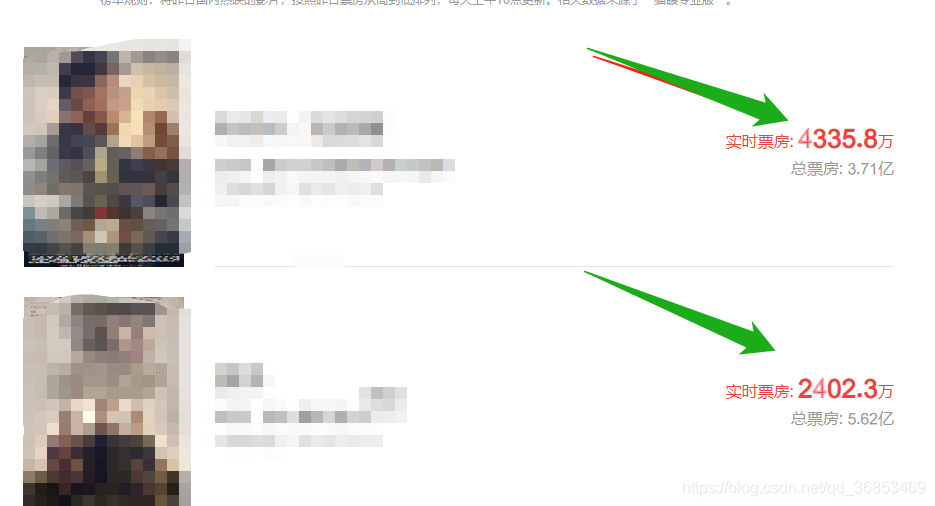
但是当我们打开开发者工具检查字体时 ,金额和票房数据却变成了类似乱码的字符
我们再检查网页源码,发现数据和上面的都不一样,而且每次请求金额还被加密成不同的密文

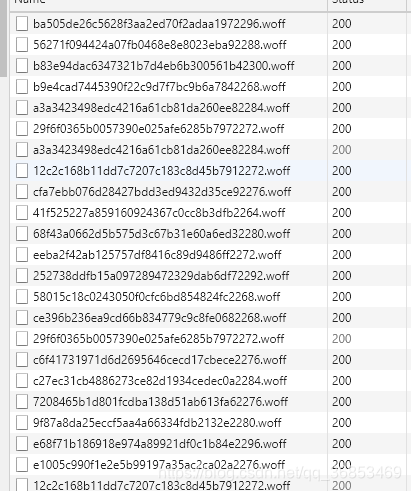
多次请求,发现返回的字体文件重复概率太低(仔细观察是有的,就是少)
4.解决思路
了解CSS 的应该会知道(我不知道),CSS 中有一个 @font-face,它允许网页开发者为其网页指定在线字体。原本是用来消除对用户电脑字体的依赖,现在有了新作用——字体反爬。具体的请查看 https://developer.mozilla.org/zh-CN/docs/Web/CSS/@font-face 再观察源码中的数据,像是编码过后的数据。
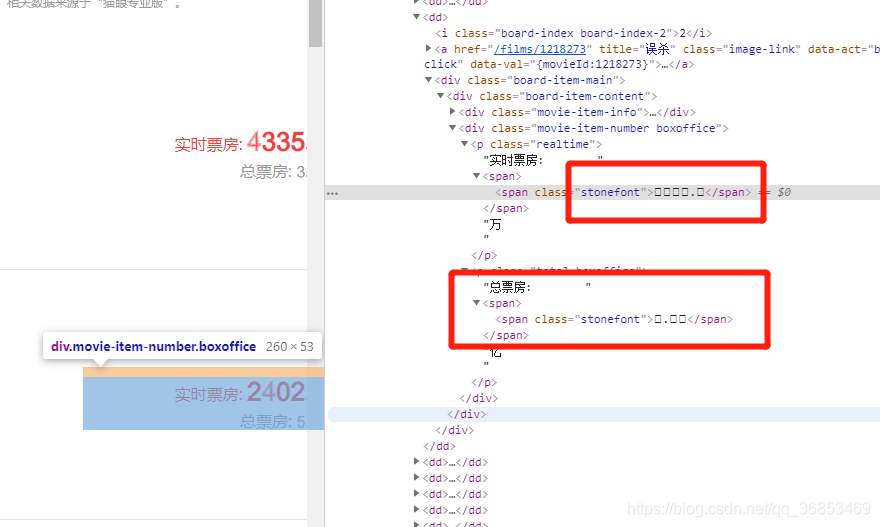
仔细观察发现是一些特定span中的数据经过处理,如下图

所以我们就查找该class名,找到了其字体样式

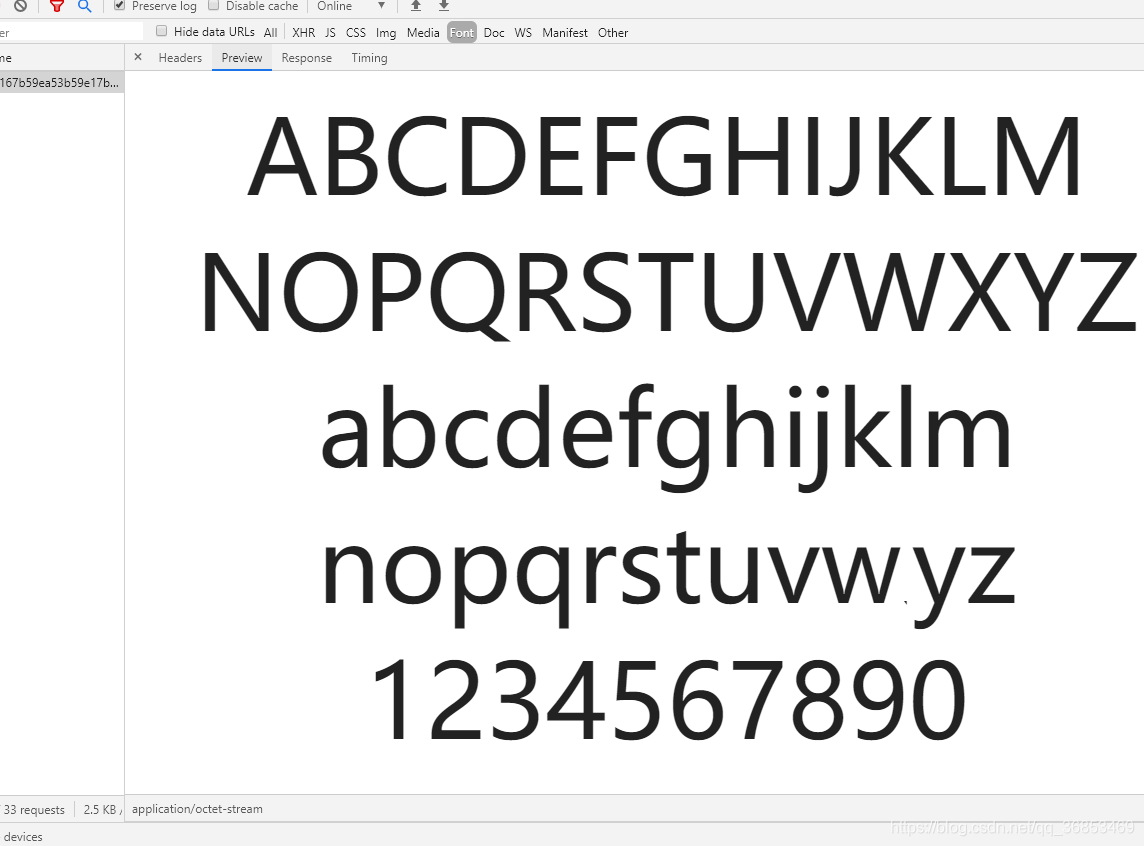
其中的woff就是字体文件,还有其他的,比如ttf字体,woff2,svg等,这里仅有woff ,可在font栏查看
将该字体下载过来,在json字体编辑器中打开,https://font.qqe2.com/,可看到字体,多次刷新的话同样的数字还不一样


我们再次拿处理前后的部分数字拿来进行对比:
- 最初数字 2 4 0 1 . 3
- 加密后     . 
- 字体中 $E290 $ED17 $F1A7 $EFBD $EFBD
- uniE290 uniED17 uniF1A7 uniEFBD uniEFBD
发现规律了吧,但是我们知道每次数字位置都是动态...
5.用TTfont把woff文件转化成xml文件
先将字体转化成xml文件。
- import requests
- from fontTools.ttLib import TTFont
- def woff_xml():
- url = "https://vfile.meituan.net/colorstone/167b59ea53b59e17be72018703b759c32284.woff"
-
- woff_dir = r"./colorstone/"
- file_name = url.split("/")[-1]
- xml_name = file_name.replace(file_name.split(".")[-1], "xml")
-
- save_woff = file_name
- save_xml = xml_name
-
- resp = requests.get(url=url)
- with open(woff_dir+save_woff, "wb") as f:
- f.write(resp.content)
- f.close()
-
- font = TTFont(woff_dir+save_woff)
- font.saveXML(woff_dir+save_xml)
转换成的数据如图:
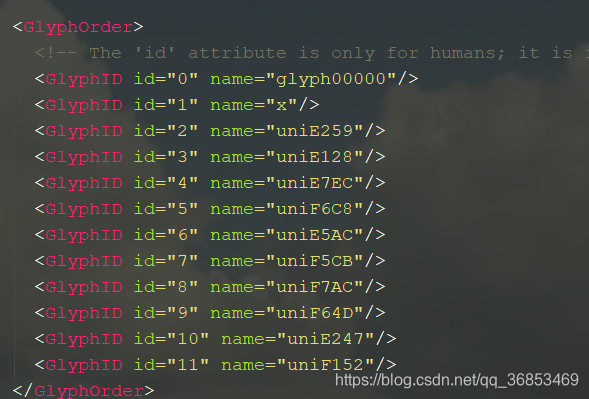
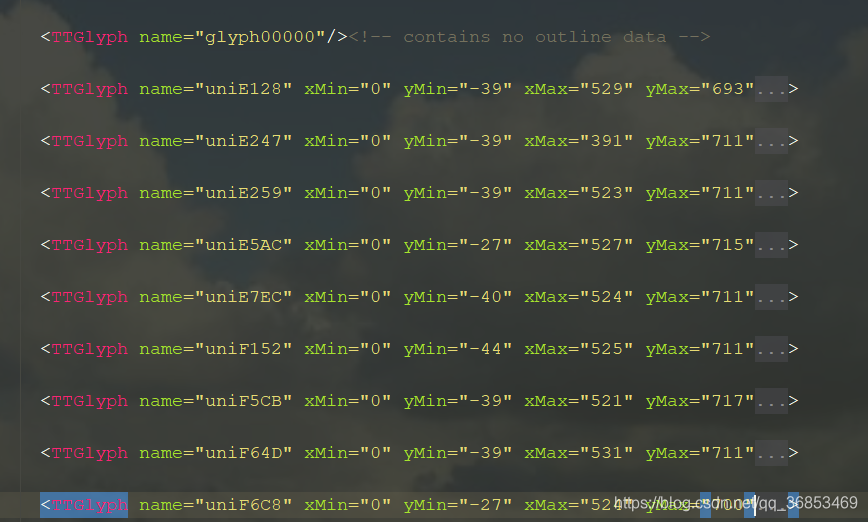
仔细查看后,确定和我们字体相关的标签:<GlyphOrder></GlyphOrder> 和 <glyf><TTGlyph/></glyf>,其中<GlyphOrder></GlyphOrder>标签中的数据在上图,我们对<TTGlyph>进行查看:
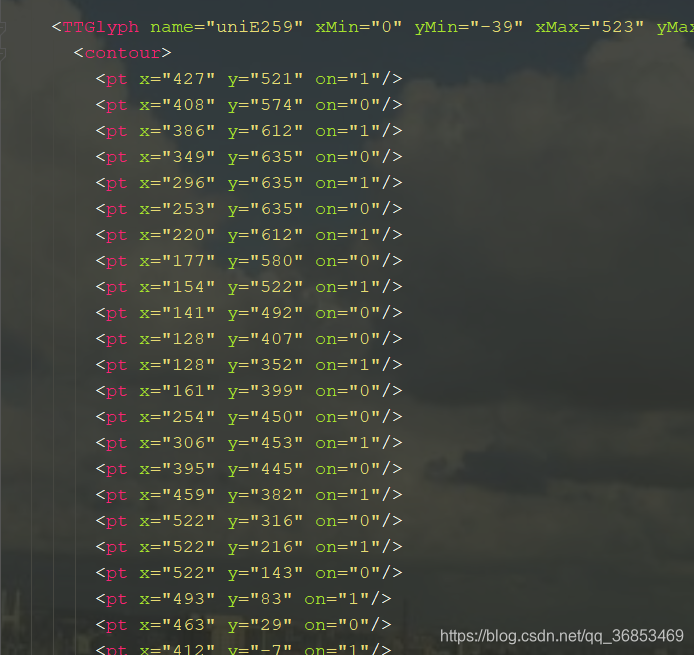
其中有x,y,Xmin,Ymin,Xmax,Ymax等值,很明显是一些坐标点的信息,其实他就是确定字体形状的坐标,不信我们可以画一下:
- import matplotlib.pyplot as plt
- import re
- str = """"
- <contour>
- 相应内容复制上来
- """
- x = [int(i) for i in re.findall(r'<pt x="(.*?)" y=', str)]
- y = [int(i) for i in re.findall(r'y="(.*?)" on=', str)]
- plt.plot(x, y)
- plt.show()
我们还可以多测试几个XML文件的相同数字的坐标
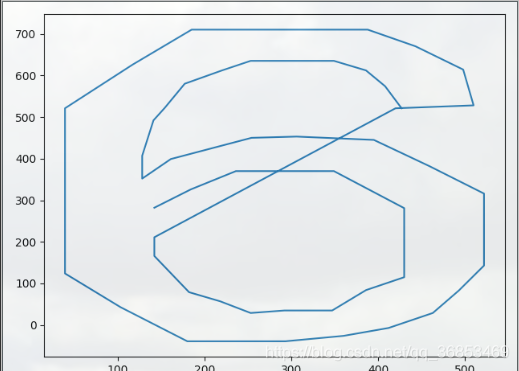
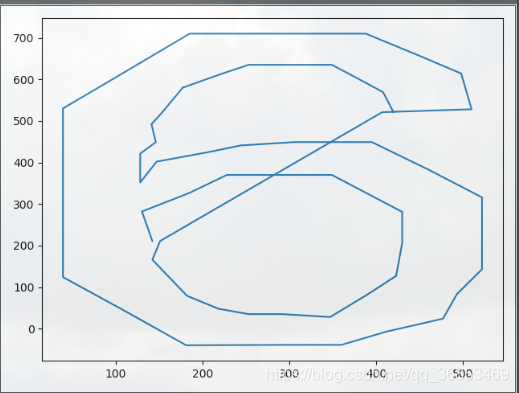
对比  和6稍微有点差异,可Ta就是6。
网上最初的方法到此都是先抓取一份字体,构建基准字体库,来进行编码对比,相同的则为同一个,但显然现在是不行的。
其实借助坐标图,再仔细观察相同数字的坐标,可以看出,相同数字的坐标x,y的差异并不大,根据同一个字体的坐标差异,其实就可以确定这个数字了。因为存在负数,所以通过abs函数取绝对值,伪代码
- #对比两个坐标的差异
- def compare(AA, BB):
- for i in range(5):
- if abs(AA[i][0] - BB[i][0]) < 80 and abs(AA[i][1] - BB[i][1]) < 80:
- pass
- else:
- return False
- return True
- #True则可视为是同一个字
最后发现也是不行的,直到看到一篇博客说可以用K近邻算法,突然恍然大悟,确实很适合这个问题,关于K近邻,参考文章
6.Python代码解决:
6.1.先获取10套字体作为样本
- def save_ten_woff(self):
- '''
- 获取10套基准字体,最初是存到XML中的,后面发现没必要
- :return: None
- '''
- for i in range(0,10):#获取10套字体作为基准字体
- time.sleep(1)
- res = requests.get(url=self.start_url,headers=self.headers,proxies=self.proxies)
- res.encoding = "utf-8"
- part_font_url = re.findall(r"url\('(.{,100}?\.woff)",res.text,re.S)
- #请求一次获得部分url
- if part_font_url:
- font_url = "https:" + part_font_url[0]
- file_name = str(i+1)+".woff" #字体文件1.woff
- save_woff = file_name
- resp = requests.get(url=font_url,proxies=self.proxies)
- try:
- with open(r"./colorstone/" + save_woff, "wb") as f:#将woff文件保存
- f.write(resp.content)
- f.close()
-
- # font = TTFont(r"./colorstone/" + save_woff)
- # font.saveXML(r"./colorstone/base" + str(i+1)+ ".xml") #保存为base1.xml这样的文件名
- print("第{}套基准字体保存完毕!".format((i+1)))
- except Exception as e:
- print(e)
- else:
- print("第{}次请求失败,请检查网站是否禁止访问等".format((i+1)))
6.2.提取样本字体中的数字 + 坐标:
- def base_font(self):
- '''
- 获取10套基准字体中数字对应的x,y值
- :return: None
- '''
- # 查看10套基准字体, 获取数字顺序
- # base_num1 = [3,8,9,2,0,1,7,5,4,6]
- # base_num2 = [3,6,5,2,4,8,9,1,7,0]
- # base_num3 = [6,0,4,8,1,9,5,2,3,7]
- # base_num4 = [1,8,2,5,7,9,4,6,3,0]
- # base_num5 = [0,9,8,6,1,4,7,3,2,5]
- # base_num6 = [9,7,5,8,3,4,6,1,2,0]
- # base_num7 = [6,5,9,4,0,2,8,3,1,7]
- # base_num8 = [6,5,1,0,4,7,8,2,9,3]
- # base_num9 = [0,6,9,5,3,8,4,1,2,7]
- # base_num10 = [0,6,2,8,5,9,5,3,1,7]
- base_num = [[3,8,9,2,0,1,7,5,4,6],[3,6,5,2,4,8,9,1,7,0],[6,0,4,8,1,9,5,2,3,7],[1,8,2,5,7,9,4,6,3,0],
- [0,9,8,6,1,4,7,3,2,5],[9,7,5,8,3,4,6,1,2,0],[6,5,9,4,0,2,8,3,1,7],[6,5,1,0,4,7,8,2,9,3],
- [0,6,9,5,3,8,4,1,2,7],[0,6,2,8,5,9,5,3,1,7]]
-
- num_coordinate = []
- for i in range(0,10):
- woff_path = "./colorstone/"+str(i+1)+".woff"
- font = TTFont(woff_path)
- obj1 = font.getGlyphOrder()[2:] #过滤到前两个不需要的
-
- for j, g in enumerate(obj1):
- coors = font['glyf'][g].coordinates
- coors = [_ for c in coors for _ in c]
- coors.insert(0, base_num[i][j])
- num_coordinate.append(coors)
- return num_coordinate
6.3. 在函数knn(self)中:
6.3.1 获取特征值,目标值
- num_coordinate = self.base_font()
- data = pd.DataFrame(num_coordinate)
-
- data = data.fillna(value=0)
- x = data.drop([0],axis=1)
-
- y = data[0]
6.3.2 进行数据的分割:训练集和测试集
x_train, x_test, y_train, y_test = train_test_split(x, y, test_size=0.25)6.3.3 调用KNN算法(这里n的参数由网格验证得出,最优参数为1):

- knn = KNeighborsClassifier(n_neighbors=1)
- knn.fit(x_train, y_train)
6.4.建立映射,将数字和对应的编码建成字典形式:
- def get_map(self):
- font = TTFont("./colorstone/target.woff")
- glyf_order = font.getGlyphOrder()[2:]
- info = []
- for g in glyf_order:
- coors = font['glyf'][g].coordinates
- coors = [_ for c in coors for _ in c]
- info.append(coors)
- print(info)
-
- knn,length = self.knn()
-
- df = pd.DataFrame(info)
- data = pd.concat([df, pd.DataFrame(np.zeros(
- (df.shape[0], length - df.shape[1])), columns=range(df.shape[1], length))])
- data = data.fillna(value=0)
- y_predict = knn.predict(data)
- num_uni_dict = {}
- for i, uni in enumerate(glyf_order):
- num_uni_dict[uni.lower().replace('uni', '&#x') + ';'] = str(y_predict[i])
- return num_uni_dict
6.5.采集数据并替换,获取正确数据:
根据网页结构,提取数据:
- def get_info(self):
- res = requests.get(url=self.start_url, headers=self.headers)
- res.encoding = "utf-8"
- part_font_url = re.findall(r"url\('(.{,100}?\.woff)", res.text, re.S)
- # 请求一次获得部分url
- if part_font_url:
- font_url = "https:" + part_font_url[0]
- resp = requests.get(url=font_url,proxies=self.proxies)
- with open(r"./colorstone/target.woff", "wb") as f: # 保存需要分析的字体文件
- f.write(resp.content)
- f.close()
-
- html = res.text
- map_dict = self.get_map()
- for uni in map_dict.keys():
- html = html.replace(uni, map_dict[uni])
-
- parse_html = etree.HTML(html)
- for i in range(0,11):
- name = parse_html.xpath('//dd[{}]//p[@class="name"]/a/@title'.format(i))
- star = parse_html.xpath('//dd[{}]//p[@class="star"]/text()'.format(i))
- releasetime = parse_html.xpath('//dd[{}]//p[@class="releasetime"]/text()'.format(i))
- realtime_amount= parse_html.xpath('//dd[{}]//p[@class="realtime"]//text()'.format(i))
- total_amount = parse_html.xpath('//dd[{}]//p[@class="total-boxoffice"]//text()'.format(i))
- print("".join(name)," ","".join(star)," ","".join(releasetime),"".join(realtime_amount).replace(" ","").replace("\n",""),"".join(total_amount).replace(" ",""))
打印结果
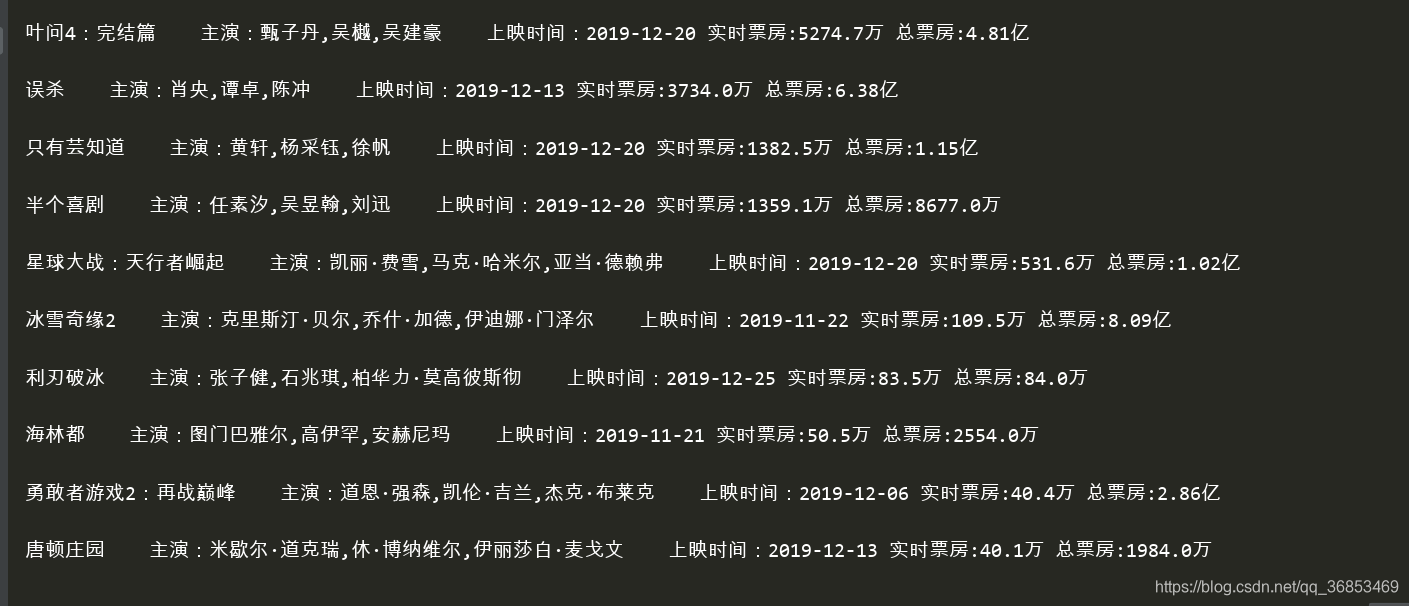
对比原网页
数据完全是一样的,此次动态字体反爬到此就结束了。
参考:
https://www.cnblogs.com/shenyiyangle/p/10711065.html
https://cloud.tencent.com/developer/article/1525768
https://cloud.tencent.com/developer/article/1553787

