- 1开源PHP论坛HadSky本地部署与配置公网地址实现远程访问
- 2RoBERTa:一种稳健优化BERT的预训练方法_roberta预训练方法
- 3[Verilog语言入门教程] 乘法器(顺序 Booth & 并行 Wallace) 原理与实现_verilog多周期乘法器
- 4基于小程序的老孙电子点菜系统开发设计与实现+ssm
- 5线性回归模型
- 6海量数据处理之--哈希分治
- 7C++设计模式——桥接模式(bridge pattern)_c++桥接模式
- 8工具应用:使用JMeter实现Phpwind的性能测试!
- 9小白必备Stable diffusion30个插件,stable diffusion最全插件大全,新手必备指南!_stable diffusion 物品数量
- 10机器学习实践——预测数值型数据:回归_模型预测值为常数
基于Licheepi 4A的YOLOv5-Lite的部署_荔枝派4a应用
赞
踩
一、项目说明
YOLOv5-Lite:
本项目采用荔枝派4a进行YOLOv5-Lite的部署,YOLOv5-Lite 牺牲了部分网络模型精度,但是极大的提升了模型的推理速度
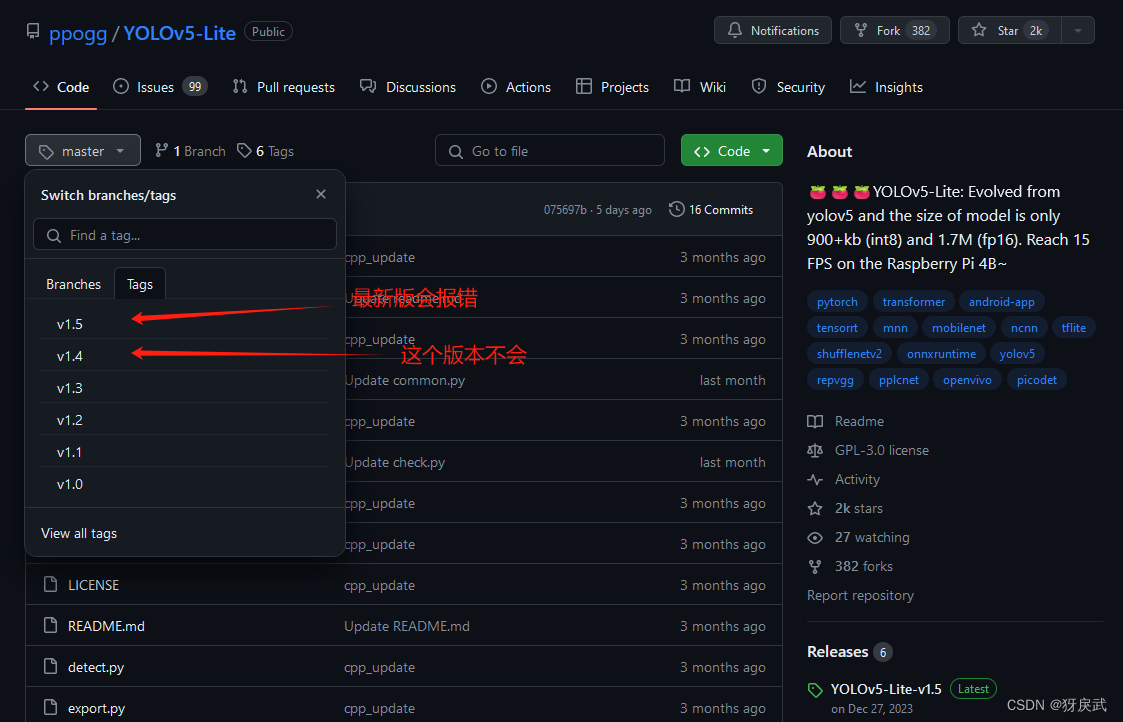
值得一提的是,这款轻量化模型的制作者是中国ppogg大佬,原项目位于:
https://github.com/ppogg/YOLOv5-Lite
Licheepi 4A:
LicheePi 4A 是基于 Lichee Module 4A 核心板的 高性能 RISC-V Linux 开发板,以 TH1520 为主控核心(4xC910@1.85G, RV64GCV,4TOPS@int8 NPU, 50GFLOP GPU),板载最大 16GB 64bit LPDDR4X,128GB eMMC,支持 HDMI+MIPI 双4K 显示输出,支持 4K 摄像头接入,双千兆网口(其中一个支持POE供电)和 4 个 USB3.0 接口,多种音频输入输出(由专用 C906 核心处理)
该pi使用的是国产的RISC-V架构,应该是目前较为强力的RISC-V SBC,未开启专用指令集加速的情况下,性能逼近基于 ARM A72 的树莓派 4,而且拥有16GB的内存(正式版,笔者使用的测试版只有8GB,有正式版16GB的同好可以直接烧录官方的FULL镜像,里面的工具一应俱全,不会再出现因为框架版本的问题导致大范围冒红,极度推荐)
二、模型训练
2.1 数据集制作
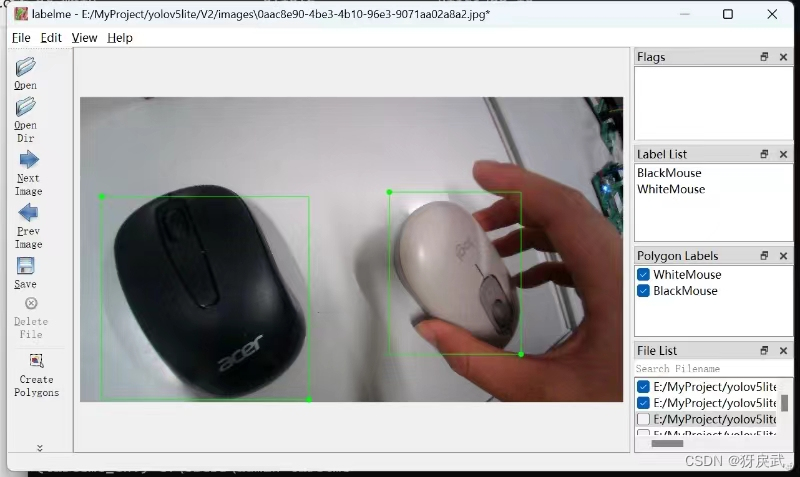
首先我们需要制作对应的数据集提供给模型进行训练,这需要我们通过荔枝派自行拍摄对应的照片,然后用labelme进行标注,手动制作数据集。
1.本项目采用SIPEED官方的USB摄像头,插上摄像头后,摄像头背面的灯会亮一会然后熄灭,这代表摄像头可以使用。
首先用指令查看摄像头是否能使用:
sudo apt-get install guvcview
guvcview
如果摄像头正常,那么屏幕上会显示出画面并且摄像头背面的灯会同时亮起两个。
2.安装Python和opencv:
安装Python是因为最适合新手入门,而OpenCV则是一个开源的跨平台计算机视觉库。
首先是更新下载器:
sudo apt update
sudo apt upgrade
然后安装Python和OpenCV:
sudo apt install python3 python3-pip
sudo apt install python3-opencv
安装所需要的依赖:
sudo apt install libqt5gui5-gles
3.利用OpenCV调用摄像头并且拍照存为训练集的素材;
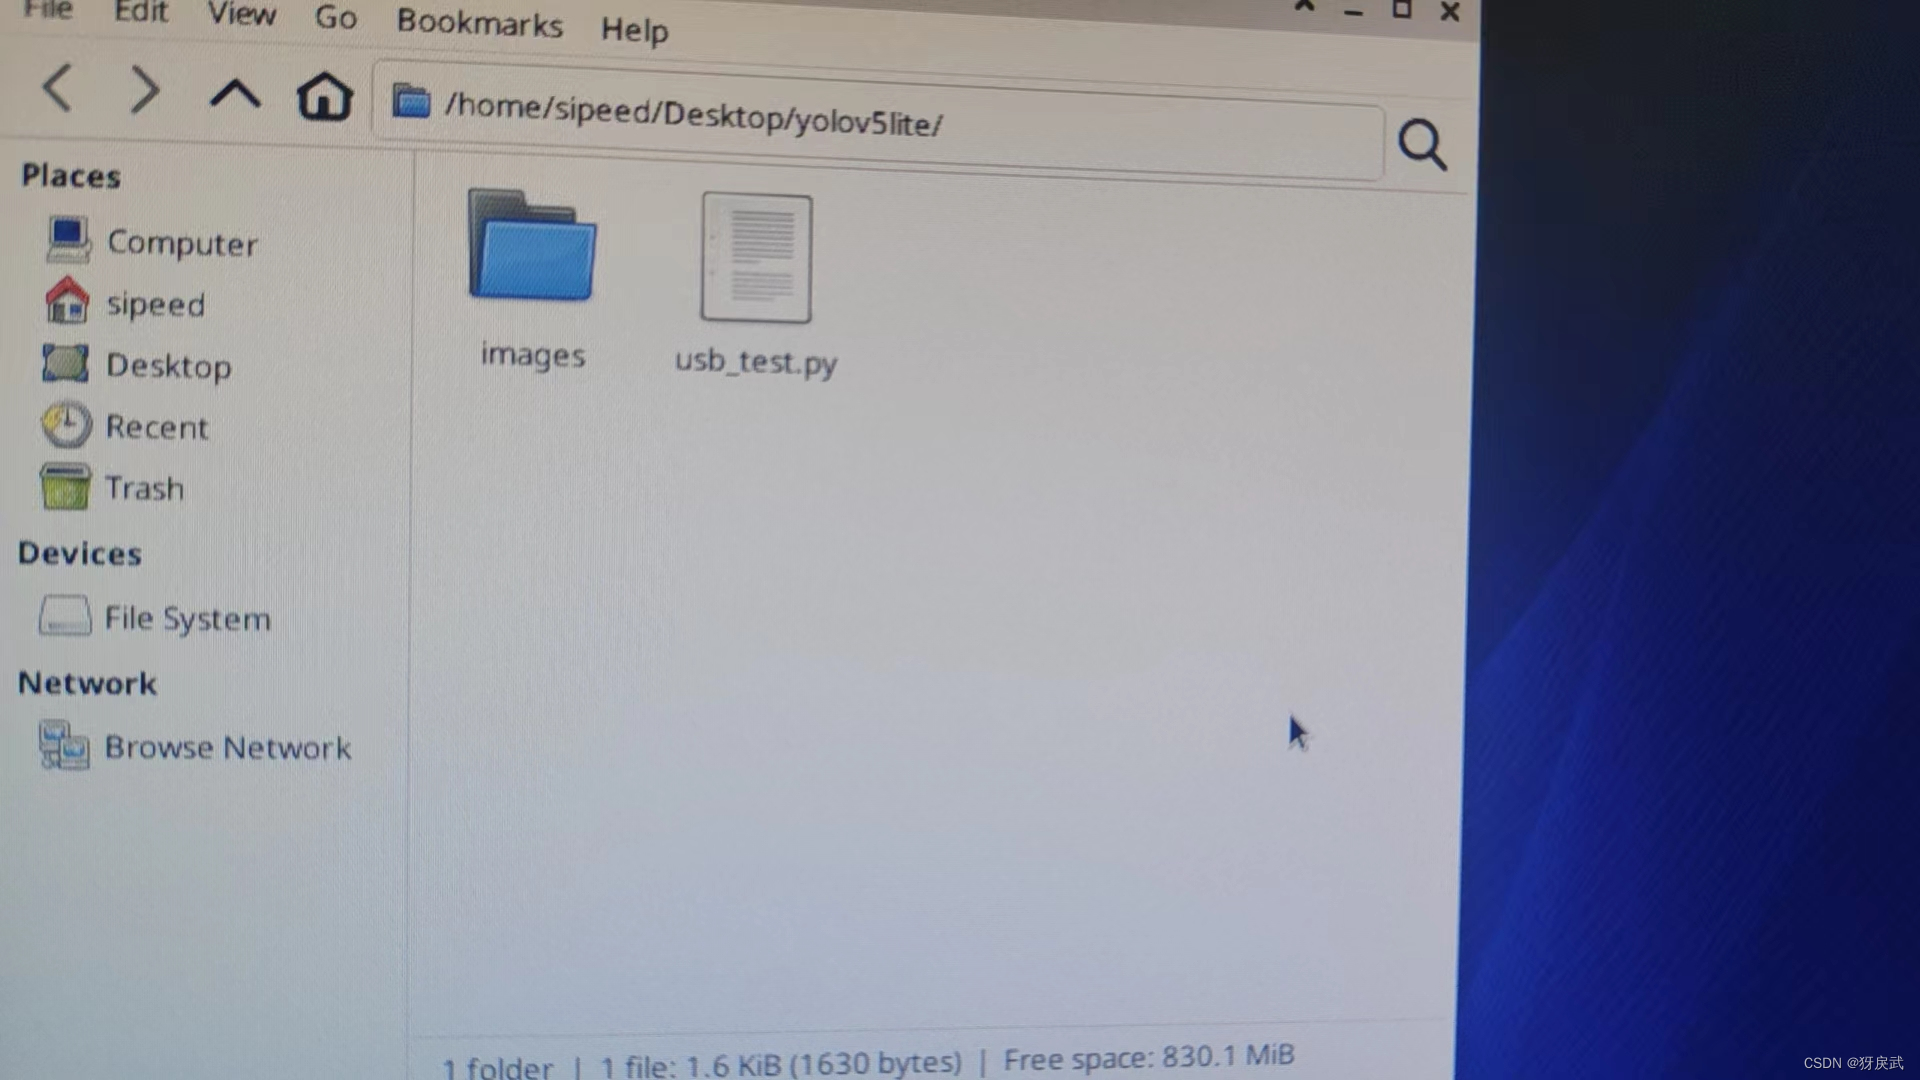
在usb_test.py中写入测试代码:
- import cv2
- from threading import Thread
- import uuid
- import os
- import time
- count = 0
- def image_collect(cap):
- global count
- while True:
- success, img = cap.read()
- if success:
- file_name = str(uuid.uuid4())+'.jpg'
- cv2.imwrite(os.path.join('images',file_name),img)
- count = count+1
- print("save %d %s"%(count,file_name))
- time.sleep(0.4)
-
- if __name__ == "__main__":
-
- os.makedirs("images",exist_ok=True)
-
- # 打开摄像头
- cap = cv2.VideoCapture(0)
-
- cv2.namedWindow("frame",cv2.WINDOW_NORMAL)
- cv2.setWindowProperty("frame",cv2.WINDOW_NORMAL,cv2.WINDOW_NORMAL)
- cap.set(cv2.CAP_PROP_FRAME_WIDTH,2560);
- cap.set(cv2.CAP_PROP_FRAME_HEIGHT,1440);
-
- m_thread = Thread(target=image_collect, args=([cap]),daemon=True)
-
- while True:
- # 读取一帧图像
- success, img = cap.read()
- if not success:
- continue
- cv2.imshow("frame",img)
- key = cv2.waitKey(1) & 0xFF
-
- # 按键 "q" 退出
- if key == ord('c'):
- m_thread.start()
- continue
- elif key == ord('q'):
- break
-
- cap.release()

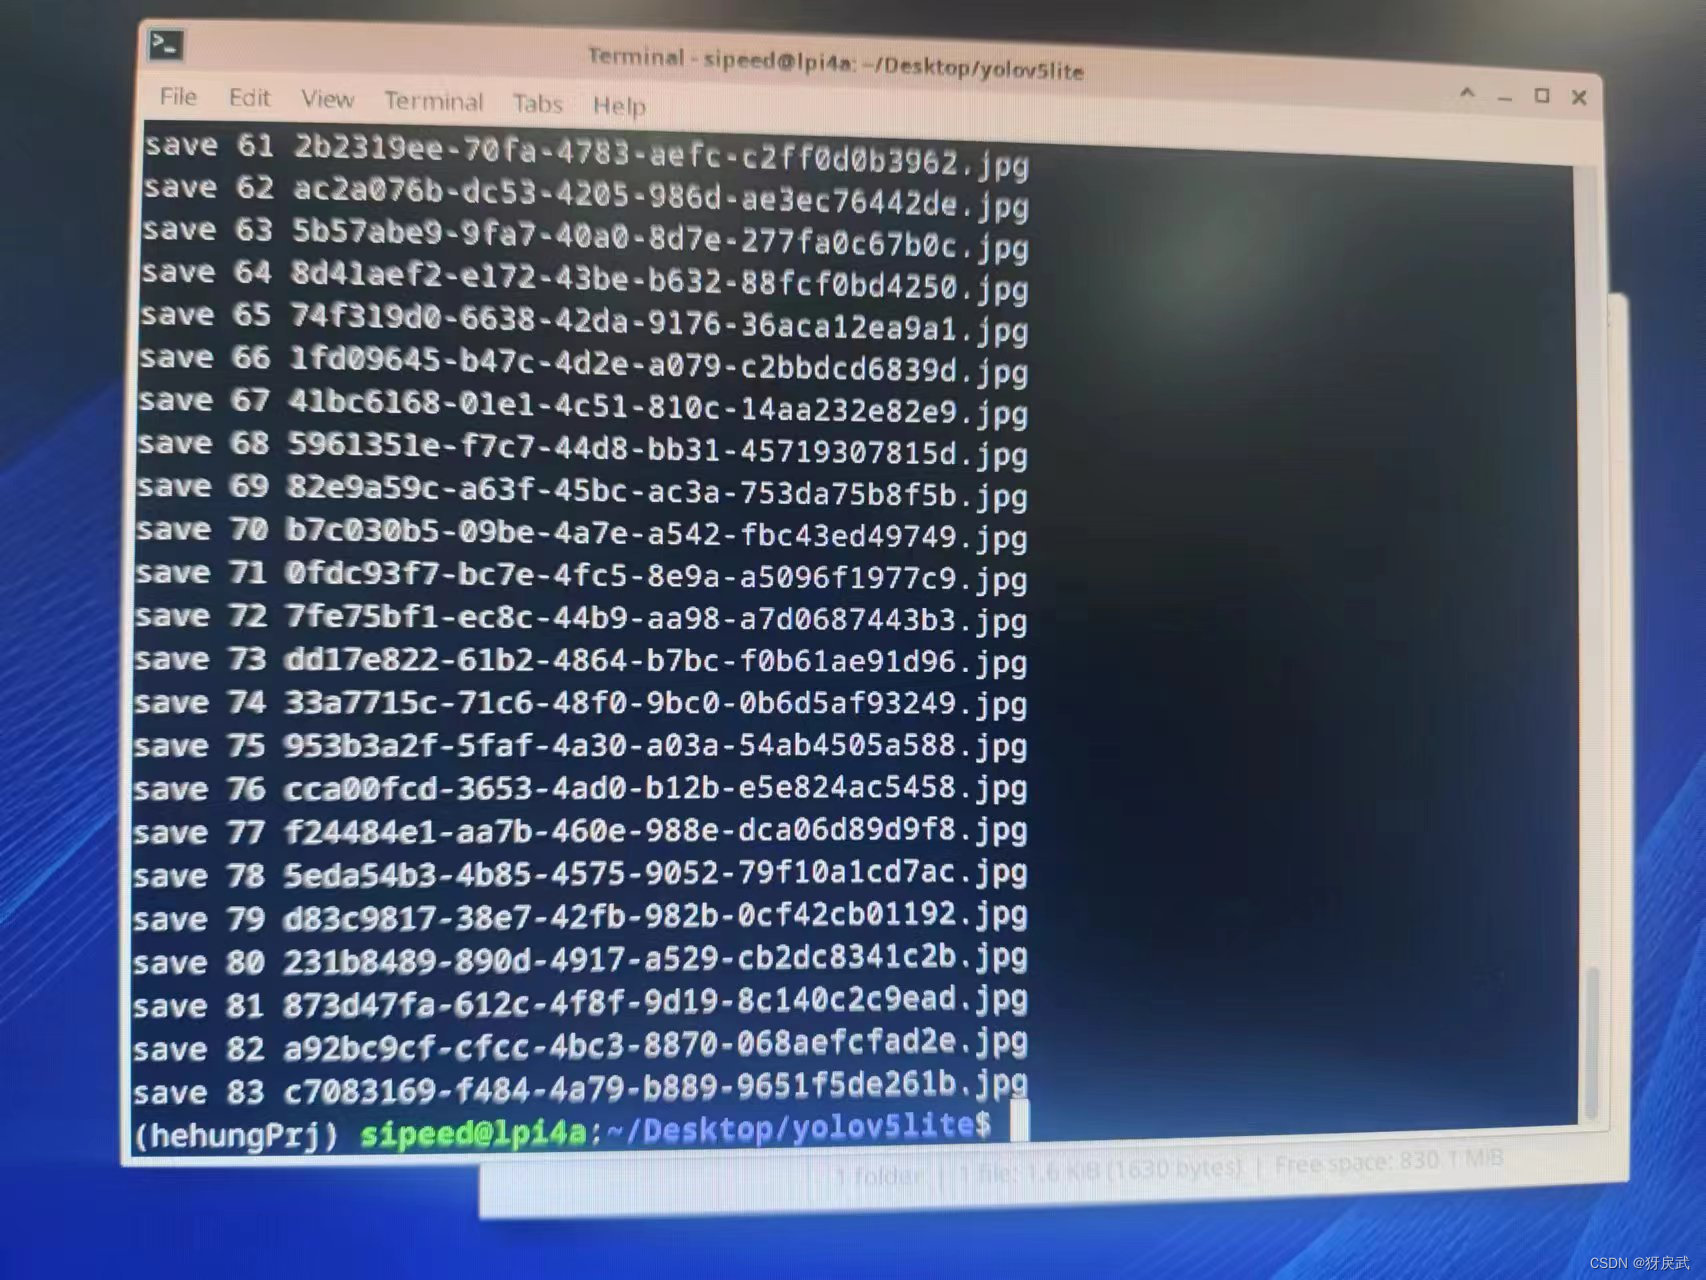
运行代码后出现摄像头画面即为成功。
按下“c“键采集图像,采集完对应的数据集后按下”q“键退出图片采集:
4.将采集到的图片传输到PC端,用自己的电脑制作训练集。

5.在自己的电脑上利用Anaconda搭建一个Python的虚拟环境(推荐,避免各种依赖干扰其他的项目运行)

6.在Python虚拟环境中下载labelme软件,然后运行labelme对图片进行标注(Labelme的下载和使用参考网上的其他教程)
7.使用JSON转TXT的Python代码进行转换
首先自定义一个字典:
dic_lab.py:
- dic_labels= {'WhiteMouse':0,
- 'BlackMouse':1,#标签名称
- 'path_json':'labels',#格式
- 'ratio':0.9}#训练集和校对集的比例
然后写JSON转TXT格式的Python代码:
lablemetoyolo.py:
- import os
- import json
- import random
- import base64
- import shutil
- import argparse
- from pathlib import Path
- from glob import glob
- from dic_lab import dic_labels
-
-
- def generate_labels(dic_labs):
- path_input_json = dic_labels['path_json']
- ratio = dic_labs['ratio']
- for index, labelme_annotation_path in enumerate(glob(f'{path_input_json}/*.json')):
-
- # 读取文件名
- image_id = os.path.basename(labelme_annotation_path).rstrip('.json')
-
- # 计算是train 还是 valid
- train_or_valid = 'train' if random.random() < ratio else 'valid'
-
- # 读取labelme格式的json文件
- labelme_annotation_file = open(labelme_annotation_path, 'r')
- labelme_annotation = json.load(labelme_annotation_file)
-
- # yolo 格式的 lables
- yolo_annotation_path = os.path.join(train_or_valid, 'labels', image_id + '.txt')
- yolo_annotation_file = open(yolo_annotation_path, 'w')
-
- # yolo 格式的图像保存
- yolo_image = base64.decodebytes(labelme_annotation['imageData'].encode())
- yolo_image_path = os.path.join(train_or_valid, 'images', image_id + '.jpg')
-
- yolo_image_file = open(yolo_image_path, 'wb')
- yolo_image_file.write(yolo_image)
- yolo_image_file.close()
-
- # 获取位置信息
- for shape in labelme_annotation['shapes']:
- if shape['shape_type'] != 'rectangle':
- print(
- f'Invalid type `{shape["shape_type"]}` in annotation `annotation_path`')
- continue
-
- points = shape['points']
- scale_width = 1.0 / labelme_annotation['imageWidth']
- scale_height = 1.0 / labelme_annotation['imageHeight']
- width = (points[1][0] - points[0][0]) * scale_width
- height = (points[1][1] - points[0][1]) * scale_height
- x = ((points[1][0] + points[0][0]) / 2) * scale_width
- y = ((points[1][1] + points[0][1]) / 2) * scale_height
- object_class = dic_labels[shape['label']]
- yolo_annotation_file.write(f'{object_class} {x} {y} {width} {height}\n')
- yolo_annotation_file.close()
- print("creat lab %d : %s" % (index, image_id))
-
-
- if __name__ == "__main__":
- os.makedirs(os.path.join("train", 'images'), exist_ok=True)
- os.makedirs(os.path.join("train", 'labels'), exist_ok=True)
- os.makedirs(os.path.join("valid", 'images'), exist_ok=True)
- os.makedirs(os.path.join("valid", 'labels'), exist_ok=True)
- generate_labels(dic_labels)
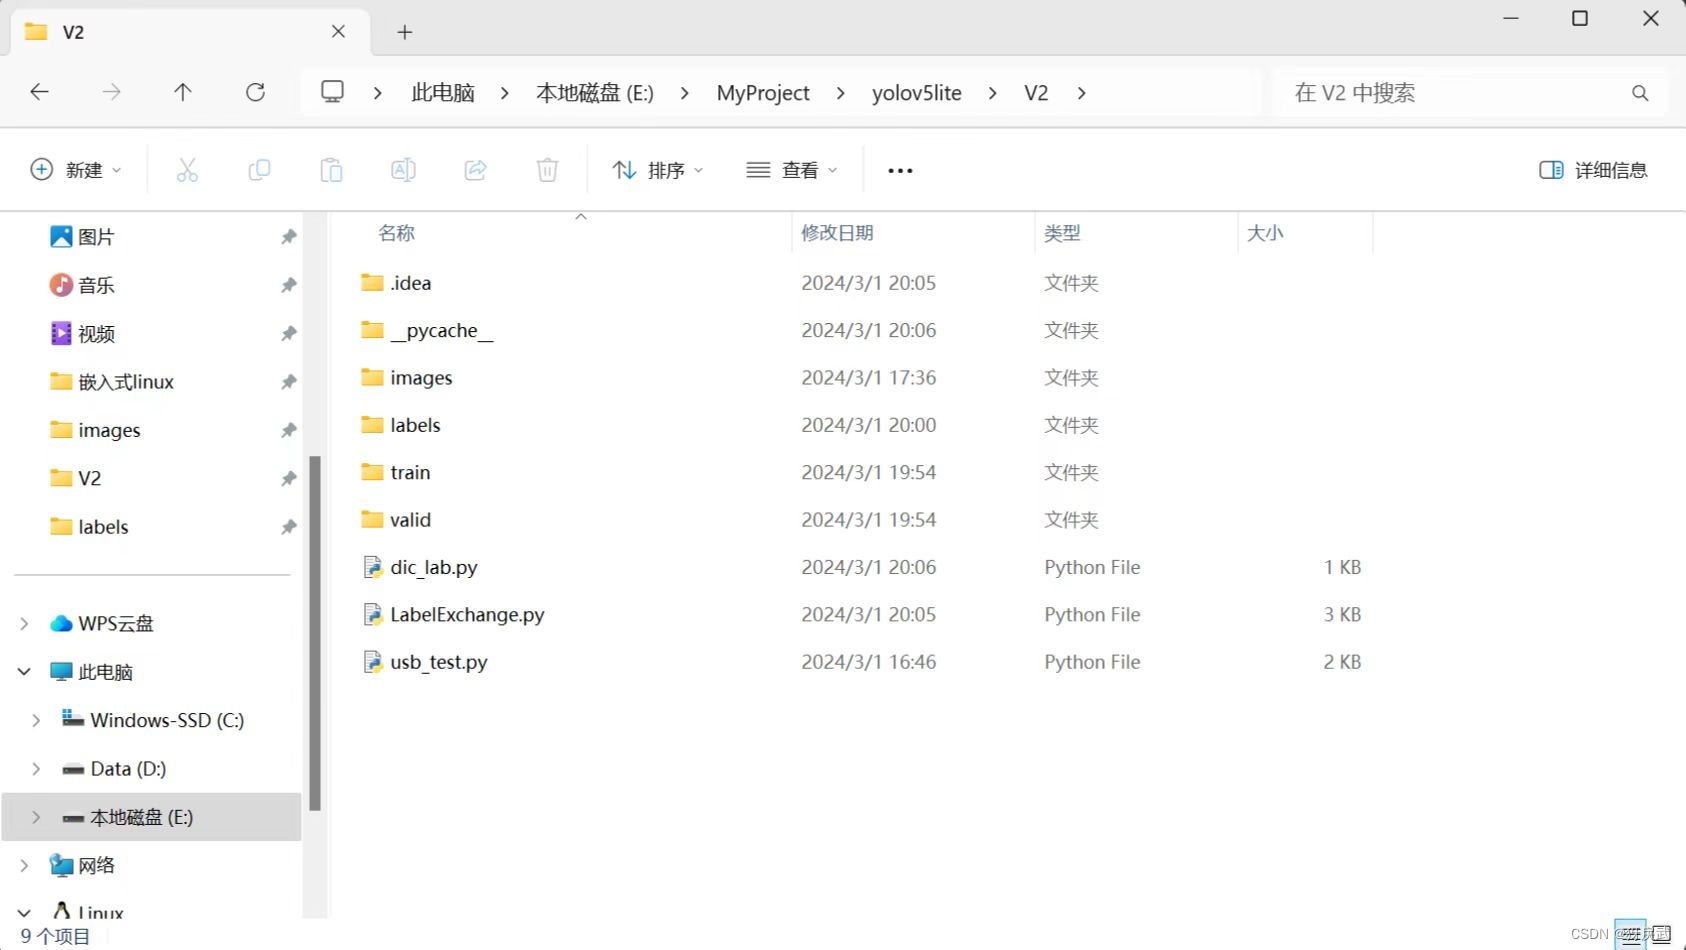
执行完毕上述两份代码后就可以成功将JSON格式转化为TXT格式方便模型训练,执行完毕后的工程如下:
train:训练用数据 valid:验证用数据
2.2 YOLOv5-Lite训练
Yolov5-Lite 训练就是常规的神经网络模型训练,从 GitHub 上下载 Yolov5-Lite 的源代码
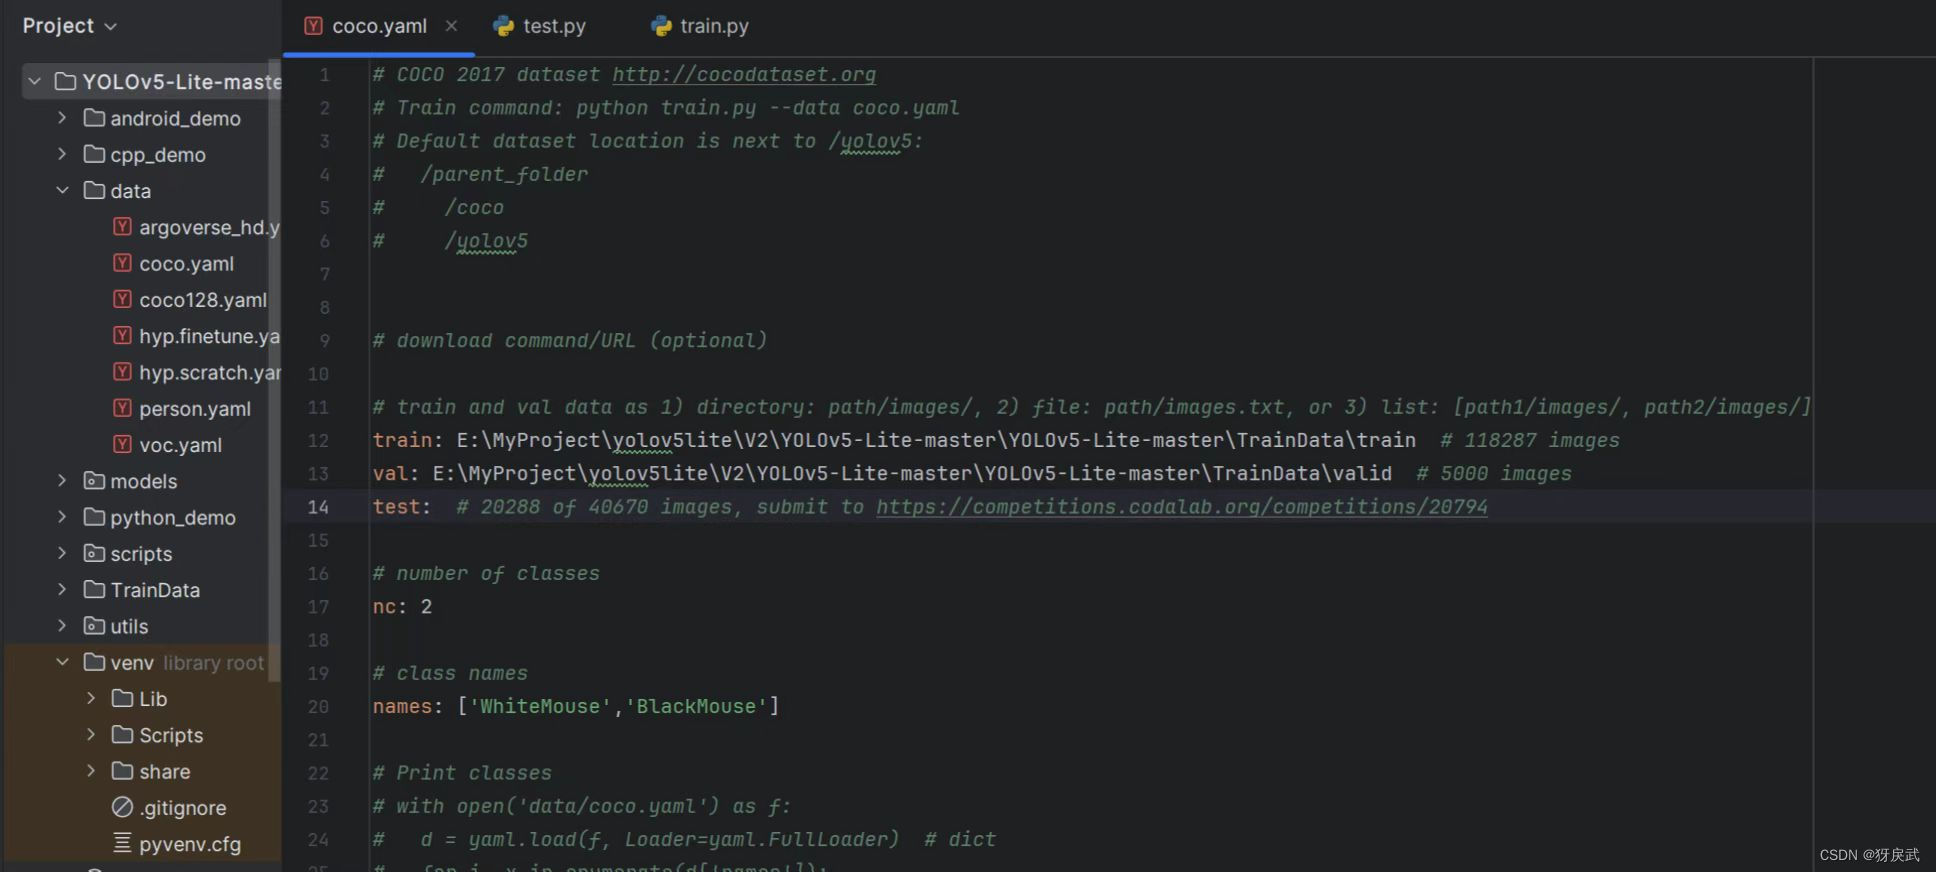
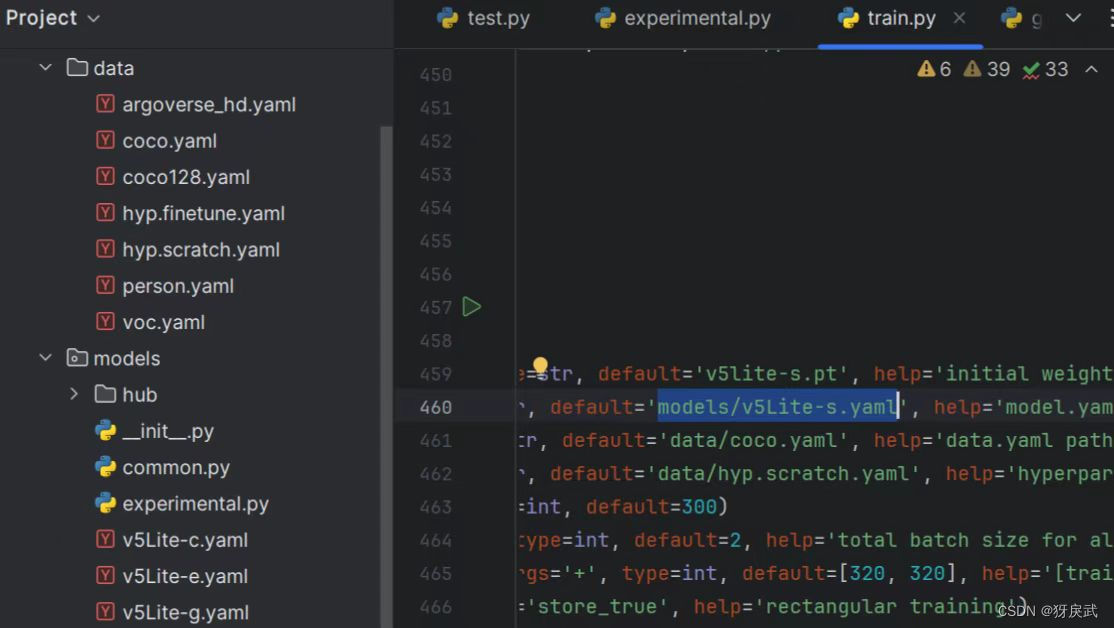
在 Yolov5-Lite 的目录下找到 train.py (训练文件)的 main 函数入口,进行如下配置:
1.将数据集存放在正确的位置并且填写到代码中:
2.安装对应的依赖(根据源代码中的requirements):
`matplotlib>=3.2.2`
`numpy>=1.18.5`
`opencv-python>=4.1.2`
`Pillow`
`PyYAML>=5.3.1`
`scipy>=1.4.1`
`torch>=1.8.0`
`torchvision>=0.9.0`
`tqdm>=4.41.0`
`tensorboard>=2.4.1`
`seaborn>=0.11.0`
`pandas`
`thop  # FLOPS computation`
`pycocotools>=2.0  # COCO mAP`
3.因为最新版本的依赖与旧版本的代码并不兼容,所以需要对代码进行修改:
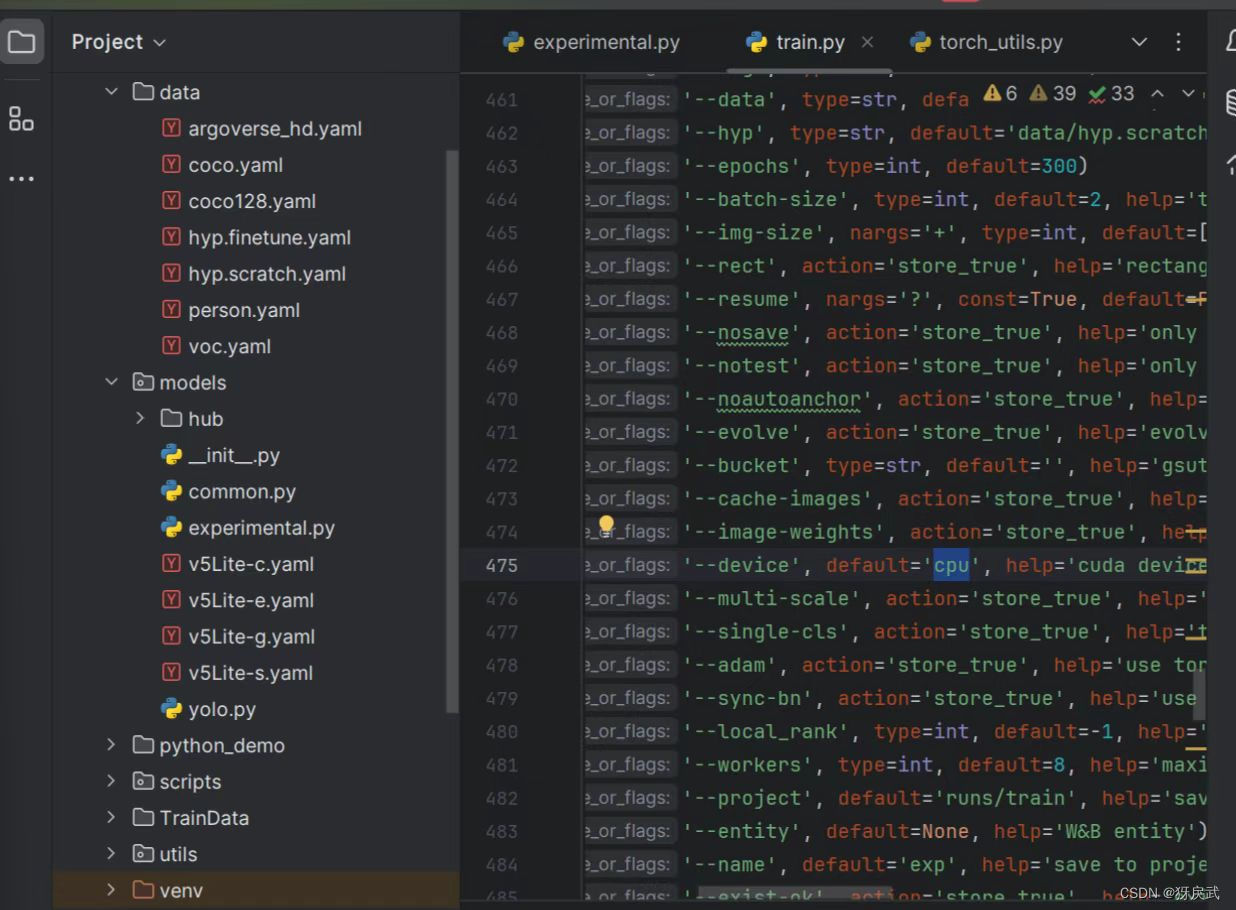
特别注意配置train中的参数:
笔者遇到的一些BUG:
①numpy版本的原因,np.int全部无法使用,所以要去对应的报错地点修改np.int为np.int_
②数据格式转换有问题,因为新版的torch无法自行转换,所以需要在每个torch中手动添加一个.long()进行数据转换,ctrl+f搜索gain,找到gain = torch.ones(7, device=targets.device),将其修改为gain = torch.ones(7, device=targets.device).long()
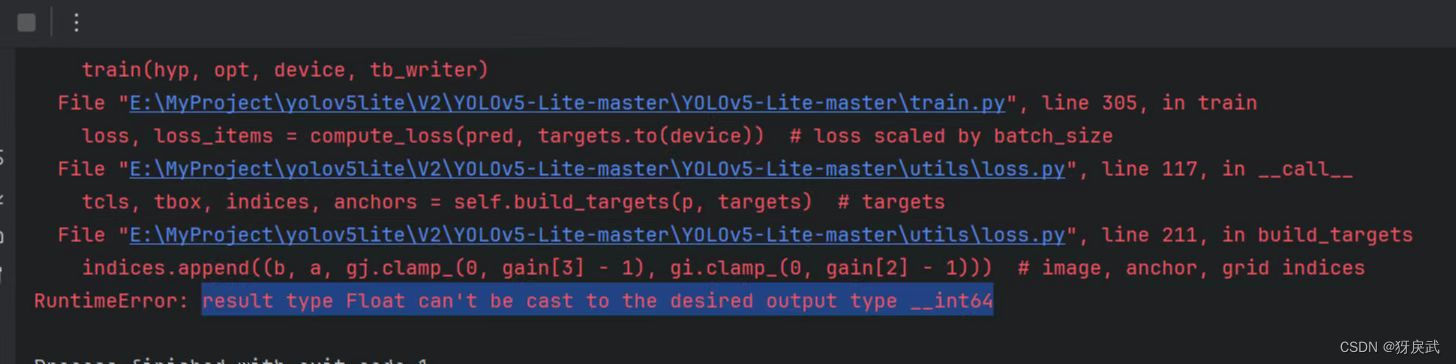
③model的返回格式中,删除多余的不明符号


4.修改完上述bug后代码运行并且开始训练,等待训练完成。
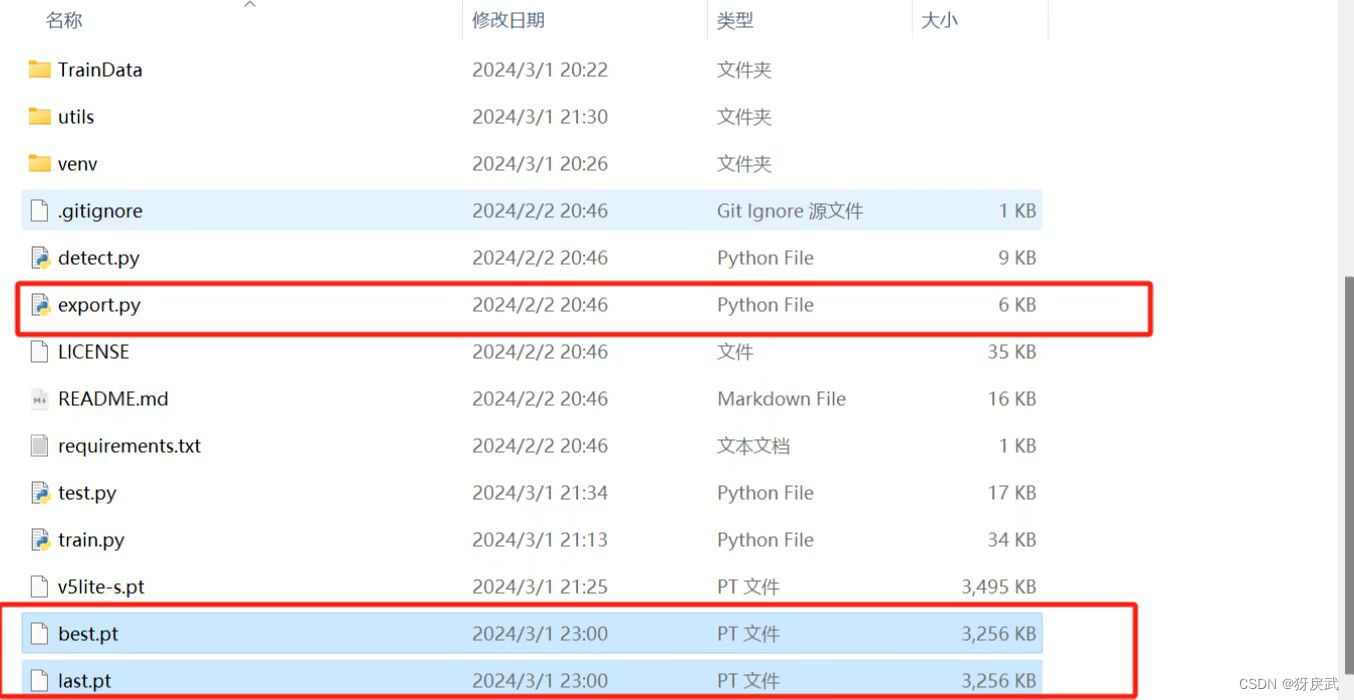
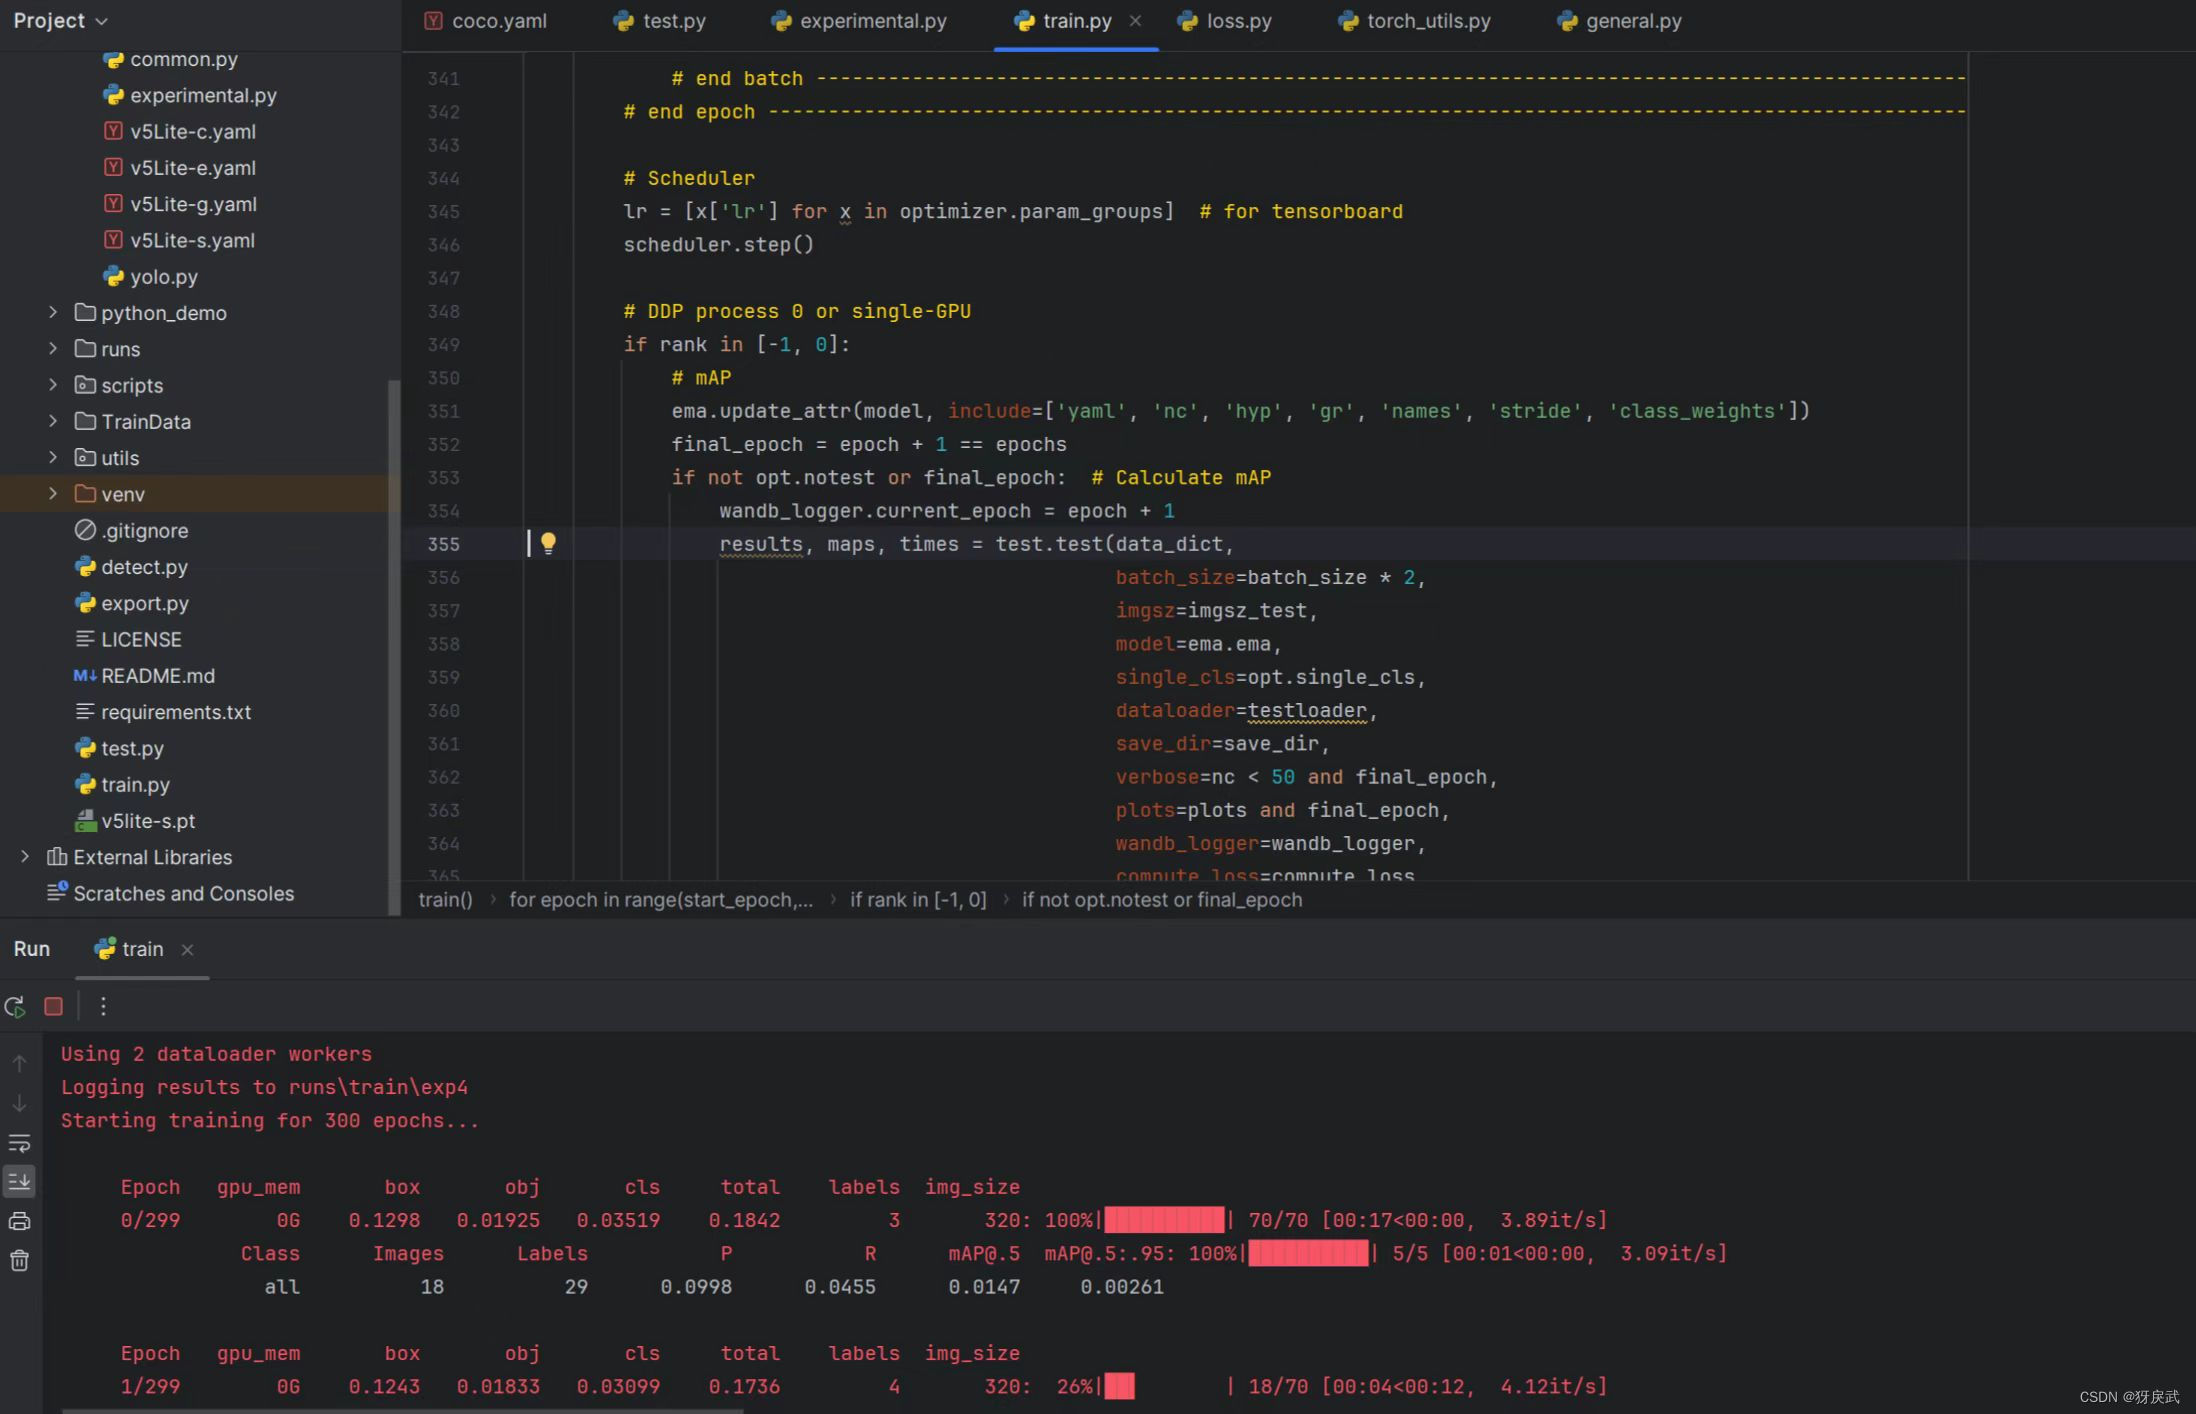 训练完成后生成以下文件:

2.3 ONNX的部署
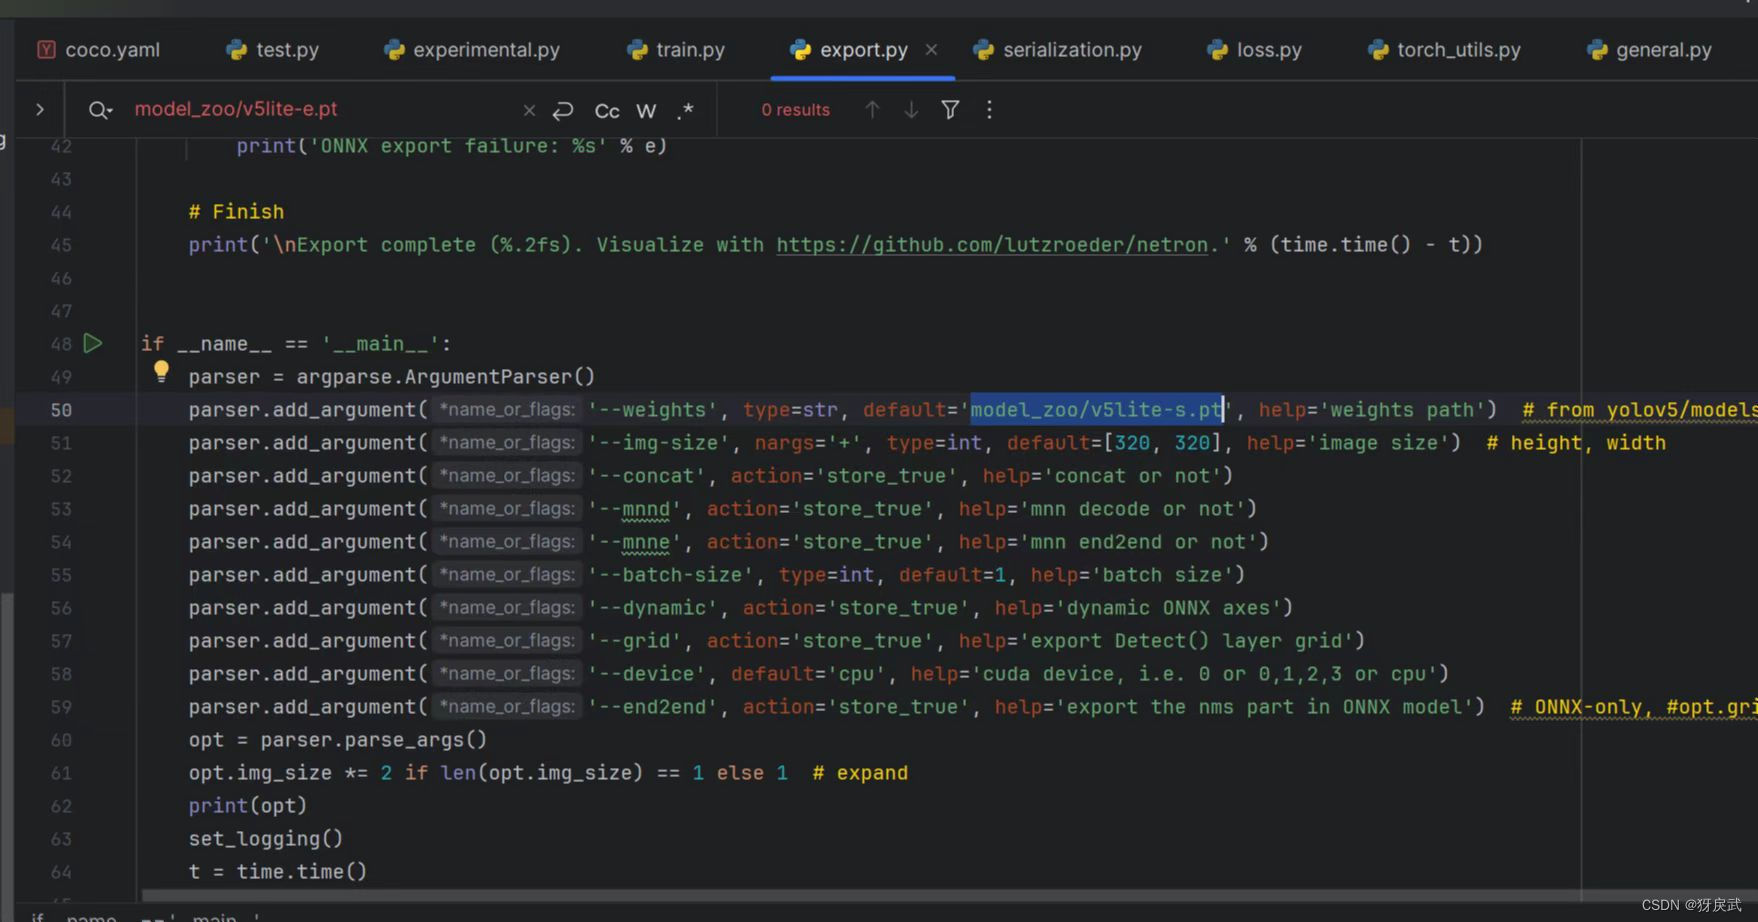
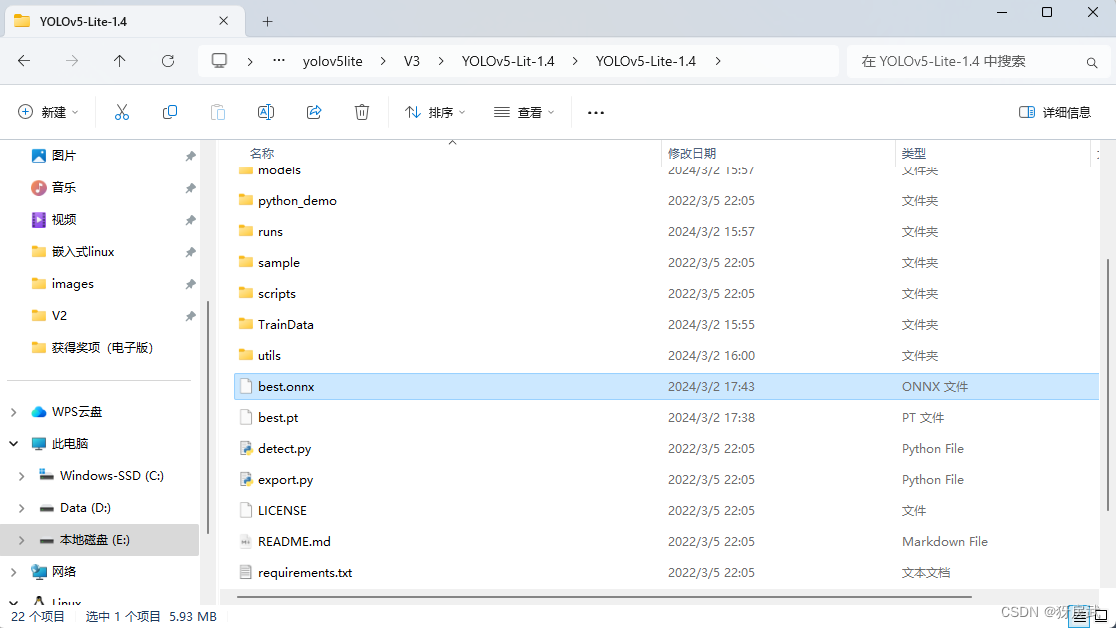
1.将exp最大的数字(此处的数字代表第几次训练)文件夹内下的pt文件放到模型主文件夹下,利用模型自带的export.py将模型训练后的文件转化为onnx格式。
2.exprot中也有很多地方需要修改:
①将初始设定的e.pt改为s.pt(根据你使用的模型来,笔者使用的是s)
②删除opt.ncnn这一选项

③下载onnx的依赖(上网搜索onnx的依赖安装,不再赘述)
3.将protohuf降低版本到3.19.0以下
(这个好像是版本的问题,总之如果前三步都做了还是报错,就降低版本试试)
pip install -U numpy==1.17.0
或者
pip uninstall numpy
pip install numpy==1.17.1
运行成功后得到以下文件:
4.搭建onnx环境到荔枝派中
①首先搭建并进入一个Python的虚拟环境,方便使用pip(很重要)
sudo -i
apt install python3.11-venv
cd /root
python3 -m venv ort
source /root/ort/bin/activate
②然后下载SHL库
pip3 install shl-python
python3 -m shl --whereis th1520
//将whereis得到的地址的库复制到/usr/lib中
sudo cp {whereis的地址}/lib/* /usr/lib/
③最后下载onnxruntime (下载该库很有可能不成功,不成功的原因有很多,有可能是镜像问题,有可能是缺少某个库或者框架)
wget https://github.com/zhangwm-pt/onnxruntime/releases/download/riscv_whl_v2.6.0/hhb_onnxruntime_c920-2.6.0-cp311-cp311-linux_riscv64.whl pip install hhb_onnxruntime_c920-2.6.0-cp311-cp311-linux_riscv64.whl
排雷:

解决方法:
去Releases · T-head-Semi/csi-nn2 · GitHub下载对应的库,放到板子的/usr/lib或者/lib目录下
5.编写摄像头代码,此处代码中按下s代表开始识别,q代表关闭程序
- import cv2
- import numpy as np
- import onnxruntime as ort
- import time
-
- def plot_one_box(x, img, color=None, label=None, line_thickness=None):
- tl = (
- line_thickness or round(0.002 * (img.shape[0] + img.shape[1]) / 2) + 1
- ) # line/font thickness
- color = color or [random.randint(0, 255) for _ in range(3)]
- x = x.squeeze()
- c1, c2 = (int(x[0]), int(x[1])), (int(x[2]), int(x[3]))
- cv2.rectangle(img, c1, c2, color, thickness=tl, lineType=cv2.LINE_AA)
- if label:
- tf = max(tl - 1, 1) # font thickness
- t_size = cv2.getTextSize(label, 0, fontScale=tl / 3, thickness=tf)[0]
- c2 = c1[0] + t_size[0], c1[1] - t_size[1] - 3
- cv2.rectangle(img, c1, c2, color, -1, cv2.LINE_AA) # filled
- cv2.putText(
- img,
- label,
- (c1[0], c1[1] - 2),
- 0,
- tl / 3,
- [225, 255, 255],
- thickness=tf,
- lineType=cv2.LINE_AA,
- )
- def _make_grid( nx, ny):
- xv, yv = np.meshgrid(np.arange(ny), np.arange(nx))
- return np.stack((xv, yv), 2).reshape((-1, 2)).astype(np.float32)
-
- def cal_outputs(outs,nl,na,model_w,model_h,anchor_grid,stride):
-
- row_ind = 0
- grid = [np.zeros(1)] * nl
- for i in range(nl):
- h, w = int(model_w/ stride[i]), int(model_h / stride[i])
- length = int(na * h * w)
- if grid[i].shape[2:4] != (h, w):
- grid[i] = _make_grid(w, h)
-
- outs[row_ind:row_ind + length, 0:2] = (outs[row_ind:row_ind + length, 0:2] * 2. - 0.5 + np.tile(
- grid[i], (na, 1))) * int(stride[i])
- outs[row_ind:row_ind + length, 2:4] = (outs[row_ind:row_ind + length, 2:4] * 2) ** 2 * np.repeat(
- anchor_grid[i], h * w, axis=0)
- row_ind += length
- return outs
- def post_process_opencv(outputs,model_h,model_w,img_h,img_w,thred_nms,thred_cond):
- conf = outputs[:,4].tolist()
- c_x = outputs[:,0]/model_w*img_w
- c_y = outputs[:,1]/model_h*img_h
- w = outputs[:,2]/model_w*img_w
- h = outputs[:,3]/model_h*img_h
- p_cls = outputs[:,5:]
- if len(p_cls.shape)==1:
- p_cls = np.expand_dims(p_cls,1)
- cls_id = np.argmax(p_cls,axis=1)
-
- p_x1 = np.expand_dims(c_x-w/2,-1)
- p_y1 = np.expand_dims(c_y-h/2,-1)
- p_x2 = np.expand_dims(c_x+w/2,-1)
- p_y2 = np.expand_dims(c_y+h/2,-1)
- areas = np.concatenate((p_x1,p_y1,p_x2,p_y2),axis=-1)
-
- areas = areas.tolist()
- ids = cv2.dnn.NMSBoxes(areas,conf,thred_cond,thred_nms)
- if len(ids)>0:
- return np.array(areas)[ids],np.array(conf)[ids],cls_id[ids]
- else:
- return [],[],[]
- def infer_img(img0,net,model_h,model_w,nl,na,stride,anchor_grid,thred_nms=0.4,thred_cond=0.5):
- # 图像预处理
- img = cv2.resize(img0, [model_w,model_h], interpolation=cv2.INTER_AREA)
- img = cv2.cvtColor(img, cv2.COLOR_BGR2RGB)
- img = img.astype(np.float32) / 255.0
- blob = np.expand_dims(np.transpose(img, (2, 0, 1)), axis=0)
- # 模型推理
- outs = net.run(None, {net.get_inputs()[0].name: blob})[0].squeeze(axis=0)
- # 输出坐标矫正
- outs = cal_outputs(outs,nl,na,model_w,model_h,anchor_grid,stride)
- # 检测框计算
- img_h,img_w,_ = np.shape(img0)
- boxes,confs,ids = post_process_opencv(outs,model_h,model_w,img_h,img_w,thred_nms,thred_cond)
- return boxes,confs,ids
- if __name__ == "__main__":
- # 模型加载
- model_pb_path = "best.onnx"
- so = ort.SessionOptions()
- net = ort.InferenceSession(model_pb_path, so)
- # 标签字典
- dic_labels= {0:'WhiteMouse',
- 1:'BlackMouse'}
- # 模型参数
- model_h = 320
- model_w = 320
- nl = 3
- na = 3
- stride=[8.,16.,32.]
- anchors = [[10, 13, 16, 30, 33, 23], [30, 61, 62, 45, 59, 119], [116, 90, 156, 198, 373, 326]]
- anchor_grid = np.asarray(anchors, dtype=np.float32).reshape(nl, -1, 2)
- video = 0
- cap = cv2.VideoCapture(video)
- flag_det = False
- while True:
- success, img0 = cap.read()
- if success:
- if flag_det:
- t1 = time.time()
- det_boxes,scores,ids = infer_img(img0,net,model_h,model_w,nl,na,stride,anchor_grid,thred_nms=0.4,thred_cond=0.5)
- t2 = time.time()
- for box,score,id in zip(det_boxes,scores,ids):
- label = '%s:%.2f'%(dic_labels[id.item()],score)
-
- plot_one_box(box.astype(np.int16), img0, color=(255,0,0), label=label, line_thickness=None)
-
- str_FPS = "FPS: %.2f"%(1./(t2-t1))
-
- cv2.putText(img0,str_FPS,(50,50),cv2.FONT_HERSHEY_COMPLEX,1,(0,255,0),3)
- cv2.imshow("video",img0)
- key=cv2.waitKey(1) & 0xFF
- if key == ord('q'):
- break
- elif key & 0xFF == ord('s'):
- flag_det = not flag_det
- print(flag_det)
- cap.release()
注意改正下面两个地方,改成自己数据集的Label和onnx文件名

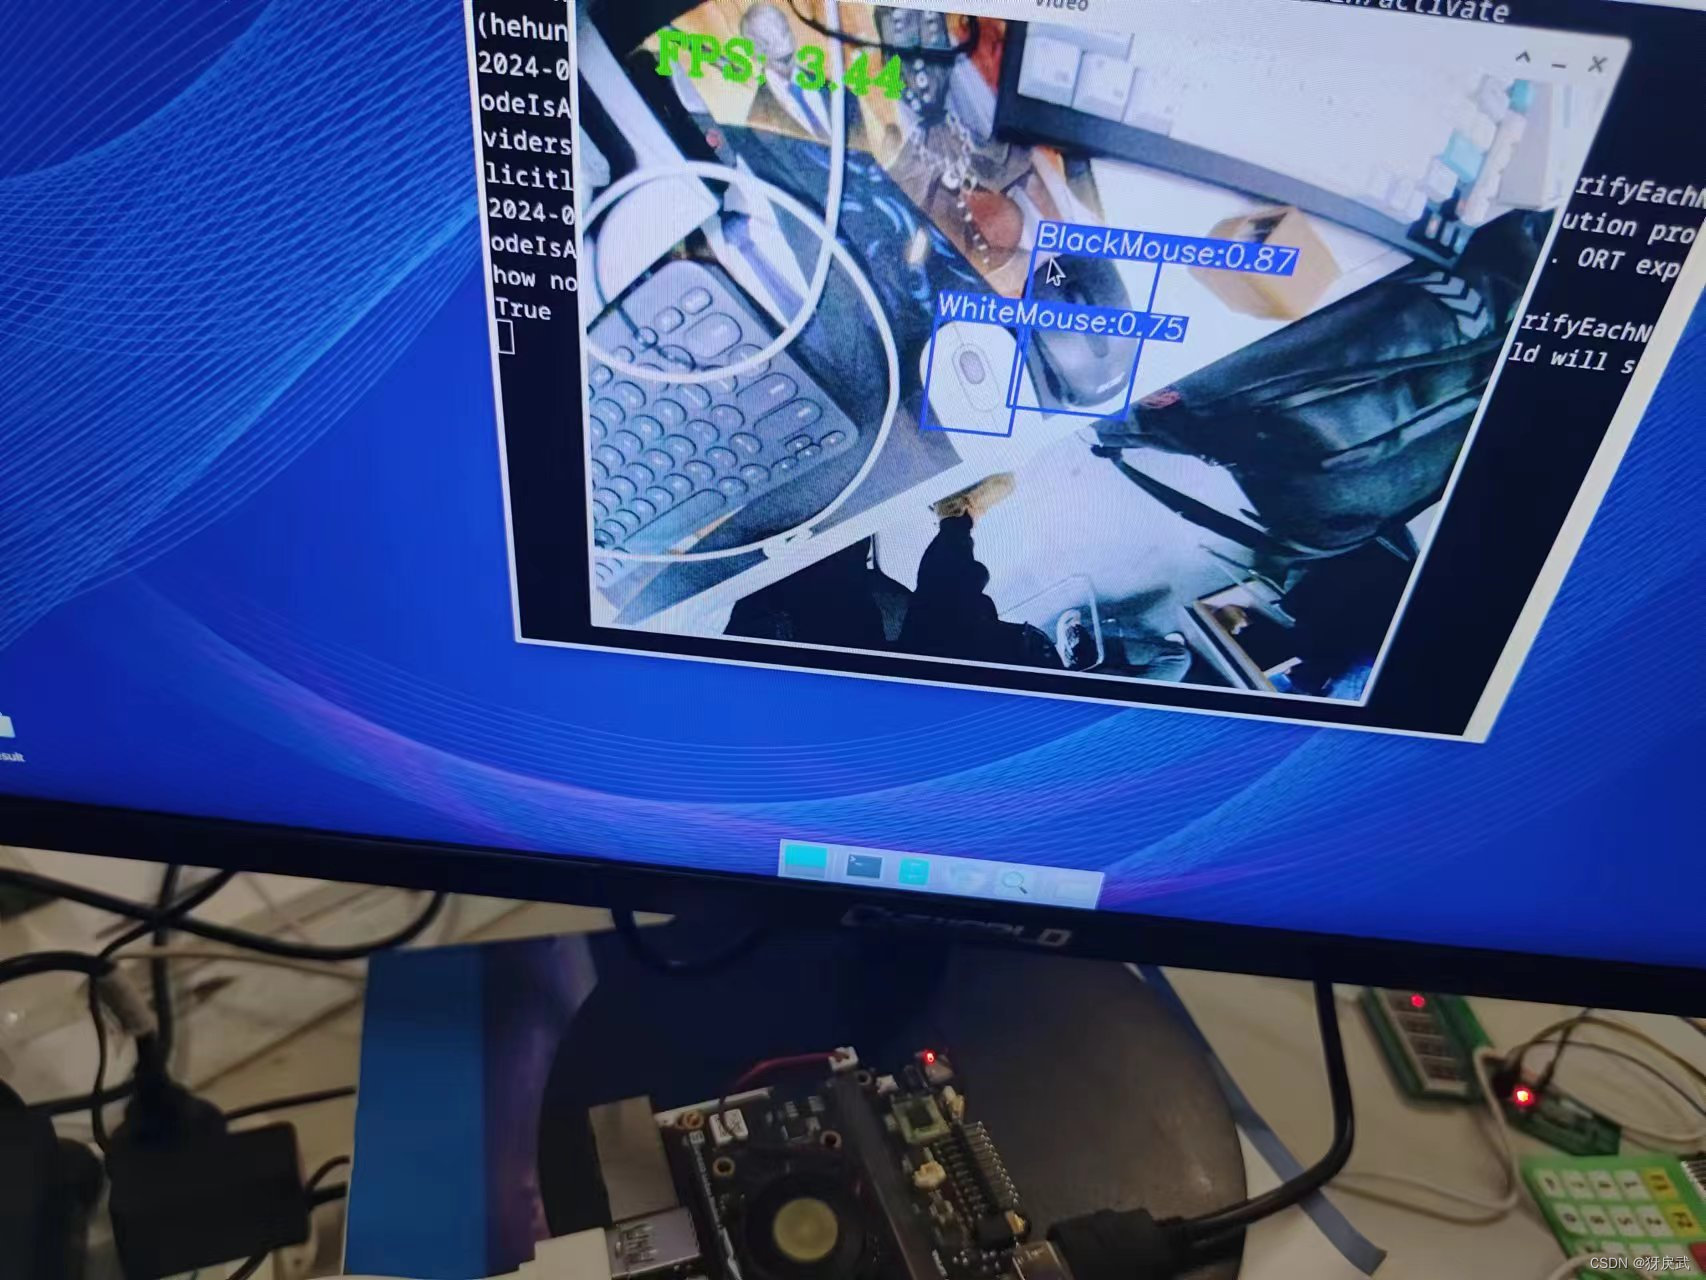
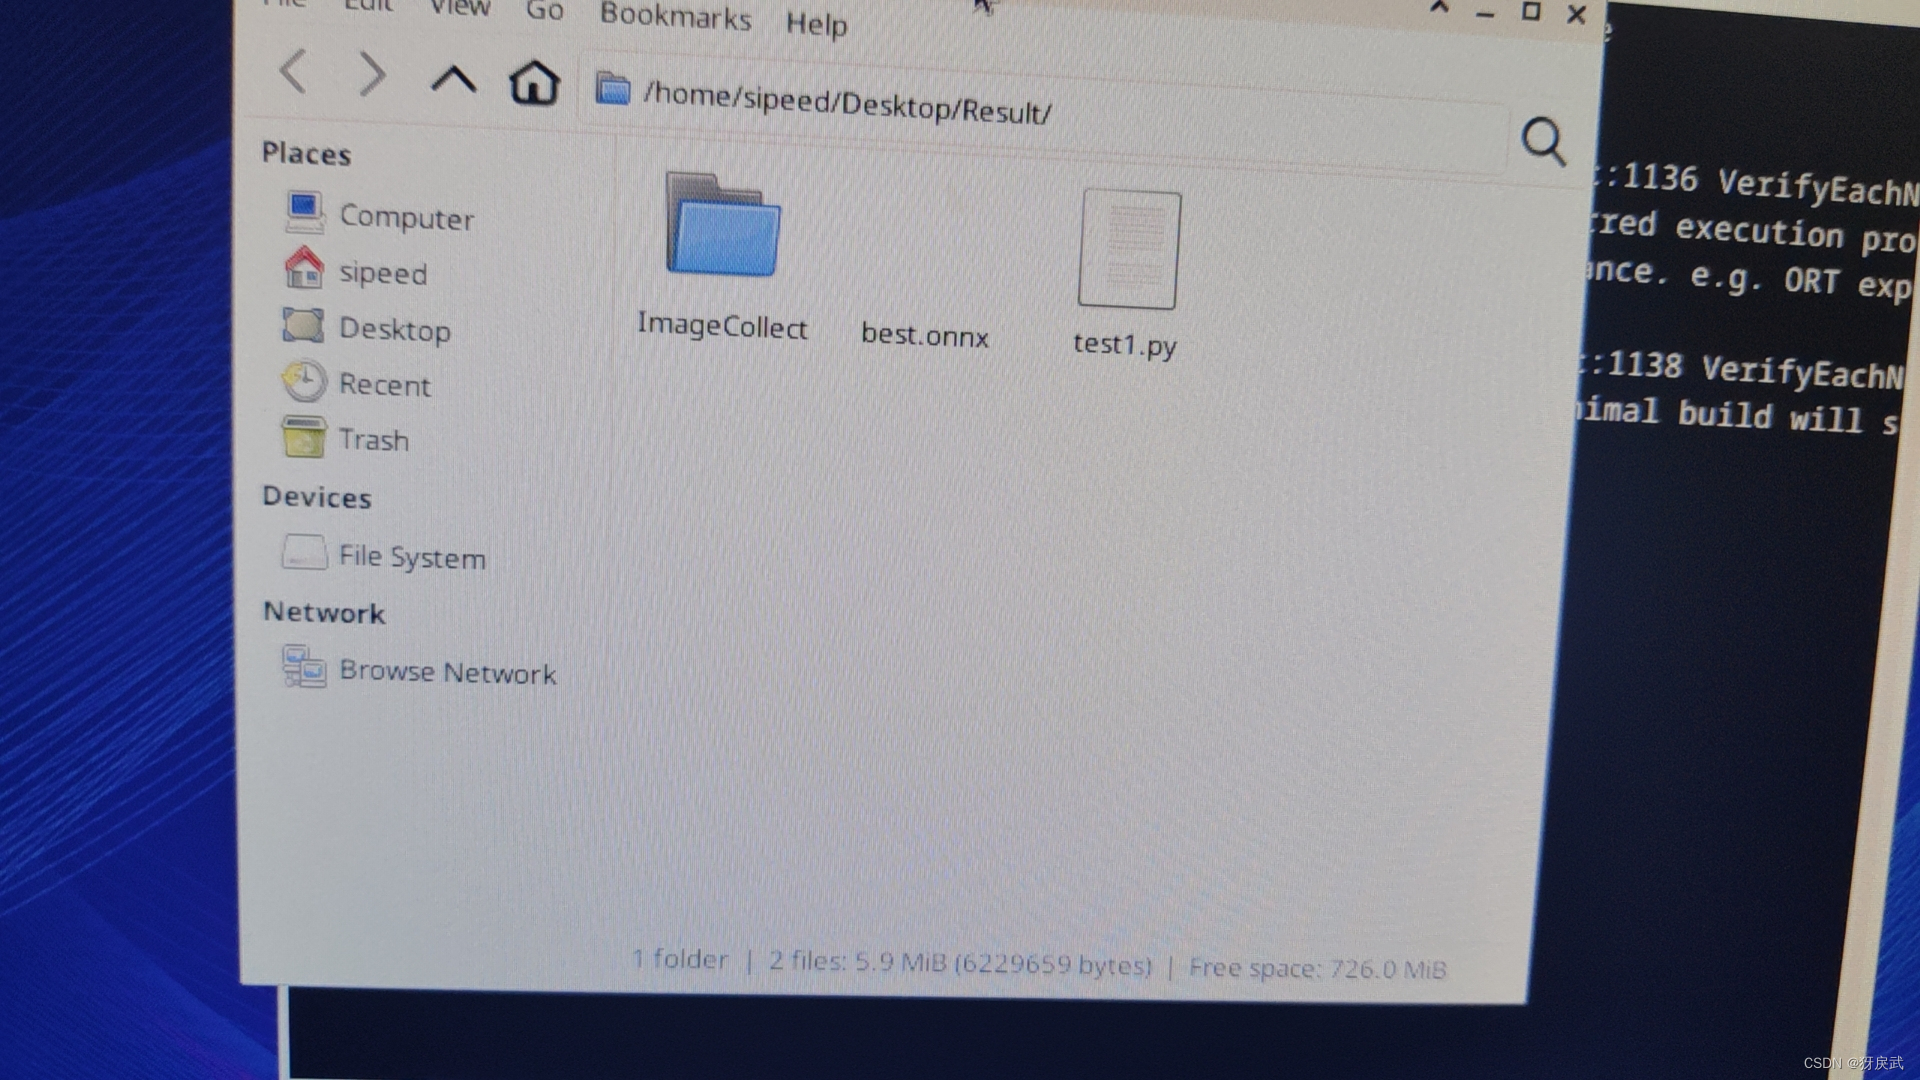
6.最后将onnx文件和摄像头代码放到同一个文件夹下,运行test1.py就可以开启识别:
最后一个BUG:
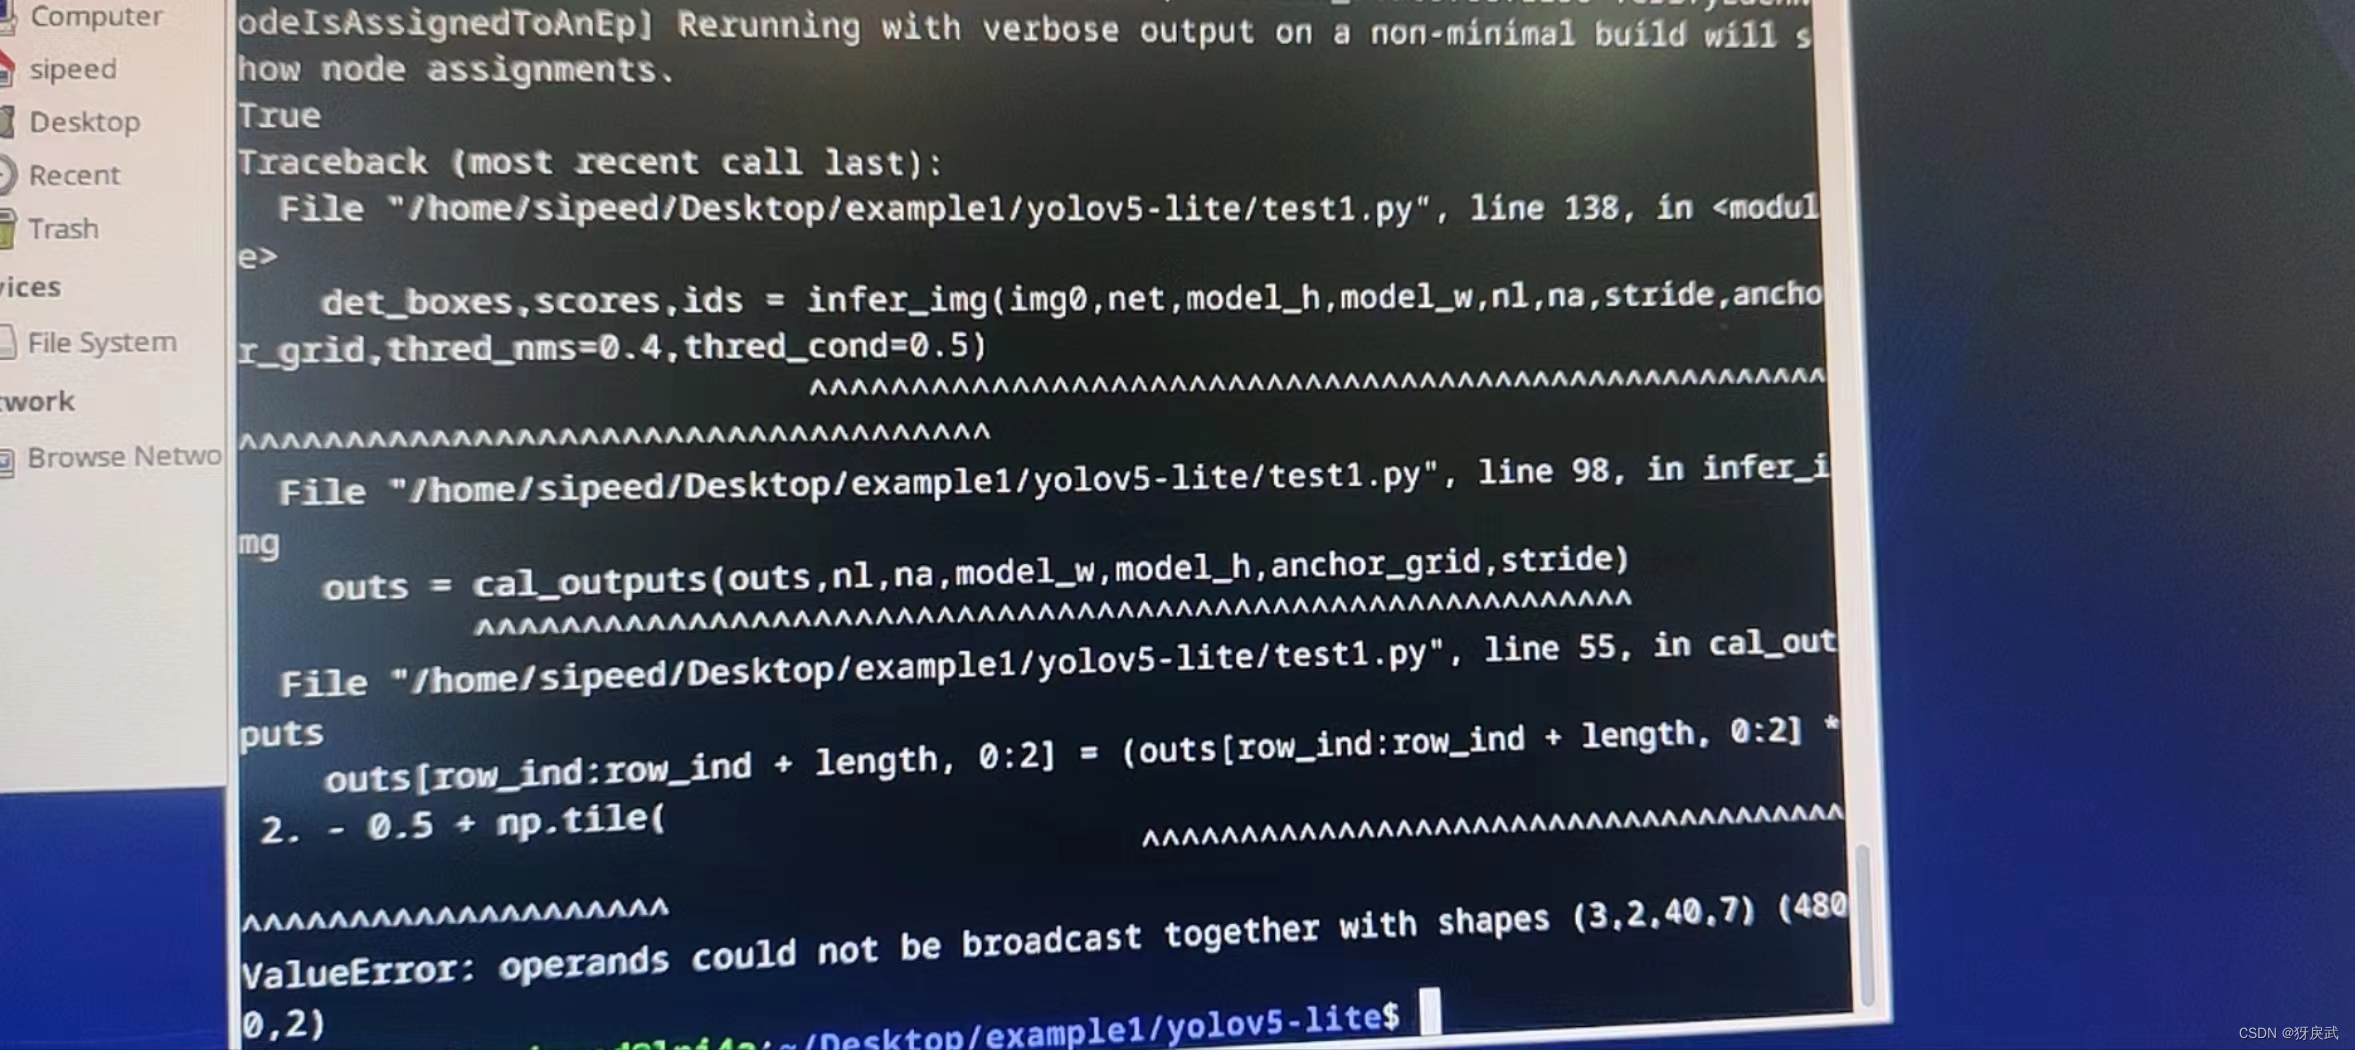
解决方法:
这个错误的提示是numpy报错,shape有问题,但是我没找到原模型中的问题出在哪个地方,最后降低了模型的版本,就没有这个报错了
三、成果展示
新手第一次部署模型,最后的成果大概3-4FPS左右,听说还可以继续优化,请教一下评论区有懂这方面的大佬。