当前位置:   article > 正文

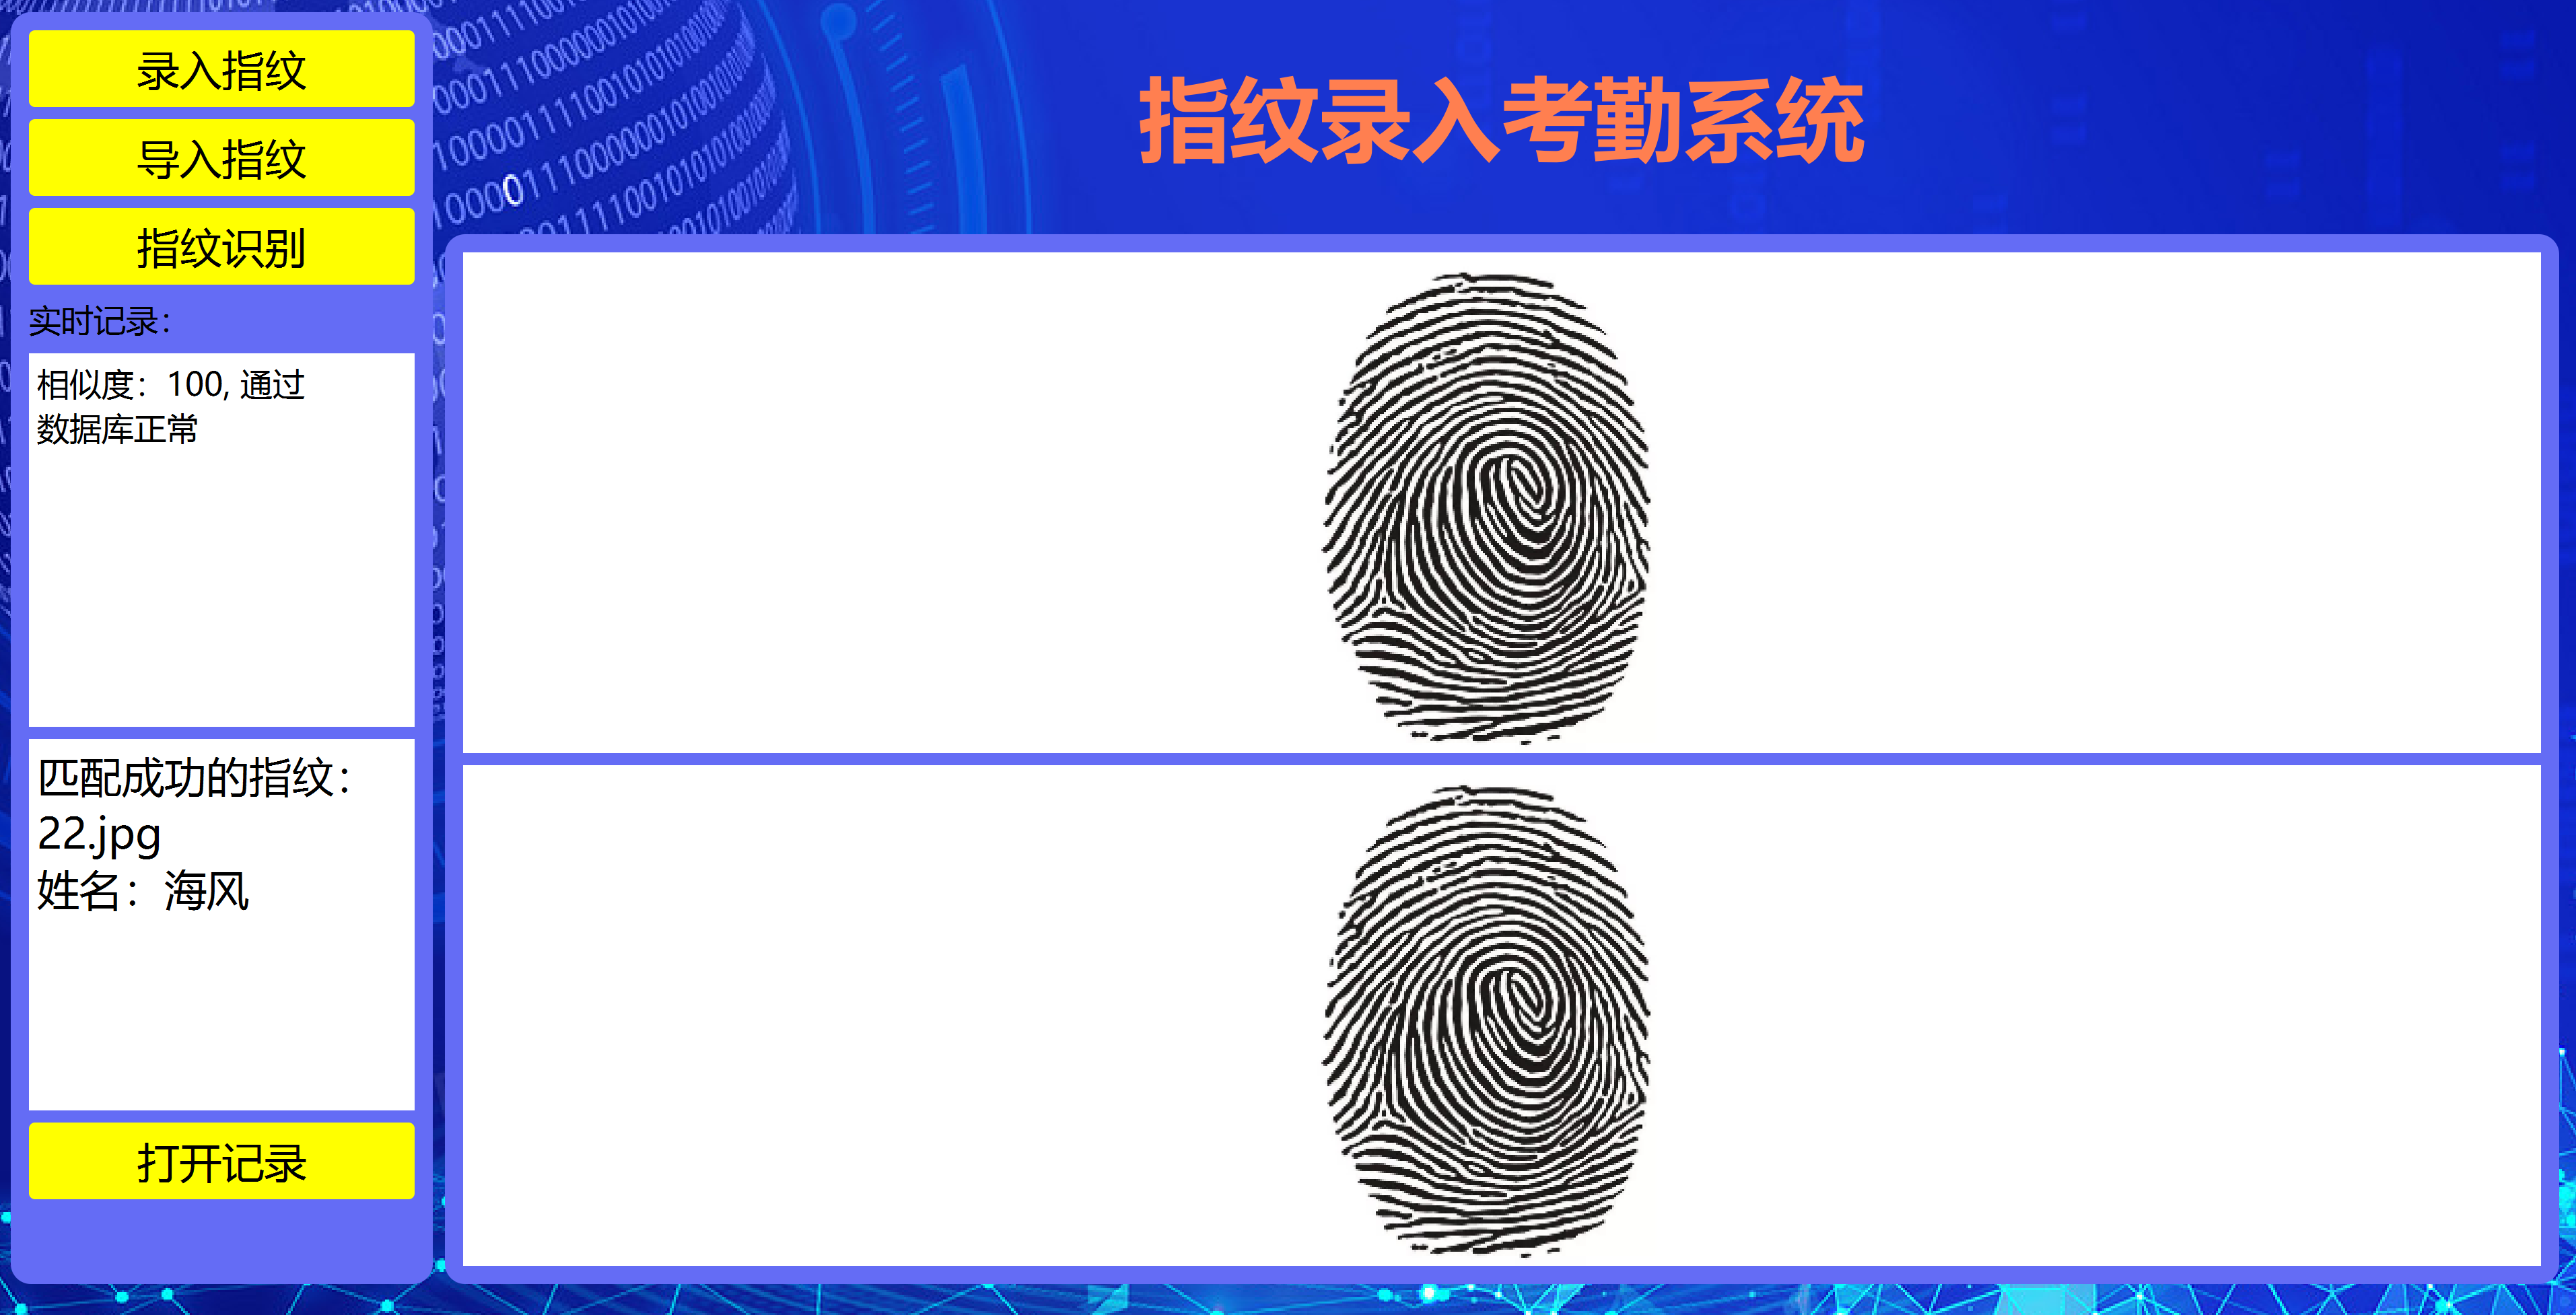
Python+Qt指纹录入识别考勤系统_基于python的指纹识别

基于python的指纹识别

Python+Qt指纹录入识别考勤系统

如需安装运行环境或远程调试,见文章底部个人QQ名片,由专业技术人员远程协助!

前言

这篇博客针对<<Python+Qt指纹录入识别考勤系统>>编写代码,代码整洁,规则,易读。 学习与应用推荐首选。

文章目录

一、所需工具软件

二、使用步骤

1. 引入库

2. 识别图像特征

3. 运行结果

三、在线协助

一、所需工具软件

1. Pycharm, Python

2. Qt, OpenCV

二、使用步骤

1.引入库

代码如下(示例):

  1. # coding:utf-8
  2. import sys
  3. import os
  4. import csv
  5. import cv2
  6. import record
  7. import name
  8. from PyQt5 import QtWidgets
  9. from PyQt5 import QtWidgets, QtCore, QtGui
  10. from PyQt5.QtGui import *
  11. from PyQt5.QtWidgets import *
  12. from PyQt5.QtCore import *
  13. from shutil import copyfile
  14. from sys import exit
  15. import os
  16. from login import *
  17. from register import *

2.识别图像特征

代码如下(示例):

  1. name=f.read()
  2. print("f",name)
  3. f.close()
  4. # 均值哈希算法
  5. def aHash(img):
  6. # 缩放为8*8
  7. img = cv2.resize(img, (8, 8), interpolation=cv2.INTER_CUBIC)
  8. # 转换为灰度图
  9. gray = cv2.cvtColor(img, cv2.COLOR_BGR2GRAY)
  10. # s为像素和初值为0,hash_str为hash值初值为''
  11. s = 0
  12. hash_str = ''
  13. # 遍历累加求像素和
  14. for i in range(8):
  15. for j in range(8):
  16. s = s + gray[i, j]
  17. # 求平均灰度
  18. avg = s / 64
  19. # 灰度大于平均值为1相反为0生成图片的hash值
  20. for i in range(8):
  21. for j in range(8):
  22. if gray[i, j] > avg:
  23. hash_str = hash_str + '1'
  24. else:
  25. hash_str = hash_str + '0'
  26. return hash_str
  27. # 差值感知算法
  28. def dHash(img):
  29. # 缩放8*8
  30. img = cv2.resize(img, (9, 8), interpolation=cv2.INTER_CUBIC)
  31. # 转换灰度图
  32. gray = cv2.cvtColor(img, cv2.COLOR_BGR2GRAY)
  33. hash_str = ''
  34. # 每行前一个像素大于后一个像素为1,相反为0,生成哈希
  35. for i in range(8):
  36. for j in range(8):
  37. if gray[i, j] > gray[i, j + 1]:
  38. hash_str = hash_str + '1'
  39. return hash_str
  40. # Hash值对比
  41. def cmpHash(hash1, hash2):
  42. n = 0
  43. # hash长度不同则返回-1代表传参出错
  44. if len(hash1) != len(hash2):
  45. return -1
  46. # 遍历判断
  47. for i in range(len(hash1)):
  48. # 不相等则n计数+1,n最终为相似度
  49. if hash1[i] != hash2[i]:
  50. n = n + 1
  51. return n
  52. import os
  53. path = "fingerDataBase/"
  54. file_list = os.listdir(path)
  55. for file in file_list:
  56. img1 = cv2.imread('temp/new.jpg')
  57. BasePath="fingerDataBase/" + str(file)
  58. print("BasePath: ", BasePath)
  59. img2 = cv2.imread(BasePath)
  60. print("img2: ",img2)
  61. hash1 = aHash(img1)
  62. hash1 = dHash(img1)
  63. hash2 = dHash(img2)
  64. print(hash1)
  65. print(hash2)
  66. n = cmpHash(hash1, hash2)
  67. print("n",n)
  68. print('差值哈希算法相似度:' + str(n))
  69. result='相似度:' + str(100-n)+", 通过"

3.运行结果如下

三、在线协助:

如需安装运行环境或远程调试,见文章底部个人 QQ 名片,由专业技术人员远程协助!
1)远程安装运行环境,代码调试
2)Qt, C++, Python入门指导
3)界面美化
4)软件制作

博主推荐文章:https://blog.csdn.net/alicema1111/article/details/123851014

个人博客主页:https://blog.csdn.net/alicema1111?type=blog

博主所有文章点这里:https://blog.csdn.net/alicema1111?type=blog

声明:本文内容由网友自发贡献,不代表【wpsshop博客】立场,版权归原作者所有,本站不承担相应法律责任。如您发现有侵权的内容,请联系我们。转载请注明出处:https://www.wpsshop.cn/w/我家自动化/article/detail/346730
推荐阅读
相关标签
  

闽ICP备14008679号