
- 1hadoop学习---基于Hive的聊天数据分析报表可视化案例_基于一个社交平台app的用户数据,完成相关指标的统计分析并结合bi工具对指标进行可
- 2成功解决TypeError: 'float' object cannot be interpreted as an integer
- 3BM25:信息检索的核心算法解析
- 4Python学习第一步之Typora简单用法_typora怎么运行python
- 5Linux 服务器基线配置_csdn linux 安全基线
- 6远程控制(command&control,C2)---Fast flux_控制 (c2) 服务器
- 7机器学习基本概念01_机器学习的样本
- 8数据库课设(图书管理系统)_数据库设置管理图书馆保管和借还的数据库
- 9建筑主体结构健康监测,高层建筑如何预警结构异常
- 10头歌Python程序设计——输入输出_头歌利用python进行语音输入
第十四届蓝桥杯(web应用开发)模拟赛2期 -大学组_蓝桥杯web模拟赛第二期
赞
踩
凭空消失的TA
题解
加入第二行代码即可,没有使用elementUI提供的js文件,所以说提供的所有文件都是有用的呀~
 <!-- 引入 element-ui 样式 -->
    <link rel="stylesheet" href="./element-ui-2.15.10/index.css" />
    <script src="./element-ui-2.15.10/index.js"></script>
- 1
- 2
- 3
用户名片
题解
核心就是让整个卡片无论在什么时候都是页面居中,就是无论你缩放页面总是居中。这里就必须用到最后的center样式,使用绝对定位实现居中
* {
  margin: 0;
  padding: 0;
}
html,
body {
  background: #fceeb5;
  height: 100%;
  overflow: hidden;
}

html,
body {
  background: #fceeb5;
}
.card {
  width: 450px;
  height: 250px;
  background: #fff;
  box-shadow: 0 8px 16px -8px rgba(0, 0, 0, 0.4);
  border-radius: 6px;
  overflow: hidden;
  position: absolute;
  margin: auto;
  left: 0px;
  bottom: 0;
  top: 0;
  right: 0;
}
.card h1 {
  text-align: center;
}

.card img {
  width: 110px;
  height: 110px;
  border-radius: 50%;
}
.additional {
  position: absolute;
  height: 100%;
  background: #92bca6;
  z-index: 2;
}

.user-card {
  width: 150px;
  height: 100%;
  position: relative;
  float: left;
}
.user-card .points {
  top: 85%;
}
.general {
  width: 300px;
  height: 100%;
  position: absolute;
  top: 0;
  right: 0;
  z-index: 1;
  box-sizing: border-box;
  padding: 12px;
  padding-top: 0;
  display: flex;
  flex-flow: column;
  justify-content: space-around;
}
.more{
  display: block;
  text-align: right;
}
/* level 和  points 定位位置 */
.level,
.points {
  width: 72px;
  text-align: center;
  position: absolute;
  color: #fff;
  font-size: 12px;
  font-weight: bold;
  background: rgba(0, 0, 0, 0.15);
  padding: 2px 0;
  border-radius: 100px;
  white-space: nowrap;
  /*这里改了一下*/
  bottom: 5% !important;
}

/*  level 位置这里也改了一下 */
.level {
  top: -68% !important;
    height: 15px;
}

/* TODO 待补充代码 居中样式*/
.center{
  position: absolute;
  left: 0;
  right: 0;
  top: 0;
  bottom: 0;
  margin: auto;
}

- 1
- 2
- 3
- 4
- 5
- 6
- 7
- 8
- 9
- 10
- 11
- 12
- 13
- 14
- 15
- 16
- 17
- 18
- 19
- 20
- 21
- 22
- 23
- 24
- 25
- 26
- 27
- 28
- 29
- 30
- 31
- 32
- 33
- 34
- 35
- 36
- 37
- 38
- 39
- 40
- 41
- 42
- 43
- 44
- 45
- 46
- 47
- 48
- 49
- 50
- 51
- 52
- 53
- 54
- 55
- 56
- 57
- 58
- 59
- 60
- 61
- 62
- 63
- 64
- 65
- 66
- 67
- 68
- 69
- 70
- 71
- 72
- 73
- 74
- 75
- 76
- 77
- 78
- 79
- 80
- 81
- 82
- 83
- 84
- 85
- 86
- 87
- 88
- 89
- 90
- 91
- 92
- 93
- 94
- 95
- 96
- 97
- 98
- 99
- 100
- 101
- 102
- 103
- 104
芝麻开门
题解
需要注意的是得把点击确定按钮的事件放在promise中,以至于最终返回的是mPrompt()的状态,不然放在外面返回的就是点击事件的状态了。我就是犯了这个错误,然后答案一直不对。然后点击事件用了.onclick和addEventListener事件监听器,因为开始不太熟悉还是什么都要多用用
const incantations = "芝麻开门";
function init(el) {
  document.querySelector(".wrapper .btn").addEventListener("click", () => {
    mPrompt()
      .then((res) => {
        console.log("@@@@@@@@@@" + res);
        if (res === incantations) {
          document
            .querySelectorAll("#door .doors")[0]
            .classList.add("door-left");
          document
            .querySelectorAll("#door .doors")[1]
            .classList.add("door-right");
        }
      })
      .catch((err) => {
        console.log(err);
      });
  });
}
/**
 * @description: 调用函数,开启弹窗,记录输入框的内容,并通过 promise 异步返回输入框中的内容
 * @return {Promise}
 */
function mPrompt() {
  // 弹窗必须使用以下结构 template 保存的是弹窗的结构字符串,可以先转化为 DOM 再通过 appendChild 方式插入到 body 中
  const template = `
        <div class="modal">
            <div class="message-box">
                <div class="message-header">请输入咒语</div>
                <div class="message-body">
                    <input type="text">
                </div>
                <div class="message-footer">
                    <button class="btn btn-small" id='cancel'>取消</button>
                    <button class="btn btn-small btn-primary" id='confirm'>确定</button>
                </div>
            </div>
        </div>
    `;
  // 让对话框弹出,先创建子节点
  const dialogDiv = document.createElement("div");
  dialogDiv.innerHTML = template;
  // body元素最后追加一个div元素
  let body = document.querySelector('body');
  body.appendChild(dialogDiv);

  // 获取对话框的确定和取消按钮,通过这个来操作对话框的显示与隐藏
  let confirmBtn = document.getElementById("confirm");
  let cancelBtn = document.getElementById("cancel");
  let inputVal = "";

  // TODO:待补充代码
  return new Promise((resolve, reject) => {
    // 点击确定事件
    confirmBtn.onclick = function () {
      // 注意getElementsByTagName获取到的是数组,取第一个
      inputVal = document.getElementsByTagName("input")[0].value
      body.removeChild(dialogDiv)
      if (inputVal == "芝麻开门") {
        return resolve("芝麻开门")
      } else {
        return reject(false)
      }
    }

    // 取消事件
    cancelBtn.addEventListener("click", () => {
      body.removeChild(dialogDiv)
      reject(false)
    })

  })
}
- 1
- 2
- 3
- 4
- 5
- 6
- 7
- 8
- 9
- 10
- 11
- 12
- 13
- 14
- 15
- 16
- 17
- 18
- 19
- 20
- 21
- 22
- 23
- 24
- 25
- 26
- 27
- 28
- 29
- 30
- 31
- 32
- 33
- 34
- 35
- 36
- 37
- 38
- 39
- 40
- 41
- 42
- 43
- 44
- 45
- 46
- 47
- 48
- 49
- 50
- 51
- 52
- 53
- 54
- 55
- 56
- 57
- 58
- 59
- 60
- 61
- 62
- 63
- 64
- 65
- 66
- 67
- 68
- 69
- 70
- 71
- 72
- 73
- 74
- 75
宝贵的一票
总结
这个题还是比较简单的就是考察了简单点dom操作,但是犯了一点错误,就是最终一直没有评测成功,最后发现应该是我动了初始化函数initRender 最初的dom结构,我为了图方便直接在里面都加了那个叉号的dom,但是最后评测时是不能有叉号的dom元素存在的,虽然我使它的display为none了但是还是不能通过检测,提示只有第一次删除检测成功,后面的直到选项小于等于2时应该就失败了。因为它检测到了序列小于2时还存在删除按钮的dom结构。
写这些的目的就是告诉大家一定不要随便操作题目已经给出的dom结构,因为它的评判标准里面就应该会检测最终的dom结构。当然我这个也是有解决办法的,就是在最后判断选项长度小于等于2时直接把选项1和选项2的删除按钮的dom结构remove就ok啦~ 我是小辣鸡一起进步吧
题解
<!DOCTYPE html>
<html lang="en">

<head>
  <meta charset="UTF-8" />
  <meta http-equiv="X-UA-Compatible" content="IE=edge" />
  <title>宝贵的一票</title>
  <script src="./js/jquery.min.js"></script>
  <link rel="stylesheet" href="./css/bootstrap.min.css" />
  <link rel="stylesheet" href="./css/style.css" />
</head>

<body>
  <div class="inner-container shadow">
    <div class="mb-3 row">
      <label class="col-sm-2 col-form-label">投票主题</label>
      <div class="col-sm-9">
        <input type="text" class="form-control" />
      </div>
    </div>
    <div class="list"></div>
    <div class="add">
      <div class="addtxt">
        <img src="./images/plus-square.svg" alt="加号图标" />
        添加选项
      </div>
    </div>
    <div class="form-check checkbox-one">
      <input class="form-check-input" type="checkbox" value="" />
      <label class="form-check-label" for="flexCheckDefault">
        支持多选
      </label>
    </div>
    <div class="form-check">
      <input class="form-check-input" type="checkbox" value="" />
      <label class="form-check-label" for="flexCheckDefault">
        公开投票结果
      </label>
    </div>

    <div class="row bottom">
      <div class="col">
        <a class="historytxt" href="javascript:void(0)">历史投票</a>
      </div>
      <div class="col"></div>
      <div class="col">
        <button type="button" class="btn btn-light">取消</button>
        <button type="button" class="btn btn-primary">发起投票</button>
      </div>
    </div>
  </div>

  <script>
    let initRender = (txt) => {
      return `<div class="mb-3 row" >
                <label class="col-sm-2 col-form-label txt">${txt}</label>
                <div class="col-sm-9">
                    <input type="text" class="form-control">
               </div>
               <div class="col-sm-1">
                 <!-- 删除图标 -->
            <img class="del-icon" src="./images/x.svg" alt="" style="display:none" />
            </div>
            </div>`;
    };
    $(
      (function () {
        // 初始化的时候渲染两条数据,且不带删除符号
        for (let index = 0; index < 2; index++) {
          let initList = initRender(`选项${index + 1}`);
          $(".list").append(initList);
        }

        // 点击加号逻辑
        $(".add").click(function () {
          // TODO 待补充代码
          // 获取当前选项列表的长度,根据initRender函数中的模板字符串可得到灵感

          let listLength = $('.list .row').length;
          let initList = initRender(`选项${listLength + 1}`);
          $(".list").append(initList);
          console.log(listLength);
          if (listLength >= 2) {
            $('.del-icon').css("display", "block")
          }
        });
        // 点击 x 删除逻辑,列表小于 2 项时不显示删除图标
        $(document).on("click", ".del-icon", function () {
          // TODO 待补充代码
          // console.log($(this).parent().parent());等价于$(this).parents()[1]
          $(this).parents()[1].remove()

          let listLength = $('.list .row').length;
          for (let index = 0; index < listLength; index++) {
            $('.txt')[index].innerHTML=`选项${index+1}`
          }
           console.log(listLength);
          if (listLength> 2) {
            $('.del-icon').css("display", "block")
          }else{
            $('.del-icon').css("display", "none")
            // 切记要删除这里呀,因为判题应该是根据dom结构来滴
            $('.list .col-sm-1').remove()
          }
        });
      })()
    );
  </script>
</body>

</html>
- 1
- 2
- 3
- 4
- 5
- 6
- 7
- 8
- 9
- 10
- 11
- 12
- 13
- 14
- 15
- 16
- 17
- 18
- 19
- 20
- 21
- 22
- 23
- 24
- 25
- 26
- 27
- 28
- 29
- 30
- 31
- 32
- 33
- 34
- 35
- 36
- 37
- 38
- 39
- 40
- 41
- 42
- 43
- 44
- 45
- 46
- 47
- 48
- 49
- 50
- 51
- 52
- 53
- 54
- 55
- 56
- 57
- 58
- 59
- 60
- 61
- 62
- 63
- 64
- 65
- 66
- 67
- 68
- 69
- 70
- 71
- 72
- 73
- 74
- 75
- 76
- 77
- 78
- 79
- 80
- 81
- 82
- 83
- 84
- 85
- 86
- 87
- 88
- 89
- 90
- 91
- 92
- 93
- 94
- 95
- 96
- 97
- 98
- 99
- 100
- 101
- 102
- 103
- 104
- 105
- 106
- 107
- 108
- 109
- 110
- 111
粒粒皆辛苦
思路:
- 先直接看json文件中的数据格式,看到是一个对象中嵌套对象的格式。获取数据就好
- 一般echarts题都有初始化渲染的例子,
我们不要动,然后直接看它是怎么渲染的,照着写就行。
获取到数据后对数据进行处理,我是直接使用for of 对对象进行遍历然后将里面不同类型的值进行分类- 直接修改 option.dataset.source中的值注意最前面要加上大豆,玉米啥的中文名。最后一定得调用
渲染函数myChart.setOption(option);最终页面才会改变
题解
<!DOCTYPE html>
<html style="height: 100%">

<head>
  <meta charset="utf-8" />
  <meta http-equiv="X-UA-Compatible" content="IE=edge" />
  <title>粒粒皆辛苦</title>
  <script type="text/javascript" src="./js/echarts.min.js"></script>
  <script src="./js/axios.min.js"></script>
</head>

<body style="height: 100%; margin: 0; overflow: hidden">
  <div id="container" style="height: 80%; width: 80%; margin: 5% auto"></div>
  <script>
    var dom = document.getElementById("container");
    var option;
    var myChart = echarts.init(dom, null, {
      renderer: "canvas",
      useDirtyRect: false,
    });
    let initCharts = () => {
      option = {
        title: {
          text: "近五年 x 市粮食总产量分布以及 2022 年粮食产量比例",
          subtext: "单位(万吨)",
        },
        dataset: {
          //source -> 图表显示所需的数据格式(饼形图和折线图共用),请勿手动修改此行
          source: [
            ["全部", "2017", "2018", "2019", "2020", "2021", "2022"],
            ["小麦", 1, 1, 1, 1, 1, 1],
            ["大豆", 9, 9, 9, 9, 9, 9],
            ["马铃薯", 13, 13, 13, 13, 13, 13],
            ["玉米", 23, 23, 23, 23, 23, 23],
          ],
        },
        xAxis: { type: "category" },
        yAxis: { gridIndex: 0 },
        grid: { top: "55%" },
        series: [
          {
            type: "line",
            seriesLayoutBy: "row",
          },
          {
            type: "line",
            seriesLayoutBy: "row",
          },
          {
            type: "line",
            seriesLayoutBy: "row",
          },
          {
            type: "line",
            seriesLayoutBy: "row",
          },
          {
            type: "pie",
            id: "pie",
            radius: "30%",
            center: ["50%", "25%"],
            label: {
              // 2022 数据的百分比
              formatter: "{b} {@2022} ({d}%)",
            },
            encode: {
              itemName: "全部",
              value: "2022",
              tooltip: "2022",
            },
          },
        ],
      };
      if (option && typeof option === "object") {
        // myChart.setOption -> 设置 echarts 数据的方法
        myChart.setOption(option);
      }
      window.addEventListener("resize", myChart.resize);
    };
    initCharts();

    // TODO: 待补充代码
    var dataList = {}
    // 初始化四个数组
    var wheat = ["小麦"], soybean = ["大豆"], corn = ["玉米"], potato = ["马铃薯"]
    window.onload = function () {
      axios.get(' ./data.json')
        .then(res => {
          dataList = res.data.data;

          // 双重循环取对象值
          for (item in dataList) {
            //  console.log(dataList[item]);
            let value = dataList[item]
            for (subitem in value) {
              // console.log(value[subitem]);
              if (subitem === "wheat") {
                wheat.push(value[subitem])
              } else if (subitem === "soybean") {
                soybean.push(value[subitem])
              } else if (subitem === "corn") {
                corn.push(value[subitem])
              } else if (subitem === "potato") {
                potato.push(value[subitem])
              }
            }
          }
          option.dataset.source = [
            ["全部", "2017", "2018", "2019", "2020", "2021", "2022"],
            wheat,
            soybean,
            potato,
            corn,]

          myChart.setOption(option);
          console.log(option);
        })
    }

  </script>
</body>

</html>
- 1
- 2
- 3
- 4
- 5
- 6
- 7
- 8
- 9
- 10
- 11
- 12
- 13
- 14
- 15
- 16
- 17
- 18
- 19
- 20
- 21
- 22
- 23
- 24
- 25
- 26
- 27
- 28
- 29
- 30
- 31
- 32
- 33
- 34
- 35
- 36
- 37
- 38
- 39
- 40
- 41
- 42
- 43
- 44
- 45
- 46
- 47
- 48
- 49
- 50
- 51
- 52
- 53
- 54
- 55
- 56
- 57
- 58
- 59
- 60
- 61
- 62
- 63
- 64
- 65
- 66
- 67
- 68
- 69
- 70
- 71
- 72
- 73
- 74
- 75
- 76
- 77
- 78
- 79
- 80
- 81
- 82
- 83
- 84
- 85
- 86
- 87
- 88
- 89
- 90
- 91
- 92
- 93
- 94
- 95
- 96
- 97
- 98
- 99
- 100
- 101
- 102
- 103
- 104
- 105
- 106
- 107
- 108
- 109
- 110
- 111
- 112
- 113
- 114
- 115
- 116
- 117
- 118
- 119
- 120
- 121
- 122
- 123
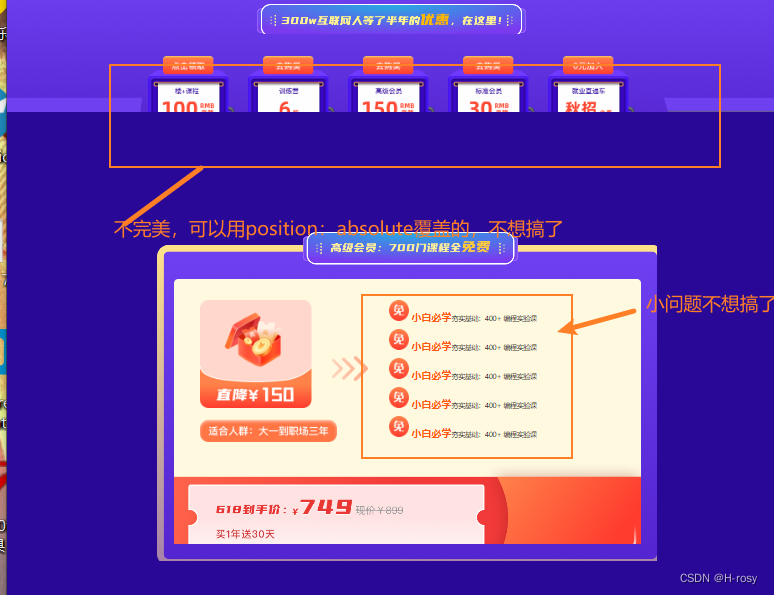
618 活动
介绍
最近蓝桥准备了很多 618 优惠,今天我们将化身蓝桥前端小工,亲自动手制作一个 618 活动页面,快来一显身手吧。
并不完美,没必要花那么多时间
下午"浅看"了一下,好像直接可以使用z-index就可以解决第一个问题。上午没想到
题解
css文件
/* TODO:待补充代码 */
*{
    margin: 0;
    padding: 0;

}
ul li{
    list-style: none;
}

.all{
    width: 1920px;
}

.top{
    background-image: url('../images/banner-bg.png') ;
    background-repeat: no-repeat;
    height: 506px;;
    position: relative;
}
.top_main{
    position: absolute;
    height: 499px;
    width: 620px;
    left: 650px;
    top: 60px;
    background: url(../images/neirong.png) no-repeat;
}
.middle{
    height: 462px; ;
    background: url('../images/stage.png') no-repeat;
    margin-top: -53px;
    margin-left: -36px;
    position: relative;
    overflow: hidden;
}

.title{
position: absolute;
width: 646px;;
height: 72px;
left: 637px;
top: 110px;
background: url('../images/title1.png') no-repeat;
}

.course{
    position: absolute;
    width: 1170px;
    height: 180.18px;
    //加一个解决第一个问题,不一定是400,值越大越在最上面
    z-index: 400;
    left: 375px; ;
   top: 236px;
}
.course ul li{
    float: left;
    height: 180.18px ;
    width: 210px;
    margin-right: 30px;

}
.course ul li:nth-child(1){
    background-image: url('../images/quan1.png');
}
.course ul li:nth-child(2){
    background-image: url('../images/quan2.png');
}
.course ul li:nth-child(3){
    background-image: url('../images/quan3.png');
}

.course ul li:nth-child(4){
    background-image: url('../images/quan4.png');
}
.course ul li:last-child{
    margin-right: 0px;
    background-image: url('../images/quan5.png');
}

.footer{
    height: 1369px;
    background-color: #290897;
    margin-top: -93px;
    position: relative;
}
.footer_body{
    position: absolute;
    left: 0;
    right: 0;
    top: 0;
    bottom: 0;
    margin: auto auto;
   background: url('../images/bg.png') no-repeat;
    width: 1200px;
    height: 789px;
}
.yellow{
    /* display: flex; */
    position: relative;
    background: #FFF9E0;
    border-radius: 10px;
    width: 1120px;
    height: 636px;
    margin: 41px;
    margin-top: 112px;
}
.hongbao{
    position: absolute;
    width: 328px;
    height: 342px;
    background: url('../images/pic.png') no-repeat;
    top: 50px;
    left: 62px;
}
.span1{
    position: absolute;
    width:88px ;
    height: 60px;
    left: 379px;
    top: 185px ;
    background:url('../images/arrow.png') no-repeat;
}
.advert{
    /* background-color: pink; */
    position: absolute;
    top: 50px;
    left: 515px;
    width: 605px;
    height: 350px;
}
.advert ul li{
    height: 50px;
    width: auto;
    margin-bottom: 20px;
}
.advert span{
    font-family: PingFangSC-Semibold;
font-size: 24px;
color: #FF5B13;
letter-spacing: 0;
line-height: 50px;
font-weight: 600;
height: 50px;
display: inline-block;
}
.coupon{
    width: 1120px;
    height: 196.39px;
    background: url('../images/coupon.png') no-repeat;
    position: absolute;
    bottom: 0px;

}
- 1
- 2
- 3
- 4
- 5
- 6
- 7
- 8
- 9
- 10
- 11
- 12
- 13
- 14
- 15
- 16
- 17
- 18
- 19
- 20
- 21
- 22
- 23
- 24
- 25
- 26
- 27
- 28
- 29
- 30
- 31
- 32
- 33
- 34
- 35
- 36
- 37
- 38
- 39
- 40
- 41
- 42
- 43
- 44
- 45
- 46
- 47
- 48
- 49
- 50
- 51
- 52
- 53
- 54
- 55
- 56
- 57
- 58
- 59
- 60
- 61
- 62
- 63
- 64
- 65
- 66
- 67
- 68
- 69
- 70
- 71
- 72
- 73
- 74
- 75
- 76
- 77
- 78
- 79
- 80
- 81
- 82
- 83
- 84
- 85
- 86
- 87
- 88
- 89
- 90
- 91
- 92
- 93
- 94
- 95
- 96
- 97
- 98
- 99
- 100
- 101
- 102
- 103
- 104
- 105
- 106
- 107
- 108
- 109
- 110
- 111
- 112
- 113
- 114
- 115
- 116
- 117
- 118
- 119
- 120
- 121
- 122
- 123
- 124
- 125
- 126
- 127
- 128
- 129
- 130
- 131
- 132
- 133
- 134
- 135
- 136
- 137
- 138
- 139
- 140
- 141
- 142
- 143
- 144
- 145
- 146
- 147
- 148
- 149
- 150
- 151
- 152
- 153
- 154
- 155
index.html
<!DOCTYPE html>
<html lang="en">
  <head>
    <meta charset="UTF-8" />
    <meta http-equiv="X-UA-Compatible" content="IE=edge" />
    <meta name="viewport" content="width=device-width, initial-scale=1.0" />
    <title>618 活动</title>
    <link rel="stylesheet" href="css/style.css" />
  </head>
  <body>
    <!-- TODO:待补充代码 -->
    <div class="all">
      <div class="top">
        <div class="top_main"></div>
      </div>
      <!-- 中部 -->
      <div class="middle">
        <div class="title">
        </div>
        <div class="course">
          <ul>
            <li>

            </li>
            <li></li>
            <li></li>
            <li></li>
            <li></li>
          </ul>
        </div>
      </div>
      <!-- 底部 -->
      <div class="footer">
        <div class="footer_body">

          <div class="yellow">
            <!-- 红包 -->
            <div class="hongbao"> </div>
              <!-- 降头 -->
            <span class="span1"></span>
            <!-- ul -->
            <div class="advert">
              <ul>
                <li>
                  <img src="./images/free.png" alt="">
                  <span>小白必学</span>夯实基础:400+ 编程实验课
                </li>
                <li>
                  <img src="./images/free.png" alt="">
                  <span>小白必学</span>夯实基础:400+ 编程实验课
                </li>
                <li>
                  <img src="./images/free.png" alt="">
                  <span>小白必学</span>夯实基础:400+ 编程实验课
                </li>
                <li>
                  <img src="./images/free.png" alt="">
                  <span>小白必学</span>夯实基础:400+ 编程实验课
                <li>
                  <img src="./images/free.png" alt="">
                  <span>小白必学</span>夯实基础:400+ 编程实验课
                </li>

              </ul>
            </div>
            <!-- coupon -->
         <div class="coupon"></div>
          </div>

        </div>
      </div>
    </div>

  </body>
</html>
- 1
- 2
- 3
- 4
- 5
- 6
- 7
- 8
- 9
- 10
- 11
- 12
- 13
- 14
- 15
- 16
- 17
- 18
- 19
- 20
- 21
- 22
- 23
- 24
- 25
- 26
- 27
- 28
- 29
- 30
- 31
- 32
- 33
- 34
- 35
- 36
- 37
- 38
- 39
- 40
- 41
- 42
- 43
- 44
- 45
- 46
- 47
- 48
- 49
- 50
- 51
- 52
- 53
- 54
- 55
- 56
- 57
- 58
- 59
- 60
- 61
- 62
- 63
- 64
- 65
- 66
- 67
- 68
- 69
- 70
- 71
- 72
- 73
- 74
- 75
- 76
资讯接口
题解
其实和模拟一的那个node题都是一样的原理
const http=require('http');

const server=http.createServer();
server.on('request',(req,res)=>{
    // 设置请求头
    res.setHeader("Content-type", "text/html;charset=utf8");
  if(req.url=="/news"){
    res.end(JSON.stringify(
        [
            {
              "channelId": "5572a108b3cdc86cf39001cd",
              "name": "国内焦点"
            },
            {
              "channelId": "5572a108b3cdc86cf39001ce",
              "name": "国际焦点"
            }
          ]
    ))
  }else{
    res.end("404")
  }
})

server.listen(8080,function(){
    console.log("8080端口启动成功");
})
- 1
- 2
- 3
- 4
- 5
- 6
- 7
- 8
- 9
- 10
- 11
- 12
- 13
- 14
- 15
- 16
- 17
- 18
- 19
- 20
- 21
- 22
- 23
- 24
- 25
- 26
- 27
绝美宋词
题解
思路:使用v-model实现双向绑定,最后使用watch监听words的变化,最后需要使用v-html指令在展示经过我们处理的字符串
<!DOCTYPE html>
<html lang="en">

<head>
  <meta charset="UTF-8" />
  <title>绝美宋词</title>
  <link rel="stylesheet" href="css/style.css" />
  <script src="./js/vue.min.js"></script>
  <script src="./js/axios.min.js"></script>
</head>

<body>
  <div id="app">
    <h1 style="text-align: center">输入关键字,找一首词</h1>
    <!-- TODO:待补充代码 -->
    <div class="search-form">
      <input type="text" id="search" v-model="words" class="search" placeholder="词牌名 词句 词人" />
      <ul class="suggestions" v-if="">
        <li v-for="item in resultList" :key="item.title">
          <span class="poet" v-html="item.poetry_content"></span>
          <span class="title" v-html=`${item.title}-${item.author}`></span>
        </li>
      </ul>
    </div>
  </div>
  <script>
    let vm = new Vue({
      el: '#app',
      // TODO:待补充代码
      data() {
        return ({
          poetryList: [],//数据库数据
          resultList: [],//最终展示数据
          words: '' //关键字
        })
      },
      mounted() {
        axios.get('./data.json').then(res => {
          this.poetryList = res.data
        })
      },
      watch: {
        words(newVal, oldVal) {
          if (newVal === '') {
            //如果关键字为空不匹配,直接返回
            this.resultList = [];
            return;
          }
          console.log("newVal值", newVal);
          this.resultList = [];
          this.poetryList.forEach(item => {
            // 处理关键字,得到含有关键字的对象
            if (item.poetry_content.includes(newVal) || item.title.includes(newVal) || item.author.includes(newVal)) {
              // 注意这里得使用深拷贝,不然在下面重新赋值resultList时会改变原有的从JSON中的数据,
              // 导致最终只能匹配一个字符
              this.resultList.push(JSON.parse(JSON.stringify(item)))
            }
          })
          // 处理高亮,全部的
          let reg = new RegExp(newVal, 'g');
          this.resultList.forEach(ele => {
            // 关键字替换
            ele.poetry_content = ele.poetry_content.replace(reg, `<span class="highlight">${newVal}</span>`)
            ele.title = ele.title.replace(reg, `<span class="highlight">${newVal}</span>`)
            ele.author = ele.author.replace(reg, `<span class="highlight">${newVal}</span>`);
          })
        },
      }
    })
  </script>
</body>

</html>
- 1
- 2
- 3
- 4
- 5
- 6
- 7
- 8
- 9
- 10
- 11
- 12
- 13
- 14
- 15
- 16
- 17
- 18
- 19
- 20
- 21
- 22
- 23
- 24
- 25
- 26
- 27
- 28
- 29
- 30
- 31
- 32
- 33
- 34
- 35
- 36
- 37
- 38
- 39
- 40
- 41
- 42
- 43
- 44
- 45
- 46
- 47
- 48
- 49
- 50
- 51
- 52
- 53
- 54
- 55
- 56
- 57
- 58
- 59
- 60
- 61
- 62
- 63
- 64
- 65
- 66
- 67
- 68
- 69
- 70
- 71
- 72
- 73
- 74
平地起高楼
题解
这个题最开始我是想直接一遍又一片for循环的后来发现好像所有的流程都是一样的,就开始尝试使用递归,但是最开始的递归时所有的数据都是单独存在的,并没有什么联系,于是我就打开了控制台反复测试每一次递归的结果,发现的确每一次递归都是正确的,但是我设置的
resultList.children=convertToTree(regions, item.id)并没有效果,导致所有的数据都无法关联,最后测试出了可以直接使用item.children,因为regions的数据是我们每一次递归都不会改变的,所以可以对其进行操作,保证最后的递归数据能够串联起来。其实就是六行代码搞定
function convertToTree(regions, rootId = "0") {
  // TODO: 在这里写入具体的实现逻辑
  // 将平铺的结构转化为树状结构,并将 rootId 下的所有子节点数组返回
  // 如果不存在 rootId 下的子节点,则返回一个空数组

  let resultList=[];
  // let testList=[]
  regions.forEach(item=>{
    // let testList=[];
    if(item.pid===rootId){
      // 符合结果就放进去,比如最先找到四川,然后就把四川
      //放进去,之后在把四川作为pid去查找下一个子代。之后在遍历子代
      resultList.push(item);
      // testList=resultList
      // 没用,因为每一次递归后的return的是resultList,所以最终会不断
      //的改变,所以得使用item.children,直接改变它的值
      //resultList.children=convertToTree(regions, item.id)
      // 为孩子做准备,题目也说了如果没有孩子就设置为空数组,不影响
      // item.children=[],这一次递归的结果就是找到这一轮符合要求的子代
      //这里把item.id作为pid继续查找子代
      item.children=convertToTree(regions, item.id)

      // console.log(convertToTree(regions, item.id));
      // resultList.children=convertToTree(regions, item.id);

      // console.log(resultList);解开注释,观察递归效果
    }
  })
  return resultList;
}

module.exports = convertToTree; // 检测需要,请勿删除
- 1
- 2
- 3
- 4
- 5
- 6
- 7
- 8
- 9
- 10
- 11
- 12
- 13
- 14
- 15
- 16
- 17
- 18
- 19
- 20
- 21
- 22
- 23
- 24
- 25
- 26
- 27
- 28
- 29
- 30
- 31
- 32
- 33
收快递了
其实也可以使用递归,向上一题平地起高楼一样的思路,就是先查找省的名字是否符合,如果不符合就查询这个省里面的市名,类似于算法中的深搜。
最初错误示例
function findRegion(regions, regionName) {
  // TODO: 在这里写入具体的实现逻辑
  // 需要从树状结构的行政信息中,遍历找到目标区域的行政信息,如输入:成都市,返回 [四川省,成都市]
  // 如果所输入的位置信息不存在,则返回 null
  let replceList=regions[0];
  // 省
  let resultArr=[regions[0].name];
  if(replceList.name===regionName){

    return resultArr;
  }

  var flag1=false;
  for(let i=0;i<replceList.children.length;i++){
    // 市级
    if(replceList.children[i].name===regionName){
      resultArr.push(regionName)
      flag1=true
      break;
    }else{
      // 区级
     replceList.children[i].children.forEach(item=>{
        if(item.name===regionName){
          flag1=true
          resultArr.push(replceList.children[i].name)
            resultArr.push(item.name)
        }
     })

    }
  }

  if(flag1){
    return resultArr;
  }else{
    return null;
  }
}
module.exports = findRegion; // 检测需要,请勿删除
- 1
- 2
- 3
- 4
- 5
- 6
- 7
- 8
- 9
- 10
- 11
- 12
- 13
- 14
- 15
- 16
- 17
- 18
- 19
- 20
- 21
- 22
- 23
- 24
- 25
- 26
- 27
- 28
- 29
- 30
- 31
- 32
- 33
- 34
- 35
- 36
- 37
- 38
- 39
题解
检测发现原来是我最初的时候就把省份定死啦,我以为最后测试的数据只有一个省原来不是!!!所以在加一层循环就好啦!!!但是这样真的很消耗时间哦,幸好不是算法竞赛,不然就给我TTL了,真给我写麻了。
需要注意的是只有for循环或者while等其他循环语句才可以使用break,所以当我使用forEach时是没有使用break跳出的。
function findRegion(regions, regionName) {
  // TODO: 在这里写入具体的实现逻辑
  // 需要从树状结构的行政信息中,遍历找到目标区域的行政信息,如输入:成都市,返回 [四川省,成都市]
  // 如果所输入的位置信息不存在,则返回 null
let resultArr=[]
  var flag1 = false;//最终返回条件
  for (let t = 0; t < regions.length; t++) {
    // 省
    if (regions[t].name === regionName) {
      resultArr.push(regions[t].name)
      flag1 = true;
      break
    } else {
      for (let i = 0; i < regions[t].children.length; i++) {
        // 市级
        if (regions[t].children[i].name === regionName) {
        //如果是省里面的市找到啦名字那就得先加入省的名字,下面区也是
        //一个道理
          resultArr.push(regions[t].name)
          resultArr.push(regionName)
          flag1 = true
          break;
        } else {
          // 区级
          regions[t].children[i].children.forEach(item => {
            if (item.name === regionName) {
              flag1 = true
              resultArr.push(regions[t].name)
              resultArr.push(regions[t].children[i].name)
              resultArr.push(item.name)
            }
          })
        }
      }
    }
  }
  if (flag1) {
    return resultArr;
  } else {
    return null;
  }
}

module.exports = findRegion; // 检测需要,请勿删除
- 1
- 2
- 3
- 4
- 5
- 6
- 7
- 8
- 9
- 10
- 11
- 12
- 13
- 14
- 15
- 16
- 17
- 18
- 19
- 20
- 21
- 22
- 23
- 24
- 25
- 26
- 27
- 28
- 29
- 30
- 31
- 32
- 33
- 34
- 35
- 36
- 37
- 38
- 39
- 40
- 41
- 42
- 43
- 44
- 45

