
热门标签
热门文章
- 1PMP 学习笔记 第4章 项目整合管理_项目移交达成共识
- 2OpenCV:解释rows,cols,channels=img2.shape,roi = img1[0:rows, 0:cols ]这行代码_roi=img[row-rows:rows,0:cols]
- 3数据库规范
- 4CSDN课的感受总结_学习dcsd的心得体会
- 5CAP和BASE理论理解-转载_cap和base理论的区别
- 6【大模型-- LoRA微调原理及代码演示】_java 版本 lora微调代码
- 7计算机网络知识点汇总(考研用)——第二章:物理层_hub的每个端口连接的网络部分是同一个网络的
- 8【Git基础】常用git命令(四)_git stash push
- 9Java面试指南:突破面试难关,成为优秀程序员的必备利器!_如何从一亿条数据里查找一条数据
- 10vue2 项目中axios二次封装以及拦截器 (全篇超级详细哦 ) 新手小白也适合哦_vue2封装axios请求
当前位置: article > 正文
Redis--------java引入redis_java 引入redis
作者:小舞很执着 | 2024-08-08 15:27:53
赞
踩
java 引入redis
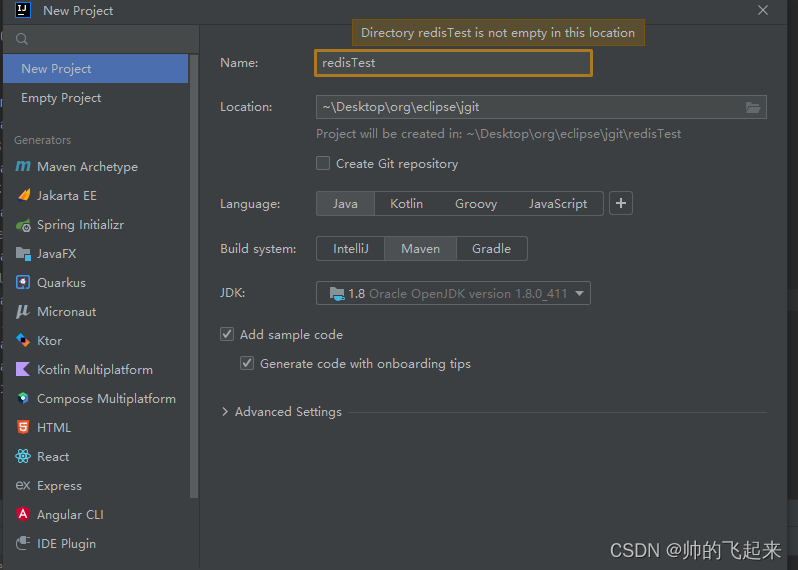
一、new一个project
用idea软件点击左上角File--》new--》project
二、引入pom依赖
- <?xml version="1.0" encoding="UTF-8"?>
- <project xmlns="http://maven.apache.org/POM/4.0.0"
- xmlns:xsi="http://www.w3.org/2001/XMLSchema-instance"
- xsi:schemaLocation="http://maven.apache.org/POM/4.0.0 http://maven.apache.org/xsd/maven-4.0.0.xsd">
- <modelVersion>4.0.0</modelVersion>
-
- <groupId>org.example</groupId>
- <artifactId>redisTest</artifactId>
- <version>1.0-SNAPSHOT</version>
-
- <parent>
- <groupId>org.springframework.boot</groupId>
- <artifactId>spring-boot-starter-parent</artifactId>
- <version>2.7.18</version>
- <relativePath/>
- </parent>
-
- <properties>
- <maven.compiler.source>8</maven.compiler.source>
- <maven.compiler.target>8</maven.compiler.target>
- <project.build.sourceEncoding>UTF-8</project.build.sourceEncoding>
- </properties>
-
- <dependencies>
- <dependency>
- <groupId>org.springframework.boot</groupId>
- <artifactId>spring-boot-starter-web</artifactId>
- </dependency>
- <dependency>
- <groupId>org.springframework.boot</groupId>
- <artifactId>spring-boot-starter-data-redis</artifactId>
- <version>2.6.7</version>
- </dependency>
-
- <dependency>
- <groupId>org.springframework.boot</groupId>
- <artifactId>spring-boot-starter-test</artifactId>
- <scope>test</scope>
- <version>2.6.7</version>
- </dependency>
- </dependencies>
- </project>

三、创建SpringBootApplication
- package org.example;
-
- import org.springframework.boot.Banner;
- import org.springframework.boot.Banner.Mode;
- import org.springframework.boot.SpringApplication;
- import org.springframework.boot.autoconfigure.SpringBootApplication;
-
- /**
- * @author zx
- * @date 2024/6/3 15:57
- */
- @SpringBootApplication(scanBasePackages = {"org.example"})
- public class application {
-
- public static void main(String[] args) {
- SpringApplication springApplication = new SpringApplication(application.class);
- // 关闭banner图案(spring 启动时的图案) http://patorjk.com/software/taag/ 在线生成图案
- /*springApplication.setBannerMode(Mode.OFF);*/
- springApplication.run();
- }
- }
其中的banner.txt(放在resources目录下就可以)就是spring启动时的图案,可以换成自己想要的,属于覆盖了原先spring启动,大佛(大家应该都见过了)
-
- // _ooOoo_ //
- // o8888888o //
- // 88" . "88 //
- // (| ^_^ |) //
- // O\ = /O //
- // ____/`---'\____ //
- // .' \\| |// `. //
- // / \\||| : |||// \ //
- // / _||||| -:- |||||- \ //
- // | | \\\ - /// | | //
- // | \_| ''\---/'' | | //
- // \ .-\__ `-` ___/-. / //
- // ___`. .' /--.--\ `. . ___ //
- // ."" '< `.___\_<|>_/___.' >'"". //
- // | | : `- \`.;`\ _ /`;.`/ - ` : | | //
- // \ \ `-. \_ __\ /__ _/ .-` / / //
- // ========`-.____`-.___\_____/___.-`____.-'======== //
- // `=---=' //
- // ^^^^^^^^^^^^^^^^^^^^^^^^^^^^^^^^^^^^^^^^^^^^^^^^^^ //
- // 佛祖保佑 永不宕机 永无BUG //
四、创建application.properties

其中填入配置信息
- # 启动端口
- server.port=9099
- ##redis settings
- ##本地连接
- spring.redis.host=127.0.0.1
- ##使用默认端口
- spring.redis.port=6379
- spring.redis.database=15
- ##未设密码,默认pwd为空
- spring.redis.password=
这里的database就是redis用的16个库中14
五、搞一个test目录,用来测试
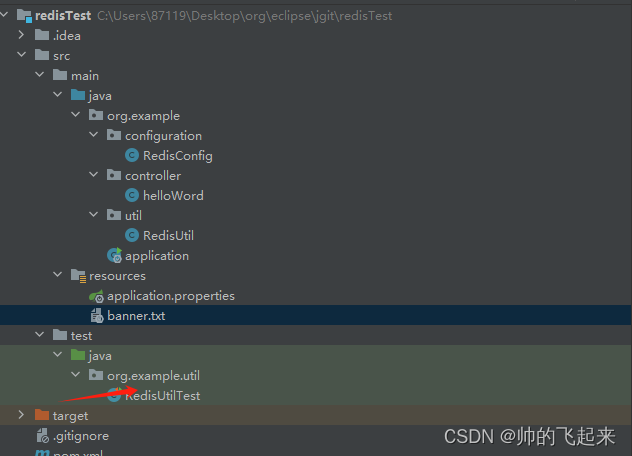
也可以直接用idea自带的ALT+Insert添加一个对应的测试用例,就会在同级目录下生成这个类
- package org.example.util;
-
- import org.junit.jupiter.api.Test;
- import org.springframework.beans.factory.annotation.Autowired;
- import org.springframework.boot.test.context.SpringBootTest;
- import org.springframework.data.redis.core.RedisTemplate;
-
- /**
- * @author zx
- * @date 2024/6/3 16:36
- */
- @SpringBootTest
- class RedisUtilTest {
-
- @Autowired
- private RedisTemplate redisTemplate;
-
- @Test
- public void test01() {
- // 第一步 存储String 字符串
- redisTemplate.opsForValue().set("ki-test", "chinese");
- Object o = redisTemplate.opsForValue().get("ki-test");
- System.out.println(o);
- }
- }
点击执行之后能够看到redis中仓库14已经有数据,但是乱码,需要配置
六、格式化字符
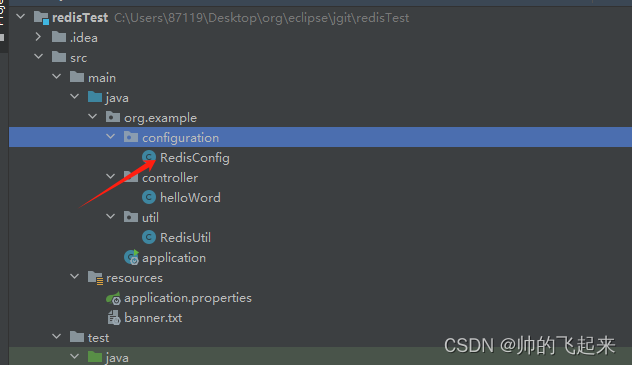
此处搞一个config,这里也就应用了spring重写bean的几种方式之一,暴力覆盖
- package org.example.configuration;
-
- import org.springframework.context.annotation.Bean;
- import org.springframework.context.annotation.Configuration;
- import org.springframework.data.redis.connection.RedisConnectionFactory;
- import org.springframework.data.redis.core.RedisTemplate;
- import org.springframework.data.redis.serializer.GenericJackson2JsonRedisSerializer;
- import org.springframework.data.redis.serializer.StringRedisSerializer;
-
- /**
- * @author zx
- * @date 2024/6/3 16:44
- */
- @Configuration
- public class RedisConfig {
-
- @Bean
- public RedisTemplate<String, Object> redisTemplate(RedisConnectionFactory factory) {
- RedisTemplate<String, Object> redisTemplate = new RedisTemplate<>();
- //key 采用String的序列化的方式
- redisTemplate.setKeySerializer(new StringRedisSerializer());
- //value的序列化采用jackson
- redisTemplate.setValueSerializer(new GenericJackson2JsonRedisSerializer());
- //hash的 key也采用String序列化的方式
- redisTemplate.setHashKeySerializer(new StringRedisSerializer());
- //hash的value也采用jackson
- redisTemplate.setHashValueSerializer(new GenericJackson2JsonRedisSerializer());
- //注入连接工厂
- redisTemplate.setConnectionFactory(factory);
- redisTemplate.afterPropertiesSet();
- return redisTemplate;
- }
- }
这一步骤之后,再跑test,结果就是ok的
参考了文章spring-boot启动时酷炫效果banner.txt
好玩的banner.txt可以参考这个SpringBoot炫酷的banner.txt
声明:本文内容由网友自发贡献,不代表【wpsshop博客】立场,版权归原作者所有,本站不承担相应法律责任。如您发现有侵权的内容,请联系我们。转载请注明出处:https://www.wpsshop.cn/w/小舞很执着/article/detail/948884
推荐阅读

相关标签

