
热门标签
热门文章
- 1IDEA中GIT常用操作_idea git常用操作
- 2java bbs源码_java开源论坛系统 jeebbs v7.0 源码包
- 3怎样在 PostgreSQL 中实现数据的异地备份?
- 4ChatGPT-4o在临床医学日常工作、论文高效撰写与项目申报、数据分析与可视化、机器学习建模中的应用
- 5WSL2-Ubuntu上安装搭建gitlab服务,并在本机运行_wsl gitlab
- 6JavaWeb 实现购物平台_一个简单的javaweb购物页面eclipse
- 7【纯血鸿蒙】——响应式布局如何实现?_响应式布局中将窗口宽度划分为两种类型
- 8CiteSpace文献分析案例讲解_citespace关键词聚类分析
- 9大模型日报 2024-07-20
- 10Win10上运行本地大模型_ollama cuda12.2
当前位置: article > 正文
深度学习入门到放弃系列 - ChatGLM3-6B微调实战_glm3 微调 使用checkpoint
作者:小舞很执着 | 2024-07-22 00:20:37
赞
踩
glm3 微调 使用checkpoint
前面我们部署了深度学习入门到放弃系列 - 阿里云人工智能平台PAI部署开源大模型chatglm3
,这一节分享一下如何根据官方资料微调ChatGLM3-6B。
LoRA微调
首先微调参考的官方推荐的微调方案和数据集,官方微调及数据集参考,只是按照官方的流程把微调跑通了。
切换到云服务器微调的目录下:
cd /opt/chatglm3/ChatGLM3/finetune_demo

# 激活虚拟环境
conda activate chatglm3_test

# 安装微调的环境
pip install -r requirements.txt
- 1
- 2
- 3
- 4
- 5
- 6
- 7
此时安装mpi4py包会报错,找了很多方法都没能解决。一怒之下把这个包删了,奇迹发生了,竟然能正常执行微调命令。所以你可以在requirements.txt直接删除mpi4py的安装包。

我们使用 AdvertiseGen 数据集来进行微调。本地下载数据集拖动到finetune_demo目录下并解压。解压命令:tar -xvf AdvertiseGen.tar.gz,并执行以下代码进行转换。
import json
from typing import Union
from pathlib import Path


def _resolve_path(path: Union[str, Path]) -> Path:
    return Path(path).expanduser().resolve()


def _mkdir(dir_name: Union[str, Path]):
    dir_name = _resolve_path(dir_name)
    if not dir_name.is_dir():
        dir_name.mkdir(parents=True, exist_ok=False)

def convert_adgen(data_dir: Union[str, Path], save_dir: Union[str, Path]):
    def _convert(in_file: Path, out_file: Path):
        _mkdir(out_file.parent)
        with open(in_file, encoding='utf-8') as fin:
            with open(out_file, 'wt', encoding='utf-8') as fout:
                for line in fin:
                    dct = json.loads(line)
                    sample = {'conversations': [{'role': 'user', 'content': dct['content']},
                                                {'role': 'assistant', 'content': dct['summary']}]}
                    fout.write(json.dumps(sample, ensure_ascii=False) + '\n')

    data_dir = _resolve_path(data_dir)
    save_dir = _resolve_path(save_dir)

    train_file = data_dir / 'train.json'
    if train_file.is_file():
        out_file = save_dir / train_file.relative_to(data_dir)
        _convert(train_file, out_file)

    dev_file = data_dir / 'dev.json'
    if dev_file.is_file():
        out_file = save_dir / dev_file.relative_to(data_dir)
        _convert(dev_file, out_file)


convert_adgen('AdvertiseGen', 'AdvertiseGen_fix')

- 1
- 2
- 3
- 4
- 5
- 6
- 7
- 8
- 9
- 10
- 11
- 12
- 13
- 14
- 15
- 16
- 17
- 18
- 19
- 20
- 21
- 22
- 23
- 24
- 25
- 26
- 27
- 28
- 29
- 30
- 31
- 32
- 33
- 34
- 35
- 36
- 37
- 38
- 39
- 40
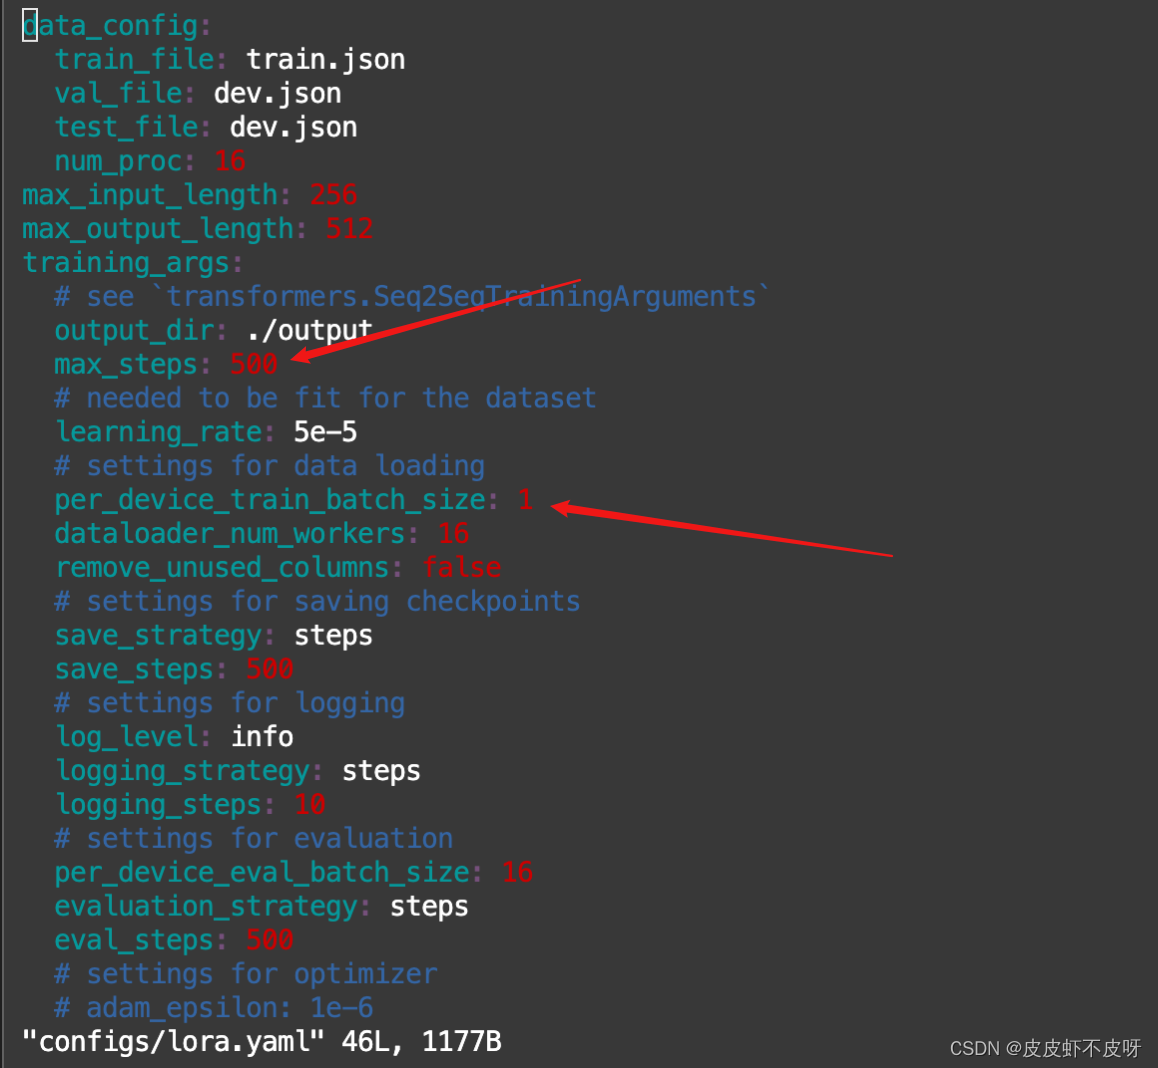
在finetune_demo目录下按照单卡GPU运行如下命令进行LoRA微调,注意:在现有的16G显存的机器上内存会爆,所以需要调整一下训练的参数,参数在configs/lora.yaml下面,如下图我调整了这两个参数max_steps和per_device_train_batch_size。
# 微调命令
python finetune_hf.py  AdvertiseGen_fix  /opt/chatglm3/ChatGLM3/chatglm3-6b  configs/lora.yaml
- 1
- 2
虽然最后训练成功了,但是训练很慢,大概有20-30分钟吧。所以有条件的可以去AutoDL租配置高些的服务器来玩,推荐4090的显卡来跑。
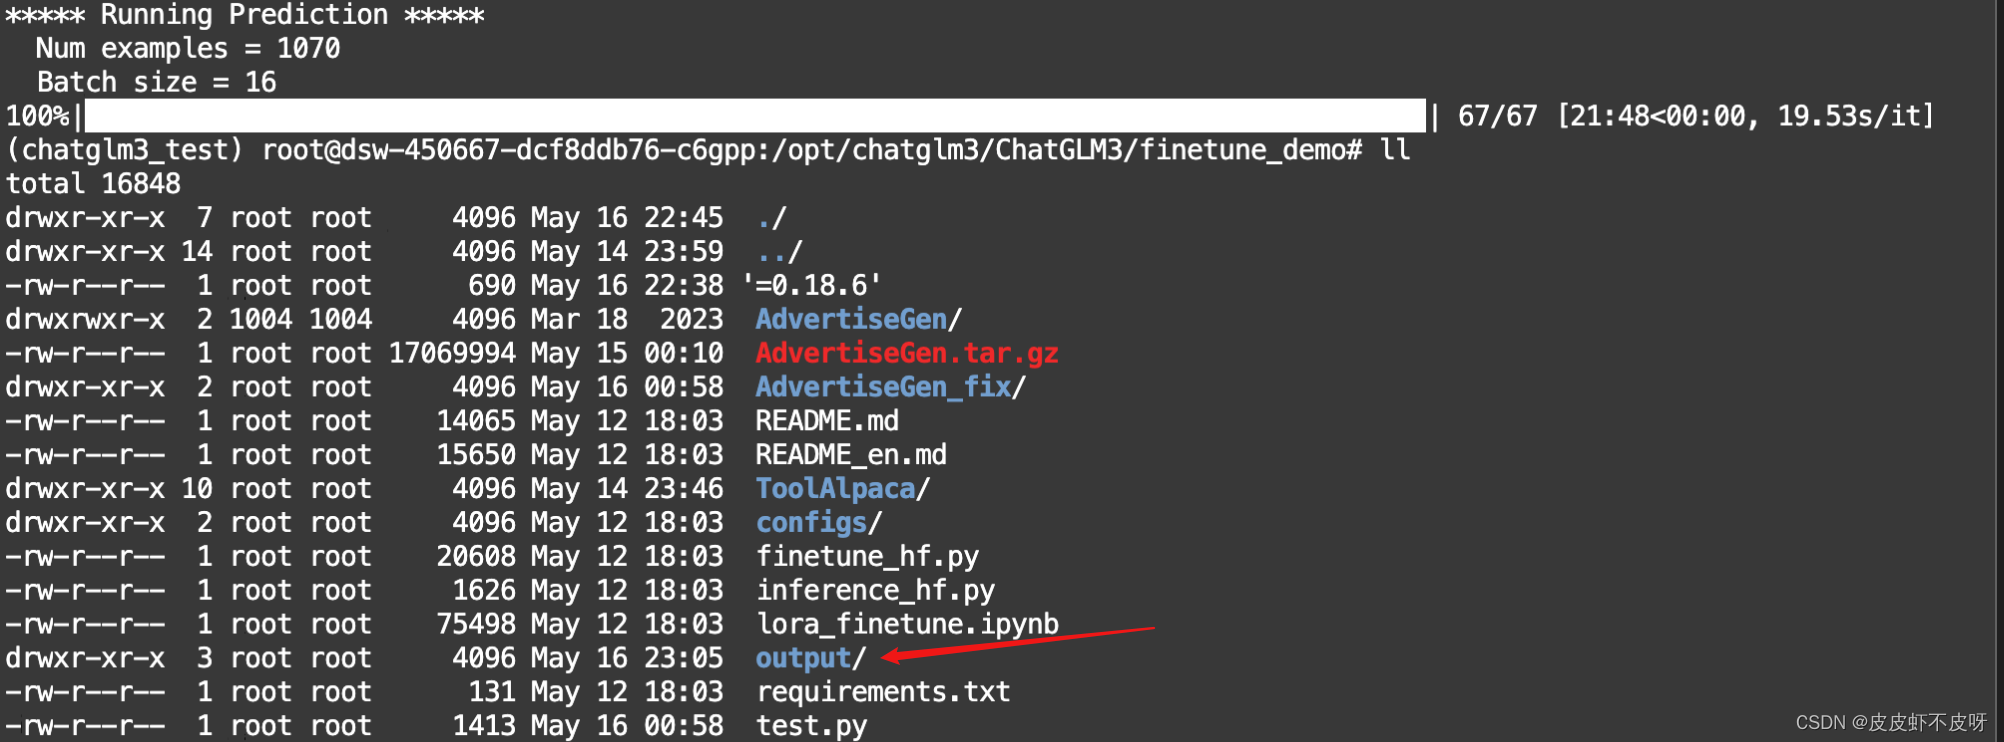
查看output输出的checkpoint文件,并使用微调的数据集进行推理
python inference_hf.py output/checkpoint-500/ --prompt "类型#裙*版型#显瘦*材质#网纱*风格#性感*裙型#百褶*裙下摆#压褶*裙长#连衣裙*裙衣门襟#拉链*裙衣门襟#套头*裙款式#拼接*裙款式#拉链*裙款式#木耳边*裙款式#抽褶*裙款式#不规则"
- 1
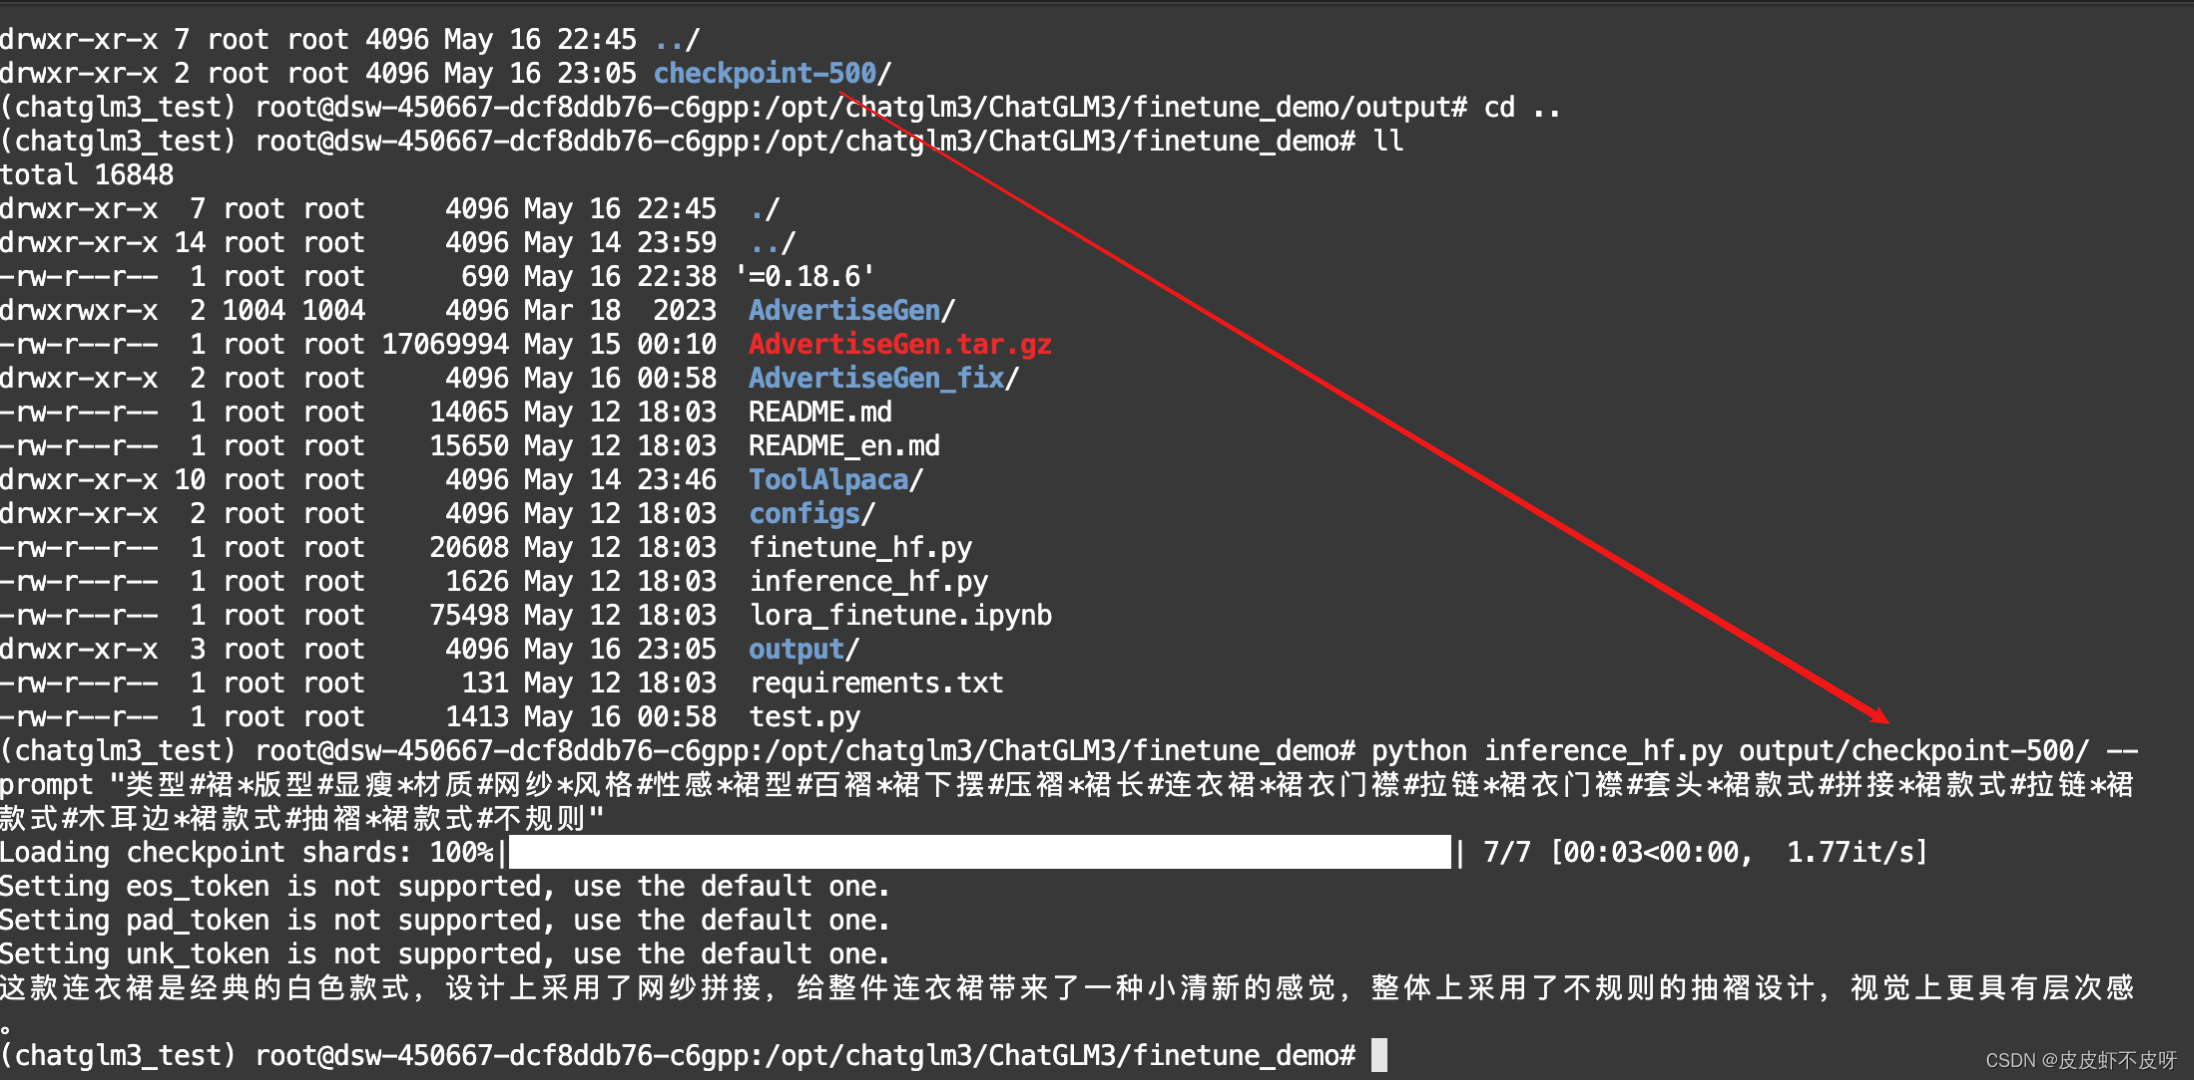
至此,使用lora微调结束。
声明:本文内容由网友自发贡献,不代表【wpsshop博客】立场,版权归原作者所有,本站不承担相应法律责任。如您发现有侵权的内容,请联系我们。转载请注明出处:https://www.wpsshop.cn/w/小舞很执着/article/detail/862730
推荐阅读
相关标签

