
热门标签
热门文章
- 1【自然语言处理三-self attention自注意是什么】
- 22021-CVPR-图像修复论文导读《TransFill: Reference-guided Image Inpainting by Merging Multiple Color and ~~~》
- 3数智化转型中的零售餐饮行业_餐饮的数据化转型分析
- 4Langfuse标注数据集
- 5【雕爷学编程】MicroPython手册之 ESP32-CAM 人脸跟踪机器人_用python获取esp-32 cam的blinker视频流
- 6【基础】1031- 前端也要懂编译:AST 从入门到上手指南
- 7有用的win11小技巧
- 8WEB电子藏书总览_css世界pdf 百度网盘
- 9第一节 docker介绍_docker的镜像可以实现 一次构建,到处运行 ,使用非常方便,我们以官方提供的基础cen
- 10Spring Boot框架介绍_springboot框架介绍
当前位置: article > 正文
Stable Video Diffusion(SVD)安装和测试_stable video diffusion 安装
作者:小小林熬夜学编程 | 2024-04-06 03:38:56
赞
踩
stable video diffusion 安装
Stable Video Diffusion(SVD)安装和测试
官网
- github | https://github.com/Stability-AI/generative-models
- Hugging Face | https://huggingface.co/stabilityai/stable-video-diffusion-img2vid-xt
- Paper | https://stability.ai/research/stable-video-diffusion-scaling-latent-video-diffusion-models-to-large-datasets
准备工作
我的系统环境
- 内存 64G
- 显存3090,24G显存
下载
git clone https://github.com/Stability-AI/generative-models
cd generative-models
- 1
- 2
下载模型
- SVD | https://huggingface.co/stabilityai/stable-video-diffusion-img2vid-xt
- SVD-XT | https://huggingface.co/stabilityai/stable-video-diffusion-img2vid
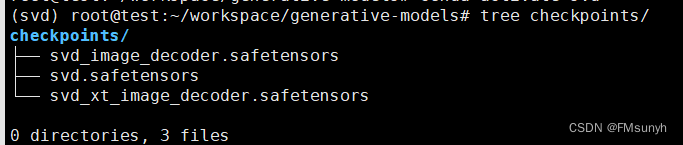
模型有4个,任意一个都可以使用,存放目录:
generative-models/checkpoints/
- 1
conda create --name svd python=3.10 -y

source activate svd
pip3 install -r requirements/pt2.txt
pip3 install .
- 1
- 2
- 3
- 4
- 5
运行
cd generative-models
streamlit run scripts/demo/video_sampling.py  --server.address  0.0.0.0  --server.port 7862
- 1
- 2
启动时,还会下载两个模型,可以手动去下载,放到以下目录:
- /root/.cache/huggingface/hub/models–laion–CLIP-ViT-H-14-laion2B-s32B-b79K
- /root/.cache/clip/ViT-L-14.pt
下载地址:
- https://huggingface.co/laion/CLIP-ViT-H-14-laion2B-s32B-b79K/tree/main
- https://openaipublic.azureedge.net/clip/models/b8cca3fd41ae0c99ba7e8951adf17d267cdb84cd88be6f7c2e0eca1737a03836/ViT-L-14.pt
或者,可以在百度云盘下载:
链接:https://pan.baidu.com/s/19SlbJp0GbZCj9VFZdCLnwQ
提取码:1234
关于models–laion–CLIP-ViT-H-14-laion2B-s32B-b79K,下载后
执行一下命令:
cp models--laion--CLIP-ViT-H-14-laion2B-s32B-b79K.tar /root/.cache/huggingface/hub/
cd /root/.cache/huggingface/hub/
tar -zxvf models--laion--CLIP-ViT-H-14-laion2B-s32B-b79K.tar
- 1
- 2
- 3
继续运行,如果报错
from scripts.demo.streamlit_helpers import *
ModuleNotFoundError: No module named 'scripts'
- 1
- 2
添加环境变量
RUN echo 'export PYTHONPATH=/generative-models:$PYTHONPATH' >>  /root/.bashrc
source /root/.bashrc
- 1
- 2
再次启动

Okay, 没有问题了
测试
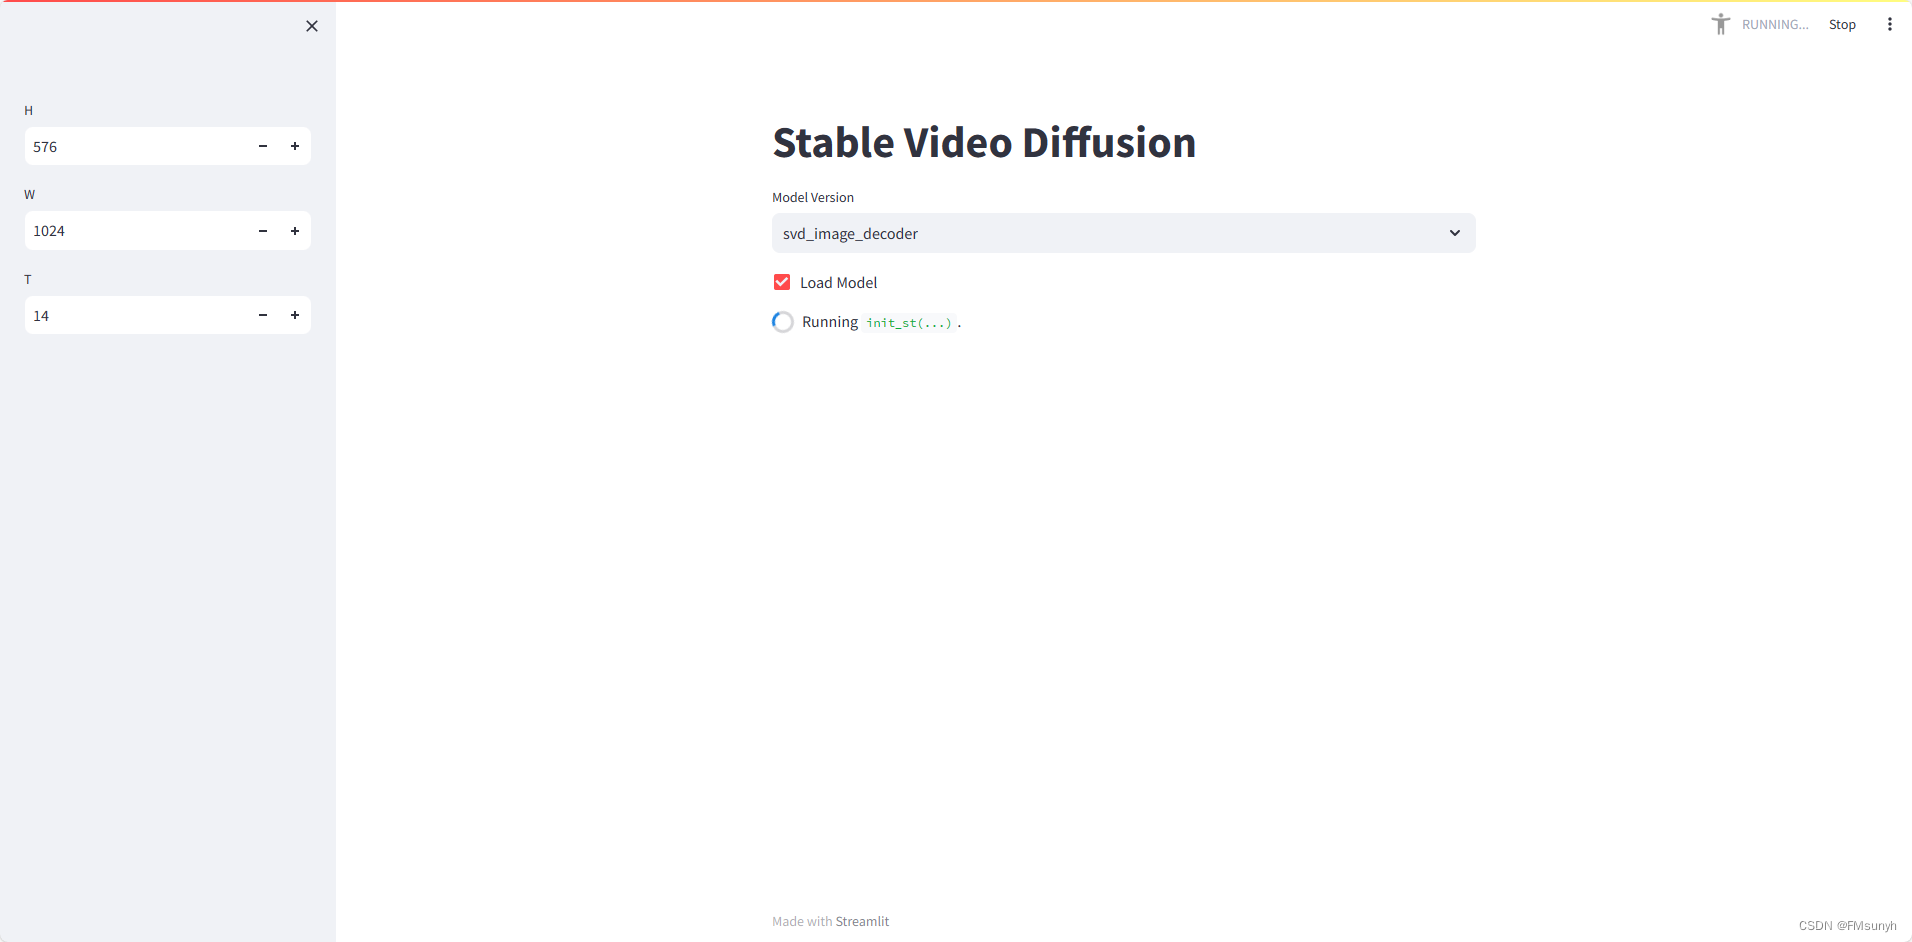
访问: 0.0.0.0:7862, 页面可以正常打开了。
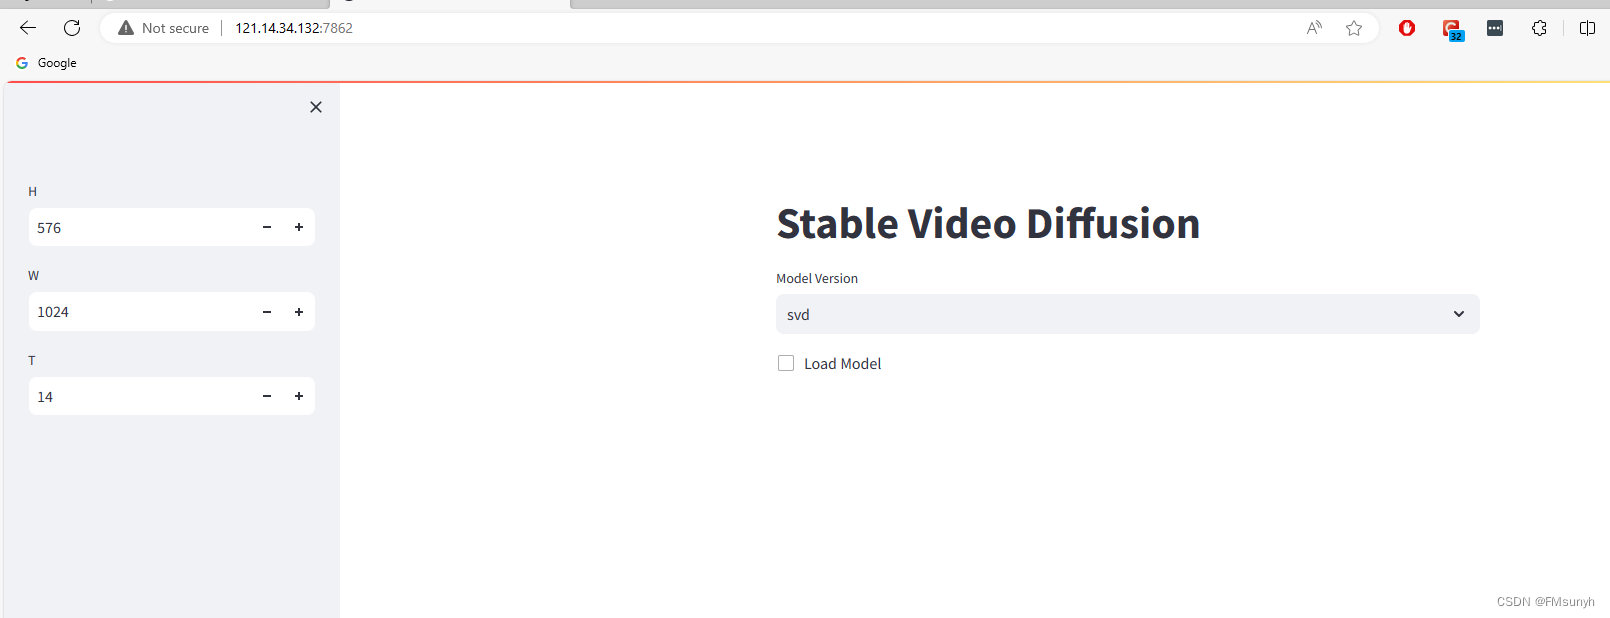
开始操作,选择模型版本,然后打钩,速度看机器配置,在我们的电脑需要2-3分钟。
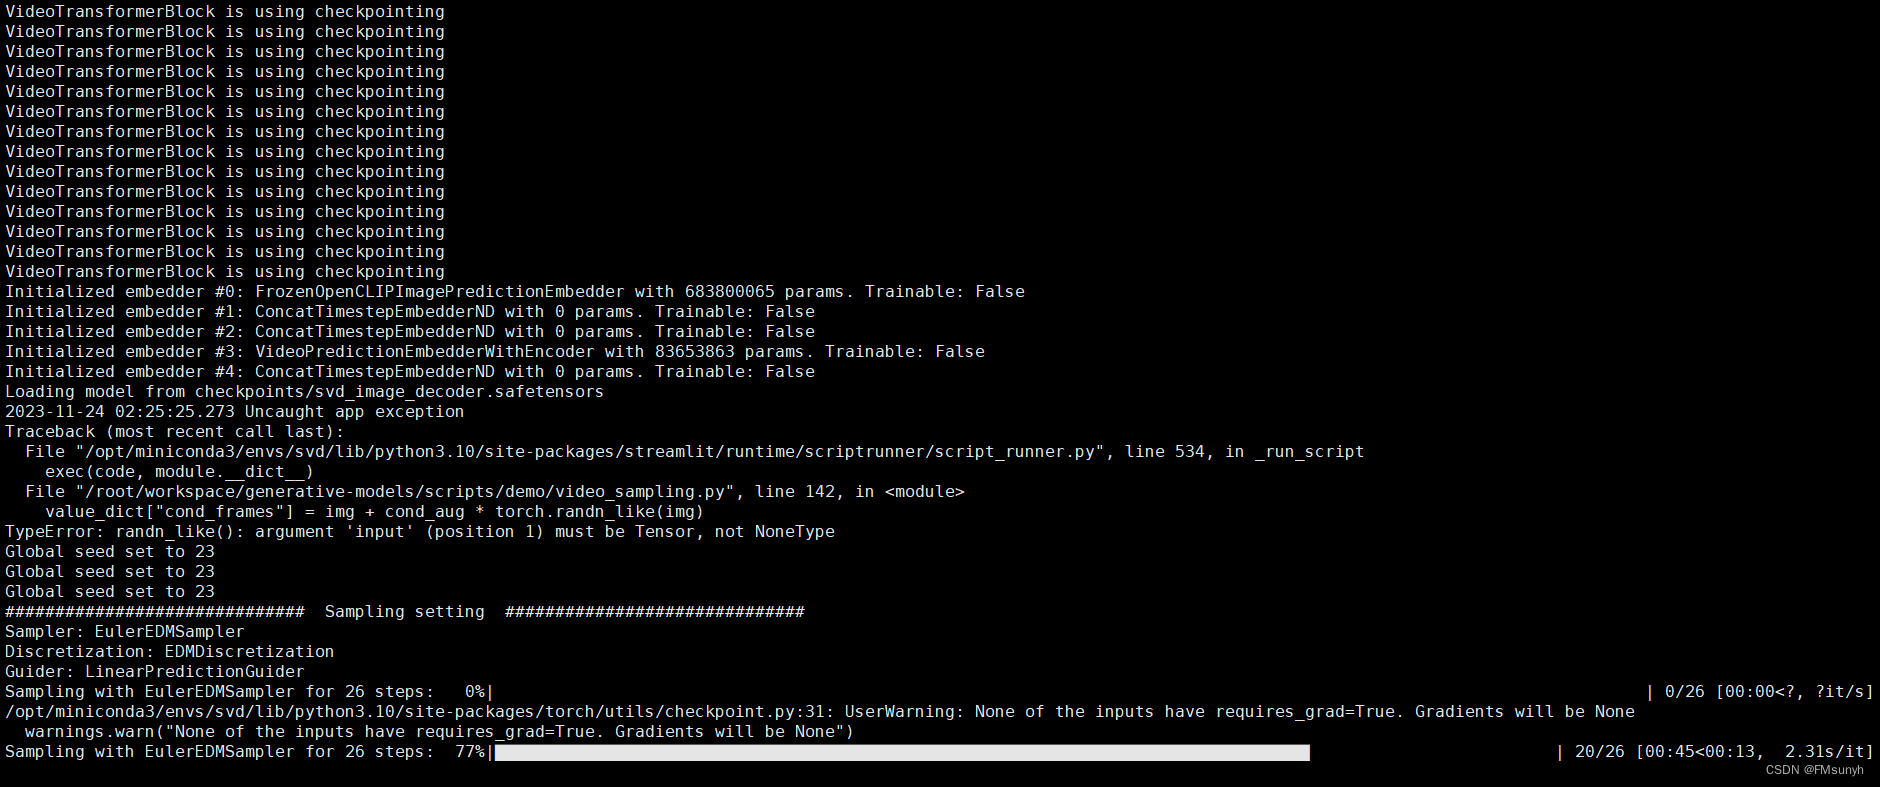
查看一下后台的情况
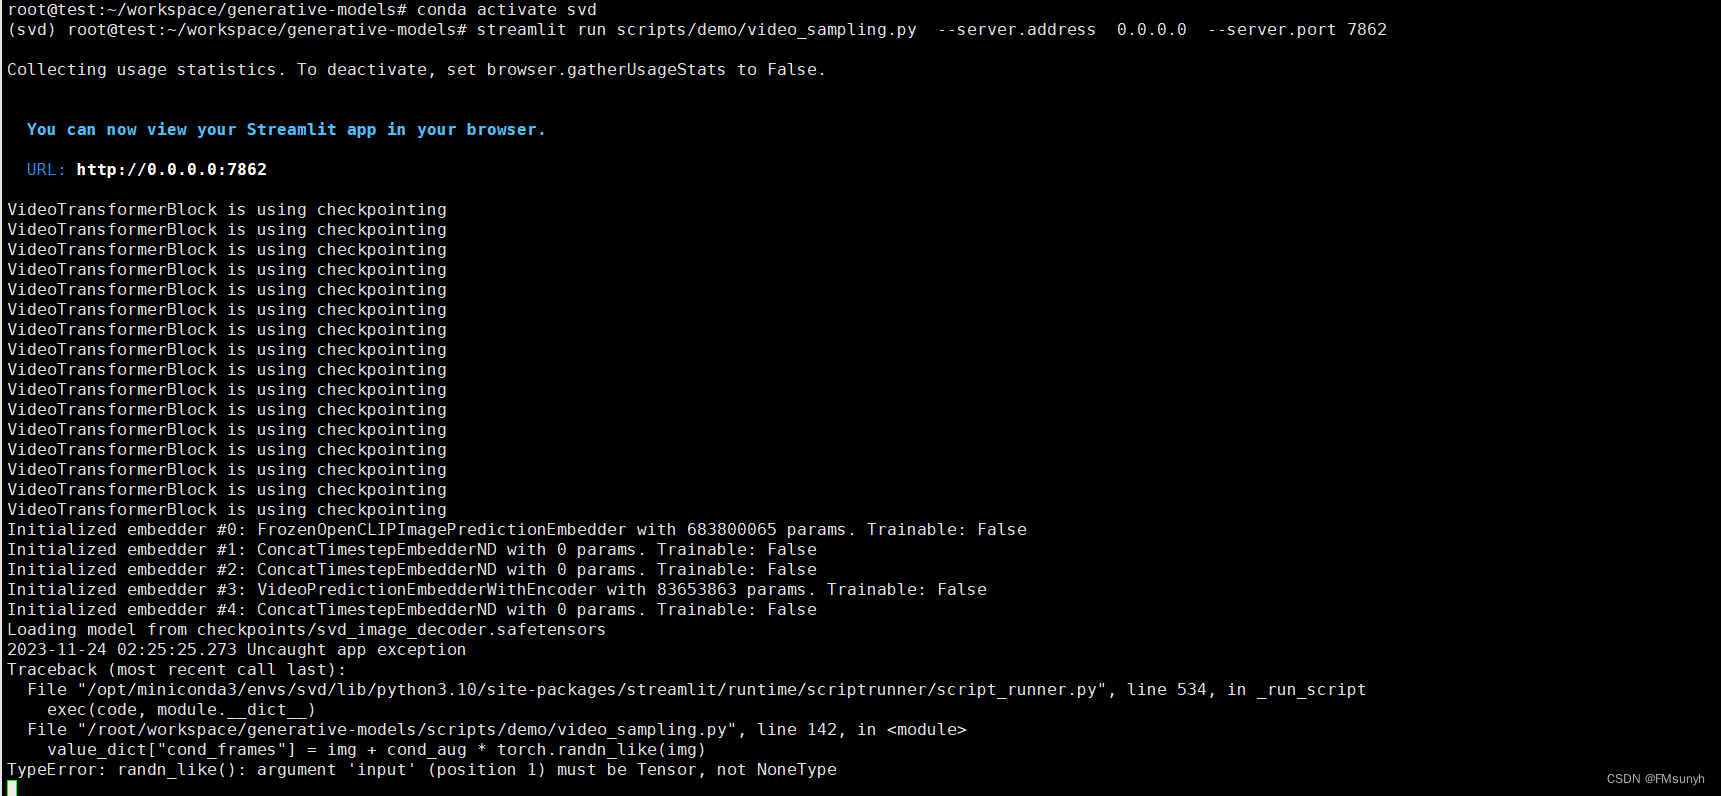
报错
  File "/opt/miniconda3/envs/svd/lib/python3.10/site-packages/streamlit/runtime/scriptrunner/script_runner.py", line 534, in _run_script
    exec(code, module.__dict__)
  File "/root/workspace/generative-models/scripts/demo/video_sampling.py", line 142, in <module>
    value_dict["cond_frames"] = img + cond_aug * torch.randn_like(img)
TypeError: randn_like(): argument 'input' (position 1) must be Tensor, not NoneType
- 1
- 2
- 3
- 4
- 5
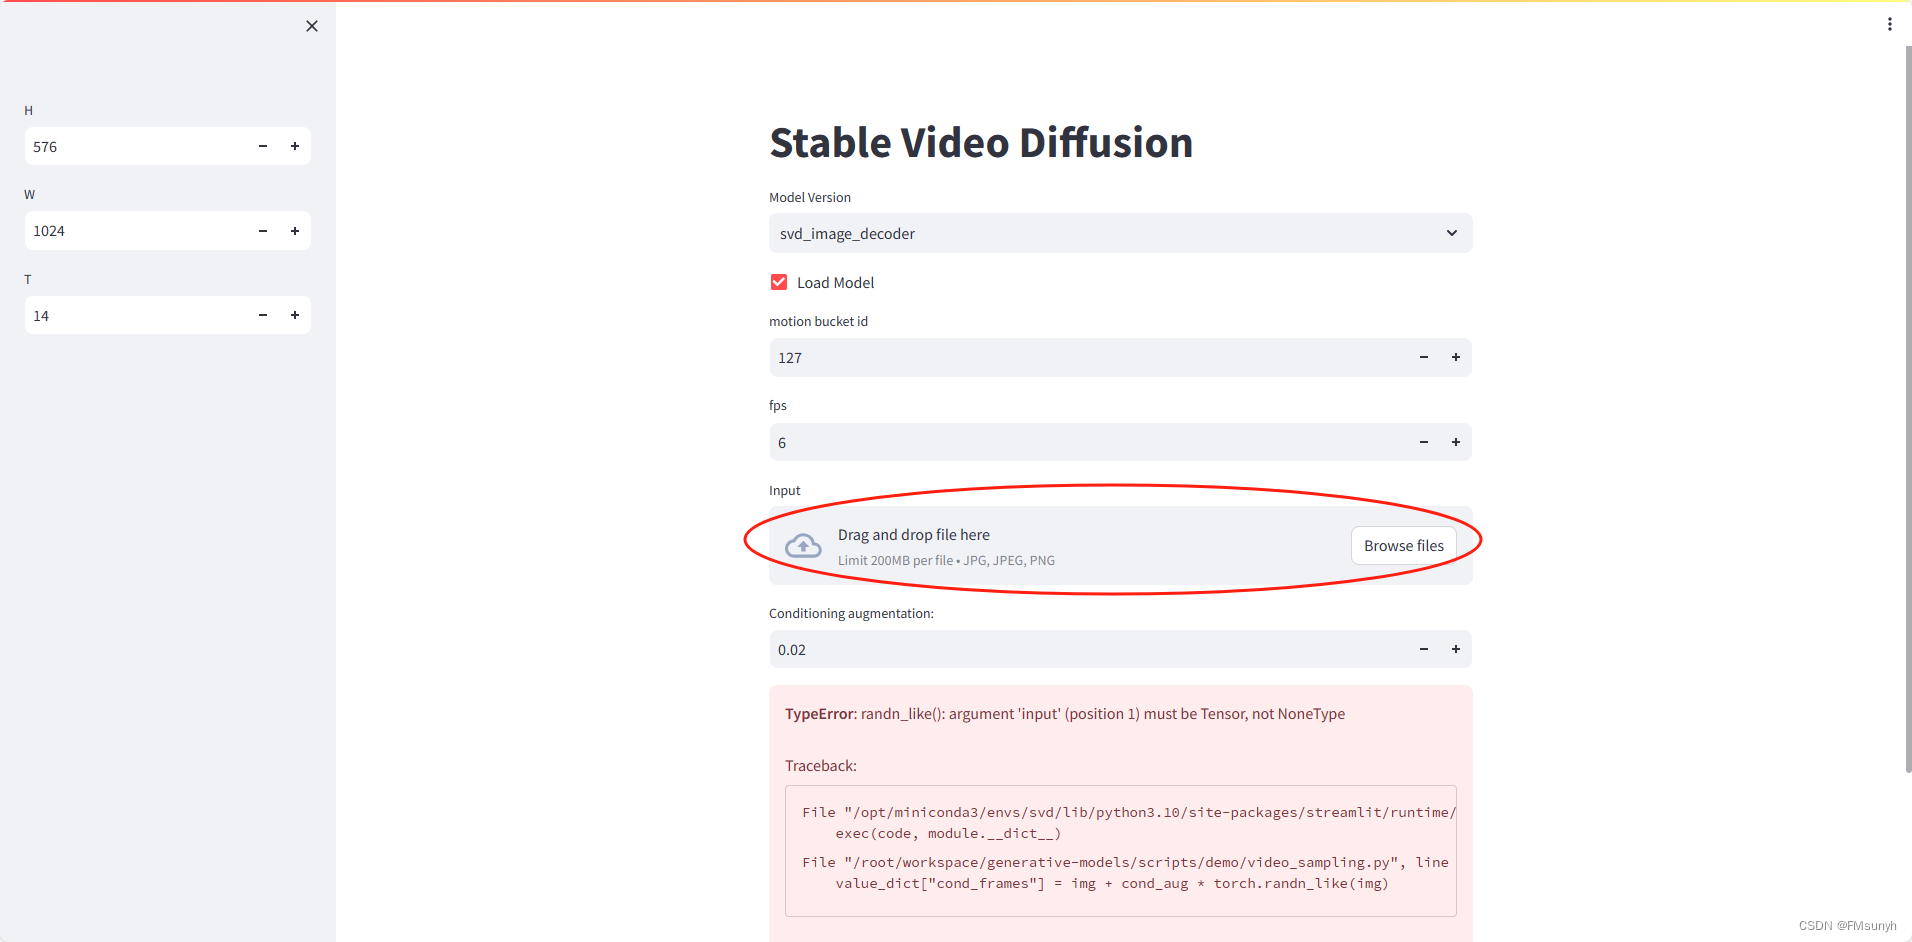
这是因为我们没有选择图片的缘故,上传图片

我们用官方提供的图片,先做测试
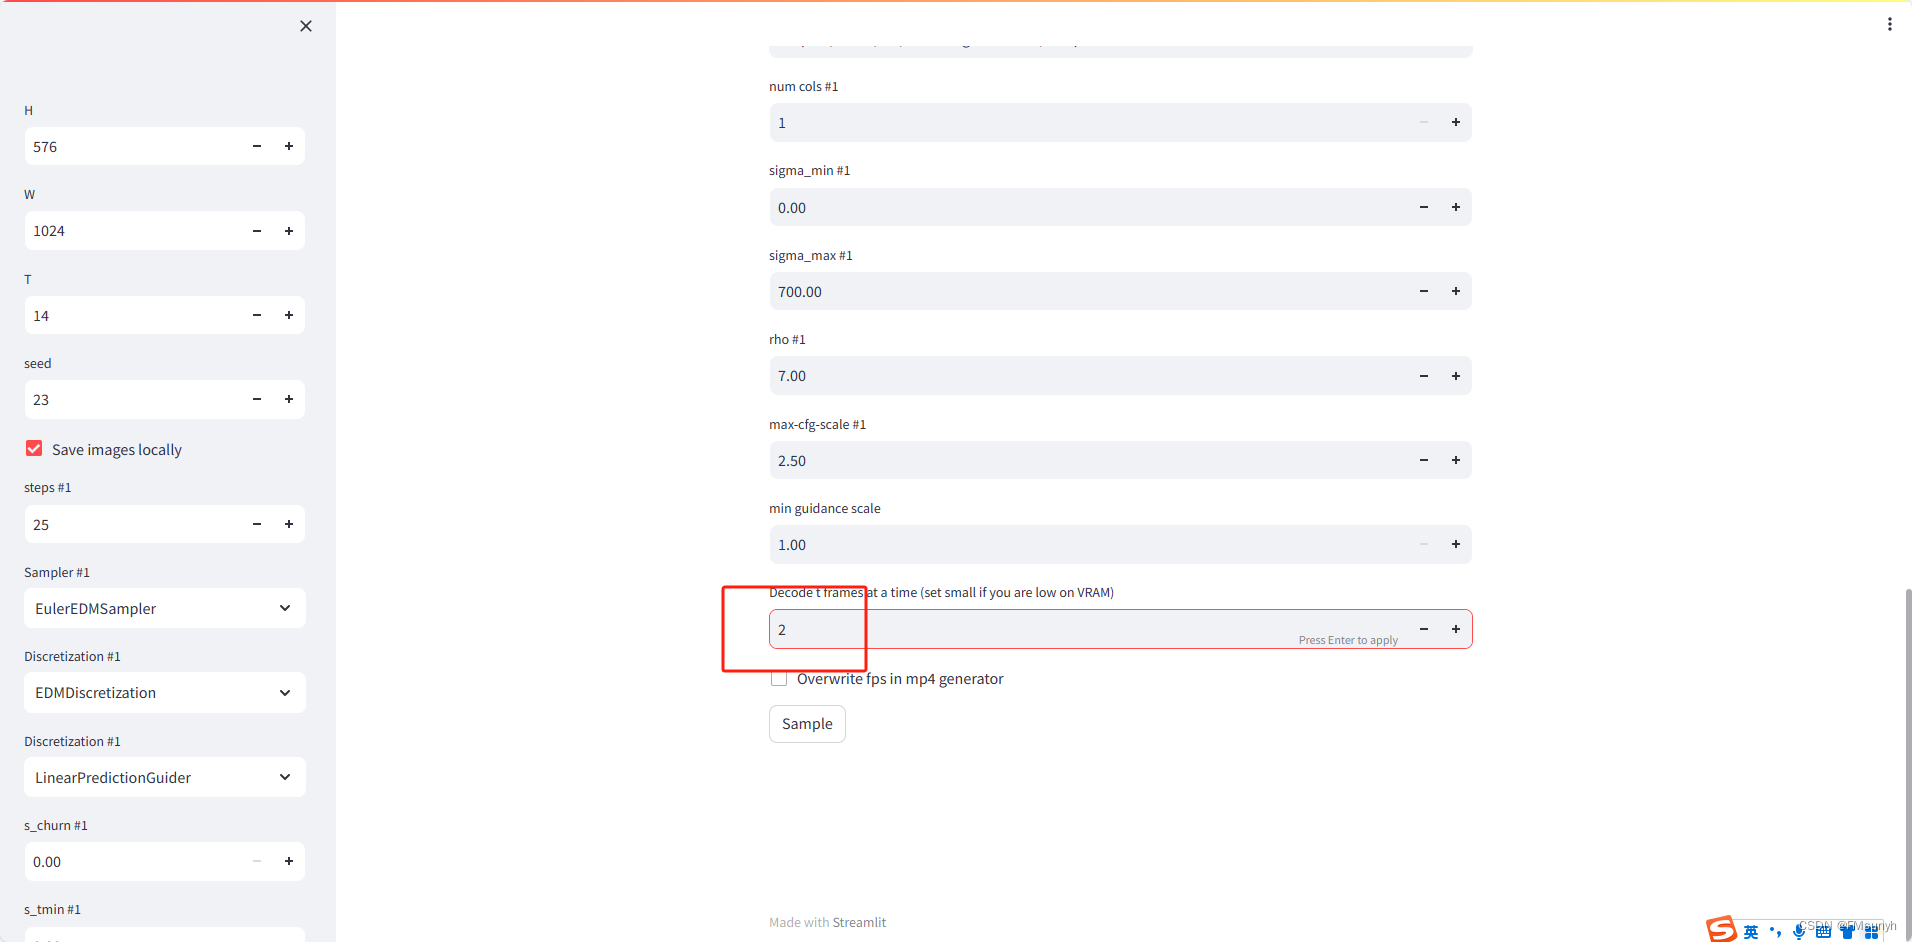
红色框的帧数改为 2,太大了,容易报显存错误,其他参数保持不变。点击 ‘Sample’,然后看一下后台
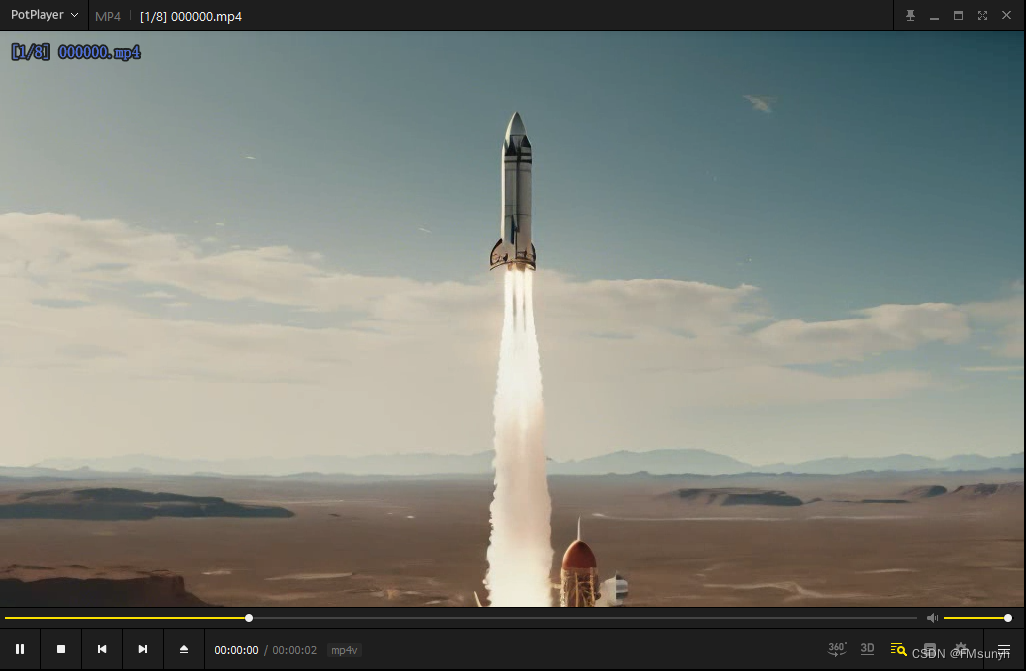
Okay,处理完之后,可以看一下视频,视频保存在:
generative-models/outputs/demo/vid/svd_image_decoder/samples
- 1
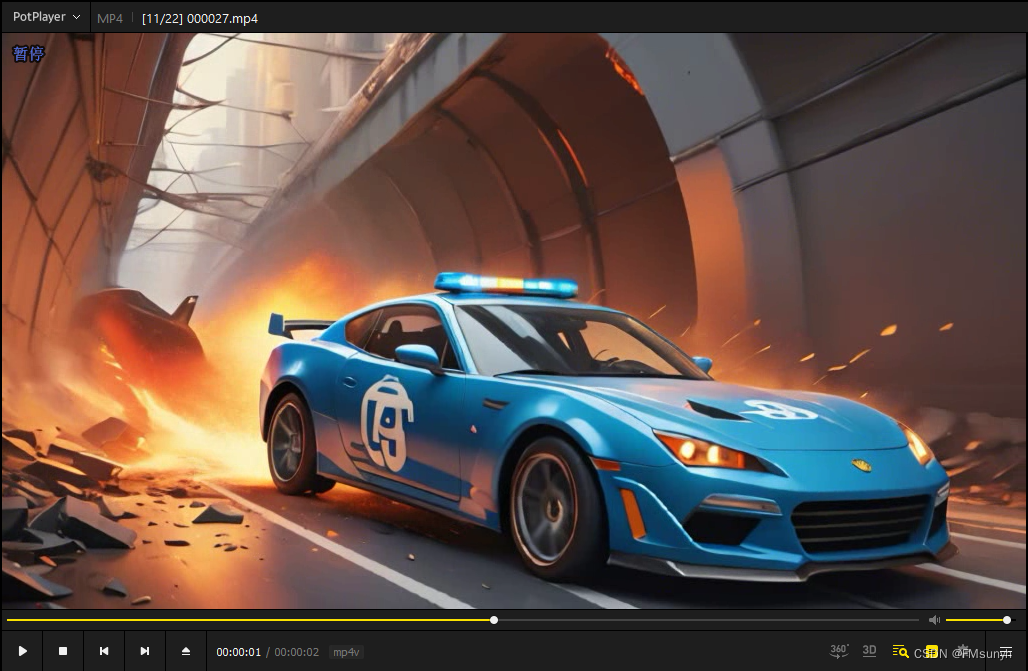
可以看到一个2秒的视频,已经生成了
如果在最后生成视频时报错
OpenCV: FFMPEG: tag 0x5634504d/'MP4V' is not supported with codec id 12 and format 'mp4 / MP4 (MPEG-4 Part 14)'
OpenCV: FFMPEG: fallback to use tag 0x7634706d/'mp4v'
sh: 1: ffmpeg: not found
2023-11-30 02:09:51.201 Uncaught app exception
Traceback (most recent call last):
  File "/opt/miniconda3/envs/svd/lib/python3.10/site-packages/streamlit/runtime/scriptrunner/script_runner.py", line 534, in _run_script
    exec(code, module.__dict__)
  File "/root/workspace/generative-models/scripts/demo/video_sampling.py", line 200, in <module>
    save_video_as_grid_and_mp4(samples, save_path, T, fps=saving_fps)
  File "/root/workspace/generative-models/scripts/demo/streamlit_helpers.py", line 883, in save_video_as_grid_and_mp4
    with open(video_path_h264, "rb") as f:
FileNotFoundError: [Errno 2] No such file or directory: 'outputs/demo/vid/svd_image_decoder/samples/000041_h264.mp4'
- 1
- 2
- 3
- 4
- 5
- 6
- 7
- 8
- 9
- 10
- 11
- 12
解决办法:
cd generative-models
vim ./scripts/demo/streamlit_helpers.py
- 1
- 2
找到“cv2.VideoWriter_fourcc”, 修改为
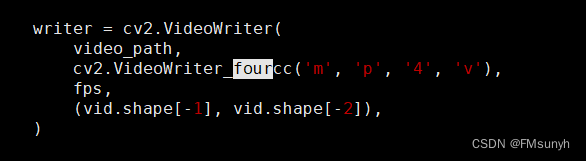
如果没有安装ffmpeg,就安装安装一下
apt install ffmpeg
- 1
Okay 搞定
AIGC群交流


声明:本文内容由网友自发贡献,不代表【wpsshop博客】立场,版权归原作者所有,本站不承担相应法律责任。如您发现有侵权的内容,请联系我们。转载请注明出处:https://www.wpsshop.cn/w/小小林熬夜学编程/article/detail/369537
推荐阅读
相关标签

