
热门标签
热门文章
- 1解读:DUSt3R: Geometric 3D Vision Made Easy
- 2基于springboot实现社区智慧养老监护管理平台系统项目【项目源码+论文说明】_基于springboot的养老院管理系统
- 3Failed to build gevent Could not build wheels for gevent which use PEP 517 ... ...
- 4SparkStreaming的案例及应用_sparkstreaming案例
- 5阿里终于开源数字人技术!!
- 6warning: LF will be replaced by CRLF问题解决方法_warning lf will be replaced by crlf
- 7Time-LLM :超越了现有时间序列预测模型的学习器
- 8LeetCode:242.有效字母的异位词
- 9STM32第二十二课:LVGL的移植和屏幕创建(7.11版本)_移植lvgl教程
- 10Java项目:基于SSM框架实现的健康综合咨询问诊平台【ssm+B/S架构+源码+数据库+毕业论文】
当前位置: article > 正文
docker 安装 fastdfs_docker安装fastdfs
作者:喵喵爱编程 | 2024-08-16 03:55:48
赞
踩
docker安装fastdfs
目录
Docker基础相关内容请跳转 https://blog.csdn.net/ZGSDMAN/article/details/131949201
安装前准备:一个云服务器或本地服务器
一、安装docker(已安装的跳过这一步)
- 1.先删除原有的docker
- yum remove docker \
- docker-client \
- docker-client-latest \
- docker-common \
- docker-latest \
- docker-latest-logrotate \
- docker-logrotate \
- docker-engine
-
- 2.安装gcc环境
- yum -y install gcc
- yum -y install gcc-c++
-
- 3.配置docker仓库:(docker hub被墙了,这用的是国内阿里云的仓库)
- yum install -y yum-utils
- yum-config-manager --add-repo http://mirrors.aliyun.com/docker-ce/linux/centos/docker-ce.repo
-
- 4.更新yum索引
- yum makecache fast
-
- 5.安装docker
- yum install -y docker-ce docker-ce-cli containerd.io
-
- 6.启动docker
- systemctl start docker
-
- 7.配置镜像加速:此处采用的阿里云的:(登录阿里云,找到控制台-容器镜像服务-镜像工具-镜像加速器)
- sudo mkdir -p /etc/docker
- sudo tee /etc/docker/daemon.json <<-'EOF'
- {
- "registry-mirrors": ["https://pdg27cfz.mirror.aliyuncs.com"]
- }
- EOF
- sudo systemctl daemon-reload
- sudo systemctl restart docker
-
- 8.测试docker(运行一个镜像,本地没有会先去官网仓库拉取)
- docker run hello-world
-
- 结果:打印了hello-world信息,安装完成

二、安装fastdfs
- 1.搜索fastdfs镜像
- docker search fastdfs
-
- 2.下载镜像,此处用的是morunchang/fastdfs镜像
- docker pull morunchang/fastdfs
-
- 3.安装tracker
- docker run -d --name tracker --net=host morunchang/fastdfs sh tracker.sh
-
- 4.安装storage
- docker run -d --name storage --net=host -e TRACKER_IP=服务器公网ip:22122 -e GROUP_NAME=group1 morunchang/fastdfs sh storage.sh
-
三、开放端口
- 1.开放80,22122,23000端口,云服务器防火墙策略也要开(注意:如果关闭防火墙,云服务器策略也要开)
- firewall-cmd --zone=public --add-port=80/tcp --permanent
- firewall-cmd --zone=public --add-port=22122/tcp --permanent
- firewall-cmd --zone=public --add-port=23000/tcp --permanent
-
- 2.重新加载配置
- firewall-cmd --reload
-
- 3.查看防火墙锁开放的端口
- firewall-cmd --zone=public --list-ports
-
四、修改nginx配置
- 1.进入storage
- docker exec -it storage容器id /bin/bash
-
- 2.找到nginx配置
- whereis nginx --->会看到目录在/etc/nginx/下
-
- 3.修改nginx配置
- vi /etc/nginx/conf/nginx.conf
-
- 4.修改监听端口(listen)和访问地址(server_name),我这将端口修改为了80,访问地址为公网ip
-
- 5.退出容器
- exit
-
- 6.重启 storage
- docker restart storage容器id
五、访问nginx测试

六、java实现文件上传
源码地址:
https://download.csdn.net/download/ZGSDMAN/88738625
目录结构:
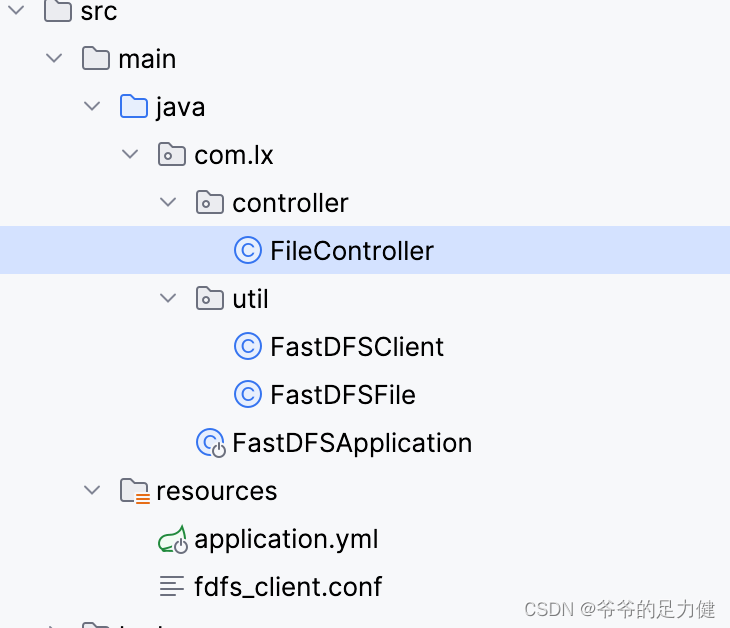
1.创建一个Maven项目
- 1.导入maven依赖
- <!--springboot工程需要继承的父工程-->
- <parent>
- <groupId>org.springframework.boot</groupId>
- <artifactId>spring-boot-starter-parent</artifactId>
- <version>2.1.8.RELEASE</version>
- </parent>
-
-
- <dependencies>
- <!--web开发的起步依赖-->
- <dependency>
- <groupId>org.springframework.boot</groupId>
- <artifactId>spring-boot-starter-web</artifactId>
- </dependency>
- </dependencies>
- 2.创建启动类
- @SpringBootApplication
- public class FastDFSApplication {
- public static void main(String[] args) {
- SpringApplication.run(FastDFSApplication.class,args);
- }
- }
-
- ## 此时项目就可以正常启动了,只是没有任何接口可以访问
2.集成fastdfs
- 1.导入fastdfs依赖
- <dependency>
- <groupId>net.oschina.zcx7878</groupId>
- <artifactId>fastdfs-client-java</artifactId>
- <version>1.27.0.0</version>
- </dependency>
-
- 2.在application.yml中配置fastdfs
- spring:
- servlet:
- multipart:
- max-file-size: 10MB
- max-request-size: 10MB
-
- 3.增加fastdfs连接配置fdfs_client.conf
- connect_timeout = 60
- network_timeout = 60
- charset = UTF-8
- http.tracker_http_port = 80 #返回访问地址的端口号,就是nginx的端口号
- tracker_server = 你的公网IP地址:22122
-
- 4.创建文件实体
- package com.lx.util;
-
- public class FastDFSFile {
- //文件名字
- private String name;
- //文件内容
- private byte[] content;
- //文件扩展名
- private String ext;
- //文件MD5摘要值
- private String md5;
- //文件创建作者
- private String author;
-
- public FastDFSFile(String name, byte[] content, String ext, String height,
- String width, String author) {
- super();
- this.name = name;
- this.content = content;
- this.ext = ext;
- this.author = author;
- }
-
- public FastDFSFile(String name, byte[] content, String ext) {
- super();
- this.name = name;
- this.content = content;
- this.ext = ext;
- }
-
- public String getName() {
- return name;
- }
-
- public void setName(String name) {
- this.name = name;
- }
-
- public byte[] getContent() {
- return content;
- }
-
- public void setContent(byte[] content) {
- this.content = content;
- }
-
- public String getExt() {
- return ext;
- }
-
- public void setExt(String ext) {
- this.ext = ext;
- }
-
- public String getMd5() {
- return md5;
- }
-
- public void setMd5(String md5) {
- this.md5 = md5;
- }
-
- public String getAuthor() {
- return author;
- }
-
- public void setAuthor(String author) {
- this.author = author;
- }
- }
-
- 5.创建工具类
- package com.lx.util;
-
- import org.csource.common.NameValuePair;
- import org.csource.fastdfs.*;
- import org.slf4j.LoggerFactory;
- import org.springframework.core.io.ClassPathResource;
-
- import java.io.ByteArrayInputStream;
- import java.io.IOException;
- import java.io.InputStream;
-
- public class FastDFSClient {
-
- private static org.slf4j.Logger logger = LoggerFactory.getLogger(FastDFSClient.class);
-
- /***
- * 初始化加载FastDFS的TrackerServer配置
- */
- static {
- try {
- String filePath = new ClassPathResource("fdfs_client.conf").getFile().getAbsolutePath();
- ClientGlobal.init(filePath);
- } catch (Exception e) {
- logger.error("FastDFS Client Init Fail!",e);
- }
- }
-
- /***
- * 文件上传
- * @param file
- * @return 1.文件的组名 2.文件的路径信息
- */
- public static String[] upload(FastDFSFile file) {
- //获取文件的作者
- NameValuePair[] meta_list = new NameValuePair[1];
- meta_list[0] = new NameValuePair("author", file.getAuthor());
-
- //接收返回数据
- String[] uploadResults = null;
- StorageClient storageClient=null;
- try {
- //创建StorageClient客户端对象
- storageClient = getTrackerClient();
-
- /***
- * 文件上传
- * 1)文件字节数组
- * 2)文件扩展名
- * 3)文件作者
- */
- uploadResults = storageClient.upload_file(file.getContent(), file.getExt(), meta_list);
- } catch (Exception e) {
- logger.error("Exception when uploadind the file:" + file.getName(), e);
- }
-
- if (uploadResults == null && storageClient!=null) {
- logger.error("upload file fail, error code:" + storageClient.getErrorCode());
- }
- //获取组名
- String groupName = uploadResults[0];
- //获取文件存储路径
- String remoteFileName = uploadResults[1];
- return uploadResults;
- }
-
- /***
- * 获取文件信息
- * @param groupName:组名
- * @param remoteFileName:文件存储完整名
- * @return
- */
- public static FileInfo getFile(String groupName, String remoteFileName) {
- try {
- StorageClient storageClient = getTrackerClient();
- return storageClient.get_file_info(groupName, remoteFileName);
- } catch (Exception e) {
- logger.error("Exception: Get File from Fast DFS failed", e);
- }
- return null;
- }
-
- /***
- * 文件下载
- * @param groupName
- * @param remoteFileName
- * @return
- */
- public static InputStream downFile(String groupName, String remoteFileName) {
- try {
- //创建StorageClient
- StorageClient storageClient = getTrackerClient();
-
- //下载文件
- byte[] fileByte = storageClient.download_file(groupName, remoteFileName);
- InputStream ins = new ByteArrayInputStream(fileByte);
- return ins;
- } catch (Exception e) {
- logger.error("Exception: Get File from Fast DFS failed", e);
- }
- return null;
- }
-
- /***
- * 文件删除
- * @param groupName
- * @param remoteFileName
- * @throws Exception
- */
- public static void deleteFile(String groupName, String remoteFileName)
- throws Exception {
- //创建StorageClient
- StorageClient storageClient = getTrackerClient();
-
- //删除文件
- int i = storageClient.delete_file(groupName, remoteFileName);
- }
-
- /***
- * 获取Storage组
- * @param groupName
- * @return
- * @throws IOException
- */
- public static StorageServer[] getStoreStorages(String groupName)
- throws IOException {
- //创建TrackerClient
- TrackerClient trackerClient = new TrackerClient();
- //获取TrackerServer
- TrackerServer trackerServer = trackerClient.getConnection();
- //获取Storage组
- return trackerClient.getStoreStorages(trackerServer, groupName);
- }
-
- /***
- * 获取Storage信息,IP和端口
- * @param groupName
- * @param remoteFileName
- * @return
- * @throws IOException
- */
- public static ServerInfo[] getFetchStorages(String groupName,
- String remoteFileName) throws IOException {
- TrackerClient trackerClient = new TrackerClient();
- TrackerServer trackerServer = trackerClient.getConnection();
- return trackerClient.getFetchStorages(trackerServer, groupName, remoteFileName);
- }
-
- /***
- * 获取Tracker服务地址
- * @return
- * @throws IOException
- */
- public static String getTrackerUrl() throws IOException {
- return "http://"+getTrackerServer().getInetSocketAddress().getHostString()+":"+ClientGlobal.getG_tracker_http_port()+"/";
- }
-
- /***
- * 获取Storage客户端
- * @return
- * @throws IOException
- */
- private static StorageClient getTrackerClient() throws IOException {
- TrackerServer trackerServer = getTrackerServer();
- StorageClient storageClient = new StorageClient(trackerServer, null);
- return storageClient;
- }
-
- /***
- * 获取Tracker
- * @return
- * @throws IOException
- */
- private static TrackerServer getTrackerServer() throws IOException {
- TrackerClient trackerClient = new TrackerClient();
- TrackerServer trackerServer = trackerClient.getConnection();
- return trackerServer;
- }
- }
-
- 6.编写controller测试方法
- package com.lx.controller;
-
-
- import com.lx.util.FastDFSClient;
- import com.lx.util.FastDFSFile;
- import org.springframework.util.StringUtils;
- import org.springframework.web.bind.annotation.PostMapping;
- import org.springframework.web.bind.annotation.RequestMapping;
- import org.springframework.web.bind.annotation.RestController;
- import org.springframework.web.multipart.MultipartFile;
-
- @RestController
- @RequestMapping("/file")
- public class FileController {
-
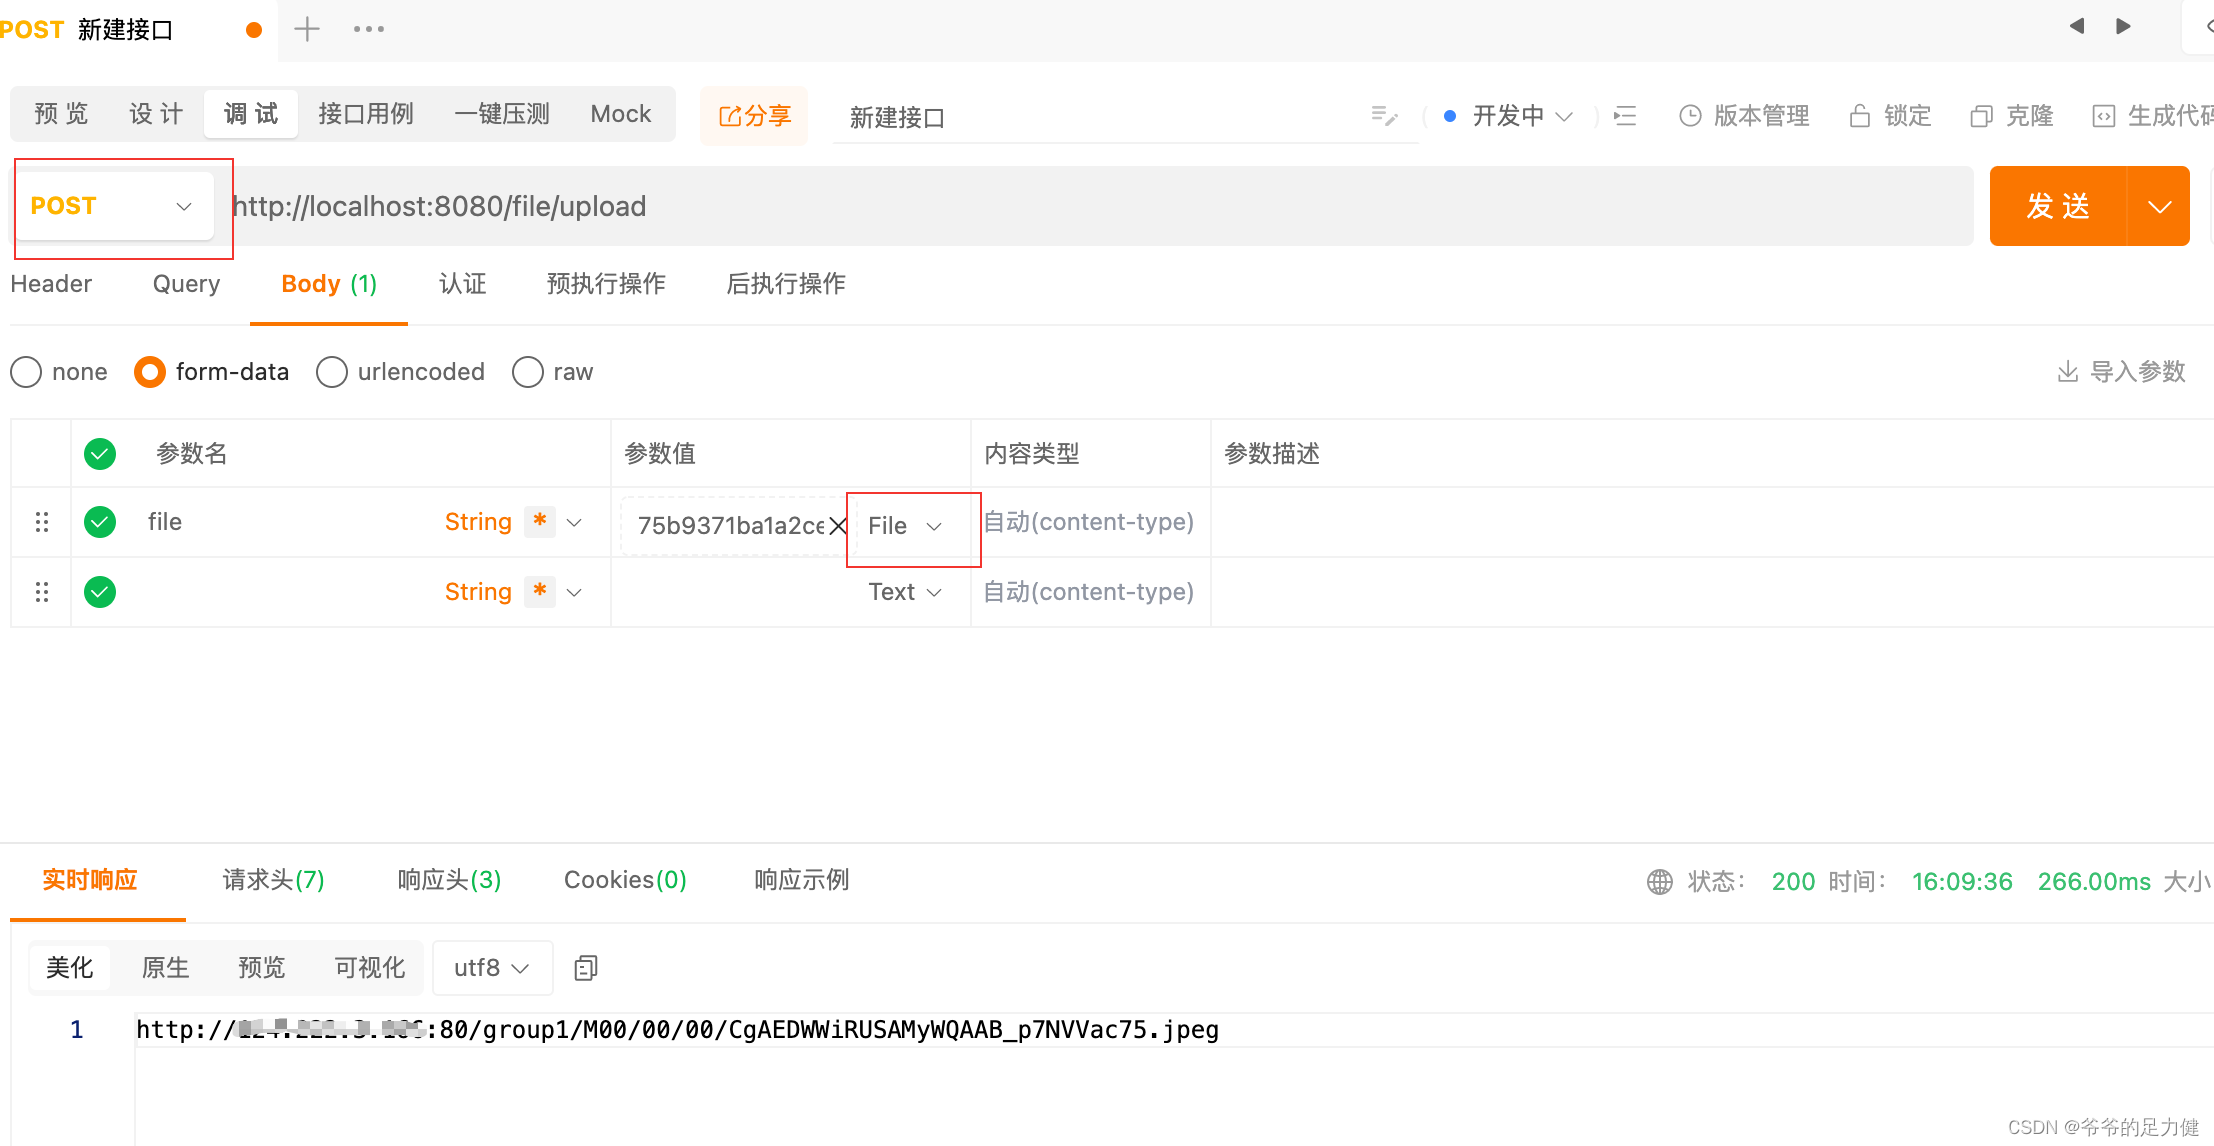
- @PostMapping("/upload")
- public String uploadFile(MultipartFile file){
- try{
- //判断文件是否存在
- if (file == null){
- throw new RuntimeException("文件不存在");
- }
- //获取文件的完整名称
- String originalFilename = file.getOriginalFilename();
- if (StringUtils.isEmpty(originalFilename)){
- throw new RuntimeException("文件不存在");
- }
-
- //获取文件的扩展名称 abc.jpg jpg
- String extName = originalFilename.substring(originalFilename.lastIndexOf(".") + 1);
-
- //获取文件内容
- byte[] content = file.getBytes();
-
- //创建文件上传的封装实体类
- FastDFSFile fastDFSFile = new FastDFSFile(originalFilename,content,extName);
-
- //基于工具类进行文件上传,并接受返回参数 String[]
- String[] uploadResult = FastDFSClient.upload(fastDFSFile);
-
- //封装返回结果
- String url = FastDFSClient.getTrackerUrl()+uploadResult[0]+"/"+uploadResult[1];
- return url;
- }catch (Exception e){
- e.printStackTrace();
- }
- return "文件上传失败";
- }
- }
-
七、启动项目上传图片文件测试
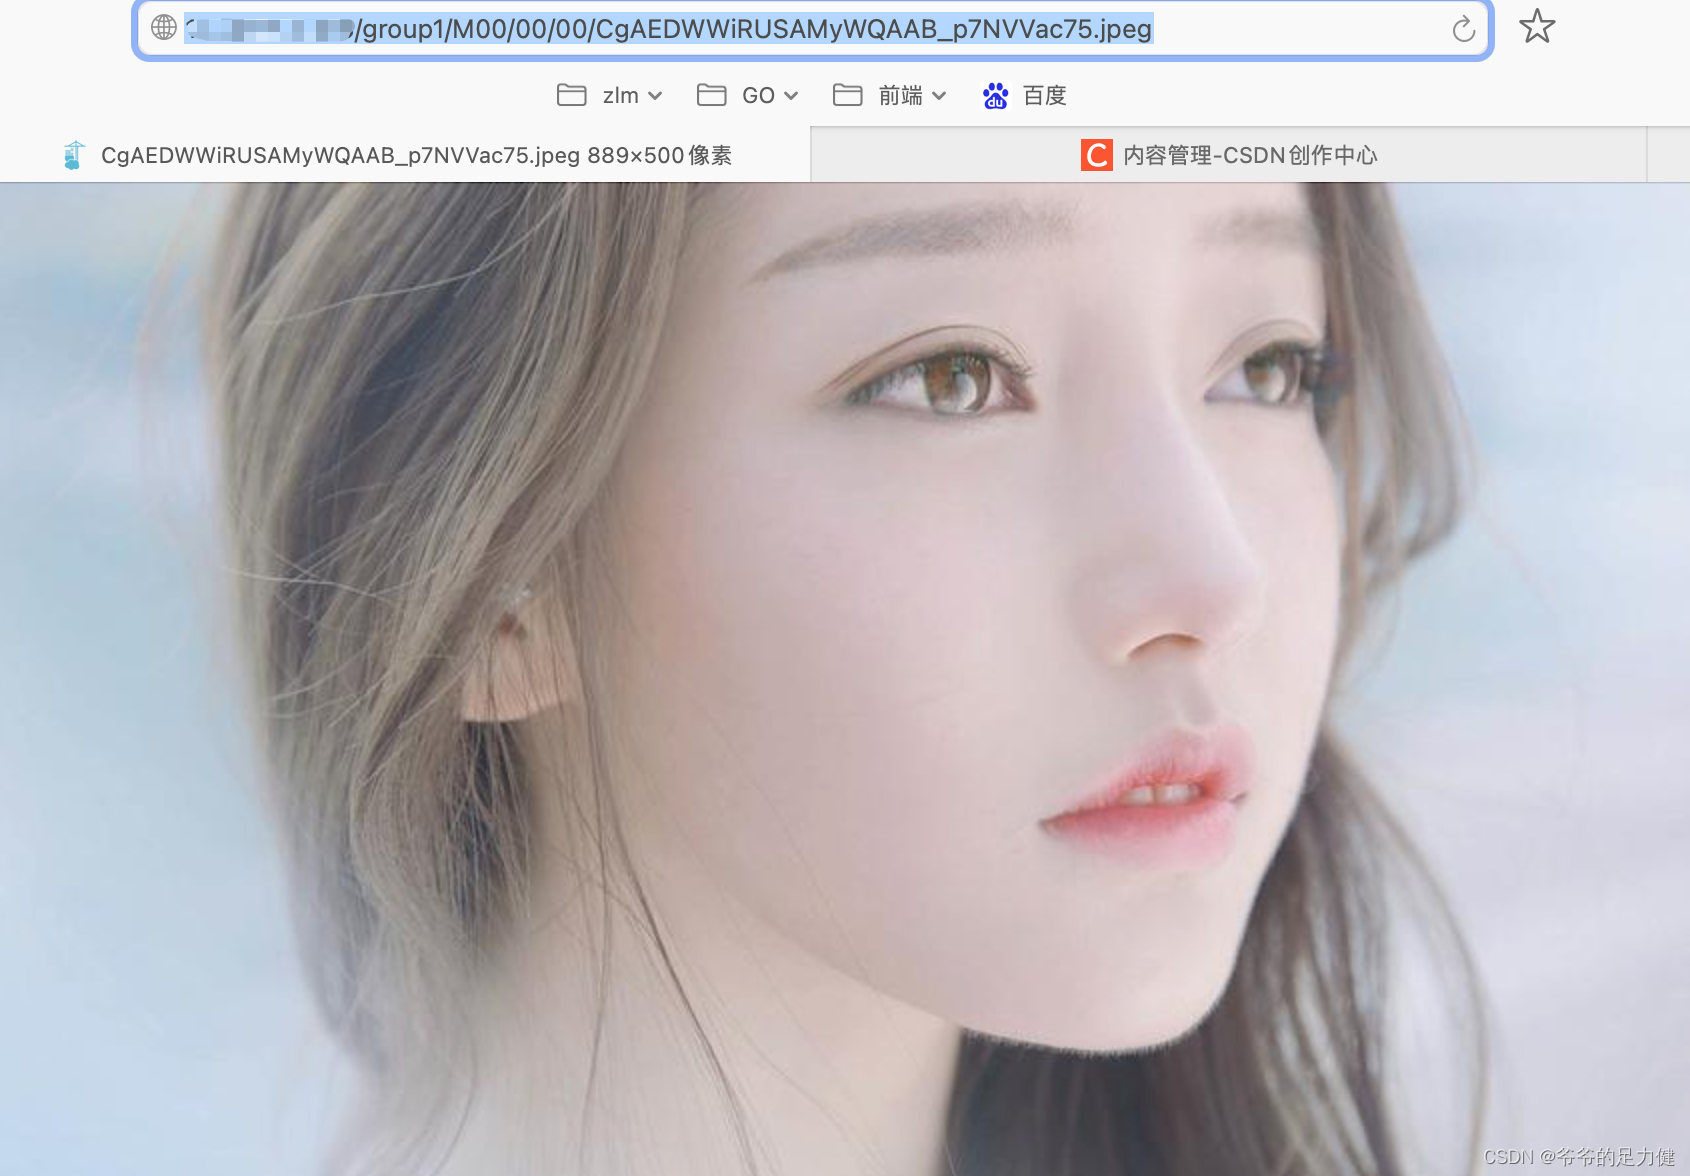
八、浏览器访问查看上传的图片
九、查看文件上传到服务器的实际位置
- 1.查看容器
- [root@VM-4-13-centos ~]# docker ps
-
- ^[[5~CONTAINER ID IMAGE COMMAND CREATED STATUS PORTS NAMES
- 60f2b9a4e7ce morunchang/fastdfs "sh storage.sh" 30 hours ago Up 30 hours storage01
- d52977f37328 morunchang/fastdfs "sh tracker.sh" 30 hours ago Up 30 hours tracker01
-
- 2.进入storage容器
- docker exec -it 60f2b9a4e7ce /bin/bash
-
- 3.找到文件所在目录 ### 00/00是上传文件后返回的路径
- cd /data/fast_data/data/00/00
-
- 4.此时ls就可以看到你上传的那个文件
-
- 5.退出容器
- exit或ctrl+P+Q

声明:本文内容由网友自发贡献,不代表【wpsshop博客】立场,版权归原作者所有,本站不承担相应法律责任。如您发现有侵权的内容,请联系我们。转载请注明出处:https://www.wpsshop.cn/w/喵喵爱编程/article/detail/986583
推荐阅读
相关标签

