
热门标签
热门文章
- 1docker离线安装_docker 19.03下载
- 2FPGA Verilog 控制CAN接收发送数据帧(标准/扩展),遥控帧(标准/扩展)_修改 can-fpga
- 3十月阿里社招Java面试题:数据库+分布式+高并发+JVM+Spring
- 4Emacs编辑器:Codigger操作系统中的编程艺术
- 5《昇思25天学习打卡营第25天|自然语言处理-LSTM+CRF序列标注》
- 6upload-labs通关详解_upload-labspass8
- 7【Transformers】第 4 章:自回归和其他语言模型_自回归transformer
- 8关于亚信安全防毒墙网络版客户端的退出与卸载(win10)(win11)(2024年测试有效)
- 9uni.setTabBarItem动态切换导航栏
- 10【面试题】前端必修-浏览器的渲染原理_浏览器渲染机制面试
当前位置: article > 正文
KVM-QEMU
作者:喵喵爱编程 | 2024-08-06 06:27:42
赞
踩
KVM-QEMU
第一天 企业级虚拟化技术KVM入门
一. 虚拟化技术概述
虚拟化[Virtualization]技术最早出现在20世纪60年代的 IBM 大型机系统,在70年代的 System370系列中逐渐流行起来,这些机器通过一种叫虚拟机监控器[Virtual Machine Monitor,VMM]的程序在物理硬件之上生成许多可以运行独立操作系统软件的虚拟机[Virtual Machine]实例。随着近年多核系统,集群,网格甚至云计算的广泛部署,虚拟化技术在商业应用上的优势日益体现,不仅降低了IT成本,而且还增强了系统安全性和可靠性,虚拟化的概念也逐渐深入到人们日常的工作与生活中。
虚拟化是一个广义的术语,对于不同的人来说可能意味着不同的东西,这要取决他们所处的环境。在计算机科学领域中,虚拟化代表着对计算机资源的抽象,而不仅仅局限于虚拟机的概念。例如对物理内存的抽象,产生了虚拟内存技术,使得应用程序认为其自身拥有连续可用的地址空间[Address Space],而实际上,应用程序的代码和数据可能是被分隔成多个碎片页或段,甚至被交换到磁盘,闪存等外部存储器上,即使物理内存不足,应用程序也能顺利执行。
二,主流虚拟化方案介绍
1,虚拟技术主要分类
(1)平台虚拟化 (Platform Virtualization)
针对计算机和操作系统的虚拟化。
(2)资源虚拟化(Resource Virtualization)
针对特定的系统资源的虚拟化,比如 内存,存储,网络资源等
(3)应用程序虚拟化(Application Virtualization)
包括仿真,模拟,解释技术等
2.平台虚拟化技术分类
我们通常所说的虚拟化主要是指平台虚拟化,通过使用控制程序 (Control Program,也被称为 Virtual Machine Monitor或 Hypervisor),隐藏特定计算平台的实际物理特性,为用户提供抽象的,统一的,模拟的计算环境(称为虚拟机)。虚拟机中运行的操作系统被称为客户机操作系统 (Guest OS),运行虚拟监控器的操作系统被称为主机操作系统 (Host OS),当然早些虚拟机监控器可以脱离操作系统直接运行在硬件之上(如 VMWARE的ESX产品)。运行虚拟机的真实系统我们称之为主机系统。
操作系统级虚拟化(Operating System Level Virtualization)
在传统操作系统中,所有用户的进程本质上是在同一个操作系统的实例中运行,因此内核或应用程序的缺陷可能影响到其他进程。操作系统级虚拟化是一种在服务器操作系统中使用的轻量级的虚拟化技术,内核通过创建多个虚拟的操作系统实例(内核和库)来隔离不同的进程,不同实例中的进程完全不了解对方的存在。
比较著名的有Solaris Container,FreeBSD Jail 和 OpenVZ等。
比如 OPENVZ:这个平台是最便宜的VPS平台,在各个vps商哪里都是价格最低的。OPENVZ本身运行在linux之上,它通过自己的虚拟化技术把一个服务器虚拟化成多个可以分别安装操作系统的实例,这样的每一个实体就是一个 vps,从客户的角度来看这就是一个虚拟的服务器,可以等同看做一台独立的服务器。
OPENVZ虚拟化出来的VPS只能安装 linux 操作系统,不能安装 windows 系统,比如 Centos,Fedora,Gentoo,Debian等。不能安装 windows 操作系统是openvz的第一个缺点,需要使用windows平台的用户不能使用 OPENVZVPS.
OPENVZ的第二个缺点是openvz不是完全的虚拟化,每个vps账号共用母机内核,不能单独修改内核。好在绝大多数根本不需要修改内核,所以这个缺点对多数人可以忽略不计。而这一点也正是openvz的优点,这一共用内核特性使得 openvz的效率最高,超过 kvm,Xen,VMware等平台。在不超售的情况下,openvz是最快速效率最高的VPS平台。
部分虚拟化(Partial Virtualization)
VMM只模拟部分底层硬件,因此客户机操作系统不做修改是无法在虚拟机中运行的,其他程序可能也需要进行修改。在历史上。部分虚拟化是通往全虚拟化道路上的重要里程碑,最早出现在第一代的分时系统CTSS和 IBM M44/44X实验性的分页系统中。
全虚拟化(Full Virtualization)
全虚拟化是指虚拟机模拟了完整的底层硬件,包括处理器,物理内存,时钟,外设等,使得为原始硬件设计的操作系统或其他系统软件完全不做任何修改就可以在虚拟机中运行。
操作系统与真实硬件之间的交互可以看成是通过一个预先规定的硬件接口进行的。全虚拟化VMM以完整模拟硬件的方式提供全部接口(同时还必须模拟特权指令的执行过程)。举例而言,x86 体系结构中,对于操作系统切换进程页表的操作,真实硬件通过提供一个特权 CR3 寄存器来实现该接口,操作系统只需执行"mov pgtable,%%cr3“汇编指令即可。
全虚拟化VMM必须完整地模拟该接口执行的全过程。如果硬件不提供虚拟化的特色支持,那么这个模拟过程将会十分复杂:一般而言,VMM必须运行在最高优先级来完全控制主机系统,而Guest OS需要降级运行,从而不能执行特权操作。当 Guest OS执行前面的特权汇编指令时,主机系统产生异常(General Protection Exception),执行控制权重新从 Guest OS转到 VMM 手中。VMM 事先分配一个变量作为影子 CR3 寄存器给 Guest OS ,将pgtable 代表的客户机物理地址(Guest Physical Address)填入影子 CR3 寄存器,最后返回到 Guest OS中。随后VMM还将处理复杂的 Guest OS 缺页异常(Page Fault).
比较著名的全虚拟化,VMM有 Microsoft Virtual PC,VMware Workstation,Sun Virtual Box,Parallels Desktop for Mac 和 QEMU.
超虚拟化(Paravirtualization)
这是一种修改 Guest OS 部分访问特权状态的代码以便直接与VMM交互的技术。在超虚拟化虚拟机中,部分硬件接口以软件的形式提供给客户机操作系统,这可以通过 Hypercall(VMM提供给 Guest OS的直接调用,与系统调用类似)的方式来提供。例如,Guest OS 把切换页表的代码修改为调用 Hypercall 来直接完成修改影子 CR3 寄存器和翻译地址的工作。由于不需要产生额外的异常和模拟部分硬件执行流程,超虚拟化可以大幅提高性能,比较著名的VMM有Denali,Xen.
硬件辅助虚拟化 (Hardware-Assisted Virtualization)
硬件辅助虚拟化是指借助硬件(主要是主机处理器)的支持来实现高效的全虚拟化。例如有了Intel-VT技术的支持,Guest OS 和 VMM的执行环境自动低完全隔离开来,Guest OS 有自己的 "套寄存器",可以直接运行在最高级别。因此在上面的例子中,Guest OS能够执行修改页表的汇编指令。Intel-VT和AMD-V是目前 x86 体系结构上可用的两种硬件辅助虚拟化技术。
这种分类并不是绝对的,一个优秀的虚拟化软件往往融合了多项技术。例如VMware Workstation 是一个著名的全虚拟化的VMM,但是他使用了一种被称为动态二进制翻译的技术把对特权状态的访问转换成对影子状态的操作,从而避免了低效率的 TRAP-And-Emulate的处理方式,这与超虚拟化相似,只不过超虚拟化是静态地址修改程序代码。对于超虚拟化而言,如果能利用硬件特性,你们虚拟机的管理将会大大简化,同时还能保存较高的性能。
三,KVM虚拟化技术简介
1,KVM架构

2,KVM架构解析
从rhel6开始使用,红帽公司直接把 KVM 的模块做成内核的一部分。
xen用在rhel6之前的企业版中默认内核不支持,需要重新安装带xen 功能的内核。
KVM针对运行在 x86 硬件上的,驻留在内核中的虚拟化基础结构。KVM 是第一个成为原生 Linux 内核(2.6.20)的一部分的Hypervisor,他是由 Avi Kivity 开发和维护的,现在归 Red Hat 所有。
这个 hypervisor 提供 x86 虚拟化,同时拥有到 PowerPC@ 和 IA64 的通道。另外,KVM最近还添加了对对称多处理(SMP)主机(和来宾)的支持,并且支持企业级特性,比如活动迁移(允许来宾操作系统在物理服务器之间迁移)。
KVM是作为内核模块实现的,因此。Linux 只要加载该模块就会成为一个 hypervisor,KVM为支持 hypervisor 指令的硬件平台提供完整的虚拟化(比如Intel@Virtualization Technology [Intel-VT]或AMD Virtualization[AMD-V]产品)。KVM还支持准虚拟化来宾操作系统,包括 Linux 和 Windows@.
这种技术有两个组件实现.第一个是可加载的KVM模块,当在Linux内核安装该模块之后,他就可以管理虚拟化硬件,并通过/proc文件系统公开其功能。第二个组件用于PC平台模拟,它是由修改版QEMU提供的。QEMU作为用户空间进程执行,并且在来宾操作系统请求方面与内核协调。
当新的操作系统在KVM上启动时(通过一个称为KVM的实用程序),它就成为宿主机操作系统的一个进程,因此,就可以像其他进程一样调度它。但与传统的Linux进程不一样,来宾操作系统被hypervisor标识为处于 "来宾"模式 (独立于内核和用户模式)。
每个来宾操作系统都是通过 /dev/KVM 设备映射的,它们拥有自己的虚拟地址空间,该空间映射到主机内核的物理地址空间。如前所述,KVM使用底层硬件的虚拟化支持来提供完整的(原生)虚拟化。I/O请求通过主机内核映射到在主机上(hypervisor)执行的QEMU进程。
KVM 在 Linux 环境中以主机的方式运行,不过只要底层硬件虚拟化支持,他就能够支持大量的来宾操作系统。
四,KVM软件安装
1,环境准备
2,查看 CPU 是否支持VT技术
cat /proc/cpuinfo | grep -E 'vmx | svm' 参数解释: 'vmx': 表示当前系统CPU支持 Inter x86 全虚拟化 'svm': 表示当前系统CPU支持 AMD 全虚拟化
3,清理环境:卸载KVM
- yum remove `rpm -qa | egrep 'qemu|virt|kvm'` -y
- rm -rf /var/lib/libvirt/images/ /etc/libvirt/qemu/
-
- 删除磁盘镜像的存储目录和配置文件的目录
4,安装软件
centos6
- centos6
-
- yum groupinstall "Virtualization" "Virtualization Client" "Virtualization Platform" "Virtualization Tools" -y
-
-
- centos7
-
- # 查看操作系统内核版本信息
- uname -r
- yum install *qemu* *virt* librbd1-devel -y
- (在安装虚拟机出错的情况下,一般是操作系统版本问题)
- yum upgrade
- qemu-KVM: 主包
- libvirt: API 接口
centos7
- # 查看操作系统内核版本信息
- uname -r
- [root@mail ~]# uname -r
- 4.18.0-348.7.1.el8_5.x86_64
-
- [root@localhost ~]# uname -r
- 3.10.0-1160.el7.x86_64
-
- [root@data-server ~]# yum install qemu-kvm qemu-img \
- virt-manager libvirt libvirt-python virt-manager \
- libvirt-client virt-install virt-viewer -y
-
- yum install *qemu* *virt* librbd1-devel -y
- yum install *qemu* *virt* librbd1-devel -y
- (在安装虚拟机出错的情况下,一般是操作系统版本问题)
- yum update
- yum upgrade -y
- qemu-KVM: 主包
- libvirt: API 接口
- virt-manager: 图形管理程序
- 在所谓的kvm技术中,应用到的其实有2个东西: qemu+kvm
- kvm 负责CPU虚拟化+内存虚拟化,实现了cpu和内存的虚拟化,但kvm不能模拟其他设备;
- qemu是模拟IO设备(网卡,磁盘),kvm 加上qemu之后就能实现真正意义上服务器虚拟化。
- 因为用到了上面两个东西,所以一般都称之为 qemu-kvm。
- libvirt则是调用kvm虚拟化技术的接口用于管理的,用 libvirt 管理方便。
-
- 安装KVM虚拟化相关软件包
- [root@localhost ~]# yum install qemu-kvm qemu-img virt-manager libvirt libvirt-python virt-manager libvirt-client virt-install virt-viewer virt-top libguestfs-tools -y
- # qemu-kvm: KVM模块
- # libvirt: 虚拟管理模块
- # virt-manager: 图形界面管理虚拟机
- # virt-install: 虚拟机命令行安装工具
-
- # 启动libvirtd服务
- systemctl start libvirtd
- systemctl enable libvirtd
- systemctl status libvirtd
- systemctl restart libvirtd
- [root@mail ~]# sudo systemctl enable --now libvirtd
-
- # 查看 kvm 模块加载
- [root@mail ~]# lsmod | grep kvm
- kvm_intel 323584 0
- kvm 880640 1 kvm_intel
- irqbypass 16384 1 kvm
-
-
-
- # 安装 ccockpit
- yum install cockpit -y
- systemctl start cockpit
- systemctl enable cockpit
- systemctl status cockpit
- netstat -lntp
- systemctl stop cockpit
-
- ip:9090可以访问cockpit的web界面
-
- [root@node3 ~]# virt-manager 可以图形方式创建虚拟机

centos8
- yum 组件安装已经可以使用了
- 问题:在进行组安装的时候会出现关于 rpm 版本的错误问题
- 解决方案: yum upgrade rpm -y
- [root@mail ~]# yum upgrade rpm -y
- Last metadata expiration check: 1:12:56 ago on Mon 15 Jul 2024 08:21:11 AM CST.
- Dependencies resolved.
- Nothing to do.
- Complete!
-
-
- [root@mail ~]# uname -r
- 4.18.0-348.7.1.el8_5.x86_64
-
- # 查看防火墙的状态
- [root@mail ~]# systemctl status firewalld
- ● firewalld.service - firewalld - dynamic firewall daemon
- Loaded: loaded (/usr/lib/systemd/system/firewalld.service; enabled; vendor preset: enabled)
- Active: active (running) since Thu 2024-07-11 15:21:15 CST; 3 days ago
- Docs: man:firewalld(1)
- Main PID: 908 (firewalld)
- Tasks: 2 (limit: 49117)
- Memory: 33.0M
- CGroup: /system.slice/firewalld.service
- └─908 /usr/libexec/platform-python -s /usr/sbin/firewalld --nofork --nopid
-
- Warning: Journal has been rotated since unit was started. Log output is incomplete or unavailable.
-
- # 关闭防火墙
- [root@mail ~]# systemctl stop firewalld
-
- # 禁用防火墙
- [root@mail ~]# systemctl disable firewalld
- Removed /etc/systemd/system/multi-user.target.wants/firewalld.service.
- Removed /etc/systemd/system/dbus-org.fedoraproject.FirewallD1.service.
- [root@mail ~]#
-
-
- # 关闭 selinux
- 1. 永久关闭 vim /etc/selinux/config
- 打开配置文件vim /etc/sysconfig/selinux
- 将 'SELINUX=enforcing'改为 'SELINUX=disabled'
- [root@mail ~]# vim /etc/sysconfig/selinux
- [root@mail ~]# cat /etc/sysconfig/selinux
-
- # This file controls the state of SELinux on the system.
- # SELINUX= can take one of these three values:
- # enforcing - SELinux security policy is enforced.
- # permissive - SELinux prints warnings instead of enforcing.
- # disabled - No SELinux policy is loaded.
- # SELINUX=enforcing
- #
- SELINUX=disabled
- #
- # SELINUXTYPE= can take one of these three values:
- # targeted - Targeted processes are protected,
- # minimum - Modification of targeted policy. Only selected processes are protected.
- # mls - Multi Level Security protection.
- SELINUXTYPE=targeted
-
-
- 2.临时关闭
- 执行 setenforce 0
- [root@mail ~]# setenforce 0
-
-
-
- # 查看 CPU 是否支持VT技术,以下表示 'vmx' 表示支持 Inter 全虚拟化
- [root@mail ~]# cat /proc/cpuinfo | grep -E 'vmx | svm'
- flags : fpu vme de pse tsc msr pae mce cx8 apic sep mtrr pge mca cmov pat pse36 clflush dts acpi mmx fxsr sse sse2 ht tm pbe syscall nx lm constant_tsc arch_perfmon pebs bts rep_good nopl cpuid aperfmperf pni dtes64 monitor ds_cpl
- vmx est tm2 ssse3 cx16 xtpr pdcm xsave lahf_lm pti tpr_shadow vnmi flexpriority vpid dtherm
-
- # 安装kvm并启用libvirtd服务
- yum -update
- yum upgrade -y
- yum install @virt
- sudo systemctl enable --now libvirtd
-
- # 通过 yum 安装 kvm 基础包和管理工具
- yum -y install qemu-kvm libvirt virt-install virt-manager virt-viewer virt-top libguestfs-tools
-
- # 检查 kvm 模块是否安装 lsmod | grep kvm
- [root@mail ~]# lsmod | grep kvm
- kvm_intel 323584 0
- kvm 880640 1 kvm_intel
- irqbypass 16384 1 kvm
- [root@mail ~]#
-
5,启动服务
- systemctl start libvirtd
- [root@mail ~]# yum upgrade
- Last metadata expiration check: 1:43:27 ago on Mon 15 Jul 2024 08:21:11 AM CST.
- Dependencies resolved.
- Nothing to do.
- Complete!
-
- # 启动libvirtd服务
- [root@mail ~]# systemctl start libvirtd
- [root@mail ~]# sudo systemctl enable --now libvirtd
-
- # 查看 kvm 模块加载
- [root@mail ~]# lsmod | grep kvm
- kvm_intel 323584 0
- kvm 880640 1 kvm_intel
- irqbypass 16384 1 kvm
-
python官网
- https://www.python.org/
- https://www.python.org/downloads/
- 作者:python风控模型 https://www.bilibili.com/read/cv10527982/ 出处:bilibili
ubuntu
- # 查看操作系统内核版本信息
-
- root@kvm-server:~# uname -r
- 5.15.0-113-generic
-
- # 关闭 selinux
- 打开配置文件vim /etc/selinuxconfig
- 将 'SELINUX=enforcing'改为 'SELINUX=disabled'
- 先安装 selinu
- root@kvm-server:~# apt install selinux-utils
- root@kvm-server:~# setenforce o
- setenforce: SELinux is disabled
- root@kvm-server:~#
-
-
-
-
- # 查看防火墙状态命令
- 1. sudo ufw status
- root@kvm-server:~# sudo ufw status
- Status: inactive
-
-
- 2. systemctl status ufw
- root@kvm-server:~# systemctl status ufw
- ● ufw.service - Uncomplicated firewall
- Loaded: loaded (/lib/systemd/system/ufw.service; enabled; vendor preset: enabled)
- Active: active (exited) since Sun 2024-07-14 22:40:56 UTC; 58min ago
- Docs: man:ufw(8)
- Process: 702 ExecStart=/lib/ufw/ufw-init start quiet (code=exited, status=0/SUCCESS)
- Main PID: 702 (code=exited, status=0/SUCCESS)
- CPU: 1ms
-
- Jul 14 22:40:56 kvm-server systemd[1]: Starting Uncomplicated firewall...
- Jul 14 22:40:56 kvm-server systemd[1]: Finished Uncomplicated firewall.
- root@kvm-server:~#
-
-
- 3. systemctl status ufw.service
- root@kvm-server:~# systemctl status ufw.service
- ● ufw.service - Uncomplicated firewall
- Loaded: loaded (/lib/systemd/system/ufw.service; enabled; vendor preset: enabled)
- Active: active (exited) since Sun 2024-07-14 22:40:56 UTC; 1h 0min ago
- Docs: man:ufw(8)
- Process: 702 ExecStart=/lib/ufw/ufw-init start quiet (code=exited, status=0/SUCCESS)
- Main PID: 702 (code=exited, status=0/SUCCESS)
- CPU: 1ms
-
- Jul 14 22:40:56 kvm-server systemd[1]: Starting Uncomplicated firewall...
- Jul 14 22:40:56 kvm-server systemd[1]: Finished Uncomplicated firewall.
- root@kvm-server:~#
-
-
- # 先用 stop 命令关闭防火墙
- systemctl stop ufw
- root@kvm-server:~# systemctl stop ufw
-
- # 再用 disable 开机禁用
- systemctl disable ufw
-
- root@kvm-server:~# systemctl disable ufw
- Synchronizing state of ufw.service with SysV service script with /lib/systemd/systemd-sysv-install.
- Executing: /lib/systemd/systemd-sysv-install disable ufw
- Removed /etc/systemd/system/multi-user.target.wants/ufw.service.
- root@kvm-server:~#
-
-
- 拓展
- 后续需要重新启用防火墙时,可以执行以下命令
- 1.先开启防火墙
- systemctl start ufw
- 2. 然后开机自启防火墙
- systemctl enable ufw
-
-
-
- # 查看 CPU 是否支持VT技术,以下表示 'vmx' 表示支持 Inter 全虚拟化
- 1. 命令 LC_ALL=C lscpu | grep Virtualization
- root@kvm-server:~# LC_ALL=C lscpu | grep Virtualization
- Virtualization: VT-x
- Virtualization type: full
- root@kvm-server:~#
-
- 2. grep -Eoc '(vmx|svm)' /proc/cpuinfo 返回数字8大于零,表示支持虚拟化
- root@kvm-server:~# grep -Eoc '(vmx|svm)' /proc/cpuinfo
- 8
- root@kvm-server:~#
-
-
- 3. cat /proc/cpuinfo | grep -E 'vmx | svm'
-
- root@kvm-server:~# cat /proc/cpuinfo | grep -E 'vmx | svm'
- flags : fpu vme de pse tsc msr pae mce cx8 apic sep mtrr pge mca cmov pat pse36 clflush mmx fxsr sse sse2 ss ht syscall nx pdpe1gb rdtscp lm constant_tsc arch_perfmon nopl xtopology tsc_reliable nonstop_tsc cpuid tsc_known_freq pni pclmulqdq vmx ssse3 fma cx16 pcid sse4_1 sse4_2 x2apic movbe popcnt tsc_deadline_timer aes xsave avx f16c rdrand hypervisor lahf_lm abm 3dnowprefetch cpuid_fault invpcid_single pti ssbd ibrs ibpb stibp tpr_shadow vnmi ept vpid ept_ad fsgsbase tsc_adjust bmi1 avx2 smep bmi2 invpcid rdseed adx smap clflushopt xsaveopt xsavec xgetbv1 xsaves arat md_clear flush_l1d arch_capabilities
- vmx flags : vnmi invvpid ept_x_only ept_ad tsc_offset vtpr mtf ept vpid unrestricted_guest ple ept_mode_based_exec
- root@kvm-server:~#
-
-
- # 检查是否支持硬件加速
- sudo apt install cpu-checker
-
- root@kvm-server:~# sudo apt install cpu-checker
- Reading package lists... Done
- Building dependency tree... Done
- Reading state information... Done
- The following additional packages will be installed:
- msr-tools
- The following NEW packages will be installed:
- cpu-checker msr-tools
- 0 upgraded, 2 newly installed, 0 to remove and 2 not upgraded.
- Need to get 17.1 kB of archives.
- After this operation, 67.6 kB of additional disk space will be used.
- Do you want to continue? [Y/n] y
- Get:1 http://mirrors.tuna.tsinghua.edu.cn/ubuntu jammy/main amd64 msr-tools amd64 1.3-4 [10.3 kB]
- Get:2 http://mirrors.tuna.tsinghua.edu.cn/ubuntu jammy/main amd64 cpu-checker amd64 0.7-1.3build1 [6,800 B]
- Fetched 17.1 kB in 1s (31.3 kB/s)
- Selecting previously unselected package msr-tools.
- (Reading database ... 110242 files and directories currently installed.)
- Preparing to unpack .../msr-tools_1.3-4_amd64.deb ...
- Unpacking msr-tools (1.3-4) ...
- Selecting previously unselected package cpu-checker.
- Preparing to unpack .../cpu-checker_0.7-1.3build1_amd64.deb ...
- Unpacking cpu-checker (0.7-1.3build1) ...
- Setting up msr-tools (1.3-4) ...
- Setting up cpu-checker (0.7-1.3build1) ...
- Processing triggers for man-db (2.10.2-1) ...
- Scanning processes...
- Scanning linux images...
-
- Running kernel seems to be up-to-date.
-
- No services need to be restarted.
-
- No containers need to be restarted.
-
- No user sessions are running outdated binaries.
-
- No VM guests are running outdated hypervisor (qemu) binaries on this host.
-
- # 输出如下信息表示支持硬件加速
- root@kvm-server:~# kvm-ok
- INFO: /dev/kvm exists
- KVM acceleration can be used
-
- apt-get install qemu-system
- apt-get install qemu-user-static
- # 安装
- sudo apt install qemu qemu-kvm libvirt-daemon-system libvirt-clients virt-manager virtinst bridge-utils -y
- sudo apt install qemu-system qemu-user-static -y
-
- root@kvm-server:~# sudo apt install qemu qemu-kvm libvirt-daemon-system libvirt-clients virt-manager virtinst bridge-utils Reading package lists... Done
- Building dependency tree... Done
- Reading state information... Done
- Note, selecting 'qemu-system-x86' instead of 'qemu-kvm'
-
- root@kvm-server:~# systemctl start libvirtd
- root@kvm-server:~# systemctl status libvirtd
- ● libvirtd.service - Virtualization daemon
- Loaded: loaded (/lib/systemd/system/libvirtd.service; enabled; vendor preset: enabled)
- Active: active (running) since Mon 2024-07-15 01:05:28 UTC; 1h 35min ago
- TriggeredBy: ● libvirtd-admin.socket
- ● libvirtd-ro.socket
- ● libvirtd.socket
- Docs: man:libvirtd(8)
- https://libvirt.org
- Main PID: 5656 (libvirtd)
- Tasks: 21 (limit: 32768)
- Memory: 9.7M
- CPU: 716ms
- CGroup: /system.slice/libvirtd.service
- ├─5656 /usr/sbin/libvirtd
- ├─5830 /usr/sbin/dnsmasq --conf-file=/var/lib/libvirt/dnsmasq/default.conf --leasefile-ro --dhcp-script=/usr/lib/libvirt/libvirt_leaseshelper
- └─5831 /usr/sbin/dnsmasq --conf-file=/var/lib/libvirt/dnsmasq/default.conf --leasefile-ro --dhcp-script=/usr/lib/libvirt/libvirt_leaseshelper
-
- Jul 15 01:05:28 kvm-server systemd[1]: Started Virtualization daemon.
- Jul 15 01:05:29 kvm-server dnsmasq[5830]: started, version 2.90 cachesize 150
- Jul 15 01:05:29 kvm-server dnsmasq[5830]: compile time options: IPv6 GNU-getopt DBus no-UBus i18n IDN2 DHCP DHCPv6 no-Lua TFTP conntrack ipset no-nftset auth cry>
- Jul 15 01:05:29 kvm-server dnsmasq-dhcp[5830]: DHCP, IP range 192.168.122.2 -- 192.168.122.254, lease time 1h
- Jul 15 01:05:29 kvm-server dnsmasq-dhcp[5830]: DHCP, sockets bound exclusively to interface virbr0
- Jul 15 01:05:29 kvm-server dnsmasq[5830]: reading /etc/resolv.conf
- Jul 15 01:05:29 kvm-server dnsmasq[5830]: using nameserver 127.0.0.53#53
- Jul 15 01:05:29 kvm-server dnsmasq[5830]: read /etc/hosts - 8 names
- Jul 15 01:05:29 kvm-server dnsmasq[5830]: read /var/lib/libvirt/dnsmasq/default.addnhosts - 0 names
- Jul 15 01:05:29 kvm-server dnsmasq-dhcp[5830]: read /var/lib/libvirt/dnsmasq/default.hostsfile
-
-
- root@kvm-server:~# systemctl enable libvirtd
- root@kvm-server:~# lsmod | grep kvm
- kvm_intel 372736 0
- kvm 1032192 1 kvm_intel
-
-
- 安装cockpit
- root@kvm-server:~# apt install cockpit -y
- Reading package lists... Done
- Building dependency tree... Done
- Reading state information... Done
- The following additional packages will be installed:
-
-
- root@kvm-server:~# systemctl start cockpit
- root@kvm-server:~# systemctl enable cockpit
- The unit files have no installation config (WantedBy=, RequiredBy=, Also=,
- Alias= settings in the [Install] section, and DefaultInstance= for template
- units). This means they are not meant to be enabled using systemctl.
-
- Possible reasons for having this kind of units are:
- • A unit may be statically enabled by being symlinked from another unit's
- .wants/ or .requires/ directory.
- • A unit's purpose may be to act as a helper for some other unit which has
- a requirement dependency on it.
- • A unit may be started when needed via activation (socket, path, timer,
- D-Bus, udev, scripted systemctl call, ...).
- • In case of template units, the unit is meant to be enabled with some
- instance name specified.
- root@kvm-server:~# systemctl status cockpit
- ● cockpit.service - Cockpit Web Service
- Loaded: loaded (/lib/systemd/system/cockpit.service; static)
- Active: active (running) since Mon 2024-07-15 05:07:20 UTC; 55s ago
- TriggeredBy: ● cockpit.socket
- Docs: man:cockpit-ws(8)
- Main PID: 7764 (cockpit-tls)
- Tasks: 1 (limit: 14169)
- Memory: 1.8M
- CPU: 346ms
- CGroup: /system.slice/cockpit.service
- └─7764 /usr/lib/cockpit/cockpit-tls
-
- Jul 15 05:07:20 kvm-server systemd[1]: Starting Cockpit Web Service...
- Jul 15 05:07:20 kvm-server cockpit-certificate-ensure[7756]: /usr/lib/cockpit/cockpit-certificate-helper: line 32: sscg: command not found
- Jul 15 05:07:20 kvm-server cockpit-certificate-ensure[7757]: .+...........+......+...+.+.....+....+..+.......++++++++++++++++++++++++++++++++++++++++++++++++++++>
- Jul 15 05:07:20 kvm-server cockpit-certificate-ensure[7757]: ..+...........+.......+++++++++++++++++++++++++++++++++++++++++++++++++++++++++++++++++*..........+.>
- Jul 15 05:07:20 kvm-server cockpit-certificate-ensure[7757]: -----
- Jul 15 05:07:20 kvm-server systemd[1]: Started Cockpit Web Service.
- lines 1-18/18 (END)
-
- 安装net-tools工具
- root@kvm-server:~# netstat -lntp
- Command 'netstat' not found, but can be installed with:
- apt install net-tools
- root@kvm-server:~# apt install net-tools
- Reading package lists... Done
- Building dependency tree... Done
- Reading state information... Done
- The following NEW packages will be installed:
- net-tools
- 0 upgraded, 1 newly installed, 0 to remove and 2 not upgraded.
- Need to get 0 B/204 kB of archives.
- After this operation, 819 kB of additional disk space will be used.
- Selecting previously unselected package net-tools.
- (Reading database ... 130009 files and directories currently installed.)
- Preparing to unpack .../net-tools_1.60+git20181103.0eebece-1ubuntu5_amd64.deb ...
- Unpacking net-tools (1.60+git20181103.0eebece-1ubuntu5) ...
- Setting up net-tools (1.60+git20181103.0eebece-1ubuntu5) ...
- Processing triggers for man-db (2.10.2-1) ...
-
-
- root@kvm-server:~# netstat -lntp
- Active Internet connections (only servers)
- Proto Recv-Q Send-Q Local Address Foreign Address State PID/Program name
- tcp 0 0 0.0.0.0:22 0.0.0.0:* LISTEN 931/sshd: /usr/sbin
- tcp 0 0 192.168.122.1:53 0.0.0.0:* LISTEN 5830/dnsmasq
- tcp 0 0 127.0.0.1:6010 0.0.0.0:* LISTEN 1156/sshd: root@pts
- tcp 0 0 127.0.0.53:53 0.0.0.0:* LISTEN 878/systemd-resolve
- tcp6 0 0 :::22 :::* LISTEN 931/sshd: /usr/sbin
- tcp6 0 0 :::9090 :::* LISTEN 1/init
- tcp6 0 0 ::1:6010 :::* LISTEN 1156/sshd: root@pts
- root@kvm-server:~#
-
- # 停止飞机驾驶舱
- root@kvm-server:~# systemctl stop cockpit
- Warning: Stopping cockpit.service, but it can still be activated by:
- cockpit.socket
- root@kvm-server:~#
-
- # 命令行模式
- longchi@kvm-server:~$ ls /etc/libvirt/qemu
- networks ubuntu22.04.xml vm1.xml
- longchi@kvm-server:~$ ls /var/lib/libvirt/images/
- ls: cannot open directory '/var/lib/libvirt/images/': Permission denied
- longchi@kvm-server:~$ sudo ls /var/lib/libvirt/images/
- [sudo] password for longchi:
- ubuntu22.04.qcow2 vm1.qcow2
- longchi@kvm-server:~$
5,启动服务
- # 启动libvirtd服务
- [root@mail ~]# systemctl start libvirtd
-
- # 设置开机自启
- [root@mail ~]# systemctl enable libvirtd
-
- # 或者直接用下面的命令启动并设置开机自启动
- [root@mail ~]# sudo systemctl enable --now libvirtd
6,查看KVM模块加载
- [root@mail ~]# lsmod | grep kvm
- kvm_intel 323584 0
- kvm 880640 1 kvm_intel
- irqbypass 16384 1 kvm
- [root@mail ~]#
五,GuestOS安装
- centos7
- yum install *cockpit* -y
- systemctl start cockpit
- 访问
- 浏览器访问
- 服务器地址:9090
-
- centos8
- # 手动安装 cockpit 软件包
- $ dnf install cockpit
-
- # 修改端口为9191
- [root@mail ~]# vim /lib/systemd/system/cockpit.socket
- [root@mail ~]# cat /lib/systemd/system/cockpit.socket
- [Unit]
- Description=Cockpit Web Service Socket
- Documentation=man:cockpit-ws(8)
- Wants=cockpit-motd.service
-
- [Socket]
- ListenStream=9191
- ExecStartPost=-/usr/share/cockpit/motd/update-motd '' localhost
- ExecStartPost=-/bin/ln -snf active.motd /run/cockpit/motd
- ExecStopPost=-/bin/ln -snf inactive.motd /run/cockpit/motd
-
- [Install]
- WantedBy=sockets.target
-
-
- # 启用并启动运行 web 服务器的 cockpit.socket 服务:
- $ systemctl enable --now cockpit.socket
-
-
- # 如果在安装系统时,所选软件包中没有默认安装Cockpit web 控制台,并且使用的是自定义防火墙配置集,需要将 cockpit 服务添加到 firewalld 中并在防火墙中打开端口 9090:
- $ firewall-cmd --add-service=cockpit --permanent
- $ firewall-cmd --reload
-
-
- 登录Cockpit web 控制台
-
- 安装配置完成之后,就可以在CentOS8的Web浏览器中打开Cockpit Web控制台了, URL:https://IP:9191,也可以在外部通过IP地址打开。
-
- # 停止飞机驾驶舱安装和管理虚拟机
- [root@mail ~]# systemctl stop cockpit.socket
- [root@mail ~]# netstat -lntp
-
1,图形模式安装 Guest OS
- # 准备镜像文件 ubuntu-22.04.4-live-server-amd64.iso
- [root@mail ~]# ls /home/longchi18/
- bat Desktop Documents Downloads linux-study Music Photographs Pictures Public Templates ubuntu-22.04.4-live-server-amd64.iso Videos vite vue_lcds
- [root@mail ~]#
-
- 使用命令调出如图所示
- root@kvm-server:~# virt-manager
virt-manager 调出如下图所示
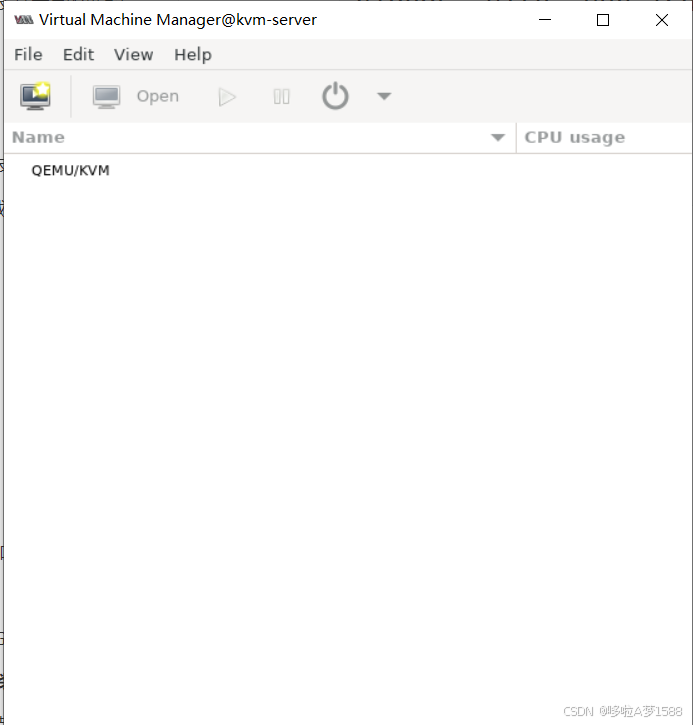
创建新的虚拟机

点击小电脑,弹出如下图
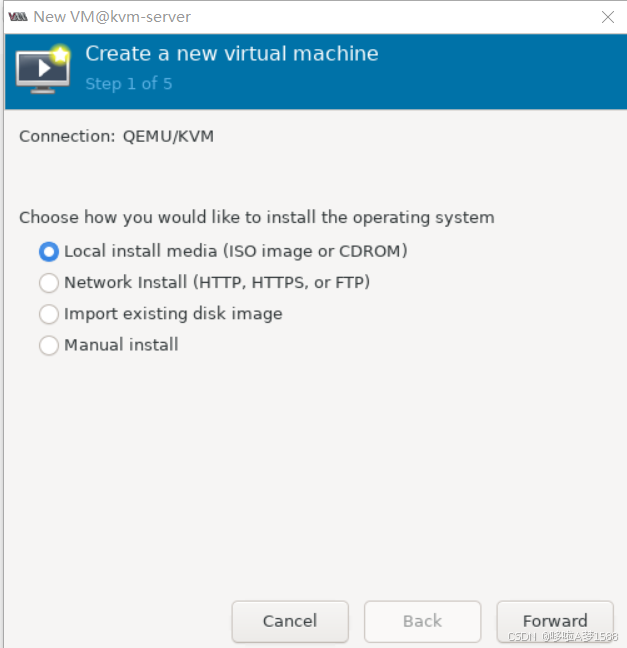
点击 Forward 选择本地源安装操作系统,弹出如下图
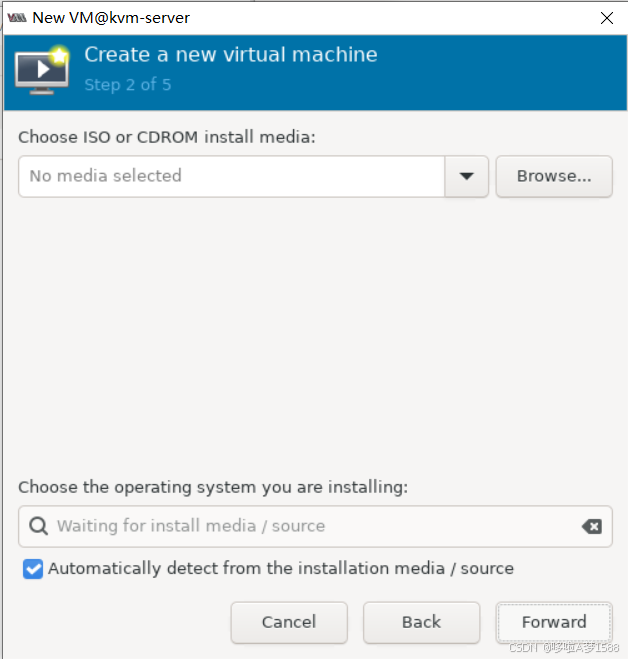
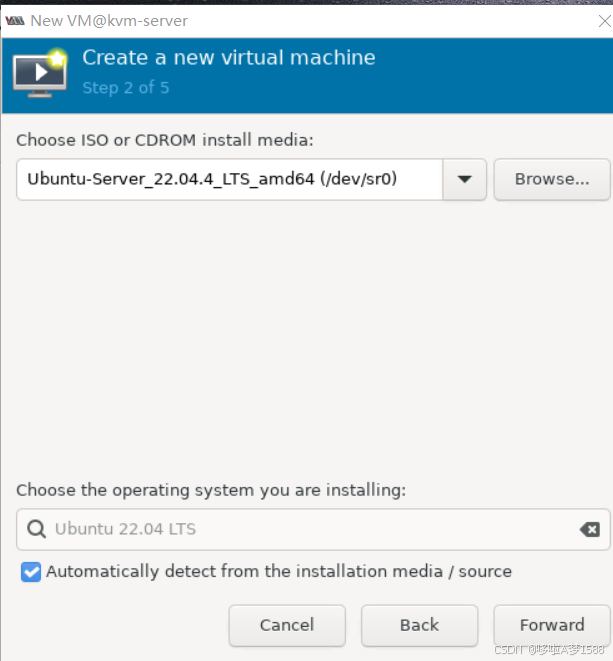
点击 Forward

点击 Forward

点击 Forward
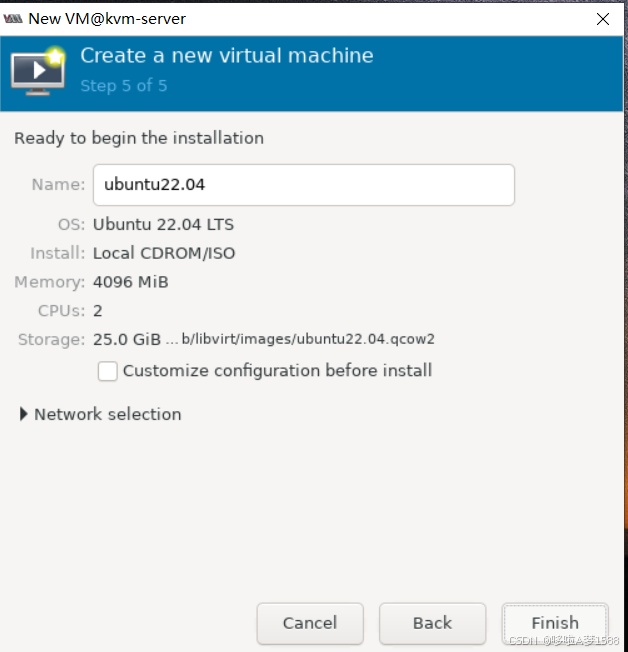
设置虚拟机的名字为 vm1
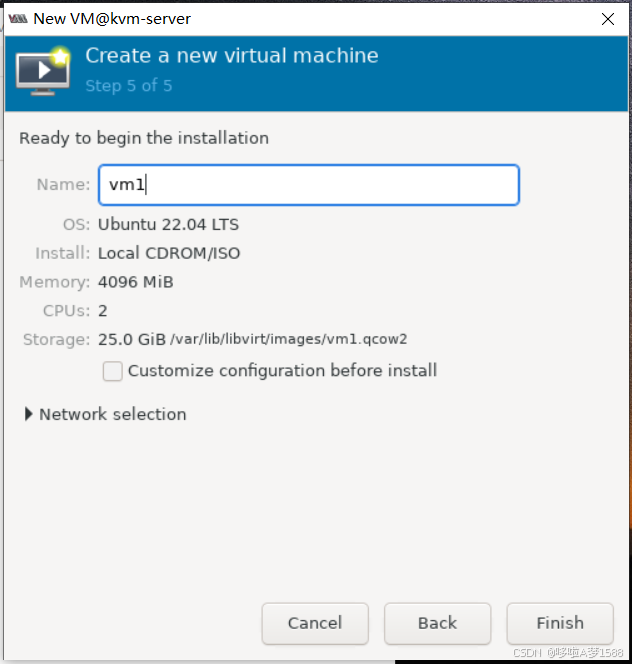
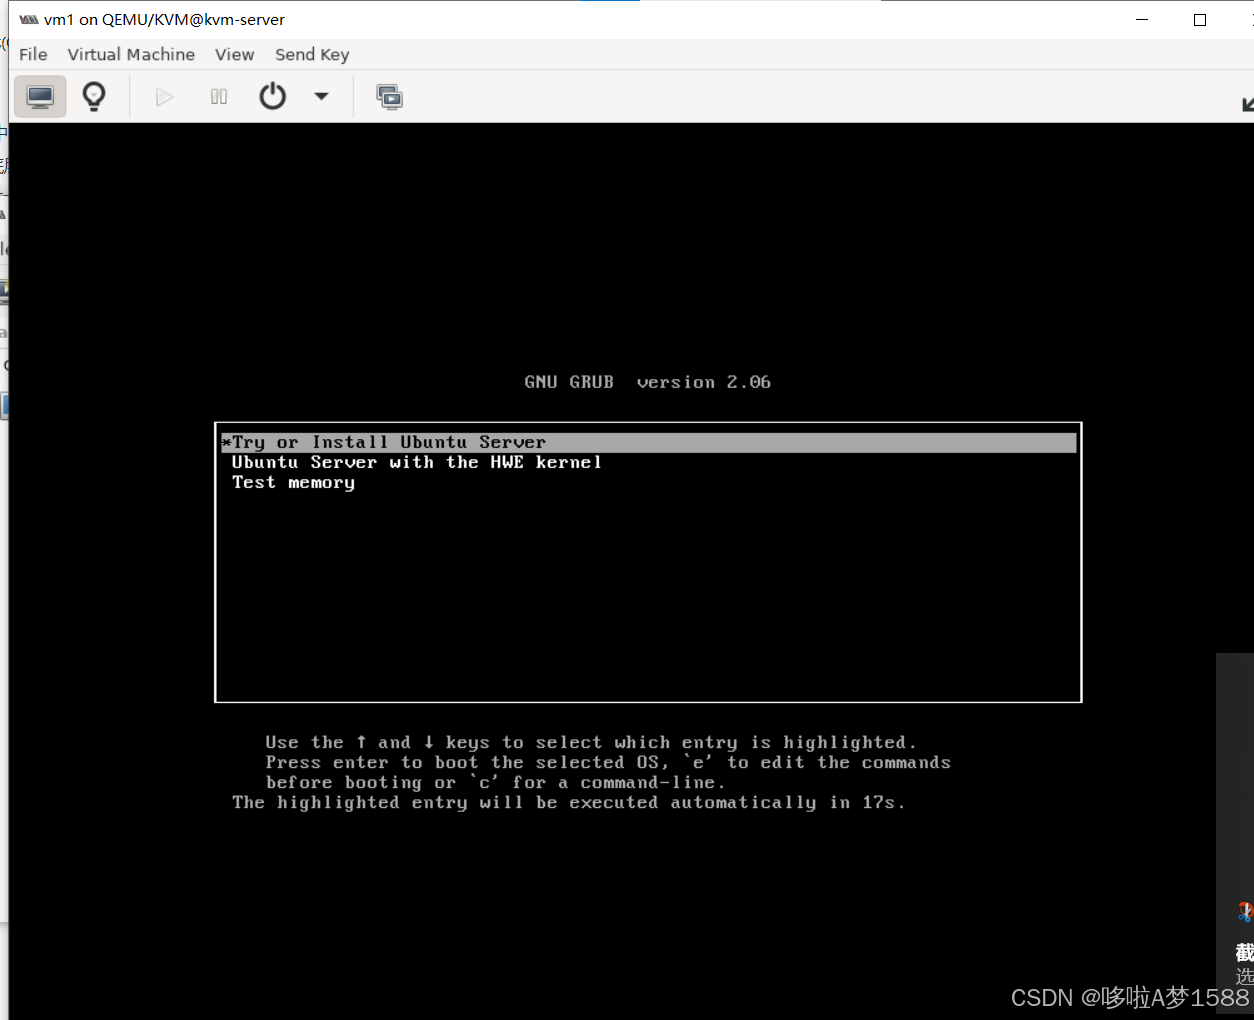
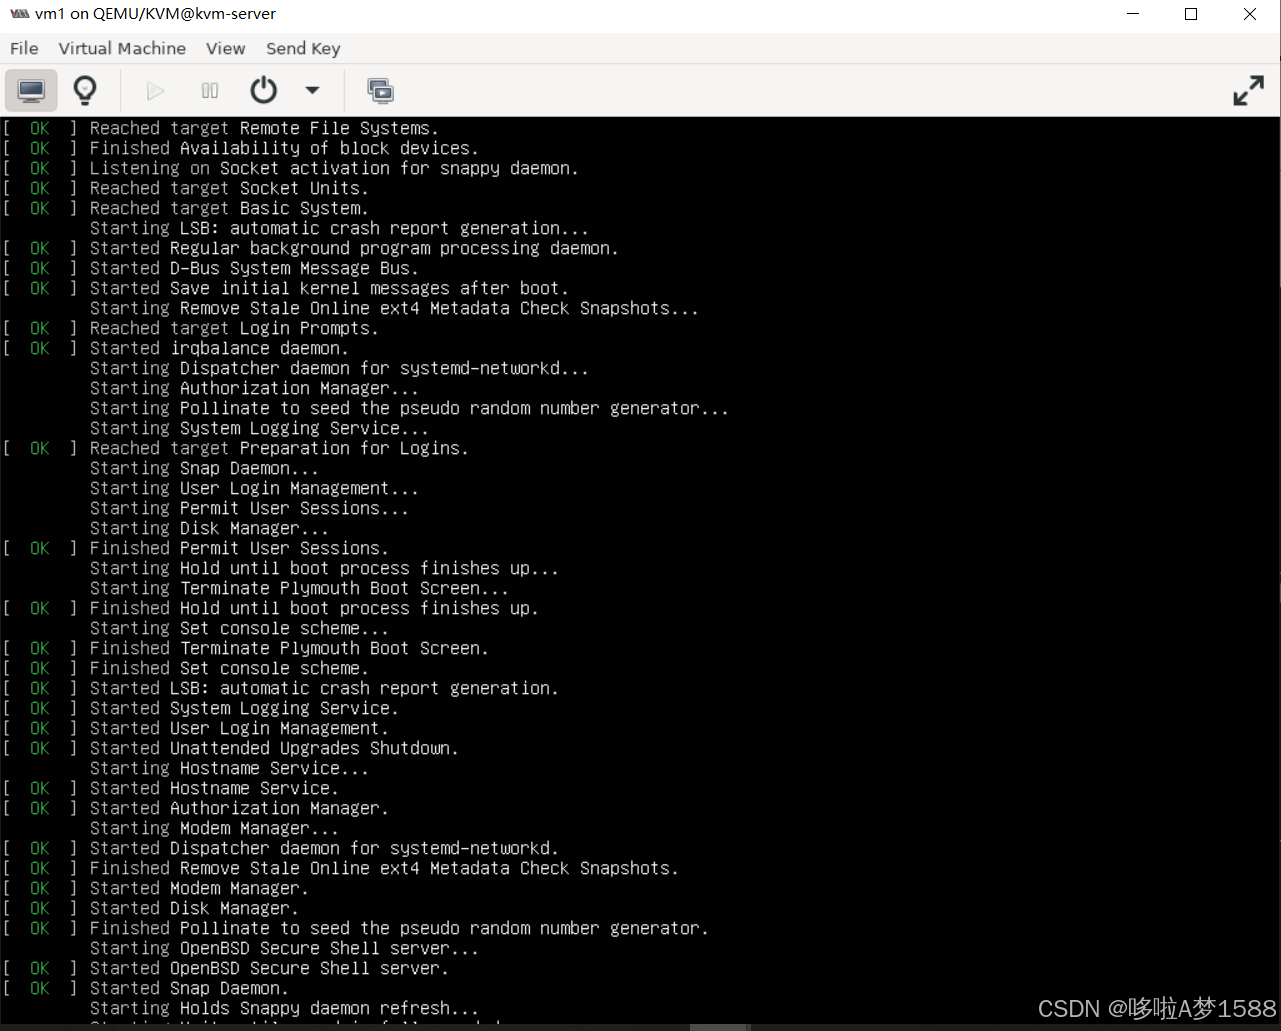
点击 Finish 完成,进入虚拟机安装
2, 完全文本方式安装
- 注意不需要将,了解即可
- 极端情况-服务器没有图形 客户端也没有图形
- # virt-install --connect qemu:///system -n vm6 -r 512 --disk path=/virthost/vmware/vm6.img.size=7 --os-type=linux --os-variant=rhel6 --vcpus=1 --network bridge=br0 --location=http://127.0.0.1/rhel6u4 -x console=ttyso --nographics
-
- #virt-install --connect qemu:///system -n vm9 -r 2048 --disk path=/var/lib/libvirt/images/vm9.img,size=7 --os-type=linux --os-variant=centos7.0 --vcpus=1 --location=ftp://192.168.100.230/centos7u3 -x console=ttyso --nographics
-
- 参数解释:
- 'virt-install': 表示执行这条安装命令
- '--connect': 表示连接 qemu
- 'qemu:///system': 表示连接系统
- '-n' : 表示给虚拟机取一个名字
- '-r' : 表示以兆为单位分配内存
- '--disk path=/var/lib/libvirt/images/vm9.img' 磁盘镜像文件存放位置
- 'size=7':磁盘的大小
- '--os-type=linux': 系统类型
- '--os-variant=centos7.0': 系统版本
- '--vcpus=1': cpu数量
- '--location=ftp://192.168.100.230/centos7u3': 从哪个主机开始安装
- 'centos7u3': 将镜像挂载到哪里
- '-x console=ttyso': 分配了一个终端
- '--nographics' 表示没有图形界面的
注意:
用这种方式安装的操作系统,大小写会胡乱变化,不影响远程操作
内存必须2G以上
查看 kvm 的 OS 版本
- man virt-install
- osinfo-query os | grep centos
- osinfo-query os | grep ubuntu
-
- [root@mail ~]# osinfo-query os | grep centos
- centos-stream8 | CentOS Stream 8 | 8 | http://centos.org/centos-stream/8
- centos-stream9 | CentOS Stream 9 | 9 | http://centos.org/centos-stream/9
- centos5.0 | CentOS 5.0 | 5.0 | http://centos.org/centos/5.0
- centos5.1 | CentOS 5.1 | 5.1 | http://centos.org/centos/5.1
- centos5.10 | CentOS 5.10 | 5.10 | http://centos.org/centos/5.10
- centos5.11 | CentOS 5.11 | 5.11 | http://centos.org/centos/5.11
- centos5.2 | CentOS 5.2 | 5.2 | http://centos.org/centos/5.2
- centos5.3 | CentOS 5.3 | 5.3 | http://centos.org/centos/5.3
- centos5.4 | CentOS 5.4 | 5.4 | http://centos.org/centos/5.4
- centos5.5 | CentOS 5.5 | 5.5 | http://centos.org/centos/5.5
- centos5.6 | CentOS 5.6 | 5.6 | http://centos.org/centos/5.6
- centos5.7 | CentOS 5.7 | 5.7 | http://centos.org/centos/5.7
- centos5.8 | CentOS 5.8 | 5.8 | http://centos.org/centos/5.8
- centos5.9 | CentOS 5.9 | 5.9 | http://centos.org/centos/5.9
- centos6.0 | CentOS 6.0 | 6.0 | http://centos.org/centos/6.0
- centos6.1 | CentOS 6.1 | 6.1 | http://centos.org/centos/6.1
- centos6.10 | CentOS 6.10 | 6.10 | http://centos.org/centos/6.10
- centos6.2 | CentOS 6.2 | 6.2 | http://centos.org/centos/6.2
- centos6.3 | CentOS 6.3 | 6.3 | http://centos.org/centos/6.3
- centos6.4 | CentOS 6.4 | 6.4 | http://centos.org/centos/6.4
- centos6.5 | CentOS 6.5 | 6.5 | http://centos.org/centos/6.5
- centos6.6 | CentOS 6.6 | 6.6 | http://centos.org/centos/6.6
- centos6.7 | CentOS 6.7 | 6.7 | http://centos.org/centos/6.7
- centos6.8 | CentOS 6.8 | 6.8 | http://centos.org/centos/6.8
- centos6.9 | CentOS 6.9 | 6.9 | http://centos.org/centos/6.9
- centos7.0 | CentOS 7 | 7 | http://centos.org/centos/7.0
- centos8 | CentOS 8 | 8 | http://centos.org/centos/8
- [root@mail ~]#
centos8镜像下载
- https://www.centos.org/centos-linux/
- https://www.centos.org/centos-stream/
- https://vault.centos.org/
- https://vault.centos.org/8.5.2111/BaseOS/x86_64/os/images/
- https://vault.centos.org/8.5.2111/cloud/x86_64/openstack-train/Packages/o/
排错:
- 安装过程中:
- 手动配置IP地址
- 到 url 位置找不到路径,要返回去手动选择 url,重新配置 url 为 ftp://192.168.100.230/rhel6u4,这里的ip不要写127.0.0.1而是br0的IP
- 给虚拟机指定的内存必须大于2048M,不然报错如下:dracut-initqueue[552:/sbin/dmsqush-live-root:line 273: printf:write error:No space left on device]
- 逃脱符:
- Escape character is ^]
3,命令行模式安装
虚拟机的组成部分
- https://netplan.io/
- 1 虚拟机配置文件
- ls /etc/libvirt/qemu
- networks vm1.xml
- 2 储存虚拟机的介质
- ls /var/lib/libvirt/images/
- vm1.img
根据配置文件创建虚拟机
- 1. 需要有磁盘镜像文件
- cp vm1.img vm2.img
- cp vm1.img vm3.img
-
- 2. 需要有配置文件
- cp vm1.xml vm2.xml
- cp vm1.xml vm3.xml
-
- 3. 修改.xml 配置文件 必须修改的有四处
- (1)主机名
- (2)uuid
- (3)镜像文件名
- (4)mac地址
- 注意: 内存修改时两处内存大小必须一致
- vcpu是可选项修改
-
- 4. 创建虚拟机:
- virsh define /etc/libvirt/qemu/vm2.xml
- virsh define /etc/libvirt/qemu/vm3.xml
-
- root@kvm-server:~# virsh define /etc/libvirt/qemu/vm3.xml
- Domain 'vm3' defined from /etc/libvirt/qemu/vm3.xml
-
- root@kvm-server:~# virsh define /etc/libvirt/qemu/vm2.xml
- Domain 'vm2' defined from /etc/libvirt/qemu/vm2.xml
-
-
-
- 5. 重启一下
- systemctl restart libvirtd
- systemctl status libvirtd
- systemctl enable libvirtd
- systemctl stop libvirtd
-
- root@kvm-server:~# systemctl restart libvirtd
- root@kvm-server:~#
-
-
- 6. 宿主机开启路由转发:
- vim /etc/sysctl.conf
- sysctl -p
- net.ipv4.ip_forward = 1
-
-
- # ubuntu
- 将 'net.ipv4.ip_forward = 1'前的注释删除,开启路由转发
- root@kvm-server:~# vim /etc/sysctl.conf
- root@kvm-server:~# sysctl -p # 使其生效
- net.ipv4.ip_forward = 1
- root@kvm-server:~#
-
-
- # centos8
- [root@mail ~]# systemctl restart libvirtd
- [root@mail ~]# vim /etc/sysctl.conf
- [root@mail ~]# sysctl -p
- vm.max_map_count = 655360
- net.ipv4.ip_forward = 1
- [root@mail ~]#
4,实例
模板镜像+配置文件 方式创建虚拟机
- 1. 拷贝模板镜像和配置文件
-
- cp /var/lib/libvirt/images/vm1.img /var/lib/libvirt/images/vm3.img
-
- root@kvm-server:/etc/libvirt/qemu# cd /var/lib/libvirt/images/
- root@kvm-server:/var/lib/libvirt/images# ls
- ubuntu22.04.qcow2 vm1.qcow2
- root@kvm-server:/var/lib/libvirt/images# cp vm1.qcow2 vm3.img
- root@kvm-server:/var/lib/libvirt/images# ls
- ubuntu22.04.qcow2 vm1.qcow2 vm3.img
-
-
-
- cp /etc/libvirt/qemu/vm1.xml /etc/libvirt/qemu/vm3.xml
-
- root@kvm-server:~# cd /etc/libvirt/qemu/
- root@kvm-server:/etc/libvirt/qemu# ls
- networks ubuntu22.04.xml vm1.xml
- root@kvm-server:/etc/libvirt/qemu# cp vm1.xml vm3.xml
- root@kvm-server:/etc/libvirt/qemu# ls
- networks ubuntu22.04.xml vm1.xml vm3.xml
-
-
- 2. 修改配置文件
- vim /etc/libvirt/qemu/vm3.xml
修改配置文件
vim /etc/libvirt/qemu/vm3.xml
- root@kvm-server:~# cat /etc/libvirt/qemu/vm3.xml
-
- <!--
- WARNING: THIS IS AN AUTO-GENERATED FILE. CHANGES TO IT ARE LIKELY TO BE
- OVERWRITTEN AND LOST. Changes to this xml configuration should be made using:
- virsh edit vm1
- or other application using the libvirt API.
- -->
-
- <domain type='kvm'>
- # 修改虚拟机的名称将 'vm1' 改为 'vm3'
- <name>vm1</name>
- # uuid 也要修改,uuid是设备的唯一标识号,每台设备都有自己的uuid,所以一定要修改
- <uuid>ef78cf9c-b4d6-411d-904e-722ff99203ec</uuid>
- <metadata>
- <libosinfo:libosinfo xmlns:libosinfo="http://libosinfo.org/xmlns/libvirt/domain/1.0">
- <libosinfo:os id="http://ubuntu.com/ubuntu/22.04"/>
- </libosinfo:libosinfo>
- </metadata>
- # 内存 'memory'与 'currentMemory'这两处要保存一致
- <memory unit='KiB'>4194304</memory>
- <currentMemory unit='KiB'>4194304</currentMemory>
- # 修改 cpu 是可选项
- <vcpu placement='static'>2</vcpu>
- <os>
- <type arch='x86_64' machine='pc-q35-6.2'>hvm</type>
- <boot dev='hd'/>
- </os>
- <features>
- <acpi/>
- <apic/>
- <vmport state='off'/>
- </features>
- <cpu mode='host-passthrough' check='none' migratable='on'/>
- <clock offset='utc'>
- <timer name='rtc' tickpolicy='catchup'/>
- <timer name='pit' tickpolicy='delay'/>
- <timer name='hpet' present='no'/>
- </clock>
- <on_poweroff>destroy</on_poweroff>
- <on_reboot>restart</on_reboot>
- <on_crash>destroy</on_crash>
- <pm>
- <suspend-to-mem enabled='no'/>
- <suspend-to-disk enabled='no'/>
- </pm>
- <devices>
- <emulator>/usr/bin/qemu-system-x86_64</emulator>
- <disk type='file' device='disk'>
- <driver name='qemu' type='qcow2' discard='unmap'/>
- # 磁盘镜像文件名得修改,不能相同,以避免冲突
- <source file='/var/lib/libvirt/images/vm1.qcow2'/>
- # 这里磁盘名称为 vda
- <target dev='vda' bus='virtio'/>
- # 插槽 slot 值为 '0x00'
- <address type='pci' domain='0x0000' bus='0x04' slot='0x00' function='0x0'/>
- </disk>
- # 添加一块新硬盘
- <disk type='file' device='disk'>
- <driver name='qemu' type='qcow2' discard='unmap'/>
- # 磁盘镜像文件名得修改,不能相同,以避免冲突,名为 vm1-1.qcow2
- <source file='/var/lib/libvirt/images/vm1-1.qcow2'/>
- # 必须修改磁盘名称,这里磁盘名称为 vdb
- <target dev='vdb' bus='virtio'/>
- # 必须修改插槽,不能放在同一个插槽里面,将slot值设为 '0x01'
- <address type='pci' domain='0x0000' bus='0x04' slot='0x01' function='0x0'/>
- </disk>
- <disk type='file' device='cdrom'>
- <driver name='qemu' type='raw'/>
- <target dev='sda' bus='sata'/>
- <readonly/>
- <address type='drive' controller='0' bus='0' target='0' unit='0'/>
- </disk>
- <controller type='usb' index='0' model='qemu-xhci' ports='15'>
- <address type='pci' domain='0x0000' bus='0x02' slot='0x00' function='0x0'/>
- </controller>
- <controller type='pci' index='0' model='pcie-root'/>
- <controller type='pci' index='1' model='pcie-root-port'>
- <model name='pcie-root-port'/>
- <target chassis='1' port='0x10'/>
- <address type='pci' domain='0x0000' bus='0x00' slot='0x02' function='0x0' multifunction='on'/>
- </controller>
- <controller type='pci' index='2' model='pcie-root-port'>
- <model name='pcie-root-port'/>
- <target chassis='2' port='0x11'/>
- <address type='pci' domain='0x0000' bus='0x00' slot='0x02' function='0x1'/>
- </controller>
- <controller type='pci' index='3' model='pcie-root-port'>
- <model name='pcie-root-port'/>
- <target chassis='3' port='0x12'/>
- <address type='pci' domain='0x0000' bus='0x00' slot='0x02' function='0x2'/>
- </controller>
- <controller type='pci' index='4' model='pcie-root-port'>
- <model name='pcie-root-port'/>
- <target chassis='4' port='0x13'/>
- <address type='pci' domain='0x0000' bus='0x00' slot='0x02' function='0x3'/>
- </controller>
- <controller type='pci' index='5' model='pcie-root-port'>
- <model name='pcie-root-port'/>
- <target chassis='5' port='0x14'/>
- <address type='pci' domain='0x0000' bus='0x00' slot='0x02' function='0x4'/>
- </controller>
- <controller type='pci' index='6' model='pcie-root-port'>
- <model name='pcie-root-port'/>
- <target chassis='6' port='0x15'/>
- <address type='pci' domain='0x0000' bus='0x00' slot='0x02' function='0x5'/>
- </controller>
- <controller type='pci' index='7' model='pcie-root-port'>
- <model name='pcie-root-port'/>
- <target chassis='7' port='0x16'/>
- <address type='pci' domain='0x0000' bus='0x00' slot='0x02' function='0x6'/>
- </controller>
- <controller type='pci' index='8' model='pcie-root-port'>
- <model name='pcie-root-port'/>
- <target chassis='8' port='0x17'/>
- <address type='pci' domain='0x0000' bus='0x00' slot='0x02' function='0x7'/>
- </controller>
- <controller type='pci' index='9' model='pcie-root-port'>
- <model name='pcie-root-port'/>
- <target chassis='9' port='0x18'/>
- <address type='pci' domain='0x0000' bus='0x00' slot='0x03' function='0x0' multifunction='on'/>
- </controller>
- <controller type='pci' index='10' model='pcie-root-port'>
- <model name='pcie-root-port'/>
- <target chassis='10' port='0x19'/>
- <address type='pci' domain='0x0000' bus='0x00' slot='0x03' function='0x1'/>
- </controller>
- <controller type='pci' index='11' model='pcie-root-port'>
- <model name='pcie-root-port'/>
- <target chassis='11' port='0x1a'/>
- <address type='pci' domain='0x0000' bus='0x00' slot='0x03' function='0x2'/>
- </controller>
- <controller type='pci' index='12' model='pcie-root-port'>
- <model name='pcie-root-port'/>
- <target chassis='12' port='0x1b'/>
- <address type='pci' domain='0x0000' bus='0x00' slot='0x03' function='0x3'/>
- </controller>
- <controller type='pci' index='13' model='pcie-root-port'>
- <model name='pcie-root-port'/>
- <target chassis='13' port='0x1c'/>
- <address type='pci' domain='0x0000' bus='0x00' slot='0x03' function='0x4'/>
- </controller>
- <controller type='pci' index='14' model='pcie-root-port'>
- <model name='pcie-root-port'/>
- <target chassis='14' port='0x1d'/>
- <address type='pci' domain='0x0000' bus='0x00' slot='0x03' function='0x5'/>
- </controller>
- <controller type='sata' index='0'>
- <address type='pci' domain='0x0000' bus='0x00' slot='0x1f' function='0x2'/>
- </controller>
- <controller type='virtio-serial' index='0'>
- <address type='pci' domain='0x0000' bus='0x03' slot='0x00' function='0x0'/>
- </controller>
- <interface type='network'>
- # 'mac'地址必须修改,修改后面六位比如'47:bf:2f'只能修改后三对比如'47 bf 2F'
- <mac address='52:54:00:47:bf:2f'/>
- <source network='default'/>
- <model type='virtio'/>
- <address type='pci' domain='0x0000' bus='0x01' slot='0x00' function='0x0'/>
- </interface>
- <serial type='pty'>
- <target type='isa-serial' port='0'>
- <model name='isa-serial'/>
- </target>
- </serial>
- <console type='pty'>
- <target type='serial' port='0'/>
- </console>
- <channel type='unix'>
- <target type='virtio' name='org.qemu.guest_agent.0'/>
- <address type='virtio-serial' controller='0' bus='0' port='1'/>
- </channel>
- <channel type='spicevmc'>
- <target type='virtio' name='com.redhat.spice.0'/>
- <address type='virtio-serial' controller='0' bus='0' port='2'/>
- </channel>
- <input type='tablet' bus='usb'>
- <address type='usb' bus='0' port='1'/>
- </input>
- <input type='mouse' bus='ps2'/>
- <input type='keyboard' bus='ps2'/>
- <graphics type='spice' autoport='yes'>
- <listen type='address'/>
- <image compression='off'/>
- </graphics>
- <sound model='ich9'>
- <address type='pci' domain='0x0000' bus='0x00' slot='0x1b' function='0x0'/>
- </sound>
- <audio id='1' type='spice'/>
- <video>
- <model type='qxl' ram='65536' vram='65536' vgamem='16384' heads='1' primary='yes'/>
- <address type='pci' domain='0x0000' bus='0x00' slot='0x01' function='0x0'/>
- </video>
- <redirdev bus='usb' type='spicevmc'>
- <address type='usb' bus='0' port='2'/>
- </redirdev>
- <redirdev bus='usb' type='spicevmc'>
- <address type='usb' bus='0' port='3'/>
- </redirdev>
- <memballoon model='virtio'>
- <address type='pci' domain='0x0000' bus='0x05' slot='0x00' function='0x0'/>
- </memballoon>
- <rng model='virtio'>
- <backend model='random'>/dev/urandom</backend>
- <address type='pci' domain='0x0000' bus='0x06' slot='0x00' function='0x0'/>
- </rng>
- </devices>
- </domain>
实战1
- longchi@kvm-server:~$ sudo osinfo-query os | grep ubuntu
- ubuntu10.04 | Ubuntu 10.04 LTS | 10.04 | http://ubuntu.com/ubuntu/10.04
- ubuntu10.10 | Ubuntu 10.10 | 10.10 | http://ubuntu.com/ubuntu/10.10
- ubuntu11.04 | Ubuntu 11.04 | 11.04 | http://ubuntu.com/ubuntu/11.04
- ubuntu11.10 | Ubuntu 11.10 | 11.10 | http://ubuntu.com/ubuntu/11.10
- ubuntu12.04 | Ubuntu 12.04 LTS | 12.04 | http://ubuntu.com/ubuntu/12.04
- ubuntu12.10 | Ubuntu 12.10 | 12.10 | http://ubuntu.com/ubuntu/12.10
- ubuntu13.04 | Ubuntu 13.04 | 13.04 | http://ubuntu.com/ubuntu/13.04
- ubuntu13.10 | Ubuntu 13.10 | 13.10 | http://ubuntu.com/ubuntu/13.10
- ubuntu14.04 | Ubuntu 14.04 LTS | 14.04 | http://ubuntu.com/ubuntu/14.04
- ubuntu14.10 | Ubuntu 14.10 | 14.10 | http://ubuntu.com/ubuntu/14.10
- ubuntu15.04 | Ubuntu 15.04 | 15.04 | http://ubuntu.com/ubuntu/15.04
- ubuntu15.10 | Ubuntu 15.10 | 15.10 | http://ubuntu.com/ubuntu/15.10
- ubuntu16.04 | Ubuntu 16.04 | 16.04 | http://ubuntu.com/ubuntu/16.04
- ubuntu16.10 | Ubuntu 16.10 | 16.10 | http://ubuntu.com/ubuntu/16.10
- ubuntu17.04 | Ubuntu 17.04 | 17.04 | http://ubuntu.com/ubuntu/17.04
- ubuntu17.10 | Ubuntu 17.10 | 17.10 | http://ubuntu.com/ubuntu/17.10
- ubuntu18.04 | Ubuntu 18.04 LTS | 18.04 | http://ubuntu.com/ubuntu/18.04
- ubuntu18.10 | Ubuntu 18.10 | 18.10 | http://ubuntu.com/ubuntu/18.10
- ubuntu19.04 | Ubuntu 19.04 | 19.04 | http://ubuntu.com/ubuntu/19.04
- ubuntu19.10 | Ubuntu 19.10 | 19.10 | http://ubuntu.com/ubuntu/19.10
- ubuntu20.04 | Ubuntu 20.04 LTS | 20.04 | http://ubuntu.com/ubuntu/20.04
- ubuntu20.10 | Ubuntu 20.10 | 20.10 | http://ubuntu.com/ubuntu/20.10
- ubuntu21.04 | Ubuntu 21.04 | 21.04 | http://ubuntu.com/ubuntu/21.04
- ubuntu21.10 | Ubuntu 21.10 | 21.10 | http://ubuntu.com/ubuntu/21.10
- ubuntu22.04 | Ubuntu 22.04 LTS | 22.04 | http://ubuntu.com/ubuntu/22.04
- ubuntu22.10 | Ubuntu 22.10 | 22.10 | http://ubuntu.com/ubuntu/22.10
- ubuntu23.04 | Ubuntu 23.04 | 23.04 | http://ubuntu.com/ubuntu/23.04
- ubuntu23.10 | Ubuntu 23.10 | 23.10 | http://ubuntu.com/ubuntu/23.10
- ubuntu24.04 | Ubuntu 24.04 LTS | 24.04 | http://ubuntu.com/ubuntu/24.04
- ubuntu4.10 | Ubuntu 4.10 | 4.10 | http://ubuntu.com/ubuntu/4.10
- ubuntu5.04 | Ubuntu 5.04 | 5.04 | http://ubuntu.com/ubuntu/5.04
- ubuntu5.10 | Ubuntu 5.10 | 5.10 | http://ubuntu.com/ubuntu/5.10
- ubuntu6.06 | Ubuntu 6.06 LTS | 6.06 | http://ubuntu.com/ubuntu/6.06
- ubuntu6.10 | Ubuntu 6.10 | 6.10 | http://ubuntu.com/ubuntu/6.10
- ubuntu7.04 | Ubuntu 7.04 | 7.04 | http://ubuntu.com/ubuntu/7.04
- ubuntu7.10 | Ubuntu 7.10 | 7.10 | http://ubuntu.com/ubuntu/7.10
- ubuntu8.04 | Ubuntu 8.04 LTS | 8.04 | http://ubuntu.com/ubuntu/8.04
- ubuntu8.10 | Ubuntu 8.10 | 8.10 | http://ubuntu.com/ubuntu/8.10
- ubuntu9.04 | Ubuntu 9.04 | 9.04 | http://ubuntu.com/ubuntu/9.04
- ubuntu9.10 | Ubuntu 9.10 | 9.10 | http://ubuntu.com/ubuntu/9.10
- longchi@kvm-server:~$
-
-
-
- [root@mail ~]# dnf install cockpit
- Last metadata expiration check: 3:14:35 ago on Mon 15 Jul 2024 08:21:11 AM CST.
- Package cockpit-251.1-1.el8.x86_64 is already installed.
- Dependencies resolved.
- Nothing to do.
- Complete!
- [root@mail ~]# systemctl enable --now cockpit.socket
- Created symlink /etc/systemd/system/sockets.target.wants/cockpit.socket → /usr/lib/systemd/system/cockpit.socket.
-
- # 修改端口为9191
- [root@mail ~]# vim /lib/systemd/system/cockpit.socket
- [root@mail ~]# cat /lib/systemd/system/cockpit.socket
- [Unit]
- Description=Cockpit Web Service Socket
- Documentation=man:cockpit-ws(8)
- Wants=cockpit-motd.service
-
- [Socket]
- ListenStream=9191
- ExecStartPost=-/usr/share/cockpit/motd/update-motd '' localhost
- ExecStartPost=-/bin/ln -snf active.motd /run/cockpit/motd
- ExecStopPost=-/bin/ln -snf inactive.motd /run/cockpit/motd
-
- [Install]
- WantedBy=sockets.target
-
-
- [root@mail ~]# systemctl daemon-reload
- [root@mail ~]# systemctl start cockpit.socket
- [root@mail ~]# systemctl status cockpit.socket
- ● cockpit.socket - Cockpit Web Service Socket
- Loaded: loaded (/usr/lib/systemd/system/cockpit.socket; enabled; vendor preset: disabled)
- Active: active (listening) since Mon 2024-07-15 11:43:15 CST; 26s ago
- Docs: man:cockpit-ws(8)
- Listen: [::]:9191 (Stream)
- Process: 172322 ExecStartPost=/bin/ln -snf active.motd /run/cockpit/motd (code=exited, status=0/SUCCESS)
- Process: 172314 ExecStartPost=/usr/share/cockpit/motd/update-motd localhost (code=exited, status=0/SUCCESS)
- Tasks: 0 (limit: 49117)
- Memory: 4.0K
- CGroup: /system.slice/cockpit.socket
-
- Jul 15 11:43:15 mail.longchi.xyz systemd[1]: Starting Cockpit Web Service Socket.
- Jul 15 11:43:15 mail.longchi.xyz systemd[1]: Listening on Cockpit Web Service Socket.
- [root@mail ~]# systemctl enable cockpit.socket
- [root@mail ~]# yum install lrasz socal -y
-
-
-
-
- 清理环境centos8
- [root@mail ~]# yum remove `rpm -qa | egrep 'qemu|virt|kvm'` -y
- Removed:
- boost-iostreams-1.66.0-10.el8.x86_64
- boost-program-options-1.66.0-10.el8.x86_64
- boost-random-1.66.0-10.el8.x86_64
- celt051-0.5.1.3-15.el8.x86_64
- edk2-ovmf-20210527gite1999b264f1f-3.el8.noarch
- freerdp-libs-2:2.2.0-7.el8_5.x86_64
- glusterfs-6.0-56.4.el8.x86_64
- glusterfs-api-6.0-56.4.el8.x86_64
- glusterfs-cli-6.0-56.4.el8.x86_64
- glusterfs-client-xlators-6.0-56.4.el8.x86_64
- glusterfs-libs-6.0-56.4.el8.x86_64
- gnome-boxes-3.36.5-8.el8.x86_64
- gssproxy-0.8.0-19.el8.x86_64
- gtk-vnc2-0.9.0-2.el8.x86_64
- gvnc-0.9.0-2.el8.x86_64
- hdparm-9.54-4.el8.x86_64
- iproute-tc-5.12.0-4.el8.x86_64
- ipxe-roms-qemu-20181214-8.git133f4c47.el8.noarch
- keyutils-1.5.10-9.el8.x86_64
- libcacard-3:2.7.0-2.el8_1.x86_64
- libibumad-35.0-1.el8.x86_64
- libiscsi-1.18.0-8.module_el8.5.0+746+bbd5d70c.x86_64
- libpmem-1.6.1-1.el8.x86_64
- librados2-1:12.2.7-9.el8.x86_64
- librbd1-1:12.2.7-9.el8.x86_64
- librdmacm-35.0-1.el8.x86_64
- libverto-libevent-0.3.0-5.el8.x86_64
- libvirt-daemon-6.0.0-37.module_el8.5.0+1002+36725df2.x86_64
- libvirt-daemon-config-network-6.0.0-37.module_el8.5.0+1002+36725df2.x86_64
- libvirt-daemon-driver-interface-6.0.0-37.module_el8.5.0+1002+36725df2.x86_64
- libvirt-daemon-driver-network-6.0.0-37.module_el8.5.0+1002+36725df2.x86_64
- libvirt-daemon-driver-nodedev-6.0.0-37.module_el8.5.0+1002+36725df2.x86_64
- libvirt-daemon-driver-nwfilter-6.0.0-37.module_el8.5.0+1002+36725df2.x86_64
- libvirt-daemon-driver-qemu-6.0.0-37.module_el8.5.0+1002+36725df2.x86_64
- libvirt-daemon-driver-secret-6.0.0-37.module_el8.5.0+1002+36725df2.x86_64
- libvirt-daemon-driver-storage-6.0.0-37.module_el8.5.0+1002+36725df2.x86_64
- libvirt-daemon-driver-storage-core-6.0.0-37.module_el8.5.0+1002+36725df2.x86_64
- libvirt-daemon-driver-storage-disk-6.0.0-37.module_el8.5.0+1002+36725df2.x86_64
- libvirt-daemon-driver-storage-gluster-6.0.0-37.module_el8.5.0+1002+36725df2.x86_64
- libvirt-daemon-driver-storage-iscsi-6.0.0-37.module_el8.5.0+1002+36725df2.x86_64
- libvirt-daemon-driver-storage-iscsi-direct-6.0.0-37.module_el8.5.0+1002+36725df2.x86_64
- libvirt-daemon-driver-storage-logical-6.0.0-37.module_el8.5.0+1002+36725df2.x86_64
- libvirt-daemon-driver-storage-mpath-6.0.0-37.module_el8.5.0+1002+36725df2.x86_64
- libvirt-daemon-driver-storage-rbd-6.0.0-37.module_el8.5.0+1002+36725df2.x86_64
- libvirt-daemon-driver-storage-scsi-6.0.0-37.module_el8.5.0+1002+36725df2.x86_64
- libvirt-daemon-kvm-6.0.0-37.module_el8.5.0+1002+36725df2.x86_64
- libvirt-gconfig-3.0.0-1.el8.x86_64
- libvirt-glib-3.0.0-1.el8.x86_64
- libvirt-gobject-3.0.0-1.el8.x86_64
- libvirt-libs-6.0.0-37.module_el8.5.0+1002+36725df2.x86_64
- libwinpr-2:2.2.0-7.el8_5.x86_64
- mtools-4.0.18-14.el8.x86_64
- netcf-libs-0.2.8-12.module_el8.5.0+746+bbd5d70c.x86_64
- nfs-utils-1:2.3.3-46.el8.x86_64
- numad-0.5-26.20150602git.el8.x86_64
- openssh-askpass-8.0p1-10.el8.x86_64
- python3-configobj-5.0.6-11.el8.noarch
- python3-linux-procfs-0.6.3-1.el8.noarch
- python3-perf-4.18.0-348.7.1.el8_5.x86_64
- python3-syspurpose-1.28.21-3.el8.x86_64
- qemu-guest-agent-15:4.2.0-59.module_el8.5.0+1063+c9b9feff.1.x86_64
- qemu-img-15:4.2.0-59.module_el8.5.0+1063+c9b9feff.1.x86_64
- qemu-kvm-15:4.2.0-59.module_el8.5.0+1063+c9b9feff.1.x86_64
- qemu-kvm-block-curl-15:4.2.0-59.module_el8.5.0+1063+c9b9feff.1.x86_64
- qemu-kvm-block-gluster-15:4.2.0-59.module_el8.5.0+1063+c9b9feff.1.x86_64
- qemu-kvm-block-iscsi-15:4.2.0-59.module_el8.5.0+1063+c9b9feff.1.x86_64
- qemu-kvm-block-rbd-15:4.2.0-59.module_el8.5.0+1063+c9b9feff.1.x86_64
- qemu-kvm-block-ssh-15:4.2.0-59.module_el8.5.0+1063+c9b9feff.1.x86_64
- qemu-kvm-common-15:4.2.0-59.module_el8.5.0+1063+c9b9feff.1.x86_64
- qemu-kvm-core-15:4.2.0-59.module_el8.5.0+1063+c9b9feff.1.x86_64
- radvd-2.17-15.el8.x86_64
- rpcbind-1.2.5-8.el8.x86_64
- seabios-bin-1.13.0-2.module_el8.5.0+746+bbd5d70c.noarch
- seavgabios-bin-1.13.0-2.module_el8.5.0+746+bbd5d70c.noarch
- sgabios-bin-1:0.20170427git-3.module_el8.5.0+746+bbd5d70c.noarch
- spice-glib-0.38-6.el8.x86_64
- spice-gtk3-0.38-6.el8.x86_64
- spice-server-0.14.3-4.el8.x86_64
- systemd-container-239-51.el8_5.2.x86_64
- tuned-2.16.0-1.el8.noarch
- usbredir-0.8.0-1.el8.x86_64
- virt-what-1.18-12.el8.x86_64
- yajl-2.1.0-10.el8.x86_64
-
- Complete!
- [root@mail ~]#
第二天 企业级虚拟化技术kvm管理
一,GuestOS 安装问题解析
- 问题1:用图形安装 guest os 的时候卡住不动
- 解决:升级系统 yum upgrade -y
- 问题2:升级系统后安装 guest os 的时候还是卡住不动
- 解决:需要在安装宿主机的时候安装兼容程序(有的同学就没有安装也可以使用,这可能是bug)
- 问题3:如果安装了各种兼容程序之后还是不行
- [root@mail ~]# rpm -q qemu-kvm
- qemu-kvm-4.2.0-59.module_el8.5.0+1063+c9b9feff.1.x86_64
-
- [root@mail ~]# rpm -q qemu-kvm-env
- package qemu-kvm-env is not installed
- [root@mail ~]# yum install qemu-kvm-env
- Last metadata expiration check: 1:04:15 ago on Tue 16 Jul 2024 06:07:03 PM CST.
- No match for argument: qemu-kvm-env
- Error: Unable to find a match: qemu-kvm-env
-
- [root@mail ~]# rpm -qa | grep kvm
- qemu-kvm-block-rbd-4.2.0-59.module_el8.5.0+1063+c9b9feff.1.x86_64
- qemu-kvm-core-4.2.0-59.module_el8.5.0+1063+c9b9feff.1.x86_64
- qemu-kvm-block-curl-4.2.0-59.module_el8.5.0+1063+c9b9feff.1.x86_64
- qemu-kvm-common-4.2.0-59.module_el8.5.0+1063+c9b9feff.1.x86_64
- qemu-kvm-4.2.0-59.module_el8.5.0+1063+c9b9feff.1.x86_64
- qemu-kvm-block-ssh-4.2.0-59.module_el8.5.0+1063+c9b9feff.1.x86_64
- qemu-kvm-block-gluster-4.2.0-59.module_el8.5.0+1063+c9b9feff.1.x86_64
- libvirt-daemon-kvm-6.0.0-37.module_el8.5.0+1002+36725df2.x86_64
- qemu-kvm-block-iscsi-4.2.0-59.module_el8.5.0+1063+c9b9feff.1.x86_64
- 如果所有问题都排查过后还是安装不上 guest os,最后的原因就是 安装宿主机系统的时候各种兼容性软件有安装而且yum也没有自动处理导致的
二,GuestOS升级配置
1. 修改配置文件(比如添加磁盘,那就添加如下配置)
- # centos7 添加磁盘需要修改的配置文件内容如下:
- <disk type='file' device='disk'>
- <driver name='qemu' type='qcow2' />
- <source file='/var/lib/libvirt/images/vm3-1.img' />
- <target dev='vda' bus='virtio' />
- <address type='pci' domain='0x0000' bus='0x00' slot='0x16' function='0x0' />
- </disk>
-
- # centos8 添加磁盘需要修改的配置文件内容如下:
-
- # ubuntu 添加磁盘需要修改的配置文件内容如下:
- # 注意修改 bus的值比较特殊
- # 第一块磁盘的 bus 值为 '0x04'即源磁盘bus的值 dev='vda' 镜像文件名为 '/var/lib/libvirt/images/vm1.qcow2'
- # 第二块磁盘的 bus 值为 '0x08' dev='vdb' 镜像文件名为:'/var/lib/libvirt/images/vm1-1.qcow2'
- # 第三块磁盘的 bus 值为 '0x09' dev='vdc' 镜像文件名为:'/var/lib/libvirt/images/vm1-2.qcow2'
- # 第四块磁盘的 bus 值为 '0x0a' dev='vdd' 镜像文件名为:'/var/lib/libvirt/images/vm1-3.qcow2'
- # 第五块磁盘的 bus 值为 '0x0b' dev='vde' 镜像文件名为:'/var/lib/libvirt/images/vm1-4.qcow2'
-
- <disk type='file' device='disk'>
- <driver name='qemu' type='qcow2' discard='unmap'/>
- <source file='/var/lib/libvirt/images/vm1-1.qcow2'/>
- <target dev='vdb' bus='virtio'/>
- <address type='pci' domain='0x0000' bus='0x08' slot='0x00' function='0x0'/>
- </disk>
- <disk type='file' device='disk'>
- <driver name='qemu' type='qcow2' discard='unmap'/>
- <source file='/var/lib/libvirt/images/vm1-2.qcow2'/>
- <target dev='vdc' bus='virtio'/>
- <address type='pci' domain='0x0000' bus='0x09' slot='0x00' function='0x0'/>
- </disk>
- <disk type='file' device='disk'>
- <driver name='qemu' type='qcow2' discard='unmap'/>
- <source file='/var/lib/libvirt/images/vm1-3.qcow2'/>
- <target dev='vdd' bus='virtio'/>
- <address type='pci' domain='0x0000' bus='0x0a' slot='0x00' function='0x0'/>
- </disk>
- <disk type='file' device='disk'>
- <driver name='qemu' type='qcow2' discard='unmap'/>
- <source file='/var/lib/libvirt/images/vm1-4.qcow2'/>
- <target dev='vde' bus='virtio'/>
- <address type='pci' domain='0x0000' bus='0x0b' slot='0x00' function='0x0'/>
- </disk>
-
-
- # ubuntu源磁盘配置文件如下:
- <disk type='file' device='disk'>
- <driver name='qemu' type='qcow2' discard='unmap'/>
- <source file='/var/lib/libvirt/images/vm1.qcow2'/>
- <target dev='vda' bus='virtio'/>
- <address type='pci' domain='0x0000' bus='0x04' slot='0x00' function='0x0'/>
- </disk>
-
特别注意: centos8里面硬盘和网卡的添加已经不能修改 slot 了,要求修改的是bus地址
2. 创建新的空磁盘卷
- 路径:/var/lib/libvirt/images/
- qemu-img create -f qcow2 vm3-1.qcow2 10G
- qemu-img create -f qcow2 vm1-1.qcow2 10G
- qemu-img create -f qcow2 /var/lib/libvirt/images/vm2-1.img 12G
-
- root@kvm-server:/etc/libvirt/qemu# vim vm1.xml
- root@kvm-server:/etc/libvirt/qemu# qemu-img create -f qcow2 /var/lib/libvirt/images/vm1-1.qcow2 10G
- Formatting 'vm1-1.qcow2', fmt=qcow2 cluster_size=65536 extended_l2=off compression_type=zlib size=10737418240 lazy_refcounts=off refcount_bits=16
-
- root@kvm-server:/var/lib/libvirt/images# qemu-img create -f qcow2 /var/lib/libvirt/images/vm2-1.img 12G
- Formatting '/var/lib/libvirt/images/vm2-1.img', fmt=qcow2 cluster_size=65536 extended_l2=off compression_type=zlib size=12884901888 lazy_refcounts=off refcount_bits=16
-
3. 重新定义
- 路径:/etc/libvirt/qemu/
- virsh define /etc/libvirt/qemu/vm2.xml
- virsh define /etc/libvirt/qemu/vm3.xml
- virsh define /etc/libvirt/qemu/vm4.xml
-
- root@kvm-server:/var/lib/libvirt/images# virsh define /etc/libvirt/qemu/vm2.xml
- Domain 'vm2' defined from /etc/libvirt/qemu/vm2.xml
4. 重启libvirt服务
- systemctl restart libvirtd
- root@kvm-server:/var/lib/libvirt/images# systemctl restart libvirtd
- root@kvm-server:/var/lib/libvirt/images# virt-manager
5. 重启 vm2 查看磁盘是否添加成功
如下图 看到vdb为12G,说明成功了
以上是ubuntu添加磁盘的具体操作和注意事项
特别注意: ubuntu里面硬盘和网卡的添加已经不能修改 slot 了,要求修改的是bus地址,而且地址值只能小于等于0【具体值为bus1代表源磁盘即第一块磁盘】
ubuntu添加磁盘配置文件规则如下
| disk | dev | file | address-bus |
|---|---|---|---|
| 第一块磁盘 | 'vda' | /var/lib/libvirt/images/vm1.qcow2 | '0x04' |
| 第二块磁盘 | 'vdb' | /var/lib/libvirt/images/vm1-1.qcow2 | '0x08' |
| 第三块磁盘 | 'vdc' | /var/lib/libvirt/images/vm1-2.qcow2 | '0x09' |
| 第四块磁盘 | 'vdd' | /var/lib/libvirt/images/vm1-3.qcow2 | '0x0a' |
| 第五块磁盘 | 'vde' | /var/lib/libvirt/images/vm1-4.qcow2 | '0x0b' |
执行如下命令
- qemu-img create -f qcow2 /var/lib/libvirt/images/vm1-1.qcow2 15G
- qemu-img create -f qcow2 /var/lib/libvirt/images/vm1-2.qcow2 200G
- qemu-img create -f qcow2 /var/lib/libvirt/images/vm1-3.qcow2 10G
- qemu-img create -f qcow2 /var/lib/libvirt/images/vm1-4.qcow2 3G
-
- virsh define /etc/libvirt/qemu/vm1.xml
-
- systemctl restart libvirtd
-
- virt-manager
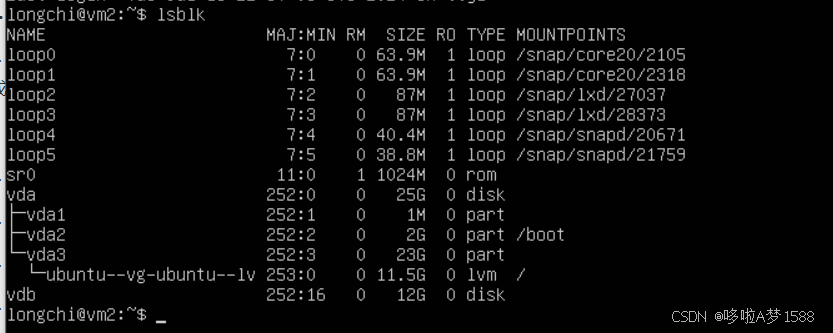
登录vm1查看磁盘添加情况,如下图表示已成功添加 命令 lsblk

连接kvm虚拟机
- # 在宿主机终端命令行输入:ssh + IP 比如
- root@kvm-server:~# ssh 192.168.12.3
- The authenticity of host '192.168.12.3 (192.168.12.3)' can't be established.
- ED25519 key fingerprint is SHA256:hQ4mOhiipaUzhmy6TYUqrbm1hskIwC0OBcOqudwe1D0.
- This key is not known by any other names
- # 询问是否要连接,输入 'yes' 表示要连接,然后回车即可
- Are you sure you want to continue connecting (yes/no/[fingerprint])? yes
- Warning: Permanently added '192.168.12.3' (ED25519) to the list of known hosts.
- root@192.168.12.3's password: # 输入要登录kvm虚拟机登录密码
- Welcome to Ubuntu 22.04.4 LTS (GNU/Linux 5.15.0-113-generic x86_64)
-
- * Documentation: https://help.ubuntu.com
- * Management: https://landscape.canonical.com
- * Support: https://ubuntu.com/pro
- System information as of Wed Jul 17 06:41:18 AM UTC 2024
-
- System load: 0.0 Processes: 130
- Usage of /: 48.3% of 11.21GB Users logged in: 1
- Memory usage: 6% IPv4 address for enp1s0: 192.168.12.3
- Swap usage: 0%
-
-
- Expanded Security Maintenance for Applications is not enabled.
-
- 26 updates can be applied immediately.
- To see these additional updates run: apt list --upgradable
-
- Enable ESM Apps to receive additional future security updates.
- See https://ubuntu.com/esm or run: sudo pro status
-
-
-
- The programs included with the Ubuntu system are free software;
- the exact distribution terms for each program are described in the
- individual files in /usr/share/doc/*/copyright.
-
- Ubuntu comes with ABSOLUTELY NO WARRANTY, to the extent permitted by
- applicable law.
-
- root@vm1:~# apt update
-
- root@vm1:~# lsblk
- NAME MAJ:MIN RM SIZE RO TYPE MOUNTPOINTS
- loop0 7:0 0 63.9M 1 loop /snap/core20/2318
- loop1 7:1 0 40.4M 1 loop /snap/snapd/20671
- loop2 7:2 0 87M 1 loop /snap/lxd/27037
- loop3 7:3 0 63.9M 1 loop /snap/core20/2105
- loop4 7:4 0 87M 1 loop /snap/lxd/28373
- loop5 7:5 0 38.8M 1 loop /snap/snapd/21759
- sr0 11:0 1 1024M 0 rom
- vda 252:0 0 25G 0 disk
- ├─vda1 252:1 0 1M 0 part
- ├─vda2 252:2 0 2G 0 part /boot
- └─vda3 252:3 0 23G 0 part
- └─ubuntu--vg-ubuntu--lv 253:0 0 11.5G 0 lvm /
- vdb 252:16 0 15G 0 disk
- vdc 252:32 0 20G 0 disk
- vdd 252:48 0 10G 0 disk
- vde 252:64 0 3G 0 disk
- root@vm1:~#
查看kvm虚拟机磁盘的添加情况
- root@vm1:~# lsblk
- NAME MAJ:MIN RM SIZE RO TYPE MOUNTPOINTS
- loop0 7:0 0 63.9M 1 loop /snap/core20/2318
- loop1 7:1 0 40.4M 1 loop /snap/snapd/20671
- loop2 7:2 0 87M 1 loop /snap/lxd/27037
- loop3 7:3 0 63.9M 1 loop /snap/core20/2105
- loop4 7:4 0 87M 1 loop /snap/lxd/28373
- loop5 7:5 0 38.8M 1 loop /snap/snapd/21759
- sr0 11:0 1 1024M 0 rom
- vda 252:0 0 25G 0 disk
- ├─vda1 252:1 0 1M 0 part
- ├─vda2 252:2 0 2G 0 part /boot
- └─vda3 252:3 0 23G 0 part
- └─ubuntu--vg-ubuntu--lv 253:0 0 11.5G 0 lvm /
- vdb 252:16 0 15G 0 disk
- vdc 252:32 0 20G 0 disk
- vdd 252:48 0 10G 0 disk
- vde 252:64 0 3G 0 disk
- ---------------宿主机登录kvm虚拟机------------------------
- root@kvm-server:~# systemctl restart libvirtd
- root@kvm-server:~# virt-manager
- root@kvm-server:~# ssh 192.168.12.3 # 宿主机登录kvm虚拟机
- root@192.168.12.3's password: 输入密码
- Welcome to Ubuntu 22.04.4 LTS (GNU/Linux 5.15.0-116-generic x86_64)
- * Documentation: https://help.ubuntu.com
- * Management: https://landscape.canonical.com
- * Support: https://ubuntu.com/pro
- System information as of Wed Jul 17 07:36:27 AM UTC 2024
- System load: 0.62109375 Processes: 140
- Usage of /: 53.6% of 11.21GB Users logged in: 1
- Memory usage: 6% IPv4 address for enp1s0: 192.168.12.3
- Swap usage: 0%
- Expanded Security Maintenance for Applications is not enabled.
- 0 updates can be applied immediately.
- Enable ESM Apps to receive additional future security updates.
- See https://ubuntu.com/esm or run: sudo pro status
- Last login: Wed Jul 17 06:41:18 2024 from 192.168.12.1
- # 退出kvm虚拟机
- root@vm1:~# exit
- logout
- Connection to 192.168.12.3 closed.
- root@kvm-server:~#
三,KVM存储
概念
KVM必须要配置一个目录当作他存储磁盘镜像 (存储卷) 的目录,我们称这个目录为存储池
默认存储池:
/var/lib/libvirt/images/
1. 存储池管理
- 1. 创建基于文件夹的存储池(目录)((在宿主机是创建存储池)
- mkdir -p /data/vmfs
-
- root@kvm-server:~# mkdir -p /data/vmfs
- root@kvm-server:~#
-
-
- 2. 定义存储池与其目录(将创建的目录定义为存储池)
- virsh pool-define-as vmdisk --type dir --target /data/vmfs
-
- 参数解释:
- 'pool-define-as': 定义池的命令
- 'vmdisk': 自定义存储池的名字
- '--type dir': 存储池的类型是目录的
- '--target': 目标(给谁定义)
-
- root@kvm-server:~# virsh pool-define-as vmdisk --type dir --target /data/vmfs
- Pool vmdisk defined # 表示定义成功
-
-
-
- 3. 创建已定义的存储池
- (1) 创建已定义的存储池
- virsh pool-build vmdisk
-
- root@kvm-server:~# virsh pool-build vmdisk
- Pool vmdisk built # 表示存储池构建成功
-
-
- (2)查看已定义的存储池,存储池不激活无法使用
- # virsh pool-list --all
-
- root@kvm-server:~# virsh pool-list --all
- Name State Autostart
- ---------------------------------
- default active yes # /var/lib/libvirt/images/
- vmdisk inactive no # /data/vmfs/vmdisk
-
-
-
-
- 4. 激活并自动启动已定义的存储池
- virsh pool-start vmdisk
- root@kvm-server:~# virsh pool-start vmdisk
- Pool vmdisk started # 表示已经激活存储池
-
- # 把存储池做成开机自启
- virsh pool-autostart vmdiask
- root@kvm-server:~# virsh pool-autostart vmdisk
- Pool vmdisk marked as autostarted # 已经成功启动开机自启存储池
-
- # 再次查看已定义的存储池
- root@kvm-server:~# virsh pool-list --all
- Name State Autostart
- -------------------------------
- default active yes
- vmdisk active yes # 表示存储池 vmdisk 已经激活
-
-
-
-
-
- 这里 vmdisk 存储池就已经创建好了,可以直接在这个存储池中创建虚拟磁盘文件了。
-
- 5. 在存储池中创建虚拟机存储卷
- virsh vol-create-as vmdisk oeltest03.qcow2 20G --format qcow2
-
-
- 参数解释:
- 'vol-create-as' 创建存储卷到哪个存储池里面
- 'vmdisk' 存储池名称
- 'oeltest03.qcow2' 自定义存储卷名称 后缀可以说 '.qcow2'或者 '.img' 都可以
- '20G' 存储卷大小
- '--format qcow2': 指定存储卷的格式为 qcow2
-
- root@kvm-server:~# virsh vol-create-as vmdisk oeltest03.qcow2 20G --format qcow2
- Vol oeltest03.qcow2 created # 表示存储卷已经创建成功
-
- # 查看存储卷是否创建成功
- root@kvm-server:~# ls /data/vmfs/
- oeltest03.qcow2
- root@kvm-server:~# ll /data/vmfs
- total 204
- drwxr-xr-x 2 root root 4096 Jul 17 08:19 ./
- drwxr-xr-x 3 root root 4096 Jul 17 07:44 ../
- -rw------- 1 root root 196928 Jul 17 08:19 oeltest03.qcow2
-
- # 查看创建的存储卷大小
- root@kvm-server:~# ll /data/vmfs -h
- total 204K
- drwxr-xr-x 2 root root 4.0K Jul 17 08:19 ./
- drwxr-xr-x 3 root root 4.0K Jul 17 07:44 ../
- -rw------- 1 root root 193K Jul 17 08:19 oeltest03.qcow2
- root@kvm-server:~#
-
-
-
- 注意:
- (1) kvm存储池主要是体现一种管理方式,可以通过挂载存储目录,lvm逻辑卷的方式创建存储池,虚拟机存储卷创建完成后,剩下的操作与无存储卷的方式无任何区别了。
- (2) kvm 存储池也要用于虚拟机迁移任务
-
-
- 6. 存储池相关管理命令
- (1) 在存储池中删除虚拟机存储卷
- virsh vol-delete --pool vmdisk oeltest03.qcow2
-
- 参数解释:
- 'vol-delete': 存储卷删除命令
- '--pool vmdisk': 哪个存储池
- 'oeltest03.qcow2': 指定删除哪个存储池的哪个文件名删除
-
- root@kvm-server:~# virsh vol-delete --pool vmdisk oeltest03.qcow2
- Vol oeltest03.qcow2 deleted
- # 表示文件名为 'oeltest03.qcow2' 已经成功删除
-
-
-
- (2) 取消激活存储池
- virsh pool-destroy vmdisk
-
- root@kvm-server:~# virsh pool-destroy vmdisk
- Pool vmdisk destroyed # 表示已经成功取消激活的存储池
-
-
- (3) 删除存储池定义的目录 /data/vmfs 之前先删除 存储池 vmdisk
- virsh pool-delete vmdisk
-
- root@kvm-server:~# virsh pool-delete vmdisk
- Pool vmdisk deleted # 表示存储池已成功删除
-
-
- (4) 取消定义存储池
- virsh pool-undefine vmdisk
-
- root@kvm-server:~# virsh pool-undefine vmdisk
- Pool vmdisk has been undefined # 表示已经成功取消定义的存储池vmdisk
-
- (5) 查看此时的存储池
- root@kvm-server:~# virsh pool-list --all
- Name State Autostart
- -------------------------------
- default active yes
-
-
-
- 到此 kvm 存储池配置与管理操作完毕。
查看磁盘大小
- root@kvm-server:~# virt-manager # 启动kvm虚拟机
- root@kvm-server:~# lsblk # 查看磁盘大小
- NAME MAJ:MIN RM SIZE RO TYPE MOUNTPOINTS
- loop0 7:0 0 63.9M 1 loop /snap/core20/2105
- loop1 7:1 0 87M 1 loop /snap/lxd/27037
- loop2 7:2 0 87M 1 loop /snap/lxd/28373
- loop3 7:3 0 63.9M 1 loop /snap/core20/2318
- loop4 7:4 0 40.4M 1 loop /snap/snapd/20671
- loop5 7:5 0 38.8M 1 loop /snap/snapd/21759
- sda 8:0 0 150G 0 disk
- ├─sda1 8:1 0 1M 0 part
- ├─sda2 8:2 0 2G 0 part /boot
- └─sda3 8:3 0 148G 0 part
- └─ubuntu--vg-ubuntu--lv 253:0 0 74G 0 lvm /
- sr0 11:0 1 2G 0 rom
- root@kvm-server:~#
-
2. 生产环境存储池使用
添加 lvm 和远程存储即可
3. 磁盘格式
(1) 磁盘镜像文件格式
- raw
- 原始格式,性能最后
- qcow
- 先去了解一下cow(写时拷贝copy on write),性能远不能和 raw 相比,所以很快夭折了,所以出现了qcow2
- qcow2
- 性能上还是不如raw格式,但是raw不支持快照,qcow2支持快照。
- qed
- 现在默认安装好的用的是raw格式,所有做快照要把他转换成 qcow2 格式
- 什么叫写时拷贝?
- raw立刻分配空间,不管你有没有用到那么多空间
- qcow2只是承诺给你分配空间,但是只有当你需要空间的时候,才会给你空间。最多只给你承诺空间的大小,避免空间浪费
-
- 工作当中用哪个?看你用不用快照。
- 工作当中虚拟机会有多个备份,一个坏了,再起一个就行了,所以没必要用快照。当然也不一定。数据绝对不会存储到本地。
(2) 创建磁盘文件
- 1. 建立 qcow2 格式磁盘文件:
- # qemu-img create -f qcow2 test.qcow2 20G
- 注意执行该命令时一定要指明绝对路径
-
- root@kvm-server:~# qemu-img create -f qcow2 test.qcow2 3G
- Formatting 'test.qcow2', fmt=qcow2 cluster_size=65536 extended_l2=off compression_type=zlib size=3221225472 lazy_refcounts=off refcount_bits=16 # 表示创建成功
-
- qemu-img create -f qcow2 /var/lib/libvirt/images/test.qcow2 20G
- root@kvm-server:~# qemu-img create -f qcow2 /var/lib/libvirt/images/test.qcow2 2G
- Formatting '/var/lib/libvirt/images/test.qcow2', fmt=qcow2 cluster_size=65536 extended_l2=off compression_type=zlib size=2147483648 lazy_refcounts=off refcount_bits=16
-
-
-
- 参数解释
- '-f'指定什么格式的磁盘文件
-
- 2. 建立 raw 格式磁盘文件
- # qemu-img create -f raw test.raw 20G
-
- root@kvm-server:~# qemu-img create -f raw /var/lib/libvirt/images/test.img 2G
- Formatting '/var/lib/libvirt/images/test.img', fmt=raw size=2147483648
-
- # 查看创建的磁盘文件
- root@kvm-server:~# ls /var/lib/libvirt/images/
- test.img test.qcow2 vm1-1.qcow2 vm1-2.qcow2 vm1-3.qcow2 vm1-4.qcow2 vm1.qcow2 vm2-1.img vm2.img vm3.img
- root@kvm-server:~# ll /var/lib/libvirt/images/ -h
- total 18G
- drwx--x--x 2 root root 4.0K Jul 17 11:25 ./
- drwxr-xr-x 7 root root 4.0K Jul 17 02:29 ../
- -rw-r--r-- 1 root root 2.0G Jul 17 11:25 test.img
- -rw-r--r-- 1 root root 193K Jul 17 11:21 test.qcow2
- -rw------- 1 root root 16G Jul 17 03:01 vm1-1.qcow2
- -rw------- 1 root root 21G Jul 17 03:10 vm1-2.qcow2
- -rw------- 1 root root 11G Jul 17 05:21 vm1-3.qcow2
- -rw------- 1 root root 3.1G Jul 17 05:24 vm1-4.qcow2
- -rw------- 1 libvirt-qemu kvm 26G Jul 17 08:30 vm1.qcow2
- -rw-r--r-- 1 root root 193K Jul 17 05:59 vm2-1.img
- -rw------- 1 root root 26G Jul 17 07:32 vm2.img
- -rw------- 1 root root 26G Jul 16 23:51 vm3.img
- root@kvm-server:~#
-
-
-
- 3. 查看已经创建的虚拟磁盘文件
- # qemu-img info test.qcow2
- qemu-img info /var/lib/libvirt/images/test.qcow2
- root@kvm-server:~# qemu-img info /var/lib/libvirt/images/test.qcow2
- image: /var/lib/libvirt/images/test.qcow2 # 镜像名称
- file format: qcow2 # 文件格式
- virtual size: 2 GiB (2147483648 bytes) # 虚拟大小
- disk size: 196 KiB # 磁盘大小
- cluster_size: 65536
- Format specific information:
- compat: 1.1
- compression type: zlib
- lazy refcounts: false
- refcount bits: 16
- corrupt: false
- extended l2: false
-
-
- root@kvm-server:~# qemu-img info /var/lib/libvirt/images/vm1.qcow2
- image: /var/lib/libvirt/images/vm1.qcow2
- file format: qcow2
- virtual size: 25 GiB (26843545600 bytes)
- disk size: 6.33 GiB
- cluster_size: 65536
- Format specific information:
- compat: 1.1
- compression type: zlib
- lazy refcounts: true
- refcount bits: 16
- corrupt: false
- extended l2: false
- root@kvm-server:~#
-
-
-
- 以上执行命令注意所有文件的路径
4. 挂载磁盘
作为虚拟机环境管理员。你肯定遇到过虚拟机无法启动的情况。实施排错时,你需要对虚拟机的内部进行检查。而Libguestfs Linux工具集可以在这种情况下为你提供帮助。
利用Libguestfs找出损坏的虚拟文件
Libguestfs允许在虚拟机上挂载任何类型的文件系统,以便修复启动故障。
使用Libguestfs,首先需要使用 Libvirt.libvirt是一个管理接口,可以和kvm,xen和其他一些基于Linux的虚拟机相互连接。Libguestfs的功能更加强大,可以打开Window虚拟机上的文件,但是首先你需要将虚拟机迁移到libguestfs可用环境当中,也就是Linux环境。
假如你是vmware的ESXI虚拟机,为了将虚拟机迁移到Linux当中,你可以使用SSH主机,这意味着你首先需要启用ESXI主机上的SSH访问方式,完成之后,在 linux 平台上运行下面的scp命令
- 查看磁盘镜像分区信息:
- virt-df -h -d vm1
-
- 参数解释
- '-h': 显示磁盘大小
- '-d': 指的是域,就相当于你机器的名字(即域名)
-
- root@kvm-server:~# virt-df -h -d vm1
- Filesystem Size Used Available Use%
- vm1:/dev/sda2 1.9G 253M 1.5G 14%
- vm1:/dev/ubuntu-vg/ubuntu-lv 11G 6.0G 4.6G 54%
-
-
- virt-filesystems -d vm1
-
- 参数解释:
- 'virt-filesystems': 文件系统
- '-d' 域 后面跟主机名
-
- root@kvm-server:~# virt-filesystems -d vm1
- /dev/sda2
- /dev/ubuntu-vg/ubuntu-lv
- root@kvm-server:~#
-
-
-
- 挂载磁盘镜像分区
- guestmount -d vm1 -m /dev/vda1 --rw /mnt
- 参数解释:
- '-d' 指明挂载主机
- '-m' 指定具体挂载谁
- '--rw' 读写
- '/mnt' 指明具体挂载在哪里(即挂载目录)
-
- # ubuntu系统
- guestmount -d vm1 -m /dev/ubuntu-vg/ubuntu-lv --rw /mnt
-
- root@kvm-server:~# guestmount -d vm1 -m /dev/ubuntu-vg/ubuntu-lv --rw /mnt
-
- # 查看挂载情况
- root@kvm-server:~# df -h
- Filesystem Size Used Avail Use% Mounted on
- tmpfs 1.2G 1.7M 1.2G 1% /run
- /dev/mapper/ubuntu--vg-ubuntu--lv 73G 29G 41G 42% /
- tmpfs 5.9G 0 5.9G 0% /dev/shm
- tmpfs 5.0M 0 5.0M 0% /run/lock
- tmpfs 5.9G 0 5.9G 0% /run/qemu
- /dev/sda2 2.0G 254M 1.6G 14% /boot
- tmpfs 1.2G 4.0K 1.2G 1% /run/user/0
- /dev/fuse 12G 6.1G 4.7G 57% /mnt
- root@kvm-server:~# df -Th
- Filesystem Type Size Used Avail Use% Mounted on
- tmpfs tmpfs 1.2G 1.7M 1.2G 1% /run
- /dev/mapper/ubuntu--vg-ubuntu--lv ext4 73G 29G 41G 42% /
- tmpfs tmpfs 5.9G 0 5.9G 0% /dev/shm
- tmpfs tmpfs 5.0M 0 5.0M 0% /run/lock
- tmpfs tmpfs 5.9G 0 5.9G 0% /run/qemu
- /dev/sda2 ext4 2.0G 254M 1.6G 14% /boot
- tmpfs tmpfs 1.2G 4.0K 1.2G 1% /run/user/0
- /dev/fuse fuse 12G 6.1G 4.7G 57% /mnt
- root@kvm-server:~# guestmount -d vm1 -m /dev/ubuntu-vg/ubuntu-lv --rw /mnt
- root@kvm-server:~# cd /mnt
- root@kvm-server:/mnt# ls
- bin boot cdrom dev etc home lib lib32 lib64 libx32 lost+found media mnt opt proc root run sbin snap srv swap.img sys tmp usr var
- root@kvm-server:/mnt#
-
-
-
-
- 取消挂载:
- guestunmount /mnt
-
- root@kvm-server:/mnt# pwd
- /mnt
- root@kvm-server:/mnt# ls
- bin boot cdrom dev etc home lib lib32 lib64 libx32 lost+found media mnt opt proc root run sbin snap srv swap.img sys tmp usr var
- root@kvm-server:/mnt# cd
- root@kvm-server:~# guestunmount /mnt
- root@kvm-server:~# ls /mnt/
- root@kvm-server:~#
-
-
- 注:
- mtab文件在centos7的启动过程中非常有用,删掉会导致不能启动
- # ubuntu
- root@kvm-server:~# virt-df -h -d vm1
- Command 'virt-df' not found, but can be installed with:
- apt install guestfs-tools
- root@kvm-server:~# apt install guests-tools
-
- # python-guestfs guests-tools不能安装
- 解决方案如下:
- root@kvm-server:~# apt install guestfsd libguestfs-dev guestfish libguestfs0 libguestfs-tools guestmount seabios
-
- 可以用virt-df命令了
- root@kvm-server:~# virt-manager
- root@kvm-server:~# virt-df -h -d vm1
- Filesystem Size Used Available Use%
- vm1:/dev/sda2 1.9G 253M 1.5G 14%
- vm1:/dev/ubuntu-vg/ubuntu-lv 11G 6.0G 4.6G 54%
- root@kvm-server:~#
-
- 挂载虚拟机的作用: 将虚拟机的某个磁盘挂载到你的宿主机上,然后对他的数据文件进行copy,导出
错误问题及解决方案:
- [root@mail ~]# systemctl restart libvirtd
- [root@mail ~]# virt-manager
- [root@mail ~]# virt-df -h -d vm1
- libguestfs: error: libvirt hypervisor doesn’t support qemu or KVM,
- so we cannot create the libguestfs appliance.
- The current backend is ‘libvirt’.
- Check that the PATH environment variable is set and contains
- the path to the qemu (‘qemu-system-*’) or KVM (‘qemu-kvm’, ‘kvm’ etc).
- Or: try setting:
- export LIBGUESTFS_BACKEND=libvirt:qemu:///session
- Or: if you want to have libguestfs run qemu directly, try:
- export LIBGUESTFS_BACKEND=direct
- For further help, read the guestfs(3) man page and libguestfs FAQ.
- [root@mail ~]#
-
-
- root@kvm-server:~# apt install guestfsd libguestfs-dev guestfish libguestfs0 libguestfs-tools python-guestfs guestmount seabios
四,KVM 管理
1. KVM 基本管理
查看 启动 关闭 重启 重置 查看
- # 查看虚拟机
-
- virsh list # 查看运行状态的虚拟机
-
- root@kvm-server:~# virt-manager
- root@kvm-server:~# virsh list
- Id Name State
- ----------------------
- 3 vm2 running
-
-
-
-
- virsh list --all # 查看所有虚拟机(无论运行状态还是关闭状态)
-
- root@kvm-server:~# virsh list --all
- Id Name State
- -----------------------
- 3 vm2 running
- - vm1 shut off
- - vm3 shut off
-
-
-
- # 查看kvm虚拟机配置文件(x)
-
- virsh dumpxml name
- # 会将具体的xml文件内容展示出来(将你要查的xml文件内容打印在你的终端设备上)
- root@kvm-server:~# virsh dumpxml vm1
-
-
- 将node4虚拟机的配置文件保存至node6.xml(x):
- virsh dumpxml node4 > /etc/libvirt/qemu/node6.xml
- virsh dumpxml vm1 > /etc/libvirt/qemu/vm6.xml
-
- root@kvm-server:~# virsh dumpxml vm1 > /etc/libvirt/qemu/vm6.xml
- root@kvm-server:~# ll /etc/libvirt/qemu/
- total 52
- drwxr-xr-x 3 root root 4096 Jul 17 23:40 ./
- drwxr-xr-x 7 root root 4096 Jul 15 06:35 ../
- drwxr-xr-x 3 root root 4096 Jul 15 01:05 networks/
- -rw------- 1 root root 8936 Jul 17 05:24 vm1.xml
- -rw------- 1 root root 7915 Jul 17 05:59 vm2.xml
- -rw------- 1 root root 7631 Jul 16 05:49 vm3.xml
- -rw-r--r-- 1 root root 8716 Jul 17 23:40 vm6.xml
-
-
- 修改node6的配置文件(x)
- virsh edit node6
-
- # centos8
- [root@mail ~]# virsh edit vm1
- error: XML error: target 'hdb' duplicated for disk sources '/var/lib/libvirt/images/vm1-1.qcow2' and '<null>'
- Failed. Try again? [y,n,i,f,?]:
- Domain vm1 XML configuration edited.
-
-
-
- 注:
- 用 edit 修改文件,不要重启libvirtd
- 用 vim 修改文件,需要重启 libvirtd
-
-
- 如果直接 vim 编辑器修改配置文件的话,需要重启 libvirtd 服务
- 启动:
- virsh start vm1
- Domain vm1 started
-
- # ubuntu
- root@kvm-server:~# virsh start vm3
- Domain 'vm3' started
-
- # 暂停虚拟机
- [root@mail ~]# virsh suspend vm1
- Domain vm1 suspended
-
-
- # 恢复虚拟机
- [root@mail ~]# virsh resume vm1
- Domain vm1 resumed
-
- 关闭:
- 方法1:
- virsh shutdown vm1
-
- [root@mail ~]# virsh shutdown vm1
- Domain vm1 is being shutdown
-
- 方法2:
- virsh destroy vm1
- [root@mail ~]# virsh destroy vm1
- Domain vm1 destroyed
-
- # 注意要在虚拟机运行的情况下才可以重置或重启
- 重启:
- virsh reboot vm2
-
- root@kvm-server:~# virsh reboot vm2
- Domain 'vm2' is being rebooted
-
-
- 重置
- virsh reset vm1
-
- root@kvm-server:~# virsh reset vm2
- Domain 'vm2' was reset
-
-
- 删除虚拟机:磁盘镜像文件要手动删除的 /var/lib/libvirt/images/
- virsh undefine vm1
-
- [root@mail ~]# virsh undefine vm1
- Domain vm1 has been undefined
-
- root@kvm-server:~# virsh undefine vm2
- Domain 'vm2' has been undefined
-
- root@kvm-server:~# virsh undefine vm3
- Domain 'vm3' has been undefined
-
-
-
- 注意: 虚拟机在开启的情况下 undefine 是无法删除的,但是如果再 destroy会直接被删除掉
-
- qemu-img info /var/lib/libvirt/images/
-
- [root@mail ~]# ls /var/lib/libvirt/images/
- vm1.qcow2 vm2.img
- [root@mail ~]# qemu-img info /var/lib/libvirt/images/vm1.qcow2
- image: /var/lib/libvirt/images/vm1.qcow2
- file format: qcow2
- virtual size: 20 GiB (21474836480 bytes)
- disk size: 20 GiB
- cluster_size: 65536
- Format specific information:
- compat: 1.1
- lazy refcounts: true
- refcount bits: 16
-
-
- 虚拟机开机自动启动:
- virsh autostart vm1
-
- root@kvm-server:~# virsh autostart vm2
- Domain 'vm2' marked as autostarted
-
- root@kvm-server:~# ls /etc/libvirt/qemu/autostart/
- vm2.xml
-
-
-
- 域 vm1 标记为自动开始
- ls /etc/libvirt/qemu/autostart/
- # 此目录默认不存在,在有开机启动的虚拟机时自动创建 vm1.xml
-
- virsh autostart --disable vm2
- 域 vm2 取消标记为自动开始
-
- root@kvm-server:~# virsh autostart --disable vm2
- Domain 'vm2' unmarked as autostarted
-
- # 查看开机自启情况
- root@kvm-server:~# ls /etc/libvirt/qemu/autostart/
- root@kvm-server:~#
-
-
- 查看所有开机自启的 guest os:
- ls /etc/libvirt/qemu/autostart/
- virsh list --all --autostart
-
- root@kvm-server:~# ls /etc/libvirt/qemu/autostart/
-
- # 设置vm2为开机自启
- root@kvm-server:~# virsh autostart vm2
- Domain 'vm2' marked as autostarted
-
- # 设置vm3为开机自启
- root@kvm-server:~# virsh autostart vm3
- Domain 'vm3' marked as autostarted
-
- # 查看开机自启情况
- root@kvm-server:~# ls /etc/libvirt/qemu/autostart/
- vm2.xml vm3.xml
-
- # 查看所有开机自启的 guest os:
- root@kvm-server:~# virsh list --all --autostart
- Id Name State
- -----------------------
- - vm2 shut off
- - vm3 shut off
kvm 常用命令实战
- # 查看 vm1 虚拟机的配置文件
- [root@node1 ~]# virsh dumpxml vm1
- <domain type='kvm'>
- <name>vm1</name>
- <uuid>be780671-7676-428e-bd94-0964ea95d3af</uuid>
- <memory unit='KiB'>1048576</memory>
- <currentMemory unit='KiB'>1048576</currentMemory>
- <vcpu placement='static'>1</vcpu>
- <os>
- <type arch='x86_64' machine='pc-i440fx-rhel7.0.0'>hvm</type>
- <boot dev='hd'/>
- </os>
- <features>
- <acpi/>
- <apic/>
- </features>
- <cpu mode='custom' match='exact' check='partial'>
- <model fallback='allow'>Broadwell-noTSX-IBRS</model>
- <feature policy='require' name='md-clear'/>
- <feature policy='require' name='spec-ctrl'/>
- <feature policy='require' name='ssbd'/>
- </cpu>
- <clock offset='utc'>
- <timer name='rtc' tickpolicy='catchup'/>
- <timer name='pit' tickpolicy='delay'/>
- <timer name='hpet' present='no'/>
- </clock>
- <on_poweroff>destroy</on_poweroff>
- <on_reboot>restart</on_reboot>
- <on_crash>destroy</on_crash>
- <pm>
- <suspend-to-mem enabled='no'/>
- <suspend-to-disk enabled='no'/>
- </pm>
- <devices>
- <emulator>/usr/libexec/qemu-kvm</emulator>
- <disk type='file' device='disk'>
- <driver name='qemu' type='qcow2'/>
- <source file='/var/lib/libvirt/images/vm1.qcow2'/>
- <target dev='hda' bus='ide'/>
- <address type='drive' controller='0' bus='0' target='0' unit='0'/>
- </disk>
- <disk type='file' device='cdrom'>
- <driver name='qemu' type='raw'/>
- <target dev='hdb' bus='ide'/>
- <readonly/>
- <address type='drive' controller='0' bus='0' target='0' unit='1'/>
- </disk>
- <disk type='file' device='disk'>
- <driver name='qemu' type='qcow2'/>
- <source file='/var/lib/libvirt/images/vm1-1.qcow2'/>
- <target dev='hdc' bus='ide'/>
- <address type='drive' controller='0' bus='1' target='0' unit='0'/>
- </disk>
- <controller type='usb' index='0' model='ich9-ehci1'>
- <address type='pci' domain='0x0000' bus='0x00' slot='0x05' function='0x7'/>
- </controller>
- <controller type='usb' index='0' model='ich9-uhci1'>
- <master startport='0'/>
- <address type='pci' domain='0x0000' bus='0x00' slot='0x05' function='0x0' multifunction='on'/>
- </controller>
- <controller type='usb' index='0' model='ich9-uhci2'>
- <master startport='2'/>
- <address type='pci' domain='0x0000' bus='0x00' slot='0x05' function='0x1'/>
- </controller>
- <controller type='usb' index='0' model='ich9-uhci3'>
- <master startport='4'/>
- <address type='pci' domain='0x0000' bus='0x00' slot='0x05' function='0x2'/>
- </controller>
- <controller type='pci' index='0' model='pci-root'/>
- <controller type='ide' index='0'>
- <address type='pci' domain='0x0000' bus='0x00' slot='0x01' function='0x1'/>
- </controller>
- <controller type='virtio-serial' index='0'>
- <address type='pci' domain='0x0000' bus='0x00' slot='0x06' function='0x0'/>
- </controller>
- <interface type='network'>
- <mac address='52:54:00:50:8b:01'/>
- <source network='default'/>
- <model type='rtl8139'/>
- <address type='pci' domain='0x0000' bus='0x00' slot='0x03' function='0x0'/>
- </interface>
- <serial type='pty'>
- <target type='isa-serial' port='0'>
- <model name='isa-serial'/>
- </target>
- </serial>
- <console type='pty'>
- <target type='serial' port='0'/>
- </console>
- <channel type='spicevmc'>
- <target type='virtio' name='com.redhat.spice.0'/>
- <address type='virtio-serial' controller='0' bus='0' port='1'/>
- </channel>
- <input type='mouse' bus='ps2'/>
- <input type='keyboard' bus='ps2'/>
- <graphics type='spice' autoport='yes'>
- <listen type='address'/>
- <image compression='off'/>
- </graphics>
- <sound model='ich6'>
- <address type='pci' domain='0x0000' bus='0x00' slot='0x04' function='0x0'/>
- </sound>
- <video>
- <model type='qxl' ram='65536' vram='65536' vgamem='16384' heads='1' primary='yes'/>
- <address type='pci' domain='0x0000' bus='0x00' slot='0x02' function='0x0'/>
- </video>
- <redirdev bus='usb' type='spicevmc'>
- <address type='usb' bus='0' port='1'/>
- </redirdev>
- <redirdev bus='usb' type='spicevmc'>
- <address type='usb' bus='0' port='2'/>
- </redirdev>
- <memballoon model='virtio'>
- <address type='pci' domain='0x0000' bus='0x00' slot='0x07' function='0x0'/>
- </memballoon>
- </devices>
- </domain>
-
-
- # 将虚拟机 vm1 的配置文件写入到 '/etc/libvirt/qemu/vm6.xml' 配置文件中
- [root@node1 ~]# virsh dumpxml vm1 > /etc/libvirt/qemu/vm6.xml
- [root@node1 ~]# ls /etc/libvirt/qemu/
- networks vm1.xml vm2.xml vm6.xml
-
- # 使用edit编辑工具修改 vm2 虚拟机的配置文件 不用重启 libvirtd 服务
- [root@node1 ~]# virsh edit vm2
- Domain vm2 XML configuration not changed.
-
-
- # 使用edit编辑工具修改 vm1 虚拟机的配置文件 不用重启 libvirtd 服务
- [root@node1 ~]# virsh edit vm1
- Domain vm1 XML configuration edited.
-
-
- # 启动虚拟机 vm1
- [root@node1 ~]# virsh start vm1
- Domain vm1 started
-
- # 重启虚拟机 vm1
- [root@node1 ~]# virsh reboot vm1
- Domain vm1 is being rebooted
-
- # 重置虚拟机 vm1
- [root@node1 ~]# virsh reset vm1
- Domain vm1 was reset
-
-
- # 自动启动虚拟机 vm1
- [root@node1 ~]# ls /etc/libvirt/qemu/
- networks vm1.xml vm2.xml vm6.xml
- [root@node1 ~]# virsh autostart vm1
- Domain vm1 marked as autostarted
-
-
- # 查看所有自动启动的虚拟机
- [root@node1 ~]# ls /etc/libvirt/qemu/
- autostart networks vm1.xml vm2.xml vm6.xml
- [root@node1 ~]# virsh list --all --autostart
- Id Name State
- ----------------------------------------------------
- 14 vm1 running
-
- # 禁止 vm1 开机自启动
- [root@node1 ~]# virsh autostart --disable vm1
- Domain vm1 unmarked as autostarted
-
- [root@node1 ~]# virsh list --all --autostart
- Id Name State
- ----------------------------------------------------
-
2. 虚拟机克隆
(1) 图形界面
Applications(左上角)--->System Tools--->Virtual Machine Manager
关闭要克隆的虚拟机,右键点击虚拟机选择 Clone
# 在终端执行如下命令
root@kvm-server:~# virt-manager
弹出如图所示
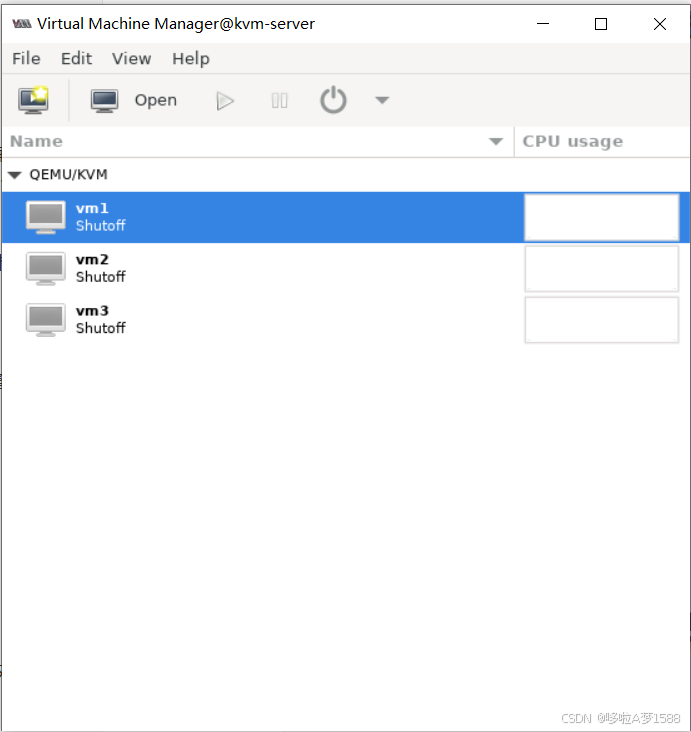
选择要克隆的虚拟机,然后右键,弹出如下窗口
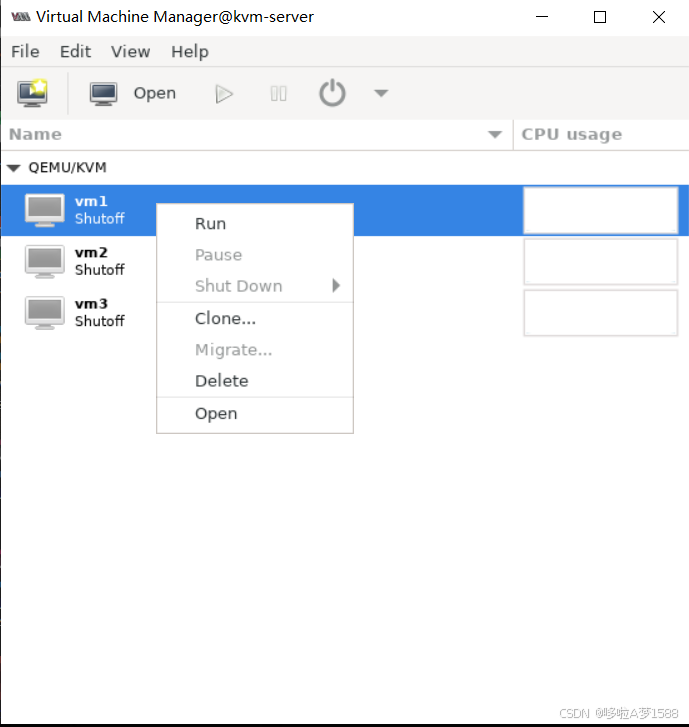
点击clone,弹出然后下图所示:
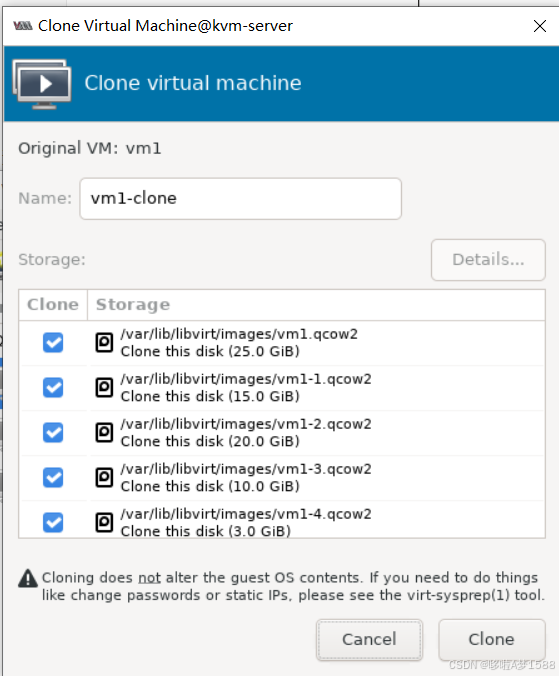
修改自己想要的虚拟机名称,选择需要的磁盘,点击 clone,跳出如下图,然后等待
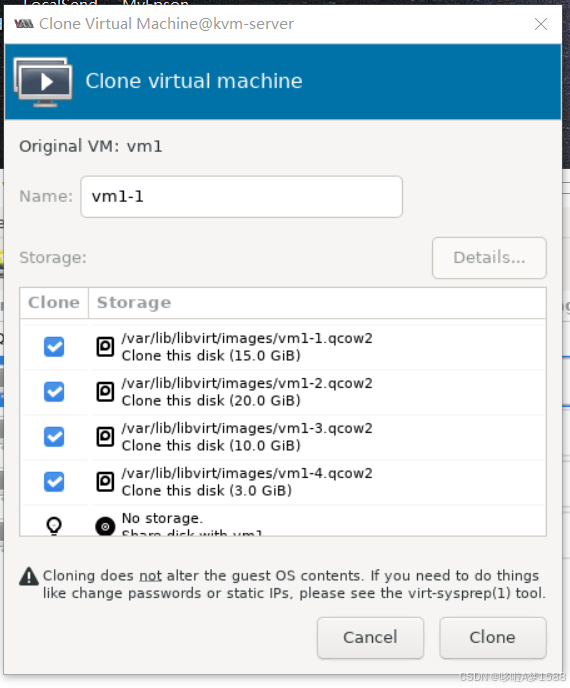
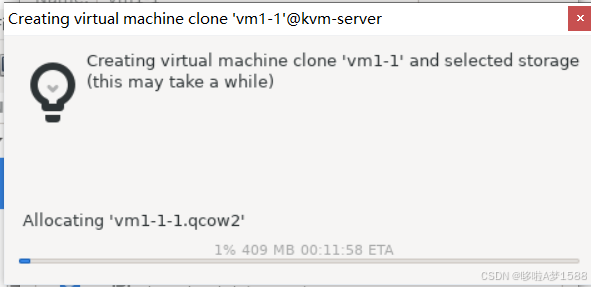
弹出如图所示,克隆结束
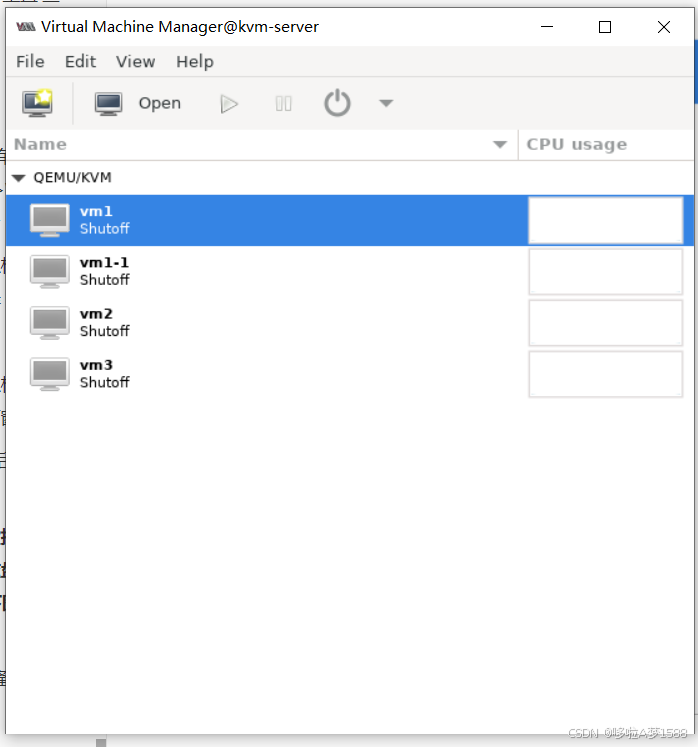
(2) 字符终端,命令克隆
- virt-clone -o vm1 --auto-clone
- WARNING 设置图形设备端口为自动端口,以避免互相冲突。
- 正在分配 'vm1-clone.qcow2' |6.0 GB 00:00:06
- 成功克隆 'vm1-clone'
-
- 命令参数解释:
- -o origin 表示你要克隆的是哪台虚拟机器
-
- root@kvm-server:~# virt-clone -o vm1 --auto-clone
- Allocating 'vm1-clone.qcow2' | 6.2 GB 00:03:45 ...
- Allocating 'vm1-1-clone-1.qcow2' | 196 kB 00:00:00 ...
- Allocating 'vm1-2-clone-1.qcow2' | 0 B 00:00:00 ...
- Allocating 'vm1-3-clone-1.qcow2' | 0 B 00:00:00 ...
- Allocating 'vm1-4-clone-1.qcow2' | 0 B 00:00:00 ...
- Clone 'vm1-clone' created successfully.
-
-
-
-
- virt-clone -o vm1 -n vm2 --auto-clone
- WARNING 设置图形设备端口为自动端口,以避免互相冲突。
- 正在分配 'vm2.qcow2' |6.0 GB 00:00:06
- 成功克隆 'vm2'
-
- 参数解释
- '-n' 表示给新克隆的机器取名称
- virt-clone -o vm1 -n vm1-2 --auto-clone
- virt-clone -o vm2 -n vm4 --aotu-clone
-
- root@kvm-server:~# virt-clone -o vm2 -n vm4 --auto-clone
- Allocating 'vm4.img' | 4.8 GB 00:02:27 ...
- Allocating 'vm2-1-clone.img' | 0 B 00:00:00 ...
- Clone 'vm4' created successfully.
-
-
-
- virt-clone -o vm1 -n vm5 -f /var/lib/libvirt/images/vm5.img
- virt-clone -o vm1 -n vm2 -f /var/lib/libvirt/images/vm2.img
- 正在克隆
- vm1.img |8.0 GB 01:03
- clone 'vm2' created successfully.
-
- 参数解释:
- -f ,--file NEW_DISKFILE: 为新客户机使用新的磁盘镜像文件
-
- root@kvm-server:~# virt-clone -o vm3 -n vm5 -f /var/lib/libvirt/images/vm5.qcow2
- Allocating 'vm5.qcow2' | 5.7 GB 00:03:09 ...
- Clone 'vm5' created successfully.
-
- 克隆注意事项: 克隆的时候,每台机器的名字不能一样,IP也不能一样,还包括他的uuid也不能一样,我们克隆的时候会自动修改配置文件
-
- 对比两台机器的配置文件 diff (克隆)
- root@kvm-server:/etc/libvirt/qemu# diff vm1.xml vm1-1.xml
- 4c4
- < virsh edit vm1
- ---
- > virsh edit vm1-1
- 9,10c9,10
- < <name>vm1</name>
- < <uuid>ef78cf9c-b4d6-411d-904e-722ff99203ec</uuid>
- ---
- > <name>vm1-1</name>
- > <uuid>7501d61d-c215-46bb-af8b-a10adc9bd5ad</uuid>
- 45c45
- < <source file='/var/lib/libvirt/images/vm1.qcow2'/>
- ---
- > <source file='/var/lib/libvirt/images/vm1-1-1.qcow2'/>
- 51c51
- < <source file='/var/lib/libvirt/images/vm1-1.qcow2'/>
- ---
- > <source file='/var/lib/libvirt/images/vm1-1-clone.qcow2'/>
- 57c57
- < <source file='/var/lib/libvirt/images/vm1-2.qcow2'/>
- ---
- > <source file='/var/lib/libvirt/images/vm1-2-clone.qcow2'/>
- 63c63
- < <source file='/var/lib/libvirt/images/vm1-3.qcow2'/>
- ---
- > <source file='/var/lib/libvirt/images/vm1-3-clone.qcow2'/>
- 69c69
- < <source file='/var/lib/libvirt/images/vm1-4.qcow2'/>
- ---
- > <source file='/var/lib/libvirt/images/vm1-4-clone.qcow2'/>
- 163c163
- < <mac address='52:54:00:47:bf:2f'/>
- ---
- > <mac address='52:54:00:03:33:26'/>
- root@kvm-server:/etc/libvirt/qemu#
对比两台机器的配置文件 diff (克隆)
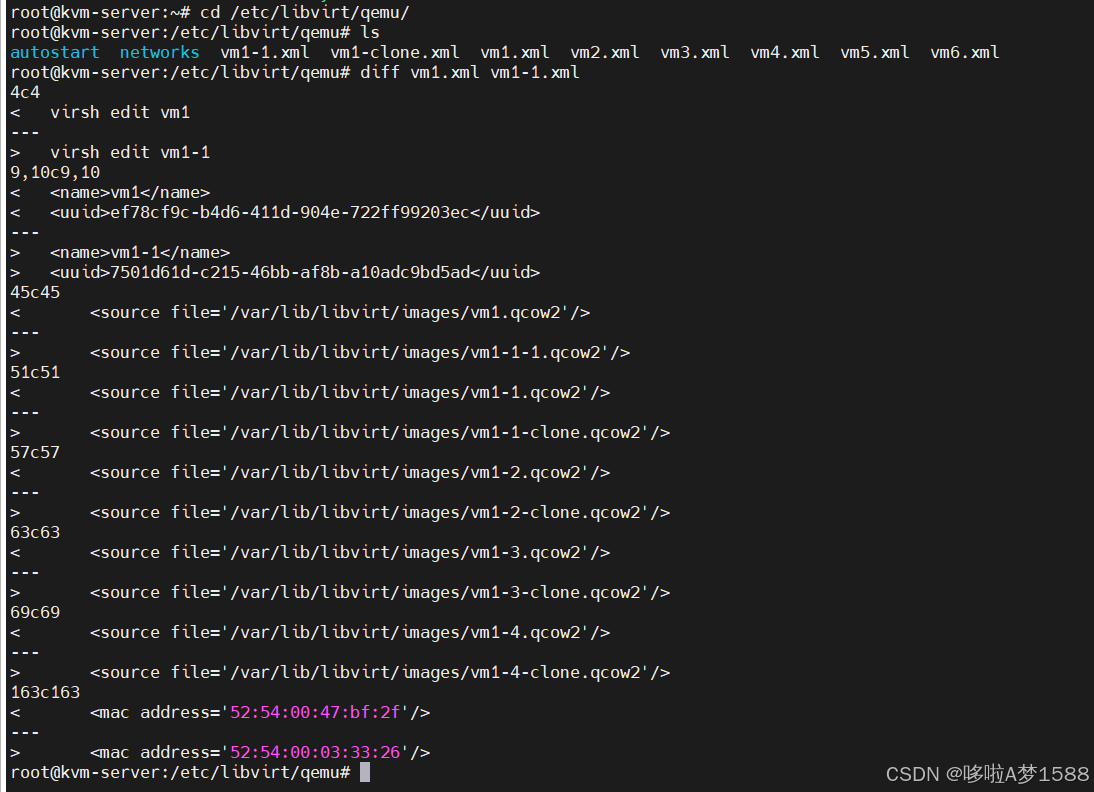
成功克隆,如图所示

centos7 虚拟机克隆实战
- [root@node1 ~]# ls /etc/libvirt/qemu/autostart/
- [root@node1 ~]# virt-manager
- [root@node1 ~]# ls /var/lib/libvirt/images/
- test.img test.qcow2 vm1-1.qcow2 vm1.qcow2 vm2-1.qcow2 vm2-2.qcow2 vm2.qcow2
- [root@node1 ~]#
- [root@node1 ~]# ls /var/lib/libvirt/images/
- test.img test.qcow2 vm1-1.qcow2 vm1.qcow2 vm2-1.qcow2 vm2-2.qcow2 vm2.qcow2
- [root@node1 ~]# ls /etc/libvirt/qemu/
- autostart networks vm1.xml vm2-clone.xml vm2.xml vm6.xml
- [root@node1 ~]# rm -rf vm2-clone.xml
- [root@node1 ~]# ls /etc/libvirt/qemu/
- autostart networks vm1.xml vm2-clone.xml vm2.xml vm6.xml
- [root@node1 ~]# ls /var/lib/libvirt/images/
- test.img test.qcow2 vm1-1.qcow2 vm1.qcow2 vm2-1.qcow2 vm2-2.qcow2 vm2-clone.qcow2 vm2.qcow2
- [root@node1 ~]# ls /var/lib/libvirt/images/
- test.img test.qcow2 vm1-1.qcow2 vm1.qcow2 vm2-1.qcow2 vm2-2.qcow2 vm2.qcow2
- [root@node1 ~]# ls /etc/libvirt/qemu/
- autostart networks vm1.xml vm2.xml vm6.xml
- [root@node1 ~]# virt-clone -o vm1 --auto-clone
- Allocating 'vm1-clone.qcow2' | 10 GB 00:00:56
-
- Clone 'vm1-clone' created successfully.
- [root@node1 ~]# ls /var/lib/libvirt/images/
- test.img test.qcow2 vm1-1.qcow2 vm1-clone.qcow2 vm1.qcow2 vm2-1.qcow2 vm2-2.qcow2 vm2.qcow2
- [root@node1 ~]# ls /etc/libvirt/qemu/
- autostart networks vm1-clone.xml vm1.xml vm2.xml vm6.xml
- [root@node1 ~]# virt-clone -o vm2 -n vm3 --auto-clone
- Allocating 'vm3.qcow2' | 10 GB 00:00:46
-
- Clone 'vm3' created successfully.
- [root@node1 ~]# virt-clone -o vm2 -n vm4 -f /var/lib/libvirt/images/vm4.qcow2 Allocating 'vm4.qcow2' | 10 GB 00:00:57
-
- Clone 'vm4' created successfully.
- [root@node1 ~]# ls /etc/libvirt/qemu/
- autostart networks vm1-clone.xml vm1.xml vm2.xml vm3.xml vm4.xml vm6.xml
- [root@node1 ~]# cd /etc/libvirt/qemu/
- [root@node1 qemu]# diff vm2.xml vm4.xml
- 4c4
- < virsh edit vm2
- ---
- > virsh edit vm4
- 9,10c9,10
- < <name>vm2</name>
- < <uuid>be780671-8686-428e-bd94-0964ea95d3af</uuid>
- ---
- > <name>vm4</name>
- > <uuid>5310bf38-4c9d-4dec-afbb-2a1d74629834</uuid>
- 44c44
- < <source file='/var/lib/libvirt/images/vm2.qcow2'/>
- ---
- > <source file='/var/lib/libvirt/images/vm4.qcow2'/>
- 77c77
- < <mac address='52:54:00:50:8b:08'/>
- ---
- > <mac address='52:54:00:70:e9:b8'/>
- [root@node1 qemu]#
对比两台机器的配置文件 diff (克隆)

3. 增量镜像
注意: 扩展内容,了解即可
(1) 概述
- 实验目的:
- 通过一个基础镜像(node.img),里面把各个虚拟机都需要的环境都搭建好,然后基于这个镜像建立起一个个增量镜像,每个增量镜像对应一个虚拟机,虚拟机对镜像中所有的改变都记录在增量镜像里面,基础镜像始终保持不变。
- 功能:
- 节省磁盘空间,快速复制虚拟机。
- 环境:
- 基本进行文件: node.img 虚拟机ID:node
- 增量镜像文件:node4.img 虚拟机ID:node4
- 要求:
-
- 以基本镜像文件 node.img 为基础,创建一个镜像文件 node4.img,以此创建一个虚拟机node4,虚拟机 node4 的改变将存储于 node4.img 中。
(2) 创建增量镜像文件
- # centos8 派生镜像的操作
- qemu-img create -b node.img -f qcow2 node4.img
- qemu-img create -b /var/lib/libvirt/images/vm1.qcow2 -f qcow2 /var/lib/libvirt/images/node4.img
-
-
- qemu-img create -b -F qcow2 /var/lib/libvirt/images/longchi.qcow2 -f qcow2 /var/lib/libvirt/images/node4.img
-
- 参数解释
- '-b': 指定基础镜像
- '-f': 指定增量镜像文件的格式
-
-
- root@kvm-server:~# ls /var/lib/libvirt/images/
- vm1.qcow2 vm2.img vm3.img
- root@kvm-server:~# qemu-img create -b /var/lib/libvirt/images/vm1.qcow2 -f qcow2 /var/lib/libvirt/images/node4.img
- qemu-img: /var/lib/libvirt/images/node4.img: Backing file specified without backing format
- Detected format of qcow2
-
- # 查看增量文件的详细信息
- qemu-img info /var/libvirt/images/node4.img
-
- # ubuntu
- sudo qemu-img create -f qcow2 /var/lib/libvirt/images/node.qcow2 -o backing_file=/var/lib/libvirt/images/vm1.qcow2
-
- 创建虚拟机镜像
-
- 以下命令是创建一个raw格式,大小为8G的镜像。
- root@ubuntu:/var/lib/libvirt/images# qemu-img create -f raw test.raw 8G
- Formatting '/var/lib/libvirt/images/test.raw', fmt=raw size=8589934592
-
- 6、使用派生镜像
-
- 刚刚我们创建了test.raw镜像,比如使用这个镜像的虚拟机安装了一个系统。然后我们可以通过创建派生镜像来使用这个系统,避免每创建一个虚拟机就安一个系统的情况。下面是创建一个派生镜像的例子。
- root@ubuntu:/var/lib/libvirt/images# qemu-img create -f qcow2 test1.qcow2 -o backing_file=test.raw
- Formatting 'test1.qcow2', fmt=qcow2 size=9663676416 backing_file='test.raw' encryption=off cluster_size=65536
- root@ubuntu:/var/lib/libvirt/images# qemu-img info test1.qcow2
- image: test1.qcow2
- file format: qcow2
- virtual size: 9.0G (9663676416 bytes)
- disk size: 136K
- cluster_size: 65536
- backing file: test.raw (actual path: test.raw)
-
- --------------如何创建ubuntu增量镜像--------------
- 使用qemu-img创建增量镜像是为了节省磁盘空间,只保存上次镜像变化的部分。以下是使用qemu-img创建增量镜像的基本步骤:/var/lib/libvirt/images/
- 1. 备份现有镜像:
- 如果你已经有了一个现有的镜像文件(如.qcow2或.dd),先备份原始镜像以防丢失
- qemu-img convert -O copy your_original_image.qcow2 your_backup_image.qcow2
- cp /var/lib/libvirt/images/longchi.qcow2 /var/lib/libvirt/images/longchi.img
-
-
- 2. 创建新镜像:
- 使用qemu-img create命令创建一个新的增量镜像,并指定其基础镜像为备份的完整镜像。
- qemu-img create -f qcow2 your_increased_image.qcow2 +diff backing_file=your_backup_image.qcow2
- +diff标志表示这是一个差异卷,它会基于指定的基础镜像(backing_file)创建。
-
- qemu-img create -f qcow2 add_ubuntu22.img -o -f qcow2 backing_file=basic_ubuntu22.img
-
- 3.迁移数据到增量镜像:
- 使用qemu-img migrate命令将原始镜像的数据迁移到增量镜像。如果需要,可以指定迁移的速度限制,如-rate 1M.
- qemu-img migrate -u your_increased_image.qcow2 backing_file=your_backup_image.qcow2
- -u选项表示迁移数据而不是克隆整个镜像。
- 4. 定期更新增量镜像:
- 当需要更新镜像时,只需再次运行qemu-img migrate,把新的更改添加到增量镜像中。
-
- # ubuntu创建增量镜像具体操作如下:(实例)
- 创建kvm虚拟机镜像:
-
- (1) 基础镜像
-
- qemu-img create -f qcow2 -o size=20G basis_ubuntu16.img
- qemu-img create -f qcow2 -o size=20G basic_ubuntu22.img
-
- -f 指定磁盘文件类型 (qcow2和raw常用)
-
- -o 指定虚拟机可用内存最大限度
-
- basis_ubuntu16.img 镜像名字
-
- 只需修改虚拟机名字,虚拟机大小(单位:字节),
-
- 镜像路径,宿主机网桥,宿主机端口(注意不要重复)
- (2) 增量镜像
-
- qemu-img create -b basic_ubuntu22.img -f qcow2 add_ubuntu22.img
-
- -b 指定基础镜像
-
- add_ubuntu16.xml修改同理
-
- (3) 启动基础镜像
-
- virsh create basis_ubuntu16.xml
-
-
-
- 查看已经启动的镜像virsh list –all
-
-
-
- 需要连接虚拟机,给虚拟机装系统
-
- (4) 挂载虚拟机
-
- guestmount -a/home/SoftwareInst/basis_ubuntu16.img -m /dev/sda5 -o nonempty --rw /mnt
-
-
-
- -a指定挂载的虚拟机
-
- -m虚拟机的挂载点 挂载点出错时会给出正确的挂载点
-
- -o 挂载点跟挂载后文件有重名时,保证不出错的情况下可以使用-o nonempty来使用
-
- --rw 读写模式以及挂载到的宿主机文件夹
-
- # 检查 longchi.qcow2 文件
- root@kvm-server:/var/lib/libvirt/images# qemu-img info longchi.qcow2
- image: longchi.qcow2
- file format: qcow2
- virtual size: 25 GiB (26843545600 bytes)
- disk size: 4.75 GiB
- cluster_size: 65536
- Format specific information:
- compat: 1.1
- compression type: zlib
- lazy refcounts: true
- refcount bits: 16
- corrupt: false
- extended l2: false
- root@kvm-server:/var/lib/libvirt/images#
-
- # 查看 longchi.qcow2 文件支持的选项
- root@kvm-server:/var/lib/libvirt/images# qemu-img create -f qcow2 -o ? longchi.qcow2
- Supported options:
- backing_file=<str> - File name of a base image #文件名为基本映像
- backing_fmt=<str> - Image format of the base image
- 基础图像的图像格式
- cluster_size=<size> - qcow2 cluster size # qcow2集群大小
- compat=<str> - Compatibility level (v2 [0.10] or v3 [1.1])
- 兼容水平
- compression_type=<str> - Compression method used for image cluster compression # 压缩方法用于图像聚类压缩
- data_file=<str> - File name of an external data file
- # 外部数据文件的文件名
- data_file_raw=<bool (on/off)> - The external data file must stay valid as a raw image # 外部数据文件必须作为原始映像保存有效
- encrypt.cipher-alg=<str> - Name of encryption cipher algorithm
- #加密密码算法名称
- encrypt.cipher-mode=<str> - Name of encryption cipher mode
- # 加密密码模式名称
- encrypt.format=<str> - Encrypt the image, format choices: 'aes', 'luks' # 加密图像,格式选择:'aes','luks'
- encrypt.hash-alg=<str> - Name of encryption hash algorithm
- # 加密哈希算法名称
- encrypt.iter-time=<num> - Time to spend in PBKDF in milliseconds
- # 在PBKDF中花费的时间,以毫秒为单位
- encrypt.ivgen-alg=<str> - Name of IV generator algorithm
- # IV 发生器算法名称
- encrypt.ivgen-hash-alg=<str> - Name of IV generator hash algorithm
- # IV 发生器哈希算法名称
- encrypt.key-secret=<str> - ID of secret providing qcow AES key or LUKS passphrase # 提供 qcow AES密钥或者LUKS口令的密钥ID
- encryption=<bool (on/off)> - Encrypt the image with format 'aes'. (Deprecated in favor of encrypt.format=aes)# 使用 'aes'格式加密图像
- extended_l2=<bool (on/off)> - Extended L2 tables # 扩展L2表
- extent_size_hint=<size> - Extent size hint for the image file, 0 to disable # 图像文件的范围大小提示,0表示禁用
- lazy_refcounts=<bool (on/off)> - Postpone refcount updates
- # 推迟折扣更新
- nocow=<bool (on/off)> - Turn off copy-on-write (valid only on btrfs)
- # 关闭写时复制(仅对btrfs有效)
- preallocation=<str> - Preallocation mode (allowed values: off, metadata, falloc, full) # 预先配置模式
- refcount_bits=<num> - Width of a reference count entry in bits
- # 引用计数项的宽度,以位为单位
- size=<size> - Virtual disk size # 虚拟磁盘大小
-
- root@kvm-server:/var/lib/libvirt/images#
-
-
-
-
- 创建有backing_file的qcow2格式的镜像文件
- [root@jay-linux kvm_demo]# qemu-img create -f qcow2 -b rhel6u3.img rhel6u3.qcow2
- Formatting ‘rhel6u3.qcow2′, fmt=qcow2 size=8589934592 backing_file=’rhel6u3.img’ encryption=off cluster_size=65536
-
- qemu-img create -o size=20G -f qcow2 longchi.img -b -f qcow2 longchi.qcow2
-
- qemu-img create -f qcow2 -o backing_file=longchi.img -b -f qcow2 longchi.qcow2 20G
- qemu-img create -f qcow2 -o backing_file=longchi.img -b -f qcow2 longchi.qcow2
- qemu-img create -f qcow2 -o backing_file=longchi.img -b longchi.qcow2
-
-
- 注意:该实验只针对 qcow2格式镜像文件,没有测试 raw 镜像文件是否可用
(3) 创建虚拟机 node4 的 XML 配置文件
- 3.创建虚拟机 node4 的 XML 配置文件
- root@kvm-server:~# cp /etc/libvirt/qemu/longchi.xml /etc/libvirt/qemu/node4.xml
-
- root@kvm-server:~# ls /etc/libvirt/qemu/
- autostart longchi.xml networks node4.xml
-
- root@kvm-server:~# vim /etc/libvirt/qemu/node4.xml
-
- 1. node4的虚拟机名,必须修改,否则与基本虚拟机冲突
- 2. node4的UUID,必须修改,否则与基本虚拟机冲突
- 3. node4的镜像文件名,必须修改,改为增量镜像文件名
- 4. node4的 mac 地址,必须修改,否则与基本虚拟机 mac 地址冲突
(4) 根据 xml 配置定义虚拟机 node4
- virsh define /etc/libvirt/qemu/node4.xml
- virsh start node4
(5) 测试
- du -h node.img
-
- du -h node4.img
-
- dd if=/dev/zero of=test bs=1M count=200
-
- 参数解释:
- 'dd' 表示用块创建一个文件
- 'if' 表示从哪里去拿这个块 指这个 '/dev/zero' 空文件里面去拿
- 'of' 表示输出,输出的文件取名为 test
- 'bs' 表示一个块多大,这个是1M
- 'count' 表示一共拿200个块
使用 du命令查看镜像大小
- root@kvm-server:/var/lib/libvirt/images# ls
- longchi.img longchi.qcow2
- root@kvm-server:/var/lib/libvirt/images# du -h longchi.qcow2
- 4.8G longchi.qcow2
- root@kvm-server:/var/lib/libvirt/images# du -h longchi.img
- 4.8G longchi.img
- root@kvm-server:/var/lib/libvirt/images# pwd
- /var/lib/libvirt/images
centos7 增量镜像实战
- 1.创建增量镜像 node4.img 以 vm2.qcow2 为基础镜像
-
- [root@node1 ~]# qemu-img create -b /var/lib/libvirt/images/vm2.qcow2 -f qcow2 /var/lib/libvirt/images/node4.img
- Formatting '/var/lib/libvirt/images/node4.img', fmt=qcow2 size=10737418240 backing_file='/var/lib/libvirt/images/vm2.qcow2' encryption=off cluster_size=65536 lazy_refcounts=off
-
- 2. 查看增量镜像 node4.img 详细详细
- [root@node1 ~]# qemu-img info /var/lib/libvirt/images/node4.img
- image: /var/lib/libvirt/images/node4.img
- file format: qcow2
- virtual size: 10G (10737418240 bytes)
- disk size: 196K
- cluster_size: 65536
- backing file: /var/lib/libvirt/images/vm2.qcow2
- Format specific information:
- compat: 1.1
- lazy refcounts: false
- [root@node1 ~]#
-
- # 创建虚拟机 node4.img 的配置文件
- [root@node1 ~]# ls /etc/libvirt/qemu/
- autostart networks vm2.xml vm6.xml
- [root@node1 ~]# cp /etc/libvirt/qemu/vm2.xml /etc/libvirt/qemu/node4.xml
- [root@node1 ~]# ls /etc/libvirt/qemu/
- autostart networks node4.xml vm2.xml vm6.xml
- [root@node1 ~]# vim /etc/libvirt/qemu/node4.xml
- [root@node1 ~]# cat /etc/libvirt/qemu/node4.xml
- <!--
- WARNING: THIS IS AN AUTO-GENERATED FILE. CHANGES TO IT ARE LIKELY TO BE
- OVERWRITTEN AND LOST. Changes to this xml configuration should be made using:
- virsh edit vm2
- or other application using the libvirt API.
- -->
-
- <domain type='kvm'>
- <name>node4</name>
- <uuid>be780681-8686-428e-bd94-0964ea95d3af</uuid>
- <memory unit='KiB'>1024000</memory>
- <currentMemory unit='KiB'>1024000</currentMemory>
- <vcpu placement='static'>2</vcpu>
- <os>
- <type arch='x86_64' machine='pc-i440fx-rhel7.0.0'>hvm</type>
- <boot dev='hd'/>
- </os>
- <features>
- <acpi/>
- <apic/>
- </features>
- <cpu mode='custom' match='exact' check='partial'>
- <model fallback='allow'>Broadwell-noTSX-IBRS</model>
- <feature policy='require' name='md-clear'/>
- <feature policy='require' name='spec-ctrl'/>
- <feature policy='require' name='ssbd'/>
- </cpu>
- <clock offset='utc'>
- <timer name='rtc' tickpolicy='catchup'/>
- <timer name='pit' tickpolicy='delay'/>
- <timer name='hpet' present='no'/>
- </clock>
- <on_poweroff>destroy</on_poweroff>
- <on_reboot>restart</on_reboot>
- <on_crash>destroy</on_crash>
- <pm>
- <suspend-to-mem enabled='no'/>
- <suspend-to-disk enabled='no'/>
- </pm>
- <devices>
- <emulator>/usr/libexec/qemu-kvm</emulator>
- <disk type='file' device='disk'>
- <driver name='qemu' type='qcow2'/>
- <source file='/var/lib/libvirt/images/node4.img'/>
- <target dev='hda' bus='ide'/>
- <address type='drive' controller='0' bus='0' target='0' unit='0'/>
- </disk>
- <disk type='file' device='cdrom'>
- <driver name='qemu' type='raw'/>
- <target dev='hdb' bus='ide'/>
- <readonly/>
- <address type='drive' controller='0' bus='0' target='0' unit='1'/>
- </disk>
- <controller type='usb' index='0' model='ich9-ehci1'>
- <address type='pci' domain='0x0000' bus='0x00' slot='0x05' function='0x7'/>
- </controller>
- <controller type='usb' index='0' model='ich9-uhci1'>
- <master startport='0'/>
- <address type='pci' domain='0x0000' bus='0x00' slot='0x05' function='0x0' multifunction='on'/>
- </controller>
- <controller type='usb' index='0' model='ich9-uhci2'>
- <master startport='2'/>
- <address type='pci' domain='0x0000' bus='0x00' slot='0x05' function='0x1'/>
- </controller>
- <controller type='usb' index='0' model='ich9-uhci3'>
- <master startport='4'/>
- <address type='pci' domain='0x0000' bus='0x00' slot='0x05' function='0x2'/>
- </controller>
- <controller type='pci' index='0' model='pci-root'/>
- <controller type='ide' index='0'>
- <address type='pci' domain='0x0000' bus='0x00' slot='0x01' function='0x1'/>
- </controller>
- <controller type='virtio-serial' index='0'>
- <address type='pci' domain='0x0000' bus='0x00' slot='0x06' function='0x0'/>
- </controller>
- <interface type='network'>
- <mac address='52:54:00:50:8b:68'/>
- <source network='default'/>
- <model type='rtl8139'/>
- <address type='pci' domain='0x0000' bus='0x00' slot='0x03' function='0x0'/>
- </interface>
- <serial type='pty'>
- <target type='isa-serial' port='0'>
- <model name='isa-serial'/>
- </target>
- </serial>
- <console type='pty'>
- <target type='serial' port='0'/>
- </console>
- <channel type='spicevmc'>
- <target type='virtio' name='com.redhat.spice.0'/>
- <address type='virtio-serial' controller='0' bus='0' port='1'/>
- </channel>
- <input type='mouse' bus='ps2'/>
- <input type='keyboard' bus='ps2'/>
- <graphics type='spice' autoport='yes'>
- <listen type='address'/>
- <image compression='off'/>
- </graphics>
- <sound model='ich6'>
- <address type='pci' domain='0x0000' bus='0x00' slot='0x04' function='0x0'/>
- </sound>
- <video>
- <model type='qxl' ram='65536' vram='65536' vgamem='16384' heads='1' primary='yes'/>
- <address type='pci' domain='0x0000' bus='0x00' slot='0x02' function='0x0'/>
- </video>
- <redirdev bus='usb' type='spicevmc'>
- <address type='usb' bus='0' port='1'/>
- </redirdev>
- <redirdev bus='usb' type='spicevmc'>
- <address type='usb' bus='0' port='2'/>
- </redirdev>
- <memballoon model='virtio'>
- <address type='pci' domain='0x0000' bus='0x00' slot='0x07' function='0x0'/>
- </memballoon>
- </devices>
- </domain>
-
-
- # 根据xml配置定义虚拟机 node4
- [root@node1 ~]# virsh define /etc/libvirt/qemu/node4.xml
- Domain node4 defined from /etc/libvirt/qemu/node4.xml
-
- # 启动 node4 虚拟机
- [root@node1 ~]# virsh start node4
- Domain node4 started
-
- # 测试(在宿主机是进行)
- du -h /var/lib/libvirt/images/vm2.qcow2
- du -h /var/lib/libvirt/images/node4.img
-
-
- [root@node1 ~]# du -h /var/lib/libvirt/images/vm2.qcow2
- 11G /var/lib/libvirt/images/vm2.qcow2
- [root@node1 ~]# du -h /var/lib/libvirt/images/node4.img
- 18M /var/lib/libvirt/images/node4.img
- [root@node1 ~]#
-
- # 用块创建文件
- dd if=/dev/zero of=test bs=1M count=200
-
- [root@node1 ~]# du -h /var/lib/libvirt/images/vm2.qcow2
- 11G /var/lib/libvirt/images/vm2.qcow2
- [root@node1 ~]# du -h /var/lib/libvirt/images/node4.img
- 218M /var/lib/libvirt/images/node4.img
- [root@node1 ~]#
KVM/QEMU官网
- https://www.qemu.org/contribute/report-a-bug/
-
-
- # 1. 源码安装qemu
- wget https://download.qemu.org/qemu-9.0.2.tar.xz
- tar xvJf qemu-9.0.2.tar.xz
- cd qemu-9.0.2
- ./configure
- make
-
- Source tarballs for official QEMU releases are signed by the release manager using this GPG public key
- pub rsa2048 2013-10-18 [SC]
- CEACC9E15534EBABB82D3FA03353C9CEF108B584
- uid [ unknown] Michael Roth
- uid [ unknown] Michael Roth
- uid [ unknown] Michael Roth
- sub rsa2048 2013-10-18 [E]
-
- # 2. To download and build QEMU from git:
- git clone https://gitlab.com/qemu-project/qemu.git
- cd qemu
- git submodule init
- git submodule update --recursive
- ./configure
- make
-
- # 3. ubuntu 安装
- apt-get install qemu-system
- apt-get install qemu-user-static
- # 4.centos8
- yum install qemu-kvm
centos7创建增量镜像如下图
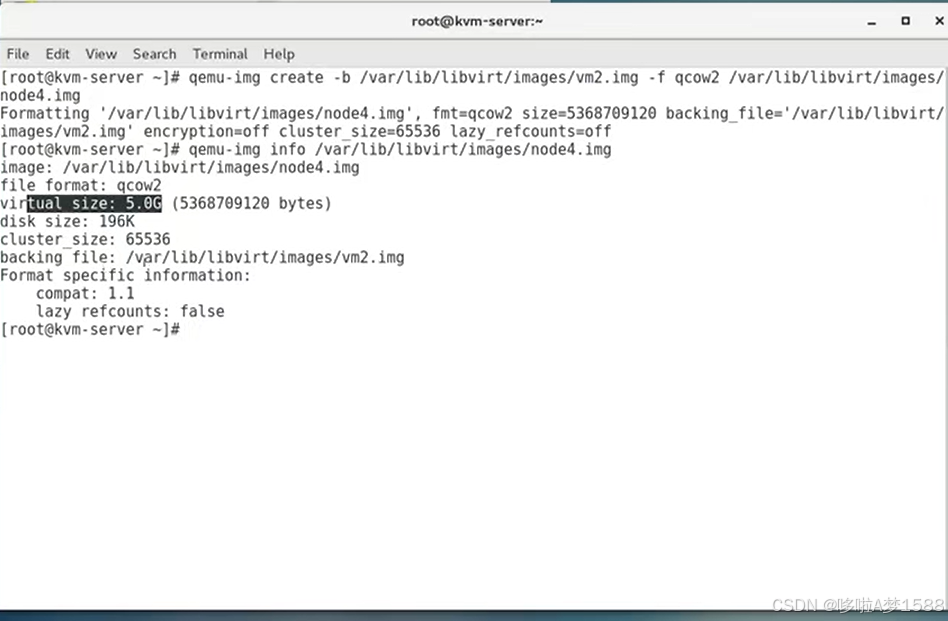
4. 快照
1. 图形方式创建快照
root@kvm-server:~# virt-manager
执行上面命令,弹出如图

选中要做快照的虚拟机

双击,弹出如下图
找到双屏电脑,此按钮是管理快照的
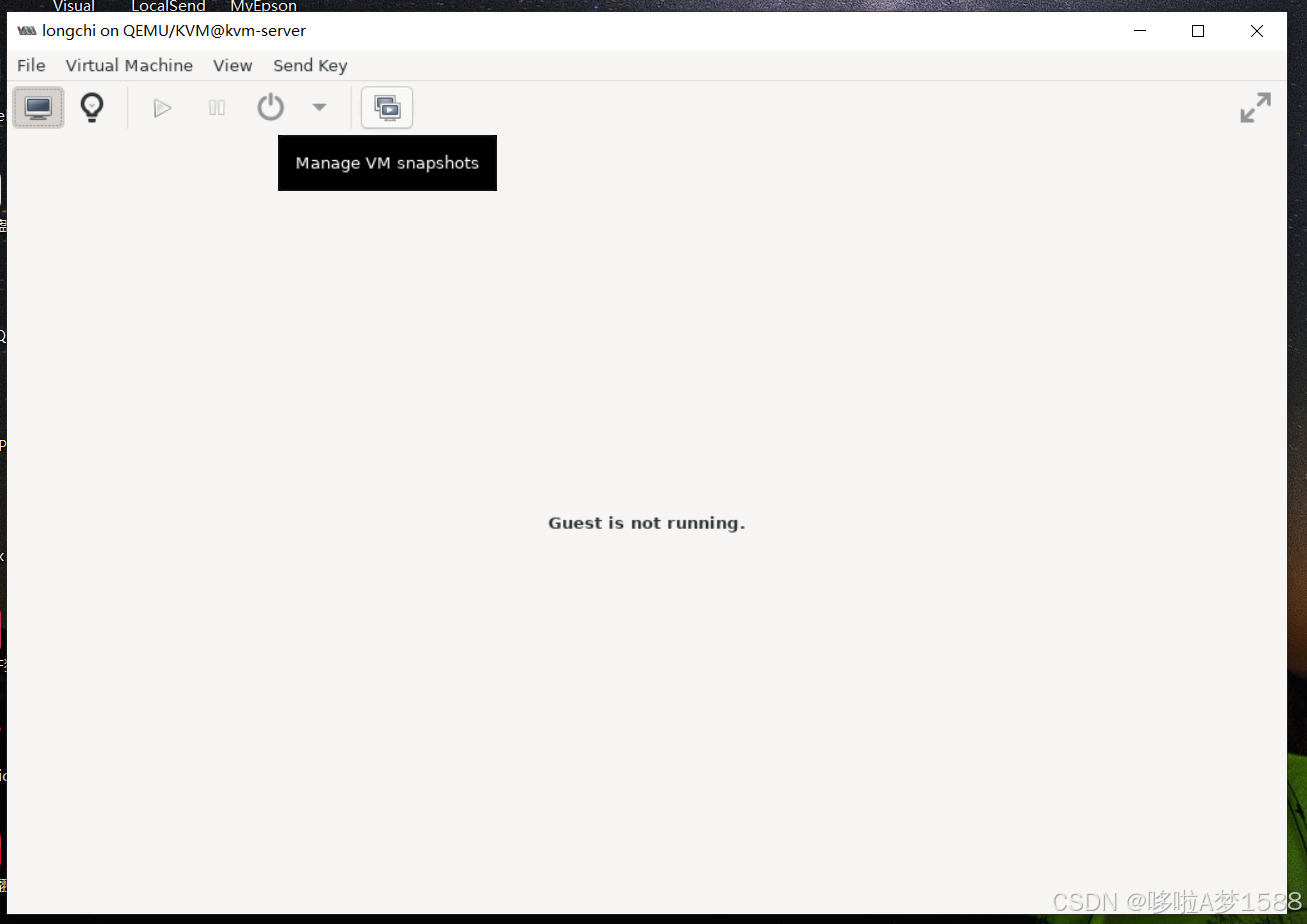
点击双屏电脑按钮,弹出如下图
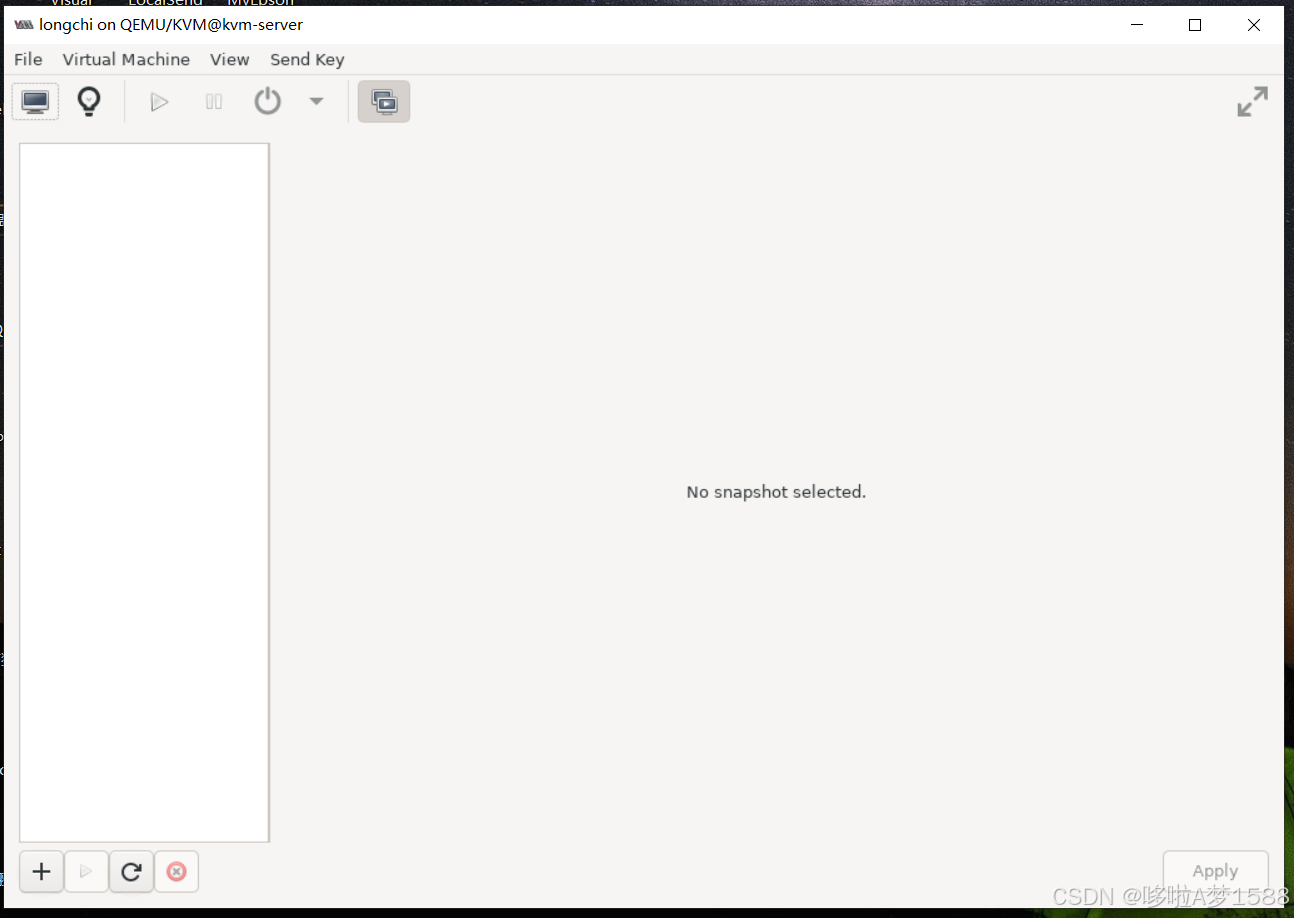
显示没有快照,找到 '+'号,弹出如下图
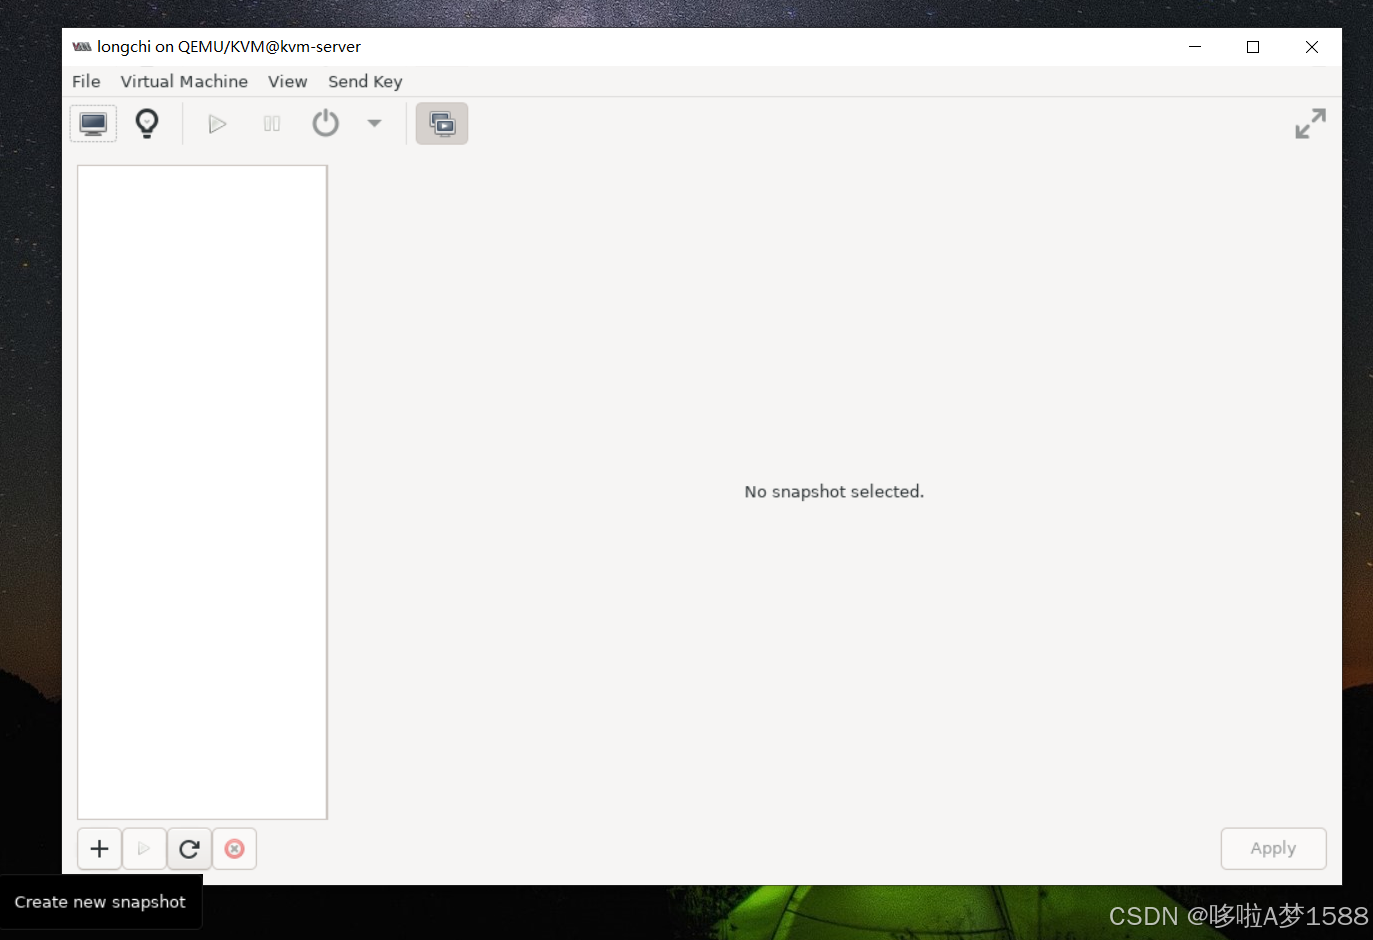
点击'+'号,弹出如下图,创建快照
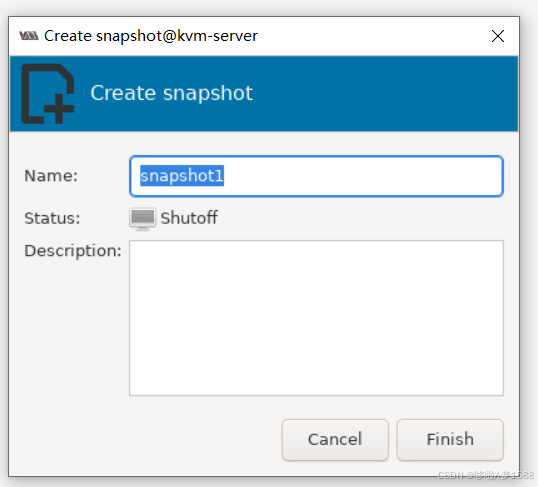
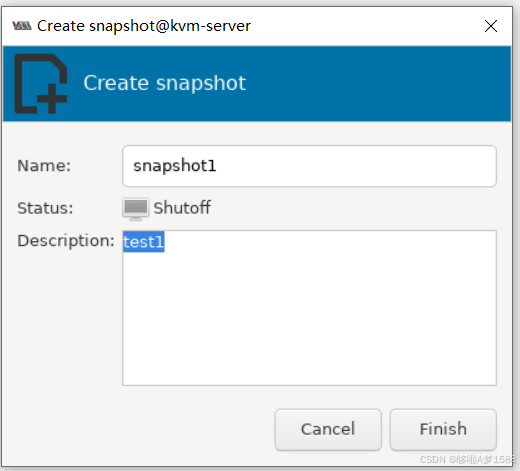
点击 Finish,快照创建成功
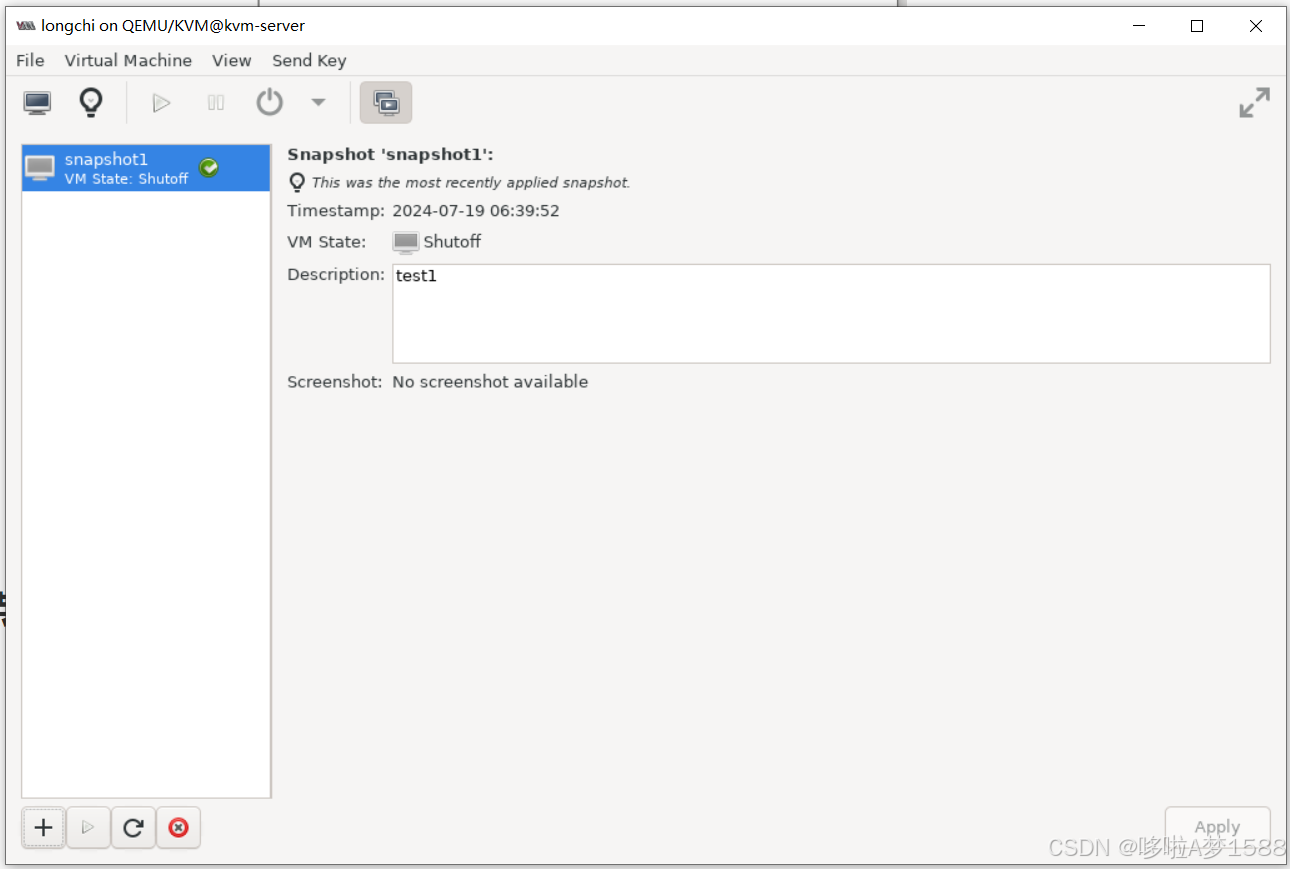
如何使用快照
选择要使用的快照
找到上图的小三角
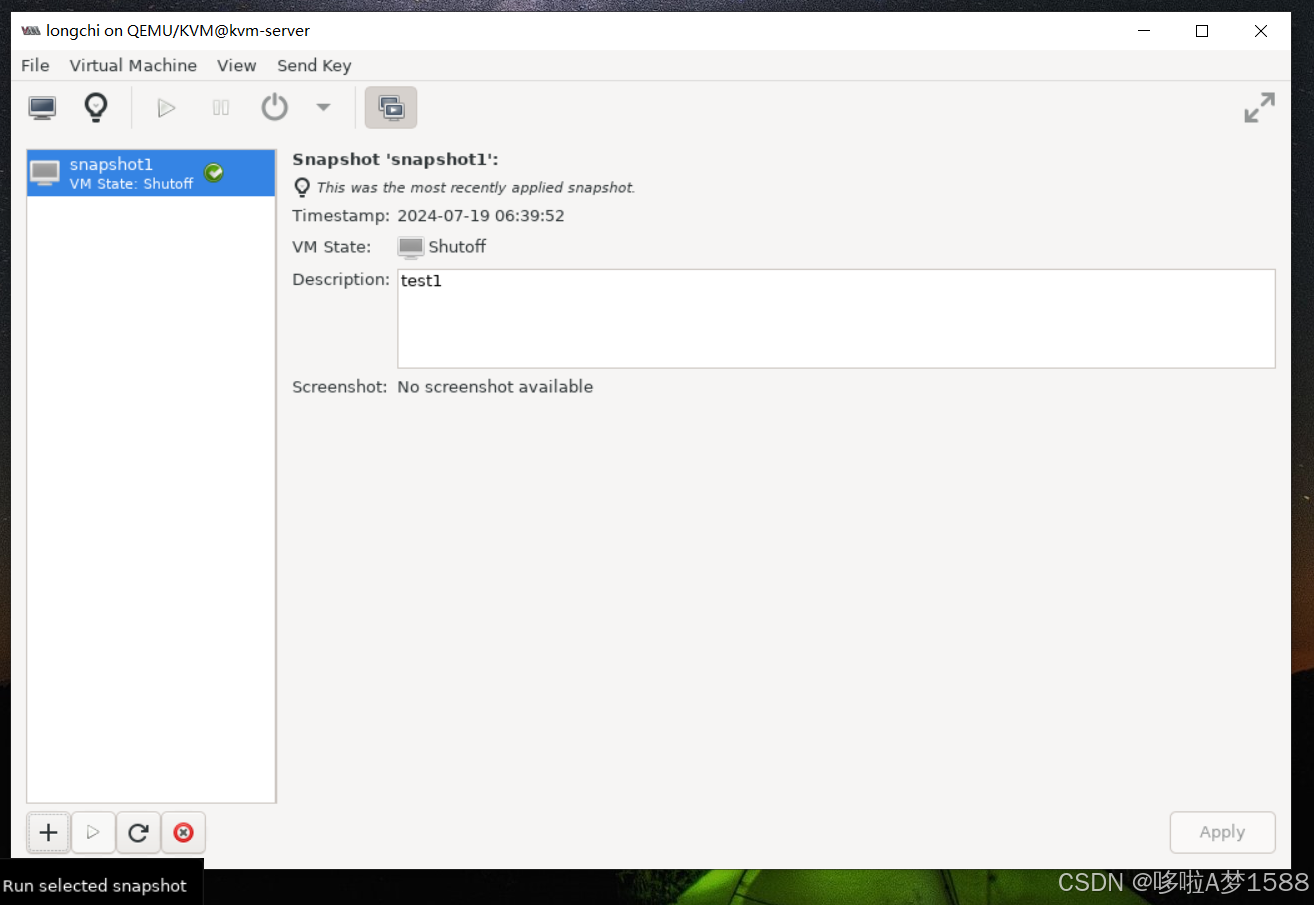
点击运行就可以恢复
如何删除快照
选择要删除的快照,找到红色按钮×,点击就可以删除
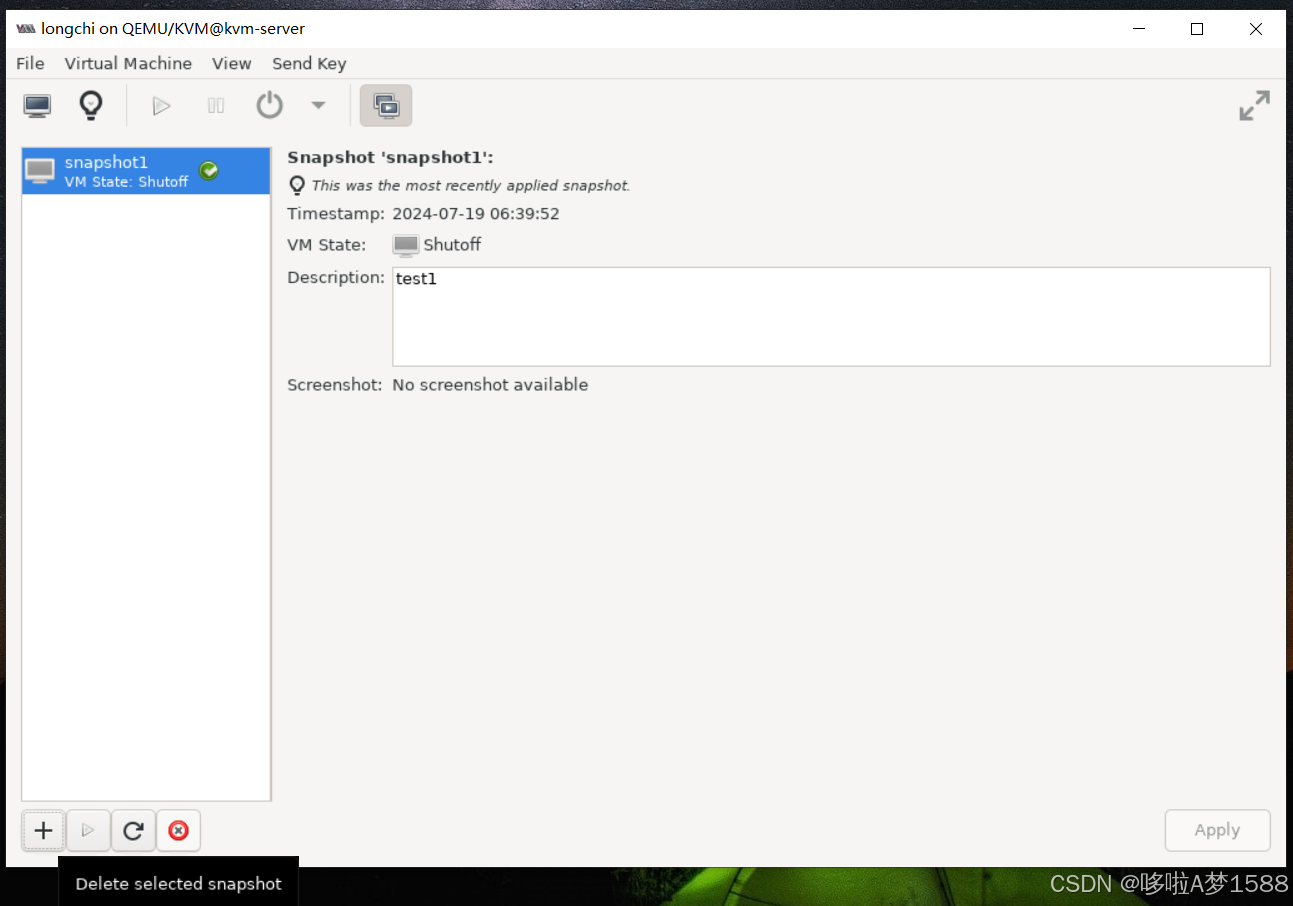
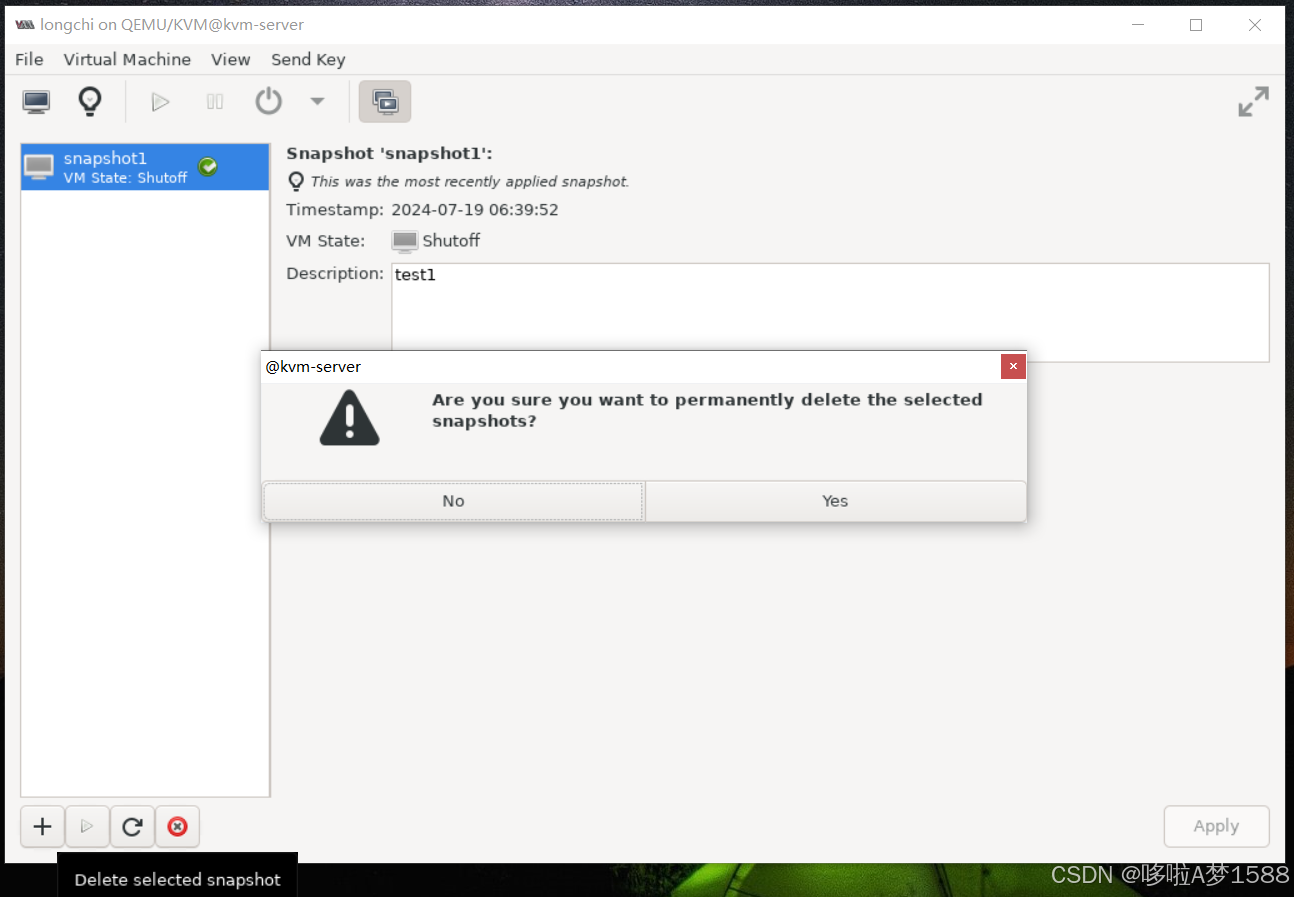
弹出如图所示对话框,选择yes,就可以删除快照
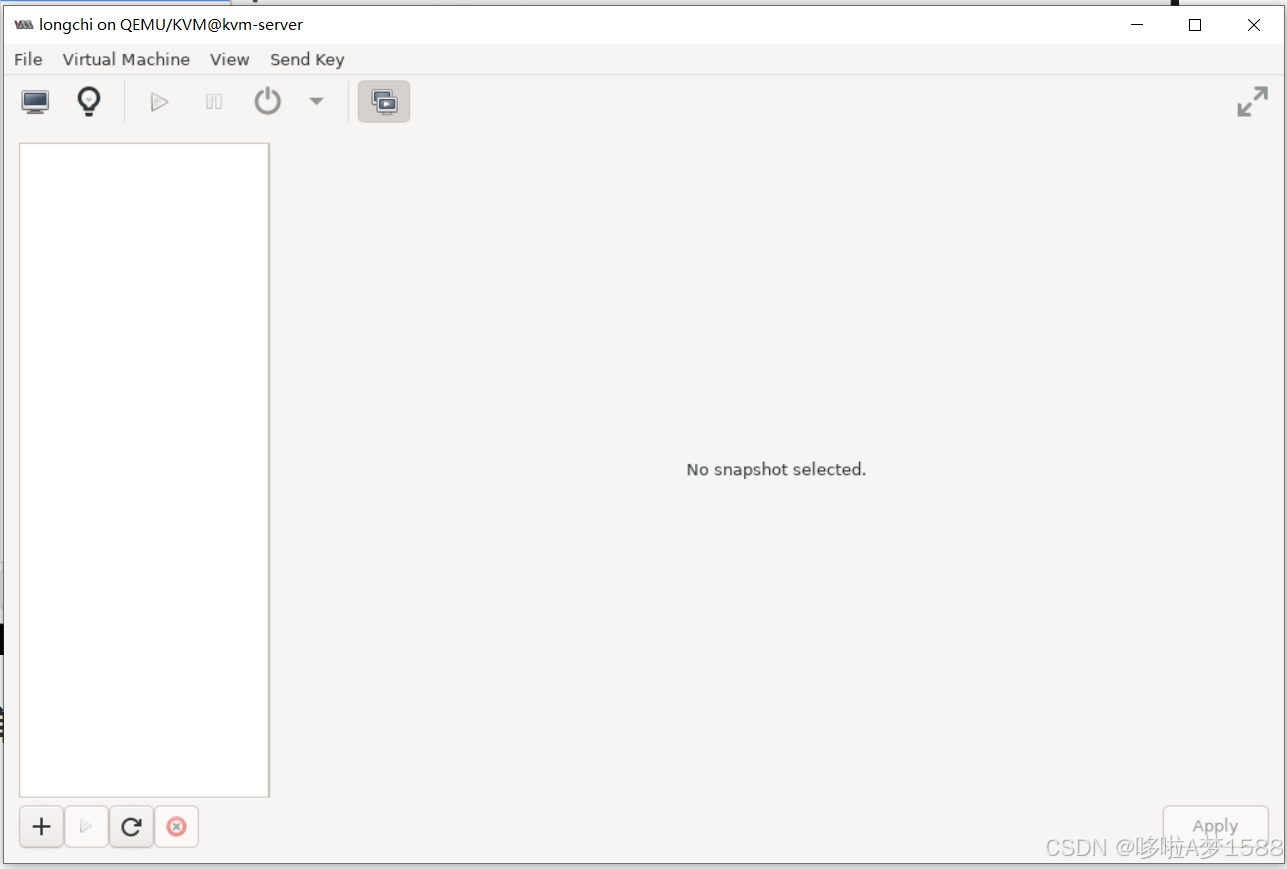
此时快照已经删除
为虚拟机 vm8 创建一个快照
virsh snapshot-create-as vm8 vm8.snapshot
raw
使用文件来模拟实际的硬盘(当然也可以使用一块真实的硬盘或一个分区)。由于原生的裸格式,不支持snapshot也是正常的。但是如果你使用LVM的裸设备,那就另当别论。说到LVM还是十分的犀利的,目前来LVM的snapshot,性能,可扩展性方面都还是有相当的效果的。目前来看的话,备份的话也问题不大。就是在虚拟机迁移方面还是有很大的限制。但是目前虚拟化的现状来看,真正需要热迁移的情况需求还不是是否的强烈。虽然使用LVM做虚拟机镜像的相关公开资料比较少,但目前来看牺牲一点灵活性,换取性能和便于管理还是不错的选择。
qcow2
现在比较主流的一种虚拟化镜像格式,经过一代的优化,目前qcow2的性能上接近raw裸格式的性能,这个也算是redhat的官方聚道了
对于qcow2的格式,几点还是比较突出的,qcow2的snapshot,可以在镜像上做N多个快照:
1. 更小的存储空间
2. Copy-on-write support 支持写时快照
3. 支持多个 snapshot ,对历史 snapshot 进行管理
4. 支持 zlib 的磁盘压缩
5. 支持AES的加密
2. 命令方式创建快照
实战
- 为虚拟机 vm2 创建一个快照 (磁盘格式必须为 qcow2)
- virsh snapshot-create-as vm2 vm2.snap
- virsh snapshot-create-as longchi longchi.snap
-
- root@kvm-server:~# virsh snapshot-create-as longchi longchi.snap
- Domain snapshot longchi.snap created
- root@kvm-server:~#
-
-
- 查看磁盘文件格式
- qemu-img info /var/lib/libvirt/images/vm2.qcow2
-
- qemu-img info /var/lib/libvirt/images/longchi.qcow2
- root@kvm-server:~# qemu-img info /var/lib/libvirt/images/longchi.qcow2
- image: /var/lib/libvirt/images/longchi.qcow2
- file format: qcow2
- virtual size: 25 GiB (26843545600 bytes)
- disk size: 4.75 GiB
- cluster_size: 65536
- Snapshot list:
- ID TAG VM SIZE DATE VM CLOCK ICOUNT
- 1 longchi.snap 0 B 2024-07-19 08:53:49 00:00:00.000 0
- Format specific information:
- compat: 1.1
- compression type: zlib
- lazy refcounts: true
- refcount bits: 16
- corrupt: false
- extended l2: false
-
-
- # 查看某台虚拟机设备的快照
- 语法: virsh snapshot-list + 虚拟机名称
- virsh snapshot-list vm2
- virsh snapshot-list longchi
-
- root@kvm-server:~# virsh snapshot-list longchi
- Name Creation Time State
- -----------------------------------------------------
- longchi.snap 2024-07-19 08:53:49 +0000 shutoff
-
-
-
-
-
- # 创建一块磁盘
- qemu-img create -f raw /var/lib/libvirt/images/vm2-1.raw 2G
- qemu-img create -f raw /var/lib/libvirt/images/longchi-1.raw 2G
-
- 参数解释:
- '-f' : 指定创建磁盘的格式
- '/var/lib/libvirt/images/vm2-1.raw': 创建磁盘存放的路径及磁盘名
- '2G': 指定磁盘的大小(分配多大的空间)
-
-
- root@kvm-server:~# qemu-img create -f raw /var/lib/libvirt/images/longchi-1.raw 2G
- Formatting '/var/lib/libvirt/images/longchi-1.raw', fmt=raw size=2147483648
-
-
-
- # 查看创建的磁盘
- ll -h /var/lib/libvirt/images/vm2-1.raw
-
- root@kvm-server:~# ll -h /var/lib/libvirt/images/longchi-1.raw
- -rw-r--r-- 1 root root 2.0G Jul 19 09:17 /var/lib/libvirt/images/longchi-1.raw
-
-
-
-
- 将其添加到vm2虚拟机上面
- cd /etc/libvirt/qemu/
- 1. 修改磁盘类型为 type='raw'
- 2. 修改磁盘文件名为:file= '/var/lib/libvirt/images/longchi-1.raw'
- 3. 修改磁盘设备名称:dev='vdb' 磁盘设备名称不能与别的磁盘设备名称相同,否则冲突
- 4. 修改 address中的 bus='0x08' 必须保证bus的值小于等于零
-
-
- root@kvm-server:~# cd /etc/libvirt/qemu/
- root@kvm-server:/etc/libvirt/qemu# ls
- autostart longchi.xml networks node4.xml
- root@kvm-server:/etc/libvirt/qemu# vim longchi.xml
- root@kvm-server:/etc/libvirt/qemu# cat longchi.xml
- <disk type='file' device='disk'>
- <driver name='qemu' type='qcow2' discard='unmap'/>
- <source file='/var/lib/libvirt/images/longchi.qcow2'/>
- <target dev='vda' bus='virtio'/>
- <address type='pci' domain='0x0000' bus='0x04' slot='0x00' function='0x0'/>
- </disk>
-
- <disk type='file' device='disk'>
- <driver name='qemu' type='raw' discard='unmap'/>
- <source file='/var/lib/libvirt/images/longchi-1.raw'/>
- <target dev='vdb' bus='virtio'/>
- <address type='pci' domain='0x0000' bus='0x08' slot='0x00' function='0x0'/>
- </disk>
-
-
- # 重新定义
- virsh define /etc/libvirt/qemu/vm2.xml
-
- # 启动虚拟机
- virsh start vm2
-
- # 创建快照 longchi.snap
- virsh snapshot-create-as longchi vm2.snap
-
- virsh define /etc/libvirt/qemu/longchi.xml
- virsh start longchi
- virsh snapshot-create-as longchi longchi.snap
- 错误: 不支持的配置,存储类型 vdb 不支持磁盘 raw 的内部快照
修改磁盘配置文件如图所示:
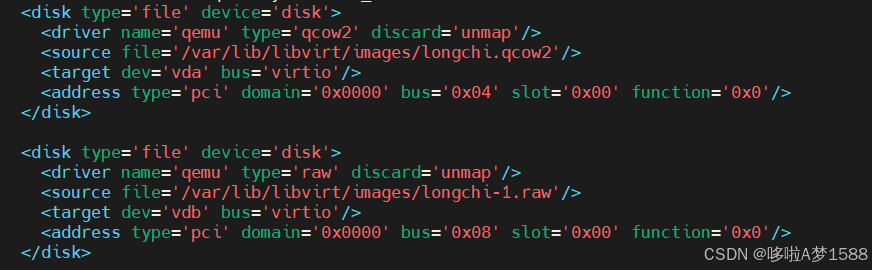
快照实战(centos7命令行创建快照)
- # 打开主机kvm图形化界面
- [root@node1 ~]# virt-manager
-
- # 创建快照
- [root@node1 ~]# virsh snapshot-create-as vm2 vm2.snap
- Domain snapshot vm2.snap created
-
- # 查看磁盘文件格式
- [root@node1 ~]# qemu-img info /var/lib/libvirt/images/vm2.qcow2
- image: /var/lib/libvirt/images/vm2.qcow2
- file format: qcow2
- virtual size: 10G (10737418240 bytes)
- disk size: 10G
- cluster_size: 65536
- Snapshot list:
- ID TAG VM SIZE DATE VM CLOCK
- 1 vm2.snap 0 2024-07-26 17:09:15 00:00:00.000
- Format specific information:
- compat: 1.1
- lazy refcounts: true
-
- # 查看 vm2 虚拟机上面所有快照(查看某台虚拟机设备快照)
- [root@node1 ~]# virsh snapshot-list vm2
- Name Creation Time State
- ------------------------------------------------------------
- vm2.snap 2024-07-26 17:09:14 -0700 shutoff
-
- [root@node1 ~]# virsh snapshot-list vm1
- Name Creation Time State
- ------------------------------------------------------------
-
- # 创建一块新磁盘
- [root@node1 ~]# qemu-img create -f raw /var/lib/libvirt/images/vm2-1.raw 2G
- Formatting '/var/lib/libvirt/images/vm2-1.raw', fmt=raw size=2147483648
- [root@node1 ~]# ls /var/lib/libvirt/images/
- node4.img test.img test.qcow2 vm2-1.raw vm2.qcow2
-
- # 查看新创建磁盘的详细信息
- [root@node1 ~]# ll -h /var/lib/libvirt/images/vm2-1.raw
- -rw-r--r-- 1 root root 2.0G Jul 26 17:16 /var/lib/libvirt/images/vm2-1.raw
- [root@node1 ~]# cd /etc/libvirt/qemu/
- [root@node1 qemu]# ls
- autostart networks node4.xml vm2.xml vm6.xml
-
- # 修改配置文件,添加如下一块磁盘
- [root@node1 qemu]# vim vm2.xml
- <disk type='file' device='disk'>
- <driver name='qemu' type='raw'/>
- <source file='/var/lib/libvirt/images/vm2-1.raw'/>
- <target dev='hdc' bus='ide'/>
- <address type='drive' controller='0' bus='1' target='0' unit='0'/>
- </disk>
-
- 重新定义vm2虚拟机(修改了配置文件-添加了一块名为 vm2-1.raw 的磁盘)
- [root@node1 qemu]# virsh define vm2.xml
- Domain vm2 defined from vm2.xml
-
- # 启动 vm2 虚拟机
- [root@node1 qemu]# virsh start vm2
- Domain vm2 started
-
- # 创建快照
- [root@node1 qemu]# virsh snapshot-create-as vm2 vm2.snap1
- error: unsupported configuration: internal snapshot for disk hdc unsupported for storage type raw
- 报错,表示raw磁盘不支持创建快照
-
- [root@node1 qemu]# ls
- autostart networks node4.xml vm2.xml vm6.xml
- [root@node1 qemu]# vim vm2.xml
-
- # 把raw格式转换成qcow2格式 注意:参数O为大写字母
- [root@node1 qemu]# qemu-img convert -O qcow2 /var/lib/libvirt/images/vm2-1.raw /var/lib/libvirt/images/vm2-1.qcow2
-
- # 查看是否转换成功
- [root@node1 qemu]# cd /var/lib/libvirt/images/
- [root@node1 images]# ll -h
- total 11G
- -rw-r--r-- 1 root root 218M Jul 26 04:32 node4.img
- -rw-r--r-- 1 root root 2.0G Jul 25 18:17 test.img
- -rw-r--r-- 1 root root 193K Jul 25 18:14 test.qcow2
- -rw-r--r-- 1 root root 193K Jul 26 18:19 vm2-1.qcow2
- -rw-r--r-- 1 qemu qemu 2.0G Jul 26 17:16 vm2-1.raw
- -rw------- 1 qemu qemu 11G Jul 26 18:14 vm2.qcow2
-
- # 查看转换后的文件是否是我们需要的格式 qcow2
- [root@node1 images]# qemu-img info /var/lib/libvirt/images/vm2-1.qcow2
- image: /var/lib/libvirt/images/vm2-1.qcow2
- file format: qcow2
- virtual size: 2.0G (2147483648 bytes)
- disk size: 196K
- cluster_size: 65536
- Format specific information:
- compat: 1.1
- lazy refcounts: false
-
- # 再次修改配置文件,注意修改配置文件前要将虚拟机关闭
- # 将磁盘类型修改为 'qcow2',将文件名修改为 'vm2-1.qcow2',具体修改内容如下
- [root@node1 images]# vim /etc/libvirt/qemu/vm2.xml
- <disk type='file' device='disk'>
- <driver name='qemu' type='qcow2'/>
- <source file='/var/lib/libvirt/images/vm2-1.qcow2'/>
- <target dev='hdc' bus='ide'/>
- <address type='drive' controller='0' bus='1' target='0' unit='0'/>
- </disk>
-
- # 重新定义
- [root@node1 images]# virsh define /etc/libvirt/qemu/vm2.xml
- Domain vm2 defined from /etc/libvirt/qemu/vm2.xml
-
- # 再次创建快照 vm2.snap2
- [root@node1 images]# virsh snapshot-create-as vm2 vm2.snap2
- Domain snapshot vm2.snap2 created
-
- # 登录 vm2 后,执行 mkdir /test (在vm2虚拟机上执行)
- # 查看创建的目录 ls /test 发现目录为空
- # 此时再次给虚拟机 vm2 创建快照 vm2.snap3 (在宿主机上执行)
- [root@node1 images]# virsh snapshot-create-as vm2 vm2.snap3
- Domain snapshot vm2.snap3 created
-
- # 进入 cd /test 目录,创建两个文件 touch a.txt b.txt(在vm2虚拟机上执行)
- # 此时再次给虚拟机 vm2 创建快照 vm2.snap4(在宿主机上执行)
- [root@node1 images]# virsh snapshot-create-as vm2 vm2.snap4
- Domain snapshot vm2.snap4 created
-
- # 关闭虚拟机(在宿主机上执行)
- [root@node1 images]# virsh shutdown vm2
- Domain vm2 is being shutdown
-
-
- # 恢复快照 vm2.snap3(在宿主机上执行)
- [root@node1 images]# virsh snapshot-revert vm2 vm2.snap3
- 可以看到此为 ls /test 为空目录
-
- # 再次虚拟机(在宿主机上执行)
- [root@node1 images]# virsh shutdown vm2
- Domain vm2 is being shutdown
-
-
- # 恢复快照 vm2.snap4(在宿主机上执行)
- [root@node1 images]# virsh snapshot-revert vm2 vm2.snap4
- 可以看到此为 ls /test 目录下有 a.txt b.txt 两个文件
-
-
- # 查看虚拟机快照
- [root@node1 images]# virsh snapshot-list vm2
- Name Creation Time State
- ------------------------------------------------------------
- vm2.snap 2024-07-26 17:09:14 -0700 shutoff
- vm2.snap2 2024-07-26 18:44:56 -0700 shutoff
- vm2.snap3 2024-07-26 18:54:59 -0700 running
- vm2.snap4 2024-07-26 19:06:16 -0700 running
-
- # 删除虚拟机快照
- [root@node1 images]# virsh snapshot-delete --snapshotname vm2.snap3 vm2
- Domain snapshot vm2.snap3 deleted
-
- # 再次查看虚拟机快照
- [root@node1 images]# virsh snapshot-list vm2
- Name Creation Time State
- ------------------------------------------------------------
- vm2.snap 2024-07-26 17:09:14 -0700 shutoff
- vm2.snap2 2024-07-26 18:44:56 -0700 shutoff
- vm2.snap4 2024-07-26 19:06:16 -0700 running
-
-
快照实战(ubuntu命令行创建快照)
- # 创建快照 vm1.snap 命令:virsh
- root@kvm-server:~# virsh snapshot-create-as vm1 vm1.snap
- Domain snapshot vm1.snap created # 成功创建快照
-
- # 查看 vm1.qcow2 镜像文件信息 命令:qemu-img
- root@kvm-server:~# ls /var/lib/libvirt/images/
- longchi-1.qcow2 longchi-1.raw longchi.img longchi.qcow2 vm1.qcow2
-
- root@kvm-server:~# qemu-img info /var/lib/libvirt/images/vm1.qcow2
- image: /var/lib/libvirt/images/vm1.qcow2
- file format: qcow2
- virtual size: 25 GiB (26843545600 bytes)
- disk size: 4.69 GiB
- cluster_size: 65536
- Snapshot list:
- ID TAG VM SIZE DATE VM CLOCK ICOUNT
- 1 vm1.snap 0 B 2024-07-20 02:31:06 00:00:00.000 0
- Format specific information: # 格式化特定信息
- compat: 1.1 # 兼容性 康帕特
- compression type: zlib # 压缩类型
- lazy refcounts: true #
- refcount bits: 16
- corrupt: false
- extended l2: false
-
-
- # 查看某台虚拟机快照
- virsh snapshot-list vm1
-
- root@kvm-server:~# virsh snapshot-list vm1
- Name Creation Time State
- -------------------------------------------------
- vm1.snap 2024-07-20 02:31:06 +0000 shutoff
-
-
- ------添加磁盘 start--------
- # 创建一块磁盘
- qemu-img create -f raw /var/lib/libvirt/images/vm1-1.raw 2G
-
- root@kvm-server:~# qemu-img create -f raw /var/lib/libvirt/images/vm1-1.raw 2G
- Formatting '/var/lib/libvirt/images/vm1-1.raw', fmt=raw size=2147483648
-
- # 查看目前磁盘镜像名称及配置文件有哪些
- root@kvm-server:~# ls /var/lib/libvirt/images/
- longchi-1.qcow2 longchi-1.raw longchi.img longchi.qcow2 vm1-1.raw vm1.qcow2
- root@kvm-server:~# ls /etc/libvirt/qemu/
- autostart longchi.xml networks node4.xml vm1.xml
-
-
- # 查看添加磁盘的大小
- root@kvm-server:~# ll -h /var/lib/libvirt/images/vm1-1.raw
- -rw-r--r-- 1 root root 2.0G Jul 20 05:08 /var/lib/libvirt/images/vm1-1.raw
-
-
- # 修改配置文件,添加磁盘信息
- <disk type='file' device='disk'>
- <driver name='qemu' type='raw' discard='unmap' />
- <source file='/var/lib/libvirt/images/vm1-1.raw' />
- <target dev='vdb' bus='virtio' />
- <address type='pci' domain='0x0000' bus='0x08' slot='0x00' function='0x0' />
- </disk>
-
- 修改如下四处,就可以完成添加磁盘
- 1.driver的type='raw'
- 2.source 的 file='/var/lib/libvirt/images/vm1-1.raw'
- 3. tardet 的 dev='vdb'
- 4. address 的 bus='0x08'
-
- # 因为添加了一块磁盘,所以需要重新定义
- root@kvm-server:/etc/libvirt/qemu# virsh define vm1.xml
- Domain 'vm1' defined from vm1.xml # 定义成功
- root@kvm-server:/etc/libvirt/qemu# pwd
- /etc/libvirt/qemu
-
- # 启动一下vm1
- root@kvm-server:/etc/libvirt/qemu# virsh start vm1
- Domain 'vm1' started # 启动成功
-
- # 再次创建快照
-
- root@kvm-server:/etc/libvirt/qemu# virsh snapshot-create-as vm1 vm1.snap1
- error: unsupported configuration: internal snapshot for disk vdb unsupported for storage type raw
-
- 失败:不支持存储类型是 'raw' 快照,raw 格式不支持快照
- # 接下来将 raw 格式转换为 qcow2 格式
- qemu-img convert -O qcow2 /var/lib/libvirt/images/vm1-1.raw /var/lib/libvirt/images/vm1-1.qcow2
-
- root@kvm-server:~# cd /var/lib/libvirt/images/
- root@kvm-server:/var/lib/libvirt/images# ls
- longchi-1.qcow2 longchi-1.raw longchi.img longchi.qcow2 vm1-1.raw vm1.qcow2
- root@kvm-server:/var/lib/libvirt/images# qemu-img convert -O qcow2 vm1-1.raw vm1-1.qcow2
- root@kvm-server:/var/lib/libvirt/images# ls
- longchi-1.qcow2 longchi-1.raw longchi.img longchi.qcow2 vm1-1.qcow2 vm1-1.raw vm1.qcow2
- root@kvm-server:/var/lib/libvirt/images# ll -h
- total 15G
- drwx--x--x 2 root root 4.0K Jul 20 06:01 ./
- drwxr-xr-x 7 root root 4.0K Jul 17 02:29 ../
- -rw-r--r-- 1 root root 193K Jul 19 10:18 longchi-1.qcow2
- -rw-r--r-- 1 root root 2.0G Jul 19 09:17 longchi-1.raw
- -rw------- 1 root root 26G Jul 19 00:02 longchi.img
- -rw------- 1 root root 26G Jul 19 08:53 longchi.qcow2
- -rw-r--r-- 1 root root 193K Jul 20 06:01 vm1-1.qcow2
- -rw-r--r-- 1 root root 2.0G Jul 20 05:08 vm1-1.raw
- -rw------- 1 root root 26G Jul 20 05:55 vm1.qcow2
-
- # 查看转格式成功的文件是不是qcow2格式
- root@kvm-server:/var/lib/libvirt/images# qemu-img info vm1-1.qcow2
- image: vm1-1.qcow2
- file format: qcow2
- virtual size: 2 GiB (2147483648 bytes)
- disk size: 196 KiB
- cluster_size: 65536
- Format specific information:
- compat: 1.1
- compression type: zlib
- lazy refcounts: false
- refcount bits: 16
- corrupt: false
- extended l2: false
- root@kvm-server:/var/lib/libvirt/images#
-
- # 将虚拟机的硬盘指向转换后的 qcow2 格式文件,再次修改配置文件
- <disk type='file' device='disk'>
- <driver name='qemu' type='qcow2' discard='unmap' />
- <source file='/var/lib/libvirt/images/vm1-1.qcow2' />
- <target dev='vdb' bus='virtio' />
- <address type='pci' domain='0x0000' bus='0x08' slot='0x00' function='0x0' />
- </disk>
- 修改如下
- 1. driver 的 type='qcow2'
- 2. source 的 file='/var/lib/libvirt/images/vm1-1.qcow2'
-
- 牢记:只要修改了配置文件,就一定要重新定义
-
- root@kvm-server:~# virsh define /etc/libvirt/qemu/vm1.xml
- Domain 'vm1' defined from /etc/libvirt/qemu/vm1.xml
-
- 再次快照(vm2添加磁盘,格式转换后再次快照)
-
- root@kvm-server:~# virsh snapshot-create-as vm1 vm1.snap2
- Domain snapshot vm1.snap2 created # 快照成功
-
- # 在vm1 虚拟机创建一个空目录
- root@vm1:~# mkdir /test
-
- # 退出 vm1 虚拟机,回到宿主机
- root@vm1:~# logout
- Connection to 192.168.122.42 closed.
- root@kvm-server:~#
-
-
-
- # 给vm1创建第三个快照
- virsh snapshot-create-as vm1 vm1.snap3
- root@kvm-server:~# virsh snapshot-create-as vm1 vm1.snap3
- Domain snapshot vm1.snap3 created # 快照创建成功
-
-
- # 再次登录 vm1 虚拟机,给/test中复制两个文件
- root@kvm-server:~# ssh 192.168.122.42
- root@192.168.122.42's password:
- Welcome to Ubuntu 22.04.4 LTS (GNU/Linux 5.15.0-116-generic x86_64)
- * Documentation: https://help.ubuntu.com
- * Management: https://landscape.canonical.com
- * Support: https://ubuntu.com/pro
- System information as of Sat Jul 20 06:51:41 AM UTC 2024
- System load: 0.0 Processes: 118
- Usage of /: 46.9% of 11.21GB Users logged in: 1
- Memory usage: 10% IPv4 address for enp1s0: 192.168.122.42
- Swap usage: 0%
- Expanded Security Maintenance for Applications is not enabled.
- 26 updates can be applied immediately.
- To see these additional updates run: apt list --upgradable
- Enable ESM Apps to receive additional future security updates.
- See https://ubuntu.com/esm or run: sudo pro status
- Last login: Sat Jul 20 06:41:16 2024 from 192.168.122.1
- # 在vm1中创建两个文件 a.txt b.txt
- root@vm1:~# cd /test
- root@vm1:/test# touch a.txt b.txt
- root@vm1:/test# ls
- a.txt b.txt
- root@vm1:/test#
- # 再给虚拟机创建第四个快照
- root@vm1:/test# logout
- Connection to 192.168.122.42 closed.
- root@kvm-server:~# virsh snapshot-create-as vm1 vm1.snap4
- Domain snapshot vm1.snap4 created # 快照创建成功
- root@kvm-server:~#
- # 查看虚拟机快照
- virsh snapshot-list vm1
- root@kvm-server:~# virsh snapshot-list vm1
- Name Creation Time State
- --------------------------------------------------
- vm1.snap 2024-07-20 02:31:06 +0000 shutoff
- vm1.snap2 2024-07-20 06:30:52 +0000 shutoff
- vm1.snap3 2024-07-20 08:02:04 +0000 shutoff
- vm1.snap4 2024-07-20 08:05:46 +0000 shutoff
- root@kvm-server:~#
- # 关闭虚拟机 vm1,恢复到第三个快照
- root@kvm-server:~# virsh shutdown vm1
- Domain 'vm1' is being shutdown
- # 恢复到第三个快照
- root@kvm-server:~# virsh snapshot-revert vm1 vm1.snap3
- # 在虚拟机中,发现 /test 目录为空
- virsh start vm1 # 启动 vm1 虚拟机
- 登录 vm1 虚拟机
- ssh 192.168.122.42
- root@vm1:~# cd /test
- root@vm1:/test# ls # 发现目录为空。表示我们已经恢复到 vm1.snap3
- root@vm1:/test#
- # 再次关闭虚拟机,恢复到第四个快照 vm1.snap4
- root@kvm-server:~# virsh shutdown vm1
- Domain 'vm1' is being shutdown
- virsh snapshot-revert vm1 vm1.snap4
- root@kvm-server:~# virsh snapshot-revert vm1 vm1.snap4
- # 再次启动 vm1 虚拟机,在虚拟机中,发现 /test 目录里面有两个文件
- virsh start vm1 # 启动 vm1 虚拟机
- 登录 vm1 虚拟机
- ssh 192.168.122.42
- root@kvm-server:~# virsh start vm1
- Domain 'vm1' started
- root@kvm-server:~# ssh 192.168.122.42
- root@192.168.122.42's password:
- Welcome to Ubuntu 22.04.4 LTS (GNU/Linux 5.15.0-116-generic x86_64)
-
- * Documentation: https://help.ubuntu.com
- * Management: https://landscape.canonical.com
- * Support: https://ubuntu.com/pro
- System information as of Sat Jul 20 08:21:22 AM UTC 2024
-
- System load: 0.59228515625 Processes: 125
- Usage of /: 47.0% of 11.21GB Users logged in: 0
- Memory usage: 10% IPv4 address for enp1s0: 192.168.122.42
- Swap usage: 0%
-
-
- Expanded Security Maintenance for Applications is not enabled.
-
- 26 updates can be applied immediately.
- To see these additional updates run: apt list --upgradable
-
- Enable ESM Apps to receive additional future security updates.
- See https://ubuntu.com/esm or run: sudo pro status
-
-
- Last login: Sat Jul 20 08:03:48 2024 from 192.168.122.1
- root@vm1:~# cd /test
- root@vm1:/test# ls
- a.txt b.txt
- root@vm1:/test#
-
-
- # 查看虚拟机快照
- virsh snapshot-list vm1
- root@kvm-server:~# virsh snapshot-list vm1
- Name Creation Time State
- --------------------------------------------------
- vm1.snap 2024-07-20 02:31:06 +0000 shutoff
- vm1.snap2 2024-07-20 06:30:52 +0000 shutoff
- vm1.snap3 2024-07-20 08:02:04 +0000 shutoff
- vm1.snap4 2024-07-20 08:05:46 +0000 shutoff
-
- 删除虚拟机快照
-
- root@kvm-server:~# virsh snapshot-delete --snapshotname vm1.snap3 vm1
- Domain snapshot vm1.snap3 deleted # 成功删除
-
- # 再次查看虚拟机快照,删除成功
- root@kvm-server:~# virsh snapshot-list vm1
- Name Creation Time State
- --------------------------------------------------
- vm1.snap 2024-07-20 02:31:06 +0000 shutoff
- vm1.snap2 2024-07-20 06:30:52 +0000 shutoff
- vm1.snap4 2024-07-20 08:05:46 +0000 shutoff
-
- root@kvm-server:~#
-
-
-
-
-
-
- ------添加磁盘 end--------
添加一块 raw 磁盘,第一次磁盘配置文件修改如下
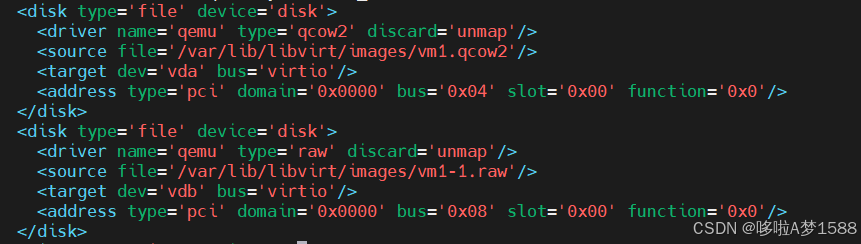
将 raw 格式转换为 qcow2 后,再次修改磁盘配置文件如下
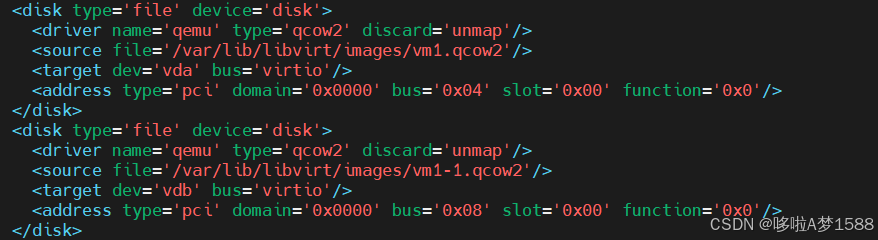
格式转换:
1. 把raw格式转换成qcow2格式
- # 转换格式
- qemu-img convert -O qcow2 /var/lib/libvirt/images/vm2-1.raw /var/lib/libvirt/images/vm2-1.qcow2
-
- qemu-img convert -O qcow2 /var/lib/libvirt/images/longchi-1.raw /var/lib/libvirt/images/longchi-1.qcow2
-
- '-O' 表示大写字母O
-
- root@kvm-server:~# qemu-img convert -O qcow2 /var/lib/libvirt/images/longchi-1.raw /var/lib/libvirt/images/longchi-1.qcow2
- root@kvm-server:~# ls /var/lib/libvirt/images/
- longchi-1.qcow2 longchi-1.raw longchi.img longchi.qcow2
- root@kvm-server:~#
-
-
-
- cd /var/lib/libvirt/images/
- ll -h
-
- root@kvm-server:~# ll -h /var/lib/libvirt/images/
- total 9.5G
- drwx--x--x 2 root root 4.0K Jul 19 10:18 ./
- drwxr-xr-x 7 root root 4.0K Jul 17 02:29 ../
- -rw-r--r-- 1 root root 193K Jul 19 10:18 longchi-1.qcow2
- -rw-r--r-- 1 root root 2.0G Jul 19 09:17 longchi-1.raw
- -rw------- 1 root root 26G Jul 19 00:02 longchi.img
- -rw------- 1 root root 26G Jul 19 08:53 longchi.qcow2
- root@kvm-server:~#
-
-
-
-
- qemu-img info /var/lib/libvirt/images/vm2-1.qcow2
- qemu-img info /var/lib/libvirt/images/longchi-1.qcow2
-
- root@kvm-server:~# qemu-img info /var/lib/libvirt/images/longchi-1.qcow2
- image: /var/lib/libvirt/images/longchi-1.qcow2
- file format: qcow2
- virtual size: 2 GiB (2147483648 bytes)
- disk size: 196 KiB
- cluster_size: 65536
- Format specific information:
- compat: 1.1
- compression type: zlib
- lazy refcounts: false
- refcount bits: 16
- corrupt: false
- extended l2: false
- root@kvm-server:~#

2. 将虚拟机的硬盘指向转换后的qcow2.img
- vim /etc/libvirt/qemu/vm2.xml
- virsh define /etc/libvirt/qemu/vm2.xml
-
- # 创建快照 vm2.snap2
- virsh snapshot-create-as vm2 vm2.snap2
- 已生成快照 vm2.snap2
- 在虚拟机中创建一个目录,但目录中是空的
- mkdir /test
- ls /test
3. 给虚拟机vm2创建第三个快照 vm2.snap3
- # 创建快照 vm2.snap3
- virsh snapshot-create-as vm2 vm2.snap3
4. 在虚拟机中,给 /test 中复制 2 个文件
- cp install.log anaconda-ks.cfg /test
- ls /test
- anaconda-ks.cfg install.log
5. 给虚拟机 vm2 创建第四个快照 vm2.snap4
- # 创建快照 vm2.snap4
- virsh snapshot-create-as vm2 vm2.snap4
- # 修改虚拟机主机名
- vim /etc/hostname
-
- #
- longchi@kvm-server:~$ cat ubuntu_1_init.sh
- #!/bin/sh
-
- sudo apt install net-tools vim-gtk lrzsz openssh-server -y
-
- sudo passwd root
-
- su - root &&
-
- cat >> /etc/ssh/sshd_config << EOF
- PermitRootLogin yes
-
- PasswordAuthentication yes
-
- EOF
-
- systemctl restart sshd
-
-
- cat >> /etc/vim/vimrc << EOF
- set nu
-
- set tabstop=4
-
- set nobackup
-
- set cursorline
-
- set ruler
-
- set autoindent
-
- EOF
如何给普通用户设置超级权限
- 如何给普通用户设置 sudo 权限
- 法一:
-
- 1.su - 进入root用户
-
- 2.cd /etc/进入etc目录
-
- 3.vim sudoers找到 root ALL=(ALL) ALL
-
- 4.在 root ALL=(ALL) ALL 后面加上一行 user_name ALL=(ALL) ALL
-
- 5.输入 :w! 强制保存
-
- 6.输入 :q退出vim
- 扩展:
-
- 第一个 ALL 指示允许从任何终端、机器访问 sudo
- 第二个 (ALL) 指示 sudo 命令被允许以任何用户身份执行
- 第三个 ALL表示所有命令都可以作为 root 执行
-
- 法二:
-
- 在sudoers中看到 %wheel ALL=(ALL)ALL;
- 所以我们到 /etc/group中修改组成员。也可实现给用户 增加 sudo权限。
-
- 一种做法是使用命令加入组成员:
-
- usermod -aG wheel your_user_name
- 另外一种是修改配置文件
-
- vim /etc/group
- 在wheel组的后面的成员列表里面添加进想要添加的用户名:wheel:x:10:root,yourusername
Python在命令行模式下如何退出命令行
- 第一种:这种方法最简单,直接输入 Ctrl+Z ,再回车,即可退出;
- 第二种:输入 exit(),再回车,也可以;
- 第三种:输入 quit(),再回车,也行;
go语言下载地址
https://golang.google.cn/dl/第3天-企业级虚拟化技术KVM网络及脚本管理
一,KVM 网络管理
画图工具
https://www.processon.com分类:
- nat :是默认的网络模式,在我们安装好 KVM 的时候,他会自动去创建 nat 模式,nat支持主机与虚拟机互访,虚拟机也可以访问外网,外网是访问不到虚拟机的
- isolated :隔离网络模式 虚拟机访问不了外网,外网也访问不了虚拟机,但是他并不影响宿主机去访问虚拟机,操作虚拟机
接口:
bridge :相当于在你虚拟机上做了一个接口,这个接口叫桥接口,然后,再把你的物理网卡和桥接口绑在一起,这就是桥接虚拟交换机
- linux-bridge(linux自带)
- ovs(open-Vswitch)
NAT网络拓扑:
- 描述:
- 有一个宿主机,通过一根网线连接着物理交换机,物理交换机的另一端可以想象为一个宿主机,在这个宿主机上安装了 KVM ,在我们安装 KVM 的时候,他会自动去创建一个网络,就是 net 网络,在创建 net 网络的时候,会去创建一个虚拟交换机,这个虚拟交换机他是三层交换机,即有路由功能,也有交换机功能,我们把虚拟交换机可以看成为虚拟路由器,虚拟交换机,虚拟机。每一个虚拟机都有自己的名字,自己的网卡,每个网卡对应一个网络, VM1 通过一根虚拟网线,连接到虚拟交换机上,也就相当于直接连接到 NAT 网络中,虚拟交换机没有名字,只要一个管理接口为 virbr0,管理接口我们可以通过 ip a 命令,在宿主机上查看到。
- 通信描述:
- 由于虚拟路由器与虚拟交换机是分开画的,其实他们是同一个东西,他们有一个共同的名字,都叫 virbr0,虚拟交换机是如何来访问的?
- VM1通过一个虚拟网线连接到虚拟交换机上面,这个虚拟网线一头连接 VM1 的 ens33 网卡,一头连接虚拟交换机的 vnet0 口,vnet0 口你可以把他想象为一个网卡和 ens33 一样,我们的数据继续往外走,走到虚拟路由器,我们的虚拟路由上,有一个对内的接口,对内接口也叫 virbr0,这个 virbr0 就相当于一个网关,我们对内接口上有一个管理地址:192.168.122.1 这个管理地址就是NAT网络所在的第一个IP地址,虚拟路由器还有一个对外的接口,就是你宿主机上ens33网卡,ens33网卡也通过虚拟网线,插在了你的物理交换机上,这个过程就是整个 NAT 的网络通信。
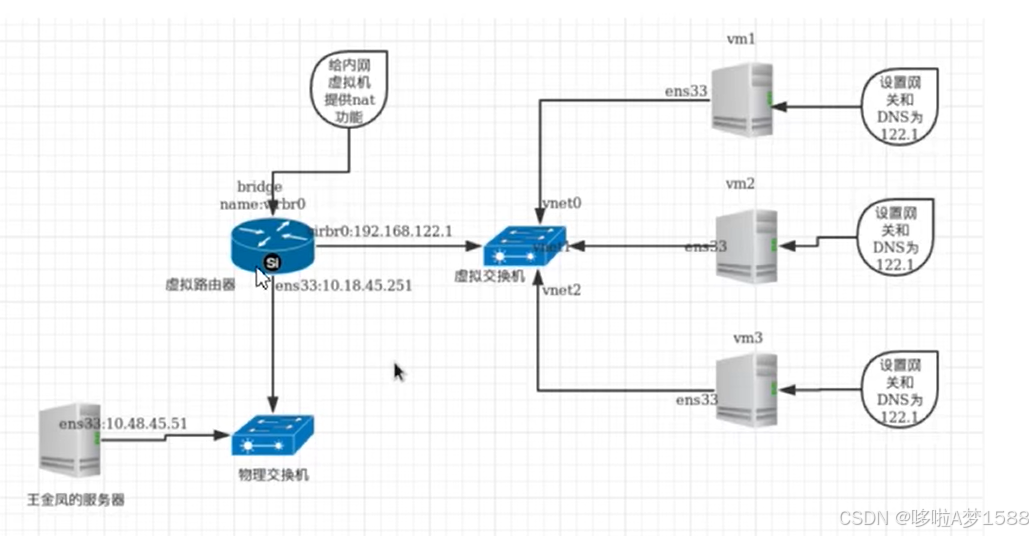
隔离网络拓扑:
- 隔离就是将物理网卡与虚拟路由器连接的网线断开
- 断开之后,虚拟机就不能上网了,里面的机器也出不来,同样外面的也连接不上虚拟机,但是宿主机是可以的,宿主机通过 virbr0:192.168.122.1 IP可以访问里面的虚拟机,也就是宿主机的网卡,宿主机可以通过网卡(virbr0)去连接虚拟机。
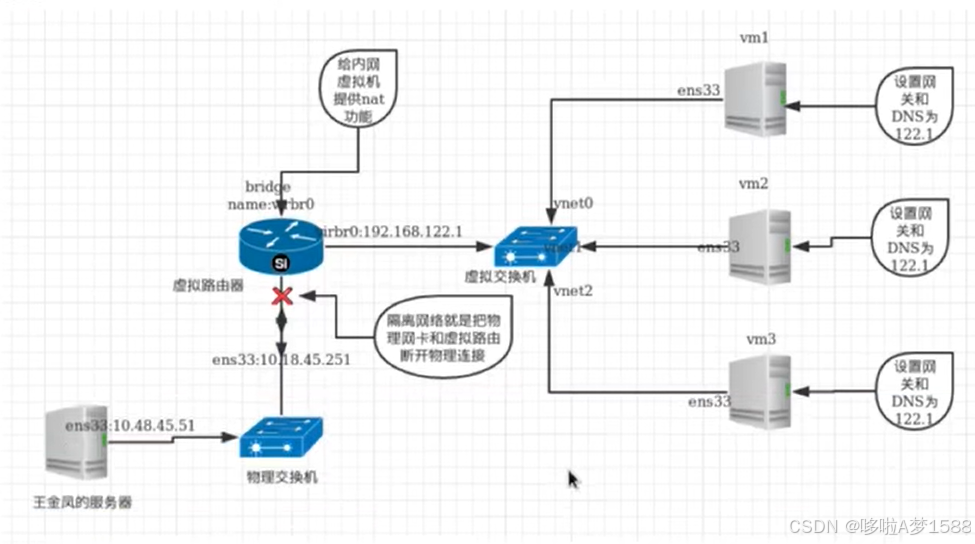
桥接网络拓扑:
- 桥接就是把虚拟路由去掉,把 ens33 这个物理网卡直接连接到虚拟交换机上,这个就是桥接,但是我们做的时候,需要在虚拟交换机上去做一个全新的接口,这个接口叫桥接接口,然后把物理网卡 ens33 与这个桥接口绑在一起,和一个口是没有区别的,此时你可以用这个桥接口上网了。
-
- # 删除虚拟交换机上的 vnet0 接口
- brctl delif virbr0 vnet0
- # 在虚拟交换机上添加一个 vnet0 接口
- brctl addif virbr0 vnet0
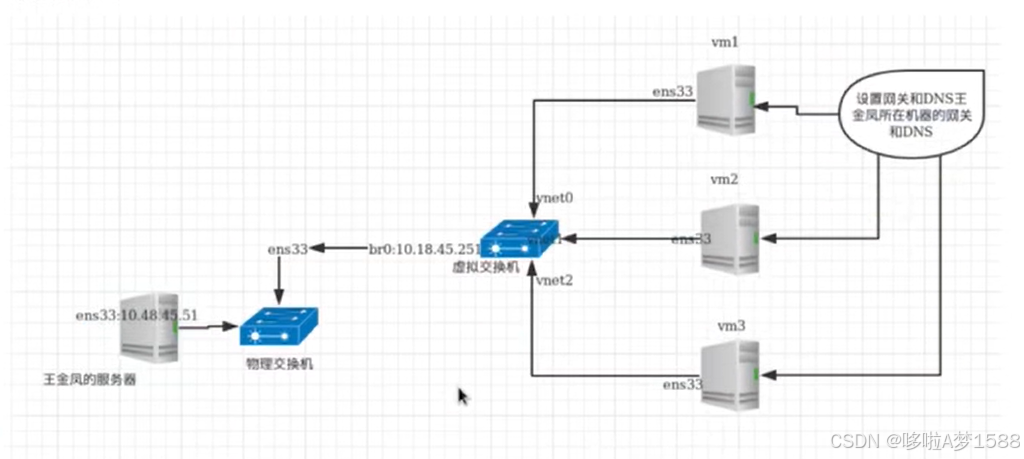
可以通过查看 mac 地址是否是一致来确定是不是一根线上的两个接口
- # 没有启动虚拟机 查看虚拟机接口( 通过虚拟机网络管理接口 virbr0 查看 你有几台虚机机 命令:brctl show)
- root@kvm-server:~# brctl show
- bridge name bridge id STP enabled interfaces
- virbr0 8000.5254003e3044 yes
-
-
- # 启动两台虚拟机
- root@kvm-server:~# brctl show
- bridge name bridge id STP enabled interfaces
- virbr0 8000.5254003e3044 yes vnet0
- vnet1
-
-
- root@kvm-server:~# ip a
- 1: lo: <LOOPBACK,UP,LOWER_UP> mtu 65536 qdisc noqueue state UNKNOWN group default qlen 1000
- link/loopback 00:00:00:00:00:00 brd 00:00:00:00:00:00
- inet 127.0.0.1/8 scope host lo
- valid_lft forever preferred_lft forever
- inet6 ::1/128 scope host
- valid_lft forever preferred_lft forever
- 2: ens33: <BROADCAST,MULTICAST,UP,LOWER_UP> mtu 1500 qdisc fq_codel state UP group default qlen 1000 #宿主机网卡
- link/ether 00:0c:29:4c:7e:1e brd ff:ff:ff:ff:ff:ff
- altname enp2s1
- inet 192.168.22.10/24 metric 100 brd 192.168.22.255 scope global dynamic ens33
- valid_lft 1052sec preferred_lft 1052sec
- inet6 fe80::20c:29ff:fe4c:7e1e/64 scope link
- valid_lft forever preferred_lft forever
- 3: virbr0: <BROADCAST,MULTICAST,UP,LOWER_UP> mtu 1500 qdisc noqueue state UP group default qlen 1000 # 虚拟机网络管理接口
- link/ether 52:54:00:3e:30:44 brd ff:ff:ff:ff:ff:ff
- inet 192.168.122.1/24 brd 192.168.122.255 scope global virbr0
- valid_lft forever preferred_lft forever
- 4: vnet0: <BROADCAST,MULTICAST,UP,LOWER_UP> mtu 1500 qdisc noqueue master virbr0 state UNKNOWN group default qlen 1000 # 虚拟机网卡
- link/ether fe:54:00:c1:08:f9 brd ff:ff:ff:ff:ff:ff
- inet6 fe80::fc54:ff:fec1:8f9/64 scope link
- valid_lft forever preferred_lft forever
- 5: vnet1: <BROADCAST,MULTICAST,UP,LOWER_UP> mtu 1500 qdisc noqueue master virbr0 state UNKNOWN group default qlen 1000 # 虚拟机网卡
- link/ether 96:07:2b:36:78:a0 brd ff:ff:ff:ff:ff:ff
- inet6 fe80::fc54:ff:fed9:c3f7/64 scope link
- valid_lft forever preferred_lft forever
从交换机上把 vnet 网卡删除:
- # 删除虚拟机上的一个接口
- brctl delif virbr0 vnet0
- root@kvm-server:~# brctl delif virbr0 vnet0
- root@kvm-server:~# brctl show
- bridge name bridge id STP enabled interfaces
- virbr0 8000.5254003e3044 yes vnet1
- root@kvm-server:~#
添加 vnet 网卡到交换机上:
- brctl addif virbr0 vnet0
- root@kvm-server:~# brctl addif virbr0 vnet0
- root@kvm-server:~# brctl show
- bridge name bridge id STP enabled interfaces
- virbr0 8000.5254003e3044 yes vnet0
- vnet1
- root@kvm-server:~#
1. 配置文件方式配置桥接
- # centos7 配置文件方式配置桥接
- [root@node1 ~]# ls /etc/sysconfig/network-scripts/
- ifcfg-ens33 ifdown-eth ifdown-isdn ifdown-sit ifup ifup-ib ifup-plip ifup-routes ifup-tunnel network-functions-ipv6
- ifcfg-lo ifdown-ib ifdown-post ifdown-Team ifup-aliases ifup-ippp ifup-plusb ifup-sit ifup-wireless
- ifdown ifdown-ippp ifdown-ppp ifdown-TeamPort ifup-bnep ifup-ipv6 ifup-post ifup-Team init.ipv6-global
- ifdown-bnep ifdown-ipv6 ifdown-routes ifdown-tunnel ifup-eth ifup-isdn ifup-ppp ifup-TeamPort network-functions
-
- 新建桥接网卡配置文件 ifcfg-br0
- vim /etc/sysconfig/network-scripts/ifcfg-br0
- [root@node1 network-scripts]# vim ifcfg-br0
- [root@node1 network-scripts]# cat ifcfg-br0
- TYPE=Bridge
- NAME=br0
- DEVICE=br0
- ONBOOT="yes"
- BOOTPROTO=static
- IPADDR=192.168.222.155
- GATEWAY=192.168.222.2
- NETMASK=255.255.255.0
- DNS1=114.114.114.114
- DNS2=8.8.8.8
- [root@node1 network-scripts]# pwd
- /etc/sysconfig/network-scripts
-
-
- # 建立桥接网卡 'ifcfg-br0' 与 物理网卡 'ifcfg-ens33' 的关系,这样配置桥接成功了
- 1. 备份
- [root@node1 network-scripts]# cp ifcfg-ens33 ifcfg-ens33-bak
-
- 2. 修改配置文件,让物理网卡 'ifcfg-ens33' 与新创建的桥接网卡 'ifcfg-br0' 建立关系
- [root@node1 network-scripts]# vim ifcfg-ens33
- [root@node1 network-scripts]# cat ifcfg-ens33
- DEVICE="ens33"
- ONBOOT="yes"
- BRIDGE=br0
-
-
- 网卡创建好了需要重启 libvirtd 与 network 服务
-
- [root@node1 network-scripts]# systemctl restart libvirtd
- [root@node1 network-scripts]# systemctl restart network
-
- # 打开虚拟机图形界面,将桥接网卡添加到 vm2 虚拟机上
- [root@node1 network-scripts]# virt-manager
-
- # 在宿主机上验证 桥接网卡配置是否成功
- 1.登录 vm2 虚拟机
- [root@node1 network-scripts]# ssh 192.168.122.66
- root@192.168.122.66's password:
- Last login: Sat Jul 27 16:01:30 2024
- 2. 'ens3' 是 vm2 的网卡,'ens8' 是添加的桥接网卡,他的IP在宿主机的IP网段 ,说明物理网卡与 vm2 虚拟机网卡桥接成功
- [root@localhost ~]# ip a
- 1: lo: <LOOPBACK,UP,LOWER_UP> mtu 65536 qdisc noqueue state UNKNOWN group default qlen 1000
- link/loopback 00:00:00:00:00:00 brd 00:00:00:00:00:00
- inet 127.0.0.1/8 scope host lo
- valid_lft forever preferred_lft forever
- inet6 ::1/128 scope host
- valid_lft forever preferred_lft forever
- 2: ens3: <BROADCAST,MULTICAST,UP,LOWER_UP> mtu 1500 qdisc pfifo_fast state UP group default qlen 1000
- link/ether 52:54:00:50:8b:08 brd ff:ff:ff:ff:ff:ff
- inet 192.168.122.66/24 brd 192.168.122.255 scope global noprefixroute dynamic ens3
- valid_lft 3182sec preferred_lft 3182sec
- inet6 fe80::f7b:8d25:8ac0:84af/64 scope link noprefixroute
- valid_lft forever preferred_lft forever
- 3: ens8: <BROADCAST,MULTICAST,UP,LOWER_UP> mtu 1500 qdisc pfifo_fast state UP group default qlen 1000
- link/ether 52:54:00:c3:cb:8d brd ff:ff:ff:ff:ff:ff
- inet 192.168.222.158/24 brd 192.168.222.255 scope global noprefixroute dynamic ens8
- valid_lft 1382sec preferred_lft 1382sec
- inet6 fe80::10ce:8f15:6d35:a38b/64 scope link noprefixroute
- valid_lft forever preferred_lft forever
-
-
- 3. 测试 网络性能 可以上网 说明桥接成功
- [root@localhost ~]# ping www.baidu.com
- PING www.a.shifen.com (180.101.50.242) 56(84) bytes of data.
- 64 bytes from 180.101.50.242 (180.101.50.242): icmp_seq=1 ttl=127 time=15.5 ms
- 64 bytes from 180.101.50.242 (180.101.50.242): icmp_seq=2 ttl=127 time=14.7 ms
- 64 bytes from 180.101.50.242 (180.101.50.242): icmp_seq=3 ttl=127 time=15.4 ms
- 64 bytes from 180.101.50.242 (180.101.50.242): icmp_seq=4 ttl=127 time=18.7 ms
- ^C
- --- www.a.shifen.com ping statistics ---
- 4 packets transmitted, 4 received, 0% packet loss, time 3014ms
- rtt min/avg/max/mdev = 14.709/16.122/18.758/1.559 ms
- 4. 退出 vm2 虚拟机
- [root@localhost ~]# logout
- Connection to 192.168.122.66 closed. # vm2虚拟机连接断开
- 5. 回到宿主机,查看发现宿主机上多出一个桥接网卡 br0,br0的IP就是宿主机IP,说明桥接成功
- [root@node1 network-scripts]# ip a
- 1: lo: <LOOPBACK,UP,LOWER_UP> mtu 65536 qdisc noqueue state UNKNOWN group default qlen 1000
- link/loopback 00:00:00:00:00:00 brd 00:00:00:00:00:00
- inet 127.0.0.1/8 scope host lo
- valid_lft forever preferred_lft forever
- inet6 ::1/128 scope host
- valid_lft forever preferred_lft forever
- 2: ens33: <BROADCAST,MULTICAST,UP,LOWER_UP> mtu 1500 qdisc pfifo_fast master br0 state UP group default qlen 1000
- link/ether 00:0c:29:10:60:49 brd ff:ff:ff:ff:ff:ff
- 3: virbr0: <BROADCAST,MULTICAST,UP,LOWER_UP> mtu 1500 qdisc noqueue state UP group default qlen 1000
- link/ether 52:54:00:99:6b:d6 brd ff:ff:ff:ff:ff:ff
- inet 192.168.122.1/24 brd 192.168.122.255 scope global virbr0
- valid_lft forever preferred_lft forever
- 4: virbr0-nic: <BROADCAST,MULTICAST> mtu 1500 qdisc pfifo_fast master virbr0 state DOWN group default qlen 1000
- link/ether 52:54:00:99:6b:d6 brd ff:ff:ff:ff:ff:ff
- 13: br0: <BROADCAST,MULTICAST,UP,LOWER_UP> mtu 1500 qdisc noqueue state UP group default qlen 1000
- link/ether 00:0c:29:10:60:49 brd ff:ff:ff:ff:ff:ff
- inet 192.168.222.155/24 brd 192.168.222.255 scope global noprefixroute br0
- valid_lft forever preferred_lft forever
- inet6 fe80::20c:29ff:fe10:6049/64 scope link
- valid_lft forever preferred_lft forever
- 14: vnet0: <BROADCAST,MULTICAST,UP,LOWER_UP> mtu 1500 qdisc pfifo_fast master virbr0 state UNKNOWN group default qlen 1000
- link/ether fe:54:00:50:8b:08 brd ff:ff:ff:ff:ff:ff
- inet6 fe80::fc54:ff:fe50:8b08/64 scope link
- valid_lft forever preferred_lft forever
- 15: vnet1: <BROADCAST,MULTICAST,UP,LOWER_UP> mtu 1500 qdisc pfifo_fast master br0 state UNKNOWN group default qlen 1000
- link/ether fe:54:00:c3:cb:8d brd ff:ff:ff:ff:ff:ff
- inet6 fe80::fc54:ff:fec3:cb8d/64 scope link
- valid_lft forever preferred_lft forever
- valid_lft forever preferred_lft forever
-
-
- 测试宿主机是否可以上网
- [root@node1 network-scripts]# ping www.baidu.com
- PING www.a.shifen.com (180.101.50.188) 56(84) bytes of data.
- 64 bytes from 180.101.50.188 (180.101.50.188): icmp_seq=1 ttl=128 time=16.6 ms
- 64 bytes from 180.101.50.188 (180.101.50.188): icmp_seq=2 ttl=128 time=17.1 ms
- 64 bytes from 180.101.50.188 (180.101.50.188): icmp_seq=3 ttl=128 time=12.8 ms
- # 移除桥接网卡,首先要将 vm2 虚拟机关闭
- 1.通过virt-manager图形化界面移除桥接网卡,找到桥接网卡 'Bridge br0:Host device ens33' 直接点击 'Remove' 移除桥接网卡
- 2. 将原宿主机网卡配置文件恢复
- [root@node1 network-scripts]# mv ifcfg-ens33 ifcfg-ens33.bak
- [root@node1 network-scripts]# mv ifcfg-ens33-bak ifcfg-ens33
- [root@node1 network-scripts]#
- 3. 需要重启 libvirtd 与 network 服务
- [root@node1 network-scripts]# systemctl restart libvirtd
- [root@node1 network-scripts]# systemctl restart network
- # 可以看出已经恢复 ens33 的IP地址了,说明桥接网卡取消了
- [root@node1 network-scripts]# ip a
- 1: lo: <LOOPBACK,UP,LOWER_UP> mtu 65536 qdisc noqueue state UNKNOWN group default qlen 1000
- link/loopback 00:00:00:00:00:00 brd 00:00:00:00:00:00
- inet 127.0.0.1/8 scope host lo
- valid_lft forever preferred_lft forever
- inet6 ::1/128 scope host
- valid_lft forever preferred_lft forever
- 2: ens33: <BROADCAST,MULTICAST,UP,LOWER_UP> mtu 1500 qdisc pfifo_fast state UP group default qlen 1000
- link/ether 00:0c:29:10:60:49 brd ff:ff:ff:ff:ff:ff
- inet 192.168.222.155/24 brd 192.168.222.255 scope global noprefixroute dynamic ens33
- valid_lft 1777sec preferred_lft 1777sec
- inet6 fe80::7e78:707:952:6d60/64 scope link noprefixroute
- valid_lft forever preferred_lft forever
- 3: virbr0: <NO-CARRIER,BROADCAST,MULTICAST,UP> mtu 1500 qdisc noqueue state DOWN group default qlen 1000
- link/ether 52:54:00:99:6b:d6 brd ff:ff:ff:ff:ff:ff
- inet 192.168.122.1/24 brd 192.168.122.255 scope global virbr0
- valid_lft forever preferred_lft forever
- 4: virbr0-nic: <BROADCAST,MULTICAST> mtu 1500 qdisc pfifo_fast master virbr0 state DOWN group default qlen 1000
- link/ether 52:54:00:99:6b:d6 brd ff:ff:ff:ff:ff:ff
- 16: br0: <NO-CARRIER,BROADCAST,MULTICAST,UP> mtu 1500 qdisc noqueue state DOWN group default qlen 1000
- link/ether 5e:a1:1f:9b:34:09 brd ff:ff:ff:ff:ff:ff
- inet 192.168.222.155/24 brd 192.168.222.255 scope global noprefixroute br0
- valid_lft forever preferred_lft forever
- inet6 fe80::5ca1:1fff:fe9b:3409/64 scope link
- valid_lft forever preferred_lft forever
- # 恢复以后可以上网了
- [root@node1 network-scripts]# ping www.baidu.com
- PING www.a.shifen.com (180.101.50.188) 56(84) bytes of data.
- 64 bytes from 180.101.50.188 (180.101.50.188): icmp_seq=1 ttl=128 time=15.1 ms
- 64 bytes from 180.101.50.188 (180.101.50.188): icmp_seq=2 ttl=128 time=14.5 ms
- 64 bytes from 180.101.50.188 (180.101.50.188): icmp_seq=3 ttl=128 time=14.1 ms
- ^X64 bytes from 180.101.50.188 (180.101.50.188): icmp_seq=4 ttl=128 time=13.8 ms
- # 重启 vm2 虚拟机,登录,测试桥接网卡取消以后 vm2 虚拟机是否可以上网
- [root@node1 network-scripts]# virsh start vm2
- Domain vm2 started
- # 虚拟机上和宿主机同时验证 vm2 是否可以上网 以下表示网卡已经取消,可以上网
- [root@node1 ~]# virt-manager
- [root@node1 ~]# ssh 192.168.122.66
- root@192.168.122.66's password:
- Last login: Sat Jul 27 17:14:42 2024
- [root@localhost ~]# ip a
- 1: lo: <LOOPBACK,UP,LOWER_UP> mtu 65536 qdisc noqueue state UNKNOWN group default qlen 1000
- link/loopback 00:00:00:00:00:00 brd 00:00:00:00:00:00
- inet 127.0.0.1/8 scope host lo
- valid_lft forever preferred_lft forever
- inet6 ::1/128 scope host
- valid_lft forever preferred_lft forever
- 2: ens3: <BROADCAST,MULTICAST,UP,LOWER_UP> mtu 1500 qdisc pfifo_fast state UP group default qlen 1000
- link/ether 52:54:00:50:8b:08 brd ff:ff:ff:ff:ff:ff
- inet 192.168.122.66/24 brd 192.168.122.255 scope global noprefixroute dynamic ens3
- valid_lft 3428sec preferred_lft 3428sec
- inet6 fe80::f7b:8d25:8ac0:84af/64 scope link noprefixroute
- valid_lft forever preferred_lft forever
- 3: ens8: <BROADCAST,MULTICAST,UP,LOWER_UP> mtu 1500 qdisc pfifo_fast state UP group default qlen 1000
- link/ether 52:54:00:c3:cb:8d brd ff:ff:ff:ff:ff:ff
- inet6 fe80::10ce:8f15:6d35:a38b/64 scope link noprefixroute
- valid_lft forever preferred_lft forever
- [root@localhost ~]# ping www.baidu.com
- PING www.a.shifen.com (180.101.50.188) 56(84) bytes of data.
- 64 bytes from 180.101.50.188 (180.101.50.188): icmp_seq=1 ttl=127 time=13.2 ms
- 64 bytes from 180.101.50.188 (180.101.50.188): icmp_seq=2 ttl=127 time=14.0 ms
- 64 bytes from 180.101.50.188 (180.101.50.188): icmp_seq=3 ttl=127 time=13.1 ms
- ^C
- --- www.a.shifen.com ping statistics ---
- 3 packets transmitted, 3 received, 0% packet loss, time 2005ms
- rtt min/avg/max/mdev = 13.187/13.471/14.009/0.380 ms
-
- # 退出 vm2 虚拟机
- [root@localhost ~]# logout
- Connection to 192.168.122.66 closed.
- [root@node1 ~]#
-
-
-
-
-
-
-
-
- --------------------------------------------------------
- # centos8 配置文件方式配置桥接
- # 准备工作备份 /etc/sysconfig/network-scripts/ifcfg-enp2s0
- [root@mail ~]# cd /etc/sysconfig/network-scripts/
- [root@mail network-scripts]# cp ifcfg-enp2s0 ifcfg-enp2s0.bak
- [root@mail network-scripts]# ls
- ifcfg-br0 ifcfg-enp2s0 ifcfg-enp2s0.bak
- [root@mail network-scripts]# pwd
- /etc/sysconfig/network-scripts
-
- # centos8 网卡配置文件
- [root@mail ~]# vim /etc/sysconfig/network-scripts/ifcfg-enp2s0
-
-
- 一. 在宿主机上
- 1. 修改配置文件 vim /etc/sysconfig/network-scripts/ifcfg-br0
- 桥接网卡配置文件内容如下:cat ifcfg-br0
- TYPE=Bridge
- NAME=br0
- ONBOOT="yes"
- BOOTPROTO=static
- IPADDR=10.18.44.251 # 宿主机IP地址
- GATEWAY=10.18.44.1 # 宿主机网关 可以用 route 查看网关
- DNS1=114.114.114.114
- DNS2=8.8.8.8
-
- # 紧接着要修改物理网卡配置文件,修改内容如下
- 修改之前先将物理网卡配置文件备份
- [root@mail ~]# cd /etc/sysconfig/network-scripts/
- [root@mail network-scripts]# cp ifcfg-enp2s0 ifcfg-enp2s0.bak
- [root@mail network-scripts]# cat ifcfg-enp2s0
- DEVICE="enp2s0"
- ONBOOT="yes"
- BRIDGE=br0
- # 将物理网卡桥接到哪里去,我们前面创建的桥接网卡ifcfg-br0配置文件中,桥接设备名为 br0
- # 将网卡'ifcfg-enp2s0'桥接到网卡为 'ifcfg-br0' 上
- 2. 重启 libvirtd 服务 systemctl restart libvirtd
- 3. 重启 network 服务 systemctl restart network
-
- 二. 删除桥接网卡步骤:
- 1. 删除桥接 br0 的配置文件
- 2. 修改正常网卡的配置文件
- 3. 重启系统
-
- 注意事项:
- 如果是桥接模式的网络,网关为:xx.xx.xx.1
- 如果是 NAT 模式的网络,网关为:xx.xx.xx.2
- 查看宿主机 IP 命令:ip a
- 查看宿主机 网关 命令:route
-
- 实战:
- # centos 系统网络配置文件
- [root@mail ~]# cat /etc/sysconfig/network-scripts/ifcfg-enp2s0
- TYPE=Ethernet
- PROXY_METHOD=none
- BROWSER_ONLY=no
- BOOTPROTO=dhcp
- DEFROUTE=yes
- IPV4_FAILURE_FATAL=no
- IPV6INIT=yes
- IPV6_AUTOCONF=yes
- IPV6_DEFROUTE=yes
- IPV6_FAILURE_FATAL=no
- NAME=enp2s0
- UUID=1a4e60a4-1453-4375-b4b8-a77c18a88e6c
- DEVICE=enp2s0
- ONBOOT=yes
- [root@mail network-scripts]# pwd
- /etc/sysconfig/network-scripts
-
-
- [root@mail system]# route
- Kernel IP routing table
- Destination Gateway Genmask Flags Metric Ref Use Iface
- default _gateway 0.0.0.0 UG 100 0 0 enp2s0
- 172.17.0.0 0.0.0.0 255.255.0.0 U 0 0 0 docker0
- 192.168.71.0 0.0.0.0 255.255.255.0 U 100 0 0 enp2s0
- 192.168.121.0 0.0.0.0 255.255.255.0 U 0 0 0 virbr2
- 192.168.122.0 0.0.0.0 255.255.255.0 U 0 0 0 virbr0
-
-
-
-
- # ubuntu 网络配置文件
- root@kvm-server:~# cat /etc/netplan/00-installer-config.yaml
- # This is the network config written by 'subiquity'
- network:
- ethernets:
- ens33:
- dhcp4: true
- version: 2
- root@kvm-server:~#
- # 准备工作备份 /etc/sysconfig/network-scripts/ifcfg-enp2s0
- [root@mail ~]# cd /etc/sysconfig/network-scripts/
- [root@mail network-scripts]# cp ifcfg-enp2s0 ifcfg-enp2s0.bak
- [root@mail network-scripts]# ls
- ifcfg-br0 ifcfg-enp2s0 ifcfg-enp2s0.bak
- [root@mail network-scripts]# pwd
- /etc/sysconfig/network-scripts
-
- # centos8 网卡配置文件
- [root@mail ~]# vim /etc/sysconfig/network-scripts/ifcfg-enp2s0
-
-
-
- 一. 在宿主机上
- 1. 修改配置文件 vim /etc/sysconfig/network-scripts/ifcfg-br0
- 桥接网卡配置文件内容如下:cat ifcfg-br0
- TYPE=Bridge
- NAME=br0
- ONBOOT="yes"
- BOOTPROTO=static
- IPADDR=10.18.44.251 # 宿主机IP地址
- GATEWAY=10.18.44.1 # 宿主机网关 可以用 route 查看网关
- DNS1=114.114.114.114
- DNS2=8.8.8.8
-
- # 紧接着要修改物理网卡配置文件,修改内容如下
- 修改之前先将物理网卡配置文件备份
- [root@mail ~]# cd /etc/sysconfig/network-scripts/
- [root@mail network-scripts]# cp ifcfg-enp2s0 ifcfg-enp2s0.bak
- [root@mail network-scripts]# cat ifcfg-enp2s0
- DEVICE="enp2s0"
- ONBOOT="yes"
- BRIDGE=br0 # 将物理网卡桥接到哪里去,我们前面创建的桥接网卡 ifcfg-br0
-
- 2. 重启 libvirtd 服务 systemctl restart libvirtd
- 3. 重启 network 服务 systemctl restart network
-
- 二. 删除桥接网卡步骤:
- 1. 删除桥接 br0 的配置文件
- 2. 修改正常网卡的配置文件
- 3. 重启系统
-
- 注意事项:
- 如果是桥接模式的网络,网关为:xx.xx.xx.1
- 如果是 NAT 模式的网络,网关为:xx.xx.xx.2
- 查看宿主机 IP 命令:ip a
- 查看宿主机 网关 命令:route
-
- 实战:
- # centos 系统网络配置文件
- [root@mail ~]# cat /etc/sysconfig/network-scripts/ifcfg-enp2s0
- TYPE=Ethernet
- PROXY_METHOD=none
- BROWSER_ONLY=no
- BOOTPROTO=dhcp
- DEFROUTE=yes
- IPV4_FAILURE_FATAL=no
- IPV6INIT=yes
- IPV6_AUTOCONF=yes
- IPV6_DEFROUTE=yes
- IPV6_FAILURE_FATAL=no
- NAME=enp2s0
- UUID=1a4e60a4-1453-4375-b4b8-a77c18a88e6c
- DEVICE=enp2s0
- ONBOOT=yes
- [root@mail network-scripts]# pwd
- /etc/sysconfig/network-scripts
-
-
- [root@mail system]# route
- Kernel IP routing table
- Destination Gateway Genmask Flags Metric Ref Use Iface
- default _gateway 0.0.0.0 UG 100 0 0 enp2s0
- 172.17.0.0 0.0.0.0 255.255.0.0 U 0 0 0 docker0
- 192.168.71.0 0.0.0.0 255.255.255.0 U 100 0 0 enp2s0
- 192.168.121.0 0.0.0.0 255.255.255.0 U 0 0 0 virbr2
- 192.168.122.0 0.0.0.0 255.255.255.0 U 0 0 0 virbr0
-
-
-
-
- # ubuntu 网络配置文件
- root@kvm-server:~# cat /etc/netplan/00-installer-config.yaml
- # This is the network config written by 'subiquity'
- network:
- ethernets:
- ens33:
- dhcp4: true
- version: 2
- root@kvm-server:~#
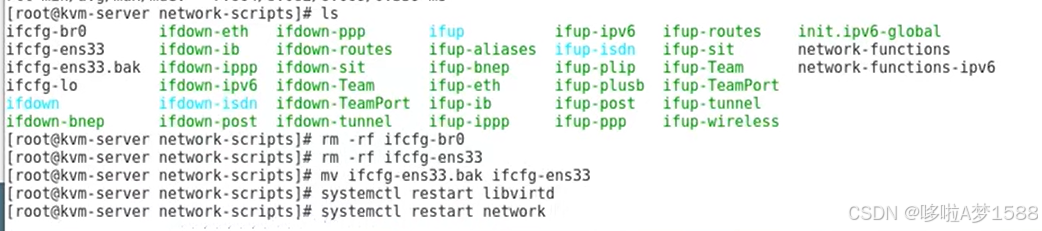
查看网关

- # centos8
- [root@mail ~]# cd /etc/sysconfig/network-scripts/
- [root@mail network-scripts]# ls
- ifcfg-br0 ifcfg-enp2s0
- [root@mail network-scripts]# cat ifcfg-br0
-
- TYPE=Bridge
- NAME=br0
- DEVICE=br0
- ONBOOT="yes"
- BOOTPROTO=static
- IPADDR=192.168.11.13
- GATEWAY=192.168.11.84
- NETMASK=255.255.255.0
- DNS1=114.114.114.114
- DNS2=8.8.8.8
-
- [root@mail network-scripts]# vim ifcfg-enp2s0
- [root@mail network-scripts]# cat ifcfg-enp2s0
- DEVICE="enp2s0"
- ONBOOT="yes"
- BRIDGE=br0
-
-
-
- [root@mail ~]# route
- Kernel IP routing table
- Destination Gateway Genmask Flags Metric Ref Use Iface
- default _gateway 0.0.0.0 UG 100 0 0 enp2s0
- 172.17.0.0 0.0.0.0 255.255.0.0 U 0 0 0 docker0
- 192.168.11.0 0.0.0.0 255.255.255.0 U 100 0 0 enp2s0
- 192.168.122.0 0.0.0.0 255.255.255.0 U 0 0 0 virbr0
-
- [root@mail ~]# ip a
- 1: lo: <LOOPBACK,UP,LOWER_UP> mtu 65536 qdisc noqueue state UNKNOWN group default qlen 1000
- link/loopback 00:00:00:00:00:00 brd 00:00:00:00:00:00
- inet 127.0.0.1/8 scope host lo
- valid_lft forever preferred_lft forever
- inet6 ::1/128 scope host
- valid_lft forever preferred_lft forever
- 2: enp2s0: <BROADCAST,MULTICAST,UP,LOWER_UP> mtu 1500 qdisc fq_codel state UP group default qlen 1000
- link/ether 00:25:b3:17:c7:30 brd ff:ff:ff:ff:ff:ff
- inet 192.168.11.13/24 brd 192.168.11.255 scope global dynamic noprefixroute enp2s0
- valid_lft 70802sec preferred_lft 70802sec
- inet6 240e:38a:244c:c300:225:b3ff:fe17:c730/64 scope global dynamic noprefixroute
- valid_lft 2163474959sec preferred_lft 172559sec
- inet6 fe80::225:b3ff:fe17:c730/64 scope link noprefixroute
- valid_lft forever preferred_lft forever
- 3: virbr0: <NO-CARRIER,BROADCAST,MULTICAST,UP> mtu 1500 qdisc noqueue state DOWN group default qlen 1000
- link/ether 52:54:00:0a:0d:84 brd ff:ff:ff:ff:ff:ff
- inet 192.168.122.1/24 brd 192.168.122.255 scope global virbr0
- valid_lft forever preferred_lft forever
- 4: virbr0-nic: <BROADCAST,MULTICAST> mtu 1500 qdisc fq_codel master virbr0 state DOWN group default qlen 1000
- link/ether 52:54:00:0a:0d:84 brd ff:ff:ff:ff:ff:ff
- 5: docker0: <NO-CARRIER,BROADCAST,MULTICAST,UP> mtu 1500 qdisc noqueue state DOWN group default
- link/ether 02:42:42:8f:59:67 brd ff:ff:ff:ff:ff:ff
- inet 172.17.0.1/16 brd 172.17.255.255 scope global docker0
- valid_lft forever preferred_lft forever
- 6: virbr2: <NO-CARRIER,BROADCAST,MULTICAST,UP> mtu 1500 qdisc noqueue state DOWN group default qlen 1000
- link/ether 52:54:00:0a:0d:86 brd ff:ff:ff:ff:ff:ff
- inet 192.168.121.1/24 brd 192.168.121.255 scope global virbr2
- valid_lft forever preferred_lft forever
- 7: virbr2-nic: <BROADCAST,MULTICAST> mtu 1500 qdisc fq_codel master virbr2 state DOWN group default qlen 1000
- link/ether 52:54:00:0a:0d:86 brd ff:ff:ff:ff:ff:ff
-
-
- [root@mail network-scripts]# cat /etc/systemd/system/network-online.target.wants/NetworkManager-wait-online.service
- [Unit]
- Description=Network Manager Wait Online
- Documentation=man:nm-online(1)
- Requires=NetworkManager.service
- After=NetworkManager.service
- Before=network-online.target
-
- [Service]
- # `nm-online -s` waits until the point when NetworkManager logs
- # "startup complete". That is when startup actions are settled and
- # devices and profiles reached a conclusive activated or deactivated
- # state. It depends on which profiles are configured to autoconnect and
- # also depends on profile settings like ipv4.may-fail/ipv6.may-fail,
- # which affect when a profile is considered fully activated.
- # Check NetworkManager logs to find out why wait-online takes a certain
- # time.
-
- Type=oneshot
- ExecStart=/usr/bin/nm-online -s -q
- RemainAfterExit=yes
-
- # Set $NM_ONLINE_TIMEOUT variable for timeout in seconds.
- # Edit with `systemctl edit NetworkManager-wait-online`.
- #
- # Note, this timeout should commonly not be reached. If your boot
- # gets delayed too long, then the solution is usually not to decrease
- # the timeout, but to fix your setup so that the connected state
- # gets reached earlier.
- Environment=NM_ONLINE_TIMEOUT=60
-
- [Install]
- WantedBy=network-online.target
- [root@mail network-scripts]#
-
-
-
-
- # ubuntu
- root@kvm-server:~# route
- Kernel IP routing table
- Destination Gateway Genmask Flags Metric Ref Use Iface
- default _gateway 0.0.0.0 UG 100 0 0 ens33
- 192.168.122.0 0.0.0.0 255.255.255.0 U 0 0 0 virbr0
- 192.168.22.0 0.0.0.0 255.255.255.0 U 100 0 0 ens33
- _gateway 0.0.0.0 255.255.255.255 UH 100 0 0 ens33
-
- root@kvm-server:~# ip a
- 1: lo: <LOOPBACK,UP,LOWER_UP> mtu 65536 qdisc noqueue state UNKNOWN group default qlen 1000
- link/loopback 00:00:00:00:00:00 brd 00:00:00:00:00:00
- inet 127.0.0.1/8 scope host lo
- valid_lft forever preferred_lft forever
- inet6 ::1/128 scope host
- valid_lft forever preferred_lft forever
- 2: ens33: <BROADCAST,MULTICAST,UP,LOWER_UP> mtu 1500 qdisc fq_codel state UP group default qlen 1000
- link/ether 00:0c:29:4c:7e:1e brd ff:ff:ff:ff:ff:ff
- altname enp2s1
- inet 192.168.22.15/24 metric 100 brd 192.168.22.255 scope global dynamic ens33
- valid_lft 1741sec preferred_lft 1741sec
- inet6 fe80::20c:29ff:fe4c:7e1e/64 scope link
- valid_lft forever preferred_lft forever
- 3: virbr0: <NO-CARRIER,BROADCAST,MULTICAST,UP> mtu 1500 qdisc noqueue state DOWN group default qlen 1000
- link/ether 52:54:00:3e:30:44 brd ff:ff:ff:ff:ff:ff
- inet 192.168.122.1/24 brd 192.168.122.255 scope global virbr0
- valid_lft forever preferred_lft forever
-
-
- root@vm2:~# logout
- longchi@vm2:~$ logout
- Connection to 192.168.122.79 closed.
- longchi@kvm-server:~$
给vm2虚拟机添加桥接网卡
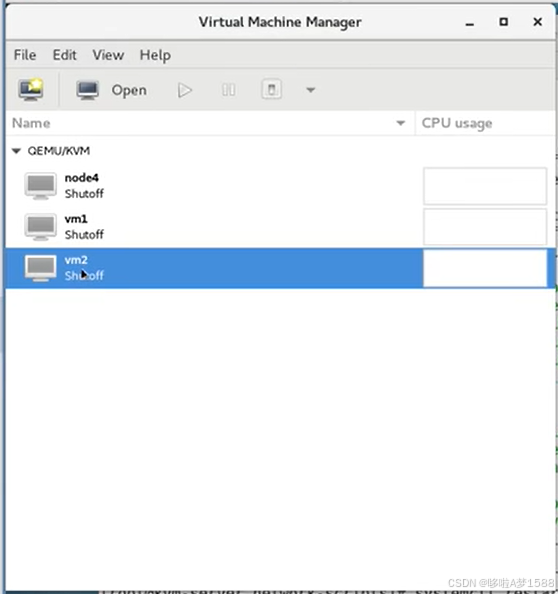
选中 vm2 双击
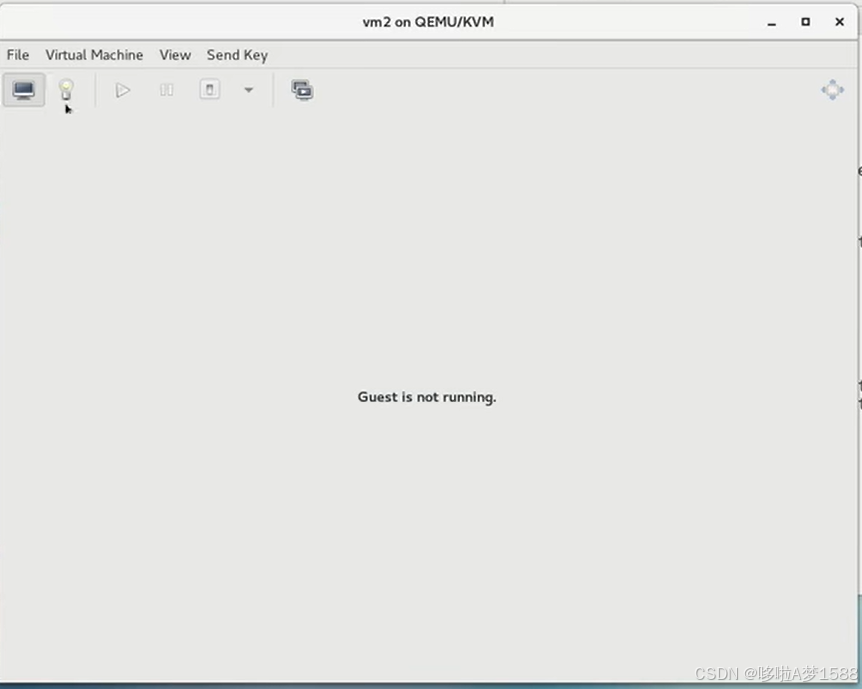
点击小灯泡
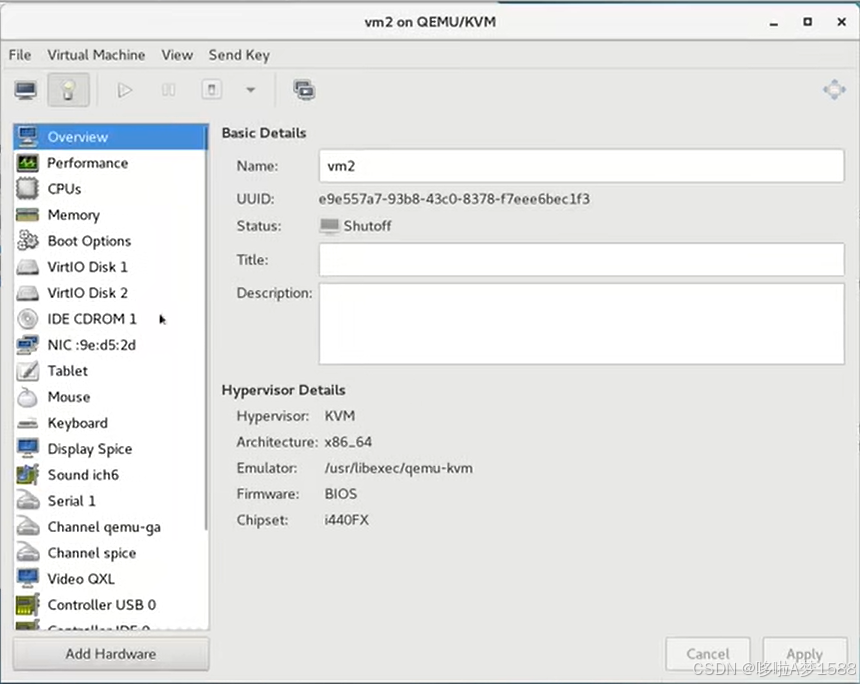
选择 Add Hardware 添加一个硬件
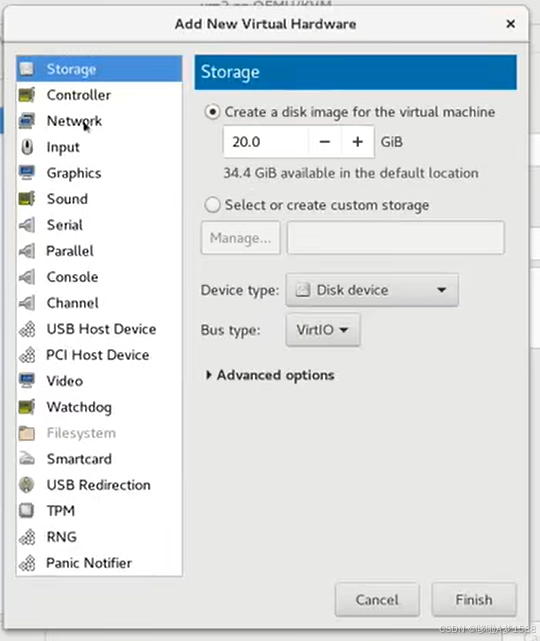
点击 Network
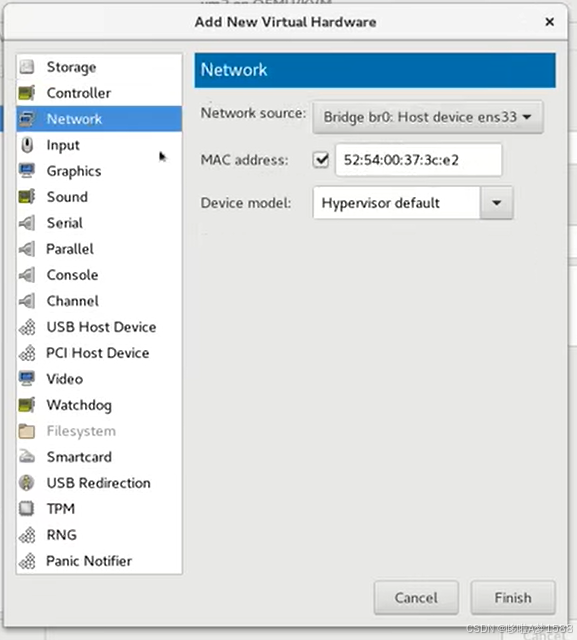
点击 'Virtual network "default"': NAT 后面的小三角,选择'Bridge bro Host device ens33'

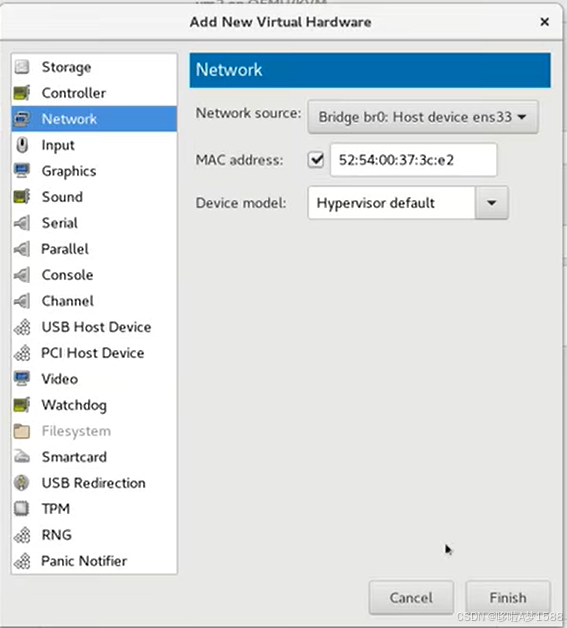
点击 Finish
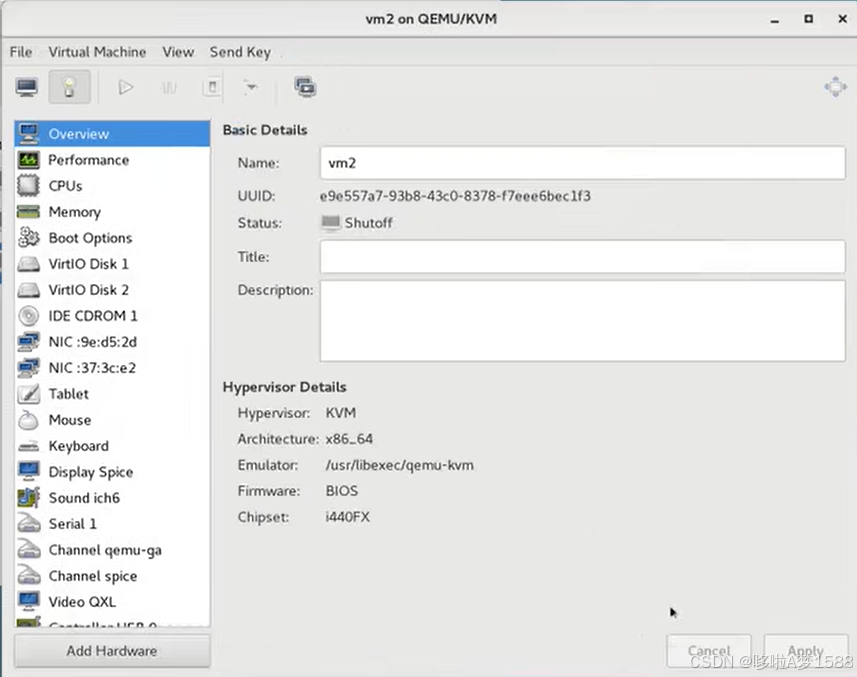
选中新添加的网卡
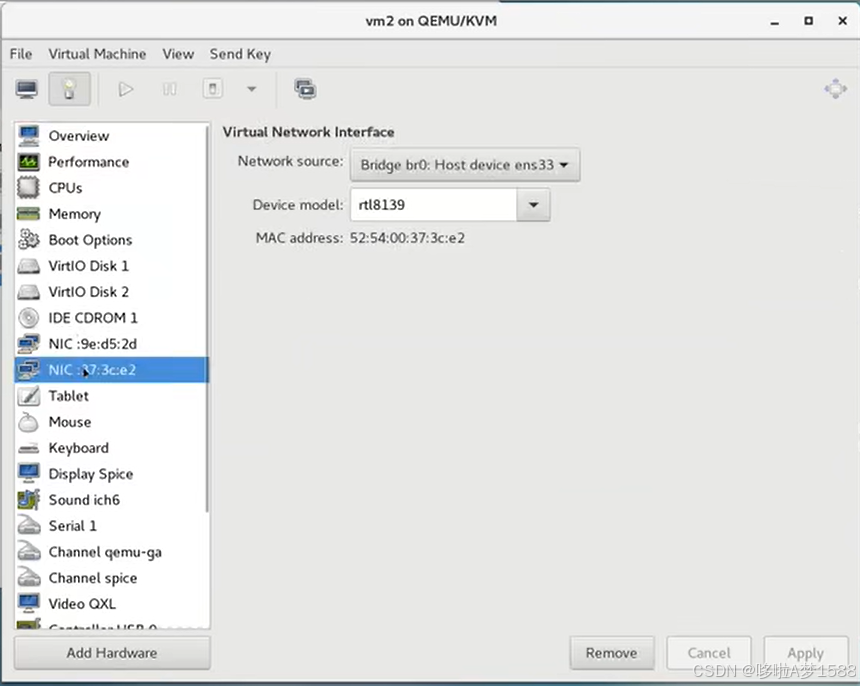
关闭,将vm2运行起来,然后登录进去看看
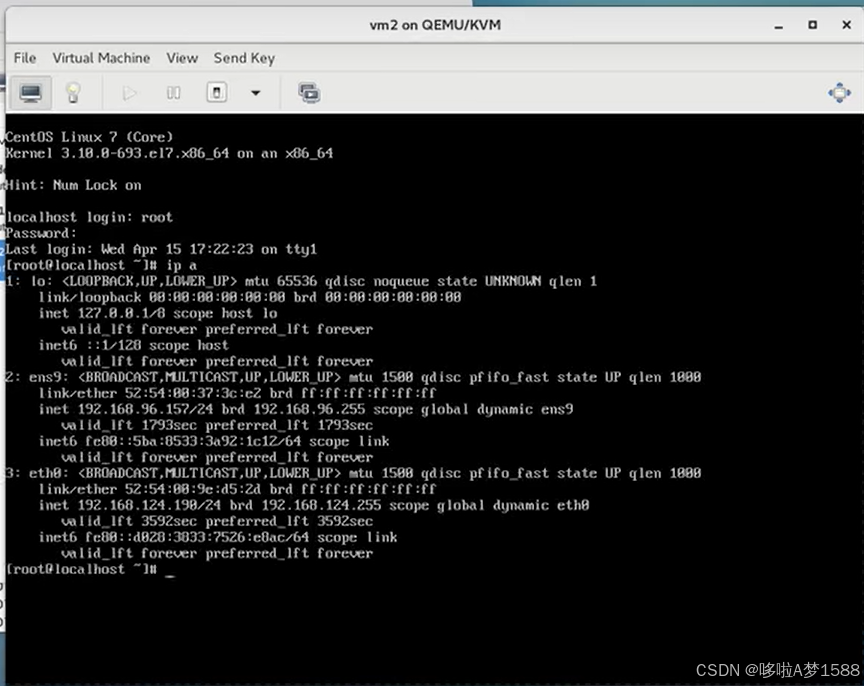
这里我们多出一块网卡 ens9 他的IP 是 192.168.96.157 他与我们宿主IP在同一个网段。

能ping通 www.baidu.com 说明桥接网卡没有问题
在宿主机上查看
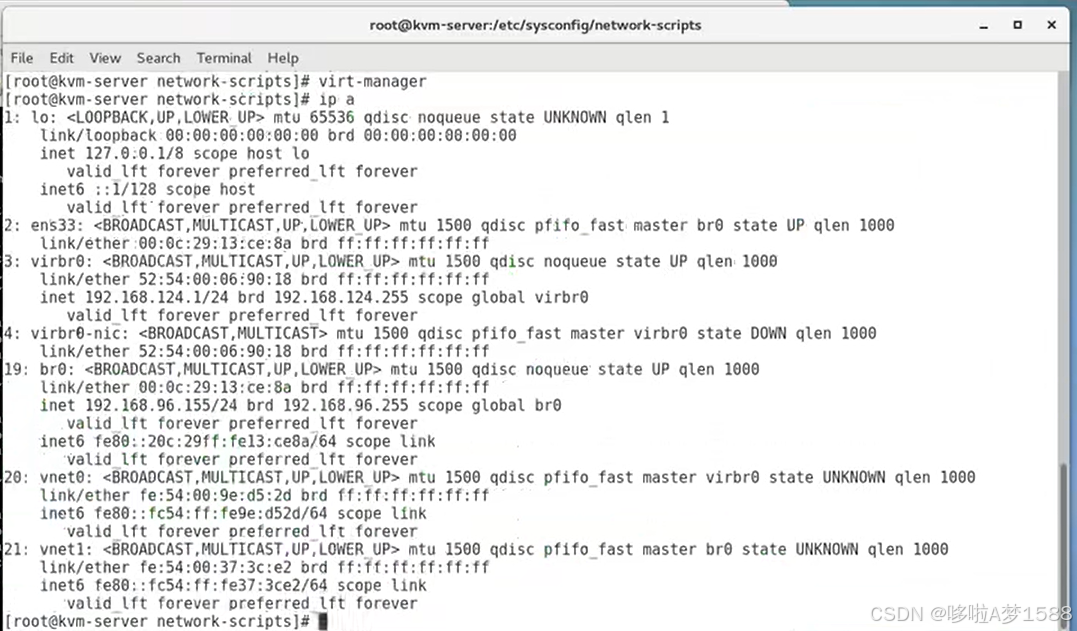
可以看出多出一块 br0 网卡 192.168.96.155,br0上的IP 就是宿主机IP,我们已经将宿主机ens33这个网卡绑定到 br0这个桥接网卡上面
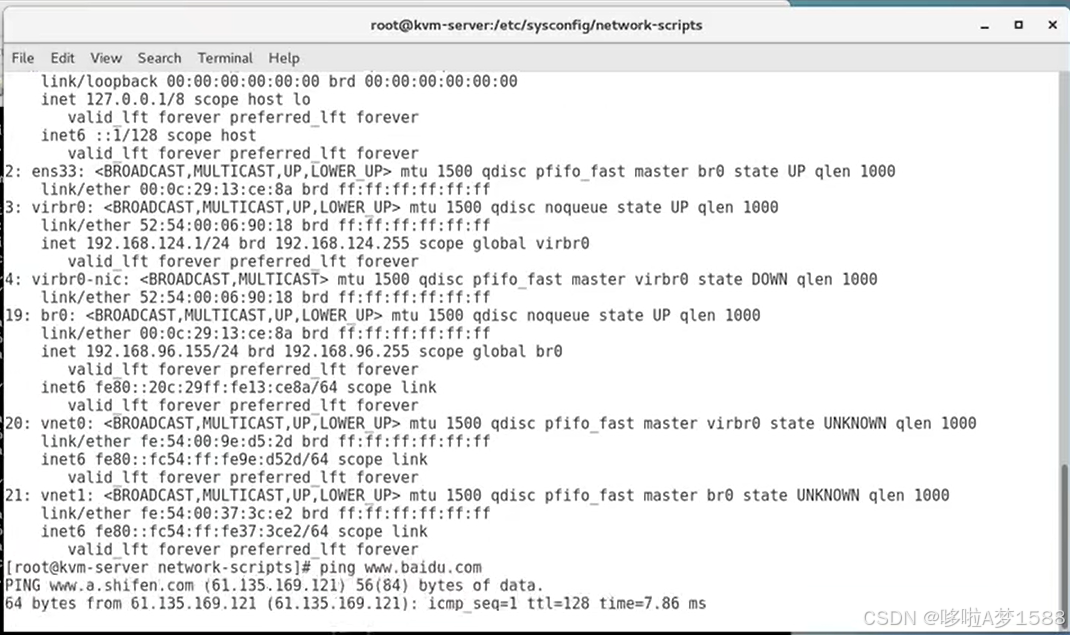
宿主机也能ping通 www.baidu.com 的
此时添加桥接网卡就结束了
如何移除桥接网卡
第一,将 vm2 关键
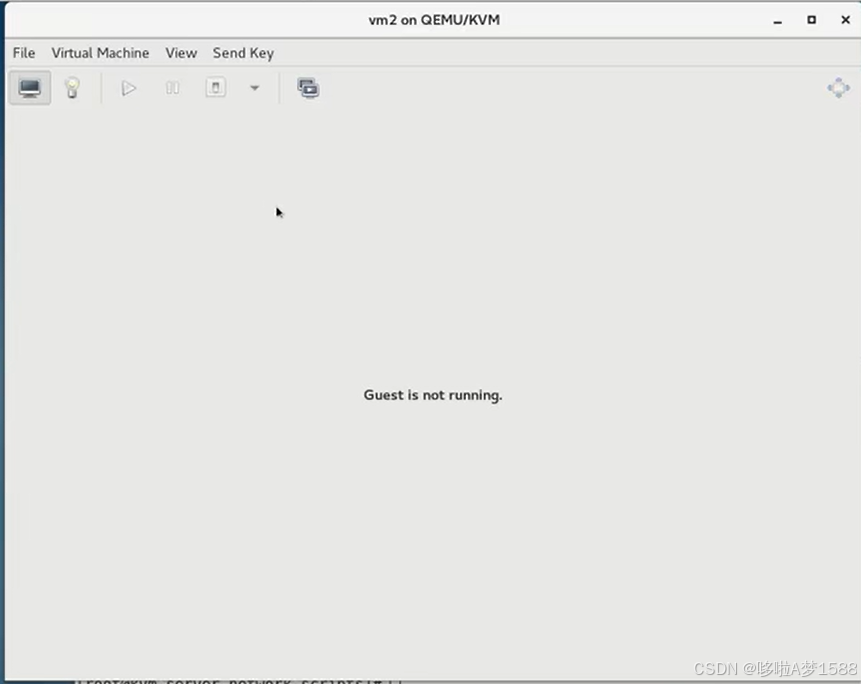
点击小灯泡
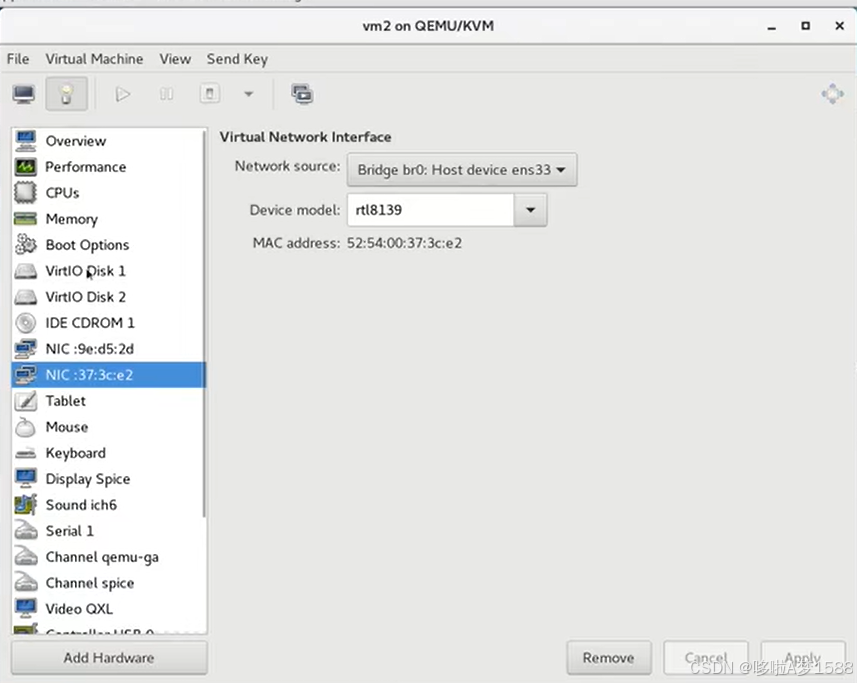
找到新添加的桥接网卡,选中我们要移除的网卡
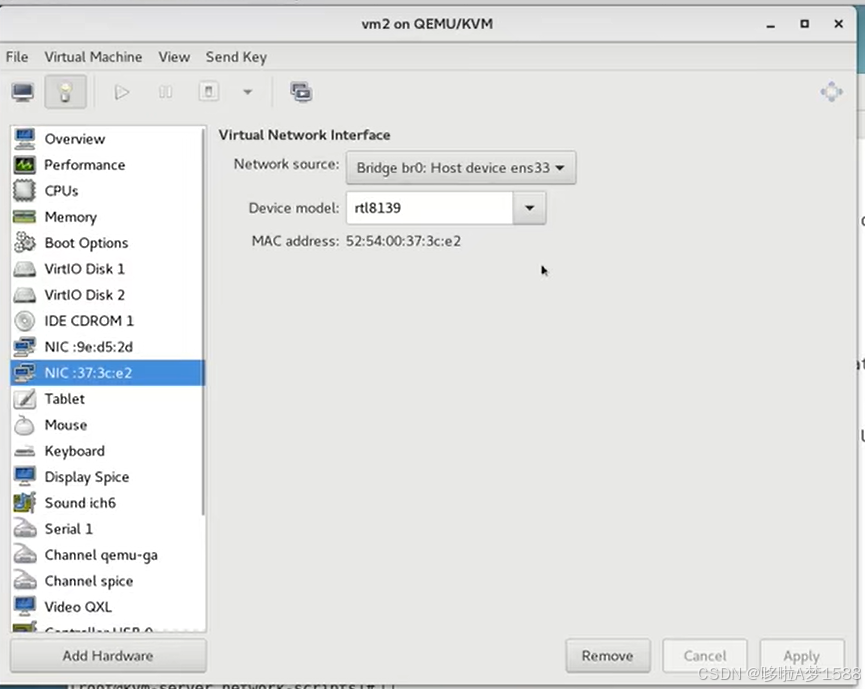
点击 Remove
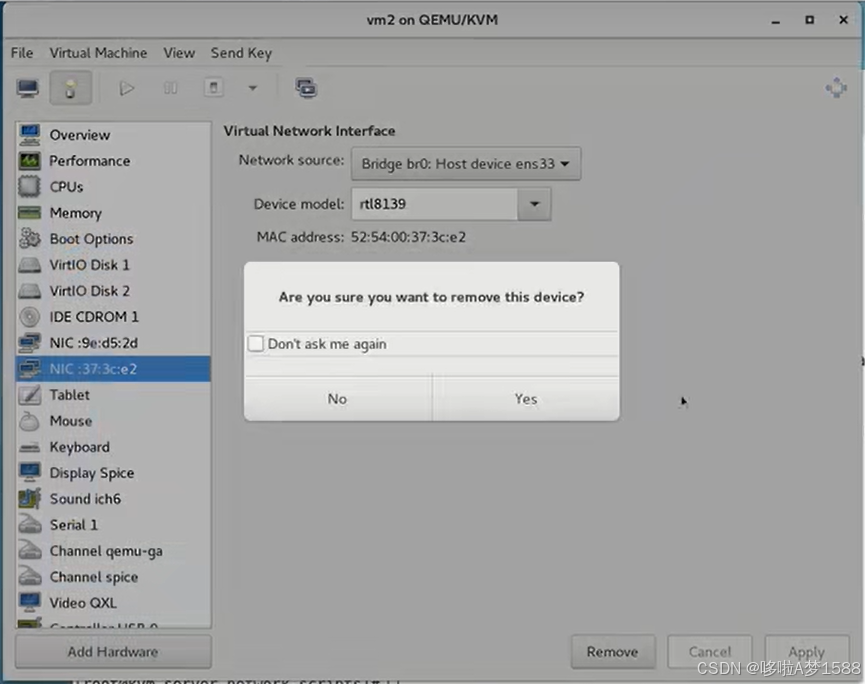
点击 yes
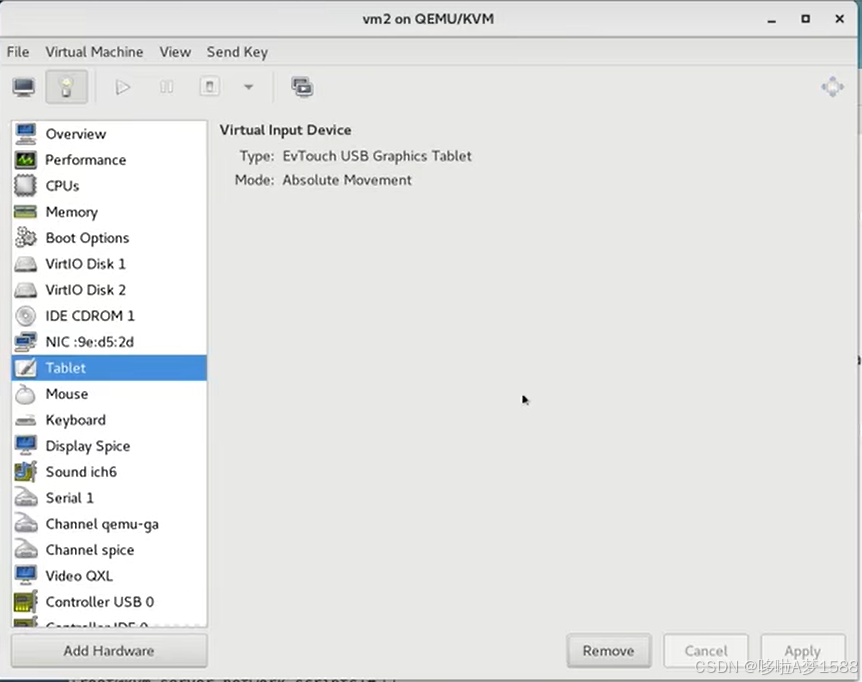
网卡移除
接着操作宿主机的步骤:
1. 删除 br0 的配置文件
- # 桥接网卡配置文件
- [root@mail network-scripts]# rm -rf ifcfg-br0
- # 在宿主机上配置桥接
- [root@mail network-scripts]# rm -rf ifcfg-enp2s0
2. 修改正常网卡的配置文件
- # 将备份的网卡还原
- [root@mail network-scripts]# mv ifcfg-enp2s0_bak ifcfg-enp2s0
3. 重启系统
- # 重启 libvirtd 服务
- [root@mail network-scripts]# systemctl restart libvirtd
-
- # 重启 network 网络服务
- [root@mail network-scripts]# systemctl restart network
再次查看网卡,br0这个网卡已经不存在了 ens33 的 IP: 192.168.96.155
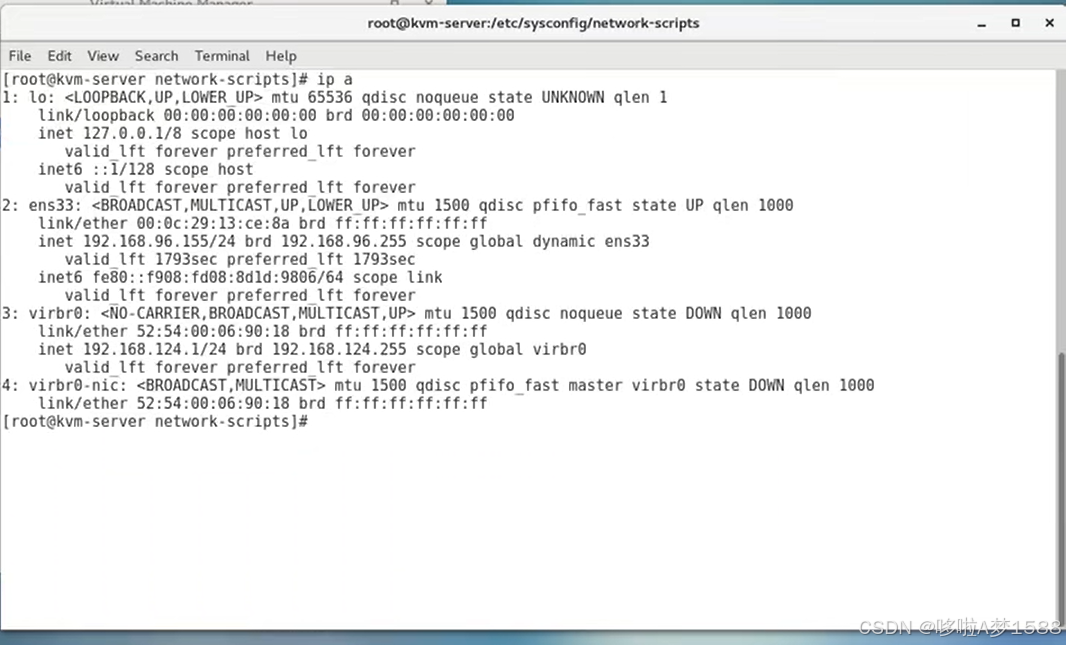
ping www.baidu.com

宿主机可以正常上网了
启动 vm2
[root@mail network-scripts]# virt-manager登录进去,看看IP
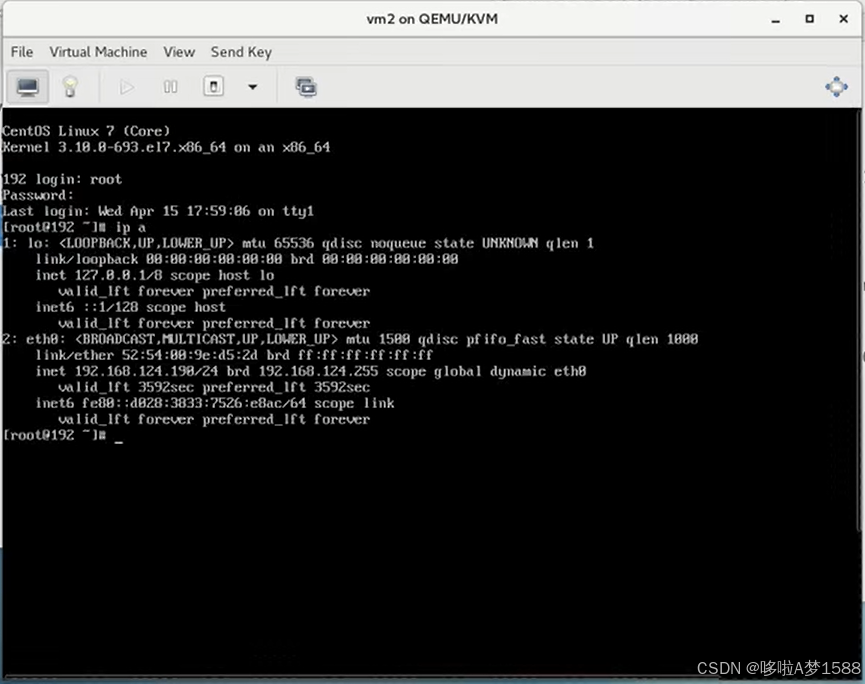
还原成我们最开始的 eth0网卡 IP:192.168.124.198
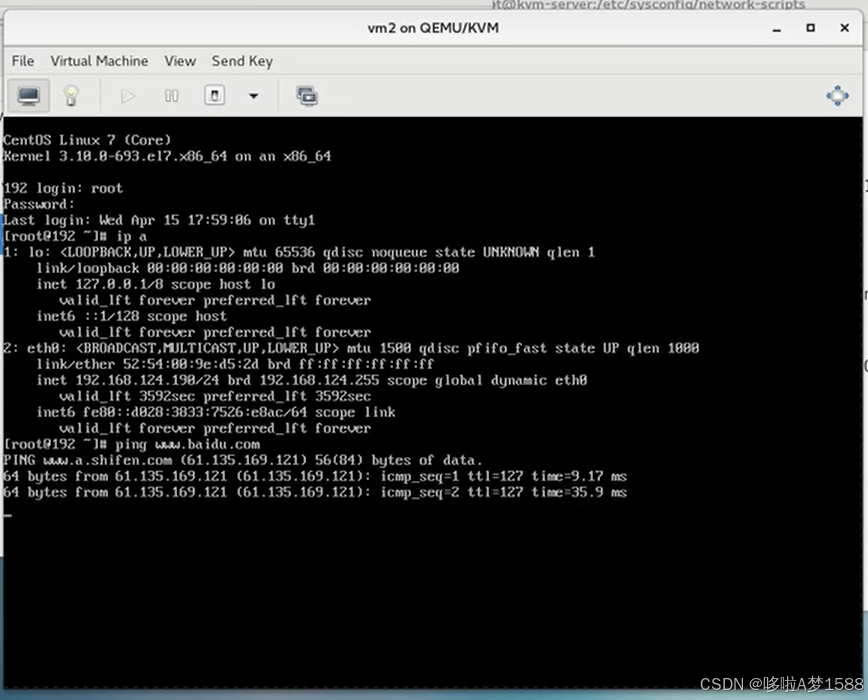
虚拟机也可以正常上网了
2. 配置文件方式创建 nat 网络
- # centos7 配置文件方式创建 nat 网络(所有的操作都是在宿主机上进行的)
- [root@node1 ~]# ls /etc/libvirt/qemu/networks/
- autostart default.xml
-
- # 复制并创建新的nat网络配置文件
- [root@node1 ~]# cp /etc/libvirt/qemu/networks/default.xml /etc/libvirt/qemu/networks/nat1.xml
- [root@node1 ~]# vim /etc/libvirt/qemu/networks/nat1.xml
- [root@node1 ~]# [root@node1 ~]# vim /etc/libvirt/qemu/networks/nat1.xml
- [root@node1 ~]# cat /etc/libvirt/qemu/networks/nat1.xml
- <network>
- <name>nat1</name>
- <uuid>43bc37be-64b5-46fd-aaf8-92a82e32f58a</uuid>
- <forward mode='nat'/>
- <bridge name='virbr8' stp='on' delay='0'/>
- <mac address='52:54:00:99:bb:d6'/>
- <ip address='192.168.128.1' netmask='255.255.255.0'>
- <dhcp>
- <range start='192.168.128.2' end='192.168.128.254'/>
- </dhcp>
- </ip>
- </network>
-
-
-
-
- # 修改如下参数:
- 1. 将默认名字 'default' 修改为 'nat1'
- 2. 修改 uuid 这个是唯一的,不能冲突
- 3. 修改接口名 'virbr0' 为 'virbr1',我们不能和默认的nat网络模式接在同一个接口上
- 4. 修改mac地址,只能修改后3对即后六位
- 5. 我们新创建的网络,IP地址可以自定义
- 将默认的 '192.168.122.1'修改为 '192.168.128。1' IP,
- 6. dhcp是我们定义地址池的范围。地址池的作用可以为我们新创建的nat网络模式分配定义这个范围的IP地址。
- 将 "start='192.168.122.2' end='192.168.122.254'"修改为:"start='192.168.128.2' end='192.168.128.254'"
-
-
- # 重启 libvirtd 服务
- [root@mail network-scripts]# systemctl restart libvirtd
-
- # 重启 network 网络服务
- [root@mail network-scripts]# systemctl restart network
-
- # 打开图形化界面,将我们新创建的 'Virtual network "nat1":NAT'添加到vm2虚拟机网卡
- [root@node1 ~]# virt-manager
-
-
- # 在宿主机上验证 桥接网卡配置是否成功
- 1. 登录 vm2 虚拟机,用新创建网卡的IP登录,如下所示
- [root@node1 ~]# ssh 192.168.128.191
- The authenticity of host '192.168.128.191 (192.168.128.191)' can't be established.
- ECDSA key fingerprint is SHA256:K++uMuPrKKVGWkv0cBW0yJfv7cBMjNxhzZrcqYTWulc.
- ECDSA key fingerprint is MD5:6c:4e:ba:72:fe:5e:aa:18:4f:3b:68:ba:8b:a0:41:a3.
- Are you sure you want to continue connecting (yes/no)? yes
- Warning: Permanently added '192.168.128.191' (ECDSA) to the list of known hosts.
- root@192.168.128.191's password:
- Last login: Sat Jul 27 19:23:27 2024
-
- 2. 查看 vm2 虚拟机网卡,新添加的网卡 ens9 成功
- [root@localhost ~]# ip a
- 1: lo: <LOOPBACK,UP,LOWER_UP> mtu 65536 qdisc noqueue state UNKNOWN group default qlen 1000
- link/loopback 00:00:00:00:00:00 brd 00:00:00:00:00:00
- inet 127.0.0.1/8 scope host lo
- valid_lft forever preferred_lft forever
- inet6 ::1/128 scope host
- valid_lft forever preferred_lft forever
- 2: ens3: <BROADCAST,MULTICAST,UP,LOWER_UP> mtu 1500 qdisc pfifo_fast state UP group default qlen 1000
- link/ether 52:54:00:50:8b:08 brd ff:ff:ff:ff:ff:ff
- inet 192.168.122.66/24 brd 192.168.122.255 scope global noprefixroute dynamic ens3
- valid_lft 2769sec preferred_lft 2769sec
- inet6 fe80::f7b:8d25:8ac0:84af/64 scope link noprefixroute
- valid_lft forever preferred_lft forever
- 3: ens8: <BROADCAST,MULTICAST,UP,LOWER_UP> mtu 1500 qdisc pfifo_fast state UP group default qlen 1000
- link/ether 52:54:00:c3:cb:8d brd ff:ff:ff:ff:ff:ff
- 4: ens9: <BROADCAST,MULTICAST,UP,LOWER_UP> mtu 1500 qdisc pfifo_fast state UP group default qlen 1000
- link/ether 52:54:00:56:ed:95 brd ff:ff:ff:ff:ff:ff
- inet 192.168.128.191/24 brd 192.168.128.255 scope global noprefixroute dynamic ens9
- valid_lft 2772sec preferred_lft 2772sec
- inet6 fe80::4030:7002:7e49:166f/64 scope link noprefixroute
- valid_lft forever preferred_lft forever
-
-
- 3. 查看虚拟机 vm2 是否可以上网
- [root@localhost ~]# ping www.baidu.com
- PING www.a.shifen.com (180.101.50.188) 56(84) bytes of data.
- 64 bytes from 180.101.50.188 (180.101.50.188): icmp_seq=1 ttl=127 time=14.0 ms
- 64 bytes from 180.101.50.188 (180.101.50.188): icmp_seq=2 ttl=127 time=17.7 ms
- 64 bytes from 180.101.50.188 (180.101.50.188): icmp_seq=3 ttl=127 time=15.1 ms
- 64 bytes from 180.101.50.188 (180.101.50.188): icmp_seq=4 ttl=127 time=18.5 ms
- ^C
- --- www.a.shifen.com ping statistics ---
- 4 packets transmitted, 4 received, 0% packet loss, time 3020ms
- rtt min/avg/max/mdev = 14.066/16.369/18.539/1.835 ms
-
- 4.退出 vm2 虚拟机,回到宿主机
- [root@localhost ~]# logout
- Connection to 192.168.128.191 closed.
-
-
- 5. 查看宿主机 ip a 新添加的 'virbr8' 已成功添加
- [root@node1 ~]# ip a
- 1: lo: <LOOPBACK,UP,LOWER_UP> mtu 65536 qdisc noqueue state UNKNOWN group default qlen 1000
- link/loopback 00:00:00:00:00:00 brd 00:00:00:00:00:00
- inet 127.0.0.1/8 scope host lo
- valid_lft forever preferred_lft forever
- inet6 ::1/128 scope host
- valid_lft forever preferred_lft forever
- 2: ens33: <BROADCAST,MULTICAST,UP,LOWER_UP> mtu 1500 qdisc pfifo_fast state UP group default qlen 1000
- link/ether 00:0c:29:10:60:49 brd ff:ff:ff:ff:ff:ff
- inet 192.168.222.155/24 brd 192.168.222.255 scope global noprefixroute dynamic ens33
- valid_lft 1278sec preferred_lft 1278sec
- inet6 fe80::7e78:707:952:6d60/64 scope link noprefixroute
- valid_lft forever preferred_lft forever
- 4: virbr0: <BROADCAST,MULTICAST,UP,LOWER_UP> mtu 1500 qdisc noqueue state UP group default qlen 1000
- link/ether 52:54:00:99:6b:d6 brd ff:ff:ff:ff:ff:ff
- inet 192.168.122.1/24 brd 192.168.122.255 scope global virbr0
- valid_lft forever preferred_lft forever
- 5: virbr0-nic: <BROADCAST,MULTICAST> mtu 1500 qdisc pfifo_fast master virbr0 state DOWN group default qlen 1000
- link/ether 52:54:00:99:6b:d6 brd ff:ff:ff:ff:ff:ff
- 6: br0: <BROADCAST,MULTICAST,UP,LOWER_UP> mtu 1500 qdisc noqueue state UP group default qlen 1000
- link/ether fe:54:00:c3:cb:8d brd ff:ff:ff:ff:ff:ff
- inet 192.168.222.155/24 brd 192.168.222.255 scope global noprefixroute br0
- valid_lft forever preferred_lft forever
- inet6 fe80::3cdb:97ff:fe24:c2da/64 scope link
- valid_lft forever preferred_lft forever
- 7: virbr8: <BROADCAST,MULTICAST,UP,LOWER_UP> mtu 1500 qdisc noqueue state UP group default qlen 1000
- link/ether 52:54:00:99:bb:d6 brd ff:ff:ff:ff:ff:ff
- inet 192.168.128.1/24 brd 192.168.128.255 scope global virbr8
- valid_lft forever preferred_lft forever
- 8: virbr8-nic: <BROADCAST,MULTICAST> mtu 1500 qdisc pfifo_fast master virbr8 state DOWN group default qlen 1000
- link/ether 52:54:00:99:bb:d6 brd ff:ff:ff:ff:ff:ff
- 9: vnet0: <BROADCAST,MULTICAST,UP,LOWER_UP> mtu 1500 qdisc pfifo_fast master virbr0 state UNKNOWN group default qlen 1000
- link/ether fe:54:00:50:8b:08 brd ff:ff:ff:ff:ff:ff
- inet6 fe80::fc54:ff:fe50:8b08/64 scope link
- valid_lft forever preferred_lft forever
- 10: vnet1: <BROADCAST,MULTICAST,UP,LOWER_UP> mtu 1500 qdisc pfifo_fast master br0 state UNKNOWN group default qlen 1000
- link/ether fe:54:00:c3:cb:8d brd ff:ff:ff:ff:ff:ff
- inet6 fe80::fc54:ff:fec3:cb8d/64 scope link
- valid_lft forever preferred_lft forever
- 11: vnet2: <BROADCAST,MULTICAST,UP,LOWER_UP> mtu 1500 qdisc pfifo_fast master virbr8 state UNKNOWN group default qlen 1000
- link/ether fe:54:00:56:ed:95 brd ff:ff:ff:ff:ff:ff
- inet6 fe80::fc54:ff:fe56:ed95/64 scope link
- valid_lft forever preferred_lft forever
-
-
- # 删除网卡
- 1.先将 vm2 虚拟机关闭
- 2. 找到 'Virtual network "nat": NAT',直接点击 Remove
-
-
- ------------------------------------------------------------
- # centos8 配置文件方式创建 nat 网络
- 准备工作
- root@kvm-server:~# cp /etc/libvirt/qemu/networks/default.xml /etc/libvirt/qemu/networks/nat1.xml
-
- root@kvm-server:~# vim /etc/libvirt/qemu/networks/nat1.xml
- root@kvm-server:~# cat /etc/libvirt/qemu/networks/nat1.xml
- <!--
- WARNING: THIS IS AN AUTO-GENERATED FILE. CHANGES TO IT ARE LIKELY TO BE
- OVERWRITTEN AND LOST. Changes to this xml configuration should be made using:
- virsh net-edit default
- or other application using the libvirt API.
- -->
-
- <network>
- <name>nat</name>
- <uuid>3bc19f94-a158-478f-8ad4-b677e7071051</uuid>
- <forward mode='nat'/>
- <bridge name='virbr0' stp='on' delay='0'/>
- <mac address='52:54:00:3e:30:44'/>
- <ip address='192.168.122.1' netmask='255.255.255.0'>
- <dhcp>
- <range start='192.168.122.2' end='192.168.122.254'/>
- </dhcp>
- </ip>
- </network>
-
-
- 1. 修改名字 将 'default' 改为 'nat1'
- 2. uuid 也要修改 保证唯一性 可以任意修改一个字符或多个字符
- 3.接口也要修改,不能在同一个接口 将 'virbr0' 改为 'virbr1'
- 4. mac 地址也要修改 注意修改后6位中任意字符
- 5. 可以自定义IP地址及定义分配该网段IP地址
-
- 修改后如下
- [root@mail ~]# cat /etc/libvirt/qemu/networks/nat1.xml
- <network>
- <name>nat1</name>
- <uuid>b97d92e4-e8fe-4628-831e-a6380f5fd25b</uuid>
- <forward mode='nat'/>
- <bridge name='virbr1' stp='on' delay='0'/>
- <mac address='52:54:00:0a:0d:85'/>
- <ip address='192.168.120.1' netmask='255.255.255.0'>
- <dhcp>
- <range start='192.168.120.2' end='192.168.120.254'/>
- </dhcp>
- </ip>
- </network>
-
- 重启 libvirtd 服务
- root@kvm-server:~# systemctl restart libvirtd
- root@kvm-server:~# virt-manager
如何使用 nat 网络
选择要使用的虚拟机,如图
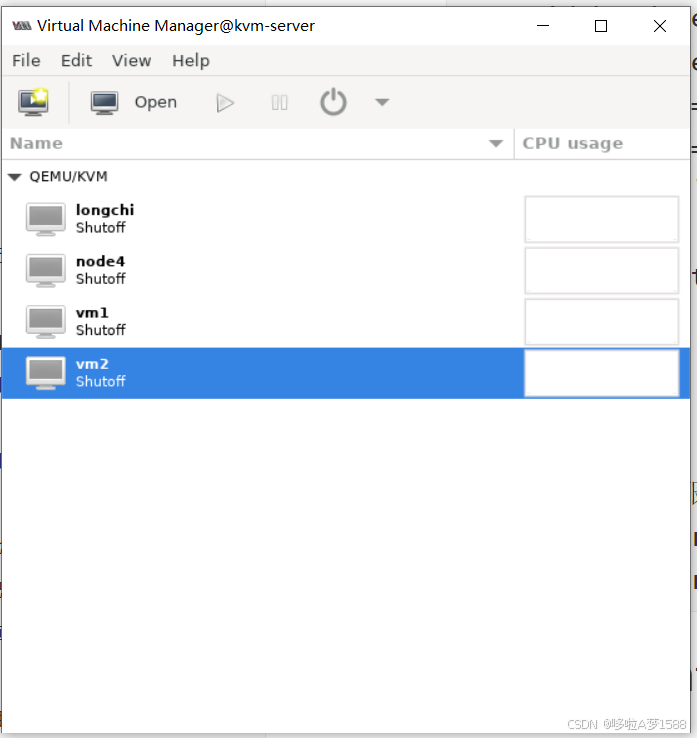
双击,如图
选择小灯泡,如图
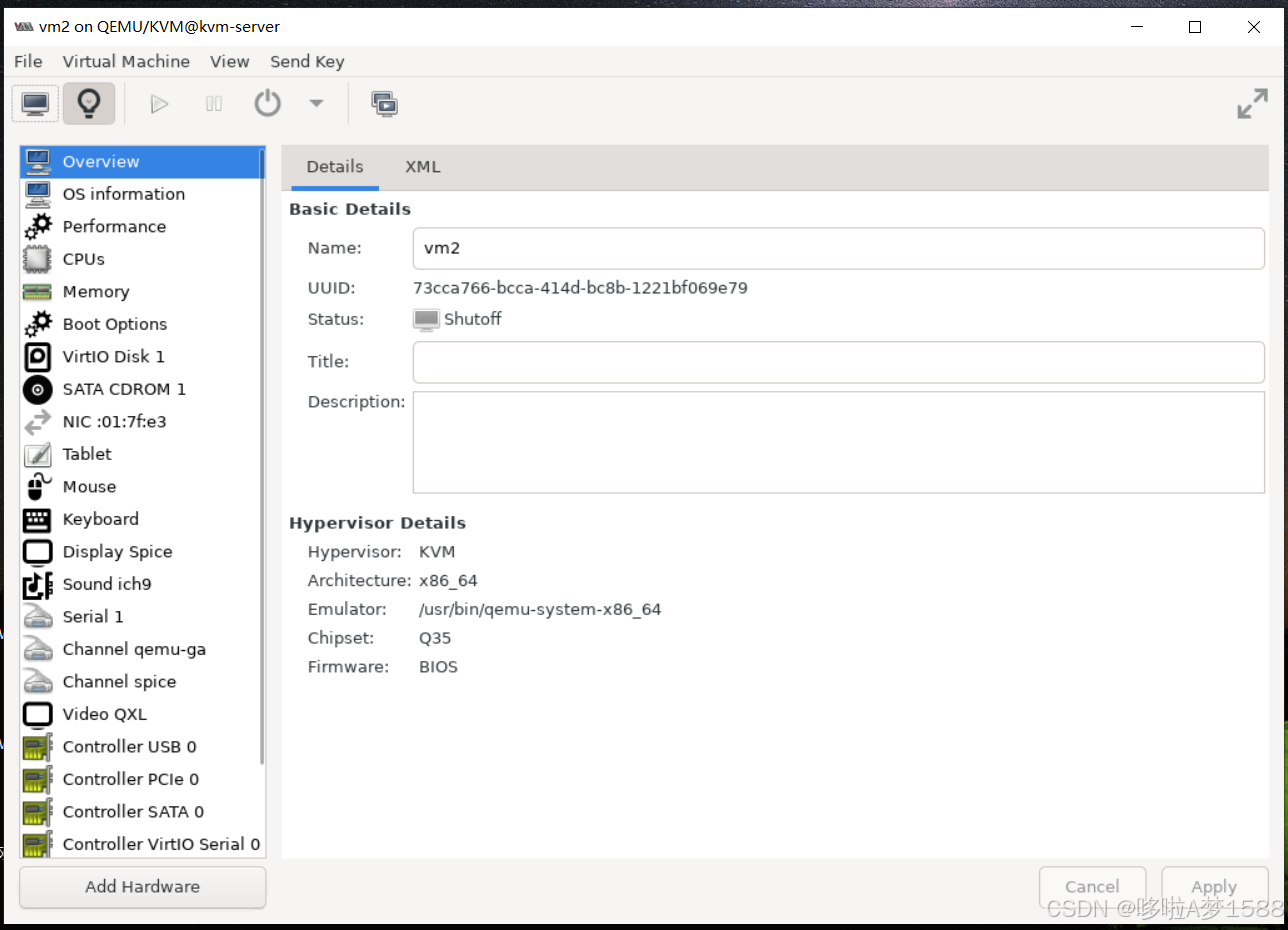
点击 Add Hardware 如图
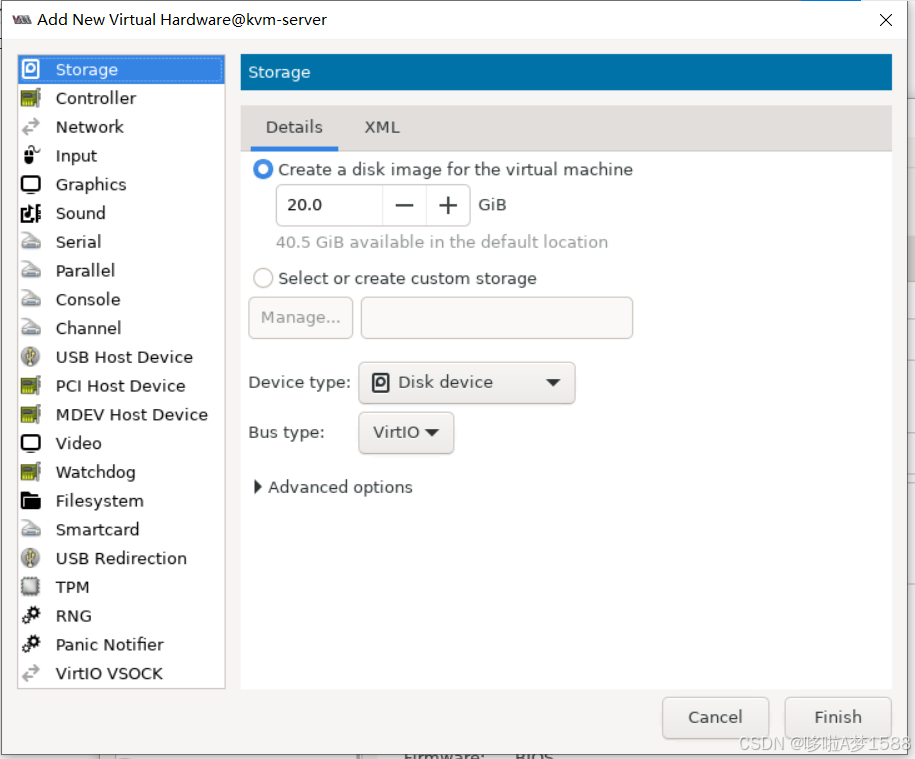
点击 network 如图
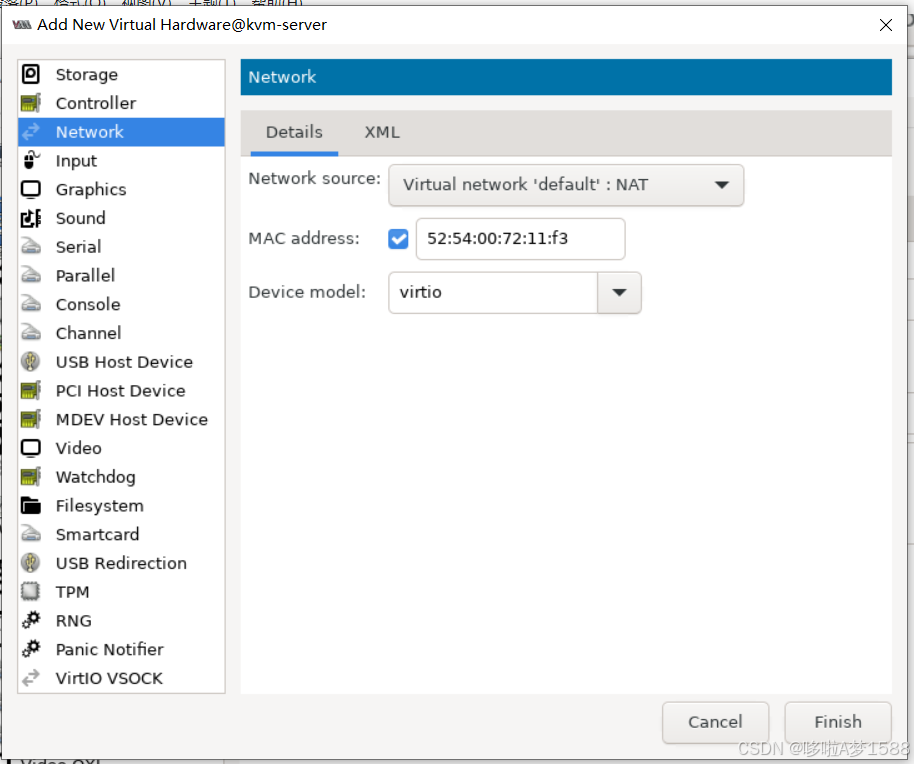
点击 Virtual network 'default' : NAT 后面的小三角,选择 'Virtual network "nat1" : NAT(inactive)' 如图所示
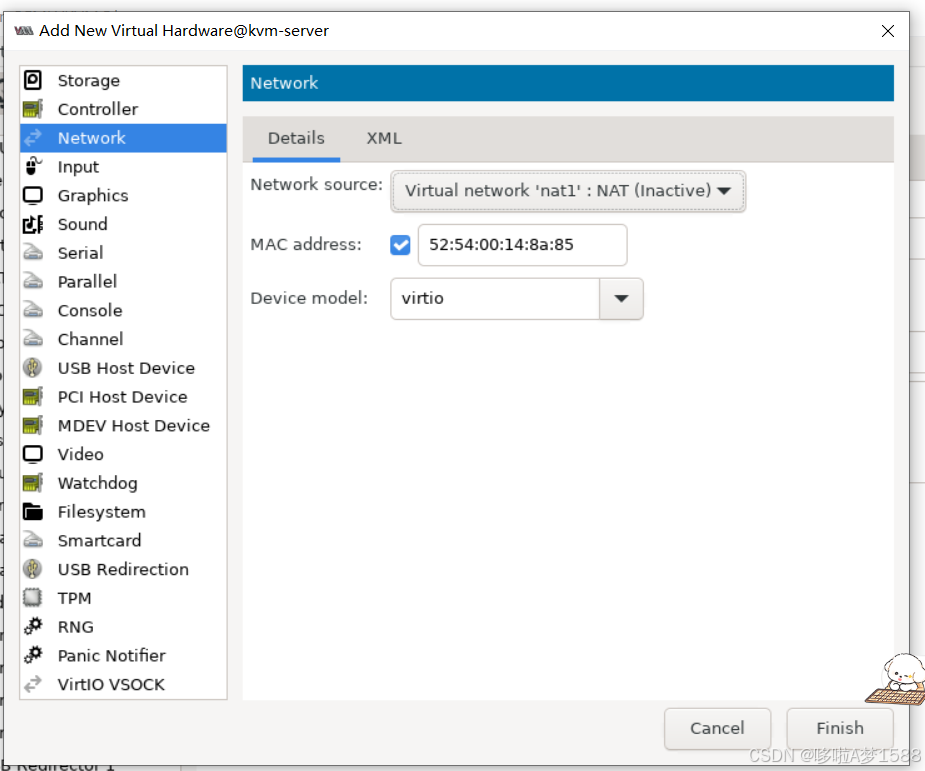
点击 Finish,弹出如图对话框
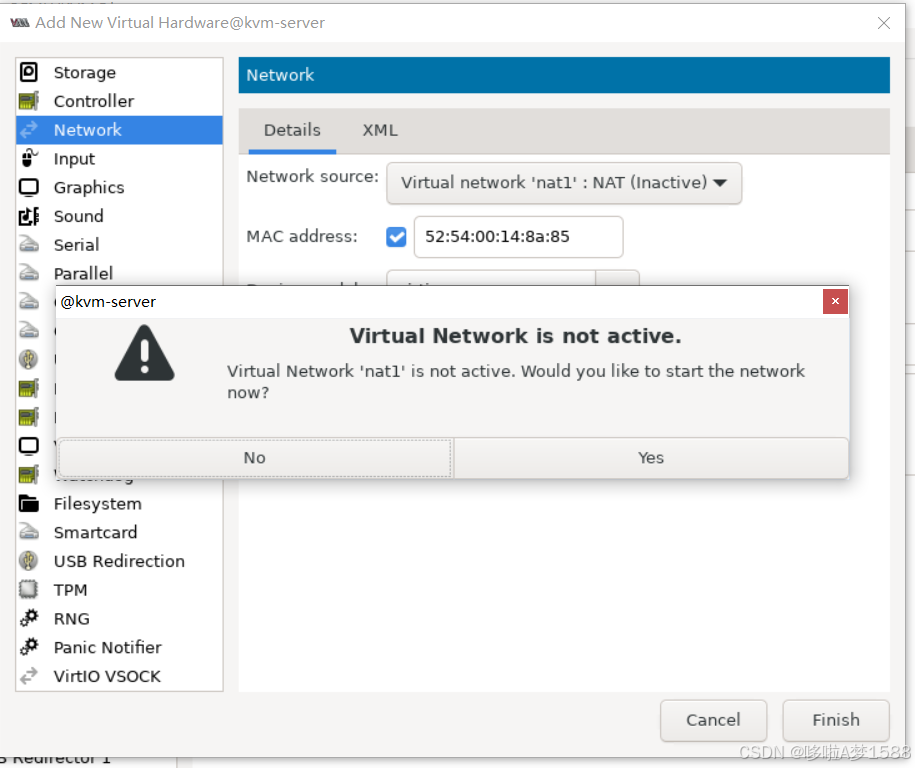
询问是否要激活nat1网络,点击 yes如图
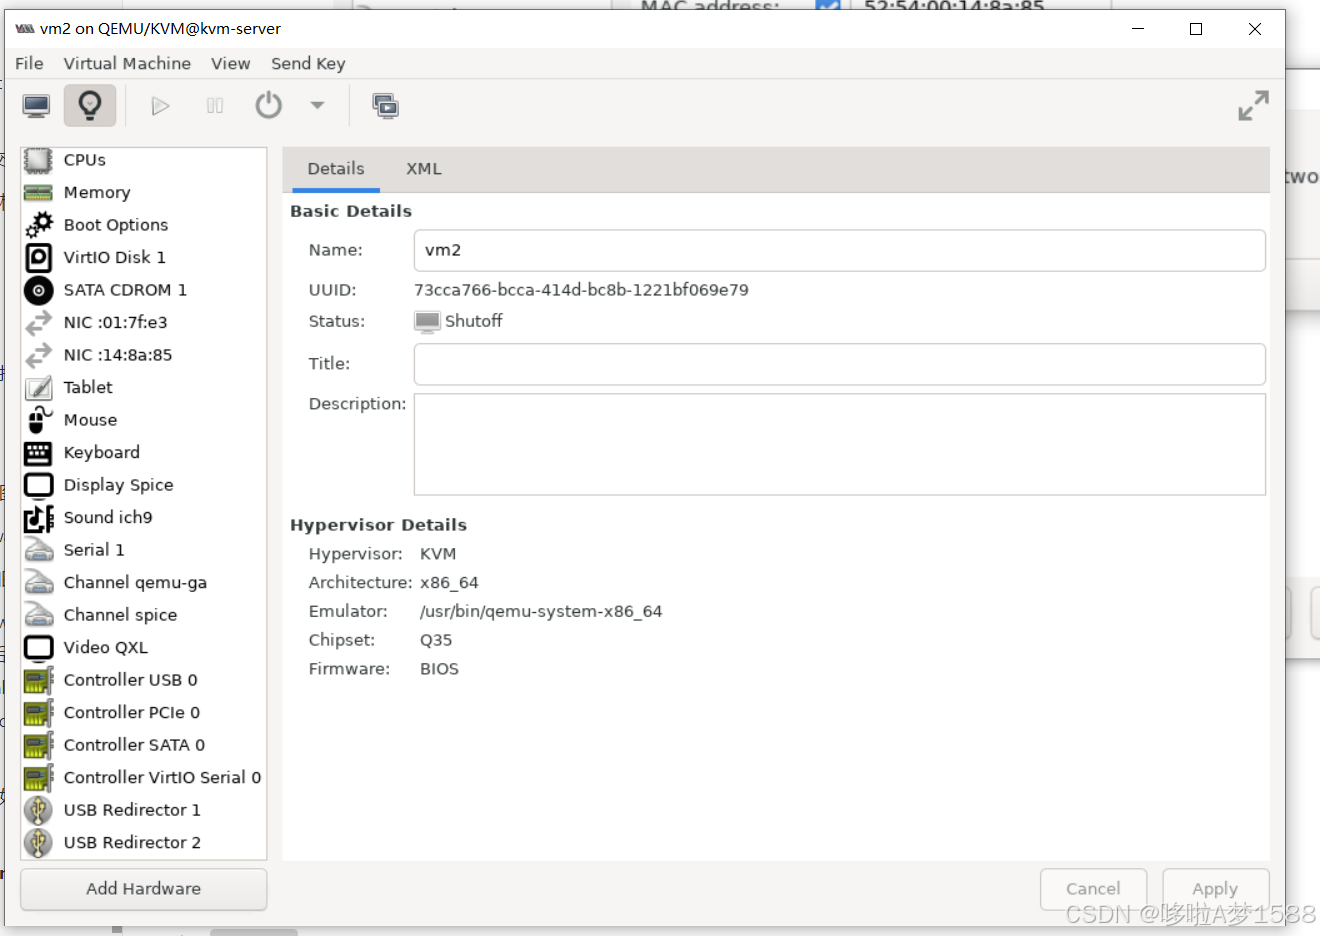
点击 上面的小三角,启动虚拟机
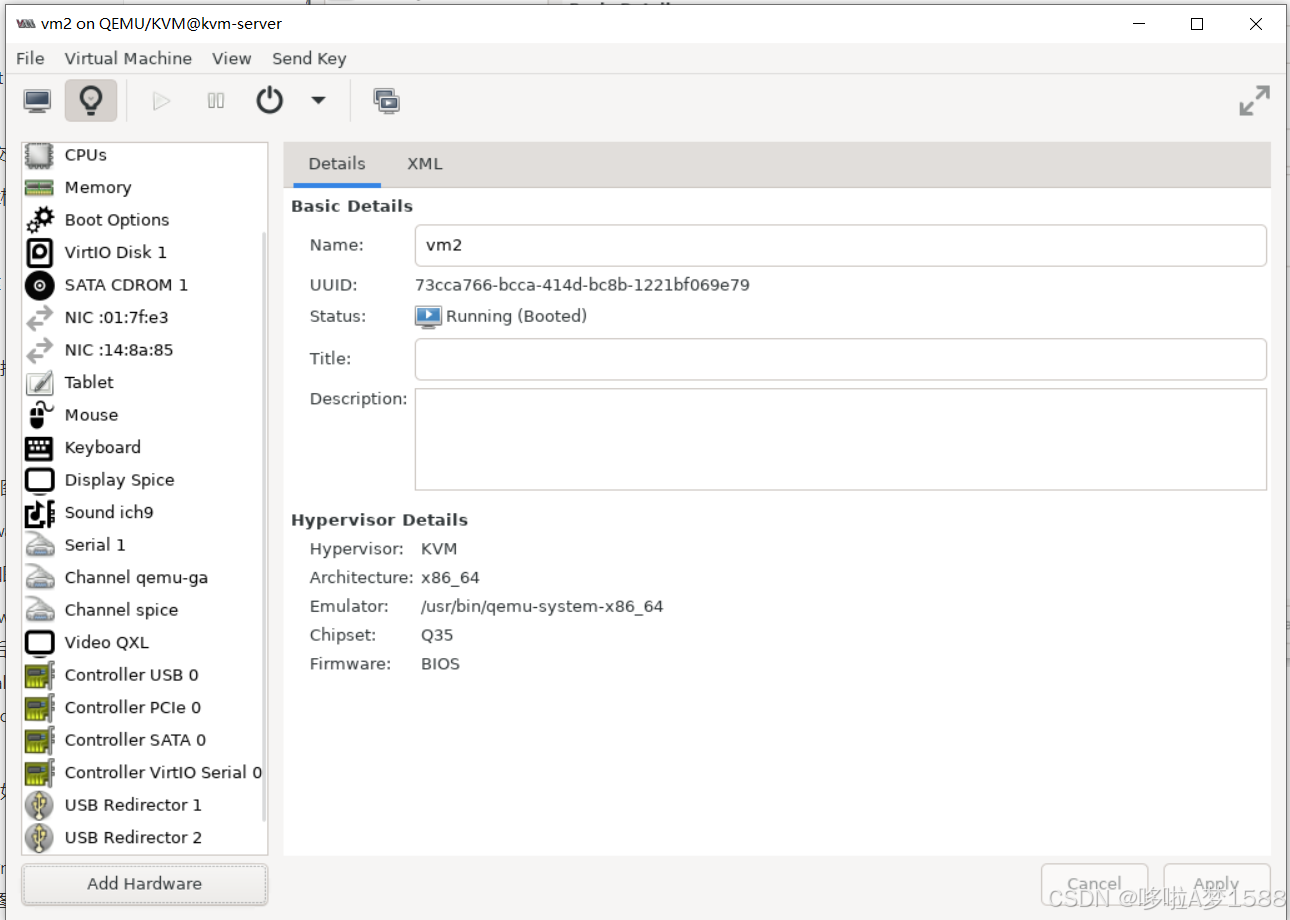
登录 vm2 虚拟机,查看新添加的网卡
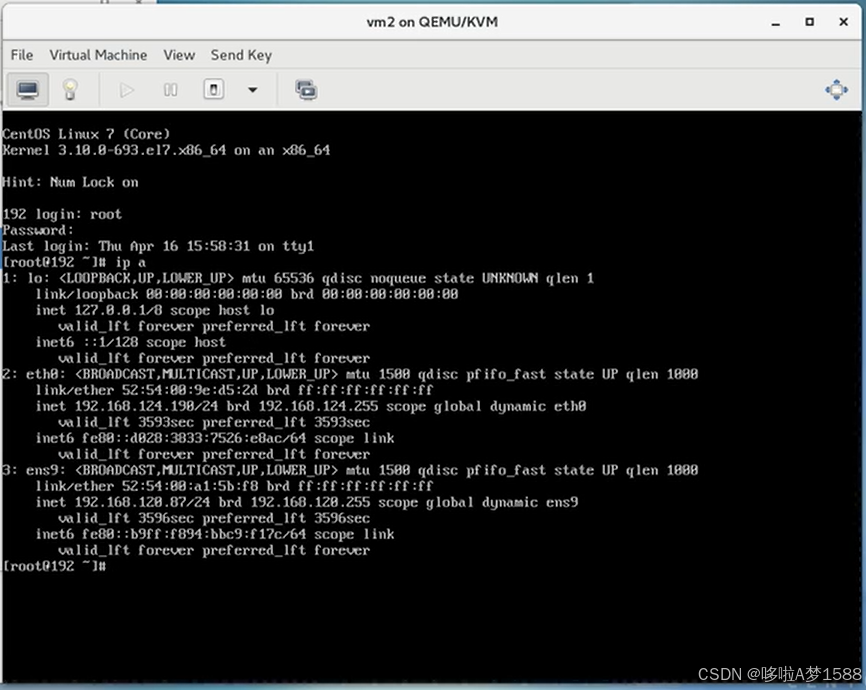
看看可以正常上网吗
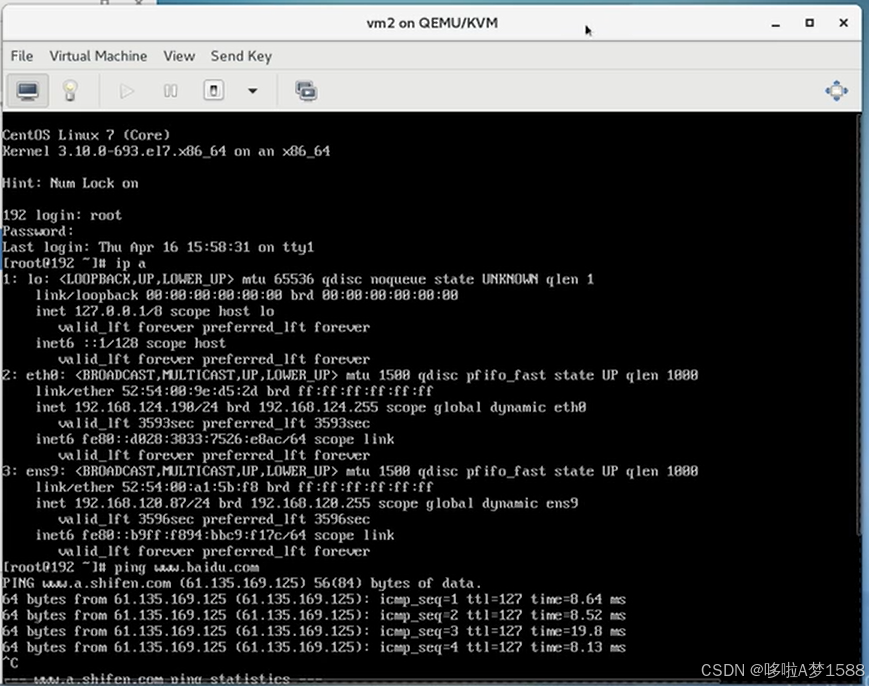
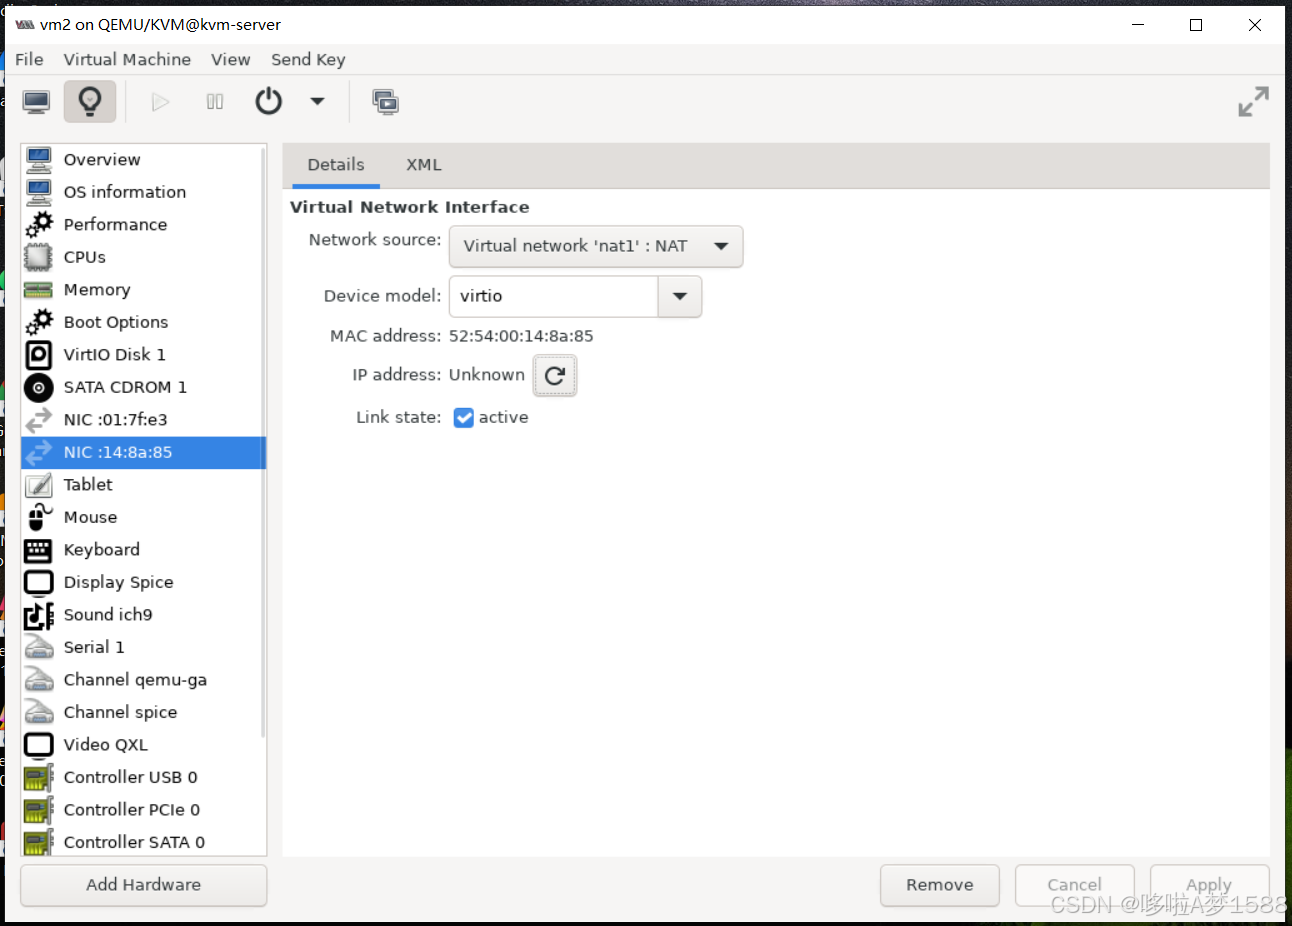
以上就是我们刚刚新添加的网卡
如何删除添加的网卡
1.关机,如图 点击 Shut Down
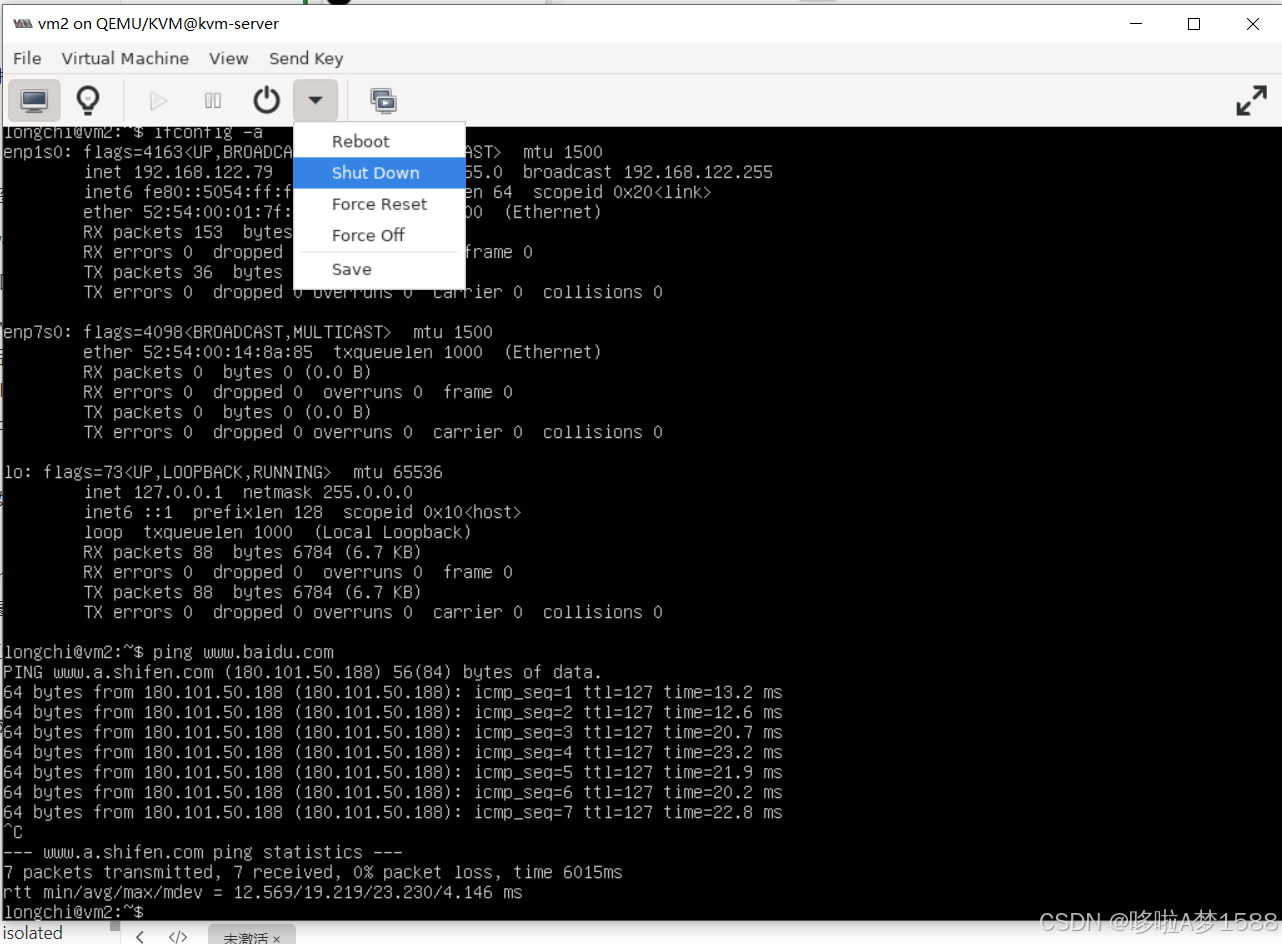
点击 小灯泡,打开硬件详情,如图
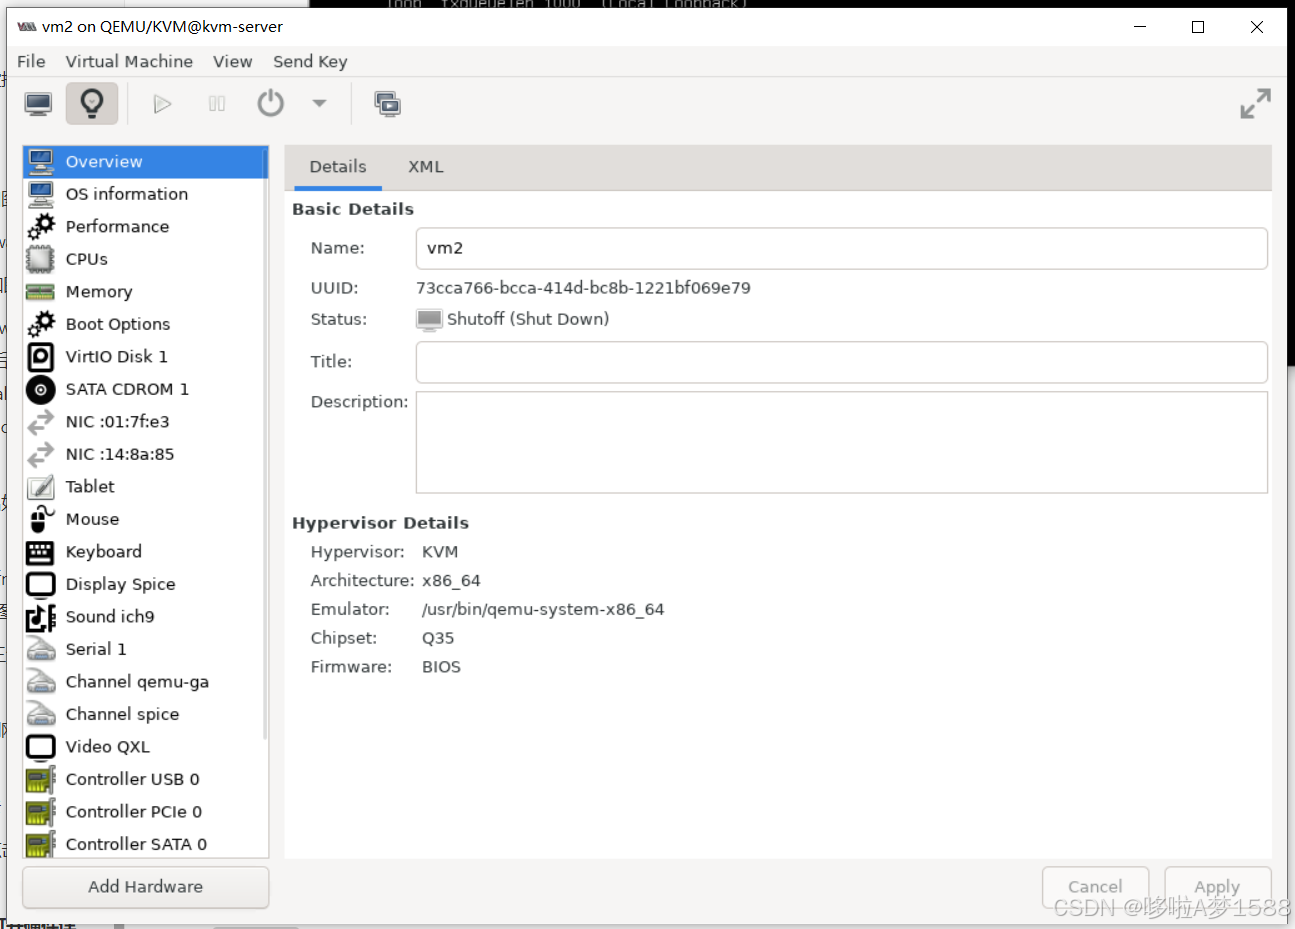
找到刚才添加的网卡,选中我们要删除的网卡,如图
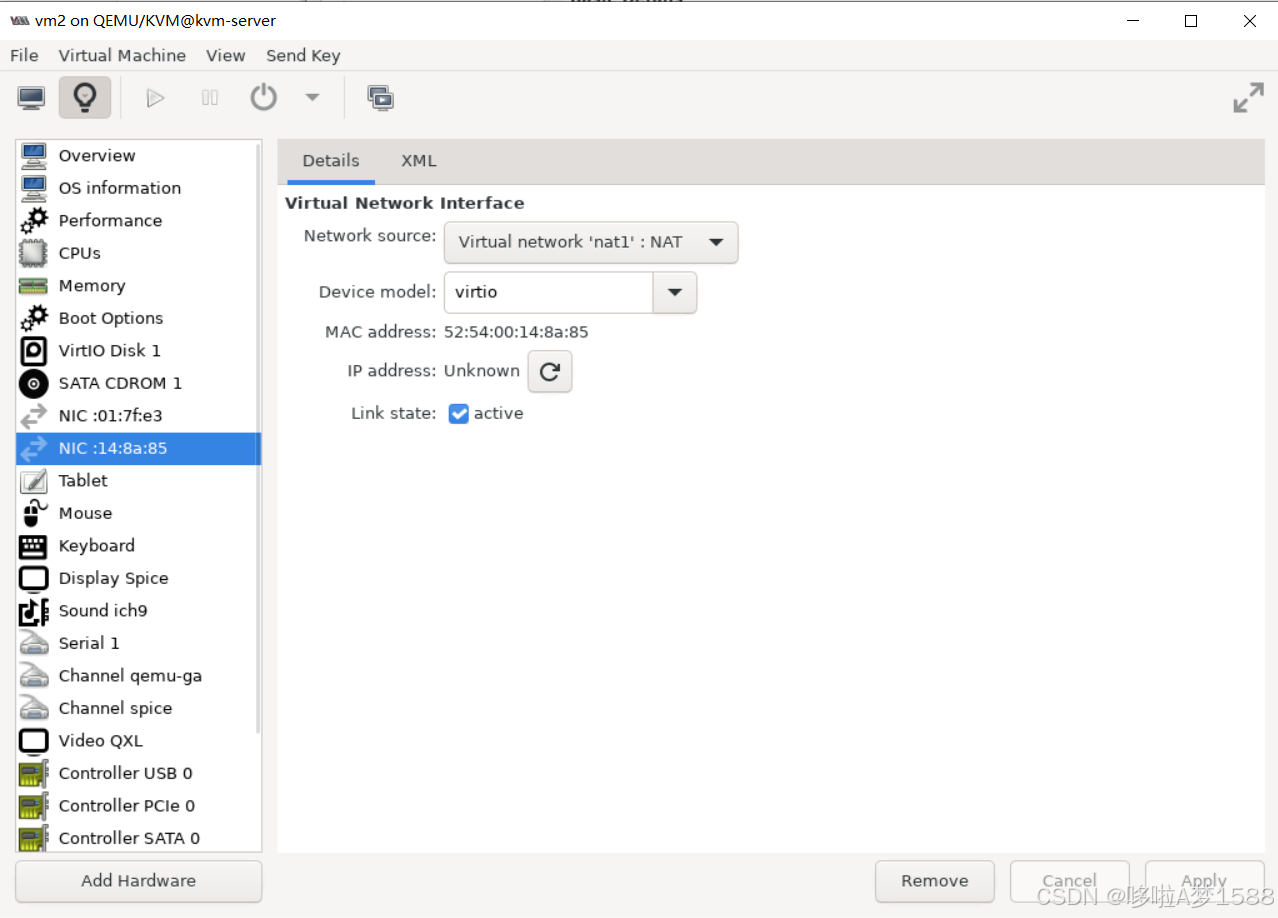
点击 Remove,就可以删除该网卡了
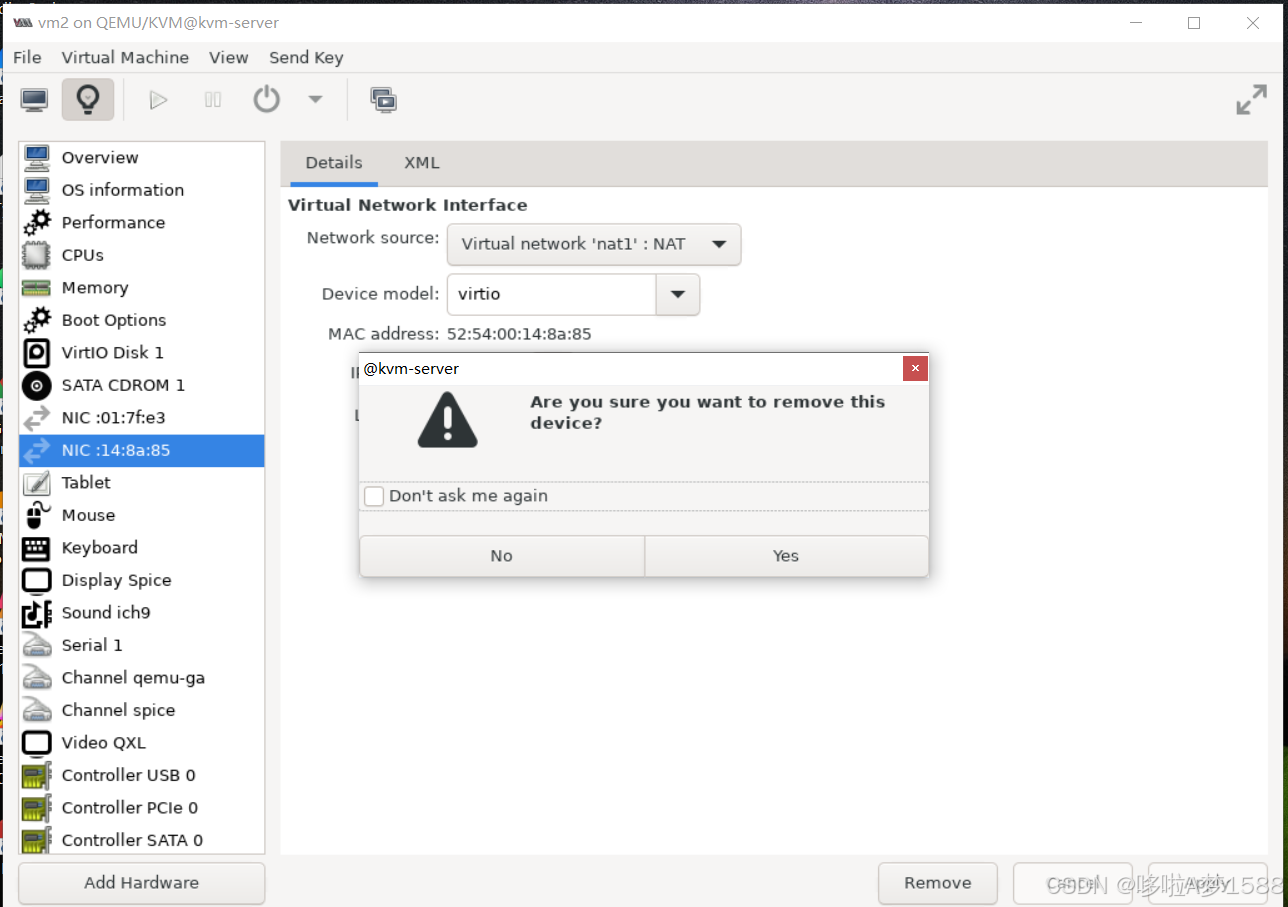
点击 yes如图 新添加的网卡移除了

网络管理服务
- [root@mail ~]# ls /usr/sbin/NetworkManager
- /usr/sbin/NetworkManager
- [root@mail ~]#
-
-
- [root@mail ~]# ls /lib/systemd/system/NetworkManager.service
- /lib/systemd/system/NetworkManager.service
-
- [root@mail ~]# vim /lib/systemd/system/NetworkManager.service
- [root@mail ~]# cp /lib/systemd/system/NetworkManager.service /etc/systemd/system/
-
- [root@mail ~]# ls /etc/systemd/system/NetworkManager.service
- /etc/systemd/system/NetworkManager.service
- [root@mail ~]#
3. 配置文件方式创建 isolated 网络(隔离网络模式)
ubuntu修改配置文件
- 复制配置文件模板 /etc/libvirt/qemu/networks/default.xml
- root@kvm-server:~# cp /etc/libvirt/qemu/networks/default.xml /etc/libvirt/qemu/networks/isolated200.xml
- 修改配置文件
- root@kvm-server:~# vim /etc/libvirt/qemu/networks/isolated200.xml
- root@kvm-server:~# cat /etc/libvirt/qemu/networks/isolated200.xml
- <!--
- WARNING: THIS IS AN AUTO-GENERATED FILE. CHANGES TO IT ARE LIKELY TO BE
- OVERWRITTEN AND LOST. Changes to this xml configuration should be made using:
- virsh net-edit default
- or other application using the libvirt API.
- -->
-
- <network>
- <name>isolated200</name>
- <uuid>3bc19f94-a158-588f-8ad4-b677e7071051</uuid>
- <bridge name='virbr2' stp='on' delay='0'/>
- <mac address='52:54:00:3e:33:44'/>
- <ip address='192.168.121.1' netmask='255.255.255.0'>
- <dhcp>
- <range start='192.168.121.2' end='192.168.121.254'/>
- </dhcp>
- </ip>
- </network>
-
-
- 修改项目:
- 1. 修改名字 将 'default' 改为 'isolated200'
- 2. uuid 也要修改 保证唯一性 可以任意修改一个字符或多个字符
- 3. 删除 '<forward mode='nat'/>' 这一行
- 4.接口也要修改,不能在同一个接口 将 'virbr0' 改为 'virbr2'
- 5. mac 地址也要修改 注意修改后6位中任意字符
- 6. 可以自定义IP地址及定义分配该网段IP地址
-
- 源配置文件内容:
- <network>
- <name>default</name>
- <uuid>3bc19f94-a158-478f-8ad4-b677e7071051</uuid>
- <forward mode='nat'/>
- <bridge name='virbr0' stp='on' delay='0'/>
- <mac address='52:54:00:3e:30:44'/>
- <ip address='192.168.122.1' netmask='255.255.255.0'>
- <dhcp>
- <range start='192.168.122.2' end='192.168.122.254'/>
- </dhcp>
- </ip>
- </network>
-
-
- # 重启 libvirtd 服务
- root@kvm-server:~# systemctl restart libvirtd
-
- # 查看所有的网络
- root@kvm-server:~# virsh net-list
- Name State Autostart Persistent
- --------------------------------------------
- default active yes yes
- nat1 active no yes
-
-
- # 启动 isolated200 服务
- root@kvm-server:~# virsh net-start isolated200
- Network isolated200 started
-
-
- # 设置自动启动 isolated200 服务
- root@kvm-server:~# virsh net-autostart isolated200
- Network isolated200 marked as autostarted
-
-
- # 查看所有网络
- root@kvm-server:~# virsh net-list
- Name State Autostart Persistent
- ------------------------------------------------
- default active yes yes
- isolated200 active yes yes
- nat1 active no yes
-
- # 当虚拟机运行以后,才能查看接口信息
- root@kvm-server:~# virsh domiflist vm2
- Interface Type Source Model MAC
- -----------------------------------------------------------------
- vnet0 network default virtio 52:54:00:01:7f:e3
- vnet1 network isolated200 virtio 52:54:00:fc:85:78
-
- root@kvm-server:~#
-
centos7 修改后的配置文件
- 1. 准备配置文件
- [root@node1 ~]# ls /etc/libvirt/qemu/networks/
- autostart default.xml nat1.xml
- [root@node1 ~]# cp /etc/libvirt/qemu/networks/default.xml /etc/libvirt/qemu/networks/isolated200.xml
-
- 2. 修改配置文件
- [root@node1 ~]# vim /etc/libvirt/qemu/networks/isolated200.xml
- [root@node1 ~]# cat /etc/libvirt/qemu/networks/isolated200.xml
- <network>
- <name>isolated200</name>
- <uuid>43bc37be-64b5-46fd-aaf6-82a82e32f58a</uuid>
- <bridge name='virbr1' stp='on' delay='0'/>
- <mac address='52:54:00:99:6b:dd'/>
- <ip address='192.168.110.1' netmask='255.255.255.0'>
- <dhcp>
- <range start='192.168.110.2' end='192.168.110.254'/>
- </dhcp>
- </ip>
- </network>
-
-
-
- 修改参数解释如下:
- (1) 修改网卡名将模板配文件中的 'default' 修改为 'isolated200'
- (2) 修改 uuid
- (3) 删除 '<forward mode='nat' />' 这一行
- (4) 修改网络接口将模板配置文件中的 'virbr0' 改为 'virbr1'
- (5) 修改 mac 地址后六位
- (6) 将IP自定义为 192.168.110.1
- 地址池的范围:192.168.110.2 到 192.168.110.254
-
- # 重启 libvirtd network 服务
- [root@mail ~]# systemctl restart libvirtd
- [root@mail ~]# systemctl restart network
-
-
- # 启动 isolated200 服务
- [root@mail ~]# virsh net-start isolated200
- Network isolated200 started
-
-
- # 设置自动启动 isolated200 服务
- [root@mail ~]# virsh net-autostart isolated200
- Network isolated200 marked as autostarted
-
-
- # 查看所有网络
- [root@node1 ~]# virsh net-list
- Name State Autostart Persistent
- ----------------------------------------------------------
- default active yes yes
- isolated200 active yes yes
- nat1 active no yes
-
- [root@node1 ~]# virt-manager
-
- # 查看一个 guest 主机网络接口信息
- [root@node1 ~]# virsh domiflist vm2
- Interface Type Source Model MAC
- -------------------------------------------------------
- vnet0 network default rtl8139 52:54:00:50:8b:08
- vnet1 bridge br0 rtl8139 52:54:00:c3:cb:8d
- vnet2 network isolated200 rtl8139 52:54:00:d6:30:e6
-
-
-
centos8 修改后的配置文件
- [root@mail ~]# vim /etc/libvirt/qemu/networks/isolated200.xml
- [root@mail ~]# cat /etc/libvirt/qemu/networks/isolated200.xml
- <!--
- WARNING: THIS IS AN AUTO-GENERATED FILE. CHANGES TO IT ARE LIKELY TO BE
- OVERWRITTEN AND LOST. Changes to this xml configuration should be made using:
- virsh net-edit default
- or other application using the libvirt API.
- -->
-
- <network>
- <name>isolated200</name>
- <uuid>b97d92e4-e8fe-4629-831e-a6380f5fd25b</uuid>
- <bridge name='virbr2' stp='on' delay='0'/>
- <mac address='52:54:00:0a:0d:86'/>
- <ip address='192.168.121.1' netmask='255.255.255.0'>
- <dhcp>
- <range start='192.168.121.2' end='192.168.121.254'/>
- </dhcp>
- </ip>
- </network>
-
-
-
- 修改项目:
- 1. 修改名字 将 'default' 改为 'nat1'
- 2. uuid 也要修改 保证唯一性 可以任意修改一个字符或多个字符
- 3. 删除 '<forward mode='nat'/>' 这一行
- 4.接口也要修改,不能在同一个接口 将 'virbr0' 改为 'virbr1'
- 5. mac 地址也要修改 注意修改后6位中任意字符
- 6. 可以自定义IP地址及定义分配该网段IP地址
-
- 源配置文件内容:
- <network>
- <name>default</name>
- <uuid>3bc19f94-a158-478f-8ad4-b677e7071051</uuid>
- <forward mode='nat'/>
- <bridge name='virbr0' stp='on' delay='0'/>
- <mac address='52:54:00:3e:30:44'/>
- <ip address='192.168.122.1' netmask='255.255.255.0'>
- <dhcp>
- <range start='192.168.122.2' end='192.168.122.254'/>
- </dhcp>
- </ip>
- </network>
-
-
- # 重启 libvirtd 服务
- [root@mail ~]# systemctl restart libvirtd
- [root@mail ~]#
-
-
- # 启动 isolated200 服务
- [root@mail ~]# virsh net-start isolated200
- Network isolated200 started
-
-
- # 设置自动启动 isolated200 服务
- [root@mail ~]# virsh net-autostart isolated200
- Network isolated200 marked as autostarted
-
-
- # 查看所有网络
- [root@mail ~]# virsh net-list
- Name State Autostart Persistent
- ------------------------------------------------
- default active yes yes
- isolated200 active yes yes
-
-
- # 当虚拟机运行以后,才能查看接口信息
- root@kvm-server:~# virsh domiflist vm2
- Interface Type Source Model MAC
- -----------------------------------------------------------------
- vnet0 network default virtio 52:54:00:01:7f:e3
- vnet1 network isolated200 virtio 52:54:00:fc:85:78
-
- root@kvm-server:~#
-
-
-
- 解决问题
- [root@mail ~]# systemctl stop libvirtd
- Warning: Stopping libvirtd.service, but it can still be activated by:
- libvirtd-ro.socket
- libvirtd.socket
- libvirtd-admin.socket
- [root@mail ~]#
centos8的问题

如何添加 isolated200 网卡(ubuntu)
输入调出图形界面命令
[root@mail ~]# virt-manager
选中要执行的虚拟机 vm2
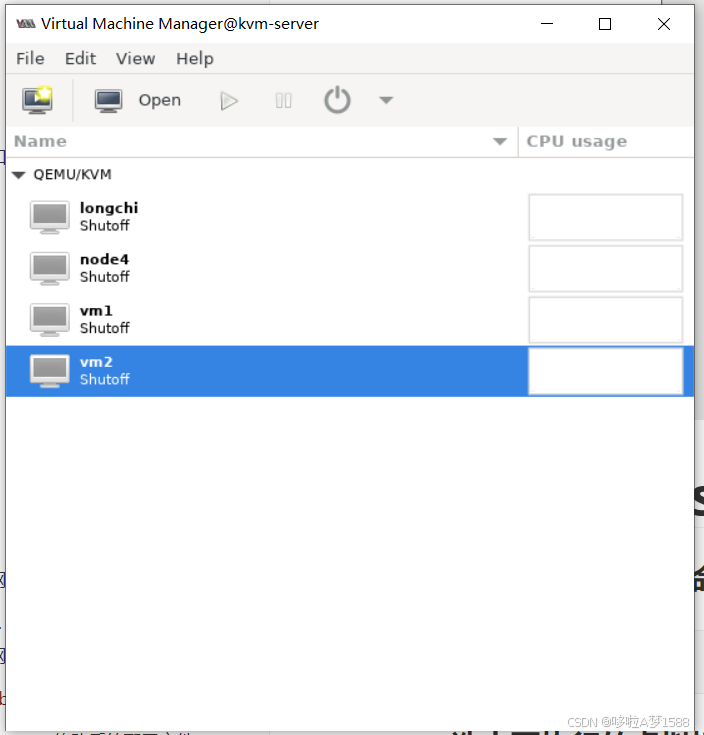
双击
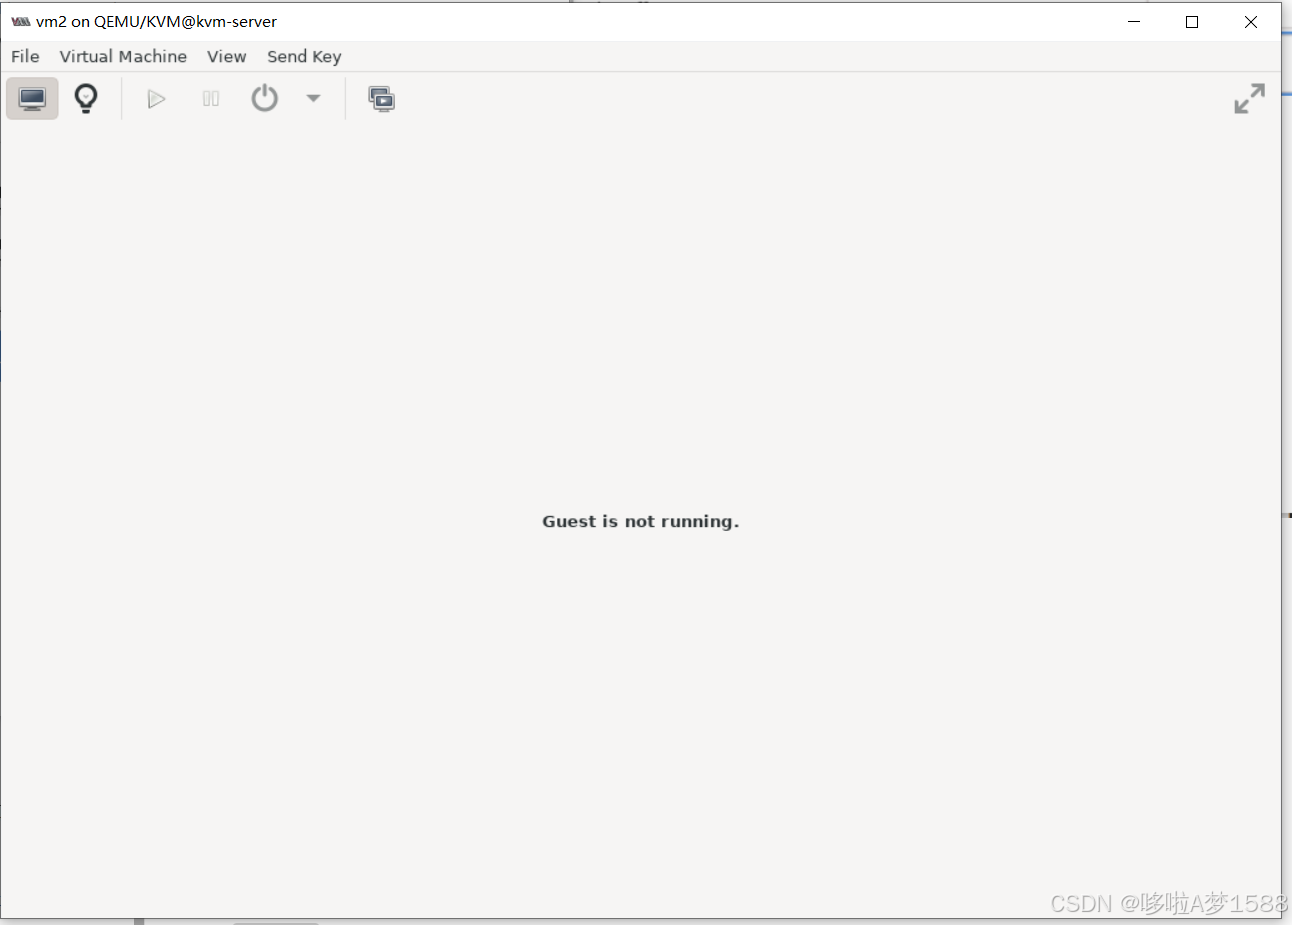
打开硬件详情
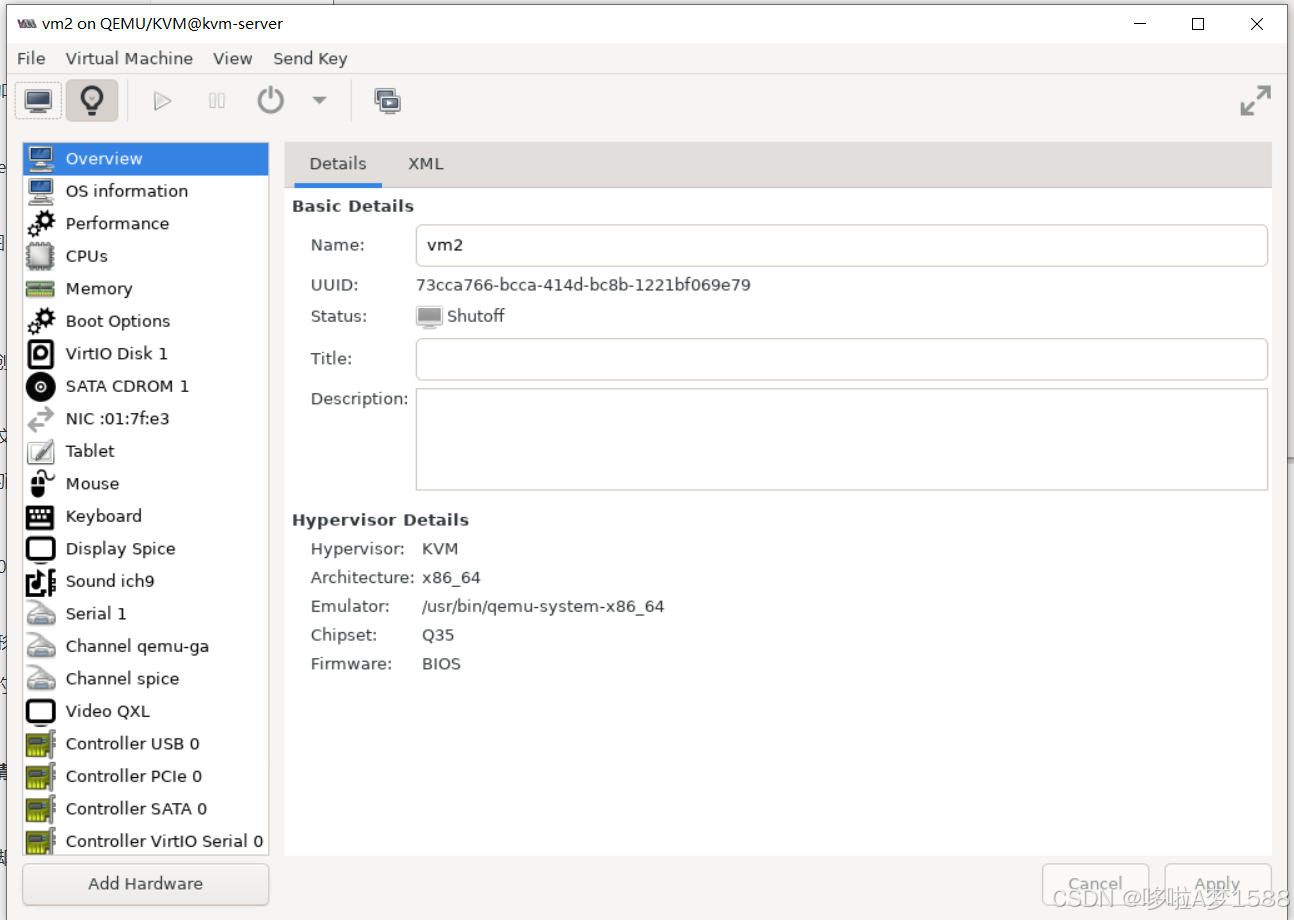
点击 Add Hardware

点击 network
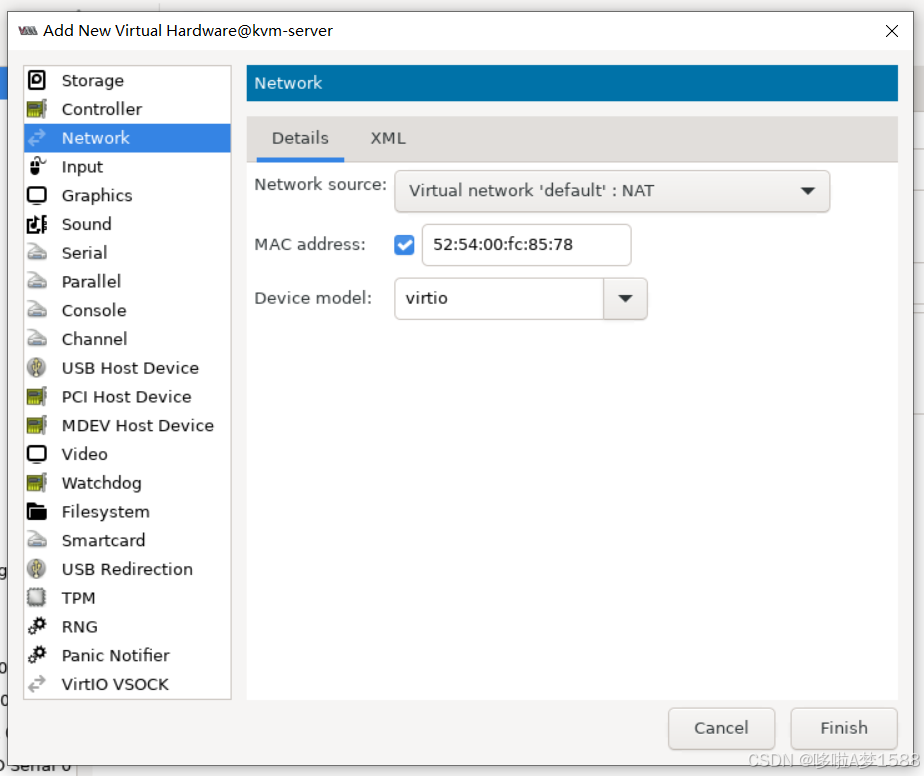
点击 'Virtual network "default" : NAT' 后面的小三角
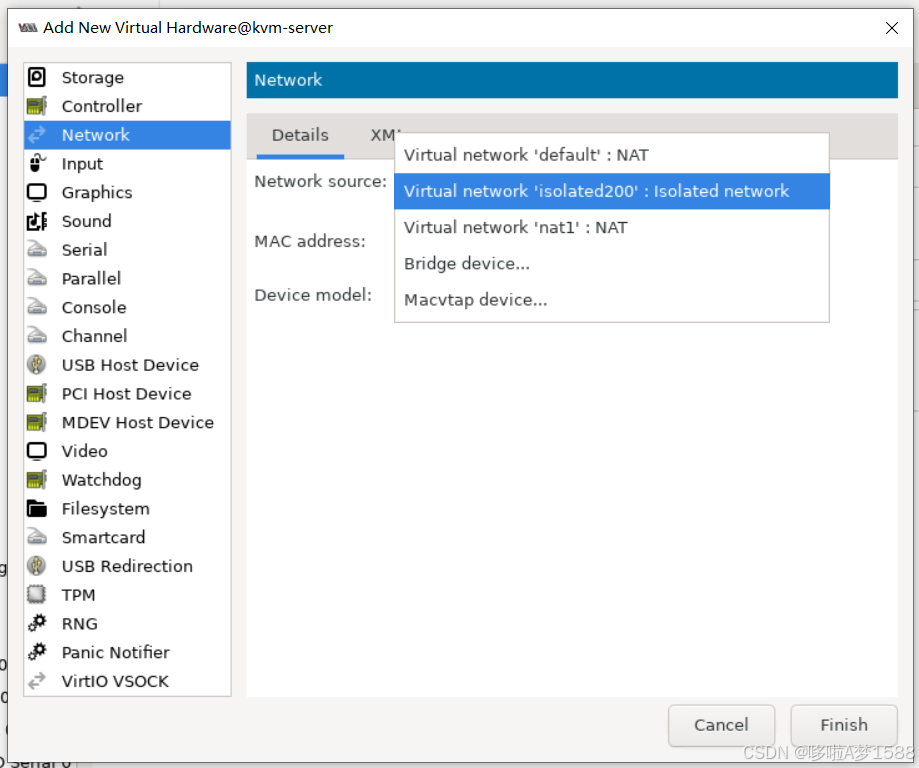
选择 'Virtual network "isolated200" : isolated network' 点击 Finish
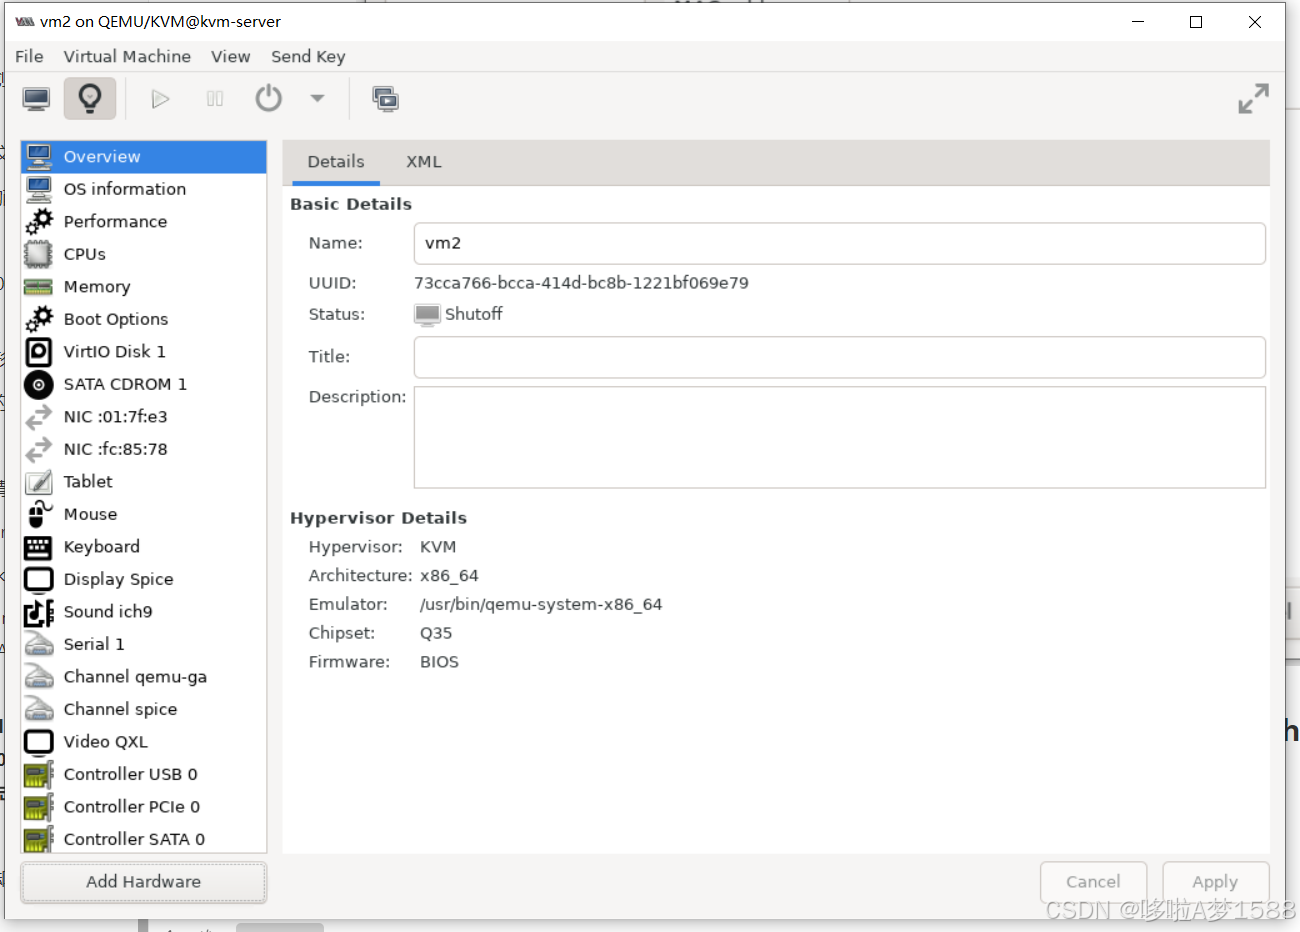
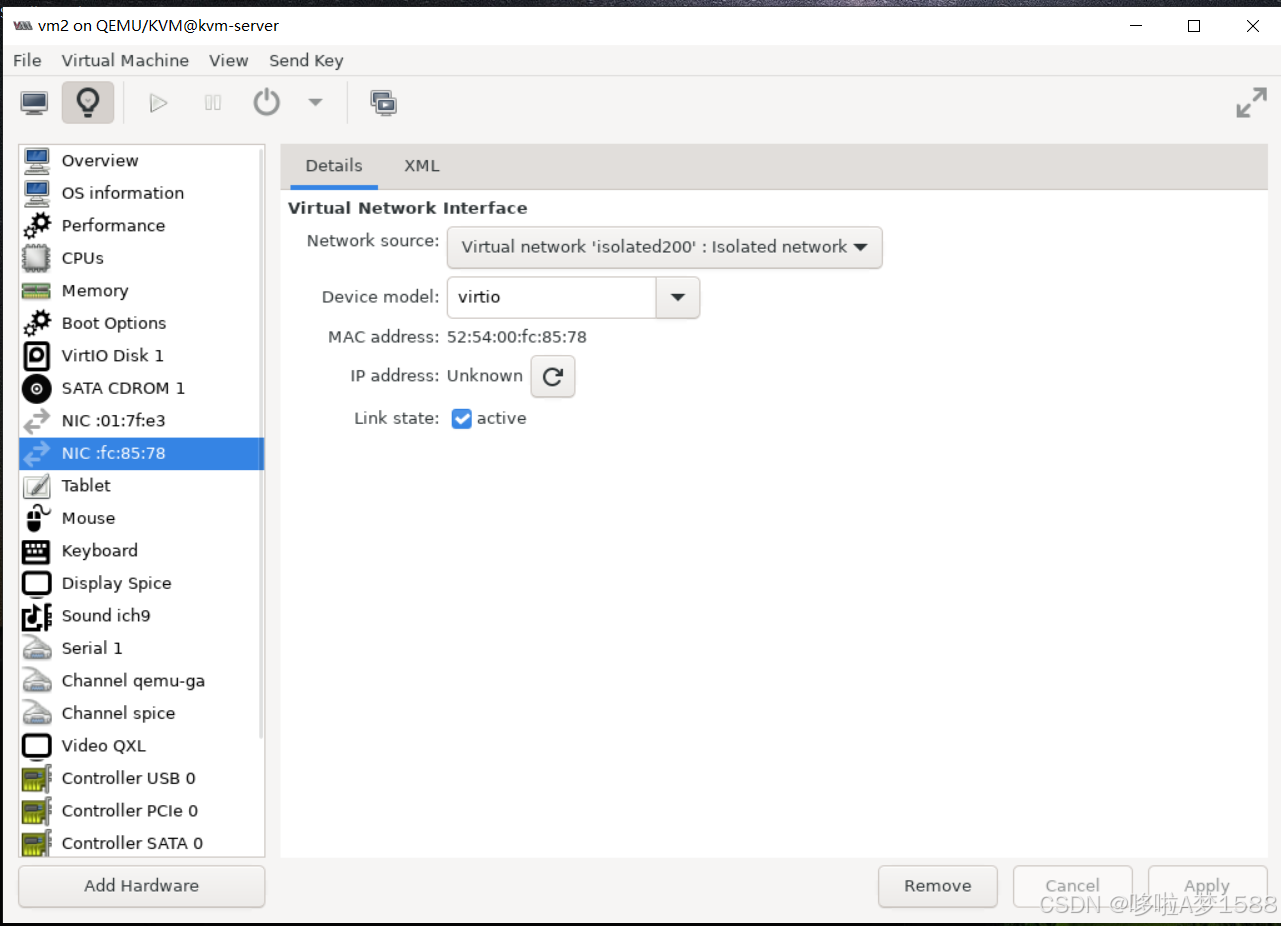
点击小三角,运行虚拟机 vm1
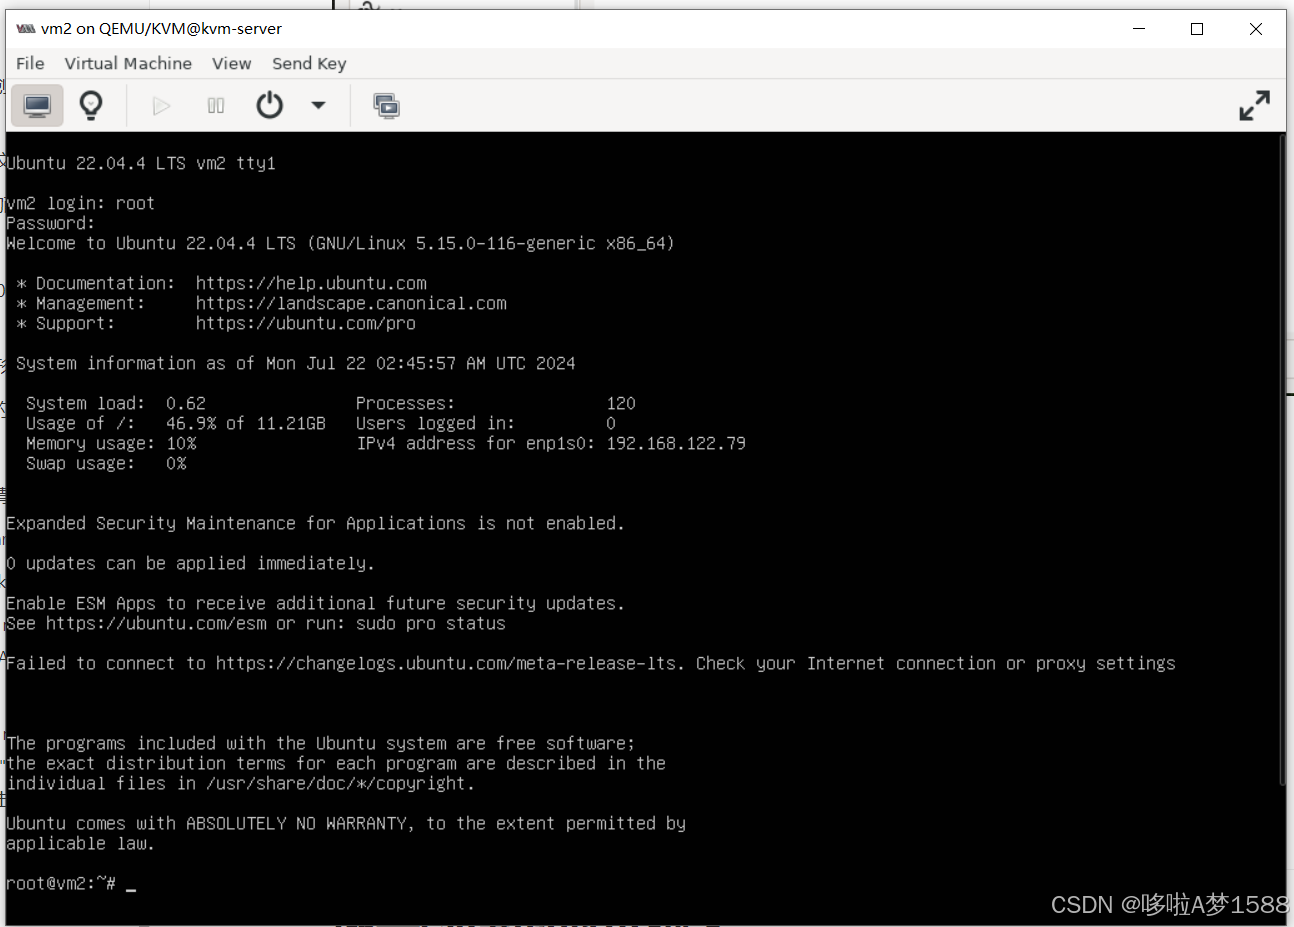
当虚拟机运行以后,才能查看接口信息
- root@kvm-server:~# virsh domiflist vm2
- Interface Type Source Model MAC
- -----------------------------------------------------------------
- vnet0 network default virtio 52:54:00:01:7f:e3
- vnet1 network isolated200 virtio 52:54:00:fc:85:78
Virbr0的DHCP
Virbr0 是 KVM 默认创建的一个 Bridge,其作用是为连接其上的虚拟网卡 NAT 访问外网的功能。
Virbr0 默认分配了一个 IP 192.168.122.1,并为连接其上的其他虚拟网卡提供 DHCP服务。
Virbr0 使用 dnsmasq 提供 DHCP 服务,可以在宿主机中查看该进程信息
- # Virbr0 使用 dnsmasq 提供 DHCP 服务,可以在宿主机中查看该进程信息
- /usr/sbin/dnsmasq --conf-file=/var/lib/libvirt/dnsmasq/default.conf
-
- root@kvm-server:~# ps -elf | grep dnsmasq
- 5 S libvirt+ 1254 1 0 80 0 - 2521 do_pol Jul21 ? 00:00:00 /usr/sbin/dnsmasq --conf-file=/var/lib/libvirt/dnsmasq/default.conf --leasefile-ro --dhcp-script=/usr/lib/libvirt/libvirt_leaseshelper
- 1 S root 1255 1254 0 80 0 - 2521 pipe_r Jul21 ? 00:00:00 /usr/sbin/dnsmasq --conf-file=/var/lib/libvirt/dnsmasq/default.conf --leasefile-ro --dhcp-script=/usr/lib/libvirt/libvirt_leaseshelper
- 5 S libvirt+ 2266 1 0 80 0 - 2521 do_pol 00:36 ? 00:00:00 /usr/sbin/dnsmasq --conf-file=/var/lib/libvirt/dnsmasq/nat1.conf --leasefile-ro --dhcp-script=/usr/lib/libvirt/libvirt_leaseshelper
- 1 S root 2267 2266 0 80 0 - 2521 pipe_r 00:36 ? 00:00:00 /usr/sbin/dnsmasq --conf-file=/var/lib/libvirt/dnsmasq/nat1.conf --leasefile-ro --dhcp-script=/usr/lib/libvirt/libvirt_leaseshelper
- 5 S libvirt+ 2708 1 0 80 0 - 2521 do_pol 02:17 ? 00:00:00 /usr/sbin/dnsmasq --conf-file=/var/lib/libvirt/dnsmasq/isolated200.conf --leasefile-ro --dhcp-script=/usr/lib/libvirt/libvirt_leaseshelper
- 1 S root 2709 2708 0 80 0 - 2521 pipe_r 02:17 ? 00:00:00 /usr/sbin/dnsmasq --conf-file=/var/lib/libvirt/dnsmasq/isolated200.conf --leasefile-ro --dhcp-script=/usr/lib/libvirt/libvirt_leaseshelper
- 0 S root 2933 1538 0 80 0 - 1653 pipe_r 02:57 pts/0 00:00:00 grep --color=auto dnsmasq
-
-
-
- 在 /var/lib/libvirt/dnsmasq/ 目录下有一个 virbr0.status 文件,当 vm2 成功获取 DHCP d IP 后,可以在该文件中看到相应的信息
-
- root@kvm-server:~# ls /var/lib/libvirt/dnsmasq/
- default.addnhosts default.hostsfile isolated200.conf nat1.addnhosts nat1.hostsfile virbr0.status virbr1.status virbr2.status
- default.conf isolated200.addnhosts isolated200.hostsfile nat1.conf virbr0.macs virbr1.macs virbr2.macs
- root@kvm-server:~# cat /var/lib/libvirt/dnsmasq/virbr0.status
- [
- {
- "ip-address": "192.168.122.79",
- "mac-address": "52:54:00:01:7f:e3",
- "hostname": "vm2",
- "client-id": "ff:56:50:4d:98:00:02:00:00:ab:11:a3:96:c9:9f:24:05:ff:ec",
- "expiry-time": 1721619896
- }
- ]
- root@kvm-server:~#
-
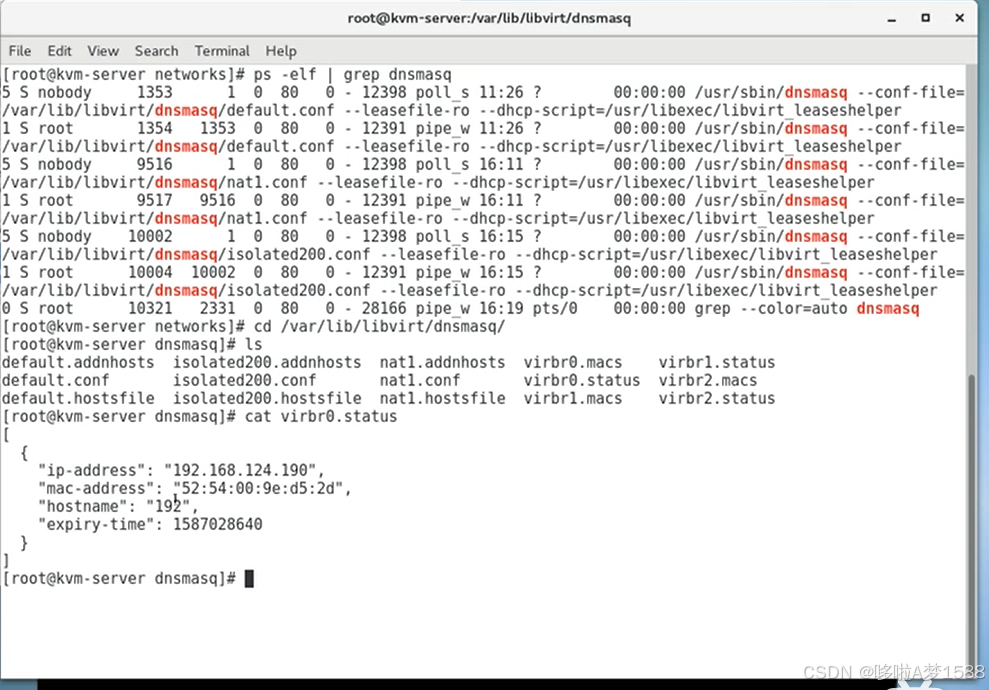
二,脚本管理KVM
1. 批量创建虚拟机脚本
- #!/bin/bash
- #kvm batch create vm tool
- #version: 0.1
- #author: wing
- #需要事先准备模板镜像和配置文件模板
-
- echo "1.创建自定义配置单个虚拟就
- 2.批量创建自定义配置虚拟机
- 3.批量创建默认配置虚拟机
- 4.删除虚拟机"
-
- #扩展功能:
- root@kvm-server:~# 查看现在虚拟机
- root@kvm-server:~# 查看某个虚拟机的配置
- root@kvm-server:~# 升配/降配
- root@kvm-server:~# 添加/删除网络
- read -p "选取你的操作(1/2/3):" op
- batch_self_define() {
- KVMname=`openssl rand -hex S`
- sourceimage=/var/lib/libvirt/images/vmmode1.img
- sourcexml=/etc/libvirt/qemu/vmmode1.xml
- newimg=/var/lib/libvirt/images/${KVMname}.img
- newxml=/etc/libvirt/qemu/${KVMname}.xml
- cp $sourceimage $newimg
- cp $sourcexml $newxml
- KVMuuid=`uuidgen`
- KVMmem=${1}000000
- KVMcpu=$2
- KVMimg=$newimg
- KVMmac=`openssl rand -hex 3 | sed -r 's/..\B/&:/g'`
- sed -i "s@KVMname@$KVMname@;s@KVMuuid@$KVMuuid@;s@KVMmem@$KVMmem@;s@KVMcpu@$KVMcpu@;s@KVMimg@$KVMimg@;s@KVMmac@$KVMmac@" $newxml
- virsh define $newxml
- virsh list --all
- }
-
- self_define() {
- read -p "请输入新虚拟机名称:" newname
- read -p "请输入新虚拟机内存大小(G):" newmem
- read -p "请输入新虚机cpu个数:" newcpu
- sourceimage=/var/lib/libvirt/images/vmmode1.img
- sourcexml=/etc/libvirt/qemu/vmmode1.xml
- newimg=/var/lib/libvirt/images/${newname}.img
- newxml=/etc/libvirt/qemu/${newname}.xml
- cp $sourceimage $newimg
- cp $sourcexml $newxml
- KVMname=$newname
- KVMuuid=`uuidgen`
- KVMmem=${newmem}000000
- KVMcpu=$newcpu
- KVMimg=$newimg
- KVMmac=`openssl rand -hex 3 | sed -r 's/..\B/&:/g'`
- sed -i "s@KVMname@$KVMname@;s@KVMuuid@$KVMuuid@;s@KVMmem@$KVMmem@;s@KVMcpu@$KVMcpu@;s@KVMimg@$KVMimg@;s@KVMmac@$KVMmac@" $newxml
- virsh define $newxml
- virsh list --all
- }
-
- case $op in
- 1)self_define;;
- 2)
- read -p "请输入要创建的虚拟机的个数:" num
- read -p "请输入新虚拟机内存大小(G):" newmem
- read -p "请输入新虚机cpu个数:" newcpu
- for ((i=1;i<=$num;i++))
- do
- batch_self_define $newmem $newcpu
- done;;
- 3)
- read -p "请输入要创建的虚拟机的个数:" num
- for ((i=1;i<=$num;i++))
- do
- batch_self_define 1 1
- done;;
- *)
- echo "输入错误,请重新执行脚本"
- exit;;
- esac
2. 配置文件模板
- vim /etc/libvirt/qemu/vmmode1.xml
- <domain type='KVM'>
- <name>KVMname</name>
- <uuid>KVMuuid</uuid>
- <memory unit="KiB">KVMmem</memory>
- <currentMemory unit='KiB'>KVMmem</currentMemory>
- <vcpu placement='static'>KVMcpu</vcpu>
- <os>
- <type arch='x86_64' machine='pc-i440fx-rhel7.0.0'>hvm</type>
- <boot dev='hd' />
- </os>
- <features>
- <acpi/>
- <apic/>
- </features>
- <cpu mode='custom' match='exact' check='partial'>
- <model fallback='allow'>Haswell-noTSX</model>
- </cpu>
- <clock offset='utc'>
- <timer name='rtc' tickpolicy='catchup'/>
- <timer name='pit' tickpolicy='delay'/>
- <timer name='hpet' present='no'/>
- </clock>
- <on_poweroff>destroy</on_poweroff>
- <on_reboot>restart</on_reboot>
- <on_crash>destroy</on_crash>
- <pm>
- <suspend-to-mem enabled='no'/>
- <suspend-to-disk enabled='no'/>
- </pm>
- <devices>
- <emulator>/usr/libexec/qemu-kvm</emulator>
- <disk type='file' device='disk'>
- <driver name='qemu' type='qcow2'/>
- <source file='/var/lib/libvirt/images/generic.qcow2'/>
- <target dev='hda' bus='ide'/>
- <address type='drive' controller='0' bus='0' target='0' unit='0'/>
- </disk>
- <disk type='file' device='cdrom'>
- <driver name='qemu' type='raw'/>
- <target dev='hdb' bus='ide'/>
- <readonly/>
- <address type='drive' controller='0' bus='0' target='0' unit='1'/>
- </disk>
- <controller type='usb' index='0' model='ich9-ehci1'>
- <address type='pci' domain='0x0000' bus='0x00' slot='0x05' function='0x7'/>
- </controller>
- <controller type='usb' index='0' model='ich9-uhci1'>
- <master startport='0'/>
- <address type='pci' domain='0x0000' bus='0x00' slot='0x05' function='0x0' multifunction='on'/>
- </controller>
- <controller type='usb' index='0' model='ich9-uhci2'>
- <master startport='2'/>
- <address type='pci' domain='0x0000' bus='0x00' slot='0x05' function='0x1'/>
- </controller>
- <controller type='usb' index='0' model='ich9-uhci3'>
- <master startport='4'/>
- <address type='pci' domain='0x0000' bus='0x00' slot='0x05' function='0x2'/>
- </controller>
- <controller type='pci' index='0' model='pci-root'/>
- <controller type='ide' index='0'>
- <address type='pci' domain='0x0000' bus='0x00' slot='0x01' function='0x1'/>
- </controller>
- <controller type='virtio-serial' index='0'>
- <address type='pci' domain='0x0000' bus='0x00' slot='0x06' function='0x0'/>
- </controller>
- <interface type='network'>
- <mac address='52:54:00:f7:97:43'/>
- <source network='default'/>
- <model type='rtl8139'/>
- <address type='pci' domain='0x0000' bus='0x00' slot='0x03' function='0x0'/>
- </interface>
- <serial type='pty'>
- <target type='isa-serial' port='0'>
- <model name='isa-serial'/>
- </target>
- </serial>
- <console type='pty'>
- <target type='serial' port='0'/>
- </console>
- <channel type='unix'>
- <target type='virtio' name='org.qemu.guest_agent.0'/>
- <address type='virtio-serial' controller='0' bus='0' port='1'/>
- </channel>
- <input type='mouse' bus='ps2'/>
- <input type='keyboard' bus='ps2'/>
- <memballoon model='virtio'>
- <address type='pci' domain='0x0000' bus='0x00' slot='0x07' function='0x0'/>
- </memballoon>
- </devices>
- </domain>
-
- root@kvm-server:~# cat /etc/libvirt/qemu/vm2.xml
- <!--
- WARNING: THIS IS AN AUTO-GENERATED FILE. CHANGES TO IT ARE LIKELY TO BE
- OVERWRITTEN AND LOST. Changes to this xml configuration should be made using:
- virsh edit vm2
- or other application using the libvirt API.
- -->
-
- <domain type='kvm'>
- <name>vm2</name>
- <uuid>73cca766-bcca-414d-bc8b-1221bf069e79</uuid>
- <metadata>
- <libosinfo:libosinfo xmlns:libosinfo="http://libosinfo.org/xmlns/libvirt/domain/1.0">
- <libosinfo:os id="http://ubuntu.com/ubuntu/22.04"/>
- </libosinfo:libosinfo>
- </metadata>
- <memory unit='KiB'>2097152</memory>
- <currentMemory unit='KiB'>2097152</currentMemory>
- <vcpu placement='static'>1</vcpu>
- <os>
- <type arch='x86_64' machine='pc-q35-6.2'>hvm</type>
- <boot dev='hd'/>
- </os>
- <features>
- <acpi/>
- <apic/>
- <vmport state='off'/>
- </features>
- <cpu mode='host-passthrough' check='none' migratable='on'/>
- <clock offset='utc'>
- <timer name='rtc' tickpolicy='catchup'/>
- <timer name='pit' tickpolicy='delay'/>
- <timer name='hpet' present='no'/>
- </clock>
- <on_poweroff>destroy</on_poweroff>
- <on_reboot>restart</on_reboot>
- <on_crash>destroy</on_crash>
- <pm>
- <suspend-to-mem enabled='no'/>
- <suspend-to-disk enabled='no'/>
- </pm>
- <devices>
- <emulator>/usr/bin/qemu-system-x86_64</emulator>
- <disk type='file' device='disk'>
- <driver name='qemu' type='qcow2' discard='unmap'/>
- <source file='/var/lib/libvirt/images/vm2.qcow2'/>
- <target dev='vda' bus='virtio'/>
- <address type='pci' domain='0x0000' bus='0x04' slot='0x00' function='0x0'/>
- </disk>
- <disk type='file' device='cdrom'>
- <driver name='qemu' type='raw'/>
- <target dev='sda' bus='sata'/>
- <readonly/>
- <address type='drive' controller='0' bus='0' target='0' unit='0'/>
- </disk>
- <controller type='usb' index='0' model='qemu-xhci' ports='15'>
- <address type='pci' domain='0x0000' bus='0x02' slot='0x00' function='0x0'/>
- </controller>
- <controller type='pci' index='0' model='pcie-root'/>
- <controller type='pci' index='1' model='pcie-root-port'>
- <model name='pcie-root-port'/>
- <target chassis='1' port='0x10'/>
- <address type='pci' domain='0x0000' bus='0x00' slot='0x02' function='0x0' multifunction='on'/>
- </controller>
- <controller type='pci' index='2' model='pcie-root-port'>
- <model name='pcie-root-port'/>
- <target chassis='2' port='0x11'/>
- <address type='pci' domain='0x0000' bus='0x00' slot='0x02' function='0x1'/>
- </controller>
- <controller type='pci' index='3' model='pcie-root-port'>
- <model name='pcie-root-port'/>
- <target chassis='3' port='0x12'/>
- <address type='pci' domain='0x0000' bus='0x00' slot='0x02' function='0x2'/>
- </controller>
- <controller type='pci' index='4' model='pcie-root-port'>
- <model name='pcie-root-port'/>
- <target chassis='4' port='0x13'/>
- <address type='pci' domain='0x0000' bus='0x00' slot='0x02' function='0x3'/>
- </controller>
- <controller type='pci' index='5' model='pcie-root-port'>
- <model name='pcie-root-port'/>
- <target chassis='5' port='0x14'/>
- <address type='pci' domain='0x0000' bus='0x00' slot='0x02' function='0x4'/>
- </controller>
- <controller type='pci' index='6' model='pcie-root-port'>
- <model name='pcie-root-port'/>
- <target chassis='6' port='0x15'/>
- <address type='pci' domain='0x0000' bus='0x00' slot='0x02' function='0x5'/>
- </controller>
- <controller type='pci' index='7' model='pcie-root-port'>
- <model name='pcie-root-port'/>
- <target chassis='7' port='0x16'/>
- <address type='pci' domain='0x0000' bus='0x00' slot='0x02' function='0x6'/>
- </controller>
- <controller type='pci' index='8' model='pcie-root-port'>
- <model name='pcie-root-port'/>
- <target chassis='8' port='0x17'/>
- <address type='pci' domain='0x0000' bus='0x00' slot='0x02' function='0x7'/>
- </controller>
- <controller type='pci' index='9' model='pcie-root-port'>
- <model name='pcie-root-port'/>
- <target chassis='9' port='0x18'/>
- <address type='pci' domain='0x0000' bus='0x00' slot='0x03' function='0x0' multifunction='on'/>
- </controller>
- <controller type='pci' index='10' model='pcie-root-port'>
- <model name='pcie-root-port'/>
- <target chassis='10' port='0x19'/>
- <address type='pci' domain='0x0000' bus='0x00' slot='0x03' function='0x1'/>
- </controller>
- <controller type='pci' index='11' model='pcie-root-port'>
- <model name='pcie-root-port'/>
- <target chassis='11' port='0x1a'/>
- <address type='pci' domain='0x0000' bus='0x00' slot='0x03' function='0x2'/>
- </controller>
- <controller type='pci' index='12' model='pcie-root-port'>
- <model name='pcie-root-port'/>
- <target chassis='12' port='0x1b'/>
- <address type='pci' domain='0x0000' bus='0x00' slot='0x03' function='0x3'/>
- </controller>
- <controller type='pci' index='13' model='pcie-root-port'>
- <model name='pcie-root-port'/>
- <target chassis='13' port='0x1c'/>
- <address type='pci' domain='0x0000' bus='0x00' slot='0x03' function='0x4'/>
- </controller>
- <controller type='pci' index='14' model='pcie-root-port'>
- <model name='pcie-root-port'/>
- <target chassis='14' port='0x1d'/>
- <address type='pci' domain='0x0000' bus='0x00' slot='0x03' function='0x5'/>
- </controller>
- <controller type='sata' index='0'>
- <address type='pci' domain='0x0000' bus='0x00' slot='0x1f' function='0x2'/>
- </controller>
- <controller type='virtio-serial' index='0'>
- <address type='pci' domain='0x0000' bus='0x03' slot='0x00' function='0x0'/>
- </controller>
- <interface type='network'>
- <mac address='52:54:00:01:7f:e3'/>
- <source network='default'/>
- <model type='virtio'/>
- <address type='pci' domain='0x0000' bus='0x01' slot='0x00' function='0x0'/>
- </interface>
- <interface type='network'>
- <mac address='52:54:00:fc:85:78'/>
- <source network='isolated200'/>
- <model type='virtio'/>
- <address type='pci' domain='0x0000' bus='0x07' slot='0x00' function='0x0'/>
- </interface>
- <serial type='pty'>
- <target type='isa-serial' port='0'>
- <model name='isa-serial'/>
- </target>
- </serial>
- <console type='pty'>
- <target type='serial' port='0'/>
- </console>
- <channel type='unix'>
- <target type='virtio' name='org.qemu.guest_agent.0'/>
- <address type='virtio-serial' controller='0' bus='0' port='1'/>
- </channel>
- <channel type='spicevmc'>
- <target type='virtio' name='com.redhat.spice.0'/>
- <address type='virtio-serial' controller='0' bus='0' port='2'/>
- </channel>
- <input type='tablet' bus='usb'>
- <address type='usb' bus='0' port='1'/>
- </input>
- <input type='mouse' bus='ps2'/>
- <input type='keyboard' bus='ps2'/>
- <graphics type='spice' autoport='yes'>
- <listen type='address'/>
- <image compression='off'/>
- </graphics>
- <sound model='ich9'>
- <address type='pci' domain='0x0000' bus='0x00' slot='0x1b' function='0x0'/>
- </sound>
- <audio id='1' type='spice'/>
- <video>
- <model type='qxl' ram='65536' vram='65536' vgamem='16384' heads='1' primary='yes'/>
- <address type='pci' domain='0x0000' bus='0x00' slot='0x01' function='0x0'/>
- </video>
- <redirdev bus='usb' type='spicevmc'>
- <address type='usb' bus='0' port='2'/>
- </redirdev>
- <redirdev bus='usb' type='spicevmc'>
- <address type='usb' bus='0' port='3'/>
- </redirdev>
- <memballoon model='virtio'>
- <address type='pci' domain='0x0000' bus='0x05' slot='0x00' function='0x0'/>
- </memballoon>
- <rng model='virtio'>
- <backend model='random'>/dev/urandom</backend>
- <address type='pci' domain='0x0000' bus='0x06' slot='0x00' function='0x0'/>
- </rng>
- </devices>
- </domain>
随机生成mac地址
- 其中5种方式:
- 第一种方式:
- echo $[$RANDOM%9]$[$RANDOM%9]:$[$RANDOM%9]$[$RANDOM%9]:$[$RANDOM%9]$[$RANDOM%9]
- root@kvm-server:~# echo $[$RANDOM%9]$[$RANDOM%9]:$[$RANDOM%9]$[$RANDOM%9]:$[$RANDOM%9]$[$RANDOM%9]
- 14:31:47
-
- 第二种方式:
- echo `openssl rand -hex 1`:`openssl rand -hex 1`:`openssl rand -hex 1`
- root@kvm-server:~# echo `openssl rand -hex 1`:`openssl rand -hex 1`:`openssl rand -hex 1`
- 71:7c:49
-
- 第三种方式:
- openssl rand -hex 3 | sed -r 's/(..)/\1:/g' | sed 's/.$//'
- root@kvm-server:~# openssl rand -hex 3 | sed -r 's/(..)/\1:/g' | sed 's/.$//'
- 3d:1a:31
-
- 第四种方式:
- openssl rand -hex 3 | sed -r 's/(..)(..)(..)/\1:\2:\3/g'
- root@kvm-server:~# openssl rand -hex 3 | sed -r 's/(..)(..)(..)/\1:\2:\3/g'
- cc:71:15
-
- 第五种方式:
- openssl rand -hex 3 | sed -r 's/..\B/&:/g'
- root@kvm-server:~# openssl rand -hex 3 | sed -r 's/..\B/&:/g'
- b6:42:ed
-
-
- \B 表示 非单词边界
- \b 表示 单词边界
- <a 表示 以 a 开头的单词
- b> 表示 以 b 结尾的单词
- 使用UUID:
- uuidgen | sed -r 's/(..)(..)(..)(.*)/\1:\2:\3/'
- root@kvm-server:~# uuidgen | sed -r 's/(..)(..)(..)(.*)/\1:\2:\3/'
- 7f:92:e1
-
- 使用熔池里面的随机数:
- echo -n 00:60:2f;dd bs=1 count=3 if=/dev/random 2>/dev/null | hexdump -v -e '/1 ":%02X"'
- root@kvm-server:~# echo -n 00:60:2f;dd bs=1 count=3 if=/dev/random 2>/dev/null | hexdump -v -e '/1 ":%02X"'
- 00:60:2f:5B:37:D5
三,简历上可写的KVM
相关项目
1. 迁移
从物理机器迁移到 KVM
从 KVM 迁移到云主机
2. 文件管理服务(ftp nfs jira+wiki)
ftp:
nfs:
jira+wiki:
3. 日志服务
新增网卡
- root@kvm-server:/etc/libvirt/qemu/networks# ls
- autostart default.xml isolated200.xml nat1.xml
- root@kvm-server:/etc/libvirt/qemu/networks# pwd
- /etc/libvirt/qemu/networks
-
- root@kvm-server:~# ip a
- 1: lo: <LOOPBACK,UP,LOWER_UP> mtu 65536 qdisc noqueue state UNKNOWN group default qlen 1000
- link/loopback 00:00:00:00:00:00 brd 00:00:00:00:00:00
- inet 127.0.0.1/8 scope host lo
- valid_lft forever preferred_lft forever
- inet6 ::1/128 scope host
- valid_lft forever preferred_lft forever
- 2: ens33: <BROADCAST,MULTICAST,UP,LOWER_UP> mtu 1500 qdisc fq_codel state UP group default qlen 1000
- link/ether 00:0c:29:4c:7e:1e brd ff:ff:ff:ff:ff:ff
- altname enp2s1
- inet 192.168.222.150/24 metric 100 brd 192.168.222.255 scope global dynamic ens33
- valid_lft 1659sec preferred_lft 1659sec
- inet6 fe80::20c:29ff:fe4c:7e1e/64 scope link
- valid_lft forever preferred_lft forever
- 3: virbr0: <NO-CARRIER,BROADCAST,MULTICAST,UP> mtu 1500 qdisc noqueue state DOWN group default qlen 1000
- link/ether 52:54:00:3e:30:44 brd ff:ff:ff:ff:ff:ff
- inet 192.168.122.1/24 brd 192.168.122.255 scope global virbr0
- valid_lft forever preferred_lft forever
- 4: virbr1: <NO-CARRIER,BROADCAST,MULTICAST,UP> mtu 1500 qdisc noqueue state DOWN group default qlen 1000
- link/ether 52:54:00:3e:31:44 brd ff:ff:ff:ff:ff:ff
- inet 192.168.120.1/24 brd 192.168.120.255 scope global virbr1
- valid_lft forever preferred_lft forever
- 7: virbr2: <NO-CARRIER,BROADCAST,MULTICAST,UP> mtu 1500 qdisc noqueue state DOWN group default qlen 1000
- link/ether 52:54:00:3e:33:44 brd ff:ff:ff:ff:ff:ff
- inet 192.168.121.1/24 brd 192.168.121.255 scope global virbr2
- valid_lft forever preferred_lft forever
- root@kvm-server:~#
声明:本文内容由网友自发贡献,不代表【wpsshop博客】立场,版权归原作者所有,本站不承担相应法律责任。如您发现有侵权的内容,请联系我们。转载请注明出处:https://www.wpsshop.cn/w/喵喵爱编程/article/detail/936202
推荐阅读
相关标签

