
- 1LinkedList源码解析_inslinklist
- 2人脸检测(Python)_人脸识别-局部二值模式直方图创建一个人脸识别器
- 3android开发,动态图标,Android动态加载很难?带你快速实现App图标热更新
- 4什么是人工智能_什么是人工智能?
- 5蓝桥杯备赛 | 洛谷做题打卡day4
- 6【论文阅读】Mamba: Linear-Time Sequence Modeling with Selective State Spaces
- 7python常用字符串拼接方法_python字符串连接输出字符串
- 8程序员副业探索:涨粉 10 万到月入过万_技术博客怎么赚钱
- 9es常用命令_如何查看es索引的分片数和副本数
- 10大模型ReAct提示工程详解【2023】
通过 Python 把图片转换为 ASCII art,好玩!
赞
踩

作者 |周萝卜
来源 |萝卜大杂烩
相信很多人都知道 ASCII art,这是一种使用可打印 ASCII 字符集来构图的图形设计技术。这种艺术最简单的形式就是表情符号,例如:-) 或 :-3,今天我们就来制作更为复杂的图像
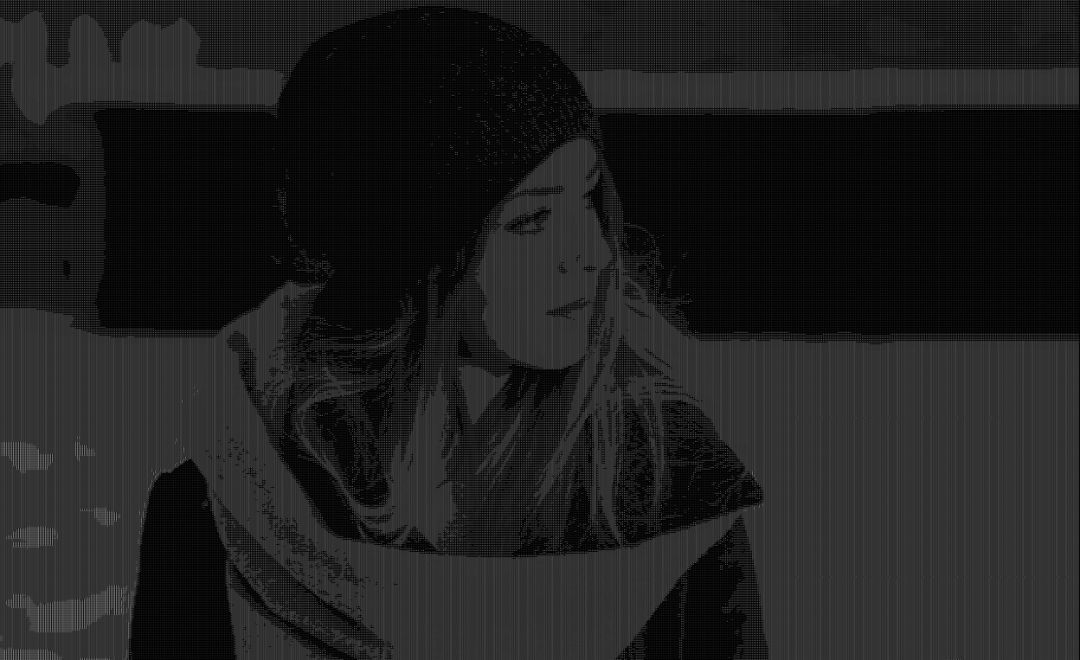
image 的本质
首先,我们先来阐明下图像在计算机系统中的表示方式。图片通常以 .png 或 .jpg 等格式存储在磁盘上,所有这些文件类型都具有相似的结构:它们大致由标题和数据部分组成,前者存储有关图像的有用信息,例如其格式签名,而后者存储实际的像素数据
我们看到的图像实际由像素组成,像素是我们都熟悉的光栅图像中最小的可寻址元素,它们通常表示为一组通道,也称为颜色。在最常见的颜色值中,有经典的 RGB(红绿蓝)和 RGBA(红绿蓝 Alpha)。两者之间的区别在于后者有一个额外的通道,称为“alpha”,用于指定图像的不透明度。
RGBA 是我们将要使用的,因为它也可以用来表示空背景
将 pixels 转换为 ASCCII
现在我们已经了解了图像的表示方式,接下来讨论如何将像素转换为实际的 ASCII 字符
要理解这一点,我们首先看一下像素颜色强度,该值是指所有像素通道的总和除以通道可以具有的最大值的总和(在本例中为 255)
- # Import types for clarity
- from typing import NewType, Tuple
-
- # Maximum value the sum of the pixel's channel values can reach
- MAX_CHANNEL_VALUES = 255 * 4
- # Defining an RGBA pixel type as a tuple of 4 integers
- Pixel = NewType("Pixel", Tuple[int, int, int, int])
- # Returns the pixel's intensity value as a float
- def get_pixel_intensity(pixel: Pixel) -> float:
- # Sum of the pixel's channel values divided by the maximum possible intensity
- return sum(pixel) / MAX_CHANNEL_VALUES
为了清晰起见,我们在第一行导入了静态类型
在上述代码中,我们定义了一个新的 Pixel 类型,一个由四个整数组成的元组,每个整数代表一个 RGBA 像素中的一个通道。然后我们又定义了一个函数来提取给定像素的强度,首先将所有通道值相加,然后将结果除以像素通道可以达到的最大值,从而有效地获得强度百分比。
一旦我们计算了像素的强度,就可以将其映射到 ASCII 字符。为此,我们必须定义一个用于表示像素的字符集
- # Character set for out ASCII arts
- CHARACTERS = (' ', '.', '°', '*', 'o', 'O', '#', '@')
-
- # Restuns the character that corresponds to the given pixel intensity
- def map_intensity_to_character(intensity: float) -> CHARACTERS:
- return CHARACTERS[round(intensity * len(CHARACTERS))]
字符集的顺序是从空格到@,这意味着像素越密集,其对应的 ASCII 字符占用的空间就越多
该函数将给定的像素强度映射到集合中的一个字符,强度 * len(CHARACTERS) 的结果四舍五入,因为索引必须是整数
现在,让我们用一个简单的脚本将这些代码片段组合在一起
- # Import an image library for the sake of simplicity
- from PIL import Image
- # Import argv for command line arguments
- from sys import argv
-
- # Transforms an image into a string of ASCII characters
- def convert_image(image: Image) -> str:
- ascii_string = ''
- # Iterate over every pixel of the image
- for pixel in image.getdata():
- intensity = get_pixel_intensity(pixel)
- character = map_intensity_to_character(intensity)
- ascii_string += character
- return ascii_string
-
- def main():
- # Get the image name from the command line arguments list
- image_name = argv[1]
- # Open the image file using the PIL image library
- image = Image.open(image_name)
- # Convert the image to a string of ASCII characters
- ascii_image = convert_image(image)
-
- if __name__ == '__main__':
- main()

查看 ASCII
一旦我们获得了图像 ASCII 字符串的表示方法,接下来就是通过一种以图形方式查看它的方法,最简单的方法就是将其打印到控制台。由于图像通常按像素行组织,因此在打印它们时,我们也必须相应地使用换行符
在这里,我们编写了一个简单的函数,将 ASCII 打印到控制台以及如何从主函数调用
- # Prints the given ASCII art
- # size is a Tuple containing the width and height of the image
- def print_ascii_art(size: Tuple[int, int], characters: str):
- index = 0
- # Iterate over all the rows of the image
- for _ in range(size[1]):
- # Print a number of characters equal to the width of the image
- # from the ascii string
- print(characters[index:index+size[0]])
- index += size[0]
-
- def main():
- image_name = argv[1]
- image = Image.open(image_name)
- ascii_image = convert_image(image)
- # Actually print the ASCII image to the console
- print_ascii_art(image.size, ascii_image)
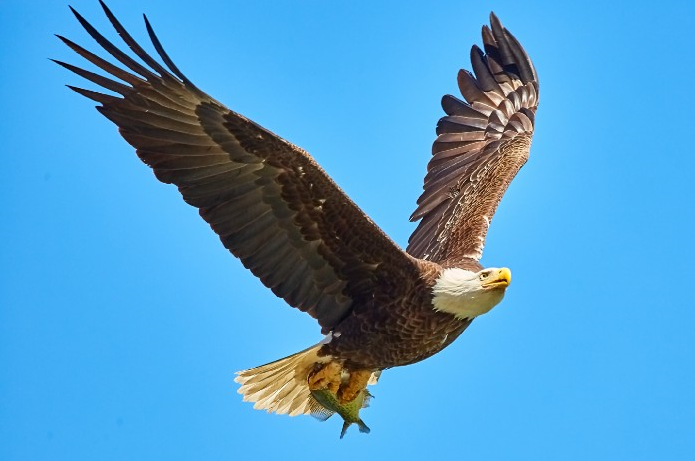
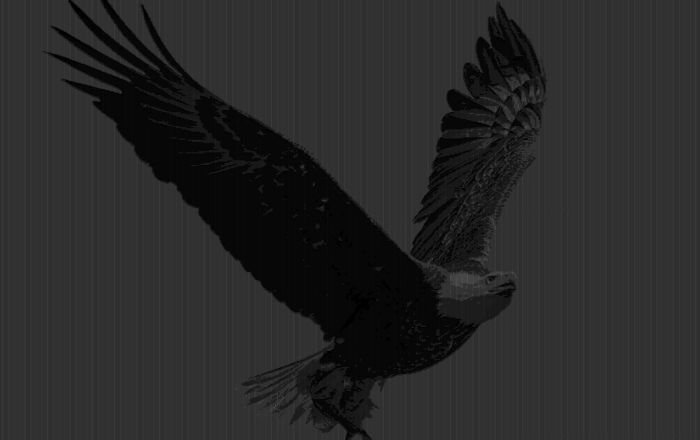
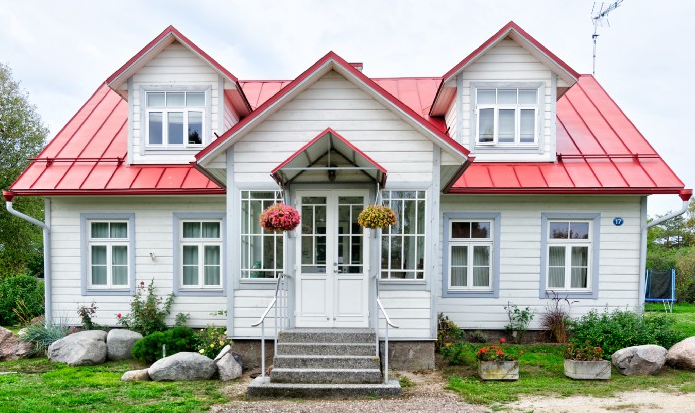
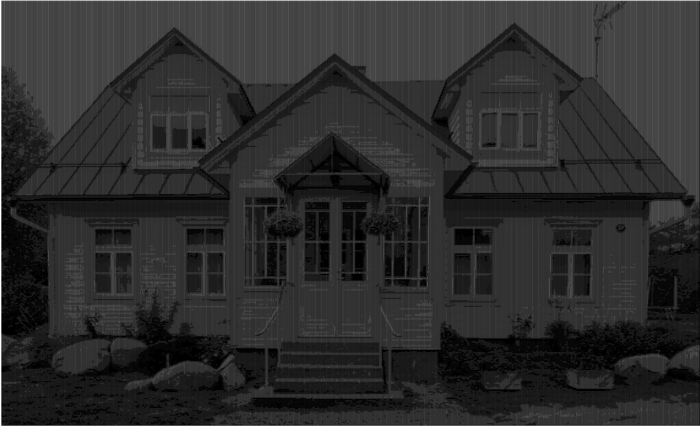
我们先转换一张简单的图片

python converter.py image.pngOutput:
可以看到,图像还是有些失真,我们再进行下优化
使用 HTML 来展示转换后的图像
- # The starting point of the generated HTML file
- HTML_TEMPLATE = """
- <!DOCTYPE html>
- <html lang="en">
- <head>
- <meta charset="UTF-8">
- <meta http-equiv="X-UA-Compatible" content="IE=edge">
- <meta name="viewport" content="width=device-width, initial-scale=1.0">
- <title>ASCII Art</title>
- </head>
- <body>
- <div style="background-color: black; color: white;">
- <pre>{}</pre>
- </div>
- </body>
- </html>
- """
-
- def ascii_image_to_html(image_name: str, characters: str, size: Tuple[int, int]):
- # Open an HTML file for writing with the '.html' extension
- with open(image_name + '.html', 'w') as image_file:
- ascii_image = ''
- index = 0
- # Generate the ASCII image as explained before
- for _ in range(size[1]):
- # Manually add a newline character at the end of each row or characters
- ascii_image += characters[index:index+size[0]] + '\n'
- index += size[0]
- # Finally write the ASCII string to the HTML file using the template
- image_file.write(HTML_TEMPLATE.format(ascii_image))
-
- def main():
- image_name = argv[1]
- image = Image.open(image_name)
- ascii_image = convert_image(image)
- # Save the result in an HTML file
- ascii_image_to_html(image_name, ascii_image, image.size)
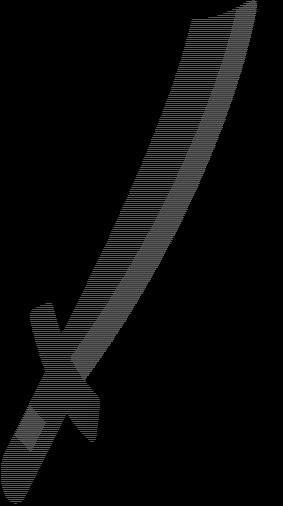
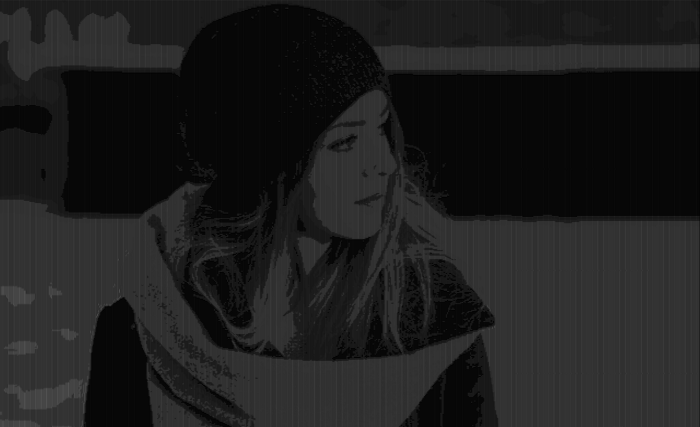
下面就来看看不同图片转换成 ASCII 之后的效果吧

下面是完整代码
- #!/usr/bin/env python3
- from typing import Tuple, NewType
- from PIL import Image
- from sys import argv
-
-
- Pixel = NewType("Pixel", Tuple[int, int, int, int])
-
- CHARACTERS = (' ', '.', '°', '*', 'o', 'O', '#', '@')
-
- MAX_CHANNEL_INTENSITY = 255
- MAX_CHANNEL_VALUES = MAX_CHANNEL_INTENSITY * 4 # 4 is the number of channels of a Pixel
-
- HTML_TEMPLATE = """
- <!DOCTYPE html>
- <html lang="en">
- <head>
- <meta charset="UTF-8">
- <meta http-equiv="X-UA-Compatible" content="IE=edge">
- <meta name="viewport" content="width=device-width, initial-scale=1.0">
- <title>ASCII Art</title>
- </head>
- <body>
- <div style="background-color: black; color: white; line-height: 10px">
- <pre>{}</pre>
- </div>
- </body>
- </html>
- """
-
-
- def map_intensity_to_character(intensity: float) -> CHARACTERS:
- return CHARACTERS[round(intensity * len(CHARACTERS))]
-
-
- def get_pixel_intensity(pixel: Pixel) -> float:
- return sum(pixel) / 1020 # 1020 = 255 * 4
-
-
- def print_ascii_art(size: Tuple[int, int], characters: str):
- index = 0
- for _ in range(size[1]):
- print(characters[index:index+size[0]])
- index += size[0]
-
-
- def ascii_image_to_html(image_name: str, characters: str, size: Tuple[int, int]):
- with open(image_name + '.html', 'w') as image_file:
- ascii_image = ''
- index = 0
- for _ in range(size[1]):
- ascii_image += characters[index:index+size[0]] + '\n'
- index += size[0]
- image_file.write(HTML_TEMPLATE.format(ascii_image))
-
-
- def convert_image(image: Image) -> str:
- ascii_string = ''
- for pixel in image.getdata():
- intensity = get_pixel_intensity(pixel)
- character = map_intensity_to_character(intensity)
- ascii_string += character
- return ascii_string
-
-
- def main() -> None:
-
- image_name = argv[1]
- image = Image.open(image_name)
-
- print(image.size, image.mode, image.size, image.getcolors())
-
- ascii_image = convert_image(image)
-
- #print_ascii_art(image.size, ascii_image)
-
- ascii_image_to_html(image_name, ascii_image, image.size)
-
-
- if __name__ == '__main__':
- main()
原文地址:https://towardsdatascience.com/convert-pictures-to-ascii-art-ece89582d65b


往
期
回
顾
资讯
资讯
资讯
资讯

分享

点收藏

点点赞

点在看


