
- 1python re模块compile_python正则表达式re模块理解(RE.COMPILE、RE.MATCH、RE.SEARCH)(六)...
- 2关于git配置代理的方法和一些需要注意的细节_git config --global proxy
- 3多模态大模型代表了人工智能领域的新一代技术范式
- 4计算机毕业设计hadoop+pyspark图书推荐系统 豆瓣图书数据分析可视化大屏 豆瓣图书爬虫 知识图谱 图书大数据 大数据毕业设计 机器学习_基于pyspark的推荐系统
- 5Caused by: kotlin.UninitializedPropertyAccessException: lateinit property rv has not been initialize
- 6弹出框 custombox.min.js 使用时候由于滚动条隐藏造成网页抖动变形的解决办法
- 7面相_面相 马鞍鼻
- 8数据安全与隐私保护在返利App中的实施策略
- 9Unity编程笔录--Unity Android 加密 so_unity text encry release
- 10STM32智能小车学习笔记(避障、循迹、跟随)_stm32f103rct6小车结合串口的避障循迹代码
【Spring Security】实现多种认证方式_springsecurity多种认证详解
赞
踩
一、引言
实际系统通常需要实现多种认证方式,比如用户名密码、手机验证码、邮箱等等。Spring Security可以通过自定义认证器AuthenticationProvider 来实现不同的认证方式。接下来介绍一下SpringSecurity具体如何来实现多种认证方式。
二、具体步骤
这里我们以用户名密码、手机验证码两种方式来进行演示,其他一些登录方式类似。
2.1 自定义认证器AuthenticationProvider
首先针对每一种登录方式,我们可以定义其对应的认证器AuthenticationProvider,以及对应的认证信息Authentication,实际场景中这两个一般是配套使用。认证器AuthenticationProvider有一个认证方法authenticate(),我们需要实现该认证方法,认证成功之后返回认证信息Authentication。
2.1.1 手机验证码
针对手机验证码方式,我们可以定义以下两个类
MobilecodeAuthenticationProvider.class
- import com.kamier.security.web.service.MyUser;
- import org.springframework.security.authentication.AuthenticationProvider;
- import org.springframework.security.authentication.BadCredentialsException;
- import org.springframework.security.core.Authentication;
- import org.springframework.security.core.AuthenticationException;
- import org.springframework.security.core.userdetails.UserDetailsService;
- import org.springframework.security.core.userdetails.UsernameNotFoundException;
-
- import java.util.HashMap;
- import java.util.Map;
-
- public class MobilecodeAuthenticationProvider implements AuthenticationProvider {
-
- private UserDetailsService userDetailsService;
-
- @Override
- public Authentication authenticate(Authentication authentication) throws AuthenticationException {
-
- MobilecodeAuthenticationToken mobilecodeAuthenticationToken = (MobilecodeAuthenticationToken) authentication;
- String phone = mobilecodeAuthenticationToken.getPhone();
- String mobileCode = mobilecodeAuthenticationToken.getMobileCode();
- System.out.println("登陆手机号:" + phone);
- System.out.println("手机验证码:" + mobileCode);
-
- // 模拟从redis中读取手机号对应的验证码及其用户名
- Map dataFromRedis = new HashMap();
- dataFromRedis.put("code", "6789");
- dataFromRedis.put("username", "admin");
-
- // 判断验证码是否一致
- if (!mobileCode.equals(dataFromRedis.get("code"))) {
- throw new BadCredentialsException("验证码错误");
- }
-
- // 如果验证码一致,从数据库中读取该手机号对应的用户信息
- MyUser loadedUser = (MyUser) userDetailsService.loadUserByUsername(dataFromRedis.get("username"));
- if (loadedUser == null) {
- throw new UsernameNotFoundException("用户不存在");
- } else {
- MobilecodeAuthenticationToken result = new MobilecodeAuthenticationToken(loadedUser, null, loadedUser.getAuthorities());
- return result;
- }
- }
-
- @Override
- public boolean supports(Class> aClass) {
- return MobilecodeAuthenticationToken.class.isAssignableFrom(aClass);
- }
-
- public void setUserDetailsService(UserDetailsService userDetailsService) {
- this.userDetailsService = userDetailsService;
- }
- }

注意这里的supports方法,是实现多种认证方式的关键,认证管理器AuthenticationManager会通过这个supports方法来判定当前需要使用哪一种认证方式。
MobilecodeAuthenticationToken.class
- import org.springframework.security.authentication.AbstractAuthenticationToken;
- import org.springframework.security.core.GrantedAuthority;
- import java.util.Collection;
-
- /**
- * 手机验证码认证信息,在UsernamePasswordAuthenticationToken的基础上添加属性 手机号、验证码
- */
- public class MobilecodeAuthenticationToken extends AbstractAuthenticationToken {
- private static final long serialVersionUID = 530L;
- private Object principal;
- private Object credentials;
- private String phone;
- private String mobileCode;
-
-
- public MobilecodeAuthenticationToken(String phone, String mobileCode) {
- super(null);
- this.phone = phone;
- this.mobileCode = mobileCode;
- this.setAuthenticated(false);
- }
-
- public MobilecodeAuthenticationToken(Object principal, Object credentials, Collection extends GrantedAuthority> authorities) {
- super(authorities);
- this.principal = principal;
- this.credentials = credentials;
- super.setAuthenticated(true);
- }
-
- public Object getCredentials() {
- return this.credentials;
- }
-
- public Object getPrincipal() {
- return this.principal;
- }
-
- public String getPhone() {
- return phone;
- }
-
- public String getMobileCode() {
- return mobileCode;
- }
-
- public void setAuthenticated(boolean isAuthenticated) throws IllegalArgumentException {
- if (isAuthenticated) {
- throw new IllegalArgumentException("Cannot set this token to trusted - use constructor which takes a GrantedAuthority list instead");
- } else {
- super.setAuthenticated(false);
- }
- }
-
- public void eraseCredentials() {
- super.eraseCredentials();
- this.credentials = null;
- }
- }
2.1.2 用户名密码
针对用户名密码方式,我们可以直接使用自带的DaoAuthenticationProvider以及对应的UsernamePasswordAuthenticationToken。
2.2 实现UserDetailService
UserDetailService服务用以返回当前登录用户的用户信息,可以每一种认证方式实现对应的UserDetailService,也可以使用同一个。这里我们使用同一个UserDetailService服务,代码如下:
MyUserDetailsService.class
- import com.google.common.collect.Lists;
- import org.springframework.security.core.AuthenticationException;
- import org.springframework.security.core.userdetails.UserDetails;
- import org.springframework.security.core.userdetails.UserDetailsService;
- import org.springframework.security.core.userdetails.UsernameNotFoundException;
- import org.springframework.security.crypto.bcrypt.BCryptPasswordEncoder;
- import org.springframework.stereotype.Service;
-
- @Service
- public class MyUserDetailsService implements UserDetailsService {
- @Override
- public UserDetails loadUserByUsername(String username) throws AuthenticationException {
- MyUser myUser;
- // 这里模拟从数据库中获取用户信息
- if (username.equals("admin")) {
- myUser = new MyUser("admin", new BCryptPasswordEncoder().encode("123456"), Lists.newArrayList("p1", "p2"));
- myUser.setAge(25);
- myUser.setSex(1);
- myUser.setAddress("xxxx小区");
- return myUser;
- } else {
- throw new UsernameNotFoundException("用户不存在");
- }
- }
- }
MyUser.class
- import com.google.common.collect.Lists;
- import org.springframework.security.core.GrantedAuthority;
- import org.springframework.security.core.userdetails.User;
- import java.util.List;
- import java.util.Optional;
- import java.util.stream.Collectors;
-
- public class MyUser extends User {
-
- private int sex;
- private int age;
- private String address;
- public MyUser(String username, String password, List authorities) {
- super(username, password, Optional.ofNullable(authorities).orElse(Lists.newArrayList()).stream()
- .map(str -> (GrantedAuthority) () -> str)
- .collect(Collectors.toList()));
- }
-
- public int getSex() {
- return sex;
- }
-
- public void setSex(int sex) {
- this.sex = sex;
- }
-
- public int getAge() {
- return age;
- }
-
- public void setAge(int age) {
- this.age = age;
- }
-
- public String getAddress() {
- return address;
- }
-
- public void setAddress(String address) {
- this.address = address;
- }
- }
2.3 统一处理认证异常
定义一个认证异常处理器,统一处理认证异常AuthenticationException,如下
- @Component
- public class MyAuthenticationEntryPoint implements AuthenticationEntryPoint {
- @Override
- public void commence(HttpServletRequest request, HttpServletResponse response, AuthenticationException authException) throws IOException, ServletException {
- R result = R.error("用户未登录或已过期");
- response.setContentType("text/json;charset=utf-8");
- response.getWriter().write(new Gson().toJson(result));
- }
- }
2.4 配置器WebSecurityConfigurer
在配置器中我们去实例化一个认证管理器AuthenticationManager,这个认证管理器中包含了两个认证器,分别是MobilecodeAuthenticationProvider(手机验证码)、DaoAuthenticationProvider(用户名密码)。
重写config方法进行security的配置:
- 登录相关接口的放行,其他接口需要认证
- 配置认证异常处理器
MySecurityConfigurer.class
- @Configuration
- public class MySecurityConfigurer extends WebSecurityConfigurerAdapter {
-
- @Autowired
- private MyAuthenticationEntryPoint myAuthenticationEntryPoint;
-
- @Autowired
- private UserDetailsService myUserDetailsService;
-
- @Autowired
- private TokenAuthenticationFilter tokenAuthenticationFilter;
-
- @Bean
- public PasswordEncoder passwordEncoder() {
- return new BCryptPasswordEncoder();
- }
-
- @Bean
- public MobilecodeAuthenticationProvider mobilecodeAuthenticationProvider() {
- MobilecodeAuthenticationProvider mobilecodeAuthenticationProvider = new MobilecodeAuthenticationProvider();
- mobilecodeAuthenticationProvider.setUserDetailsService(myUserDetailsService);
- return mobilecodeAuthenticationProvider;
- }
-
- @Bean
- public DaoAuthenticationProvider daoAuthenticationProvider() {
- DaoAuthenticationProvider daoAuthenticationProvider = new DaoAuthenticationProvider();
- daoAuthenticationProvider.setPasswordEncoder(passwordEncoder());
- daoAuthenticationProvider.setUserDetailsService(myUserDetailsService);
- return daoAuthenticationProvider;
- }
-
- /**
- * 定义认证管理器AuthenticationManager
- * @return
- */
- @Bean
- public AuthenticationManager authenticationManager() {
- List authenticationProviders = new ArrayList();
- authenticationProviders.add(mobilecodeAuthenticationProvider());
- authenticationProviders.add(daoAuthenticationProvider());
- ProviderManager authenticationManager = new ProviderManager(authenticationProviders);
- // authenticationManager.setEraseCredentialsAfterAuthentication(false);
- return authenticationManager;
-
- }
-
- @Override
- public void configure(HttpSecurity http) throws Exception {
- http
- // 关闭csrf
- .csrf().disable()
- // 处理认证异常
- .exceptionHandling().authenticationEntryPoint(myAuthenticationEntryPoint)
- .and()
- // 权限配置,登录相关的请求放行,其余需要认证
- .authorizeRequests()
- .antMatchers("/login/*").permitAll()
- .anyRequest().authenticated()
- .and()
- // 添加token认证过滤器
- .addFilterAfter(tokenAuthenticationFilter, LogoutFilter.class)
- // 不使用session会话管理
- .sessionManagement().sessionCreationPolicy(SessionCreationPolicy.STATELESS);
- }
- }
到这里实现多种认证方式基本就结束了。
但在实际项目中,认证成功后通常会返回一个token令牌(如jwt等),后续我们将token放到请求头中进行请求,后端校验该token,校验成功后再访问相应的接口,所以这里在上面的配置中加了一个token认证过滤器TokenAuthenticationFilter。
TokenAuthenticationFilter的代码如下:
- @Component
- @WebFilter
- public class TokenAuthenticationFilter extends OncePerRequestFilter {
-
- @Override
- protected void doFilterInternal(HttpServletRequest httpServletRequest, HttpServletResponse httpServletResponse, FilterChain filterChain) throws ServletException, IOException {
- String token = httpServletRequest.getHeader("token");
-
- // 如果没有token,跳过该过滤器
- if (!StringUtils.isEmpty(token)) {
- // 模拟redis中的数据
- Map map = new HashMap();
- map.put("test_token1", new MyUser("admin", new BCryptPasswordEncoder().encode("123456"), Lists.newArrayList("p1", "p2")));
- map.put("test_token2", new MyUser("root", new BCryptPasswordEncoder().encode("123456"), Lists.newArrayList("p1")));
-
- // 这里模拟从redis获取token对应的用户信息
- MyUser myUser = map.get(token);
- if (myUser != null) {
- UsernamePasswordAuthenticationToken authRequest = new UsernamePasswordAuthenticationToken(myUser, null, myUser.getAuthorities());
- SecurityContextHolder.getContext().setAuthentication(authRequest);
- } else {
- throw new PreAuthenticatedCredentialsNotFoundException("token不存在");
- }
- }
-
- filterChain.doFilter(httpServletRequest, httpServletResponse);
- }
- }
三、测试验证
编写一个简单的Controller来验证多种登录方式,代码如下:
- @RestController
- @RequestMapping("/login")
- public class LoginController {
-
- @Autowired
- private AuthenticationManager authenticationManager;
-
- /**
- * 用户名密码登录
- * @param username
- * @param password
- * @return
- */
- @GetMapping("/usernamePwd")
- public R usernamePwd(String username, String password) {
- UsernamePasswordAuthenticationToken usernamePasswordAuthenticationToken = new UsernamePasswordAuthenticationToken(username, password);
- Authentication authenticate = null;
- try {
- authenticate = authenticationManager.authenticate(usernamePasswordAuthenticationToken);
- } catch (Exception e) {
- e.printStackTrace();
- return R.error("登陆失败");
- }
-
- String token = UUID.randomUUID().toString().replace("-", "");
- return R.ok(token, "登陆成功");
- }
-
- /**
- * 手机验证码登录
- * @param phone
- * @param mobileCode
- * @return
- */
- @GetMapping("/mobileCode")
- public R mobileCode(String phone, String mobileCode) {
- MobilecodeAuthenticationToken mobilecodeAuthenticationToken = new MobilecodeAuthenticationToken(phone, mobileCode);
- Authentication authenticate = null;
- try {
- authenticate = authenticationManager.authenticate(mobilecodeAuthenticationToken);
- } catch (Exception e) {
- e.printStackTrace();
- return R.error("验证码错误");
- }
-
- String token = UUID.randomUUID().toString().replace("-", "");
- return R.ok(token, "登陆成功");
- }
- }
- 用户名密码
访问/login/usernamePwd接口进行登录,账号密码为admin/123456,可以看到访问成功,如下图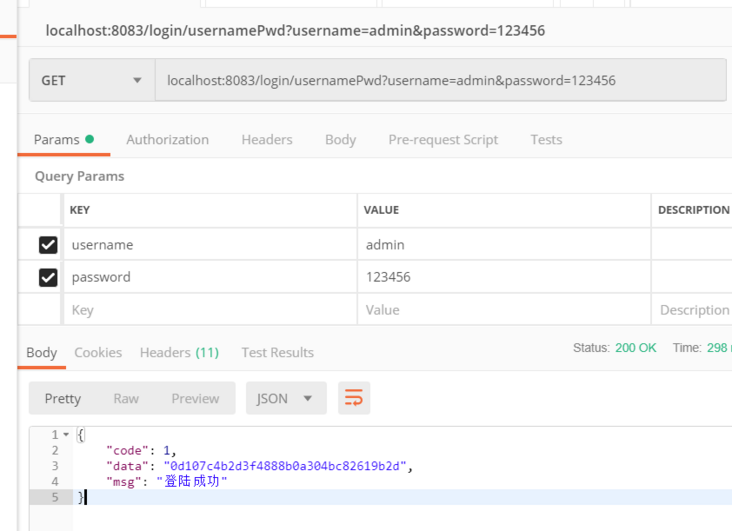
- 手机验证码
访问/login/mobileCode接口进行登录,如下图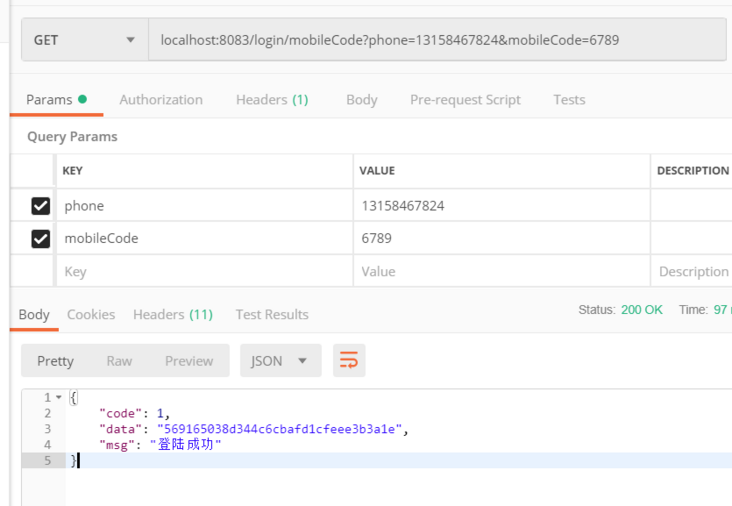
- 带token访问
在请求头带上token访问接口,如下图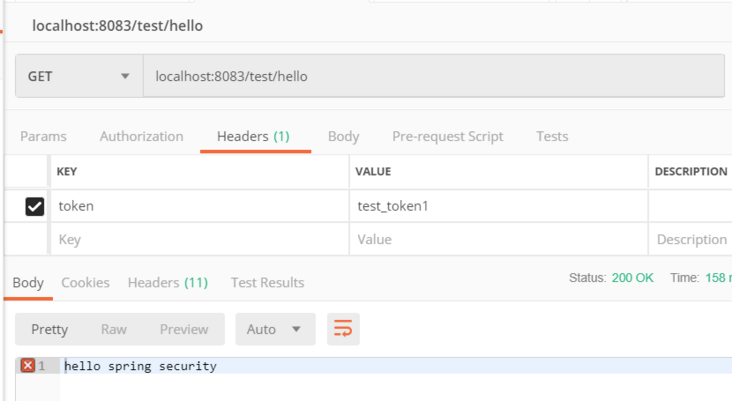
- 不带token访问
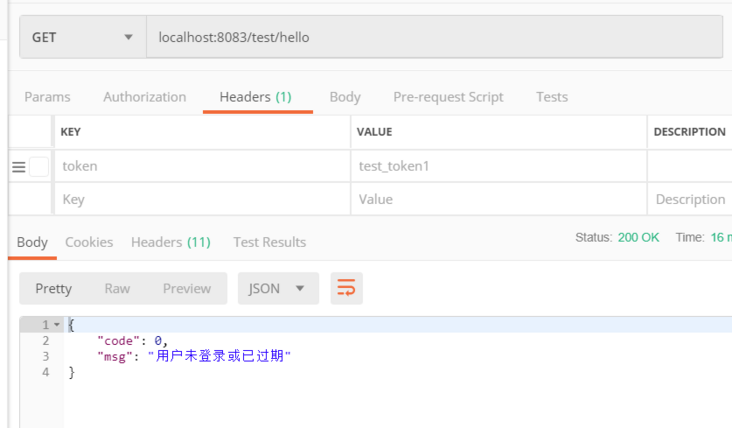
到这里Spring Security实现多种认证方式就结束了,如有错误,感谢指正。


