
- 1AMD处理器电脑使用VMware Workstation Pro 16.2.0安装macOS 10.13/10.15.3_amd对vmware兼容吗
- 2metersphere接口录制器
- 3图论算法——环和有向无环图
- 4LeetCode 矩阵置零_矩阵 恰好k个1变为0
- 5c# 前后台协同
- 6如何做一个基于微信教室预约小程序系统毕业设计毕设作品_微信小程序预约系统设计
- 7django:缓存_django 缓存
- 8EOS源码备忘-Push Transaction机制_pushtransaction 唤醒tp签名
- 9vue3+element plus组件库中el-carousel组件走马灯特效,当图片变动时下面数字也随着图片动态变化_el-carousel 动态
- 10基于SSH+MySQL的食品销售购物商城网站设计与实现_用ssh框架实现网上商城网站
ubuntu下vscode+STM32CubeMX+openocd+stlinkv2搭建STM32开发调试下载环境
赞
踩
1、换源
# 默认注释了源码镜像以提高 apt update 速度,如有需要可自行取消注释
deb https://mirrors.tuna.tsinghua.edu.cn/ubuntu/ jammy main restricted universe multiverse
# deb-src https://mirrors.tuna.tsinghua.edu.cn/ubuntu/ jammy main restricted universe multiverse
deb https://mirrors.tuna.tsinghua.edu.cn/ubuntu/ jammy-updates main restricted universe multiverse
# deb-src https://mirrors.tuna.tsinghua.edu.cn/ubuntu/ jammy-updates main restricted universe multiverse
deb https://mirrors.tuna.tsinghua.edu.cn/ubuntu/ jammy-backports main restricted universe multiverse
# deb-src https://mirrors.tuna.tsinghua.edu.cn/ubuntu/ jammy-backports main restricted universe multiverse

deb http://security.ubuntu.com/ubuntu/ jammy-security main restricted universe multiverse
# deb-src http://security.ubuntu.com/ubuntu/ jammy-security main restricted universe multiverse

# 预发布软件源,不建议启用
# deb https://mirrors.tuna.tsinghua.edu.cn/ubuntu/ jammy-proposed main restricted universe multiverse
# # deb-src https://mirrors.tuna.tsinghua.edu.cn/ubuntu/ jammy-proposed main restricted universe multiverse
- 1
- 2
- 3
- 4
- 5
- 6
- 7
- 8
- 9
- 10
- 11
- 12
- 13
- 14
复制上边内容进行修改
sudo vim /etc/apt/sources.list
- 1
换源后,更新当前的源
sudo apt update
sudo apt upgrade
- 1
- 2
2、下载相关软件
下载deb版本
sudo dpki -i 下载的VScode deb文件
- 1
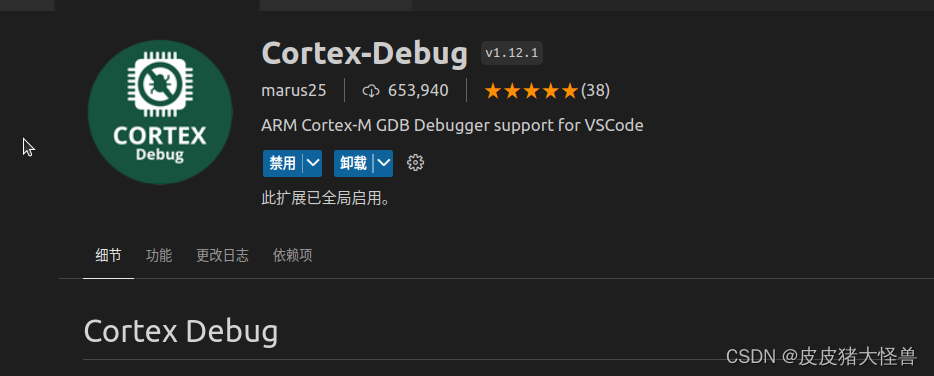
安装插件
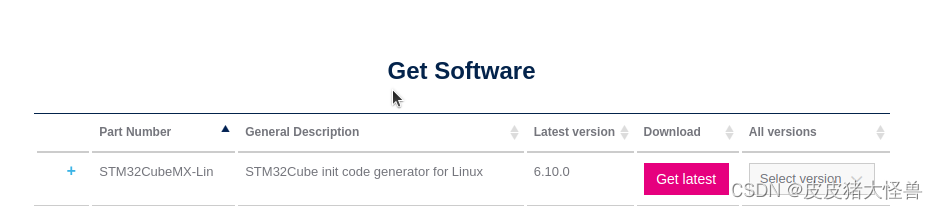
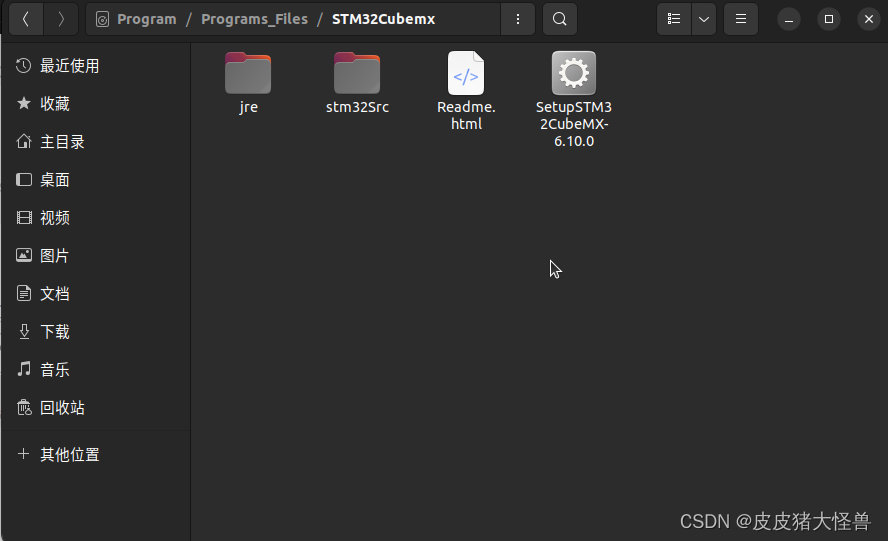
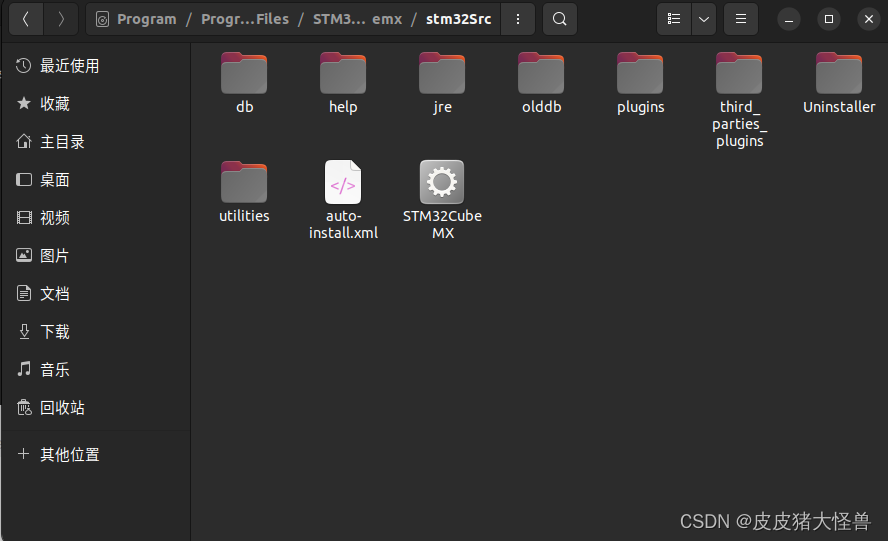
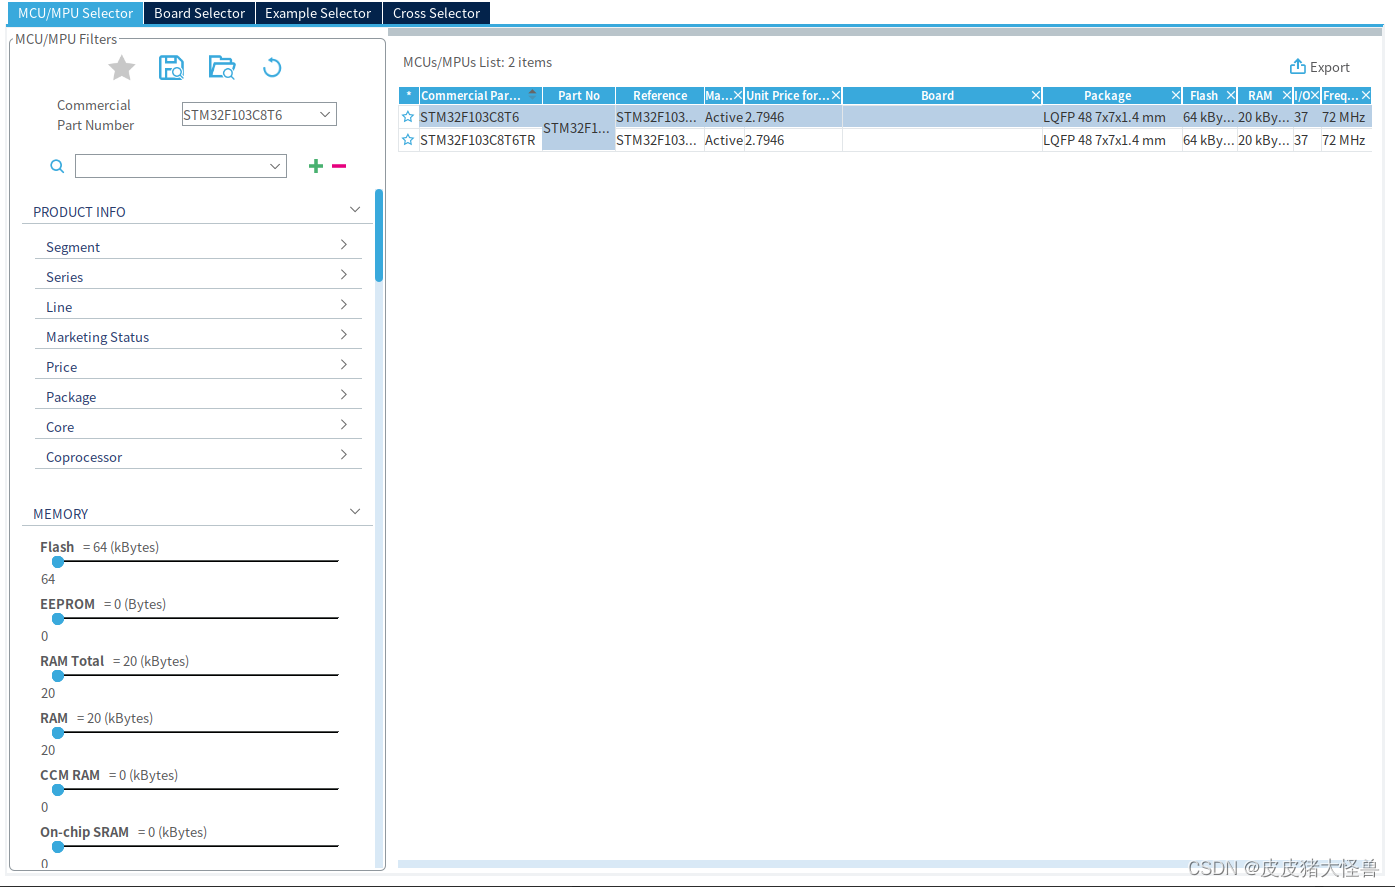
3、STM32CubeMX安装
STM32CubeMX
给他增加图标到菜单
vim /usr/share/applications/stm32CubeMX.desktop
- 1
[Desktop Entry]
Type=Application
Name=STM32CubeMX
Comment=STM32 Development Environment
Encoding=UTF-8
StartupNotify=true
Terminal=false
Categories=Development;java;c;c++;
icon= ##########图标的路径,自己找一个就行
Exec= #########可执行文件的路径
- 1
- 2
- 3
- 4
- 5
- 6
- 7
- 8
- 9
- 10
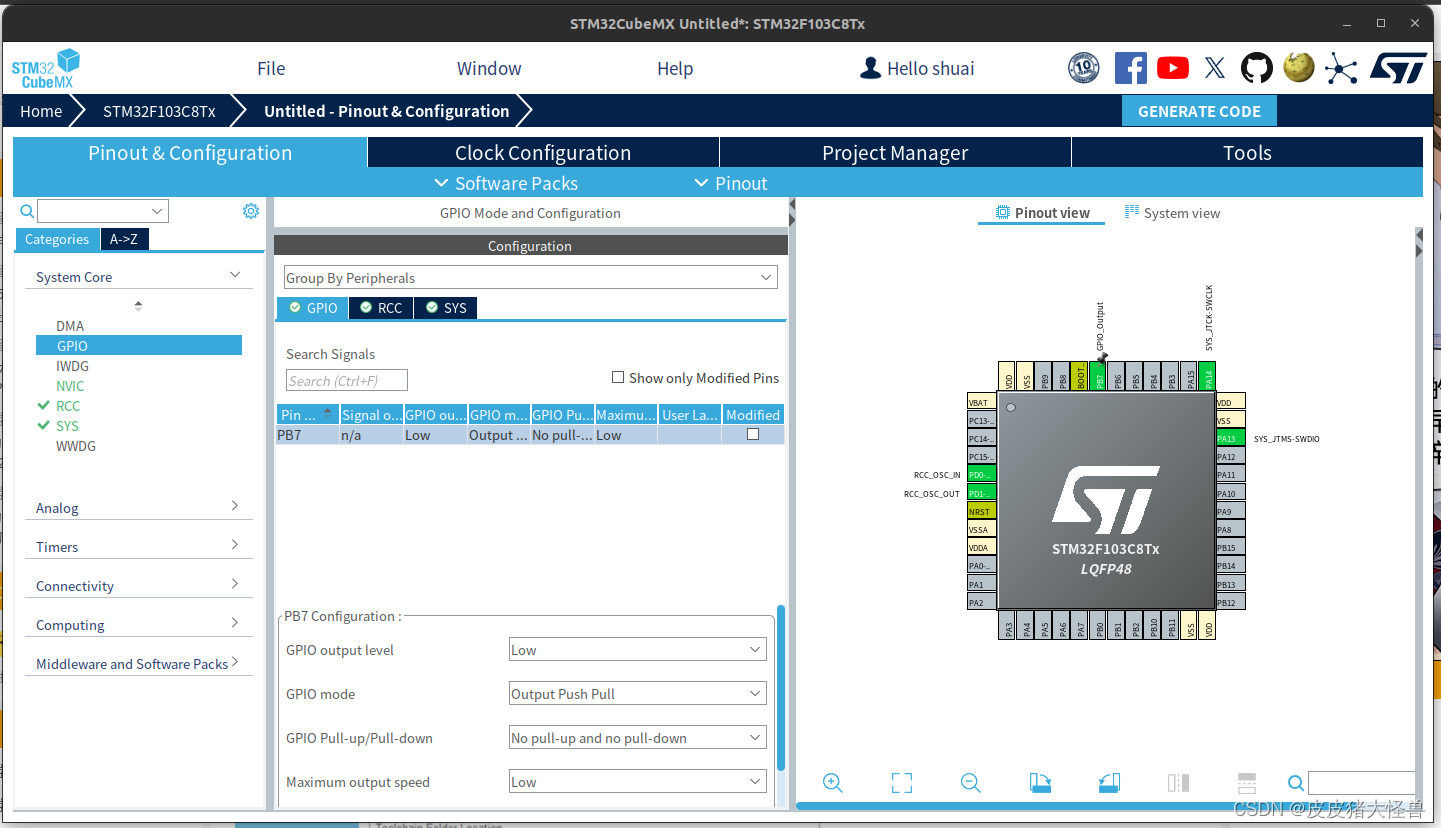
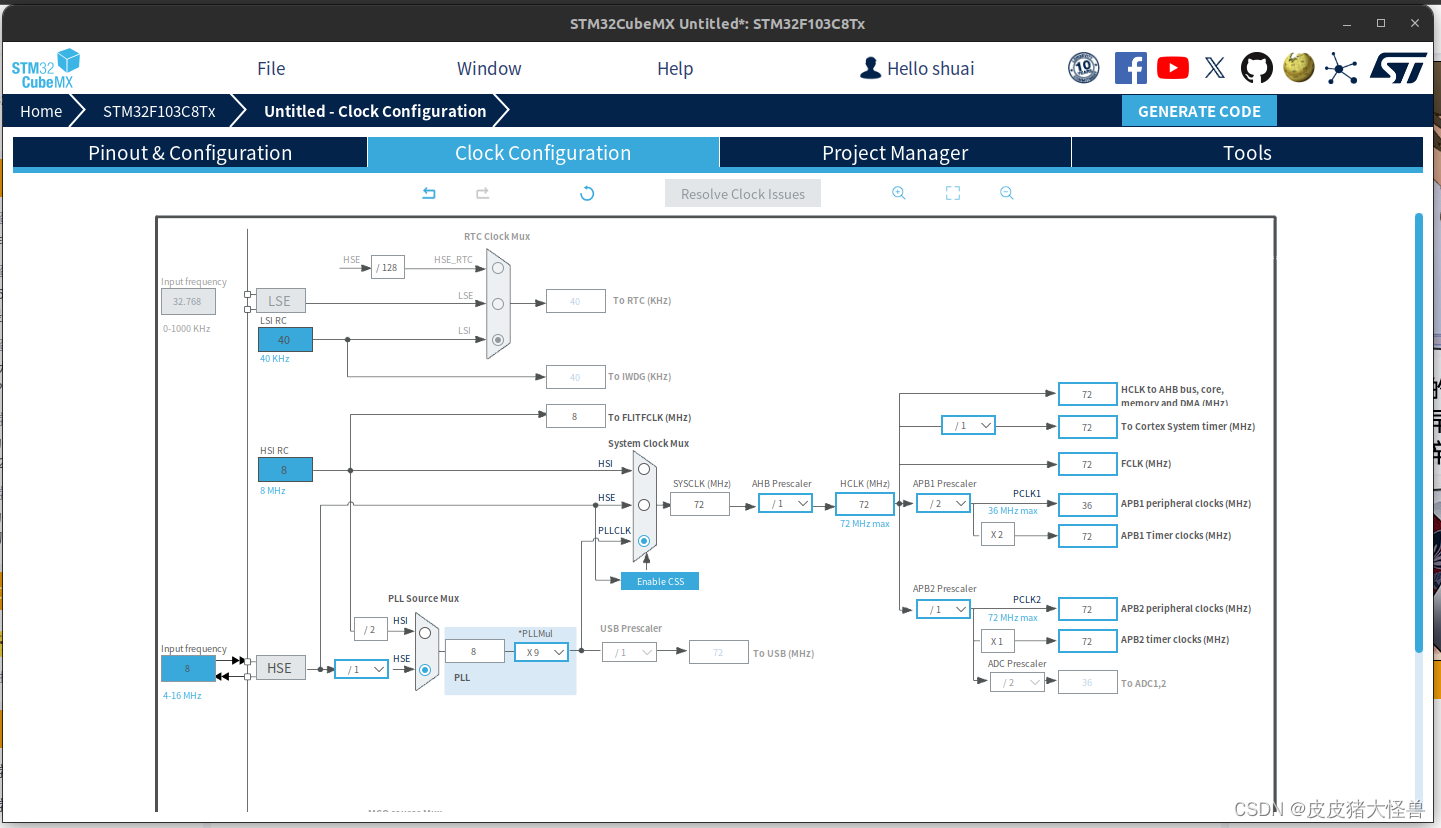
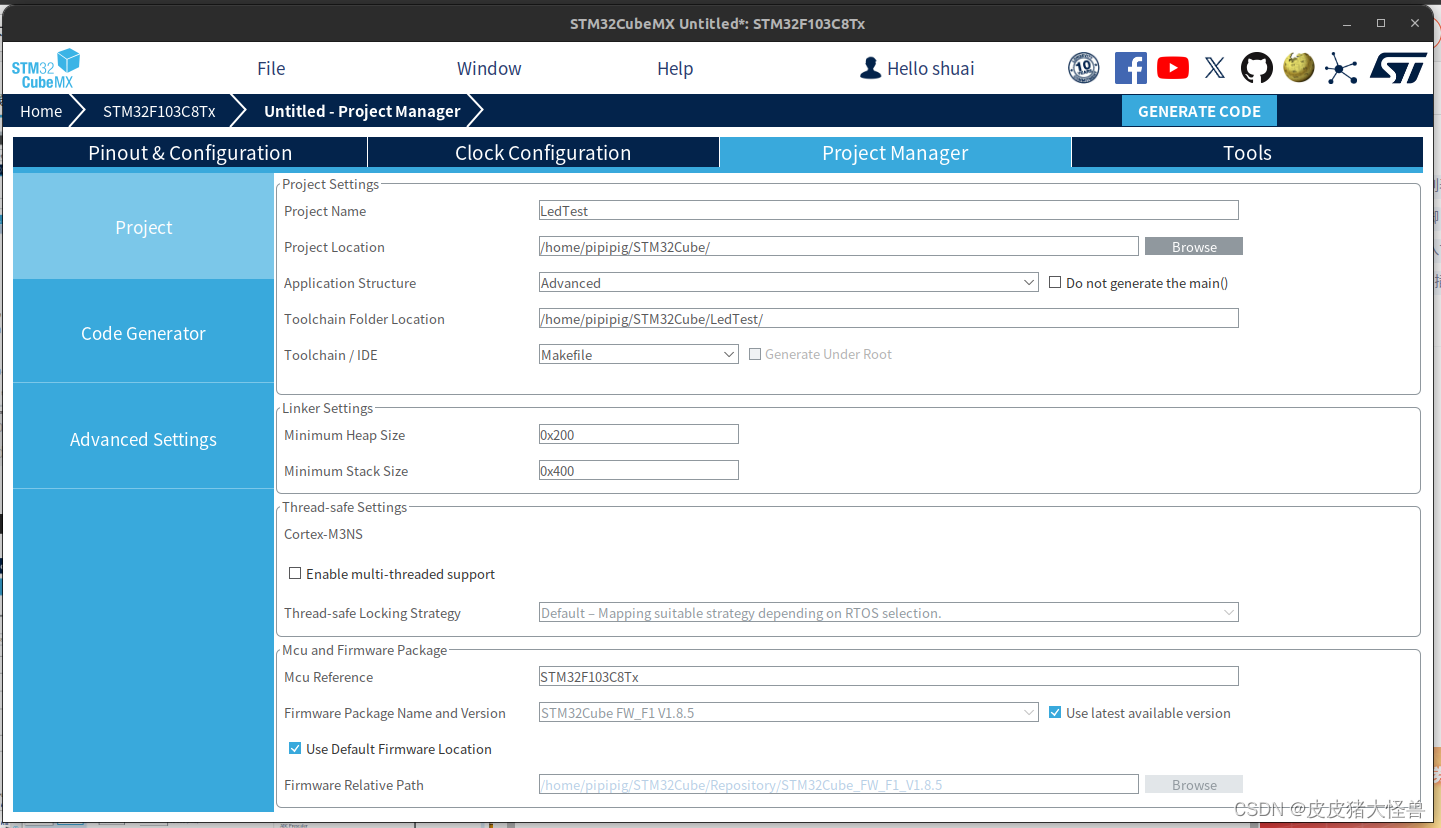
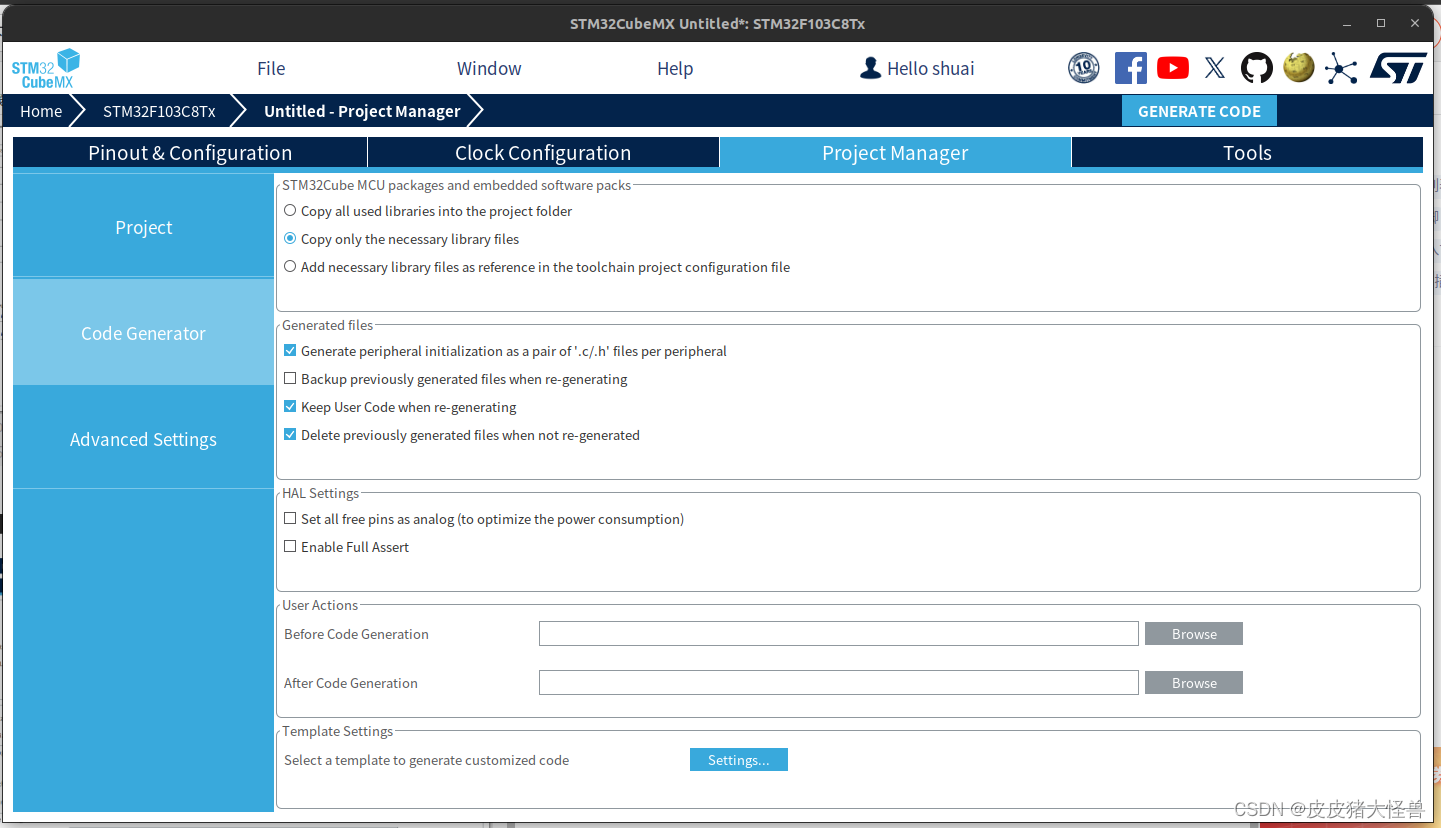
3.1 新建一个点灯的小程序
一定一定记得这个,要不后期调试和下载报错

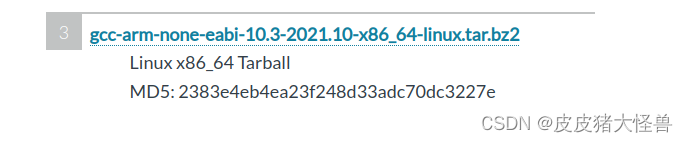
4 arm-none-eabi交叉编译工具安装
arm-none-eabi
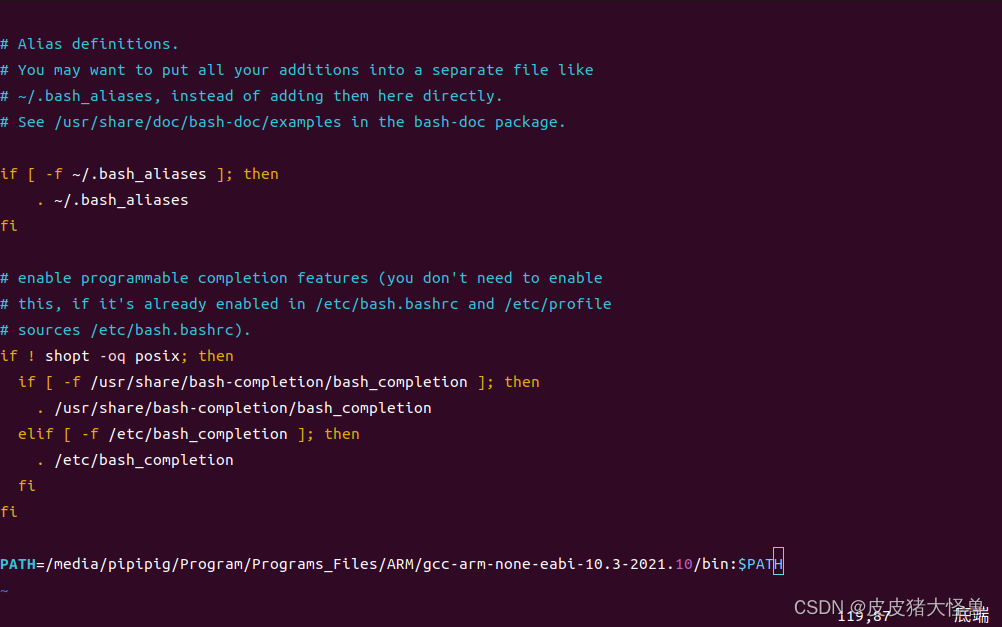
解压后将bin文件夹加入PATH
vim ~/.bashrc
加入PATH=你的路径:$PATH
- 1
- 2
source ~/.bashrc
- 1
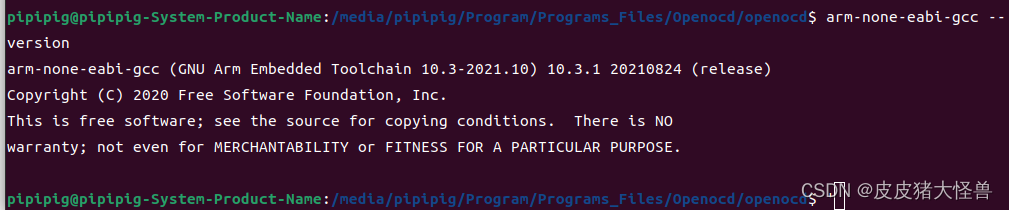
验证是否成功
arm-none-eabi-gcc --version
- 1
arm-none-eabi-gdb --version
- 1
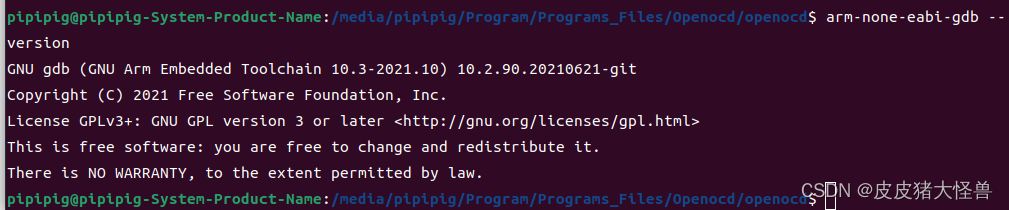
如果这里你的GDB有问题,请一定要解决。我碰到了缺少 error while loading shared libraries: libncurses.so.5,解决方法参考
5、安装gdbserver
wget https://ftp.gnu.org/gnu/gdb/gdb-14.2.tar.xz

tar -xvf gdb-14.2.tar.xz

./configure

make

sudo make install
- 1
- 2
- 3
- 4
- 5
- 6
- 7
- 8
- 9
6、安装openocd
sudo apt-get install build-essential pkg-config autoconf automake libtool libusb-dev libusb-1.0-0-dev libhidapi-dev

sudo apt-get install libtool libsysfs-dev

git clone git://git.code.sf.net/p/openocd/code openocd

cd openocd

./bootstrap

./configure

make

sudo make install
- 1
- 2
- 3
- 4
- 5
- 6
- 7
- 8
- 9
- 10
- 11
- 12
- 13
- 14
- 15
如果这里bootstrap阶段,告诉你子模块出错,碰到EOF提前结束,说明子模块下载失败,可以按照如下修改
vim .gitmodules
修改其子模块地址,可以去gitee上找镜像拉取,我这里jimtcl报错
- 1
- 2

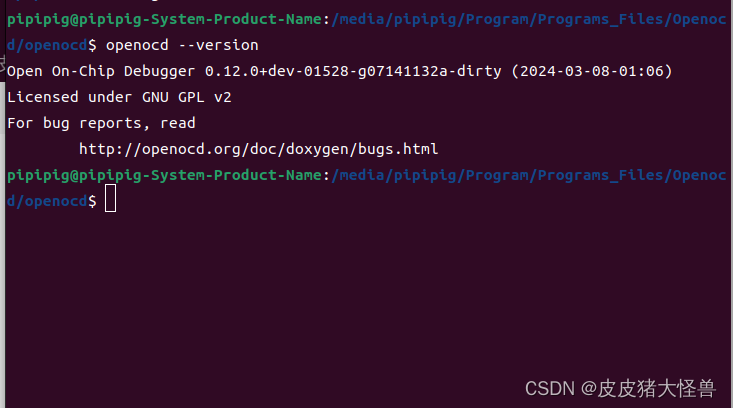
6.1验证是否成功
openocd --version
- 1
7、STLink安装
依赖安装
sudo apt-get install libusb-1.0

sudo apt-get install cmake

sudo apt-get install libgtk-3-dev
- 1
- 2
- 3
- 4
- 5
git clone https://github.com/stlink-org/stlink

cd stlink

cmake .

make

cd bin

sudo cp st-* /usr/local/bin

cd ../lib

sudo cp *.so* /lib32

sudo cp config/udev/rules.d/49-stlinkv* /etc/udev/rules.d/

- 1
- 2
- 3
- 4
- 5
- 6
- 7
- 8
- 9
- 10
- 11
- 12
- 13
- 14
- 15
- 16
- 17
- 18
验证是否成功
lsusb
- 1

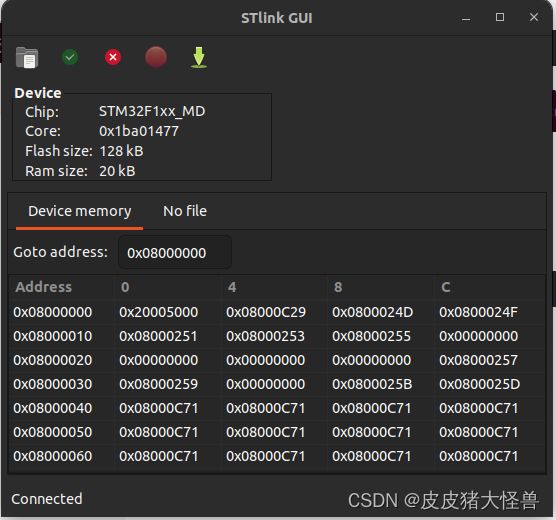
7.1
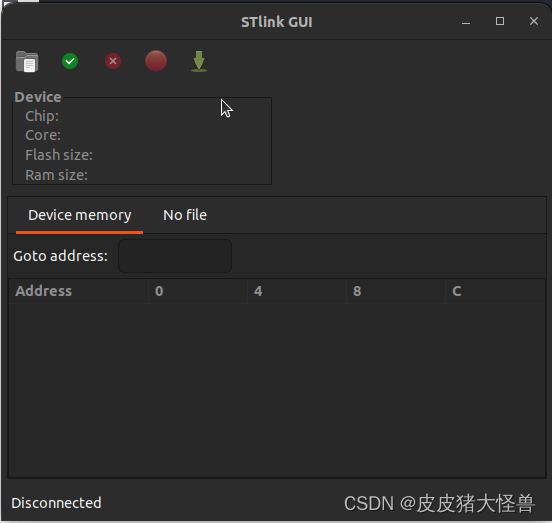
安装界面化烧录工具
ubuntu deb下载地址
sudo dpkg -i 你的下载文件.deb
- 1
8、进入Vscode进行点灯
在main.c的while(1)中加入
HAL_GPIO_WritePin(GPIOB, GPIO_PIN_7, 1);
- 1
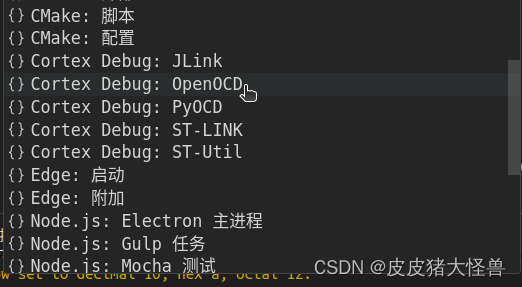
点击vscode的调试,添加配置,选择
{
    // 使用 IntelliSense 了解相关属性。
    // 悬停以查看现有属性的描述。
    // 欲了解更多信息,请访问: https://go.microsoft.com/fwlink/?linkid=830387
    "version": "0.2.0",
    "configurations": [
        {
            "cwd": "${workspaceRoot}",
            "executable": "./build/你的项目生成的文件.elf",
            "name": "Debug with OpenOCD",
            "request": "launch",
            "type": "cortex-debug",
            "servertype": "openocd",
            "configFiles": [
                "/usr/share/openocd/scripts/interface/stlink-v2-1.cfg",
                "/usr/share/openocd/scripts/target/stm32f1x.cfg"
            ],
            "searchDir": [],
            "runToEntryPoint": "main",
            "showDevDebugOutput": "none"
        }
    ]
}
- 1
- 2
- 3
- 4
- 5
- 6
- 7
- 8
- 9
- 10
- 11
- 12
- 13
- 14
- 15
- 16
- 17
- 18
- 19
- 20
- 21
- 22
- 23
需要修改的是executable,变成你的elf文件
configFiles,变成你的stlink-v2-1.cfg(STLink驱动),stm32f1x.cfg(和你开发板型号有关)文件的地址,具体的可以查看
/usr/share/openocd/scripts/interface/stlink-v2-1.cfg
/usr/share/openocd/scripts/target/stm32f1x.cfg
- 1
- 2
进入终端,输入
make
- 1
即可编译。当然你也可以配置tasks.json
{
    // See https://go.microsoft.com/fwlink/?LinkId=733558
    // for the documentation about the tasks.json format
    "version": "2.0.0",
    "tasks": [
        {
            "label": "build",
            "type": "shell",
            "command": "make",
            "problemMatcher": [],
            "group": {
                "kind": "build",
                "isDefault": true
            }
        },

    ]
}
- 1
- 2
- 3
- 4
- 5
- 6
- 7
- 8
- 9
- 10
- 11
- 12
- 13
- 14
- 15
- 16
- 17
- 18
9、下载烧录
- 命令行烧录
st-flash write 你生成的hex文件 0x8000000
- 1
-
UI界面烧录
-
配置tasks.json进行烧录
{
    // See https://go.microsoft.com/fwlink/?LinkId=733558
    // for the documentation about the tasks.json format
    "version": "2.0.0",
    "tasks": [
        {
            "label": "build",
            "type": "shell",
            "command": "make",
            "problemMatcher": [],
            "group": {
                "kind": "build",
                "isDefault": true
            }
        },
        {
            "label": "download",
            "type": "shell",
            "command": "st-flash write 你生成的hex文件 0x8000000"
        }
    ]
}
- 1
- 2
- 3
- 4
- 5
- 6
- 7
- 8
- 9
- 10
- 11
- 12
- 13
- 14
- 15
- 16
- 17
- 18
- 19
- 20
- 21
- 22
10、调试
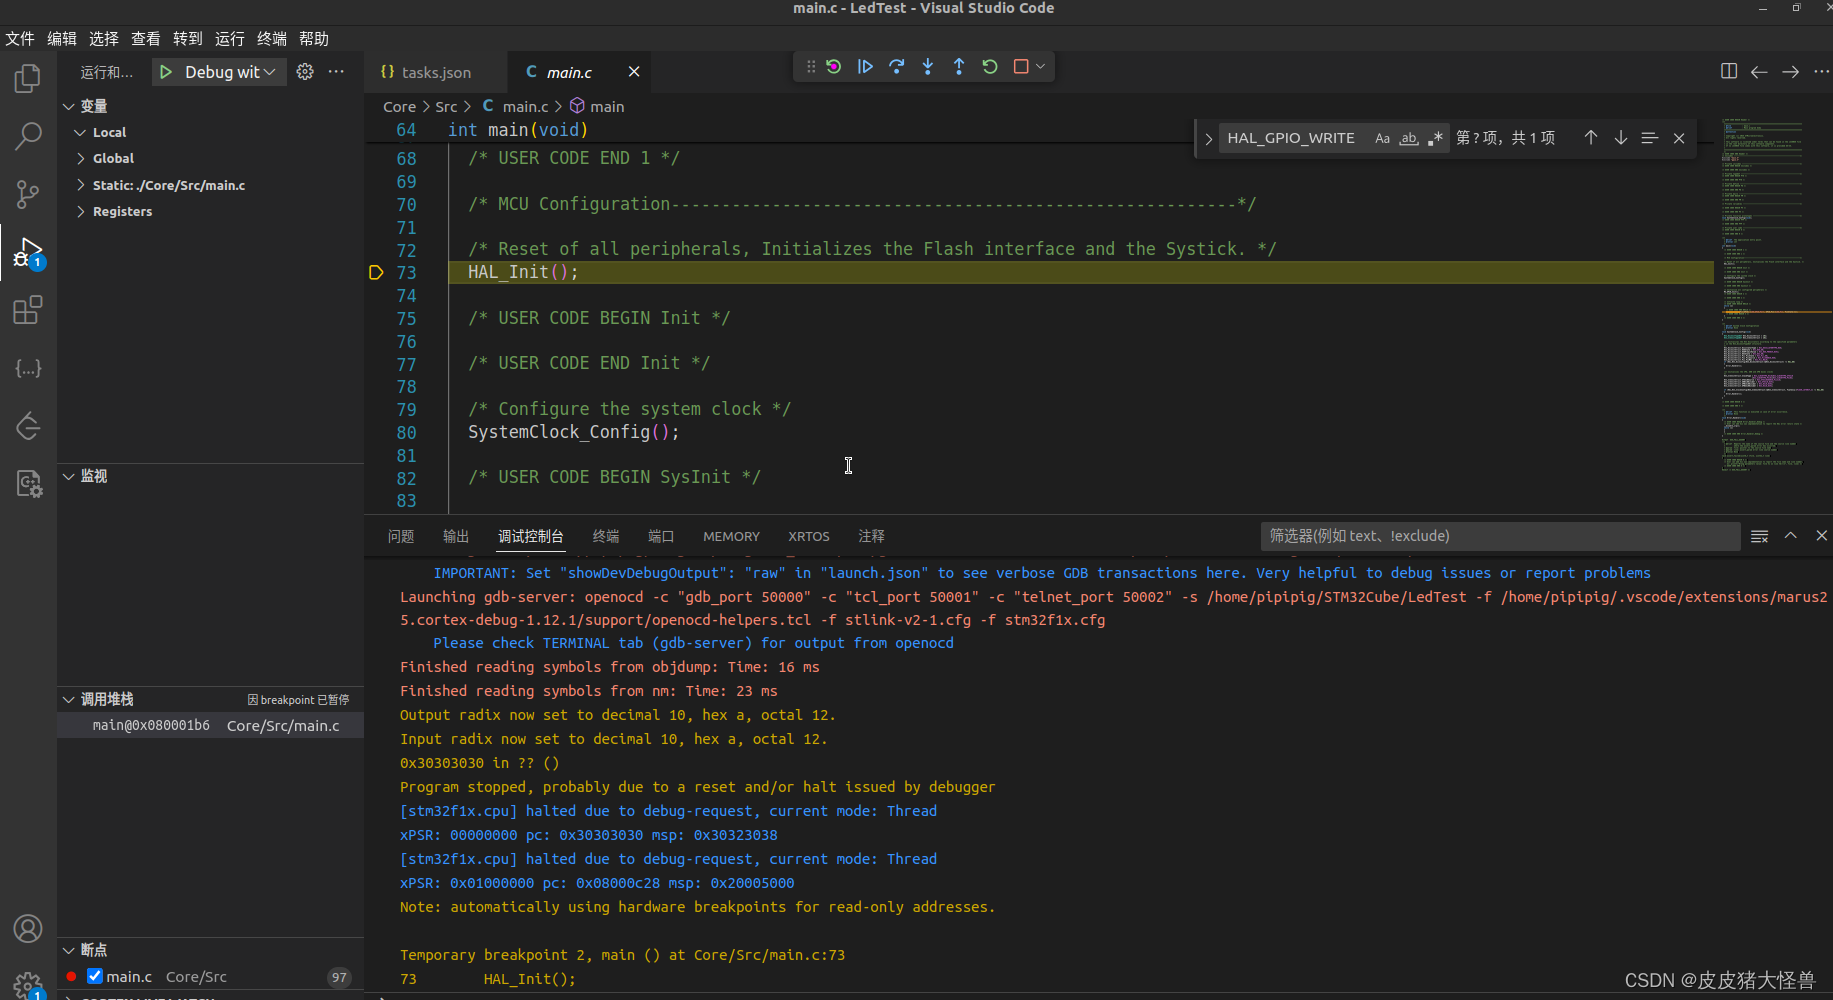
如果你卡在 IMPORTANT: Set “showDevDebugOutput”: “raw” in “launch.json” to see verbose GDB transactions here. Very helpful to debug issues or report problems
的话,很大可能是你的arm-none-eabi-gdb出错了,可以尝试看看
arm-none-eabi-gdb -v
- 1
一切路径不能有中文,有中文很容易报错.OK,差不多就这样,折腾了两个晚上,记录一下,坑比较多,很少有写Ubuntu在STM32开发的

