
热门标签
热门文章
- 1【技术教程】AI人体检测/人脸识别智能分析网关V2的配置步骤_ai智能人脸识别分析控制系统
- 2win10系统运行sh脚本_win10 运行run.sh
- 3智能交通未来:从自动驾驶到智能城市
- 4wget/curl命令行设置代理的方法_curl noproxy
- 5计算机网络原理摘要,计算机网络原理与应用2摘要.ppt
- 6某马2024SpringCloud微服务开发与实战 bug记录与微服务知识拆解(MybatisPlus、Docker、MQ、ES、Redis)第四章重制版_receive server push request, request = notifysubsc
- 7在Ubuntu子系统上安装宝塔面板(BT Panel)
- 8C语言printf怎么折行_c 语言 printf 打印字符串 中间折行
- 9【Linux常用基本指令大全】详解!!!_linux操作指令
- 10入职鹅厂一周年...
当前位置: article > 正文
2024年运维最全吊炸天的 Kafka 图形化工具 Eagle,必须推荐给你!_kafka-eagle
作者:你好赵伟 | 2024-08-01 02:53:54
赞
踩
kafka-eagle
Kafka是当下非常流行的消息中间件,据官网透露,已有成千上万的公司在使用它。最近实践了一波Kafka,确实很好很强大。今天我们来从三个方面学习下Kafka:Kafaka在Linux下的安装,Kafka的可视化工具,Kafka和SpringBoot结合使用。希望大家看完后能快速入门Kafka,掌握这个流行的消息中间件!
Kafka简介
Kafka是由LinkedIn公司开发的一款开源分布式消息流平台,由Scala和Java编写。主要作用是为处理实时数据提供一个统一、高吞吐、低延迟的平台,其本质是基于发布订阅模式的消息引擎系统。
Kafka具有以下特性:
- 高吞吐、低延迟:Kafka收发消息非常快,使用集群处理消息延迟可低至2ms。
- 高扩展性:Kafka可以弹性地扩展和收缩,可以扩展到上千个broker,数十万个partition,每天处理数万亿条消息。
- 永久存储:Kafka可以将数据安全地存储在分布式的,持久的,容错的群集中。
- 高可用性:Kafka在可用区上可以有效地扩展群集,某个节点宕机,集群照样能够正常工作。
Kafka安装
我们将采用Linux下的安装方式,安装环境为CentOS 7.6。此处没有采用Docker来安装部署,个人感觉直接安装更简单(主要是官方没提供Docker镜像)!
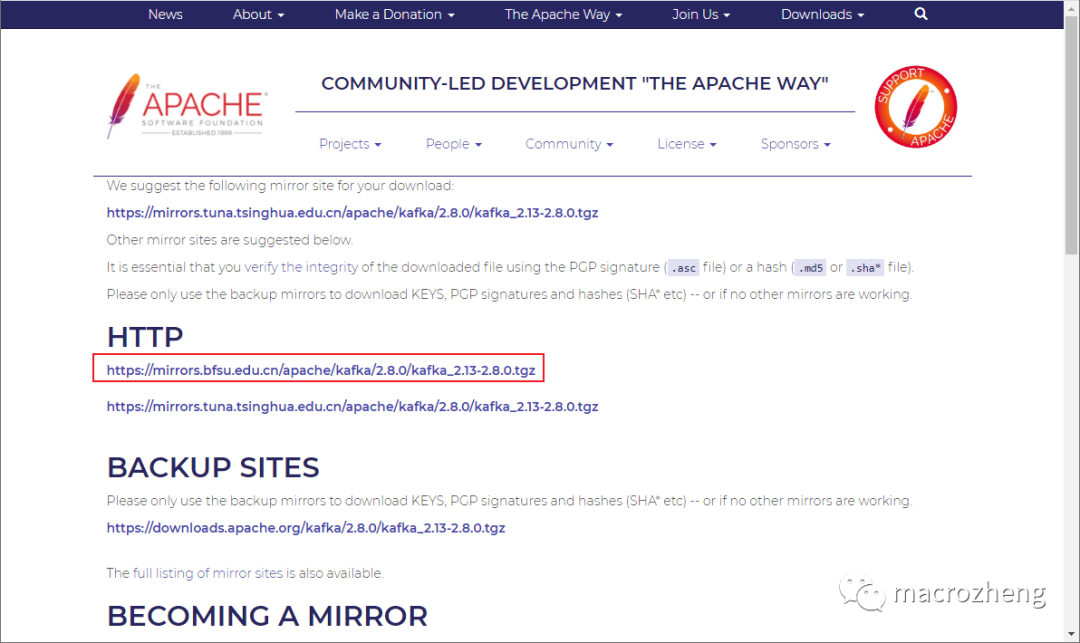
- 首先我们需要下载Kafka的安装包,下载地址:https://mirrors.bfsu.edu.cn/apache/kafka/2.8.0/kafka_2.13-2.8.0.tgz
- 下载完成后将Kafka解压到指定目录:
cd /mydata/kafka/
tar -xzf kafka_2.13-2.8.0.tgz
- 1
- 2
- 3
- 解压完成后进入到解压目录:
cd kafka_2.13-2.8.0
- 1
- 2
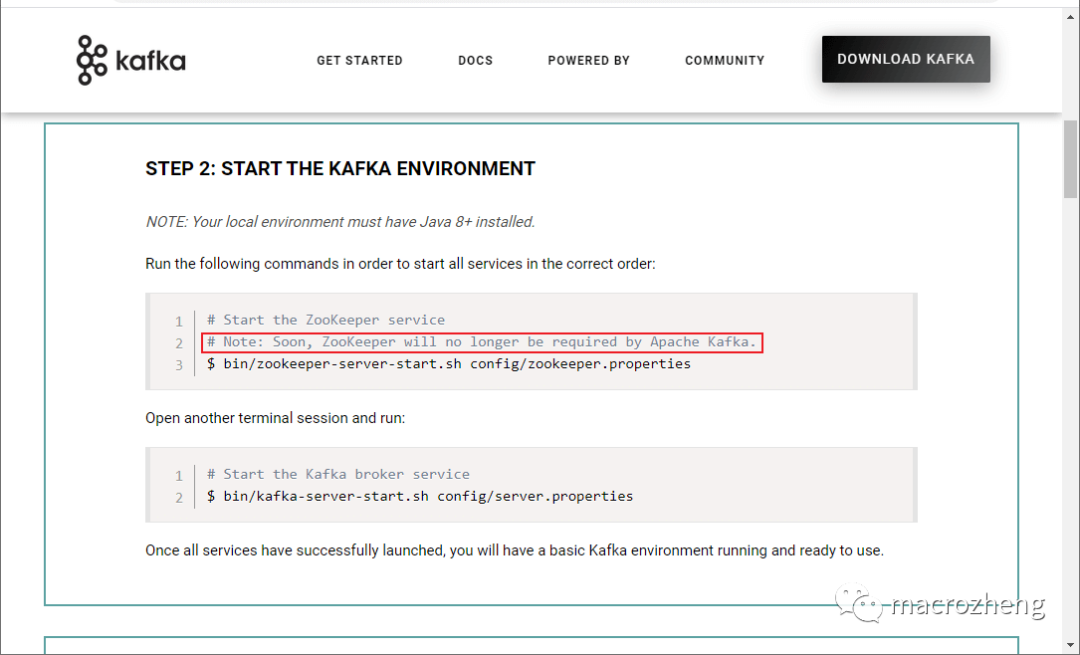
- 虽然有消息称Kafka即将移除Zookeeper,但是在Kafka最新版本中尚未移除,所以启动Kafka前还是需要先启动Zookeeper;
- 启动Zookeeper服务,服务将运行在
2181端口;
# 后台运行服务,并把日志输出到当前文件夹下的zookeeper-out.file文件中
nohup bin/zookeeper-server-start.sh config/zookeeper.properties > zookeeper-out.file 2>&1 &
- 1
- 2
- 3
- 由于目前Kafka是部署在Linux服务器上的,外网如果想要访问,需要修改Kafka的配置文件
config/server.properties,修改下Kafka的监听地址,否则会无法连接;
############################# Socket Server Settings #############################

# The address the socket server listens on. It will get the value returned from
# java.net.InetAddress.getCanonicalHostName() if not configured.
#   FORMAT:
#     listeners = listener_name://host_name:port
#   EXAMPLE:
#     listeners = PLAINTEXT://your.host.name:9092
listeners=PLAINTEXT://192.168.5.78:9092
- 1
- 2
- 3
- 4
- 5
- 6
- 7
- 8
- 9
- 10
- 最后启动Kafka服务,服务将运行在
9092端口。
# 后台运行服务,并把日志输出到当前文件夹下的kafka-out.file文件中
nohup bin/kafka-server-start.sh config/server.properties > kafka-out.file 2>&1 &
- 1
- 2
- 3
Kafka命令行操作
接下来我们使用命令行来操作下Kafka,熟悉下Kafka的使用。
- 首先创建一个叫
consoleTopic的Topic;
bin/kafka-topics.sh --create --topic consoleTopic --bootstrap-server 192.168.5.78:9092
- 1
- 2
- 接下来查看Topic;
bin/kafka-topics.sh --describe --topic consoleTopic --bootstrap-server 192.168.5.78:9092
- 1
- 2
- 会显示如下Topic信息;
Topic: consoleTopic TopicId: tJmxUQ8QRJGlhCSf2ojuGw PartitionCount: 1 ReplicationFactor: 1 Configs: segment.bytes=1073741824
 Topic: consoleTopic Partition: 0 Leader: 0 Replicas: 0 Isr: 0
- 1
- 2
- 3
- 向Topic中发送消息:
bin/kafka-console-producer.sh --topic consoleTopic --bootstrap-server 192.168.5.78:9092
- 1
- 2
- 直接在命令行中输入信息即可发送;

- 重新打开一个窗口,通过如下命令可以从Topic中获取消息:
bin/kafka-console-consumer.sh --topic consoleTopic --from-beginning --bootstrap-server 192.168.5.78:9092
- 1
- 2

Kafka可视化
使用命令行操作Kafka确实有点麻烦,接下来我们试试可视化工具
kafka-eagle。
安装JDK
如果你使用的是CentOS的话,默认没有安装完整版的JDK,需要自行安装!
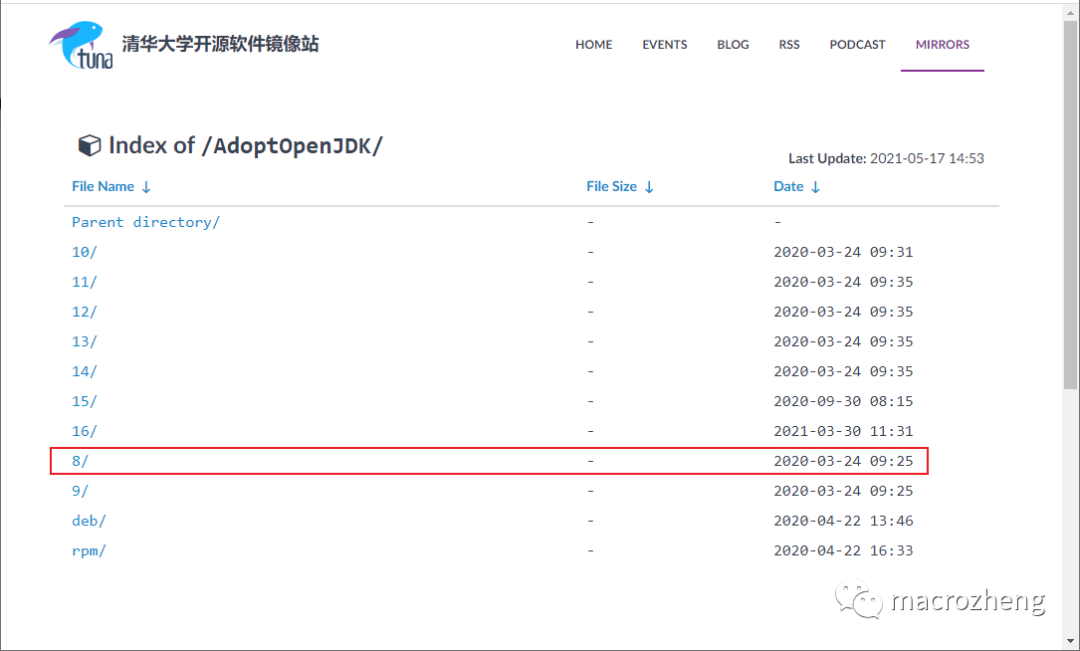
- 下载JDK 8,下载地址:https://mirrors.tuna.tsinghua.edu.cn/AdoptOpenJDK/
- 下载完成后将JDK解压到指定目录;
cd /mydata/java
tar -zxvf OpenJDK8U-jdk_x64_linux_xxx.tar.gz
mv OpenJDK8U-jdk_x64_linux_xxx.tar.gz jdk1.8
- 1
- 2
- 3
- 4
- 在
/etc/profile文件中添加环境变量JAVA_HOME。
vi /etc/profile
# 在profile文件中添加
export JAVA_HOME=/mydata/java/jdk1.8
export PATH=$PATH:$JAVA_HOME/bin
# 使修改后的profile文件生效
. /etc/profile
- 1
- 2
- 3
- 4
- 5
- 6
- 7
安装kafka-eagle
- 下载
kafka-eagle的安装包,下载地址:https://github.com/smartloli/kafka-eagle-bin/releases
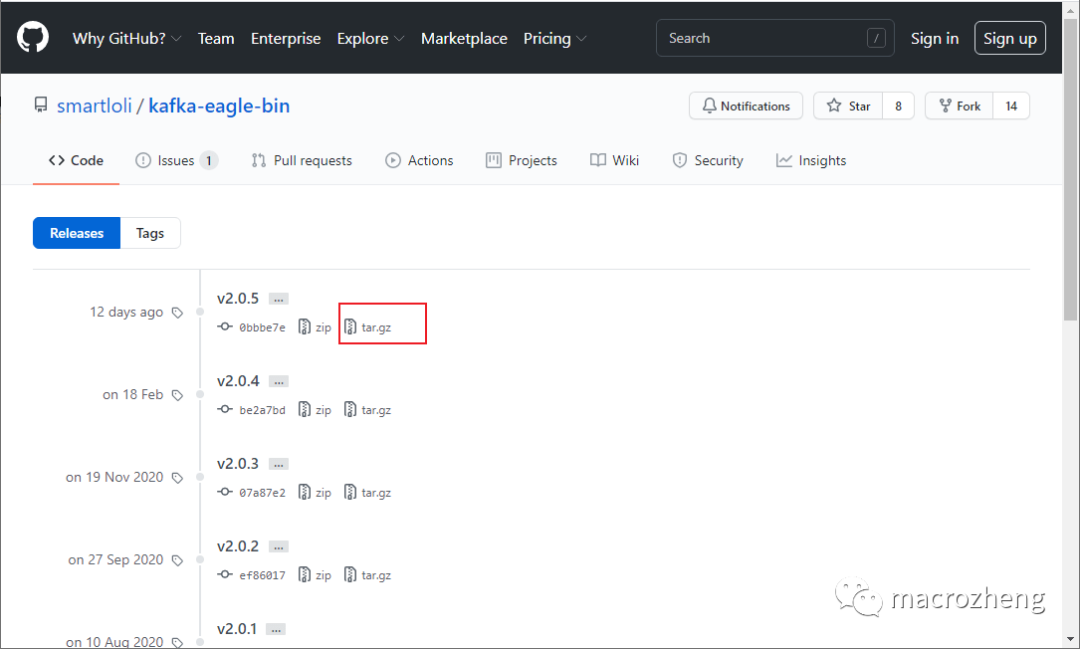
- 下载完成后将
kafka-eagle解压到指定目录;
cd /mydata/kafka/
tar -zxvf kafka-eagle-web-2.0.5-bin.tar.gz
- 1
- 2
- 3
- 在
/etc/profile文件中添加环境变量KE_HOME;
vi /etc/profile
# 在profile文件中添加
export KE_HOME=/mydata/kafka/kafka-eagle-web-2.0.5
export PATH=$PATH:$KE_HOME/bin
# 使修改后的profile文件生效
. /etc/profile
- 1
- 2
- 3
- 4
- 5
- 6
- 7
- 安装MySQL并添加数据库
ke,kafka-eagle之后会用到它; - 修改配置文件
$KE_HOME/conf/system-config.properties,主要是修改Zookeeper的配置和数据库配置,注释掉sqlite配置,改为使用MySQL;
######################################
# multi zookeeper & kafka cluster list
######################################
kafka.eagle.zk.cluster.alias=cluster1
cluster1.zk.list=localhost:2181

######################################
# kafka eagle webui port
######################################
kafka.eagle.webui.port=8048

######################################
# kafka sqlite jdbc driver address
######################################
# kafka.eagle.driver=org.sqlite.JDBC
# kafka.eagle.url=jdbc:sqlite:/hadoop/kafka-eagle/db/ke.db
# kafka.eagle.username=root
# kafka.eagle.password=www.kafka-eagle.org

######################################
# kafka mysql jdbc driver address
######################################
kafka.eagle.driver=com.mysql.cj.jdbc.Driver
kafka.eagle.url=jdbc:mysql://localhost:3306/ke?useUnicode=true&characterEncoding=UTF-8&zeroDateTimeBehavior=convertToNull
kafka.eagle.username=root
kafka.eagle.password=root

- 1
- 2
- 3
- 4
- 5
- 6
- 7
- 8
- 9
- 10
- 11
- 12
- 13
- 14
- 15
- 16
- 17
- 18
- 19
- 20
- 21
- 22
- 23
- 24
- 25
- 26
- 27
- 使用如下命令启动
kafka-eagle;
$KE_HOME/bin/ke.sh start
- 1
- 2
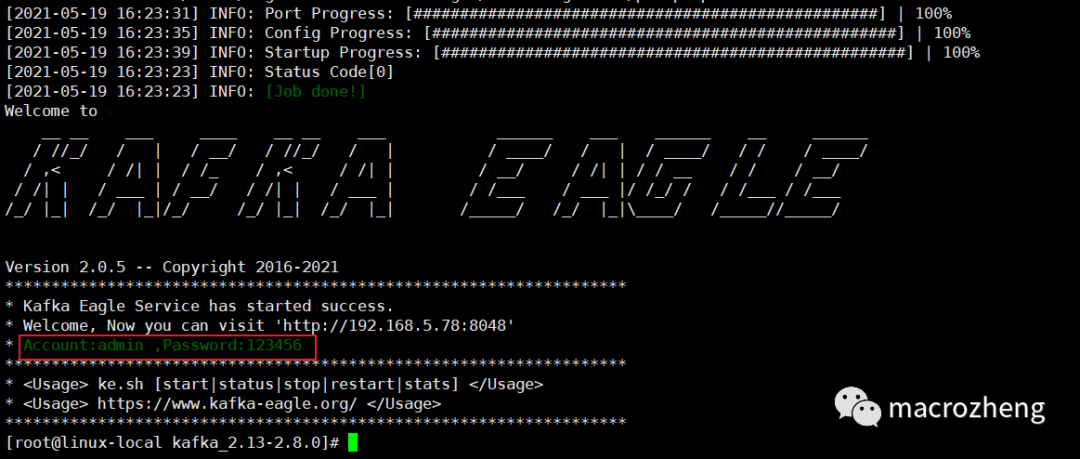
- 命令执行完成后会显示如下信息,但并不代表服务已经启动成功,还需要等待一会;
- 再介绍几个有用的
kafka-eagle命令:
# 停止服务
$KE_HOME/bin/ke.sh stop
# 重启服务
$KE_HOME/bin/ke.sh restart
# 查看服务运行状态
$KE_HOME/bin/ke.sh status
# 查看服务状态
$KE_HOME/bin/ke.sh stats
# 动态查看服务输出日志
tail -f $KE_HOME/logs/ke_console.out
- 1
- 2
- 3
- 4
- 5
- 6
- 7
- 8
- 9
- 10
- 11
- 启动成功可以直接访问,输入账号密码
admin:123456,访问地址:http://192.168.5.78:8048/

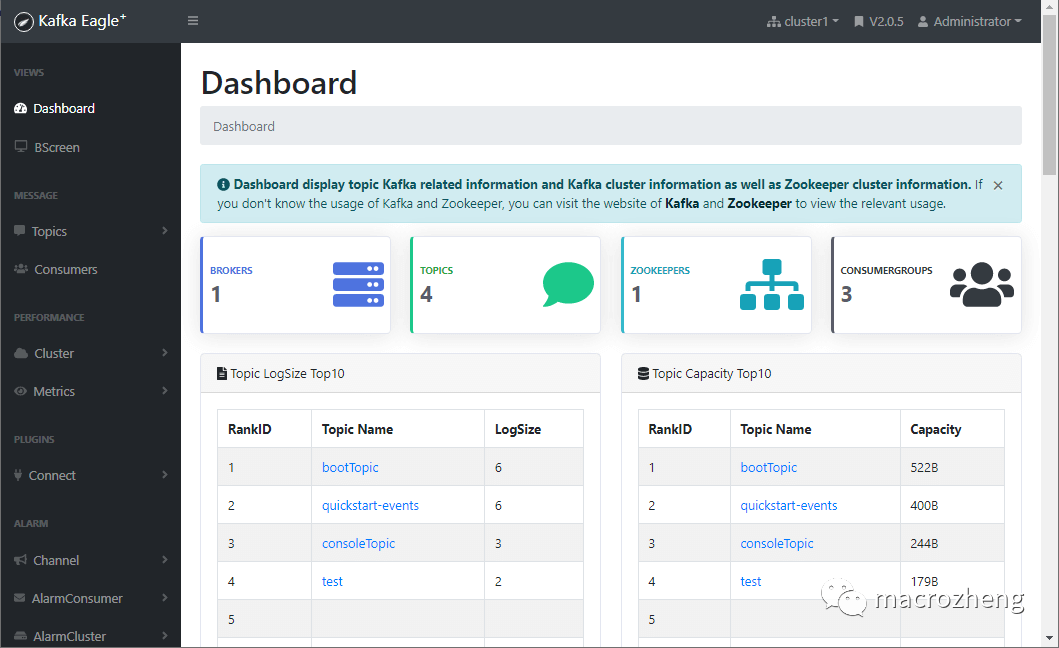
- 登录成功后可以访问到Dashboard,界面还是很棒的!
可视化工具使用
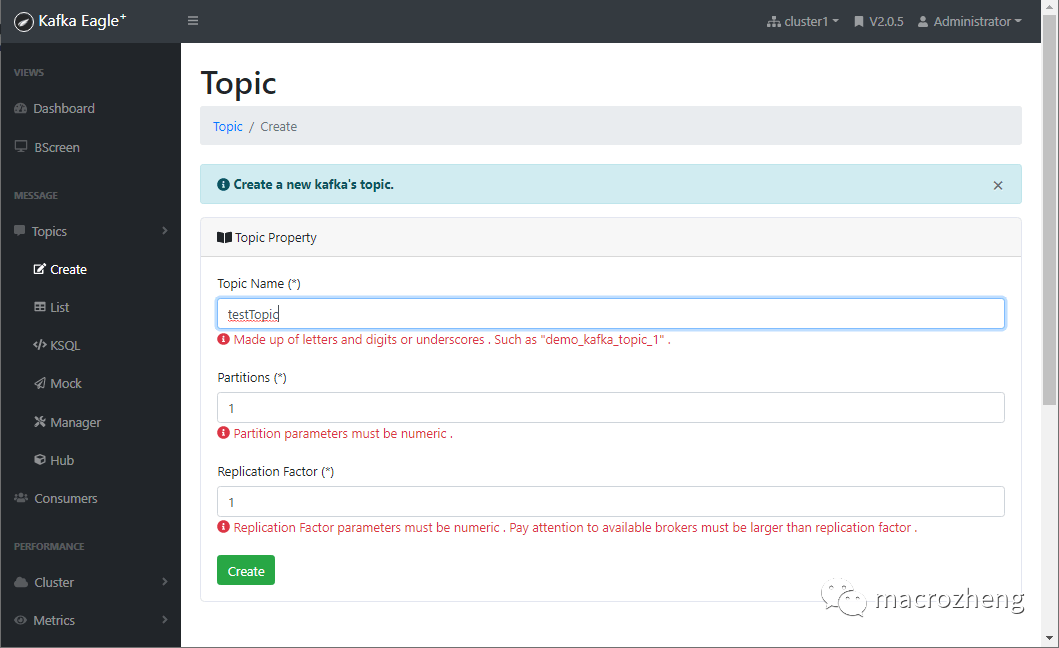
- 之前我们使用命令行创建了Topic,这里可以直接通过界面来创建;
网上学习资料一大堆,但如果学到的知识不成体系,遇到问题时只是浅尝辄止,不再深入研究,那么很难做到真正的技术提升。
一个人可以走的很快,但一群人才能走的更远!不论你是正从事IT行业的老鸟或是对IT行业感兴趣的新人,都欢迎加入我们的的圈子(技术交流、学习资源、职场吐槽、大厂内推、面试辅导),让我们一起学习成长!
本文内容由网友自发贡献,转载请注明出处:【wpsshop博客】
推荐阅读
相关标签

