
- 1git clone报错:SSL certificate problem: unable to get local issuer certificate_git clone ssl certificate problem: unable to get l
- 2排序——堆排序和TopK_top k堆排序
- 3Selenium实现滑动滑块验证码验证_python selenium 滑动验证
- 4MySQL常用判断函数总结!!看你都用过没_mysql 判断
- 5idea为springboot项目配置热部署
- 6华为Java社招面试(已拿到offer)
- 7谷歌中国在服务器撤离中国以后欲卷土重来?_谷歌不愿意把服务器放中国吗
- 8最简单的python爬虫案例,适合入门学习
- 9tensorRT 自定义算子plugin的实现
- 10AnythingLLM:私人 ChatGPT,构建专属知识库,本地代码库问答助手_anythingllm no embedding model was set.
接口自动化测试之request模块讲解,以及初步接口自动化测试框架封装(统一请求)_自动化测试用例统一请求封装
赞
踩
一、有接口测试工具的情况下,为什么要做接口自动化?
1.敏捷开发,接口一般数量很大,团队实现接测试,版本控制。
2.功能太死板,有些接口完全无法实现(复杂的加密接口,签名接口等)
3.接口项目当中有多种不同协议的接口。
4.排错,定位接口问题不方便,结合抓包实现。
5.没有办法生成美观的报告。
6.多接口串联,数据库验证,日志监控。
7.有些公司做web自动化+接口自动化。
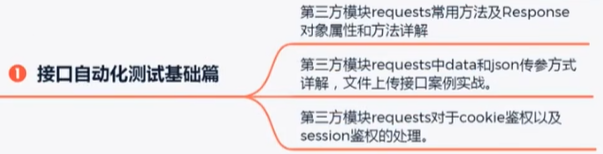
二、python+requests模块
requests第三方库,主要用于发送http请求,做接口自动化。
pip install requests三、requests全局观请求
1.requests.get() 发送get请求
2.requests.post() 发送post请求
3.requests.delete() 发送delete请求
4.requests.put() 发送put请求
5.requests.request() 最核心的方法
响应:response对象
- rep=requests.request()
- #返回字符串的数据
- print(rep.text)
- # 返回字节格式的数据
- print(rep.content)
- # 返回字典格式的数据
- print(rep.json())
- # 返回状态信息
- print(rep.reason)
- #返回cookie信息
- print((rep.cookies))
四、接口实战
pytest默认规则
1.py文件必须以test_开头或者_test结尾。
2.类名必须以Test开头
3.测试用例必须以test_开头
注意︰
1、get请求通过params传递参数。
2、post请求通过json或者data传参。
json或者data传参,他们的区别是什么?
data
①数据报文:dict字典类型,那么默认情况下,请求头: applilcation/x-www-form-urlencoded,表示以form表单的方式传参,格式: a=1&b=2&c=3
②数据报文∶str类型,那么默认情况下,请求头:text/plain(如果是字典格式需要转换成dict格式传参)
json
①数据报文∶不管是dict还是str类型,默认都是application/json,格式:{"a":1,"b":2}
json.dumps(data) 序列化把字典格式的数据转换成str格式。
json.loads(data) 反序列化把str格式转换成字典格式
总结:data只能传简单的只有键值对的dict或者是str格式,json一般只能传dict格式
cookie鉴权:网页的接口基本上都要做cookie鉴权。这种不常用。
通过session实现cookie鉴权,这种常用。
- import json
- import re
- import time
-
- import pytest
- import requests
-
- class TestsendRequest:
-
- # 类变量:通过类名访问
- access_token = " "
- csrf_token = ""
-
- def test_get_token(self):
- # 发送get请求ctrl+左键
- url = "https://api.weixin.gq.com/cgi-bin/token"
- data = {
- "grant_type": "client_credential",
- "appid": "wx6b11b3efd1cdc290",
- "secret": "106a9c6157c4db5f6029918738f9529d"
- }
- rep = requests.get(url=url, params=data)
- print(rep.json())
- TestsendRequest.access_token = rep.json()['access_token']
-
- def test_edit_flag(self):
- # 发送post请求(data和json只需要传一个,下面举例两种)
- url = "https://api.weixin.qq.com/cgi-bin/tags/update?acess_token=" + TestsendRequest.access_token + ""
- data = {"tag": {"id": 134, "name": "广东人"}}
- #因为上面是字典的形式,所以使用json的方式进行传参
- rep = requests.post( url, json=data)
- #如果是使用data的形式,就得将字典转换成str格式进行传参
- # rep=TestsendRequest.session.request(url,data=json.dump(data))
- #如果是简单的字典(如只有一层的简单的键值对),也是可以使用data的形式.如:
- # data={"tag":""}
- # rep=TestsendRequest.session.request((url,data=data))
- print(rep.json)
-
- def test_file_upload(self):
- url = "https://api.weixin.qq.com/cgi-bin/media/uploading?acess_token=" + TestsendRequest.access_token + ""
- data = {
- "media": open(r"E:\shu.png", "rb")
- }
- rep = requests.post(url=url, files=data)
- #也可以这样
- # rep = requests.request("post", url=url, files=data)
- print(rep.json())
-
- # 需要带请求头的接口以及需要cookie关联的接口如何测试?
- def test_start(self):
- # 发送get请求ctrl+左键
- url = "http://47.107.116.139/phpwind"
- rep = requests.get(url=url)
- # print(rep.text)
- # 通过正则表达式获取鉴权码
- TestsendRequest.csrf_token = re.search('name="csrf_token"value="(.*?)"', rep.text)[1]
- print(TestsendRequest.csrf_token)
- TestsendRequest.cks = rep.cookies
-
- # 请求需要带请求头的接口
- def test_login(self):
- url = "http://47.107.116.139/phpwind/index.php?m=u&c=login&a=dorun"
- data = {
- "username": "msxy",
- "password": "msxy",
- "csrf_token": TestsendRequest.csrf_token,
- "backurl": "http://47.107.116.139/phpwind/",
- "invite": ""
- }
- headers = {
- "Accept": "application/json,text/javascript,/;q=0.01",
- "X-Requested-With": "XMLHttpRequest"
- }
- time.sleep(4)
- rep = requests.post( url, data=data, headers=headers, cookies=TestsendRequest.cks)
- print(rep.json)
-
-
- if __name__ == '__main__':
- pytest.main(['-vs'])

五、接口自动化测试框架封装
接口自动化框架封装的第一步:统一请求方式。
将上述的代码进行框架封装,如下所示:
- import json
- import re
- import time
-
- import pytest
- import requests
-
- class TestsendRequest:
-
- # 类变量:通过类名访问
- access_token = " "
- csrf_token = ""
- session = requests.session()
-
- def test_get_token(self):
- # 发送get请求ctrl+左键
- url = "https://api.weixin.gq.com/cgi-bin/token"
- data = {
- "grant_type": "client_credential",
- "appid": "wx6b11b3efd1cdc290",
- "secret": "106a9c6157c4db5f6029918738f9529d"
- }
- rep = TestsendRequest.session.request("get", url=url, params=data)
- print(rep.json())
- TestsendRequest.access_token = rep.json()['access_token']
-
- def test_edit_flag(self):
- # 发送post请求(data和json只需要传一个,下面举例两种)
- url = "https://api.weixin.qq.com/cgi-bin/tags/update?acess_token=" + TestsendRequest.access_token + ""
- data = {"tag": {"id": 134, "name": "广东人"}}
- #因为上面是字典的形式,所以使用json的方式进行传参
- rep = TestsendRequest.session.request("post", url, json=data)
- #如果是使用data的形式,就得将字典转换成str格式进行传参
- # rep=TestsendRequest.session.request(url,data=json.dump(data))
- #如果是简单的字典(如只有一层的简单的键值对),也是可以使用data的形式.如:
- # data={"tag":""}
- # rep=TestsendRequest.session.request((url,data=data))
- print(rep.json)
-
- def test_file_upload(self):
- url = "https://api.weixin.qq.com/cgi-bin/media/uploading?acess_token=" + TestsendRequest.access_token + ""
- data = {
- "media": open(r"E:\shu.png", "rb")
- }
- rep = TestsendRequest.session.request("post", url=url, files=data)
- #也可以这样
- # rep = requests.request("post", url=url, files=data)
- print(rep.json())
-
- # 需要带请求头的接口以及需要cookie关联的接口如何测试?
- def test_start(self):
- # 发送get请求ctrl+左键
- url = "http://47.107.116.139/phpwind"
- rep = TestsendRequest.session.request("get", url=url)
- # print(rep.text)
- # 通过正则表达式获取鉴权码
- TestsendRequest.csrf_token = re.search('name="csrf_token"value="(.*?)"', rep.text)[1]
- print(TestsendRequest.csrf_token)
- # TestsendRequest.cks = rep.cookies
-
- # 请求需要带请求头的接口
- def test_login(self):
- url = "http://47.107.116.139/phpwind/index.php?m=u&c=login&a=dorun"
- data = {
- "username": "msxy",
- "password": "msxy",
- "csrf_token": TestsendRequest.csrf_token,
- "backurl": "http://47.107.116.139/phpwind/",
- "invite": ""
- }
- headers = {
- "Accept": "application/json,text/javascript,/;q=0.01",
- "X-Requested-With": "XMLHttpRequest"
- }
- time.sleep(4)
- rep = TestsendRequest.session.request("post", url, data=data, headers=headers, cookies=TestsendRequest.cks)
- print(rep.json)
-
- if __name__ == '__main__':
- pytest.main(['-vs'])
- ...
赞
踩

