
- 1配置文件_"type=\"system.configuration.namevaluesecionhandle
- 2人工神经网络类型有哪些,人工神经网络类型包括_人工神经网络包括哪几种
- 3【狂神说】SpringMVC笔记整理 | SSM框架整合_狂神说ssm
- 4ECharts3笔记--使用Java快速开发ECharts图表_baroption baroption = new baroption();
- 5【你也能从零基础学会网站开发】Web建站之javascript入门篇 认识Document文档对象
- 6Unity3D 制作绿草地,草坪,模型表面生成草地,草地效果Shader实现 草着色器 Brute Force - Grass Shader_unity3d stylized grass shader 1.3.4怎么用
- 7Python爬虫经常爬不到数据,或许你可以看一下小编的这篇文章!_为什么有的页面用相同的代码爬不到信息
- 8网络适配器里没有vmnet1、vmnet8网卡的解决方法_网络连接中没有vmnet8
- 9Redis集群模式下使用Scan命令模糊查询(Java)_redis集群 scan
- 10基于python微博舆情分析系统+可视化+Django框架 K-means聚类算法(源码)✅
Android studio连接MySQL数据库,在fragment中使用listview显示数据(Navicat操作数据库)(夜神模拟器运行)_andriod studio fragment访问数据库
赞
踩
本文连接MySQL数据库,使用到的为包mysql-connector-java-5.1.47-bin.jar。MySQL数据库版本为5.7.38.
在开始连接前请务必确保MySQL版本不是8.0及以上的版本!!否则会一直报错无法创建连接。
请不要嫌重装麻烦,我因为不舍得重装,搞了两三天还是重装了才成功。
环境配置:
一、资源包下载网址:MySQL :: 下载 MySQL Connector/J (存档版本)
二、MySQL8.0卸载:第一步:关闭当前MySQL服务,任务管理器——服务——打开服务,找到MySQL服务关闭
第二步:左下角电脑——设置——系统——存储——应用,卸载掉所有当前MySQL关键字的程序
三、MySQL5.7版本安装教程:http://t.csdn.cn/hW25g
开始连接:
一、准备工作
1.选择下载好的jar文件(带bin和不带bin的对我们连接MySQL没有区别,我们连接数据库主要是使用到包里面封装好的Driver类,用于加载驱动)
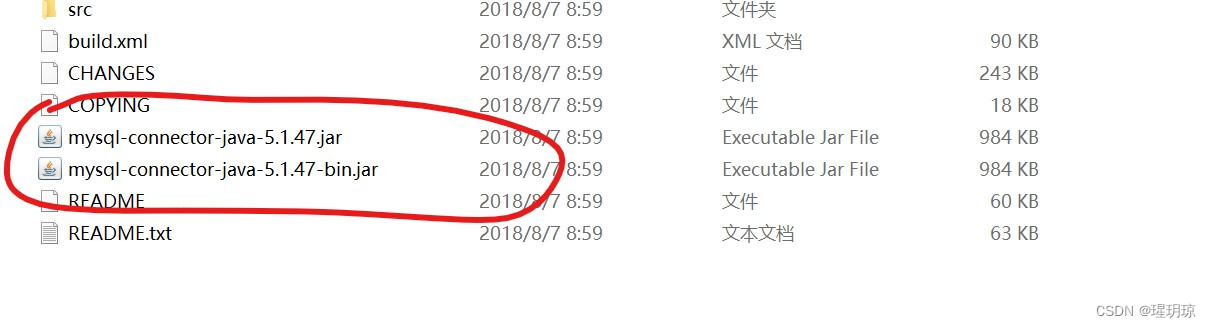
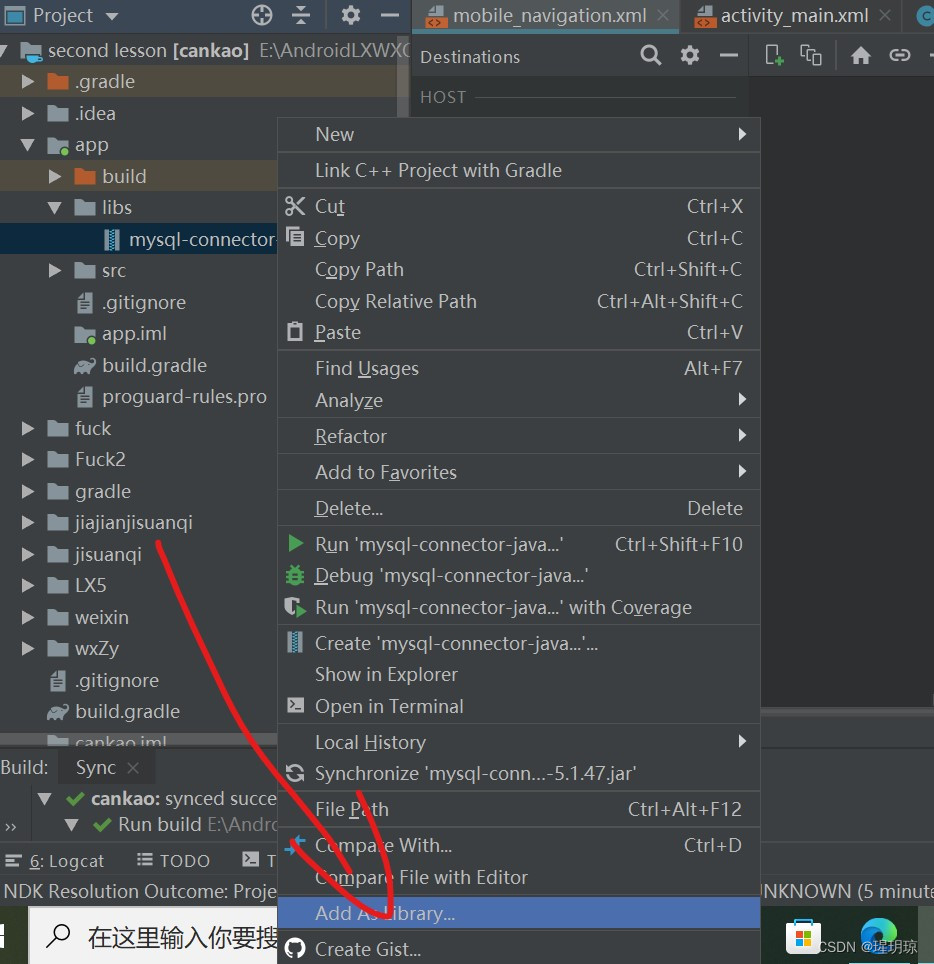
2.粘贴到目录下的libs中,点击左上角选择project,找到libs目录,粘贴

3.右击jar包,点击Add as library,弹出来的窗口直接确定即可。
( 一开始我出现了右击却没有显示Add as library的情况,然后放那里不管,忙完回来再点击又显示出来了,如果有出现这个情况的,具体原因还未知)
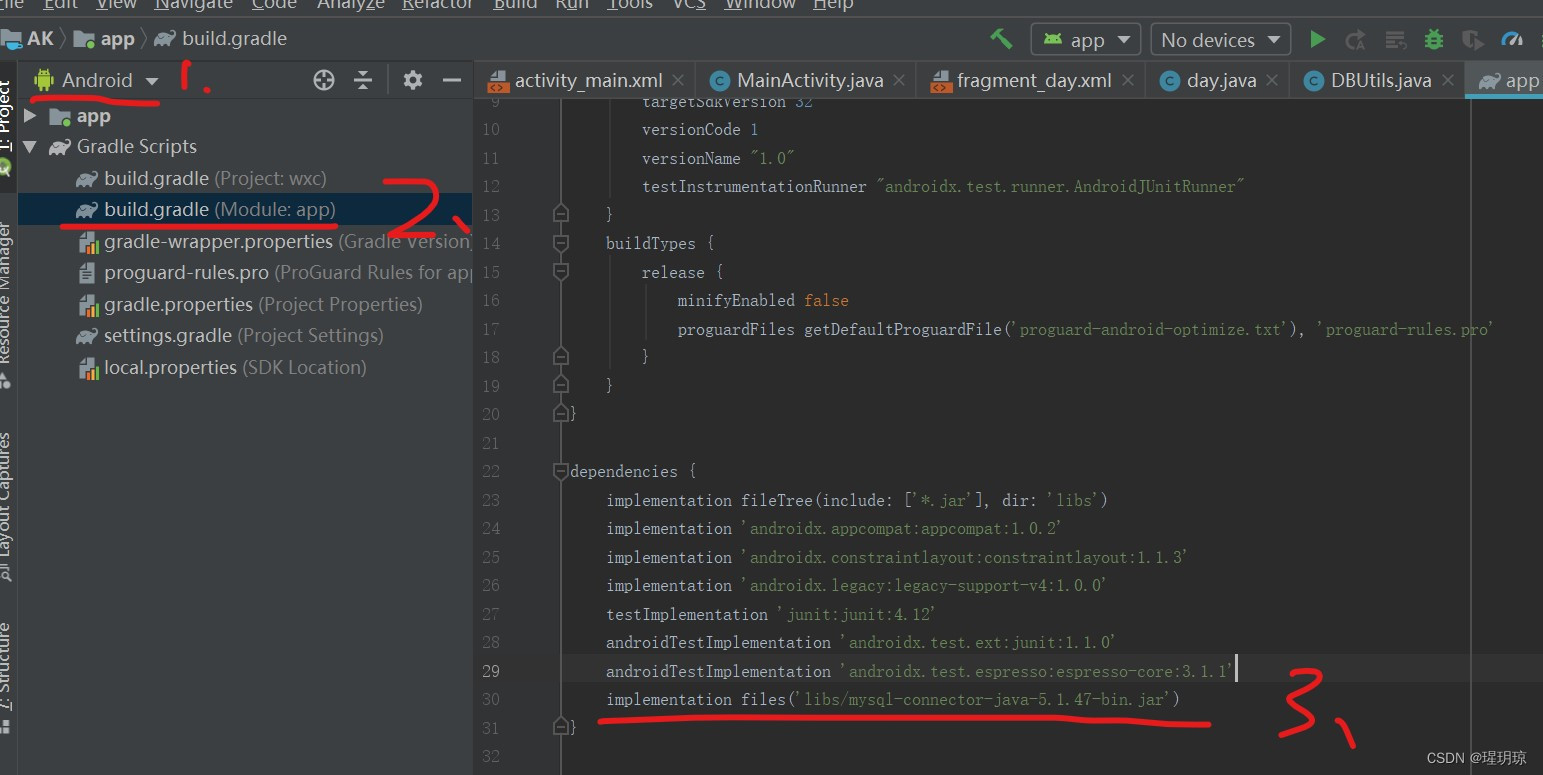
然后回到android编辑界面,在biuld.gradle中查看是否成功,注意有两个biuld.gradle,在第二个中查看
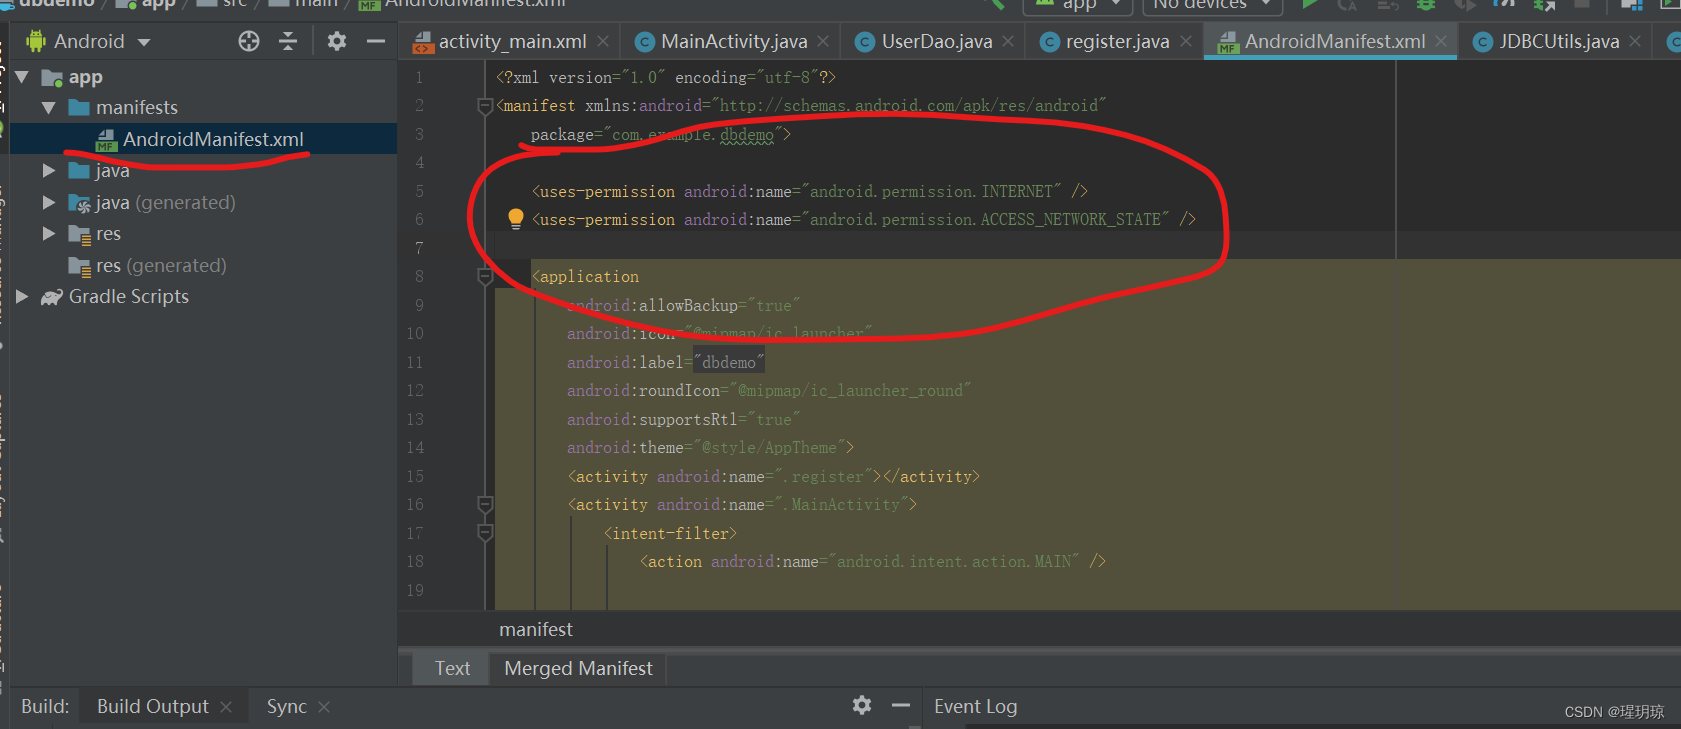
4.在AndroidMainfest.xml添加连接网络权限(只是本机连接展示的话不用添加也行)。语句为:
<uses-permission android:name="android.permission.INTERNET" />
<uses-permission android:name="android.permission.ACCESS_NETWORK_STATE" />
至此准备工作结束,开始连接。
二、创建文件
1.创建java类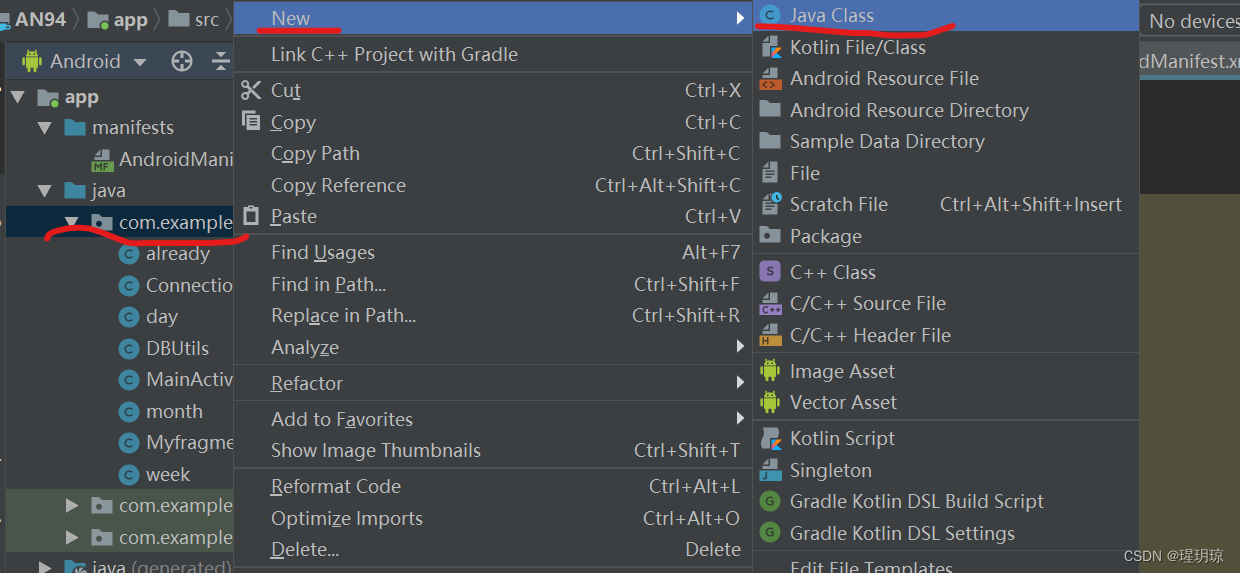
(1).创建数据库连接池DBUtils类。在java包下创建一个连接类DBUtils,用于调用里面的连接函数
DBUtils代码:
( 具体解释在注释中已经写明了,如果想深入理解,请耐心观看。如果急需能用即可,直接粘贴即可。如果报错,请去掉try语句,再运行查看是哪一句出错)
- package com.example.an94;
-
- import android.util.Log;
-
-
- import java.sql.Connection;
- import java.sql.DriverManager;
- import java.sql.ResultSet;
- import java.sql.SQLException;
- import java.sql.Statement;import java.util.ArrayList;
- import java.util.HashMap;
- import java.util.List;
-
- public class DBUtils {
- private static final String TAG="DBUtils";// 用于日志打印
- private static Connection conn=null;// 定义连接变量conn
-
- //数据库连接函数
- public static Connection getConnection(String dbname) {//定义connection类函数,需要返回一个connection对象,即在上面定义的conn
-
- String ip = "192.168.56.1";//ip地址,win+R,输入cmd打开控制台,输入ipconfig /all查看本机ipv4地址,最上面那个
- int port = 3306;//MySQL安装时的默认端口号,无需更改
- String user = "root";//打开Navicat,点击用户,如果显示root@localhost,请修改为root@%或新加一个root@%,%表示任意,任意ip地址都可以连接
- String password = "6433868482";//密码
- String url = "jdbc:mysql://" + ip + ":" + port + "/" + dbname + "?useUnicode=true&characterEncoding=UTF-8";
- // "?useUnicode=true&characterEncoding=UTF-8"添加中文信息时不会乱码
-
- // 注册JDBC驱动的固定语句
- try {
-
- Class.forName("com.mysql.jdbc.Driver");//这是一个目录,你可以找到这个目录点进去就懂了
- Log.d(TAG, "加载JDBC驱动成功");
- } catch (ClassNotFoundException e) {
- Log.d(TAG, "加载JDBC驱动失败");
- }
-
-
- // 创建与mysql的连接对象conn,当然你也可以直接把上面定义的那些变量url的值直接写进去,就不用上面写一堆定义
- try {
- conn = DriverManager.getConnection(url, user, password);
- Log.d(TAG, "数据库连接成功");
-
- } catch (SQLException e) {
- Log.d(TAG, "数据库连接失败");
- }
-
- return conn;//connection类,返回一个connection连接对象
- }
-
- //数据库查询函数
- //前面加载完JDBC驱动了,现在开始使用JDBC,
- //↓ List里只能放Map类型的对象,而这个Map类型的对象又只能放以String类型为键,以Object类型为值的键值对
- //就是说你定义了一个表list,然后表里得每一行数据都是HashMap,然后HashMap<标识符,你要保存的数据>
- public static List<HashMap<String,Object>> getinfo(String dbname) throws SQLException {
- // 定义List<HashMap<String,Object>>类型的数据并实例化
- List<HashMap<String,Object>> list=new ArrayList<HashMap<String, Object>>();
- // 调用连接函数,传入数据库名的形参,获得conn对象,因为getConnection的返回类型就是Connection及conn
- //1.调用连接,不然你连不上数据库
- Connection conn=getConnection(dbname);
-
- // 通过connection对象conn获取statement对象sta,createStatement():创建基本的statement对象
- //2.你要用statement去执行sql语句,但你得连上数据库才能执行,所以要用连接对象创建statement对象。
- Statement sta=conn.createStatement();
-
- // 定义sql语句
- String sql="select * from user ";
-
- // 调用Statement对象执行sql语句,返回结果为结果集,就是一个带指针的表格,通过操作指针来进行数据操作
- //3.使用statement的三种方法中的executeQuery()方法,返回的就是一个结果集ResultSet对象,所以你要用ResultSet变量接收
- ResultSet result=sta.executeQuery(sql);
-
- // 判断一下是否为空
- if (result==null){
- return null;
- }
-
- // 当这个结果集(就这个表)还有下一行时进入函数。这个表是有指针的,百度搜索ResultSet接口中的方法,
- while (result.next()) {
- // 每次循环都会新实例化一个HashMap对象,用于将遍历到的数据填进去
- HashMap<String,Object> map=new HashMap<>();
- // 往map中填数据,map的数据类型相当于键值对
- map.put("ID",result.getString("ID"));//ResultSet中的getString方法,获取指定字段的String类型值
- map.put("message",result.getString("message"));
- // 每次循环完就添加到list中
- list.add(map);
- }
- // 把list返回出去,否则拿不到这个list
- return list;
- }
-
- }

(2).我定义的 fragment(下文中的fragment_already),这个fragment对应的java类already(类名自定义)。listview放在fragment_already中。
already代码:
- package com.example.an94;
-
-
- import android.annotation.SuppressLint;
- import android.os.Bundle;
-
- import androidx.annotation.NonNull;
- import androidx.fragment.app.Fragment;
-
-
- import android.os.Handler;
- import android.os.Message;
- import android.util.Log;
- import android.view.LayoutInflater;
- import android.view.View;
- import android.view.ViewGroup;
- import android.widget.Button;
- import android.widget.ListView;
- import android.widget.SimpleAdapter;
-
- import java.sql.SQLException;
- import java.util.ArrayList;
- import java.util.HashMap;
- import java.util.List;
-
- import static com.example.an94.DBUtils.getConnection;
- import static com.example.an94.DBUtils.getinfo;
-
-
- public class already extends Fragment {
-
- private static final String TAG="DBUtils";
-
- @Override
- public View onCreateView(LayoutInflater inflater, ViewGroup container,
- Bundle savedInstanceState) {
- final View view = inflater.inflate(R.layout.fragment_already,null);//找到你的fragment
-
- //找到你的fragment中的控件,之所以要view.findViewById(),因为是在fragment里找,而你是通过的view找到fragment
- Button query=view.findViewById(R.id.query);
-
- //*************查找按钮功能****************************************************************************
- query.setOnClickListener(new View.OnClickListener() {
- @Override
- public void onClick(View v) {
- // 在点击事件里写内容
- //-----------------------------------------
- // Handler部分
- //Android studio中,需要新开一个子线程处理数据库,主线程只有一个不能同时执行
- // 由子线程传出的数据在这里处理
- @SuppressLint("HandlerLeak")
- // 先new一个Handler对象
- final Handler handler =new Handler(){
- @Override
- public void handleMessage(@NonNull Message msg) {
- super.handleMessage(msg);
- // 获取listview组件,因为我们要在这个部分更新UI组件
- final ListView listView=view.findViewById(R.id.list_already);
- // if的判断条件是区分msg是哪一条,即msg的ID,是下面连接数据库时我们自己定义的
- if(msg.what==1){
- // 获取发送过来的msg.obj对象,因为我传的是List<HashMap<String, Object>>类型的obj,所以这边同样用List<HashMap<String, Object>> list去接收,要强转
- List<HashMap<String,Object>> list= (List<HashMap<String, Object>>) msg.obj;
- // 定义SimpleAdapter,参数分别为当前上下文,刚拿到的数据集合list,子项布局文件,数据集合中的字段信息,要添加到的子布局文件中的控件ID
- SimpleAdapter simpleAdapter=new SimpleAdapter(getContext(),list,R.layout.already_list_item,new String[]{"ID","message"},new int[]{R.id.序号,R.id.介绍});
- // 为listview设置适配器
- listView.setAdapter(simpleAdapter);
- }
- }
- };
- // Handler部分
- //----------------------------------------------------------------------
-
- //--------------------------------------------------------------
- // 连接数据库并进行相应操作的线程
- // 第二、第三部分
- // new 一个线程,接下来是数据库操作部分,要在子线程中执行
- Thread thread=new Thread(new Runnable() {
- // 定义一个子线程中的全局变量List<HashMap<String,Object>> list1,用于接收从DBUtils中返回的list
- List<HashMap<String,Object>> list1=new ArrayList<HashMap<String, Object>>();
- @Override
- public void run() {
- // 与数据库建立连接
- getConnection("android");
- try {
- // 以下这些要用try/catch包含
- // 调用数据库工具类的getinfo函数,用list1接收返回的list数据
- list1=getinfo("android");
-
- // 打印日志,测试用
- Log.d(TAG, list1.toString());
- } catch (SQLException e) {
- e.printStackTrace();
- }
-
- // 将从数据库拿到的list1对象传给message再由handler传出,再在handler中处理,可进行更新UI
- // 新建一个message对象,尽量不要直接new,而是用这种方法,因为有内存的问题存在
- Message message=Message.obtain();
-
- // 设置message的辨认码,这里设为1
- message.what=1;
-
- // 把刚才接收到的list1赋给message.obj对象
- message.obj=list1;
-
- // 通过handler将携带数据的message传出去,传到handler中
- handler.sendMessage(message);
- }
- });
-
- // 上面线程定义完了,现在启动线程
- thread.start();
-
- // 第二、第三部分
- //------------------------------------------------
- }
- });
- return view;
- }
- }
(3)最后是 MainActivity.Java
- package com.example.an94;
-
- import androidx.appcompat.app.AppCompatActivity;
- import androidx.fragment.app.FragmentManager;
- import androidx.fragment.app.FragmentTransaction;
-
- import android.os.Bundle;
- import android.view.View;
- import android.widget.FrameLayout;
- import android.widget.TextView;
-
- public class MainActivity extends AppCompatActivity implements View.OnClickListener{
- private TextView txt_dibufour;
-
- private already fg4;
- private FragmentManager fManager; //声明FragmentManager类变量
-
- @Override
- protected void onCreate(Bundle savedInstanceState) {
- super.onCreate(savedInstanceState);
- // requestWindowFeature(Window.FEATURE_NO_TITLE);//将系统自带的标题栏隐藏掉
- //这一句一定要在加载activity之前调用
- setContentView(R.layout.activity_main);
-
- fManager = getSupportFragmentManager(); //实例化fragmentManager变量
- bindViews();
- }
-
- private void bindViews() {
-
- txt_dibufour=(TextView) findViewById((R.id.txt_dibu4));
- txt_dibufour.setOnClickListener(this);
- }
-
- private void setSelected(){//重置所有文本选中状态
- txt_dibufour.setSelected(false);
- }
-
- private void hideAllFragment(FragmentTransaction fragmentTransaction){
-
- if(fg4 != null)fragmentTransaction.hide(fg4);
- }
-
- @Override
- public void onClick(View v){
- FragmentTransaction fTransaction = fManager.beginTransaction();//通过begin开启事务
- hideAllFragment(fTransaction);
- switch (v.getId()){
- case R.id.txt_dibu4:
- setSelected();
- txt_dibufour.setSelected(true);
- if(fg4==null){
- fg4=new already();
- fTransaction.add(R.id.zj_content,fg4);
- }else{
- fTransaction.show(fg4);
- }
- break;
- }
- fTransaction.commit();//提交事务
- }
-
- }
2.创建布局文件
(1)MainActivity.xml
-
- <RelativeLayout xmlns:android="http://schemas.android.com/apk/res/android"
- xmlns:tools="http://schemas.android.com/tools"
- android:layout_width="match_parent"
- android:layout_height="match_parent"
- tools:context=".MainActivity">
- <RelativeLayout
- android:id="@+id/dingbu_bar"
- android:layout_width="match_parent"
- android:layout_height="48dp">
- <TextView
- android:id="@+id/txt_topbar"
- android:layout_width="match_parent"
- android:layout_height="match_parent"
- android:layout_centerInParent="true"
- android:gravity="center"
- android:textSize="18sp"
- android:textColor="#000"
- android:text="信息界面"
- />
- <View
- android:layout_width="match_parent"
- android:layout_height="2px"
- android:background="#C0C0C0"
- android:layout_alignParentBottom="true"
- />
-
- </RelativeLayout>
- <LinearLayout
- android:id="@+id/dibu_bar"
- android:layout_width="match_parent"
- android:layout_height="56dp"
- android:layout_alignParentBottom="true"
- android:orientation="horizontal"
- android:background="#C0C0C0"
- >
-
-
- <TextView
- android:id="@+id/txt_dibu4"
- android:layout_width="0dp"
- android:layout_height="match_parent"
- android:layout_weight="1"
- android:background="#FFF"
- android:drawablePadding="3dp"
- android:gravity="center"
- android:padding="0dp"
- android:text="显示记录"
- android:textColor="@android:color/holo_green_light"
- android:textSize="16sp"
- />
-
- </LinearLayout>
- <View
- android:id="@+id/tab_bar"
- android:layout_width="match_parent"
- android:layout_height="2px"
- android:background="@android:color/white"
- android:layout_above="@id/dibu_bar"
- />
-
- <FrameLayout
- android:id="@+id/zj_content"
- android:layout_width="match_parent"
- android:layout_height="match_parent"
- android:layout_below="@id/dingbu_bar"
- android:layout_above="@id/tab_bar"
- >
-
- </FrameLayout>
- </RelativeLayout>
(2)fragment_already.xml
- <?xml version="1.0" encoding="utf-8"?>
- <RelativeLayout xmlns:android="http://schemas.android.com/apk/res/android"
- xmlns:tools="http://schemas.android.com/tools"
- android:layout_width="match_parent"
- android:layout_height="match_parent"
- tools:context=".already">
- <LinearLayout
- android:layout_width="wrap_content"
- android:layout_height="wrap_content"
-
- >
- <!-- TODO: Update blank fragment layout -->
- <ListView
- android:id="@+id/list_already"
- android:layout_width="match_parent"
- android:layout_height="match_parent"
- />
- </LinearLayout>
- <LinearLayout
- android:layout_width="match_parent"
- android:layout_height="56dp"
- android:layout_alignParentBottom="true"
- android:background="#C0C0C0"
- android:orientation="horizontal"
- android:gravity="center"
- android:layout_marginBottom="0dp"
-
- >
- <Button
- android:id="@+id/query"
- android:layout_width="wrap_content"
- android:layout_height="wrap_content"
- android:text="显示记录"
- android:textSize="20sp"
- />
-
- </LinearLayout>
- </RelativeLayout>
(3)already_list_item .xml
- <?xml version="1.0" encoding="utf-8"?>
- <LinearLayout xmlns:android="http://schemas.android.com/apk/res/android"
- android:orientation="vertical" android:layout_width="match_parent"
- android:layout_height="match_parent">
- <LinearLayout
- android:layout_width="match_parent"
- android:layout_height="wrap_content"
- android:orientation="horizontal">
- <TextView
- android:id="@+id/序号"
- android:layout_width="64dp"
- android:layout_height="wrap_content"
- android:textSize="20sp"
- />
-
- <TextView
- android:id="@+id/介绍"
- android:layout_width="wrap_content"
- android:layout_height="wrap_content"
- android:textSize="20sp"
- />
-
- </LinearLayout>
- </LinearLayout>
由于我前面写的部分是已经做出来的效果,所以前面的图片里会出现很多无关文件,因此我又重做了一遍,将代码原原本本的粘贴一个都不改,运行效果如下。

在粘贴代码时,修改数据库链接池DBUtils中的使用JDBC链接数据库部分即可。
都看到这里了,不妨点个赞再走吧~
欢迎收藏讨论~
already类代码部分参考文章: http://t.csdn.cn/eRFGw

