
- 1【数据竞赛】2020 Kaggle 10大竞赛方案汇总
- 2深入了解软件测试:从入门到奥秘,揭开测试的精髓
- 3抖音最近很火的QQ在线价值评估网站源码(qq价值在线评估)_抖音qq价格评估是哪个网站
- 4informatica学习1-数据仓库,ETL,数据仓库工具Informatica介绍_informatic技术是什么意思
- 5macOS 环境下安装 Nginx_macos 安装nginx
- 6数据库MySql实验学习总结(一)_mysql实验总结
- 7大数据框架之Hadoop_hdfs存储600mb数据图
- 8异步电机矢量控制matlab simulink
- 9ISO26262汽车功能安全软件级产品研发的主要内容_汽车软件功能安全
- 10慕课美和易思_美和易思学习脚本最新
【Pytorch】(十五)模型部署:ONNX和ONNX Runtime_onnx onnxruntime
赞
踩
(十五)模型部署:ONNX和ONNX Runtime
ONNX 和 ONNX Runtime的关系
ONNX(模型表示格式):Open Neural Network Exchange(ONNX)一种用于表示深度学习模型的标准格式。这个格式允许将模型从一个深度学习框架转移到另一个框架,以及在不同平台上进行推理。
ONNX Runtime(推理引擎):ONNX Runtime(ORT) 是一个用于运行和执行 ONNX 模型的推理引擎。ONNX Runtime 提供了高性能、低延迟的深度网络模型推理,并且是跨平台的,支持各种操作系统和设备。ONNX Runtime已被证明可以显著提高多个模型的推理性能。
想用ONNX和ONNX Runtime进行Pytorch模型部署,首先需要安装以下Python包:
pip install --upgrade onnx onnxscript onnxruntime
- 1
将PyTorch模型导出为ONNX格式
Pytorch中torch.onnx模块提供API来从PyTorch的 torch.nn.Module模块捕获计算图,并将其转换为ONNX格式。从PyTorch 2.1开始,ONNX Exporter有两个版本。
torch.onnx.dynamo_export是基于PyTorch 2.0发布的TorchDynamo技术的最新Exporter(仍处于测试版)
torch.onnx.export则基于TorchScript,自PyTorch 1.2.0以来一直可用
本文只介绍torch.onnx.export,关于torch.onnx.dynamo_export,可阅读:
https://pytorch.org/tutorials/beginner/onnx/intro_onnx.html
https://pytorch.org/tutorials/beginner/onnx/export_simple_model_to_onnx_tutorial.html
下面将以一个图像超分模型为例,介绍如何使用基于TorchScript 的torch.onnx.export将PyTorch中定义的模型转换为ONNX格式。
import numpy as np
from torch import nn
import torch.utils.model_zoo as model_zoo
import torch.onnx
import torch.nn as nn
import torch.nn.init as init

# 1 搭建一个超分模型。
class SuperResolutionNet(nn.Module):
    def __init__(self, upscale_factor, inplace=False):
        super(SuperResolutionNet, self).__init__()

        self.relu = nn.ReLU(inplace=inplace)
        self.conv1 = nn.Conv2d(1, 64, (5, 5), (1, 1), (2, 2))
        self.conv2 = nn.Conv2d(64, 64, (3, 3), (1, 1), (1, 1))
        self.conv3 = nn.Conv2d(64, 32, (3, 3), (1, 1), (1, 1))
        self.conv4 = nn.Conv2d(32, upscale_factor ** 2, (3, 3), (1, 1), (1, 1))
        self.pixel_shuffle = nn.PixelShuffle(upscale_factor)

        self._initialize_weights()

    def forward(self, x):
        x = self.relu(self.conv1(x))
        x = self.relu(self.conv2(x))
        x = self.relu(self.conv3(x))
        x = self.pixel_shuffle(self.conv4(x))
        return x

    def _initialize_weights(self):
        init.orthogonal_(self.conv1.weight, init.calculate_gain('relu'))
        init.orthogonal_(self.conv2.weight, init.calculate_gain('relu'))
        init.orthogonal_(self.conv3.weight, init.calculate_gain('relu'))
        init.orthogonal_(self.conv4.weight)

# 创建一个模型实例
torch_model = SuperResolutionNet(upscale_factor=3)

# 2 训练模型或者直接导入预训练的模型参数,这里采用后者:
model_url = 'https://s3.amazonaws.com/pytorch/test_data/export/superres_epoch100-44c6958e.pth'

map_location = lambda storage, loc: storage
if torch.cuda.is_available():
    map_location = None
torch_model.load_state_dict(model_zoo.load_url(model_url, map_location=map_location))

# 3 将模型转换为推理模式。
# 这是必需的,因为像dropout或batchnorm这样的运算符在推理和训练模式中表现不同。
# set the model to inference mode
torch_model.eval()

# 4 导出ONNX模型

batch_size = 1    # just a random number
## 首先需要提供一个输入张量x。只要它是正确的类型和大小,其中的值就可以是随机的。
x = torch.randn(batch_size, 1, 224, 224, requires_grad=True)

## 导出模型
torch.onnx.export(torch_model,               # 模型
                  x,                         # 模型输入
                  "super_resolution.onnx",   # onnx文件保存路径
                  export_params=True,        # 将经过训练的参数权重存储在模型文件中
                  opset_version=10,          # ONNX的版本
                  do_constant_folding=True,  # 执行常量折叠(constant folding)进行优化
                  input_names = ['input'],   # 模型输入的名字
                  output_names = ['output'], #  模型输出的名字
                  dynamic_axes={'input' : {0 : 'batch_size'}, # 将第一个维度指定为dynamic
                                'output' : {0 : 'batch_size'}})
# 计算原始Pytorch模型的输出,用于验证导出的ONNX 模型是否能计算出相同的值。
torch_out = torch_model(x)  # 计算原始Pytorch模型的输出

- 1
- 2
- 3
- 4
- 5
- 6
- 7
- 8
- 9
- 10
- 11
- 12
- 13
- 14
- 15
- 16
- 17
- 18
- 19
- 20
- 21
- 22
- 23
- 24
- 25
- 26
- 27
- 28
- 29
- 30
- 31
- 32
- 33
- 34
- 35
- 36
- 37
- 38
- 39
- 40
- 41
- 42
- 43
- 44
- 45
- 46
- 47
- 48
- 49
- 50
- 51
- 52
- 53
- 54
- 55
- 56
- 57
- 58
- 59
- 60
- 61
- 62
- 63
- 64
- 65
- 66
- 67
- 68
- 69
请注意,除非在dynamic_axes指定,否则ONNX模型中输入和输出的尺寸大小都是固定的。在本例中,在torch.onnx.export()中的dynamic_axies参数中将第一个维度指定为dynamic。这使得导出的模型接受大小为 [batch_size, 1, 224, 224]的输入,其中batch_size是可变的。
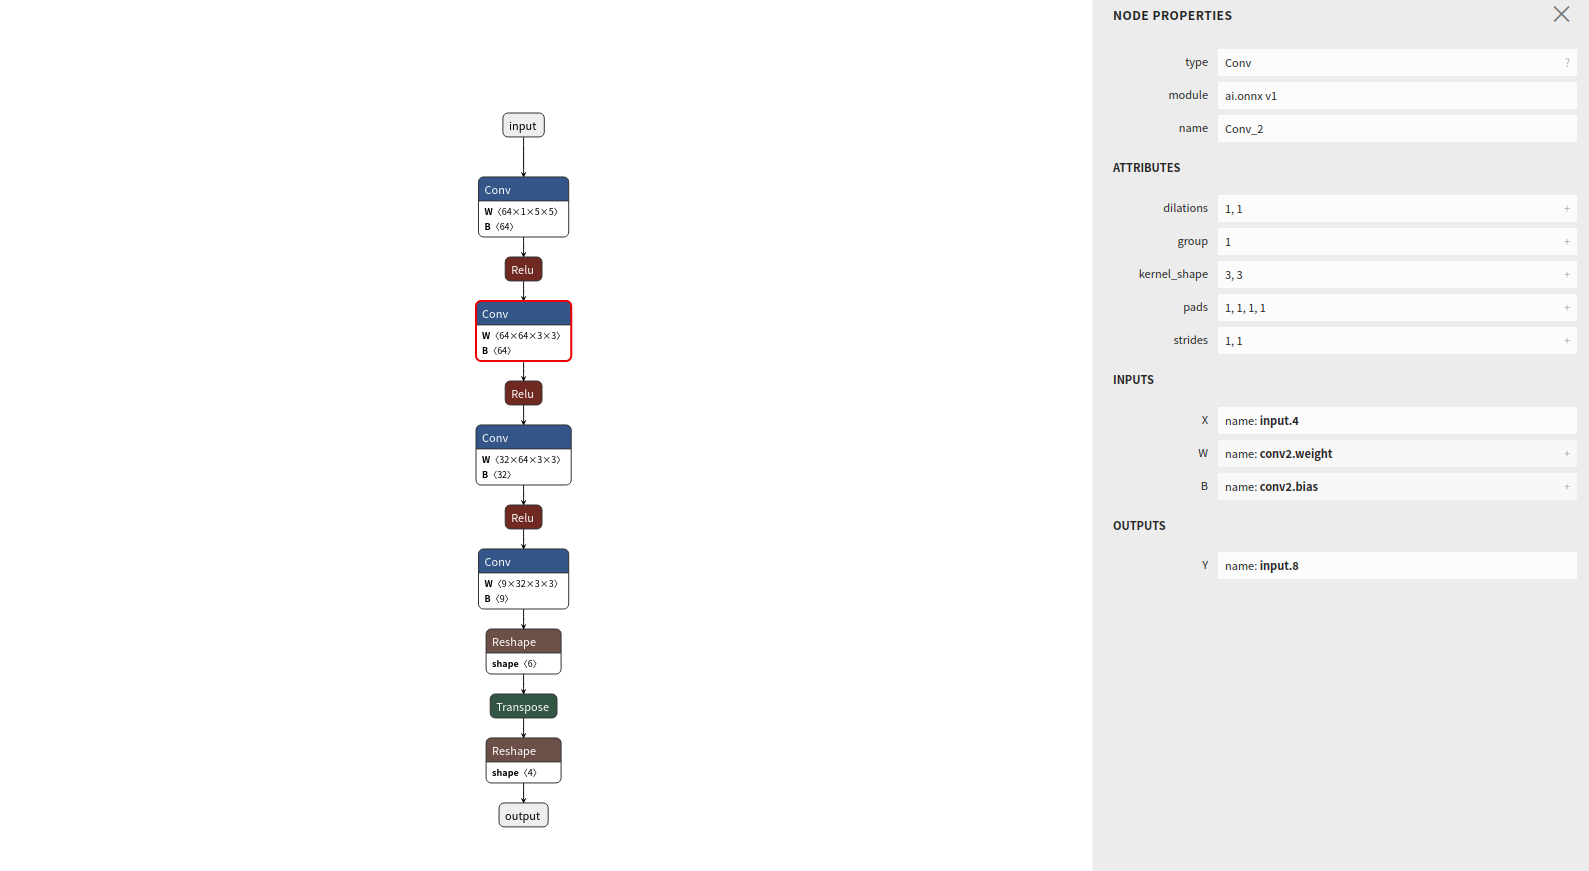
使用Netron可视化ONNX模型图
Netron可以对ONNX模型图进行可视化。Netron除了可以安装在macos、Linux或Windows系统的计算机上,还可以在浏览器上运行:https://netron.app/
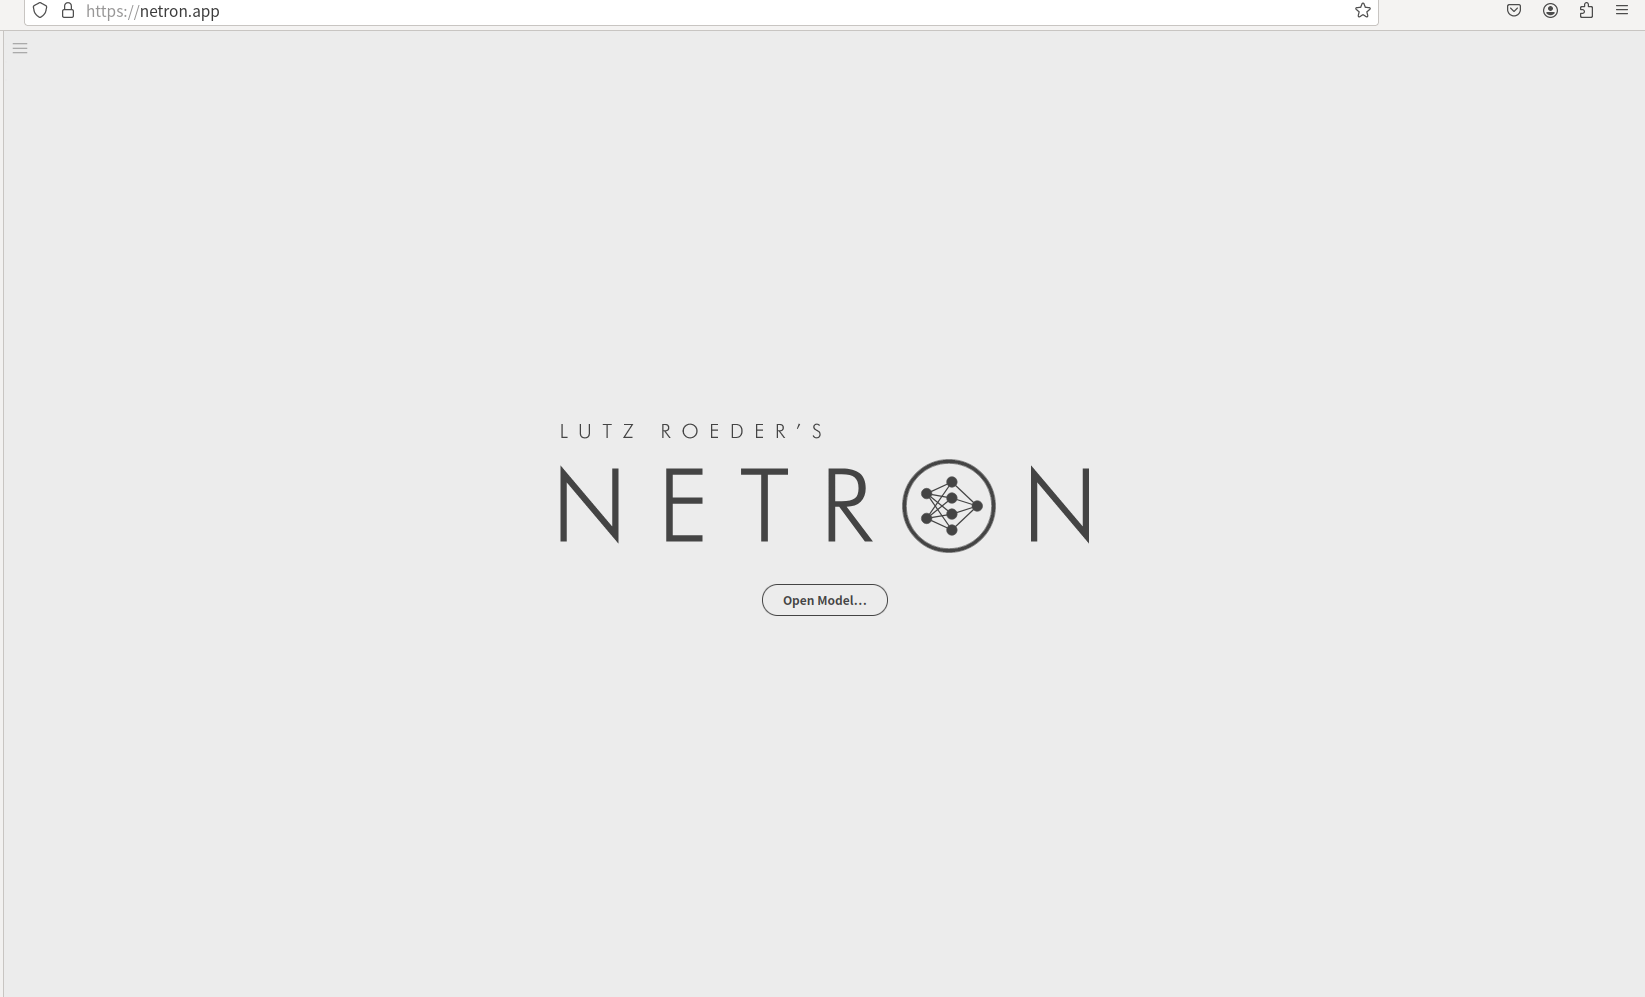
打开Netron后,我们可以将.onnx文件拖放到浏览器中,也可以在单击“打开模型”从文件目录选择它,进行可视化:
检查ONNX模型
在使用ONNX Runtime进行推理之前,我们先使用ONNX API检查ONNX模型。
import onnx
# 加载onnx模型
onnx_model = onnx.load("super_resolution.onnx")
# 验证ONNX模型的有效性,包括通过检查模型的版本、图的结构和节点及其输入和输出
onnx.checker.check_model(onnx_model)
- 1
- 2
- 3
- 4
- 5
验证ONNX Runtime推理结果
现在,让我们使用ONNX Runtime的Python API来进行推理。
这一部分通常是在另一个进程中或在另一台机器上完成。为了验证ONNX Runtime和PyTorch原始网络模型计算的值是否近似,我们在一个进程进行。
import onnxruntime
# 创建一个推理会话
ort_session = onnxruntime.InferenceSession("super_resolution.onnx", providers=["CPUExecutionProvider"])

def to_numpy(tensor):
    return tensor.detach().cpu().numpy() if tensor.requires_grad else tensor.cpu().numpy()

# 使用ONNX Runtime进行推理
ort_inputs = {ort_session.get_inputs()[0].name: to_numpy(x)}
ort_outs = ort_session.run(None, ort_inputs)

# ONNX Runtime和PyTorch原始网络模型输出的近似程度没有达到指定精度(rtol=1e-03和atol=1e-05),将抛出异常。
np.testing.assert_allclose(to_numpy(torch_out), ort_outs[0], rtol=1e-03, atol=1e-05)

print("Exported model has been tested with ONNXRuntime, and the result looks good!")
- 1
- 2
- 3
- 4
- 5
- 6
- 7
- 8
- 9
- 10
- 11
- 12
- 13
- 14
- 15
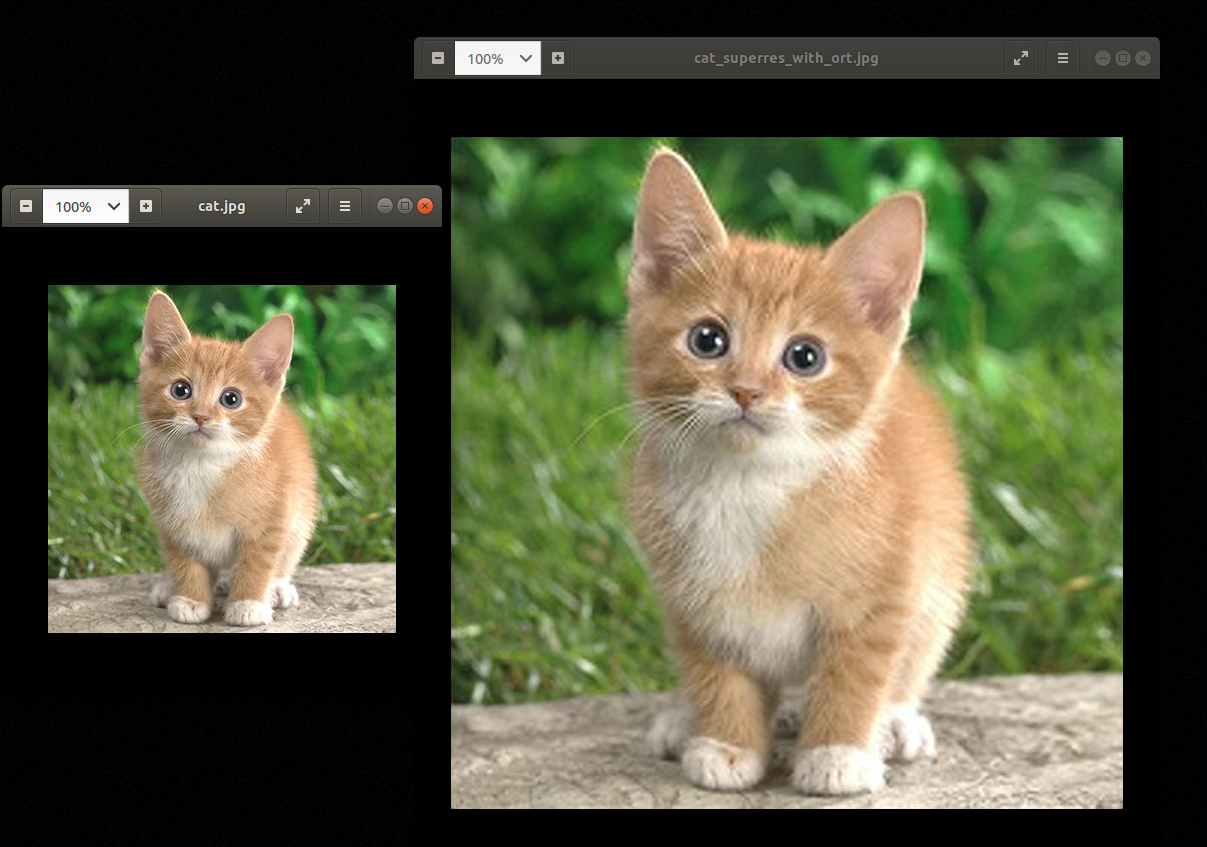
使用ONNX Runtime运行超分模型
import numpy as np
import onnxruntime
from PIL import Image
import torchvision.transforms as transforms

def to_numpy(tensor):
    return tensor.detach().cpu().numpy() if tensor.requires_grad else tensor.cpu().numpy()


# 创建一个推理会话
ort_session = onnxruntime.InferenceSession("super_resolution.onnx", providers=["CPUExecutionProvider"])

# 加载图像与预处理
img = Image.open("cat.jpg")

resize = transforms.Resize([224, 224])
img = resize(img)

img_ycbcr = img.convert('YCbCr')
img_y, img_cb, img_cr = img_ycbcr.split()

to_tensor = transforms.ToTensor()
img_y = to_tensor(img_y)
img_y.unsqueeze_(0)

# 在ONNX Runtime中运行超分辨率模型
ort_inputs = {ort_session.get_inputs()[0].name: to_numpy(img_y)}
ort_outs = ort_session.run(None, ort_inputs)
img_out_y = ort_outs[0]

# 从输出张量构造最终输出图像,并保存
img_out_y = Image.fromarray(np.uint8((img_out_y[0] * 255.0).clip(0, 255)[0]), mode='L')

final_img = Image.merge(
    "YCbCr", [
        img_out_y,
        img_cb.resize(img_out_y.size, Image.BICUBIC),
        img_cr.resize(img_out_y.size, Image.BICUBIC),
    ]).convert("RGB")  # Cr, Cb通道通过插值发大

final_img.save("cat_superres_with_ort.jpg")
- 1
- 2
- 3
- 4
- 5
- 6
- 7
- 8
- 9
- 10
- 11
- 12
- 13
- 14
- 15
- 16
- 17
- 18
- 19
- 20
- 21
- 22
- 23
- 24
- 25
- 26
- 27
- 28
- 29
- 30
- 31
- 32
- 33
- 34
- 35
- 36
- 37
- 38
- 39
- 40
- 41
- 42
参考:
https://pytorch.org/tutorials/advanced/super_resolution_with_onnxruntime.html

